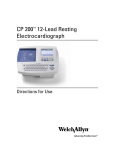
Download CardioPerfect Workstation, Resting ECG, User Manual
Transcript
CardioPerfect Workstation Resting ECG Module - User Manual Welch Allyn, Inc. 4341 State Street Road Skaneateles Falls, NY 13153 USA www.welchallyn.com 901047 CARDIOPULMONARY ECG SYSTEM 0297 DIR 80012333 Ver. F Revision date: 2015-05 CardioPerfect Workstation Resting ECG Module - User Manual Caution US Federal law restricts this device to sale by or on the order of a physician. Copyright © Copyright 2015, Welch Allyn. All rights are reserved. To support the intended use of the product described in this publication, the purchaser of the product is permitted to copy this publication, for internal distribution only, from the media provided by Welch Allyn. No other use, reproduction, or distribution of this publication, or any part of it, is permitted without written permission from Welch Allyn. Welch Allyn assumes no responsibility for any injury to anyone, or for any illegal or improper use of the product, that may result from failure to use this product in accordance with the instructions, cautions, warnings, or statement of intended use published in this manual. Unauthorized copying of this publication may not only infringe copyright but also reduce the ability of Welch Allyn to provide accurate and up-to-date information to users and operators alike. ® ® ® Welch Allyn , CardioPerfect Workstation and SpiroPerfect are registered trademarks of Welch Allyn. Software in this product is Copyright 2015, Welch Allyn. All rights are reserved. The software is protected by United States of America copyright laws and international treaty provisions applicable worldwide. Under such laws, the licensee is entitled to use the copy of the software provided on the original distribution medium. The software may not be copied, decompiled, reverse-engineered, disassembled or otherwise reduced to human-perceivable form. This is not a sale of the software or any copy of the software; all right, title and ownership of the software remains with Welch Allyn. The information contained in this manual is subject to change without notice. All changes will be in compliance with regulations governing manufacture of medical equipment. User responsibility This product is designed to perform in conformity with the description thereof contained in this manual and accompanying labels and inserts, when assembled, operated, maintained and repaired in accordance with the instructions provided. A defective product should not be used. Parts that are broken, plainly worn, missing or incomplete, distorted or contaminated should be replaced immediately. Should any repair or replacement become necessary, we recommend that service be performed at the nearest approved service center. The user of the product shall have the sole responsibility for any malfunction, which results from improper use, faulty maintenance, improper repair, damage or alteration by anyone other than Welch Allyn or their authorized service personnel. Accessories The Welch Allyn warranty can only be honored if you use Welch Allyn approved accessories and replacement parts. DIR 80012333 Ver. F 2 / 51 CardioPerfect Workstation Resting ECG Module - User Manual Caution Use of accessories other than those recommended by Welch Allyn may compromise product performance. Warranty, Service, and Spare Parts Warranty All repairs on products under warranty must be performed or approved by Welch Allyn. Unauthorized repairs will void the warranty. In addition, whether or not covered under warranty, any product repair shall exclusively be performed by Welch Allyn certified service personnel. Assistance and Parts If the product fails to function properly or if assistance, service, or spare parts are required, contact the nearest Welch Allyn Technical Support Center. USA 1-800-535-6663 Canada 1-800-561-8797 Latin America (+1) 305-669-9003 South Africa (+27) 11-777-7555 European Call Center (+353) 46-90-67790 Australia (+61) 2-9638-3000 United Kingdom (+44) 207-365-6780 Singapore (+65) 6419-8100 France (+33) 1-55-69-58-49 Japan (+81) 42-703-6084 Germany (+49) 695-098-5132 China (+86) 21-6327-9631 Netherlands (+31) 202-061-360 Sweden (+46) 85-853-65-51 Before contacting Welch Allyn it is helpful to attempt to duplicate the problem and to check all accessories to ensure that they are not the cause of the problem. When calling, please be prepared to provide: Product name and model number and complete description of the problem The serial number of your product (if applicable) The complete name, address and phone number of your facility For out-of-warranty repairs or spare parts orders, a purchase order (or credit card) number For parts order, the required spare or replacement part number(s) Repairs If your product requires warranty, extended warranty, or non-warranty repair service, please call first the nearest Welch Allyn Technical Support Center. A representative will assist you troubleshooting the problem and will make every effort to solve it over the phone, avoiding potential unnecessary return. In case the return cannot be avoided, the representative will record all necessary information and will provide a Return Material Authorization (RMA) number, as well as the appropriate return address. A Return Material Authorization (RMA) number must be obtained prior to any return. Note Welch Allyn does not accept returned products without an RMA. Packing Instructions If you have to return goods for service, follow these recommended packing instructions: Remove all hoses, cables, sensors, power cords, and ancillary products (as appropriate) before packing, unless you suspect they are associated with the problem. Wherever possible use the original shipping carton and packing materials. Include a packing list and the Welch Allyn Return Material Authorization (RMA) number. It is recommended that all returned goods be insured. Claims for loss or damage to the product must be initiated by the sender. DIR 80012333 Ver. F 3 / 51 CardioPerfect Workstation Resting ECG Module - User Manual Limited Warranty Statement Welch Allyn, Inc. warrants that the Welch Allyn CardioPerfect Workstation computer based product you have purchased meets the labeled specifications of the Product and will be free from defects in materials and workmanship that occur within 1 year after the date of purchase. Accessories used with the Product are warranted for 90 days after the date of purchase. The date of purchase is: 1) the date specified in our records, if you purchased the Product directly from us, 2) the date specified in the warranty registration card that we ask you to send to us, or 3) if you don’t return the warranty registration card, 120 days after the date on which the Product was sold to the dealer from whom you bought the Product, as documented in our records. This warranty does not cover damage caused by: 1) handling during shipping, 2) use or maintenance contrary to labeled instructions, 3) alteration or repair by anyone not authorized by Welch Allyn, and 4) accidents. You assume all responsibility for use of the Product with any hardware or software that does not meet the system requirements described in the Product documentation. If a Product or accessory covered by this warranty is determined to be defective because of defective materials, components, or workmanship, and the warranty claim is made within the warranty period described above, Welch Allyn will, at its discretion, repair or replace the defective Product or accessory free of charge. You must obtain a return authorization from Welch Allyn to return your Product before you send it to Welch Allyn’s designated service center for repair. THIS WARRANTY IS IN LIEU OF ALL OTHER WARRANTIES, EXPRESS OR IMPLIED, INCLUDING BUT NOT LIMITED TO THE IMPLIED WARRANTIES OF MERCHANTABILITY AND FITNESS FOR A PARTICULAR PURPOSE. WELCH ALLYN'S OBLIGATION UNDER THIS WARRANTY IS LIMITED TO REPAIR OR REPLACEMENT OF PRODUCTS CONTAINING A DEFECT. WELCH ALLYN IS NOT RESPONSIBLE FOR ANY INDIRECT OR CONSEQUENTIAL DAMAGES RESULTING FROM A PRODUCT DEFECT COVERED BY THE WARRANTY. DIR 80012333 Ver. F 4 / 51 CardioPerfect Workstation Resting ECG Module - User Manual WARNING Power strips (multiple portable socket outlets) are not allowed for use in connecting the medical electrical equipment or any accessories to ground unless used in concert with a medical approved isolation transformer. During defibrillation, the ECG signals displayed may show waveform artifacts and cannot be relied on as a true indication of the patient’s physical condition. Accessible metal parts, such as electrode terminations, should not come in contact with other electrically conductive parts, including earth ground. Welch Allyn provides a number of high quality patient leads in varying termination styles. Use of these approved patient leads is required for electrical protection of the patient during cardiac defibrillation. CardioPerfect devices are not intended for direct cardiac application. An inoperable or damaged electrocardiograph can be identified by abnormal signals on the ECG waveforms. Abnormal signals are characterized by flat lines, excess noise, square waves or other non typical anomalies that appear on the ECG waveform. The electrocardiograph can be periodically tested by connecting the CardioPerfect to an ECG simulator. Follow manufacturer’s instructions. If there is a requirement for equipment to be connected to a personal computer or other non-medical rated equipment, it is the responsibility of the user to ensure that the electric power circuit to which the CardioPerfect system is connected includes an additional protective earth ground or an isolation transformer in order to satisfy the IEC 60601-1 safety standard. Other medical equipment—including but not limited to defibrillators, ultrasound machines, pacemakers, and other stimulators—may be used simultaneously with the electrocardiograph. However, such devices may disturb the electrocardiograph signal. The electrocardiograph has not been designed for use with high frequency (HF) surgical equipment and does not protect against hazards to the patient. Fire and explosion hazard. Do not operate the electrocardiograph in the presence of a flammable anesthetic mixture with air, oxygen, or nitrous oxide; in oxygen-enriched environments; or in any other potentially explosive environment. To prevent the spread of infection, take these precautions: DIR 80012333 Ver. F Dispose of single-use components (for example, electrodes) after using them once. Regularly clean all components that come in contact with patients. Consult your facility's equipment cleaning procedures when 5 / 51 CardioPerfect Workstation Resting ECG Module - User Manual performing ECG testing on patients with open, infectious sores. Ensure the location of the electrode and associated cables provides maximum separation away from all sources of high-frequency energy. The best way to ensure patient safety is to completely remove all electrodes and cables from the patient when exposed to high-frequency energy. No modification of this equipment is allowed. DIR 80012333 Ver. F 6 / 51 CardioPerfect Workstation Resting ECG Module - User Manual Table of Contents 1. GETTING STARTED ................................................................................ 10 1.1. 2. The Welch Allyn CardioPerfect resting ECG window ....................................... 10 RECORDING ECGS ................................................................................. 12 2.1. 2.2. 2.3. 2.4. 2.5. 2.6. 2.7. 2.8. 2.9. 2.10. 2.11. 2.12. 2.13. Record an ECG ............................................................................................... 12 Place electrodes on the patient ........................................................................ 12 Create a new ECG ........................................................................................... 14 Select how you want to view leads................................................................... 15 Set a rhythm strip............................................................................................. 15 Turn pacemaker on and off .............................................................................. 15 Apply an AC filter ............................................................................................. 15 Apply a muscle noise filter ............................................................................... 16 Record an ECG ............................................................................................... 16 Recording rhythm ECGs .................................................................................. 16 Cancel a recording ........................................................................................... 17 Pacemaker pulse detection .............................................................................. 17 Signal quality indication ................................................................................... 18 3. RECORDING ECGS FOR PEDIATRIC PATIENTS .................................. 20 4. VIEWING ECGS........................................................................................ 22 4.1. 4.2. 4.3. 4.4. 4.5. 4.6. 4.7. 4.8. 4.9. 4.10. 4.11. 4.12. 4.13. 4.14. 4.15. 4.16. 4.17. 5. 5.1. 5.2. 5.3. 5.4. 6. 6.1. View and edit ECG information ........................................................................ 22 Views ............................................................................................................... 23 Parameters ...................................................................................................... 26 QTc.................................................................................................................. 26 QT dispersion (optional) ................................................................................... 27 Working with views .......................................................................................... 28 Zoom in and out on an ECG ............................................................................ 28 Set chart speed and sensitivity ........................................................................ 29 View one single complex or loop ...................................................................... 29 Turn pacemaker on and off .............................................................................. 29 Apply muscle noise filter .................................................................................. 29 Apply AC filter .................................................................................................. 30 Apply baseline filter .......................................................................................... 30 Apply anti-aliasing ............................................................................................ 30 Make measurements ....................................................................................... 31 Compare ECGs ............................................................................................... 31 Display markers ............................................................................................... 32 INTERPRETING ECGS............................................................................. 33 About MEANS and PEDMEANS interpretation software .................................. 33 Edit and confirm an interpretation .................................................................... 34 View interpretation history ................................................................................ 35 Reanalyze an ECG .......................................................................................... 35 PRINTING ECGS ...................................................................................... 36 Print an ECG ................................................................................................... 36 DIR 80012333 Ver. F 7 / 51 CardioPerfect Workstation Resting ECG Module - User Manual 6.2. 7. 7.1. 7.2. 7.3. 8. 8.1. 8.2. 8.3. 8.4. 8.5. 8.6. Automatically print an ECG .............................................................................. 36 MAINTAINING THE RECORDER ............................................................. 37 Clean the PRO ECG Recorder ........................................................................ 37 Cleaning the Patient cables and PC interface cables ....................................... 37 Accessories ..................................................................................................... 38 CUSTOMIZING THE RESTING ECG SOFTWARE .................................. 39 General tab ...................................................................................................... 39 Viewing tab ...................................................................................................... 40 Printing tab ...................................................................................................... 40 QT dispersion tab ............................................................................................ 41 Recorder Tab ................................................................................................... 42 Customize ecg.txt ............................................................................................ 42 9. TROUBLESHOOTING .............................................................................. 43 10. FUNCTION KEYS ..................................................................................... 44 11. BEFORE INSTALLING THE RESTING ECG SOFTWARE ...................... 45 11.1. Structure .......................................................................................................... 45 12. INSTALLING THE RESTING ECG MODULE........................................... 46 12.1. Connecting the Prolink USB interface .............................................................. 46 13. SAFETY AND PRECAUTIONS ................................................................ 47 DIR 80012333 Ver. F 8 / 51 CardioPerfect Workstation Resting ECG Module - User Manual Welcome Welcome to Welch Allyn CardioPerfect Resting ECG, a module of Welch Allyn CardioPerfect Workstation. With the Welch Allyn CardioPerfect Resting ECG Module, you can record, view and interpret resting ECGs. You can also use it to print ECGs in various formats. This manual contains specific information about the Resting ECG Module of Welch Allyn CardioPerfect Workstation. For all general information about the workstation software please refer to the Workstation manual, this includes: - Creating and editing Patient cards - General information about printing For information about the ECG hardware and accessories please refer to the Pro Manual. For further information on installation and configuration please refer to the Installation manual. Detailed information on servicing is described in the Service and Advanced Installation manual. Intended use Using the optional ECG module and associated accessories, the user can acquire, view, store, and print ECG waveforms. The ECG module also provides optional algorithms (MEANS) to generate measurements, data presentations, graphical presentations, and interpretive statements on an advisory basis. These are presented for review and interpretation by the clinician. Indications Indications for electrocardiography range from routine screening of cardiac health in the physician office environment to directed diagnostic differentiation in a hospital cardiology department. Contraindications There are no known contraindications for the recording of a resting ECG. Caution DIR 80012333 Ver. F A computer generated interpretation cannot replace sound medical reasoning by a trained professional. Therefore, a physician should always review the interpretation. 9 / 51 CardioPerfect Workstation Resting ECG Module - User Manual 1. Getting started 1.1. The Welch Allyn CardioPerfect resting ECG window This section will guide you around the various parts of Welch Allyn CardioPerfect Resting ECG module. Search area Toolbar Menu bar Title bar Workspace Status bar DIR 80012333 Ver. F Parameters area Interpretation area 10 / 51 CardioPerfect Workstation Resting ECG Module - User Manual Title bar The title bar displays the name of the program. The title bar contains three buttons that you can use to maximize, minimize and close the Workstation window. Menu bar Each menu in the menu bar contains a number of tasks that you can perform with Welch Allyn CardioPerfect. Sometimes, menus are gray. This means that you cannot access that functionality at that particular point, either because it is not available, or because you are not authorized to use it. Each module has its own menu bar. Tool bar The tool bar contains buttons that give you easy access to the most common tasks in Welch Allyn CardioPerfect. Search area The search area contains search and display functionality that lets you easily retrieve patients and tests. In the search area, you can find a patient, see which tests were recorded for that patient and see the kind of tests that were recorded. You can also create search patterns, an easy way of finding information that you need frequently. Workspace The workspace is the core part of Welch Allyn CardioPerfect. It displays the ECG in various formats. These formats, also called views, are each displayed on a separate tab. The workspace is the place where you view, compare and measure ECGs. Parameters area The parameters area contains some details of the ECG, such as the age and the heart rate of the patient, and the global measurements for the ECG (P duration, QRS duration, PQ duration, QT duration, corrected QT duration, P-axis, QRS-axis, T-axis and QTd or JTd duration). Interpretation The Interpretation area contains the interpretation (either entered by the physician area or generated by MEANS software). It displays the interpretation text and whether the interpretation has been confirmed. Shortcut menu In the workspace, you can use shortcut menus to access the most common tasks. You can access these by clicking on the workspace with your right mouse button. Status bar The status bar displays the name of the user that is currently logged on to Welch Allyn CardioPerfect. DIR 80012333 Ver. F 11 / 51 CardioPerfect Workstation Resting ECG Module - User Manual 2. Recording ECGs 2.1. Record an ECG Welch Allyn CardioPerfect records ECGs fast, easily and reliably. The only thing you have to do is make sure the electrodes are placed correctly and switch on the Recorder. Welch Allyn CardioPerfect takes care of recording, making a number of measurements and calculations, saving the recording and providing a first interpretation. To record an ECG, you need to follow these global steps. Each step is explained in more detail on the following pages. 1. Place electrodes on the patient. 2. Select or create a patient. 3. Create a new ECG. The Real-time monitor is displayed. 4. Switch on the Recorder. If a PRO Recorder with USB cable is used no message will appear, the Recorder will be switched on automatically. The Real-time monitor displays the ECG traces. 5. Select how you want to see leads and set a rhythm strip. 6. If necessary, apply an AC filter to remove possible noise that is due to AC mains interference. 7. In the Real-time monitor, wait until the signal is stabilized and click the Record button to start recording. The progress of the recording is shown in the gauge at the bottom of the window. 8. When the recording is finished, Welch Allyn CardioPerfect will ask you to switch off the Recorder. If a PRO Recorder with USB connection is used the Recorder will be switched off automatically, no message appears. Welch Allyn CardioPerfect automatically saves the ECG and calculates the averaged complexes. 9. Disconnect the patient. The recorded ECG is automatically displayed. 2.2. Place electrodes on the patient Important: Because Welch Allyn CardioPerfect is a 12 lead electrocardiograph all electrodes must be connected! Proper skin preparation (abrasion if necessary) and proper electrodes are very important for a good signal quality. Important: When you connect the electrodes to the patient, make sure that the electrodes and their connectors (also the RL/N electrode) do not contact other conducting parts (including earth). Extremity electrodes The electrodes may be placed on any part of the arms or the legs as long as they are below the shoulders in the former and below the inguinal fold anteriorly and the gluteal fold posteriorly in the latter. Any other placement necessary by deformed or missing extremities must be noted on the record. DIR 80012333 Ver. F 12 / 51 CardioPerfect Workstation Resting ECG Module - User Manual Precordial electrodes Connect the precordial electrodes in the following positions: AHA IEC V1 V2 V3 V4 C1 C2 C3 C4 V5 V6 RL N LL C6 L R LA RA C5 F V1 Fourth intercostal space at the right border of the sternum. C1 V2 Fourth intercostal space at the left border of the sternum. C2 V3 Midway between locations V2 and V4. C3 V4 At the mid-clavicular line in the fifth intercostal space. C4 V5 At the anterior axillary line on the same horizontal level as V4. C5 V6 At the midaxillary line on the same horizontal level as V4 and V5. C6 RA Right arm R LA Left arm L RL Right leg N LL Left leg F Reusable Electrodes Each electrode must be attached securely. The electrode paste, gel, or cream must cover an area the size of the electrode, but must not extend beyond it, especially on the chest. DIR 80012333 Ver. F 13 / 51 CardioPerfect Workstation Resting ECG Module - User Manual Disposable Tab Electrodes Disposable electrodes have conductive material on the adhesive side only. The electrode tab must be placed between (clip) or on (banana or pushbutton) the electrode adapter, and remain flat. Do not attempt to place the electrode adapter so close to the circular part of the electrode that the tab of the electrode is bent, or contact is made with the conductive gel. Gently tug on the electrode adapter to ensure that the electrode adapter is properly placed on the electrode. Good and accurate placement of each electrode on the first attempt is important. Each time an electrode is lifted off the skin and reattached, the adhesive gel becomes less effective. Never mix reusable and disposable electrodes on the same patient. Caution 2.3. Create a new ECG To create a new test: 1. Select the patient. See the CPWS Workstation manual for details. 2. In the File menu, point to New and click ECG. The New ECG dialog box is displayed. 3. In the New ECG dialog box, select the Name and the Specialty of the Referring physician and/or the name of the Ordering physician, and select the lead set that you want to use for the ECG. 4. Click the OK button. The Real-time monitor is displayed. Here you can adjust your view settings and start recording the test. DIR 80012333 Ver. F 14 / 51 CardioPerfect Workstation Resting ECG Module - User Manual 5. When you are prompted to do so, switch on the Recorder. The Pro Recorder is switched on automatically. The Real-time monitor displays the ECG traces. 2.4. Select how you want to view leads Once you have created a new ECG, the Real-time monitor displays the ECG traces. Before you start the actual recording, you can select how you want to view the traces. Welch Allyn CardioPerfect offers three different views: 1x12, 2x6 and 4x3. In addition, you can set different chart speeds and different sensitivities. To select a different view: In the Real-time monitor, select a view from the list. The new view is immediately displayed. To select a different chart speed or sensitivity for the view: In the Real-time monitor, select a chart speed or sensitivity from the list. The speed and sensitivity are immediately displayed. 2.5. Set a rhythm strip As a default, Welch Allyn CardioPerfect uses lead II as a rhythm strip, but you can set any lead as a rhythm strip. To set another lead as a rhythm strip: In the Rhythm strip pane, select a lead from the list. The new lead is immediately used as a rhythm strip. To set the speed and the sensitivity of the rhythm strip: In the Rhythm strip pane, select a speed and sensitivity. The new speed and sensitivity are immediately used. 2.6. Turn pacemaker on and off ECG traces can contain artificial pacemaker signal indicators. You can remove this artificial pacer indicator by disabling the "Show Pacer" selection. To learn how, see Customizing the Resting ECG software on 39. 2.7. Apply an AC filter ECG traces can contain noise that is due to AC mains interference. This makes the traces harder to read. You can filter out noise by applying an AC filter. When you apply a filter, the original ECG signal is not permanently changed. You only change the way it is displayed on the monitor. You can always restore the original signal. To apply an AC filter: At the top of the Real-time monitor, click AC filter. Click again to switch the filter off. DIR 80012333 Ver. F 15 / 51 CardioPerfect Workstation Resting ECG Module - User Manual 2.8. Apply a muscle noise filter Muscle noise in an ECG signal hides low amplitude signals that may be important for the interpretation of an ECG. You can remove this noise with a muscle noise filter. To apply a muscle noise filter: At the top of the Real-time monitor, click Muscle filter. Click again to switch the filter off. 2.9. Record an ECG You are now ready to record the ECG. To record an ECG: 1. In the Real-time monitor wait until the signal is stabilized and click the Record button to start recording. The progress of the recording is shown in the gauge at the bottom of the window. 2. Next see §2.1follow steps 8-9. Create a pretriggered recording When you want to catch a particular event, such as arrhythmia, without having to record an entire ECG, you can use a pretriggered recording. When you start a pretriggered recording, it includes the five seconds before and after you clicked on the Record button. This means that when you see an event and click the Record button, your recording includes the event, five seconds before the event, and five seconds after the event. The pretriggered option is also convenient when you have difficulties recording an ECG with clean traces, for example because the patient has muscle spasms. The pretrigger option helps defining the 10 seconds of recording by already saving 5 seconds of possibly clean traces. To create a pretriggered recording: 1. Create a new test and switch on the MD or Portable Recorder, the PRO is switched on automatically. The Real-time monitor is displayed. 2. In the Real-time monitor, click the Pretrigger option. 3. Wait until you see the event that you want to record. 4. As soon as you see the event, click the Record button. Welch Allyn CardioPerfect will continue recording for five more seconds. 5. Next see §2.1 follow steps 8-9. 6. The recorded ECG is automatically displayed, including the event that you wanted to capture. 2.10. Recording rhythm ECGs The procedures for recording a rhythm ECG are almost identical to those for recording a regular ECG. If you need any detailed help with the steps that follow, please refer to section 2.1. To record a rhythm ECG: 1. In the Real-time monitor wait until the signal is stabilized and click the Rhythm button to start recording. The progress of the recording is shown in the gauge at the bottom of the window. 2. Next see §2.1 follow steps 8-9. DIR 80012333 Ver. F 16 / 51 CardioPerfect Workstation Resting ECG Module - User Manual Capture an event When you notice an event, like arrhythmia, during recording, you can capture this in the ECG. When you do this, a small exclamation mark is inserted at the place where the event occurred. To capture an event, click the Event button. 2.11. Cancel a recording You can cancel a recording at any time in the recording process. To cancel a recording: Click the Cancel button in the Real-time monitor. The recording is cancelled and you are asked to switch off the Recorder. The test is not saved. Tips for canceling a recording: When you have not yet recorded 10 seconds of regular ECG, you can also cancel the recording by clicking the Record button. You can choose to record a regular ECG or a rhythm ECG without leaving the real-time monitor. 2.12. Pacemaker pulse detection The Welch Allyn CardioPerfect software is able to display pacemaker pulse spikes detected by the hardware. These spikes are marked with a symbol in the Real time monitor, in Review mode and on printouts. When the Pacemaker pulse detection is on, the detected spikes are marked on the trace, as shown here. To learn how to disable this function to remove artificial pacemaker signal indicators, see Customizing the Resting ECG software on 39. Pacemaker markers DIR 80012333 Ver. F 17 / 51 CardioPerfect Workstation Resting ECG Module - User Manual 2.13. Signal quality indication If Welch Allyn CardioPerfect Workstation finds the signal from one of the channels to be erroneous, for example caused by a disconnected electrode, the monitor will display “Bad signal on…”. The trace shows square waves, see example below. Override Warning in red Square waves Please check the indicated electrodes/channels immediately! The status information is saved with the test. Erroneous leads will show square waves on both the Review and the printout. Depending on the duration of the erroneous signal no interpretation or measurement will be possible and therefore will not be shown. In the few moments between a lead being disconnected and that event being detected by the software, pacemaker spikes may be erroneously detected. As a result, a group of pacemaker markers may be shown on the trace just before the square waves are shown. The pacemaker pulse detection will be suppressed as soon as the square waves are shown, and will continue to be suppressed until the erroneous signal is corrected. DIR 80012333 Ver. F 18 / 51 CardioPerfect Workstation Resting ECG Module - User Manual Leadoff, Framing Errors and DCOffset conditions: If the application detects a Lead-off, DC offset, or Framing error within 10 seconds after you have started an ECG recording, the recording automatically restarts. In the case of a Leadoff condition, the ECG recording will not start until the signal is stabilized. The progress bar of the recording will remain at 0 until all the signals are of acceptable quality. You can use the override button to disable the automatic restart. DCOffSet The DCOFFSET DETECTED! message displays in the progress bar when battery power is interrupted or when there is a spike in voltage. Framing Errors Framing errors display in the progress bar and can occur in CPWS configurations when the PRO Recorder is connected via a serial cable and the packets of information are delayed. Leadoff The Leadoff message displays in the workspace when an electrode is disconnected. The real-time monitor will display “Bad signal on…”. The trace shows square waves until the signal is stabilized. DIR 80012333 Ver. F 19 / 51 CardioPerfect Workstation Resting ECG Module - User Manual 3. Recording ECGs for pediatric patients Pediatric Electrode Placement CardioPerfect supports two lead sets for the recording and interpretation of pediatric electrocardiograms. Where anatomically feasible, the standard electrode placement described on page 12 may be used. For very small children, an alternative arrangement is described below, in which leads V3R and V7 replace V3 and V5. Extremity electrodes The electrodes may be placed on any part of the arms or the legs as long as they are below the shoulders in the former and below the inguinal fold anteriorly and the gluteal fold posteriorly in the latter. Any other placement necessary by deformed or missing extremities must be noted on the record. Pediatric Precordial electrodes Place the electrodes on the anatomical positions V3R, V1, V2, V4, V6 and V7, then attach precordial lead wires 1 through 6 from left to right. Connect the precordial electrodes in the following positions: AHA IEC V1 Fourth intercostal space at the right border of the sternum (V3R). C1 V2 Fourth intercostal space, at the right sternal margin (V1). C2 V3 Fourth intercostal space, at the left sternal margin (V2). C3 V4 Fifth intercostal space, on the left mid-clavicular line (V4). C4 V5 Left midaxillary line, at the horizontal level of V4 (V6). C5 V6 Left posterior axillary line, at the horizontal level of V4 (V7). C6 RA Right arm R LA Left arm L RL Right leg N LL Left leg F To select the pediatric lead set: 1. Place electrodes on the patient. 2. In Welch Allyn CardioPerfect, select or create a patient. DIR 80012333 Ver. F 20 / 51 CardioPerfect Workstation Resting ECG Module - User Manual 3. In the File menu, point to New and click ECG. The New ECG dialog box is displayed. 4. From the Lead set list, select Pediatric and click OK. 5. Follow the steps on page 14 to finish recording the ECG. DIR 80012333 Ver. F 21 / 51 CardioPerfect Workstation Resting ECG Module - User Manual 4. Viewing ECGs To view an ECG: 1. Select a patient. The tests that have been recorded for that patient are listed in the test list Patient list Test list 2. From the test list, click the ECG that you want to see. ECGs are indicated with a sign. Welch Allyn CardioPerfect is started automatically, and the test is displayed in the workspace. View Parameters Interpretation 4.1. View and edit ECG information The Information window gives you all kinds of information about the ECG that you are currently viewing. You can see the name of the referring physician, the name of the technician that recorded the ECG and any comments that were entered. If you wish, you can add some comments. To view ECG information: In the Tools menu, click Information. The Information window is displayed. DIR 80012333 Ver. F 22 / 51 CardioPerfect Workstation Resting ECG Module - User Manual To add your comments: 1. Type your comments in the Information window. 2. Click OK to save your comments. 4.2. Views Welch Allyn CardioPerfect offers various views on an ECG. Each view highlights a different aspect of the ECG. Each view is presented on a different tab in the workspace and has different functionality. You can view at all twelve leads in two different formats (the traditional 4x3 format, and a convenient 2x6 format). But you can also view the measurements that Welch Allyn CardioPerfect calculated, or display one single average complex. If you recorded a rhythm ECG, you can examine the entire recording. 4x3 view The 4x3 view displays a 12 lead-ECG strip of 2.5 seconds long. The leads are shown in a 4x3 configuration with a rhythm strip at the bottom of the view. View can be simultaneous or sequential. 2x6 view The 2x6 view displays a 12 lead-ECG strip of 5 seconds long. The leads are shown in a 2x6 configuration. On the left, leads I through aVF are displayed; on the right, leads V1 till V6 are displayed. View can be simultaneous or sequential. Averages view The Averages view displays the averages of the dominant complexes for all 12 leads. You can also view a single average complex, display markers and compare complexes of other ECGs. DIR 80012333 Ver. F 23 / 51 CardioPerfect Workstation Resting ECG Module - User Manual Measurements view The Measurements view displays the measurements that were taken by the computer. These measurements include the values for several common parameters, such as Q, R and S amplitude and ST values. The amplitudes are expressed in microvolts. The durations are expressed in milliseconds. The measurements cannot be edited. Rhythm view When you have recorded a rhythm ECG, you can view the entire ECG in the Rhythm view. You can use the scroll bar to move through the ECG. The Rhythm view displays leads in different groupings, so that you can easily switch between the most common groups. Old rhythm strip The Old rhythm strip view is only available for ECGs that were recorded with older versions of the Workstation software (software from before 2000). It displays the original II V2 rhythm strip. DIR 80012333 Ver. F 24 / 51 CardioPerfect Workstation Resting ECG Module - User Manual Vector view (optional) The Vector view is only available if the vectorcardiogram option is enabled. It displays the results of an ECG in a vectorcardiogram. The left hand pane displays the reconstructed orthogonal x, y and z leads. The right hand side of the Vector view is divided into three windows. Window 1 displays the following loops: Fp, Hp, Rp F: complete frontal loop H: complete horizontal loop R: complete right sagittal loop Window 2 displays the following loops: Ft, Ht, Rt F, H, R Ft: frontal plane of the T wave Ht: horizontal plane of the T wave Rt: right sagittal plane of the T wave Window 3 displays the following loops: Fp: frontal plane of the P wave Hp: Horizontal plane of the P wave Rp: Right sagittal plane of the P wave R-R view (optional) R-R is the interval between two subsequent QRS complexes. The R-R view gives an overview of the heart rate variability. This view lists the number of intervals, the minimum, maximum and average number, and the standard deviation. DIR 80012333 Ver. F The Trend graph displays the duration of the subsequent intervals. The x-axis lists the interval numbers. The y-axis displays the duration. The Histogram graph displays the distribution of the intervals. The x-axis lists the duration (in ms, divided into bins of 8ms). The y-axis lists the number of intervals that falls in a particular bin. 25 / 51 CardioPerfect Workstation Resting ECG Module - User Manual HRV view (optional) This tab shows the heart rate variability. Additional information is available upon request. Note: HRV option not sold in the US. The view in the workspace can be used in for example a Word document. Right-click in the Workspace and select copy from the pop-up menu; paste the view in a document. 4.3. Parameters The lower part of the workspace contains the Parameters pane. The Parameters pane contains global parameters that are determined from all leads. These parameters are: Patient age and heart rate P and PQ duration QRS duration QT, QTc and QTd duration P, QRS and T axis 4.4. QTc The QT interval in an ECG is a good indicator of the repolarization. However, the QT depends heavily on the heart rate. To make a useful measurement, the QT is usually corrected. Welch Allyn CardioPerfect offers three correction methods that can be used to derive the QTc parameter: Bazett: QT QTcB QT QT 60 HR HR 60 QT Fridericia: QTcF RR QT 3 RR 3 60 HR QT 3 HR 60 Hodges: QTcH QT 1.75 * ( HR 60) DIR 80012333 Ver. F 26 / 51 CardioPerfect Workstation Resting ECG Module - User Manual To select the QTc correction method: 1. In the File menu, click Settings. The Settings dialog box is displayed. 2. Click ECG and click on the Viewing tab. 3. Under QTc method, click the method that you want to use. 4. Click OK to save your changes. 4.5. QT dispersion (optional) Note: QT dispersion option not sold in the US. QT dispersion (QTd) is defined as the difference in duration between the longest QT interval and the shortest QT interval in any lead. There are several ways of calculating the QT dispersion. These ways depend on: The reference point in the QRS complex from which the measurement should be started Whether the marker that indicates the reference point should be local or global. A local marker is one that is taken for each lead, and therefore differs for each lead. A global marker is one that is used for all leads, and therefore is the same for all leads. The number of leads that is used for calculation. The QTd duration is calculated and displayed in the Parameters area of the view. You can specify a number of options that affect the calculation of the QTd duration. To set QTd options: 1. In the File menu, click Settings. The Settings window is displayed. 2. Click ECG and click on the QT dispersion tab. 3. In the QT dispersion tab, select which reference point you want to use, and whether it should be local or global. 4. Select the number of leads you want to use, see section 8.1 for details. 5. Click OK to save your changes. DIR 80012333 Ver. F 27 / 51 CardioPerfect Workstation Resting ECG Module - User Manual 4.6. Working with views There are a number of things you can do in a view. They fall apart in the following groups of actions: Action Function Adjusting scales and magnitude of the view Zoom in and out Reset zoom Set chart speed Set sensitivity View one single average or loop Improving signal quality 4x3, 2x6, Averages, Rhythm, Old rhythm strip, Vector 4x3, 2x6, Averages, Rhythm, Old rhythm strip, Vector, R-R 4x3, 2x6, Averages, Rhythm, Old rhythm strip, Vector 4x3, 2x6, Averages, Rhythm, Old rhythm strip, Vector Enlarge Averages, Vector Autosize Vector Apply muscle noise filter 4x3, 2x6, Averages, Rhythm, Vector 4x3, 2x6, Averages, Rhythm, Vector 4x3, 2x6, Averages, Rhythm, Vector 4x3, 2x6, Averages, Rhythm, Vector Apply AC filter Apply anti-aliasing Studying the ECG Available in Make measurements Compare ECGs Averages Display markers Averages, Vector On the next pages, each action is described in detail. Most of these actions are also available from the right-click menu. 4.7. Zoom in and out on an ECG If you want to get a closer look at the traces, you can adjust the size of the leads with by zooming in and out of the ECG. To see leads in more detail: In the View menu, click Zoom in. To see a larger part of the ECG: In the View menu, click Zoom out. To reset the zoom function and return to the standard lead size: In the View menu, click Reset zoom. DIR 80012333 Ver. F 28 / 51 CardioPerfect Workstation Resting ECG Module - User Manual 4.8. Set chart speed and sensitivity Welch Allyn CardioPerfect offers a wide range of speed and sensitivity. You can adjust the scale of the ECG by adjusting the chart speed and the sensitivity. To set the chart speed: In the View menu, point to Chart speed and select a value. The higher the chart speed, the more lead signal will be visible. To set the sensitivity: In the View menu, point to Sensitivity and select a value. The lower the value, the lower the peaks in the lead signal will be. 4.9. View one single complex or loop In the Averages view and the Vector view, you can view one single complex or loop. To view a single complex or loop: 1. In the Action menu, click Enlarge. The first lead in an ECG (or the first loop in an VCG) is enlarged. With the autosize function, available from the right-click menu the selected loop will be shown as large as possible in the available space. 2. To enlarge another lead or loop, select it from the drop down in the upper left corner of the workspace. 3. To switch off the enlarge function, click Enlarge from the Action menu once more. 4.10. Turn pacemaker on and off ECG traces can contain artificial pacemaker signal indicators. You can remove this artificial pacer indicator by disabling the "Show Pacer" selection. To learn how, see Customizing the Resting ECG software on page 39. 4.11. Apply muscle noise filter Muscle noise in an ECG signal hides low amplitude signals that may be important for the interpretation of an ECG. You can remove this noise with a muscle noise filter. DIR 80012333 Ver. F 29 / 51 CardioPerfect Workstation Resting ECG Module - User Manual To apply a muscle noise filter: In the Action menu, click Muscle noise filter. 4.12. Apply AC filter ECG traces can contain noise that is due to AC mains interference. This makes the traces harder to read. You can filter out noise by applying an AC filter. When you apply a filter, you do not change the actual ECG signal. You only change the way it is displayed on the monitor. The ECG signal always keeps its original form. To apply an AC filter while you view an ECG: In the Action menu, click AC filter. 4.13. Apply baseline filter ECG traces can contain some baseline wander caused by movement. You can reduce this wander of the baseline by applying a baseline filter. When you apply the baseline filter you only change the display of the traces. The actual signal remains unchanged. To apply a baseline filter while you view an ECG: In the Action menu, click baseline filter. If accurate ST segment contours are required for ECGs, do not use the 0.5 Hz baseline wander filter. This filter suppresses baseline wander to the extent that it may alter the ST segment. Instead, configure your cardiograph to operate without the baseline wander filter. Regardless of the filter used, the rhythm characteristics of the ECG are accurately recorded and the filter settings do not affect the interpretation algorithm. 4.14. Apply anti-aliasing When you view an ECG on a monitor, the signal can look ragged, especially when you zoom in on a complex. You can use anti-aliasing to make the signal look smoother. Anti-aliasing does not change the signal itself. It only affects how the signal is displayed on the monitor. Before anti-aliasing After anti-aliasing To apply anti-aliasing: In the View menu, click Anti-aliasing. DIR 80012333 Ver. F 30 / 51 CardioPerfect Workstation Resting ECG Module - User Manual 4.15. Make measurements In each view that displays leads, complexes or vectors, you can make measurements between two points. To make a measurement between two points: 1. Move the crosshair pointer to the starting point of your measurement. 2. Double click on the starting point. Welch Allyn CardioPerfect inserts a mark. 3. Move the crosshair pointer to the end point of your measurement. 4. Double click on the end point. Welch Allyn CardioPerfect draws a line between the two points and displays the measured values. To clear all measurements: In the Action menu, click Refresh. 4.16. Compare ECGs If a patient has had several ECGs, Welch Allyn CardioPerfect can make a serial comparison of the average complexes of these ECGs. In such a comparison, the curves are superimposed in such a way that the starting points of the QRS complexes coincide. Serial comparison is only possible in the Averages tab. To compare ECGs: 1. In the Tools menu, click comparison. The Comparison dialog box is displayed. This dialog box contains all other ECGs that have been recorded for this patient. 2. In the Comparison dialog box, select one or more ECGs to which you want to compare your ECG. 3. Click OK. The selected ECGs are now displayed. DIR 80012333 Ver. F 31 / 51 CardioPerfect Workstation Resting ECG Module - User Manual 4.17. Display markers Markers are convenient reference points that mark global points in an average complex or vector. You can use a marker as a starting point for your observations or measurements. You can only view markers in the Average and Vector tabs. Welch Allyn CardioPerfect inserts markers at the following points: Start P wave End P wave Start QRS complex End QRS complex End T wave To display markers: In the View menu, click Markers. The markers are displayed. Tips for displaying markers: You can set the color of the markers in the ECG settings. You can also use your right mouse menu for displaying markers. DIR 80012333 Ver. F 32 / 51 CardioPerfect Workstation Resting ECG Module - User Manual 5. Interpreting ECGs When you view an ECG, the interpretation is shown in the lower right corner of the workspace. If you have the optional MEANS software installed on your computer, this software makes an initial interpretation for you. If not, this is where you can enter your own interpretation. Interpretation 5.1. About MEANS and PEDMEANS interpretation software MEANS is short for Modular ECG Analysis System. PEDMEANS is short for Pediatric Modular ECG Analysis System. They are ECG interpretation programs developed by the University of Rotterdam in the Netherlands, and can be used to interpret ECGs that were recorded with Welch Allyn CardioPerfect. MEANS and PEDMEANS use an algorithm that consists of signal processing, measurements, rhythm and contour classification. The adult algorithm is applicable to patient ages 18 and higher. The pediatric algorithm is applicable for ages 1 day through 17 years. MEANS and PEDMEANS interpretations consist of A number of statements in different categories Reasoning supporting the statement A conclusion An indication of the severity of the ECG Missing information The MEANS algorithm uses the gender and the age of a patient to make a reliable interpretation. If this information is not present in the patient card, the following assumptions are made: The patient is male The patient is 35 years old If these values are used, this is mentioned at the top of the interpretation. Caution DIR 80012333 Ver. F A computer generated interpretation cannot replace sound medical reasoning by a trained professional. Therefore, a physician should always review the interpretation. 33 / 51 CardioPerfect Workstation Resting ECG Module - User Manual 5.2. Edit and confirm an interpretation You can edit an interpretation in the Interpretation editor. In this editor, you can enter your own texts. Alternatively, you can use the statement tree to select and enter common interpretation statements. Until confirmed, the test will be labeled as ‘Unconfirmed Interpretation’. Interpretation display Statement tree To edit and confirm an interpretation manually: 1. In the Tools menu, click Interpretation. The Interpretation editor is displayed. 2. In the Interpretation display, at the pointer, start typing. 3. Click the Confirm button to save your comments and to return to the ECG. To edit and confirm an interpretation with the statement tree: 1. In the Tools menu, click Interpretation. The Interpretation editor is displayed. 2. From the statement tree, click on one of the categories to display all possible statements for that category. 3. From a category, click on the statement that you want to include in the interpretation. The statement is added. 4. To delete a statement from the interpretation, select the statement text and press BACKSPACE to delete it. 5. Click the Confirm button to save your comments and to return to the ECG. Tips for editing and confirming an interpretation: You can automatically insert the current date and time by clicking the Date/time button. You can clear the interpretation editor by clicking the Clear button. When you return to the ECG after confirming an interpretation, the interpretation header shows the date and time of confirmation and the name of the person that confirmed it. The statement tree can be changed. Please consult your system administrator or local DIR 80012333 Ver. F 34 / 51 CardioPerfect Workstation Resting ECG Module - User Manual dealer for new or changed statements. 5.3. View interpretation history When you change something in an interpretation, Welch Allyn CardioPerfect does not change the original interpretation, but creates a new one. This way, you never lose any information. A copy of all interpretations is kept in the interpretation history. Date and editor of the interpretation Interpretation dates Interpretation To view the interpretation history: 1. In the Tools menu, click History. The Interpretation history window is displayed. The left hand pane displays the interpretations sorted by date. The right hand pane shows the content of each interpretation, plus the interpretation date, time and editor. 2. Click on a date to view an interpretation. 5.4. Reanalyze an ECG When you have overwritten a MEANS interpretation with a manual interpretation, you can always get the MEANS interpretation back. To do this, you need to reanalyze the ECG. To reanalyze an ECG: In the Tools menu, click Reanalyze. The original MEANS interpretation is placed back in the interpretation window. DIR 80012333 Ver. F 35 / 51 CardioPerfect Workstation Resting ECG Module - User Manual 6. Printing ECGs 6.1. Print an ECG You can make a printout of each view in the ECG at any time between recording and interpretation. There are two ways of manually printing an ECG: One view: Welch Allyn CardioPerfect prints one view in the way it is displayed on the monitor. Selected formats: Welch Allyn CardioPerfect prints a number of views simultaneously. Print formats The resting ECG Module can print the following reports: 12 averages + 6 rhythm leads 2x6, all pages 2x6, two pages 50 mm/s 2x6 4x3, 25 mm/s 4x3, 50 mm/s 4x3 5 mm/mV 4x3 20 mm/mV Averages Large averaged complex Measurements OldRhythm Rhythm R-R Vectors HRV Each report contains the view and a header that displays additional information. Please refer to the Workstation manual for further information on printing ECGs. 6.2. Automatically print an ECG Welch Allyn CardioPerfect can automatically print an ECG directly after recording and after confirming the interpretation. To automatically print an ECG, you need to enable automatic printing and select the ECG formats to be printed. To enable automatic printing: 1. In the File menu, click Settings. The Settings dialog box is displayed. 2. Click ECG and click on the Printing tab. 3. In the Printing tab, click Print after recording and/or Print after interpretation confirmed. 4. Click OK to confirm. DIR 80012333 Ver. F 36 / 51 CardioPerfect Workstation Resting ECG Module - User Manual 7. Maintaining the Recorder To keep your Welch Allyn CardioPerfect Recorder in good working condition, do not expose the Recorder to temperatures lower than -20° C or higher than 50° C, at a maximum non-condensing humidity of 90%. Warning Keep the PRO ECG Recorder, reusable electrodes, and the patient cable clean. Patient contact with contaminated equipment can spread infection. The patient cables should be cleaned after each use and disinfected as needed. Caution Never immerse the PRO ECG Recorder or the patient cable in liquid. Never autoclave or steam clean the PRO ECG Recorder or the patient cable. Never pour alcohol directly on the PRO ECG Recorder or the patient cable, and never soak any components in alcohol. If any liquid enters the PRO ECG Recorder, remove the PRO ECG Recorder from service, and have it inspected by a qualified service person before using it again. 7.1. Clean the PRO ECG Recorder Unless the PRO ECG Recorder (the device itself rather than the cables and electrodes) comes in direct contact with a patient, it is acceptable to clean the device on a routine basis according to your facility's protocols and standards or local regulations. Patient contact with the device might require immediate cleaning. The following agents are compatible with the PRO ECG Recorder: • 70 percent isopropyl alcohol • 10 percent chlorine bleach solution Caution When cleaning the device, avoid using cloths or solutions that include quaternary ammonium compounds (ammonium chlorides) or glutaraldehyde-based disinfectants. 7.2. Cleaning the Patient cables and PC interface cables When you use electrodes that need electrode gel, make sure that the cables and the non-disposable electrodes are cleaned regularly. Otherwise, the gel may build up on the wires. Clean the cables 1. Slightly dampen a soft, clean cloth with lukewarm, soapy water or a neutral cleaner and clean the patient cable and PC USB interface cable. 2. Dry all cables with a clean, soft cloth or paper towel. DIR 80012333 Ver. F 37 / 51 CardioPerfect Workstation Resting ECG Module - User Manual 3. Wait at least 10 minutes before powering on the PRO ECG Recorder again. Disinfect the cables When disinfection is required, use chemical disinfectants containing ethanol (70%–80%), propanol (70%–80%), or aldehydes (2%–4%). Disinfect according to your facility's protocols and standards or local regulations. Caution Do not use these agents for routine cleaning of the cables. Alcohol can cause the plastic to become brittle and may cause the cable to fail prematurely. Inspecting the equipment Perform the following inspections daily: • Check for cracks or breaks in the PC USB interface cable, the patient cable, the patient electrodes, and the PRO ECG Recorder. • Check for bent or missing pins on all cables. • Check all cable and cord connections; reseat if any connectors are loose. 7.3. Accessories For information about the ECG hardware and accessories please refer to the Pro Manual. DIR 80012333 Ver. F 38 / 51 CardioPerfect Workstation Resting ECG Module - User Manual 8. Customizing the Resting ECG software You can customize the Welch Allyn CardioPerfect software to your own preferences. The features that you can customize are located in the ECG settings (File > Settings). 8.1. General tab In the General tab, you can configure a number of common options that are used by Welch Allyn CardioPerfect. The General tab contains the following options: Default chart speed From this list, you can select the default monitoring chart speed. Possible values are 5, 10, 12.5, 25, 50,100 mm/sec. Default sensitivity From this list, you can select the default monitoring sensitivity. Possible values are 5, 10 or 20 mm/mV. Extremity lead order With this option you can choose from two different lead orders: Standard (aVL, I, -aVR, II, aVF, III) and Cabrera (I, II, III, aVR, aVL, aVF). Maximum recording length The maximum number of seconds for a rhythm recording. Anti-alias monitor If this option is selected, your monitor is anti-aliased, so that the curves of the ECG signal appear smoother. Show new ECG dialog If this option is selected, the New ECG dialog box is displayed when you start a new ECG. Otherwise, you are taken straight to the Real-time monitor to start recording. See page 14 for more details. Ask for lead set on pediatric patients If this option is selected and you select a pediatric patient, Welch Allyn CardioPerfect will ask you whether you want to use a pediatric lead set. Show Pacer By disabling this setting, you can remove artificial pacemaker signal indicators. For example, see Pacemaker pulse detection on page 17. Amplitude unit The unit in which the amplitude is displayed. This can be either micro volts or millimeters. Muscle filter frequency This setting will affect the high cutoff frequency that is used by the muscle filter. DIR 80012333 Ver. F 39 / 51 CardioPerfect Workstation Resting ECG Module - User Manual 8.2. Viewing tab In the Viewing tab you can configure the settings that determine how the ECGs will be displayed on the screen. The Viewing tab contains the following options: QTc method (Bazett, Hodges, Fridericia) With this option you can set the method that should be used to correct the measured QT. AC filter mode With this option you can set the mode of the AC mains filter. Appearance Here, you can specify individual colors for the background, grid lines, grid dots, trace, begin and end of the QRS complex, the markers, the T wave and the font that is used in the ECG. Color schemes This list lets you choose from a number of predefined color formats. Grid style From this list you can select the style of the grid in which the ECG is displayed. You can either leave out the grid, use lines to represent the grid, or display a full grid. 8.3. Printing tab In the Printing tab, you can configure automatic printing and selected formats. The Printing tab contains the following options: Default report templates From this list of templates, you can select the formats that are printed when automatic printing is enabled. These formats are also printed when you click Print selected formats in the ECG window. Grid From this list, you can select the grid style in which the selected formats should be printed. Print after recording If this option is selected, the ECG is automatically printed when the recording has finished. Welch Allyn CardioPerfect prints the formats that you selected in the Default report templates area. Print after interpretation is confirmed If this option is selected, the ECG is automatically printed when the interpretation of the ECG has been confirmed. Welch Allyn CardioPerfect prints the formats that you selected in the Default report templates area. Print calibration pulse DIR 80012333 Ver. F If this option is selected, the calibration pulse will be printed. 40 / 51 CardioPerfect Workstation Resting ECG Module - User Manual 8.4. QT dispersion tab The QT dispersion tab is only visible when you have purchased the QT dispersion software. Use the QT dispersion tab to set your preferences for the calculation of the QT dispersion. Note: QT dispersion option not sold in the US. The QT dispersion tab contains the following options: Reference point In the Reference point area, you can specify from which reference point in the QRS complex the measurement should be started, and whether that reference point should be the same for all leads (global), or whether it should be set for each lead (local). Leads In the Leads area, you can specify the number of leads you want to use in calculating the QT dispersion. Reference point If you select… Then… Local Q Reference point is local Q point. Local J Reference point is local J point. Global Q Reference point is global Q point. Global J Reference point is global J point. Leads If you select... The leads that are used are... 6 6 precordial leads 8 The shortest peripheral lead The mean of all other peripheral leads 10 6 precordial leads All peripheral leads except the shortest and the longest one. 12 All 12 leads. DIR 80012333 Ver. F 41 / 51 CardioPerfect Workstation Resting ECG Module - User Manual 8.5. Recorder Tab In the Recorder tab, you can configure your Welch Allyn CardioPerfect Recorder. You can only access this tab when you have administrator rights or when the software security is switched off. The Recorder tab contains the following options: Model Use the MDXN1 PRO Recorder. Frequency The sampling frequency of the Recorder (either 300, 600 or 1200 Hz). Port The communication port of the PC to which the recorder is connected. This is typically the USB port. When operating in a thin-client environment, the application displays an additional option, called PerfectLink™. This option allows the use of the PRO Recorder with a USB cable in thin client environments. This only works with the PRO Recorder; therefore, the Recorder type is automatically set as well. AC filter (Hz) The frequency that is filtered by the AC mains filter. This can be either 50 or 60 Hz. Recorder options Display switch off message This option disables the display of the message “Switch recorder off” after a test has been completed. If a Welch Allyn CardioPerfect PRO Recorder with USB connection is used this option should be off/unchecked. 8.6. Customize ecg.txt You can customize the statements that are used in the Comment editor according to your own preferences. Please refer to the Workstation manual for further instructions. DIR 80012333 Ver. F 42 / 51 CardioPerfect Workstation Resting ECG Module - User Manual 9. Troubleshooting In this chapter, some known problems and possible solutions are described. When you start a recording you do not see the ECG traces on the screen and you receive a number of errors Make sure that the setting for the sampling frequency in the Recorder tab of the ECG settings matches the sampling frequency of your recorder. The sampling frequency can be either 300, 600 or 1200 Hz. Some buttons or menu entries are inactive This is probably caused by the fact that your user role does not allow you to perform the actions of those buttons or menu entries. Test recovery To recover a test after the database connection has been lost: If during the test the connection to the database is lost, for example because of a loose network cable, the test will be saved in a file called “Emergency saved resting ECG #x.MDW” (x stands for a number, which is automatically generated) in the database folder named in the error message. After the database connection has been restored, this file can be imported into the database by using the import function in the Workstation (File – Import, browse to the folder and select the correct file). Technical Support If you have a technical question that you cannot answer with the provided tools, please contact our Installation & Support department or contact your local distributor. When you contact the Installation & Support department via phone, e-mail or fax, please provide the following information: Your name, company name, address, phone number, fax number and e-mail address. Product serial number. Exact product name and version number. Type of operating system. Type of installation (network or standalone). A copy of the Technical Support Form. Complete description of the problem and the steps to reproduce it. If applicable we would also like to have the exact error message. To print the Technical support form: 1. In the Help menu, click Information. 2. Click on the Registration tab. 3. Click on the Support... button. The Welch Allyn CardioPerfect support form is now printed and saved as file MDW.txt in the MDW installation directory. You can fax the printout or e-mail the file. DIR 80012333 Ver. F 43 / 51 CardioPerfect Workstation Resting ECG Module - User Manual 10. Function keys The Welch Allyn CardioPerfect module is, just like all Windows applications, designed for working with the mouse. However, there might be situations in which working with the keyboard can be quicker. Therefore a number of functions within the Welch Allyn CardioPerfect module can also be selected directly using the keyboard. Here is a list of all available keyboard shortcuts in this module, for a more general function key description please refer to the Workstation manual: Viewing Key [SHIFT]+[CTRL]+[E] [CTRL]+[I] [CTRL]+[H] [CTRL]+[DOWN] Function Starts a new Resting ECG recording. Opens the Interpretation window Opens the Interpretation History Zooms out. [CTRL]+[UP] Zooms in. [CTRL]+[E] Enlarge average complex or vector loop. [CTRL]+[M] Activates the markers (only active in the ‘Averages’ and ‘Vector’ tab). [CTRL]+[R] Activates the refresh functionality, which clears all user made measurements. Real time monitor Key F2 [Esc] F12 Function Start/stop test Exit the recording. Starts a long recording (In Real Time Monitor). [INS] Inserts an event in the recording (Real-time monitor only) DIR 80012333 Ver. F 44 / 51 CardioPerfect Workstation Resting ECG Module - User Manual 11. Before installing the Resting ECG software In this chapter, you will find information about the structure of the Welch Allyn CardioPerfect resting ECG software. 11.1. Structure The workstation consists of two elements: Hardware: the recorder and the interface to the computer. Software: the Resting ECG module that runs in the Welch Allyn CardioPerfect Workstation. The recorder must be connected to the computer that runs the module. Software The Resting ECG module is automatically installed with Welch Allyn CardioPerfect Workstation. For instructions on how to install and configure Welch Allyn CardioPerfect Workstation, please refer to the Installation manual. Hardware The PRO Recorder uses a Prolink USB cable to communicate with the computer. DIR 80012333 Ver. F 45 / 51 CardioPerfect Workstation Resting ECG Module - User Manual 12. Installing the Resting ECG Module Before you can start recording ECGs, you need to: Install the hardware Install the drivers Configure the software 12.1. Connecting the Prolink USB interface Please run the software installation prior to inserting the USB-Interface into a USB socket of your computer. To set up your computer for use of the USB Interface: 1. Connect the USB Interface to the USB port of the computer. 2. Connect the other end of the interface directly to the PRO Recorder. To configure Welch Allyn CardioPerfect Workstation: 1. Start Welch Allyn CardioPerfect Workstation and log in as Administrator. 2. In the File menu, click Settings, click ECG, and click on the Recorder tab. 3. From the Port list, select Unilink USB (This is the default setting after a new installation) DIR 80012333 Ver. F 46 / 51 CardioPerfect Workstation Resting ECG Module - User Manual 13. Safety and precautions Conventions WARNING - Warning statements describe conditions or actions that can result in personal injury or loss of life. CAUTION - Caution statements describe conditions or actions that can result in damage to the equipment or software. NOTE - Notes contain additional information on cardiograph usage. Attention (Caution, Warning, Danger, Important, Note, Refer to Accompanying Documentation) Ingress Protection (ordinary) Serial Number Reference Number Defibrillation-Proof Type CF applied part Manufacture Date YYYY-MM-DD CE Mark for Class Is, Im, IIa, IIb & III Temperature Range DIR 80012333 Ver. F 47 / 51 CardioPerfect Workstation Resting ECG Module - User Manual Reorder Number Do not dispose of in trash, for devices Consult operating instructions/directions for use (DFU). A copy of the DFU is available on this website. A printed copy of the DFU can be ordered from Welch Allyn for delivery within 7 calendar days. Global Trade Item Number Electromagnetic Compatibility When using the Cardio Perfect PRO cardiograph, electromagnetic compatibility with surrounding devices should be considered and evaluated. The Cardio Perfect PRO cardiograph complies with IEC 60601-1-2 limits for EMC. General Safety and Precautions tips Caution Radio Frequency (RF) interference between the cardiograph and any existing RF transmitting or receiving equipment at the installation site, including electrosurgical equipment, in close proximity to the cardiograph should be evaluated before the equipment is operated as they may seriously degrade performance. The Cardio Perfect Cardiograph is susceptible to interference from RF energy sources (lowered RF immunity) which exceed the IEC 60601-1-2 limits, such as power line bursts, other medical devices, cellular products, information technology equipment and radio/television transmission. To reduce EMC interference the cardiograph shall be separated from the emitting source as much as possible. If assistance is needed, call your local Welch Allyn service representative. Artifact on the ECG caused by electromagnetic interference should be evaluated by a physician or physician authorized personnel to determine if it will negatively impact patient diagnosis or treatment. Like all electronic devices, this cardiograph is susceptible to electrostatic discharge (ESD). Electrostatic discharge typically occurs when electrostatic energy is transferred to the patient, the electrodes, or the cardiograph. ESD may result in ECG artifact that may appear as narrow spikes on the cardiograph display or on the printed report. When ESD occurs, the cardiograph’s ECG interpretation may be inconsistent with the physician’s interpretation. DIR 80012333 Ver. F 48 / 51 CardioPerfect Workstation Resting ECG Module - User Manual Welch Allyn assumes no liability for failures resulting from RF interference between Welch Allyn medical electronics and any radio frequency generating equipment when these levels exceed those established by applicable standards. Patient and Operational Safety The cardiograph isolates all connections to the patient from electrical ground and all other conductive circuits in the cardiograph. This reduces the possibility of hazardous currents passing from the cardiograph through the patient’s heart to ground. To ensure the patient’s safety and your own please observe the following: Any system components (e.g. treadmill, personal computer, ergo meter) that require to be connected to an outlet socket shall use only grounded power cords (three-wire power cords with grounded plugs). Also make sure the outlet accepts the plug and is grounded. Never adapt a grounded plug to fit an ungrounded outlet by removing the ground prong or ground clip. Multiple portable outlet sockets shall not be placed on the floor. Multiple portable outlet sockets or extension cord shall not be connected to the system. Do not connect items which are not part of the system. The use of multiple (non-) medical electrical equipment connected to the same patient may pose a safety hazard due to the summation of leakage currents from each instrument. Any combination of (non-) medical electrical equipment should be evaluated by local safety personnel before put into service. Multiple portable outlet sockets use without an isolation transformer is disapproved unless casual access for additional equipment is impeded or prevented. Patient cable and Interface cable Caution Warning DIR 80012333 Ver. F The patient cable supplied with the CardioPerfect cardiograph is an integral part of the cardiograph’s safety features. Using any other patient cable may compromise defibrillation protection as well as cardiograph performance. The patient cable should be routed away from power cords and any other electrical equipment. Failure to do so can result in AC power line frequency interference on the ECG trace. Do not touch the patient, patient cable, PC interface cable (Prolink) or cardiograph during defibrillation. Death or injury may occur from the electrical shock delivered by the defibrillator. It is recommended to check the patient cable and PC interface cable (Prolink) for damage prior to the use of the system. If damage exists do not use the cable, contact your local Welch Allyn Sales Office or your authorized Welch Allyn dealer or distributor to have the cable replaced. 49 / 51 CardioPerfect Workstation Resting ECG Module - User Manual Index 12 lead-ECG ......................................... 23 2x6 view ................................................ 23 4x3 view ................................................ 23 AC filter ........................................... 12, 30 Apply ................................................. 30 AC mains interference ........ 12, 15, 16, 30 Action menu .................. 15, 16, 29, 30, 31 Anti-aliased ..................................... 30, 39 Apply AC filter ................................. 15, 30 Apply anti-aliasing ................................ 30 Ask for leadset ...................................... 39 Automatically print an ECG .................. 36 Averages .................................. 29, 31, 32 Averages view ...................................... 23 AVF ....................................................... 23 Bazett.............................................. 26, 40 Cabrera ................................................. 39 Calculating ...................................... 27, 41 QT ............................................... 27, 41 Cancel recording .................................. 17 Capture an event .................................. 17 Chart speed .......................................... 29 Compare ECGs .................................... 31 Comparison dialog................................ 31 Complex ............................................... 29 Confirm button ...................................... 34 Confirm interpretation ........................... 34 CPCOM ................................................ 42 CPCOM PCI ......................................... 42 Create ................................................... 16 Pre-triggered recording ..................... 16 Create a new patient ............................ 14 Curves .................................................. 39 Customize Cardio Perfect..................... 39 Date/time button ................................... 34 Default report template ......................... 40 Delete measurements .......................... 31 Display ECG traces .............................. 15 Display markers .................................... 32 ECG ........................ 12, 29, 30, 33, 35, 36 Automatical print ............................... 36 Compare ........................................... 31 Interpreting ........................................ 33 Open ........................................... 28, 36 Reanalyze ......................................... 35 Record ........................................ 12, 15 Record rhythm .................................. 16 View .................................................. 30 ECG settings ........................................ 39 General tab ....................................... 39 Printing tab ........................................ 40 QT dispersion tab .............................. 41 Recorder tab ..................................... 42 Viewing tab ....................................... 40 Ecg.txt ................................................... 42 DIR 80012333 Ver. F Edit ECG information............................ 22 Electrode placement............................. 12 End ....................................................... 32 P… .................................................... 32 QRS .................................................. 32 Enlarge ................................................. 29 Enter IRQ ............................................. 42 Event .................................................... 17 Capture ............................................. 17 Events button ................................. 12, 16 Extremity leadorder .............................. 39 File menu .............................................. 26 Filter...................................................... 12 Fridericia ......................................... 26, 40 General settings ................................... 39 Global J ................................................ 41 Global Q ............................................... 41 History .................................................. 35 Hodges ........................................... 26, 40 Information ........................................... 22 Information window .............................. 22 Interpretation .................................. 34, 35 Interpreting ECGs ................................. 33 IRQ ....................................................... 42 J… ........................................................ 41 Leads .................................................... 41 Leadset ................................................. 39 Local J .................................................. 41 Local Q ................................................. 41 Loop...................................................... 29 Make measurements ............................ 31 Manually print ....................................... 36 Markers ................................................ 32 MEANS ................................................. 33 MEANS Interpretation software ............ 35 Measurements ...................................... 31 Measurements view ............................. 24 Muscle noise filter ........................... 16, 29 Old rhythm strip view ............................ 24 Open ............................................... 28, 36 ECG ............................................ 28, 36 P…........................................................ 32 End.................................................... 32 Start .................................................. 32 pacemaker signal indicators15, 17, 29, 39 Parameters ..................................... 26, 27 Patient .................................................. 14 Create new ....................................... 14 Place electrodes ................................... 12 Plane .................................................... 25 Precordial leads .................................... 27 Pre-triggered recording ........................ 16 Pre-triggered recording ........................ 16 Print ...................................................... 36 ECG .................................................. 36 Revision date: 2015-05 CardioPerfect Workstation Resting ECG Module - User Manual Print settings ......................................... 40 Printing ................................................. 36 Q… ....................................................... 41 QRS .................................... 27, 32, 40, 41 Complex ............................................ 41 End .................................................... 32 Start................................................... 32 QT ............................................. 26, 27, 41 Calculating .................................. 27, 41 Dispersion settings ............................ 41 QT dispersion .................................... 27 QTc correction method ..................... 26 QTd ................................................... 27 QTd options ...................................... 27 QT dispersion settings .......................... 27 Real-time monitor ......... 12, 15, 16, 17, 39 Reanalyze ECG .................................... 35 Record ...................................... 12, 15, 16 ECG ...................................... 12, 15, 16 Record button ................................. 16, 17 Recorder settings ................................. 42 Reference point .................................... 41 Refresh ................................................. 31 Remove measurements ....................... 31 Repolarization ....................................... 26 Reset zoom .......................................... 28 Rhythm ................................................. 16 Rhythm button ...................................... 16 Rhythm ECG ........................................ 16 Rhythm strip ......................................... 15 Rhythm view ......................................... 24 Right sagittal plane ............................... 25 R-R view ............................................... 25 Sagittal plane ........................................ 25 Select .................................................... 26 QTc correction method ..................... 26 DIR 80012333 Ver. F Sensitivity ............................................. 29 Set ........................................................ 15 Chart speed ...................................... 29 Rhythm strip...................................... 15 Sensitivity .......................................... 29 Set QTd options ................................... 27 Shortcut keys ........................................ 44 Show Pacer .......................................... 39 Start ...................................................... 32 P… .................................................... 32 QRS .................................................. 32 Tools menu ............................... 22, 34, 35 Traces .................................................. 15 USB ...................................................... 42 V1 ......................................................... 23 V6 ......................................................... 23 Vector ............................................. 29, 32 Vector view ........................................... 25 View ........................ 15, 22, 29, 30, 33, 35 2x6 .................................................... 23 4x3 .................................................... 23 Avarages ........................................... 23 Complex ............................................ 29 ECG ...................................... 15, 30, 33 ECG information ............................... 22 Interpretation history ......................... 35 Leads ................................................ 15 Loop .................................................. 29 Measurements .................................. 24 Old rhythm strip ................................ 24 Rhythm ............................................. 24 R-R.................................................... 25 Vector ............................................... 25 View menu ...................................... 29, 32 View settings ........................................ 40 Zoom .................................................... 28 51 / 51


