1
For the Owner and the Installing Contractor
LAB COCK
COMPACT BALL VALVE
ASAHI
Serial No. :UA-008E
User's Guide
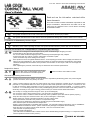
Installation Procedure
COMPACT BALL VALVE
The connection method of the COMPACT BALL VALVE, there are Socket End, Threaded End. Install according to the preferred
method of joining for the particular application. As for details, refer to the User's manual separately.
Socket End
㪮㪸㫉㫅㫀㫅㪾
(Material: PVC, C-PVC)
-When using an adhesive, ventilate the space sufficiently, prohibit the use of fire in the vicinity, and do not inhale
adhesive vapors directly.
-If an adhesive gets into contact with your skin, wash it off immediately. If you feel sick or find any anomaly, receive a
physician's diagnosis and take appropriate measures promptly.
-Take care in doing work at low temperatures. Solvent vapors are hard to evaporate and are likely to remain.
(Solvent cracks may occur, damaging the equipment.) After assembling the piping system, open both ends of the piping
and use a fan (of the Low-Voltage Type) or something similar to ventilate the space, thus removing the solvent vapors.
-Do not apply more cement than necessary. Avoid getting cement in the internals of the valve. This can cause damage
to the seals and moving parts. Solvent and fumes can chemically attack the valve materials if allowed to enter the
internals of the valve. (Cementing with the valve in a vertical position should be avoided)
-Do not under any circumstances try to insert a pipe into another fitting or valve by striking it, which may break the
piping.
-Use Asahi AV cement Number-32, Number-52, or Number-62 for PVC and Number-88 for C-PVC in case of JIS Pipe &
Fittings. The other standard Pipe & Fittings shall be used industrial proper PVC or C-PVC cement.
-Allow 24 hours for solvent cement to dry before performing a water leak test.
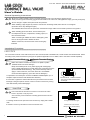
1. Entry of the Bench Mark: The bench mark indicates the maximum
penetration depth of the pipe into the end connector.
2. Cleaning: Clean the hub part of the end connector by wiping with a waste cloth.
CEMENT
3. Application of adhesive: Apply adhesive evenly to the hub part of the end
connector and the pipe spigot.
4. Insertion: After applying adhesive, insert the pipe quickly into the end
connector and leave it alone for at least 60 seconds.
5. Insertion completion: Wipe away overflowing adhesive.
㪚㪸㫌㫋㫀㫆㫅
Threaded End
(Material: PVC, C-PVC)
-Make sure that the threaded connections are plastic x plastic.
(Metallic thread can cause damage.)
-Wrap the threaded joints on our plastic piping with sealing tape.
Using a liquid sealing agent or liquid gasket may cause stress cracks
(Environmental Stress Cracking). Our product warranty shall not
apply in case of said use, even when said use is unavoidable.
-Avoid excessive tightening. (The valve can be damaged.)
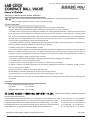
1. Preparation: The seal tape is wound to the Male threaded adapter. (2 to 3
complete wraps around the male threads are sufficient.)
2. Connection: Tighten the external thread of the joint and the end connector
hand tight. Using the spanner wrench, screw in the end connector by turning
180°-360°carefully without damaging it.
㪚㪸㫌㫋㫀㫆㫅
Sealing Tape
Operating Procedure
-When operating the handle, be sure to do so with your hand.
㪚㪸㫌㫋㫀㫆㫅
LAB COCK
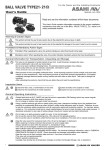
Open and close the valve by turning handle smoothly.
Handle
Body
Full-Shut (Close) Position
COMPACT BALL VALVE
Full-Opened Position
Open and close the valve by turning handle smoothly.
Handle
Body
Full-Shut (Close) Position
3
Full-Opened Position
ASAHI AV VALVES