1
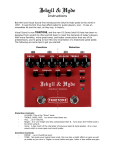
AGRO®
Based on the Saturation channel of the popular AG 500 bass head, the AGRO®
was designed to give bass players a wide range of overdriven sounds. Capable
of producing everything from warm, tube-like overdrive to full on distortion,
this pedal will give you the grind you need without sucking out your low end.
Features:
•
•
•
•
•
Contour control: broad spectrum mid scoop centered around 900Hz
Presence control: + 6dB/-20dB >4kHz
Power: Nine-volt battery or optional universal power supply
Heavy Duty steel construction
Battery life >120 hours
Owner’s Manual
Manual Version 1.0
I. Functions
A. Top Panel Controls:
LEVEL: Controls the output volume
SATURATION: Controls the amount of saturation
PRESENCE: + 6dB/-20dB >4kHz
CONTOUR: broad range mid scoop @ 900Hz (ccw=max scoop (~20dB) cw=flat)
ENGAGE: Toggles between on and off. The blue LED indicates that the effect is
on.
B. Side Panel Connections:
IN: ¼” input
DC IN: This is a standard 2.1mm DC jack. The center terminal polarity is
negative.
OUT: ¼” output
C. Specifications:
Current consumption:………………………..7mA
Input impedance: ............................................1MΩ (Effect On)
Output impedance: .........................................1 KΩ
Maximum Output:…….……………………..+6dBu (1.6VRMS)
Battery Life…………………….……………..~120hours
Noise Level: .................................................…-91 dBu ‘A’ weighted *
External DC Power:………………………..9-10VDC, 20mA min, center
terminal negative
All specs with knobs set to 12 oʹclock except:
* = Saturation set to minimum
+ = nominal input of -20dBu
II. Sample Settings
Please visit our website, www.aguilaramp.com, for sample settings.
III. “How To”s
How to change the battery:
This operation can be done quickly and easily and requires no tools!
The battery is easily accessible by loosening the thumbscrew on the bottom of the
unit.
The battery compartment will slide forward and you will be able to see the
padded area to insert the battery and attach the battery clips.
Once the battery has been replaced, simply slide the compartment back in and
hand tighten the thumbscrew.
How to attach the unit to a pedal board:
We have included two neoprene spacers to help attach the unit to a pedal board.
These pieces can be attached as shown to the bottom of the unit.
Once the neoprene spacers are secured to the bottom of the pedal, you can then
affix a piece of Velcro to them – you are now ready to mount the AGRO to your
pedal board!
We have included an additional screw that can be used to replace the
thumbscrew if itʹs in the way of your board.
IV. Warranty Information
The AGRO is covered under limited warranty against defects in materials and
workmanship for a period of 3 years. This warranty is non-transferable.
The warranty period starts from the date of purchase from an authorized Aguilar
dealer. Please retain your sales receipt as it is necessary to obtain warranty
service.
Before sending your unit to Aguilar for repair, you must receive a return
authorization
number
from
us.
Please
contact
us
via
email
([email protected]). Do not send any products to us without first
receiving a return authorization from Aguilar.
You are responsible for all shipping charges. You must ship the unit to us freight
prepaid. We will return the unit to you freight collect. Aguilar Amplification LLC
is not responsible for shipping damage, either to or from our service center.
Claims must be filed with the carrier.
The only company in the US authorized to perform work under this warranty is
Aguilar Amplification LLC of New York, NY.
Warranty service outside the USA: Warranty Service may be different in your
country. Please contact the Aguilar distributor in your country for terms and
procedures.
Aguilar Amplification LLC
599 Broadway, 7th fl.
NY, NY 10012