1
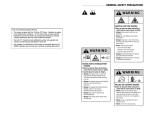
GENERAL SAFETY PRECAUTIONS
WARNING
FCC and IndustryCanada(IC) Warning:
• This device complies with Part 15 of the FCC Rules. Operation is subject
to the following two conditions: (1) This device may not cause harmful
interference, and (2) this device must accept any interference received,
including interference that may cause undesired operation.
• The term “IC:” before the radio certification number only signifies that
industry Canada technical specifications were met.
As you read these instructions, you will see
WARNINGS, CAUTIONS, NOTICES and NOTES.
Each message has a specific purpose. WARNINGS
are safety messages that indicate a potentially
hazardous situation, which, if not avoided could result
in serious injury. CAUTIONS are safety messages that
indicate a potentially hazardous situation which, if not
avoided, may result in minor or moderate injury. A
CAUTION may also be used to alert against unsafe
practice. CAUTIONS and WARNINGS identify the
hazard, indicate how to avoid hazard, and advise of
the probable consequence of not avoiding the hazard.
NOTICES are messages to avoid property damage.
NOTES are additional information to help you
complete a procedure. PLEASE WORK SAFELY!
• Any changes or modifications to this product not expressly approved by
WARN Industries could void the user’s authority to operate this product.
WARNING
CHEMICAL AND FIRE HAZARD
Failure to observe these instructions
could lead to severe injury or death.
• Always remove jewelry and wear eye
protection.
• Never lean over battery while making
connections.
• Always verify area is clear of fuel lines,
fuel tank, brake lines, electrical wires, etc.
when drilling.
• Never route electrical cables:
- Across any sharp edges.
- Through or near moving parts.
- Near parts that become hot.
• Always insulate and protect all exposed
wiring and electrical terminals.
• Always install terminal boots as directed
in installation instructions.
MOVING PARTS ENTANGLEMENT
HAZARD
Failure to observe these instructions
could lead to severe injury or death.
To avoid injury to hands or fingers.
• Always keep hands clear of rope, hook
loop, hook and fairlead opening during
installation, operation, and when spooling
in or out.
• Always use extreme caution when handling
hook and rope during spooling operations.
• Always use supplied hook strap whenever
spooling rope in or out, during installation
and during operation.
• Always keep vehicle in sight during
winching operation.
• Always wear heavy leather gloves when
handling rope.
WARNING
FALLING OR CRUSHING HAZARD
Failure to observe these instructions
could lead to severe injury or death.
• Never use winch to lift or move persons.
• Never use winch as a hoist or to suspend a
load.
CAUTION
CAUTION
CAUTION
MOVING PARTS ENTANGLEMENT
HAZARD
MOVING PARTS ENTANGLEMENT
HAZARD
Failure to observe these instructions
could lead to minor or moderate
injury.
General Safety:
• Always Know Your Winch. Take time to fully
read the Installation and Operations Guide,
and Basic Guide to Winching Techniques, in
order to understand your winch and its
operation.
• Never operate this winch if you are under
16 years of age.
• Never operate this winch when under the
influence of drugs, alcohol or medication.
• Never exceed winch or rope capacity listed on
product data sheet. Double line using a snatch
block to reduce winch load.
• Never use winch or rope for towing.
Installation Safety:
• Always choose a mounting location that is
sufficiently strong to withstand the maximum
pulling capacity of your winch.
• Always use factory approved mounting
hardware, components, and accessories.
• Always use grade 5 or better hardware.
• Never weld mounting bolts.
• Always use care when using longer bolts
than those supplied from factory. Bolts that
are too long can damage the base and/or
prevent the winch from being mounted
securely.
• Always mount the winch and attach the hook
to the rope’s end loop before connecting the
electrical wiring.
• Always position fairlead with WARNING label
on top.
• Always spool the rope onto the drum in the
direction specified by the winch warning label
on the winch and/or documentation. This is
required for the automatic brake to function
properly.
• Always prestretch rope and respool under
load before use. Tightly wound rope reduces
chances of "binding", which can damage the
rope.
MOVING PARTS ENTANGLEMENT
HAZARD
Failure to observe these instructions
could lead to minor or moderate
injury.
Winching Safety:
• Always inspect rope, hook, and slings before
operating winch. Damaged components must
be replaced before operation. Protect parts
from damage.
• Never leave wired remote control plugged into
winch when free spooling, rigging, or when the
winch is not being used.
• Never hook rope back onto itself. This
damages the rope.
• Always use a choker chain, choker rope, or
tree trunk protector on the anchor.
• Always remove any element or obstacle that
may interfere with safe operation of the
winch.
• Always take time to use appropriate rigging
techniques for a winch pull.
• Always be certain the anchor you select will
withstand the load and the strap or chain will
not slip.
• Never engage or disengage clutch if winch is
under load, rope is in tension or drum is
moving.
• Never winch with less than 5 wraps of rope
around the drum, the rope could come loose
from the drum.
• Never touch rope or hook while in tension or
under load.
• Never touch rope or hook while someone else
is at the control switch or during winching
operation.
• Always stand clear of rope and load and keep
others away while winching.
• Always be aware of stability of vehicle and
load during winching. Alert all bystanders of
any unstable condition.
• Never use a winch to secure a load.
Failure to observe these instructions
could lead to minor or moderate
injury.
Winching Safety:
• Always keep wired remote control lead clear
of the drum, rope, and rigging. Inspect for
cracks, pinches, frayed wires or loose
connections. Replace remote control if
damaged.
• Always pass wired remote control through a
window to avoid pinching lead in door, when
using remote inside a vehicle.
• Never leave remote control where it can be
activated during free spooling, rigging, or
when the winch is not being used.
CAUTION
CUT AND BURN HAZARD
Failure to observe these instructions
could lead to minor or moderate
injury.
To avoid injury to hands or fingers:
• Always wear heavy leather gloves when
handling a rope.
• Never let rope slip through your hands.
• Always be aware of possible hot surface at
winch motor, drum or rope during or after
winch use.
NOTICE
CAUTION
MOVING PARTS ENTANGLEMENT
HAZARD
Failure to observe these instructions
could lead to minor or moderate
injury.
• Always use a hook with a latch.
• Always ensure hook latch is closed and not
supporting load.
• Never apply load to hook tip or latch. Apply
load only to the center of hook.
• Never use a hook whose throat opening has
increased, or whose tip is bent or twisted.
AVOID WINCH AND EQUIPMENT
DAMAGE
• Always avoid side pulls which can pile up
rope at one end of the drum. This can damage
rope or winch.
• Always ensure the clutch is fully engaged or
disengaged.
• Never use winch to tow other vehicles or
objects. Shock loads can momentarily exceed
capacity of rope and winch.
• Always avoid “powering out” rope for
extended distances. This causes excess heat
and hear on the winch motor and brake.
• Always use care to not damage the vehicle
frame when anchoring to a vehicle during a
winching operation.
• Never "jog" rope under load. Shock loads can
momentarily exceed capacity of rope and
winch.
• Never use winch to secure a load during
transport.
• Never submerge winch in water.
• Always store the remote control in a
protected, clean, dry area.
• Always double line or pick distant anchor
point when rigging. This maximizes pulling
power and avoids overloading the winch.
OVERVIEW
STEP 1: MOUNT ALL WINCH
COMPONENTS
The WARN Wireless Control gives you the ability to operate
the winch using a wireless hand held remote. The wireless
control system integrates with the standard handlebar switch
and remote so that the operator may use either the wired or
wireless controls at any time.
First install the winch and other components including the
contactor, handlebar switch, and socket for wired remote
(optional on some models). Then install the wireless control
system.
To use the wireless system, the operator first activates the
system by pressing and holding both buttons on the wireless
remote for 3 seconds. This transfers control of the winch to
the wireless control system. The GREEN indicator light on
the handheld remote glows when the system is active and
ready to use. Deactivate the system by pressing both
buttons on the wireless transmitter simultaneously and
holding for 3 seconds until GREEN light turns off.
Location for these components may differ from the illustration
depending on make and model of the ATV. Read and
understand the instructions to choose the appropriate
mounting locations.
After 2 minutes of idle time, the wireless system de-activates.
Handlebar mounted
control switch
SAFETY
When installing your winch and winch control system, read
and follow all mounting and safety instructions. Always use
caution when working with electricity and remember to verify
that no exposed electrical connections exist before
energizing your winch circuit.
Electrical contactor
Socket for standard remote
SPECIFICATIONS
Part numbers for complete system:
PN 74500 (wireless control upgrade kit)
PN 74600 (kit supplied with new ATV winch)
Transmission range:
15-27 m (50-90 ft.)
Receiver Operating voltage:
8 to 24 VDC
Receiver Fuse type and current rating:
ATC 7.5 amp
Batteries for hand held remote:
two alkaline, 12 volt, type 23
WIRELESS CONTROL
KIT INCLUDES:
Wireless Receiver (1)
Wireless Transmitter (1)
Wiring Harness (1)
Holster Assembly (1)
Hardware Kit (1)
Winch
STEP 2: MOUNT THE RECEIVER
What is the receiver?
WA R N I N G
TO PREVENT SERIOUS INJURY OR
DEATH FROM EXPLOSION:
• Do not drill into gas tank.
• Verify the area is clear behind the
mounting location before drilling.
The receiver is a vital safety component of your wireless
winch system. It disconnects the winch from its power source
when the ATV is not in use. The receiver must be correctly
installed to work properly.
The receiver should be mounted in a location that is as clean
and dry as possible while also allowing access to the
programming button. The mounting location must also
provide clearance for the wire harness to attach to the
receiver.
Best locations for the receiver will vary depending on the
ATV. Typical locations include the inside, top, or side of the
rear storage box or under the seat. The receiver can be
attached to a flat surface or to a frame tube of the ATV.
WA R N I N G
TO AVOID SERIOUS INJURY OR
DEATH FROM ELECTRICAL FIRE:
• Never route electrical
cables:
-Across any sharp
edges.
-Through or near
moving parts.
-Near parts that
become hot.
• Always insulate and
protect all exposed
wiring and electrical
terminals.
Mounting Steps:
STEP 4: CONNECT THE WIRING
Note: Refer to Figure 1.
1. Pull apart the bullet connectors on the BLACK and
GREEN wires identified in Step 3 above. These will be
located near the contactor
2. Connect the BLACK and GREEN wires to the same color
wires on the wire harness as shown on the wiring diagram.
3. Connect the BLACK ground wire with the ring terminator to
the battery as shown.
4. Using a test light, locate a switched accessory wire
attached to the ATV ignition system. The wire should only
have power when the key is in the "ON" position.
5. Splice the RED wire to the key controlled accessory wire
using the provided wire splice.
1. Determine the mounting location.
6. Connect the other end of the wire harness to the receiver
and tighten the mounting bolts on the receiver.
2. If mounting on a flat surface, mark and drill a minimum of
two (2) mounting holes, one on each side of the receiver.
7. Use tie wraps to secure the wire harness
3. Loosely attach the receiver using 1/4-inch or M6 bolts and
locknuts.
4. If mounting on a frame tube, loosely attach using the wire
ties supplied.
5. Do not tighten fasteners at this time.
Use a test light to locate a
switched accessory wire.
Programming LED
Programming button
green
black
green
black
WA R N I N G
TO AVOID SERIOUS INJURY OR
DEATH FROM ELECTRICAL FIRE:
• Never route electrical
cables:
-Across any sharp
edges.
-Through or near
moving parts.
-Near parts that
become hot.
• Always insulate and
protect all exposed
wiring and electrical
terminals.
black
Minimum of one fastener on each side
red
STEP 3: ROUTE THE HARNESS
Locate the BLACK and GREEN wires running from the
contactor to the handlebar switch. Find the bullet connectors
on these wires located near the contactor.
Plan a route for the wire harness between the receiver and
these bullet connectors.
Figure 1: Wiring Installation Diagram
WA R N I N G
TO AVOID SERIOUS INJURY OR
DEATH:
• Always use caution when moving
or repositioning any vehicle controls
so as to not compromise the safe
operation of the winch or vehicle.
Select a mounting position that will
provide clearance for all vehicle
controls.
• Never attempt to bypass receiver
by connecting switches directly to
contactor.
STEP 5: MOUNT THE HOLSTER
For ATV use, the typical location for the holster is on the left
handlebar.
· The holster clamp must be mounted before assembly
· Do not tighten over any hoses, cables, or wiring.
· For ATVs, it is recommended that the holster be clamped
on the left handlebar. The clamp is designed to prevent
rotation. If necessary, a piece of electrical tape around the
handlebar may be used to prevent slipping.
· For UTVs, the holster may be mounted on the dash or
other convenient surface using two #10 or M5 machine
screws and locknuts.
· Assemble the holster as shown. Holster may be oriented
in any one of eight positions.
OPERATION
This WARN Wireless Control
System has been designed
to minimize interference
from other sources of radio.
C AU T I O N
TO AVOID MINOR OR MODERATE
INJURY:
• Always be aware that obstacles and
other radio transmission sources may
affect performance.
• Always insure the matching WARN
transmitter is closer to its receiver
than other transmitters in use during
winching.
Turn on sequence:
1. Activate the system by pressing both buttons on the
wireless transmitter simultaneously and holding for 3
seconds until GREEN light illuminates.
2. The winch system is now operational.
3. Press the power IN button or power OUT button as
needed.
Turn off sequence:
1. Deactivate the system by pressing both buttons on the
wireless transmitter simultaneously and holding for 3
seconds until GREEN light turns off.
LED Indicator Light
STEP 6: SYSTEM CHECK
Steady GREEN - system active and ready to use
1. Insure that wiring to all components is correct and all loose
wires are securely tie wrapped.
2. Insure that there are no exposed terminals or wiring.
Cover any bare terminal with terminal boots, heat shrink
tubing or electrical tape.
3. Turn ATV ignition switch to the ON position.
4. Check winch for proper operation using the handlebar
switch. The wire rope should spool in and out in the
direction indicated on the switch. If winch functions
correctly, proceed to the next step. Otherwise
troubleshoot.
C AU T I O N
ALWAYS KNOW YOUR WINCH:
Before doing a system check, take
time to fully understand your
winch and the winching operation
by reviewing the Basic Guide to
Winching Techniques, included
with your winch.
C AU T I O N
Steady RED - winch powering in or out
Flashing RED during winching - battery low
TO AVOID MINOR OR MODERATE
INJURY:
• Always use handlebar switch or
wired remote when intermittently
“jogging” winch.
LED indicator light
Power IN
Power OUT
OUT
IN
Press and hold
both buttons for
3 seconds to
activate wireless
system.
5. Press and hold both buttons on the wireless handheld
remote until the GREEN indicator light comes on. The
wireless system is now active and ready to use.
6. By pressing the buttons on the remote, verify that the
winch powers IN and powers OUT properly.
REPLACING BATTERIES
Press and hold both
buttons for 3 seconds
to deactivate the
wireless system.
If the indicator light on the handheld remote flashes RED
during winching, the batteries are low and should be
replaced.
1. Remove the two screws from the handheld remote.
2. Separate the top and bottom sections of the remote using
a coin or screw driver.
3. Remove the old batteries and dispose in accordance with
local environmental regulations.
4. Insert new alkaline batteries as shown with the positive
terminals facing the switches. Do not mix old and new
batteries.
5. Join the top and bottom sections making sure that they
snap together and rubber seal remains intact.
6. Secure with the two screws.
TROUBLESHOOTING
If the winch does not power in or out when remote buttons are pushed:
1. Check that the wireless system has been activated (GREEN LED on remote is ON).
2. Check all electrical connections. Verify that connections follow the wiring diagram and
instructions.
3. Insure that 10 seconds have passed since the standard wired control system was last used.
PROGRAMMING THE RECEIVER
Programming LED
Programming button
The hand held remote (transmitter) is programmed from the
factory to communicate with your specific receiver. Under
normal circumstances programming will not be necessary.
However, any replacement remote must be programmed to
communicate with your receiver. Use the following
procedure:
1. Insure the system is properly installed and connected.
2. Turn the ATV ignition key to ON.
3. Activate the system by pressing and holding both buttons
until the GREEN LED lights up.
4. Press and hold the receiver programming button for at
least five (5) seconds until the RED LED on the receiver
lights up and stays on.
5. Release the programming button.
6. Press the power IN button on the remote for at least one
(1) second until the RED LED on the receiver turns off.
Programming is now complete.
NOTE: Only one remote can be programmed for each
receiver.
WA R N I N G
TO AVOID SERIOUS INJURY OR
DEATH:
• Never attempt to service components
inside transmitter or receiver.
• Always consult an authorized WARN
service center for service or warranty.
WARRANTY
Please refer to the warranty sheet enclosed with your winch
for details.
REPLACEMENT PART NUMBERS
Ordering information: Parts may be obtained through your
local dealer or distributor.
Part Number
PN 77825
PN 74524
PN 74525
PN 74604
PN 74520
WARN WINCHES
Description
Receiver Module
Holster
Harness
Hardware Kit
Replacement transmitter (remote)
TRUCK WINCHES