1
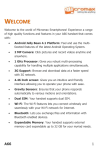
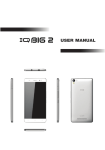
A5 User Manual 1 Contents 2 1. What’s in the box? Open the packing box of the phone and check you have the following: • Transreceiver • Standard Charger • Standard Battery • Handsfree Kit • User Guide 2. Learn about the phone 3 3. Before using Please insert the SIM card as shown below: Note: The SIM card is a small object; please keep the card out of the reach of children to avoid swallowing the card by accident. Do not touch the metal surface of the SIM card and keep it away from electromagnetism to avoid loss and damage of the data. You will not be able to connect to the network if the SIM card is damaged. Please install the battery as shown below: Note: Please use the original-packing battery and accessories. 4 4. Charger Before charging, make sure the battery is inserted properly: Connect the USB cable to the phone Connect the other end of the cable to the local charger Plug the charger into a power outlet When start charging the charging icon is shown on the screen 5. Getting to know the Home screen When you sign in, the home screen opens. The status bar shows the time, signal strength, battery status, and other information. It also displays notification icons. Touch items on the Home screen to open them. Touch & hold an empty spot to add a shortcut to an application, a widget and so on. Touch the Launcher icon to open the Launcher and view all your applications. Touch the Launcher icon to open the Launcher and view all your5applications. The Home screen is your starting point to access all the features on your phone. It displays application icons, widgets, shortcuts, and other features. You can customize the Home screen with different wallpaper and display the items you want. At the top of the screen, the Status bar displays the time, information about the status of your phone, and icons for notifications that you’ve received. Touch the Launcher icon at the bottom of the screen to view all installed applications. To wake up the phone If you don’t use the phone for a while, the Home screen or other screen you are viewing is replaced with the lock screen and then the screen darkens, to conserve the battery. 1.Press the power button If you’ve locked your screen, you must draw an unlock pattern or enter a PIN or password to unlock it. If you haven’t unlocked your screen, this lock screen appears. 6 2.Drag the lock icon up or down forward, the last screen you were working on opens. To return to the Home screen Press the Home button at any time, in any application. To view other parts of the Home screen Slide your finger left or right across the Home screen. These extensions to the Home screen provide more space for widgets, shortcuts, and other items, 6. Using the touch screen The main way to control Android features is by using your finger to touch icons, buttons, menu items, the onscreen keyboard, and other items on the touch screen. Touch: To act on items on the screen, such as application and settings icons, to type letters and symbols using the onscreen keyboard, or to press onscreen buttons, you simply touch them with your finger. Touch & hold: Touch & hold an item on the screen by touching it and not lifting your finger until an action occurs. For example, to open a menu for customizing the Home screen, you touch an empty area on the Home screen until the menu opens. Drag: Touch & hold an item for a moment and then, without lifting your finger, move your finger on the screen until you reach the target position. You drag items on the Home screen to reposition them and you drag to open the Notification panel. Swipe or slide: To swipe or slide, you quickly move your finger across the surface of the screen, without pausing when you first touch (so you don’t drag an item instead). For example, you slide the screen up or down to scroll a list, and in some Calendar views you swipe quickly across the screen to change the range of time visible. Double-tap: Tap quickly twice on a webpage, map, or other screen to zoom. For example, you double-tap a section of a webpage in Browser to zoom that section to fit the width of the screen. You can also double-tap to control the Camera zoom, In Maps, and in other applications, Double-tapping after pinching to zoom in some applications, such as browser, reflows a column of text to fit the width of the screen. Pinch: In some applications (Such as Maps, Browser, and Gallery) you can zoom in and out by placing two fingers on the screen at once and pinching them together (to zoom out) or spreading them apart (to zoom in). 7 Rotate the screen: On most screens, the orientation of the screen rotates with the phone as you turn it from upright to its slide and back again. You can turn this feature on and off. 7. Using the phone’s buttons The phone’s physical buttons and soft buttons offer a lot of functions and shortcuts. Button Press Opens the previous screen you were working on, Back If the onscreen keyboard is open, closes the keyboard Press & hold Menu Opens a menu with items that affect the current screen or Application. Home Open the Home screen, If you’re viewing the left or right Extended Home screen, opens the central Home screen. Opens the most recently Used applications screen. On the home screen, opens Google search for searching Your phone and the web. In many applications, opens a Search box for searching within the application. Turns on/off the screen. Opens Google search by voice. Search Power (Top) Volume Up/Down (Right side) When a call is in progress, Increases or decrease the call volume, When the phone is ringing, silences the ringer. On the Home screen when no calls in progress, Increase or decreases the ringtone volume, or sets the phone to be silent instead of ringing. In other applications, controls the volume of music, spoken directions, and other audio. 8 Opens a menu with options for airplane mode, for Reboot / powering off The phone and so on. Quickly increasing the ringtone volume to maximum or minimum. 8. Working with menus These are two kinds of Android menus: Options menus and context menus. Options menus Options menus contain tools that apply to the activities of the current screen or application, not to any specific item on the screen. You open options menu by pressing the menu button . Not all screens have options menus; If you press Menu on a screen that has no options menu, nothing happens. Some screens have more options menu items than can fit in the main menu; you touch More to open a menu of additional items. Options menus contain items that apply to the current screen or to the application as a whole. 9 Context menus Context menus contain tools that apply to specific item on the screen. You open a context menu by touching & holding an item on the screen. Not all items have context menus. If you touch & hold an item that has no context menu, nothing happens. (1) (2) (1)Touch the photos of the left of the item, an option menu opens (2) When you touch & hold some items on a screen, a context menu opens 9. Managing notifications Notification icons report the arrival of new messages, calendar events, and alarms, as well as ongoing events, such as when call forwarding is on or the current call status. When you receive a notification, its icon appears in the status bar, along with a summary that appears only briefly. You can open the Notifications panel to view a list of all your notifications. Applications whose activities produce notifications, such as Gmail have their own settings, which you can use to configure 10 whether and how they send notifications, whether they sound a ringtone, vibrate, and so on. To open the Notifications panel Drag the status bar down from the top of the screen. The Notifications panel displays your wireless provider and a list of your current notifications, Notifications about ongoing activities are listed first. Followed by notifications about events, such as new mail notifications or calendar reminders. Touch a notification to open it in its Application. To respond to a notification Open the notification panel, your current notifications are listed in the panel, each with a brief description. Touch a notification to respond it. The notifications panel closes. What happens depends on the notification. For example, new voicemail notifications dial your voicemail box, and network disconnect notifications open the list of configured network so you can reconnect. 11 To clear all notifications Open the Notifications panel Touch Clear at the top right of the panel. All event-based notifications are cleared; ongoing notifications remain in the list. To close the Notifications panel Drag the tab at the bottom of the Notifications panel to the top of the screen. Or just press the back button. The panel also closes when you touch a notification to respond to it. To open the Toolkits In the toolkits you can quickly start the common applications such as: Bluetooth, Wi-Fi and so on. Open the Notifications panel Touch the Toolkits at the right bottom of the screen, then the Toolkits screen will be open. 12 Touch to enter the Toolkits screen. 10. Using the onscreen keyboard You enter text using the onscreen keyboard. When you enable soft keyboard feature, some applications open the keyboard automatically. In others, you touch a text field where you want to enter text to open the keyboard. 13 Touch a suggestion to enter it. Press space or a punctuation mark to enter the highlighted suggestion. Touch once to capitalize the next letter you type. Touch & hold for call caps. To enter text Touch a text field, the onscreen keyboard opens. Touch the keys on the keyboard to type; the characters you’ve entered appear in a strip above the keyboard. With suggestions for the word you are typing to the right. Press the left or right arrows in the strip to view more suggestions. Press space or a punctuation mark to enter the highlighted suggested word. If you touch the space key, the suggestion strip offers a series of punctuation marks you can touch, to replace the space with, or touch another suggested word to enter it. Use the Delete key to erase characters to the left of the cursor. When you’re finished typing, Press Back to close the keyboard. 14 To enter numbers, symbols, and other characters. Press the symbols key to switch to the numbers and symbols keyboard. Press the Alt key on the symbols keyboard to view additional symbols; Press it again to switch back. 11. Editing text You can edit the text you enter in text fields and use menu to commands to cut, copy, and paste text, within or across applications. Some applications don’t support editing some or all of the text they display. Others may offer their own way to select text you want to work with. To edit text Touch the text field that contains the text to edit. Type, cut, paste, or delete text. Press the Back button when you’re finished typing, to close the keyboard. You may also have a Next or Done button on the keyboard, depending on the application and text field you’re typing in. To select text You select text that you want to cut or copy. Selected text is highlighted in orange. Touch the text field or other portion of the screen that contains the text to select, a menu opens with options for cutting, copying, and performing other tasks with the text field. Touch “Select word”, you can move the cursor to select the text you want. Touch “Select all” to select all the text in the text field. Touch in the text field to move the cursor in text. 15 Touch“Select word”, you can move the cursor to select the text you want. To cut or copy text Select the text to cut or copy. Touch Cut or Copy in the menu that opens. If you touch Cut, the selected text is removed from the text field. In either case, the text is stored in a temporary area on the phone, so that you can paste it into another text field. To paste text Copy the text to paste. Touch the text field where you want to paste the text. You can paste text that you copied from one application into a text field in any application. Slide you finger to move the cursor to the location where you want to paste the text. Touch & hold the text field. 16 Touch Paste in the menu that opens. The text is inserted at the cursor. The text that you pasted also remains in a temporary area on the phone, so you can paste that same text in another location. 12. Opening and switching applications The Launcher, which you open from the Home screen, holds icons for all of the applications on your phone, including any applications that you downloaded and installed from Android Market or other sources. When you open an application, the other applications you’ve been using don’t stop; they keep on running: playing music, opening webpages, and so on. You can quickly switch among your applications, to work with several at once. The Android operating system and applications work together to ensure that applications you aren’t using don’t consume resources unnecessarily, stopping them and starting them as needed. For this reason, there’s no need or facility for quitting applications. To open and close the Launcher On the Home screen, touch the Launcher Icon to open it. If you have more applications than can fit on the Launcher in one view, you can slide the Launcher left or right to view more. You can add an application icon to the Home screen by touching & holding it on the Launcher until it vibrates and then dragging it to a location on the Home screen. 17 Touch an application to open it. Slide the Launcher left or right to bring more icons into view. Touch to close the Launcher. Touch the Home icon on the Launcher or the Home button to close the Launcher. The Launcher closes automatically if you touch an icon to open its application or if you move an icon from the Launcher to the Home screen. To open an application Touch an application’s icon on the Launcher Touch an application’s icon on the Home screen. Touch to close the Launcher. To switch to a recently used application 1. Press & hold the Home button . A small window opens, with icons of applications that you’ve used recently. 2. Touch an icon to open its application. Or press Back to return to the current application. 18 Touch an icon to open an application you’ve used recently. Locking your screen You can lock your screen so that only you can unlock it to make calls, access your data, buy applications, and so on. You may also be required to lock your screen by a policy set by an email or other account you add to your phone. To lock your phone 1. On the Home screen, Press Menu and touch Settings>Touch Application Tab> security. 2. Touch Set up screen lock. 3. Touch Pattern or Password. If you touch Pattern, you’re guided to create a pattern you must draw to unlock the screen. The first time you do this, a short tutorial about creating an unlock pattern appears. You can press Menu and touch Help at any time for a refresher. Then you’re prompted to draw and redraw your own pattern. If you 19 touch password, you’re prompted to set a numeric password you must enter to unlock your screen. The next time you turn on your phone or wake up the screen, you must draw your unlock pattern or to enter your password to unlock the screen. Customizing the Home screen You can add applications, shortcuts, widgets, and other items to any part of the Home screen. You can also change the wallpaper. To add items to the Home screen 1. Open the Home screen where you want to add the item. For an introduction to working with the Home screen, including how to switch Home screens. 2. Press menu and touch Add. Or just touch & hold an empty location on the Home screen. If there are no empty spots on the Home screen. Add is dimmed; you must delete or move an item before you can add another item, or switch to another Home screen. 3. In the menu that opens, touch the type of item to add. You can add the following types of items to the Home screen. Shortcuts: Add shortcuts to applications, a bookmarked webpage, a favorite contact, a destination in Maps, a Gmail label, a music play list, and many other items. The shortcuts available depend on the applications you have installed. Widgets: Add any of miniature applications (widgets) to your Home screen, Including a clock, a music player, a picture frame, the Google search bar, a Power manager, a calendar that shows upcoming appointments, and a News & weather widget. You can also download widgets from Android Market. Folder: Add a folder where you can organize Home screen items, or folders that contain all your contacts, contacts with phone number, or starred contacts. Your folder’s contents are kept up to date automatically. To move an item on the Home screen 1. Touch & hold the item you want to move. Don’t lift your finger. 2. Drag the item to a new location on the screen. 20 3. When the item is where you want it, lift your finger. To remove an item from the Home screen 1. Touch & hold the item you want to remove. Don’t lift your finger. The Launcher icon changes to a menu with two options: delete and uninstall. 2. Touch delete. 3. Lift your finger. To change the Home screen wallpaper 1.Press Menu and touch Wallpapers. You can also touch & hold an empty area of the Home screen and in the menu that opens, touch Wallpapers. 2.Touch Gallery, Live wallpapers, or Wallpapers. Touch Gallery to use a picture that you have captured using the camera or copied to your phone. You can crop the picture before setting it as wallpaper. Touch Live wallpapers to open a scrolling list of animated wallpapers installed on your phone. Some live wallpapers change according to the time of day, in response to touching the screen, tell the time, or offer other information. Some live wallpapers change according to the time of day, in response to touching the screen, tell the time, or offer other information. Some live wallpapers have a settings button. Touch Wallpapers to open a screen where you can sample the wallpaper images that come with the phone. Slide the miniature images left and right to view the samples. Touch a sample to view a large version. 3. Touch Set wallpaper. To rename a folder 1. Touch the folder to open it. 2. Touch & hold the folder window’s title bar. 3. Enter a new name in the dialog that appears. 4. Touch OK. 13. Optimizing battery life 21 You can extend your battery’s life between charges by turning off features that you don’t need. You can also monitor how applications and system resources consume battery power. To extend the life of your battery Turn off radios that you aren’t using. If you aren’t using WI_FI, Bluetooth, or GPS, use the Settings application to turn them off. Turn down screen brightness and set a shorter screen timeout. If you don’t need them, turn off automatic syncing for Gmail, Calendar, Contacts, and other applications. Use the Power Control widget to check and control the status of radios, the display brightness, and syncing. To check the battery charge level On the Home screen, Press Menu and touch Settings>Touch Others Tab>About phone>Status The battery status and level are displayed at the top of the screen. To monitor and control what uses the battery The Battery Use screen shows which applications consume the most battery power. You can also use it to turn off applications that you’ve download, If they are consuming too much power. On the Home screen, Press Menu and touch Settings>Touch Others Tab> About phone>Battery use. The Battery Use screen lists the applications that have been using the battery, from greatest to least battery use. The top of the screen displays the time since you were last connected to a charger or, if you’re currently connected to one, how long you were running on battery power before you connected to a charger. Then each application or service that used battery power during that time is displayed, In order of the amount of power they used. Touch an application in the Battery Use screen to learn details about its power consumption. Different applications offer different kinds of information. Some applications include buttons that open screens with settings to adjust power use. 22 14. Connecting to networks and devices Your phone can connect to a variety of networks and devices, including mobile networks for voice and data transmission, Wi-Fi data networks, and Bluetooth devices, such as headsets. You can also connect your phone to a computer, to transfer files from your phone’s SD card, and share your phone’s mobile data connection via USB or as a portable Wi-Fi hotspot. Connecting to mobile networks When you assemble your phone with a SIM card from your wireless service provider, your phone is configured to use your provider’s mobile networks for voice calls and for transmitting data. Your phone is configured to work with many mobile carriers’ network. If your phone doesn’t connect to a network when you insert a SIM card and turn it on, contact your carrier to obtain the details of its access point name. Different locations may have different mobile networks available. Initially, your phone is configured to use the fastest mobile network available for data. But you can configure your phone to use only a slower 2G network for data, to extend the life of your battery between charges. You can also configure your phone to access a different set of networks entirely, or to behave in special ways when roaming. The icons in the Status bar indicate which kind of data network you’re connected to and the voice and data network signal strength. When you’re connected to a slower network, you may want to postpone using your phone for data-intensive tasks until you are connected to a faster network again, or find a WI-FI network to connect to. To determine what network you’re using 1. Press Home , press Menu ,and touch Settings to open the Communication Tab. 2. Touch Wireless & networks>Mobile networks> Access Point Names. The name of the wireless service provider you’re currently registered with is selected in the list. To edit or create a new access point If you and your wireless service provider determine that you need to change the settings of your current access point name (APN) or to create a new one, you must obtain the APN and detailed settings from your provider. 23 1. Press Home , Press Menu , and touch Settings to open the Communication Tab. 2. Touch Wireless & networks>Mobile networks>Access point names. 3. Touch an existing APN to edit it, or press Menu and touch New APN. Enter the APN settings that you obtained from your wireless service provider by touching each setting that you need to edit. 4. When you’re finished, press Menu and touch Save. 5. If you created a new APN, touch it in the APNs screen to start using it. Connecting to Wi-Fi networks Wi-Fi is a wireless networking technology that can provide internet access at distance of up to100 meters, depending on the Wi-Fi router and your surroundings. To use Wi-Fi on your phone, you access a wireless access point, or “hotspot”. Some hotspots are open and you can simply connect to them. Others are hidden or implement other security features, so you must configure your phone so it can connect to them. There are numerous systems for securing Wi-Fi connections, including some that rely on secure certificates or other schemes to ensure that only authorized users connect. Turn off Wi-Fi when you’re not using it, to extend the life of your battery. When you connect to a Wi-Fi network, the phone obtains a network address and other information it needs from the network, using the DHCP protocol. To turn WI-FI on and connect to a Wi-Fi network If you’re adding a Wi-Fi network when first setting up your phone, Wi-Fi is turned on automatically, so you can skip to step 4. 1. Press Home , press Menu , and touch Settings. 2. Touch Wireless & networks> Wi-Fi settings. 3. Check Wi-Fi to turn it on. The phone scans for available Wi-Fi networks and displays the names of those it finds. Secured networks are indicated with a Lock icon. If the phone finds a network, you connected previously, It connects to it. 24 4. Touch a network to connect to it If the network is open, you are prompted to confirm that you want to connect to that network by touching Connect. If the network is secured, you’re prompted to enter a password or other credentials (Ask your network administrator for details) When you’re connected to a network, you can touch its name in the Wi-Fi settings screen for details about the speed, security, address, and related settings. To receive notifications when open networks are in range By default, when Wi-Fi is on, you receive notifications in the status bar when your phone detects an open Wi-Fi network. 1. Turn on Wi-Fi, if it’s not already on. 2. In the Wi-Fi settings screen, check Network notification. You can uncheck this option to receiving notifications. Connecting to Bluetooth devices Bluetooth is a short-range wireless communications technology that devices can use to exchange information over a distance of about 10 meters. The most common Bluetooth devices are headphones for making calls or listening to music, hands-free kits for cars , and other portable device, including laptops and cell phones. To turn Bluetooth on or off 1. Press Home , press Menu , and touch Settings to open the Communication Tab. 2. Touch Wireless & networks 3. Check or uncheck Bluetooth to turn it on or off. To pair your phone with a Bluetooth device You must pair your phone with a device before you can connect to it. Once you pair your phone with a device, they stay paired unless you unpair them. 1. Press Home , Press Menu , and touch Settings to open the Communication Tab. 2. Touch Wireless & network>Bluetooth settings. 3. If Bluetooth isn’t turned on, check Bluetooth to turn it on. Your phone scans for and display the IDs of all available 25 Bluetooth devices in range. 4. If the device you want to pair with isn’t in the list, make it discoverable. 5. If your phone stops scanning before you make the other device discoverable, touch Scan for devices. 6. Touch the ID of the other device in the list in Settings to pair them. The devices pair with each other. If you’re prompted to enter a password, try entering 0000 or 1234 (the most common password), or consult the documentation that came with the device to learn its password, If the pairing is successful, your phone connects to the device. To connect to a Bluetooth device Once paired, you can connect to Bluetooth device—for example, to switch devices or the reconnect after the phone and the device come back into range. 1. Press Home , press Menu , and touch Settings to open the Settings application. 2. Touch Wireless & network> Bluetooth settings. 3. If Bluetooth isn’t turned on, check Bluetooth to turn it on. 4. In the list of devices, touch a paired but unconnected device in the list. If the device you expected isn’t displayed, touch Scan for devices. When the phone and device are connected, the device is displayed as connected in the list. Connecting to a computer via USB You can connect your phone to a computer with a USB cable, to transfer music, pictures, and other files between your phone’s SD card and the computer. When connecting your phone to a computer and mounting its SD card, you must follow your computer’s instructions for connecting and disconnecting USB devices, to avoid damaging or corrupting the files on your SD card. You can’t share your phone’s data connection and SD card via USB cable at the same time. If you are using USB tethering, you must turn that off first. To connect your phone to a computer via USB 1. Use the USB cable that came with your phone to connect the phone to a USB port on your computer. You receive a notification that the USB is connected. 26 2. Open the notification panel and touch USB connected. 3. Touch Turn on USB storage in the screen that opens to confirm that you want to transfer files. When the phone is connected as USB storage, the screen indicates that USB storage is in use and you receive a notification. You phone’s SD card is mounted as a drive on your computer. You can now copy files to and from the SD card. During this time, you can’t access the SD card from your phone, so you can’t use applications that rely on the SD card, such as camera, Gallery, and Music. You also can’t share your phone’s data connection with your computer via USB. Working with secure certificates If your organization’s VPN or Wi-Fi Network rely on secure certificates, you must obtain the certificates and store them in your phone’s secure credential storage, before you can configure access to those VPN or Wi-Fi networks on your phone. If you network administrate instructs you to download the certificates from a website, you’re prompted to set a password for the credential storage when you download the certificates. To install a secure certificate from the SD card 1. Copy the certificate from your computer to the root of the SD card. 2. Press Home , press , and touch Settings>Touch Application Tab. 3. Touch security. 4. Touch Install from SD card. 5. Touch the file name of the certificate to install. Only the names of certificates that you have not already installed on your phone are displayed. 6. If prompted, enter the certificate’s password and touch OK. 7. Enter a name for the certificate and touch OK. 15. Placing and receiving calls You can place a phone call by dialing a phone number. You can also touch a number in your contacts, on web pages, and other places. When you’re on a call, you can answer incoming calls or send them to your voicemail box. You can even set up conference calls with several participants. 27 Placing and ending calls You can place calls with the phone application. You can also place calls working in the Call log or in contacts. To open phone Touch the phone icon Phone tab. on the Home screen or if you’re already working with Contacts or the Call log, touch the To placing a call by dialing 1.Open Phone Touch & hold to enter “+” Touch to make a video call.(This function needs the support of the network operator.) Touch to erase a digital, Touch & hold 28 to erase the entire number. Touch the keys on the phone tab to enter the phone number. If you enter a wrong number, touch to erase digits one by one. To erase entire number, touch & hold . To dial an international number, touch & hold the 0 key to enter the Plus (+) symbol, then enter the international prefix or the country, followed by the full phone number. Touch the blue phone icon to dial the number that you entered. The duration of the call. Touch to display more options. You can switch applications during a call—for example, to look up information by using the Browser. The green phone 29 icon appears in the Status bar while the call is underway. Press the Volume Up/ Down button to adjust the call volume. To end a call Touch End. To placing a call by using contacts 1.Open the contacts list 2.Touch the picture at the left of the contact entry you want to dial 3.Touch the dial icon in the menu that opens. Touch the photos to open an option menu, with this menu you can dial or send message to the contacts. 30 To disable phone calls (Airplane mode) Some locations may require you to turn off your phone’s mobile, Wi-Fi, and Bluetooth wireless connections. You can turn off all these wireless connections at once by placing your phone in Airplane mode. 1. Press & hold the Power button 2. Touch Airplane mode. Working with the Call log The call log is a list of all the calls you’ve placed, received, or missed. It offers a convenient way to redial a number, return a call, or add a number to your Contacts. To open the Call log Press the Call button. Or if you have the phone or Contacts tab open, touch the Call log tab. Calls are listed with the most recent at the top. Calls exchanged sequentially with the same number are grouped. Scroll to view earlier entries in the log. 31 Incoming call Missed call Outgoing call Touch & Hold an entry for more options. To dial a number in the Call log You can touch & hold the entry to open a menu with options for communicating with that contact. To add an entry’s number to your Contacts 1. Touch & hold the entry. 2. Touch Add contact in the menu that opens. 3. A menu with two options opens, touch Existing to add the number to an existing contact; Touch New to create a new contact. To take other actions on a Call log entry Touch a Call log entry to open a screen where you can call the contact again, send the contact a message, add the number to your contacts, and learn more about the original call. 32 Touch & hold a Call log entry to open a menu where you can call the contact, view contact information, edit the number before you redial, and more. To clear the Call log While view the call log, press Menu and touch Clear call log. You can also touch & hold an entry in the log, In the menu that opens, touch Remove from call log to remove just the entry from the log. Options during a call When a call is in progress, you can put a call on hold, create a phone conference, mute your microphone. To place a call on hold Touch the Hold Icon Touch More to open more options. 33 The current call screen indicates that you have a call on hold. A Hold icon appears in the Status bar to remind you that you have a call on hold. From any other application, you can open the Notifications panel and touch the entry for the call on hold to return to the current call screen. Take the call off hold by touching the Unhold button. To mute the microphone during a call Touch the Mute icon When the Mute icon turn to indicates that the microphone is muted. The Mute icon appears in the Status bar to remind you that the microphone is turned off. When viewing the current call screen, you can unmute the microphone by touching the Mute icon again. The microphone is unmuted automatically when the current call ends. To turn the speakerphone on or off Touch the speakerphone icon The speaker icon appears in the Status bar and the sound from you call is through the phone’s speaker. When viewing the current call screen, you can turn the speakerphone off by touching the Speaker icon again. The speaker is turned off automatically when your current call ends. Managing multiple calls If you accept a new call when you’re already on a call, you can switch between the two callers or merge the two calls into a single conference call. You can also set up a conference call with multiple callers. To switch between current calls Touch the swap icon 34 , the current call is put on hold and you join the other call. Touch to merge the calls into a conference call. Touch to swap calls. To setup a conference call Contact your wireless service provider to learn whether they support conference calls and how many participants you can include. 1. Place a call to the first participant 2. When you’re connected, touch , the first participant is put on hold and you’re prompted to dial the second caller. 3. Place the next call, using the phone tab, the Call log, or your contacts. 4. When you’re connected, touch . The participant is added to the conference call. You can add as many callers as your carrier supports. 35 16. Messaging You can use Messaging to exchange text messages and multimedia messages with your friends on their mobile phones. Touch the Messaging icon on the Home screen or in the Launcher. The Messaging window opens, where you can create a new message or open an ongoing message thread. Touch to open a messaging conversation . Touch to compose a new text or multimedia message. To delete a message thread from the Messaging window 1. Touch & hold the message to start a new text or multimedia message. 36 2. Touch Delete thread in the menu that opens. You can also press Menu and touch Delete threads to delete all message threads from the window. Exchanging messages You can send text message of up to 160 characters to another mobile phone. If you keep typing after the limit, your message is delivered as a series of messages. Multimedia messages can contain text and a picture, a recorded voice, an audio file, a video, or a picture slideshow. Messaging automatically converts a message into a multimedia message if you send it to an email address instead of a phone number, add a subject, or attach a media file. To send a text message 1. On the Messaging screen, touch Compose new message. 2. Enter a mobile phone number in the To filed. As you enter the phone number, matching contacts appear. You can touch a suggested recipient or continue enter with a mobile number. You can also enter the name of a contact with a mobile number. 3. Touch the composition text box to start entering your message. 4. Touch to send the message. 37 Enter a mobile phone number or the name of a contact with a mobile number. Enter the content of the message. To create and send a multimedia message 1. On the Messaging screen, touch compose new message. 2. Enter a mobile phone number or email address in the To filed. As you type, matching contacts appear. You can touch a suggested contact or continue typing. You can also enter the name of a contact with a mobile number. 3. Touch the composition text box to start entering your message. 4. Touch on the left of the text box, a menu opens as the following picture: 38 If you touch subject to add a message subject; If you touch pictures, you’re prompted to touch a picture to attach it. If you touch capture picture, Camera opens so you can take a picture and attach it. If you touch videos, you’re prompted to touch a video to attach it. If you touch capture videos, Camcorder opens so you can shoot a video and attach it. If you touch Audio, you’re prompted to touch a ringtone to attach it. If you touch Record audio, a screen opens where you can record a spoken message and attach it. If you touch Slideshow, a screen opens where you can assemble photos into a slideshow of up to 10 Slides to attach to the message. Use the buttons in the Compose Message screen to preview or remove the media attachment. 5. Touch to send the multimedia message. 39 To respond a message you receive If you are working on a message window, messages that you receive are displayed in it. Otherwise, you receive a new message notification and a new message icon appears in the Status bar. When you touch the new message notification, the Message window opens, where you can reply to the message. If the message contains a media file, touch Play to view, watch, or listen to it. Touch & hold the media file to open a menu with an option for saving the message on your SD card. Touch & hold a message to open a menu with number of options for working with the message and it’s sender’s information. To forward a message 1. Touch & hold a message in a message window. 2. Touch Forward in the menu that opens. 3. Enter a recipient for the message and edit the content if you want. 4. Touch to send the message. To lock a message You can lock a message so it won’t be deleted if you reach your storage limits. If you try to delete a thread that contains a locked message, you’re asked to confirm that you want to delete it. 1. Touch & hold message in a message window. 2. Touch Lock message in the menu that opens. A lock icon appears to the left of the message. Unlock a message by touching & holding it and then touch Unlock message. To view details about a message 1. Touch & hold a message in a message window. 2. Touch View message details in the menu that opens. 40 17. Camera The Camera allows you to shoot and share pictures and videos. Pictures and videos are stored on the phone’s SD card, so you must insert one to use the Camera. You can copy your pictures and videos from the SD card to computer. You can view your pictures and videos on the phone, edit them, share them, and so on form the Gallery. Touch to preview your pictures or videos in Gallery. Drag up to shoot videos; drag down to take photos. Touch to take a picture or shoot a video. 17.1 Open Camera Touch the Camera icon in the main menu. 17.2 Take a picture Adjust your exposure, flash, and other settings if you wish. Or leave them on automatic. Frame your subject on screen. You can zoom in or out by sliding the Zoom icon. Touch the shutter icon on the screen. The picture you just took is displayed for a moment, and then is displayed as a thumbnail at the top right. 17.3 Shoot Videos Drag the control to the video position Adjust the quality, effect, and other settings if you wish. Or leave them on automatic. Point the lens to frame the scene where you want to start 41 Touch the start video icon. Touch the stop video icon to stop shooting. An image from your most recent video is displayed as a thumbnail at the top right. 17.4 Change Camera Settings Your camera has automatic settings that you can use to take quick point-and shoot photographs and videos. It also offers a number of ways to control your exposures, including controlling the focus, turning the flash on and off, and adjusting the white balance. In Video mode, the camera includes settings for controlling picture and video quality and video length, storage location of your pictures, and so on. Open the Camera and touch the icon for the settings you want to change. The settings open over the screen. Touch the settings category you want to control and then touch a setting. Press the Back key to close the Settings menu. Take your pictures using the new settings. 17.5 Gallery You can use the Gallery to view pictures and play videos that you have taken with your Camera, downloaded, or copied onto your SD card. 17.5.1 Open Gallery and view albums 1. Touch the Gallery icon in the Launcher. OR 2. Open Gallery from camera by touching the thumbnail image at the top right. OR 3. Open Gallery from camera by pressing Menu and touching Gallery. If you have many pictures or videos on your SD card , it may take a few minutes when you open it and organize them. 42 Touch in any view to return to the main Gallery screen. Touch to open camera. An album of the photos and videos you took with camera. Slide left or right to view more albums. 1. Touch an album to open it and view its contents. 2. Peek into an album stack by touching it with two fingers and spreading them apart. 3. Touch a picture or a video in an album to view it. 17.6 Share an Album You can share the entire contents of one or more albums. 1. Open the main Gallery window. 2. Press Menu twice. 3. Check or uncheck the albums you want to share. 4. Touch Share at the bottom of the screen. In the menu that opens, touch the application to use to share the selected albums. You can share via email, Bluetooth, Gmail and messaging. 43 17.7 Delete an Album You can delete an album and its content from your SD card. 1. Open the gallery window 2. Press Menu twice. 3. Check or uncheck the albums you want to delete 4. Touch Delete at the bottom of the screen. In the dialog that opens, touch confirm delete. 18. Music You can easily transfer your favorite music from your PC to the SD card and experience a whole world of interesting and melodious music. Touch the music icon in the launcher or home screen to open your music player. When you copy music to your SD card, the Music player searches the card for music files and builds a catalog of your music, based on information about each file that is stored in the file itself. This can take a few seconds, depending on how many files you have copied onto the SD card. When the catalog is complete, the Music library screen opens, with tabs that you can touch to view your music library organized by Artists, Albums, Songs or playlists. 44 Touch a tab to view your library in one of four ways. Touch the summary of the current track to open the playback screen. You can return to the main library screen from most other screens in the Music applications by pressing Menu touch Library. and 18.1 Play Music Touch a song in your library to listen to it. The playback screen opens and the song you touched or the first song in the album or other playlist starts to play. The tracks in the current playlist plays in order until you reach the end of the playlist (unless you choose a repeated option). Playback stops only if you stop it. It pauses when you receive a phone call 45 Touch to open the current playlist. Touch to shuffle the current playlist. Touch to repeat the current playlist; touch again to repeat the current track. Touch and hold to search for information. Skip tracks, pause or resume playback. Drag the slider to go directly to a section of a track. 18.2 Control Playback Volume You can control the volume of music in the Music application: Press the phone’s volume up/down keys. A panel opens to show the current media volume; the indicator moves as you adjust the volume. Some headsets include their own volume controls or ways to pause and resume playback or switch tracks. 46 19. FM Radio You can listen to your favorite FM channels using the inbuilt FM receiver of your phone. Use your phone to listen to the Radio. Add the current FM channel to the Favorites. Touch to turn on the loud speaker. Touch to open the channel list. Touch to play or pause the FM Radio. Slide to adjust the FM channel quickly. 47 20. Phone settings You use the Settings application to configure how your phone looks, sounds, communicates, protects your privacy, and operates in many other ways: Wireless & networks Call settings Audio profiles Display settings security settings Accounts & sync settings Privacy settings storage settings Language & keyboard settings Use Wireless &Network settings to configure and manage connections to networks and devices by Using Wi-Fi, Bluetooth, and mobile networks. Use Call settings to configure phone call settings, such as call forwarding, call waiting, and other special features offered by your carrier. Use the sound settings to configure how and at what volume the phone rings, vibrates. Use the Display settings to configure brightness and other screen settings. Use the Location & Security settings to set your preferences for using and sharing your location when your search for information and use locationaware applications, such as Maps. Use the Accounts & sync settings to add, remove and manage your Google and other supported accounts You use the privacy settings to manage your personal information. Use the SD card & Phone storage settings to monitor the used and available space on your phone and on your SD card and to manage your SD card. Use the Language & keyboard settings to select the language for the text on your phone and for configuring the onscreen keyboard. 48 21. Original screen 49 Status bar: The status bar appears at the top of every screen. It displays icons indicating that you’ve received notifications and icons indicating the phone’s status, along with the current time. Display area: For the operation and display of the phone. Status bar Display area Interface switches includes: The dialer, Main menu and messages. The dialer Main menu 50 Messages 22. Desktop themes Canvas is a desktop allows you to freely define and expand. You can do the following on-screen canvas: Expand the screen in any direction Custom Home screen Create and organize shortcuts Create and organize widget Create and organize folders Identify and change the wallpaper 51 23. Widgets A widget that acts as a shortcut, allows you to preview or open an application. You can paste the widget on the desktop as icons or preview windows. In addition to the default widget is installed on the phone, you can also download additional widgets in the library Android widgets. 24. Google service Google provides you the excellent services as diverse as Gmail, Navigation, Market and Maps Gmail Gmail is Google’s web-based email service. When you first setup your phone, you configured it to use an existing Gmail Account, or you created a new account. The first time you open the Gmail application on your phone, your inbox contains the messages from your Gmail account on the web. Maps You use Maps to find your current location; to view real-time traffic conditions; to get detailed directions by foot, public transportation, bicycle, or car; and to navigate by using spoken, turn –by turn driving instructions, using the Google Maps Navigation service. You can search on a street map or a satellite image to locate an address or a landmark, and you can view some locations as if you were strolling down the street. If you join Google Latitude, you can view your friend’s locations on your maps and share your location and other information with them. Maps might not have information about every location. Market Android Market provides direct access to applications and games to download and install on your phone. 52 25. Warnings and notes Operational Warnings IMPORTANT INFORMATION ON SAFE AND EFFICIENT OPERATION. Read this information before using your phone. For the safe and efficient operation of your phone, observe these guidelines: Potentially explosive at atmospheres: Turn off your phone when you are in any areas with a potentially explosive atmosphere, such as fueling areas (gas or petrol stations, below deck on boats), storage facilities for fuel or chemicals, blasting areas and areas near electrical blasting caps, and areas where there are chemicals or particles (Such as metal powders, grains, and dust) in the air. Interference to medical and personal Electronic Devices: Most but not all electronic equipment is shielded from RF signals and certain electronic equipment may not be shielded against the RF signals from your phone. Audio Safety: This phone is capable of producing loud noises which may damage your hearing. When using the speaker phone feature, it is recommended that you place your phone at a safe distance from your ear. Other Media Devices, hospitals: If you use any other personal medical device, consult the manufacture of your device to determine if it is adequately shielded from external RF energy. Your physician may be able to assist you in obtaining this information. Turn your phone OFF in health care facilities when any regulations posted in these areas instruct you to do so. Hospitals or health care facilities may be using equipment that could be sensitive to external RF energy. Product statement on handling and use: You alone are responsible for how you use your phone and any consequences of its use. You must always switch off your phone wherever the use of a phone is prohibited. Use of your phone is subject to safety measures designed to protect users and their environment. Always treat your phone and its accessories with care and keep it in a clean and dust-free place Do not expose your phone or its accessories to open flames or lit tobacco products. Do not expose your phone or its accessories to liquid, moisture, or high humidity. 53 Do not drop, throw, or try to bend your phone or its accessories Do not use harsh chemicals, cleaning solvents, or aerosols to clean the device or its accessories. Do not attempt to disassemble your phone or its accessories; only authorized personnel must do so. Do not expose your phone or its accessories to extreme temperatures, minimum 32℉and maximum 113 ℉(0℃ to 45 ℃). Battery: Your phone includes an internal lithium-ion or lithium-ion polymer battery. Please note that use of certain data applications can result in heavy battery use and may require frequent battery charging. Any disposal of the phone or battery must comply with laws and regulations pertaining to lithium-ion or lithium-ion polymer batteries. Faulty and damaged products: Do not attempt to disassemble the phone or its accessory. Only qualified personnel must service or repair the phone or its accessory. If your phone or its accessory has been submerged in water, Punctured, or subjected to a severe fall, do not use it until you have taken it to be checked at an authorized service center. 54