Download Osmomat 030
Transcript
www.gonotec.com
User Guide
Osmolality measurement for the medical and pharmaceutical fields
SPONT.CRYST.
RESULT
NO CRYST.
SAMPLE
0 300
..
OSMOL / KG
ZERO
CAL
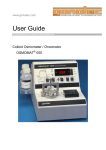
Cryoscopic Osmometer
OSMOMAT® 030
OSMOMAT® 030 osmometer series
OSMOMAT 030
D
RS
CHRYOSCOPIC OSMOMETER
M
A
3P
Notes, Safety Notices and Warnings
The symbols and abbreviations defined below may appear on the packaging material, on the unit
nameplate or in the operating instructions:
In-vitro diagnostic device
This product meets the requirements of
EEC Directive 98/79 relating to in-vitro
diagnostics.
Attention (refer to documentation)!
Please follow the safety notices in the
equipment operating instructions.
“Use by …” The date that follows indicates
the expiration data as year-month.
Appears beside the name of the product
batch.
REF
Article number or order number
The following pages provide you with a step-by-step introduction to using, maintaining and servicing
the measurement equipment. Passages requiring special attention are marked as follows:
This symbol warns against the danger of
corrupting
measurement
results—for
example, through improper use of
measuring vessels.
This symbol warns against the danger of
damaging the unit or the measurement
system—for example, through improper
servicing.
Subject to errors and technical changes.
The information contained in this document may be changed without prior notice.
© 2005 Gonotec Gesellschaft für Meß- und Regeltechnik mbH. All rights reserved.
Reproduction of this document in any form is permissible only with the prior written consent of Gonotec Gesellschaft für Meßund Regeltechnik mbH.
The trademarks used in this document—GONOTEC, OSMOMAT and OSMOREF—are trademarks of
Gonotec Gesellschaft für Meß- und Regeltechnik mbH.
Other trademarks and trade names used in this document may be trademarks or names of the corresponding companies or
their products. Gonotec Gesellschaft für Meß- und Regeltechnik mbH does not assert any claim on trademarks or trade names
other than its own.
®
OSMOMAT 030 model, series 1996 and later
May 2006
Version 1.2
Contents
1
Introduction....................................................................7
1.1
Applications of the OSMOMAT 030 ....................................................................................... 7
1.1.1
Application Restrictions of the Osmomat 030.............................................................................. 8
1.2
Measurement Method of the OSMOMAT 030 ....................................................................... 8
1.3
Reproducibility in the OSMOMAT 030 Standard Model ........................................................ 8
1.4
Function of the OSMOMAT 030............................................................................................. 9
1.5
Unpacking the OSMOMAT 030 Cryoscopic Osmometer..................................................... 10
1.6
Packaging Contents ............................................................................................................. 10
2
Overview of the OSMOMAT 030 .................................11
2.1
Overview of Display and Connectors................................................................................... 11
2.2
Power Supply ....................................................................................................................... 12
2.3
Dimensions and Weight ....................................................................................................... 12
3
Setup and Initial Operation.........................................13
3.1
Safety and Handling Information.......................................................................................... 14
3.2
Known Risks Associated with the Use of the OSMOMAT 030 ............................................ 14
4
Calibrating the OSMOMAT 030...................................15
4.1
Calibrating the Zero Point with Distilled Water .................................................................... 15
4.2
Calibrating with a Calibration Solution ................................................................................. 16
5
Measuring a Sample Solution ....................................17
5.1
Series Measurement ............................................................................................................ 17
5.2
Repeating a Sample Measurement ..................................................................................... 18
6
Error Messages and Troubleshooting.......................19
6.1
Spontaneous Crystallization ................................................................................................ 19
6.2
Preventing False Readings Due to Spontaneous Crystallization ........................................ 19
6.3
Late or Absent Crystallization .............................................................................................. 20
6.3.1
Excessive Osmolality ................................................................................................................ 20
6.3.2
Injection with Ice Crystals Does Not Work................................................................................. 20
6.4
Classification of Malfunctions by Component Group ........................................................... 21
Contents | 3
Contents
7
Servicing the OSMOMAT 030 .....................................28
7.1
Requirements of the Medical Devices Operator Ordinance ................................................ 28
7.2
Safety Checks (§ 6 of Medical Devices Operator Ordinance) ............................................. 28
7.3
Measurement Checks (§ 11 of Medical Devices Operator Ordinance) ............................... 28
7.4
Internal Quality Control of the OSMOMAT 030 ................................................................... 28
7.5
Aligning the Thermistor Probe ............................................................................................. 29
7.6
Replacing a Defective Thermistor Probe ............................................................................. 29
7.7
Replacing a Defective Initiation Needle ............................................................................... 31
7.8
Replacing a Defective Mains Fuse ...................................................................................... 33
7.9
Using the Correct Measuring Vessel ................................................................................... 34
7.9.1
Intended Use ............................................................................................................................. 34
7.9.2
Specification .............................................................................................................................. 34
7.9.3
Forfeiture of Measurement System Warranty............................................................................ 34
8
Options .........................................................................35
8.1
OSMOMAT 030-D with Built-In Printer ................................................................................ 35
8.1.1
Design and Function of the OSMOMAT 030-D ......................................................................... 35
8.1.2
Overview of Display and Connectors ........................................................................................ 35
8.1.3
Setting the Time and Date......................................................................................................... 36
8.1.4
Operating the Printer ................................................................................................................. 36
8.1.5
Replacing the Printer Paper ...................................................................................................... 37
8.1.6
Replacing the Ribbon Cartridge ................................................................................................ 38
8.2
OSMOMAT 030-M with 15µl Sample Volume ..................................................................... 39
8.2.1
8.3
Specifications ............................................................................................................................ 39
OSMOMAT 030-RS with Digital, Serial Data Output RS 232C ........................................... 40
8.3.1
Overview of Connector Components......................................................................................... 40
8.3.2
Specifications ............................................................................................................................ 40
8.3.3
Communication Software .......................................................................................................... 41
8.4
OSMOMAT 030-A with Analog Data Output........................................................................ 42
8.4.1
Overview of Display and Connectors ........................................................................................ 42
8.4.2
Specifications ............................................................................................................................ 42
8.5
OSMOMAT 030-3P with Three-Point Calibration ................................................................ 43
8.5.1
Overview of Display................................................................................................................... 43
8.5.2
Calibration Modes ..................................................................................................................... 43
8.5.3
Performing a Three-Point Calibration ........................................................................................ 44
8.5.4
Errors During Calibration ........................................................................................................... 44
8.5.5
Other Calibration Points ............................................................................................................ 45
8.6
Further Options .................................................................................................................... 45
4 | Contents
Contents
9
NaCl Calibration Solutions for Osmometry ..............46
9.1
GONOTEC Calibration- and Reference Material................................................................. 46
Classification of the IVD ........................................................................................................................ 46
EC Compliance Statement—Calibration- and Reference Material ....................................................... 46
Provisions of Certification...................................................................................................................... 46
9.2
Restrictions on Use of the Calibration- and Reference Material.......................................... 47
9.3
Composition ......................................................................................................................... 47
9.4
Safety and Handling Information.......................................................................................... 47
9.5
Storage and Shelf Life ......................................................................................................... 48
9.6
Use of Other Calibration Solutions....................................................................................... 48
Appendix .................................................................................49
Consumables ..........................................................................49
Accessories and Replacement Parts ...................................49
Classification of the IVD ........................................................................................................................ 50
EC Compliance Statement—OSMOMAT® 030..................................................................................... 50
Provisions of Certification...................................................................................................................... 50
Limited Warranty ....................................................................51
Returning Parts for Warranty Repair or Credit....................52
Before Calling Gonotec
OSMOMAT 030 Upgrade Options .........................................53
Specifications of OSMOMAT 030..........................................53
Contents | 5
Contents
Illustrations
Figure 1: Freezing point depression of solvent ....................................................................................... 9
Figure 2: Front view of the OSMOMAT 030 .......................................................................................... 11
Figure 3: Rear view of the Osmomat 030.............................................................................................. 12
Figure 4: Elevator cover ........................................................................................................................ 29
Figure 5: Mounting plate........................................................................................................................ 29
Figure 6: Thermistor with mounting plate .............................................................................................. 30
Figure 7: Thermistor probe adjustment along X-axis ............................................................................ 30
Figure 8: Thermistor probe adjustment along Y-axis ............................................................................ 31
Figure 9: Replacing an initiation needle ................................................................................................ 32
Figure 10: Power switch ........................................................................................................................ 33
Figure 11: OSMOMAT 030-D display.................................................................................................... 35
Figure 12: Opening the printer .............................................................................................................. 37
Figure 13: Correct feed direction for paper roll ..................................................................................... 37
Figure 14: Incorrect feed direction for paper roll ................................................................................... 37
Figure 15: Printer with paper roll ........................................................................................................... 37
Figure 16: Replacing the ribbon ............................................................................................................ 38
Figure 17: RS232 interface with pin assignment................................................................................... 40
Figure 18: Analog interface with pin assignment .................................................................................. 42
Figure 19: OSMOMAT 030-3P display.................................................................................................. 43
Figure 20: OSMOMAT 030-D-3P display .............................................................................................. 43
Tables
Table 1: Malfunction of the elevator track/lower cooling system component group.............................. 22
Table 2: Malfunction of the upper cooling system component group.................................................... 23
Table 3: Malfunction of the EPROM/thermistor probe component group ............................................. 24
Table 4: Malfunction of the ventilator/display component group ........................................................... 25
Table 5: Malfunction of the initiation needle/power switch component group....................................... 26
Table 6: Malfunction of the printer component group............................................................................ 27
Table 7: NaCl solutions for osmometry based on Geigy scientific tables, 8th edition............................ 48
6 | Contents
1
1
Introduction
Introduction
1.1 Applications of the OSMOMAT 030
The Gonotec cryoscopic osmometer—Osmomat® 030—is a non-invasive in-vitro diagnostic device for
in-vitro analysis of human blood, urine, semen and other samples, such as drip solutions. Its purpose
is to provide information to help identify, diagnose, monitor and treat physiological conditions, states of
health or illnesses.
The OSMOMAT® 030 must be operated by persons whose training or skills have provided them
with the necessary practical experience (cf. German Medical Devices Operator Ordinance,
MPBetreibV).
The cryoscopic osmometer OSMOMAT 030 is particularly suited for routine measurements in the
fields of medicine, industry and research. The cryoscopic osmometer OSMOMAT 030 determines the
total osmolality of aqueous solutions. Osmolality is an important measure of concentration for diluted
solutions, such as all bodily fluids. The OSMOMAT standard model needs a sample volume of 50µl,
while the M option requires only 15µl, making it suitable for measuring even minute samples. The
measuring speed permits rapid series measurements.
In the hospital or doctor’s office, osmolality can be used as one of several parameters to help form a
diagnosis or prompt further testing. In the pharmaceutical industry and research, the Osmomat 030 is
used to test various aqueous solutions (saline drips, etc.) and for process validation.
The OSMOMAT 030 has been applied successfully in the following fields:
General medicine
Urology
Routine and research
Nephrology
Forensic medicine
Hemodialysis
Electron microscopy
Hemofiltration
Physiology
Botany
Clinical laboratories
Veterinary medicine
Intensive care laboratories
Pharmaceutics
Pediatrics
Pharmacies
Gynecology
… and many more
Introduction | 7
1
Introduction
1.1.1 Application Restrictions of the Osmomat 030
-
The unit is not intended for determining the osmolality of dilutions.
-
Only the osmolality of aqueous solutions can be determined.
Plausibility checks of the results must be performed by the doctor with the support of the pertinent
literature.
1.2 Measurement Method of the OSMOMAT 030
The OSMOMAT 030 is a cryoscopic osmometer that measures the freezing point depression to
determine the total osmolality of aqueous solutions.
The freezing points of pure water and a solution are measured and compared. Whereas water has a
freezing point of 0°C, a solution with a saline concentration of 1 Osmol/kg has a freezing point of
–1.858°C. That means that one mol of a given non-dissociated substance (6.023 x 10²³ parts diluted in
one kilogram of water) lowers the freezing point of a solution by 1.858°C. The following definitions are
used in calculating osmolality:
Cosm = ΔT / K
Cosm
= osmolality [osmol/kg]
T
= freezing point depression [°C]
K
= 1.858°C kg/osmol freezing point constant
The osmolality indicates the concentration of all osmotically active dissolved parts in the solvent.
Since the freezing point depression is directly proportional to the dissolved parts, the OSMOMAT 030
measures the osmolality directly.
1.3 Reproducibility in the OSMOMAT 030 Standard Model
Measurement display
4.5 digits
Measuring range
0 to approximately 3000 mOsmol/kg
Resolution
1 mOsmol/kg or 1 mOsmol/digit across the entire measuring range
Reproducibility
Sample volume of 50µl
< ±0.5%
Sample volume of 30µl
< ±1.0%
8 | Introduction
1
Introduction
1.4 Function of the OSMOMAT 030
The sample solution is cooled with a peltier cooling system while its temperature is electronically
monitored. Once the sample solution has reached a specific temperature below the freezing point,
crystallization is automatically initiated. The OSMOMAT 030 initiates crystallization by injecting the
sample with a stainless steel needle that is cooled by a secondary upper cooling system and at the tip
of which small ice crystals have formed through moisture in the air. When crystallization begins, ice
forms spontaneously. The heat that was removed during undercooling is released again, the
temperature rises spontaneously and the temperature of the sample rises to the freezing point.
If the sample consists of water (solvent), equilibrium is achieved as long as the sample contains water
and ice. The temperature remains constant because further heat removal does not result in a lowering
of the temperature but the formation of ice. The time of temperature equilibrium is known as plateau
time. Only after complete crystallization the temperature does fall again.
If the sample consists of a solution, the pure water in the solution crystallizes spontaneously and the
substances move to the rest of the solution. This means that at the time the freezing point temperature
is measured, the concentration is higher than in the original solution. A plateau occurs here as well,
but it is inclined. The osmolality reading is taken at the resulting reversal point (Figure 1: Freezing
point depression of solvent). The temperature is measured with a resolution of 1.858 x 10E-3°C.
Figure 1: Freezing point depression of solvent
Introduction | 9
1
Introduction
1.5 Unpacking the OSMOMAT 030 Cryoscopic Osmometer
The cryoscopic osmometer OSMOMAT 030 should be unpacked immediately upon receipt and
checked for obvious signs of damage sustained during shipping. If any damage is found, notify the
manufacturer:
Gonotec GmbH
Tel.: +49 (0) 30 7809588-0
Eisenacher 56
Fax: +49 (0) 30 7809588-88
D-10823 Berlin, Germany E-mail: [email protected]
Web: www.gonotec.com
Toll-free service number within Germany: 0800 / 7846027
The packaging for this equipment was specially designed to ensure safe and hygienic transport. The
packaging is re-usable. Please save the packaging in case it becomes necessary to ship the unit back
to us for repairs or servicing.
This will save you the time and money needed to find equally suitable packaging.
1.6 Packaging Contents
Check to make sure the contents of your shipment is complete. We cannot accept responsibility for
any missing items reported at a later date.
Accessories and consumables included in the shipment
Article number
OSMOMAT 030
20.9.0100
9
1 power cord
00.9.0104
00.9.0106
9
2 fine-wire fuses 230 V 0.5 A
(for 110 V: 1.0 A)
30.9.0010
30.9.0020
9
100 measuring vessels
9
20 ampoules calibration standard
300 mOsmol/kg + certificate
30.9.0850
9
10 ampoules calibration standard
850 mOsmol/kg + certificate
30.9.0290
9
10 ampoules reference solution
OSMOREF®290 mOsmol/kg + certificate
30.2.0030
9
1 adjustment tool
30.9.0030
9
1 pasteur pipette (bellow)
9
1 user guide 030
Option D
30.9.1010
9
8 rolls of printer paper
Option RS
20.9.0160
9
1 RS-232 cable
Option A
20.9.0120
9
1 analog cable
10 | Introduction
2
2
Overview of the OSMOMAT 030
Overview of the OSMOMAT 030
2.1 Overview of Display and Connectors
Digital display –
output for readings
Key for measuring
sample solutions
Control lamp for
"spontaneous crystallization"
SPONT.CRYST
Control lamp for "valid
measurement results"
Control lamp for
"no crystallization"
OSMOMAT 030
Plexiglas shield
Elevator cover
SAMPLE
0 .300
RESULT
NO CRYST
.
.
OSMOL / KG
ZERO
Calibration key for
calibration with distilled
water
CAL
CHRYOSCOPIC OSMOMETER
Calibration key for
calibrating with
calibration solutions
Upper front panel
Middle front panel
Lower front panel
Thermistor
Figure 2: Front view of the OSMOMAT 030
Overview of the OSMOMAT 030 | 11
2
Overview of the OSMOMAT 030
MOTOR button to
test the operability of
the initiation needle
RESET button for
resetting the
microprocessor
Power connector
MOTOR
Power switch:
1=on, 0=off
RESET
POWER / NETZ
1
Rating for the
mandatory hardware
protection
FUSE : 0,5A LAG
0
Fuse holder for
two-phase
protection of main
power supply
FUSE
Nameplate, including serial
number, voltage,
frequency and power input
Figure 3: Rear view of the Osmomat 030
2.2 Power Supply
The standard model is supplied with 220V (+/- 30V) at 50/60Hz. The power consumption is 120VA.
Special models using 110V or 100V are also available.
2.3 Dimensions and Weight
Dimensions (width x depth x height):
Weight:
12 | Overview of the OSMOMAT 030
220x205x360 mm
approximately 7 kg
3
3
Setup and Initial Operation
Setup and Initial Operation
The unit must be placed in a location free from vibrations and protected from direct sources of heat
such as sunlight, heaters or furnaces. The ambient temperature should be between 10°C and 35°C
(50–95°F).
Do not block the air intake openings on the bottom of the unit. Use the power cord provided to connect
the OSMOMAT 030 from the power connector on the back of the unit to a power outlet. Make sure the
unit’s ground is enabled via the shockproof grounding.
If the power cord plug does not match the conventional power outlets in your location, you may
substitute another power cord. It is essential, however, that the cable’s green/yellow wire be
connected to the safety grounding.
It is also important to ensure that the voltage indicated on the nameplate matches that
of your electricity network. Incorrect voltage will cause the fuse in the power supply
unit to blow.
The OSMOMAT 030 can now be switched on using the power switch on the back of the unit (next to
the power connector). Five horizontal dashes appear on the digital display. Simultaneously, the
SPONT.CRYS., RESULT and NO CRYST. control lamps will flash on and off for about two minutes.
When the lamps go out, the OSMOMAT 030 is ready for measurements.
The waiting period of approximately two minutes is necessary for the formation of ice crystals at the
upper cooling system. The waiting period can be interrupted by pressing any key.
Fill a measuring vessel with 50μl of sample solution (or 15µl for models with option M) and place it
securely onto the measuring vessel holder (thermistor probe). (You will feel a slight resistance and
hear a click.) The highly sensitive thermistor probe is now immersed in the sample solution.
Measuring vessels that are placed loosely or incorrectly will yield non-reproducible
results.
Now press the measuring vessel holder down into the measuring position (noticeable resistance). The
measuring vessel is immediately cooled by the lower cooling system.
The current temperature of the solution is shown on the digital display in degrees Celsius. The cooling
process can be directly observed.
The moment the undercooling temperature is reached, crystallization is initiated automatically by the
injection of ice crystals, and an acoustic signal sounds. The resulting ice formation causes the
temperature to rise to the freezing point of the solution. A freezing plateau then forms that the
thermistor probe records and the measurement system identifies, saves and shows on the digital
display in osmol/kg or digits.
Setup and Initial Operation | 13
3
Setup and Initial Operation
After the measurement process is finished—regardless of whether it was successful or produced an
error message—and the elevator has been raised, the measurement system automatically switches to
standby and is ready for the next measurement.
3.1 Safety and Handling Information
The cryoscopic osmometer OSMOMAT 030 is an electric laboratory measurement device. It should
therefore be handled according to the safety provisions and precautions for electric measurement,
control and laboratory equipment.
The unit must be adequately disinfected prior to decommissioning. Equipment must be
decommissioned in accordance with local accident prevention guidelines.
The unit emits no harmful substances either in operation or while switched off.
Symbols on the unit and its nameplate correspond to the requirements of the following standards: DIN
EN 61010-1, DIN EN 375 and DIN EN 980 (harmonized standard for medical devices according to § 3
no. 17 of the German Medical Device Law MPG).
3.2 Known Risks Associated with the Use of the OSMOMAT 030
In our experience using the Osmomat since 1979, we have not found it to present any direct hazards
or risks to the user. Such hazards and risks cannot entirely be excluded for technical equipment,
however.
These operating instructions help you gain a basic understanding of the design, the measurement
principle, maintenance and servicing of the unit. Please pay special attention to chapter 7.7, Replacing
a Defective Initiation Needle.
14 | Setup and Initial Operation
4
4
Calibrating the OSMOMAT 030
Calibrating the OSMOMAT 030
Before the total osmolality of sample solutions can be measured, the OSMOMAT 030 must be
calibrated with distilled water and a calibration solution.
4.1 Calibrating the Zero Point with Distilled Water
Begin by pipetting 50 µl of distilled water (or 15µl for units with Option M) into a clean, dry measuring
vessel.
There must be no visible air bubbles in the liquid!
Next, place the measuring vessel securely onto the measuring vessel holder. (It should engage
slightly.) Make sure the lid of the measuring vessel is pointing forward. The thermistor probe is now
immersed in the water.
Press the ZERO key. The display shows 0.000 and the ZERO control lamp illuminates yellow. The
measuring vessel holder is lowered and the cooling process begins. The display shows the current
temperature.
After undercooling has occurred, the needle will automatically be submerged, initiating crystallization.
The freezing point of distilled water will be achieved and recorded by the unit. The reading obtained by
the unit is automatically adopted as the “zero value” and the value 0.000 is visible on the digital
display.
If the built-in printer is switched on, “ZERO: 0.000” is printed out.
When calibrating, be aware that the thermistor probe may still be contaminated with
sample residues from previous measurements.
Following the zero point calibration, a control measurement with water should confirm the exact
calibration. If necessary, a new calibration must be carried out.
Always use a new measuring vessel with fresh distilled water for each new
measurement.
Calibrating the OSMOMAT 030 | 15
4
Calibrating the OSMOMAT 030
4.2 Calibrating with a Calibration Solution
Begin by pipetting 50µl of calibration solution (or 15µl for units with Option M) into a clean, dry
measuring vessel.
There must be no visible air bubbles in the liquid!
Next, place the measuring vessel securely onto the measuring vessel holder. (It should engage
slightly.) Make sure the lid of the measuring vessel is pointing forward. The thermistor probe is now
immersed in the liquid.
Press the CAL key. The digital display shows the value 300 and the CAL control lamp illuminates
yellow.
Pressing this key again toggles through the following values:
400 1 , 500, 600, 700, 850, 900, 1200, 1500, 1800, 2000, 2500, 100, 200 and back to 300.
It is thus possible to set the osmolality value of the calibration solution to be used.
Standard calibration solutions with an osmolality of 300mOsmol/kg and 850mOsmol/kg are provided in
ampoules, but additional calibration solutions can be manufactured by the user. The corresponding
NaCl concentrations can be found in the appendix to these operating instructions. This sets the value
of the calibration solution used for calibration.
After the measuring vessel holder is lowered, the solution is undercooled and crystallization initiated. A
reading is obtained that is automatically adopted as the calibration value according to the prior setting
and output to the digital display.
If the built-in printer is switched on two values are printed out for a standard calibration solution. The
measured one e.g. 0.298 and the “CAL- value: 0.300” (shown separately with an arrow).
When calibrating, be aware that the thermistor probe may still be contaminated with
sample residues from previous measurements.
Following calibration, a control measurement with the calibration solution or a solution of known
osmolality should confirm the exact
2
setting. If necessary, a new calibration must be carried out.
Always use a new measuring vessel with fresh calibration solution for each new
measurement.
1
2
Cf. chapter 8.4 Osmomat 030-3P
Deviation: Sample volume of 50µl: <+/- 0.5%
Sample volume of 30µl: <+/- 1.0%
Sample volume of 15µl: <+/- 2.0%
16 | Calibrating the OSMOMAT 030
5
5
Measuring a Sample Solution
Measuring a Sample Solution
After calibration or calibration confirmation, the unit is ready for sample measurements.
Since sample measurements must be carried out under the same conditions as the
calibration, pipette 50 µl of the sample liquid (or 15µl for units with Option M) into a clean, dry
measuring vessel.
It is essential that there be no air bubbles!
Place the measuring vessel containing the sample liquid securely onto the measuring vessel holder
(thermistor probe). (It should engage slightly.) Make sure the lid of the measuring vessel is pointing
forward. The thermistor probe is immersed in the sample liquid.
Before lowering the measuring vessel holder, press the SAMPLE key. (This step is not necessary if
the SAMPLE control lamp is already illuminated.) Crystallization is automatically initiated once the
sample liquid is undercooled. The temperature is shown on the display until the crystallization
temperature of –7°C is reached.
The calculated freezing point temperature is recorded by the unit and, using the calibration value,
converted into an osmolality value and output to the digital display.
The measurement result, together with a 4-digit sample number and the time of day, is printed out on
the built-in printer (if switched on).
Use a soft paper towel to thoroughly clean the thermistor probe after each
measurement. The sensor may also be cleaned beforehand with a cloth moistened with
water.
5.1 Series Measurement
Pipette the various sample solutions into a corresponding number of measuring vessels and close
their lids until you are ready to begin measurement.
Be sure to identify samples uniquely.
Erroneous measurements: Insufficiently sealed measuring vessels can lead to
evaporation of the sample solution.
The samples are then measured sequentially, making full use of the high measuring speed of the
OSMOMAT 030.
Measuring a Sample Solution | 17
5
Measuring a Sample Solution
5.2 Repeating a Sample Measurement
To check reproducibility using repeat determinations, two clean and dry measuring vessels must be
filled with the same sample solution. A repeat determination using just one sample is not possible, as
the sample separates during measurement.
If, in exceptional circumstances, a repeat determination can only be run with one sample, the sample
must be carefully thawed and mixed after the first measurement.
18 | Measuring a Sample Solution
6
6
Error Messages and Troubleshooting
Error Messages and Troubleshooting
The following explains the error messages reported by the unit along with their possible causes and
describes the proper use of measuring vessels.
6.1 Spontaneous Crystallization
The freezing point of a solution is measured by first undercooling the solution, without any ice
formation, to a predefined temperature. Crystallization is then automatically initiated by injecting ice
crystals. A portion of the solution’s water content is crystallized out. The crystallization enthalpy
causes an immediate rise in temperature up to the freezing point of the remaining, somewhat more
highly concentrated solution. During the time in which both ice and solution are present, a freezing
plateau then forms. Since ice is constantly forming through the ongoing gradual cooling of the sample,
however, the concentration of the remaining solution increases steadily, leading to a steady increase
of the osmolality and thereby inclining the freezing plateau to a specific degree. The OSMOMAT 030
obtains a reading for the total osmolality by calculating the temperature difference between the
freezing point of the water and the reversal point detected while measuring the sample solution. The
OSMOMAT 030 monitors the temperature changes during the undercooling phase. If crystallization
begins prematurely, before the undercooling temperature of –7°C is reached, the error message
“SPONT.CRYST.” signals the error, and display of the erroneous reading—which in this case is too
low—is suppressed.
6.2 Preventing False Readings Due to Spontaneous Crystallization
The main cause of spontaneous crystallization is the presence of seed crystals, which prevent
undercooling to the proper temperature. Such seed crystals might be salt crystals, gas saturation or
any pre-existing ice crystals. Seed crystals of this type can be easily eliminated by briefly heating the
sample liquid close to its boiling point and subsequently cooling it. Seed crystals that cannot be
eliminated in this manner may be removable through filtration. Salt crystal formation may result when
cooling sample solutions contain certain salts whose low solubility or high concentration put them on
the solubility threshold. These salt crystals then act as seed crystals. In such cases, adequate dilution
may help, though precise results can no longer be expected. (See also chapter 6.3.1, Excessive
Osmolality.) Seed crystals can also adhere to the thermistor probe. Clean the sensor thoroughly using
water and a soft paper towel to remove any seed crystals.
Error Messages and Troubleshooting | 19
6
Error Messages and Troubleshooting
If the thermistor probe’s glass bead has even a hairline scratch that cannot be removed, however,
replace the sensor. Dirty measuring vessels (dust on the inside surface) can also cause such errors.
See also chapter 7.6.
Measuring vessels that are re-used may eventually develop cracks in the plastic in which a fine liquid
film can cause premature crystallization.
Measuring vessels are designed for single use only. Re-use of measuring vessels can
lead to non-reproducible results.
6.3 Late or Absent Crystallization
After the sample solution has been cooled to the proper temperature, crystallization is initiated
automatically through the injection of ice crystals. There are two possible reasons for a failure of
crystallization to occur:
6.3.1 Excessive Osmolality
Crystallization is initiated at –7°C.
The OSMOMAT 030 can measure solutions with a maximum osmolality of approximately 3 osmols,
since this osmolal concentration yields a freezing point temperature of:
3 x 1.858 = 5.574 ≈ –5.6°C
If the freezing point is very close to the temperature at which crystallization is initiated, however,
crystallization will not initiate despite the very effective method of initiating crystallization through the
injection of ice crystals. This condition is further exacerbated if the solution exhibits a rising viscosity.
The only remedy in such cases is to adequately dilute the sample solution.
It must be taken into consideration, however, that the osmolality does not change in proportion to the
dilution ratio, since the degree of electrolyte dissociation during dilution is different for each substance.
For routine measurements—quality inspections, for example—corresponding relative measurement
results from diluted samples can be used as a basis for evaluation.
6.3.2 Injection with Ice Crystals Does Not Work
If no crystallization occurs during the crystallization-initiating phase despite the sounding of the
acoustic signal and even though the sample liquid does not exhibit excessive osmolality, there are
various possible causes. (See also chapter 6.4, Classification of Malfunctions by Component Group.)
1. The stainless steel needle that transports the ice crystals is not moving from its upper to lower
position. A mechanical problem is preventing the movement of the needle.
20 | Error Messages and Troubleshooting
6
Error Messages and Troubleshooting
Unscrew the thermistor probe. The needle can then be straightened (caution—risk of
Remedy:
injury!), repositioned and checked for mechanical maneuverability. The movement of the
needle can be tested by pressing the MOTOR button on the back of the unit.
2. The ice crystals at the tip of the stainless steel needle are not reaching the undercooled liquid
sample despite the lack of any mechanical problem with the movement of the needle. The
iced-covered tip of the stainless steel needle passes through a bore above the measuring
vessel during the crystallization-initiating phase. This bore may contain a drop of water or be
very dirty. The drop of water may be the result of ice crystals falling from the upper cooling
system.
Remedy:
Use the Pasteur pipette included with the accessories together with a long tube as a
bellows to blow debris from the bore. First remove the measuring vessel and hold a
paper towel underneath the thermistor probe. The bore can first be rinsed using a spray
bottle of water to clean out sample residues, which can rub off and accumulate on the
interior surface over time. The unit does not need to be switched off for this cleaning
process, so measurement is only briefly interrupted.
3. No ice forms in the upper cooling system because the humidity is too low or the unit was
operated too quickly after having been switched on.
Remedy:
Do not run the initial measurement until at least two minutes have elapsed after the
unit was switched on. If the air humidity is very low (for example, in heated or airconditioned rooms), it may be necessary to open the cover of the upper cooling system.
6.4 Classification of Malfunctions by Component Group
The following presents an overview of the individual component groups, identifying the function of
each component, its potential malfunctions, the effects of the malfunctions on the measurement
system, the possible causes of the malfunctions and the procedure for correcting each malfunction.
Calibration cannot help minimize damage in the case of malfunction. It is also of no consequence
whether these malfunctions occur during calibration or sample measurement.
Some errors can be remedied directly by the user or an in-house medical equipment technician;
others require return of the unit to the manufacturer.
Error Messages and Troubleshooting | 21
6
Error Messages and Troubleshooting
Component and
Function
Elevator guide
Manually lowers the
sample into the lower
cooling system
Lower cooling system
Cools the sample
Malfunction
Effect
Sluggish (noisy)
Possible Cause
Procedure
Mechanical wear due to ball
bearing abrasion
Lubricate the track, e.g. with silicone spray
or graphite
Jams
Error message or
incorrect reading
Blockage from foreign
substances
Remove foreign substance
No cooling,
measurement takes too
long, measurement
terminates
No reading
Error message
Corrosion
Use fine sandpaper to clean the cooling
clamp
Display -.- - -
Photosensor for controlling lower Make sure the photosensor is working and is
cooling system is defective or
positioned properly; replace if necessary
misaligned
Incorrect reading
Misaligned lower cooling system Use the adjustment tool to align the lower
cooling system
Peltier element defective
Table 1: Malfunction of the elevator track/lower cooling system component group
22 | Error Messages and Troubleshooting
Replace the lower cooling system
6
Component and
Function
Upper cooling system
Nucleation
Malfunction
No cooling or no ice
crystals at the upper
cooling system
Insufficient ice
accumulation on the bar
of the needle
Incomplete rotation of
the motor disc (with
initiation needle)
Effect
Error message and no
reading
No crystallization
No reading
Error message
No crystallization
No reading
Error message
Possible Cause
Error Messages and Troubleshooting
Procedure
Peltier element ruined, e.g.
through deposits from liquids
Replace upper cooling system
Corrosion
Clean the cooling nipple using a fine wire
brush (fiberglass pin) or fine sandpaper
Misaligned upper cooling system Align the cooling system
Bar of needle too short or too
long
Align the needle bar or check for proper
length
Photosensor for motor control
defective or misaligned
Make sure the photosensor is working and is
positioned properly
Motor disc loose
Tighten the motor disc
Table 2: Malfunction of the upper cooling system component group
Error Messages and Troubleshooting | 23
6
Error Messages and Troubleshooting
Component and
Function
EPROM
Malfunction
Defective
Effect
Calibration and
measurement
impossible or results not
verifiable
Possible Cause
Aging,
External electric shock,
Excessive electromagnetic
irradiation
Procedure
Check electromagnetic compatibility of
equipment operating near osmometer
Check system load of power grid
Have medical equipment technician or
Gonotec replace EPROM
Thermistor probe
Analysis
Measuring vessel fits
Incorrect reading
loosely on the thermistor
probe
Incorrect measuring vessel
Use measuring vessels recommended by
Gonotec
Incorrect placement of
measuring vessel
Place measuring vessel securely on sensor
(until you hear a click)
The thermistor probe’s
measuring vessel receptacle is
damaged
Replace the thermistor probe
Defective
Display shows lines but
no numbers _._ _ _
Thermistor probe bead broken
off or defective
Replace the thermistor probe
When lowered into the
lower cooling system,
the thermistor probe
moves outside the
center of the solution
Incorrect reading
Misaligned thermistor probe
Incorrect measuring vessel
Use the adjustment tool to align the
thermistor probe and/or lower cooling system
Table 3: Malfunction of the EPROM/thermistor probe component group
24 | Error Messages and Troubleshooting
6
Component and
Function
Malfunction
Ventilator
Doesn’t work (not
Cools the entire system moving)
Possible Cause
Procedure
Measurement process
too slow
No reading
Error message
Ventilator blocked by foreign
object (e.g. measurement
vessel)
Check unit for foreign objects
Destruction of lower
cooling system
Ventilator defective
Replace ventilator
Destruction of
electronics (e.g. lower
cooling system)
Ventilator impaired by foreign
object or is no longer running
within its bearing
Check unit for foreign objects and/or replace
ventilator immediately
Numbers or decimal
points flicker or
disappear
Loose contact in wiring to
mainboard
Check the wiring between the display and
the mainboard
Nonsensical readings
(Option D)
Date on printer changed
(manually or automatically)
Repeat measurement and press the Sample
or Zero key, depending on the next work
step
Display defective
Replace display
Emits strange noises
Display
Displays readings
Effect
Error Messages and Troubleshooting
Table 4: Malfunction of the ventilator/display component group
Error Messages and Troubleshooting | 25
6
Error Messages and Troubleshooting
Component and
Function
Initiation needle
Crystallization
Rear of unit/power
switch
Power supply
Malfunction
No/few ice crystals
transported
Effect
Error message:
No crystallization
Possible Cause
Procedure
Needle too long or too short
Bring needle to proper length
Needle not deburred at tip (e.g.
after re-installation)
Debur tip of needle
Needle bent
Straighten or replace needle
Needle does not move
Error message:
No crystallization
Bar of needle disengaged from
motor or stuck firmly in place
Check upper cooling system component
group
Fuses in power switch
blow out when unit is
switched on
The following parts may
be damaged:
- Mainboard
- Transformer
Unit voltage setting does not
match power grid voltage
Check setting for proper unit voltage of
110 V or 230 V. Check for that fuse plug is
seated properly.
Insert new fuses.
No external power supply
Check cables leading to unit
Fuses are burnt out
Replace fuses
Unit does not turn on
If another cause is found, the unit must be
sent to customer service
Table 5: Malfunction of the initiation needle/power switch component group
26 | Error Messages and Troubleshooting
6
Component and
Function
Printer
Outputs readings
Malfunction
Possible Cause
Procedure
Date in printer changed
Repeat measurement and press the Sample
or Zero key, depending on the next work
step
Cable break
Check the printer’s cable connections
Prints no results
No paper or ribbon needs
replacing
Replace paper or ribbon
Does not print
Printer switched off
Switch printer on
Wiring to mainboard interrupted
Check wiring
Defective
Replace printer
Prints no results or
nonsensical results
Effect
Error Messages and Troubleshooting
Reading not printed out
Table 6: Malfunction of the printer component group
Error Messages and Troubleshooting | 27
7
7
Servicing the OSMOMAT 030
Servicing the OSMOMAT 030
7.1 Requirements of the Medical Devices Operator Ordinance
The regulatory scope of Germany’s Medical Devices Operator Ordinance includes the maintenance
and servicing of medical devices. Sections 2 (Special Regulations for Active Medical Devices) and
3 (Medical Devices with Measurement Functions) regulate the safety and measurement checks to
be performed on medical devices.
These checks are mandatory for devices listed in Annexes 1 and 2 of the Medical Devices Operator
Ordinance.
7.2 Safety Checks (§ 6 of Medical Devices Operator Ordinance)
The OSMOMAT 030 is not listed in Annex 1 of the Medical Devices Operator Ordinance. Public
authorities do not require the unit to undergo safety checks.
Safety checks should be conducted by the on-site safety coordinator in accordance
with relevant accident prevention guidelines.
7.3 Measurement Checks (§ 11 of Medical Devices Operator
Ordinance)
The Osmomat 030 is not listed in Annex 2 of the Medical Devices Operator Ordinance. No
measurement checks are stipulated by the Ordinance.
The user should perform the following checks, however:
•
Calibration of the unit with a standardized osmometry calibration solution
•
Comparative measurements with OSMOREF® 290 or aqueous solutions of
known osmolality
•
Logging of measurement readings and any evaluation results
The frequency of such checks should follow local quality assurance guidelines.
7.4 Internal Quality Control of the OSMOMAT 030
A microcontroller monitors the unit’s functions based on the program flow. The failure of individual
functional groups in the unit results in a malfunction that either reports an error message or shuts
down the unit. Standardized calibration and reference solutions and an adjustment tool are used to
check the internal quality control mechanism.
28 | Servicing the OSMOMAT 030
7
Servicing the OSMOMAT 030
7.5 Aligning the Thermistor Probe
Good reproducibility relies on a few key elements. To ensure optimal reproducibility, the
thermistor probe must be exactly in the center of the measuring vessel during measurement.
This is especially important to remember when a defective thermistor probe is replaced.
7.6 Replacing a Defective Thermistor Probe
Before replacing a defective sensor, unplug the unit from the power supply! Risk of
electric shock!
Step 1
Raise the cover of the upper cooling system
(Figure 7: Elevator cover). Two screws can
be seen. They must be removed in order to
remove the entire cover.
Elevator cover
Figure 4: Elevator cover
Step 2
Initiation needle/
guide tube
Two more screws are now visible. Remove
Connector
these also (Figure 5: Mounting plate).
Plug
Step 3
Next, remove the plug (black/brown) from the
Mounting plate
connector (white). Now you can remove the
thermistor and mounting plate from the
initiation needle. The initiation needle will
slide out of the guide tube and pull the
protective tubing along with it.
Figure 5: Mounting plate
Warning: Risk of injury from the tip of the needle!
Servicing the OSMOMAT 030 | 29
7
Servicing the OSMOMAT 030
Step 4
Now unscrew the thermistor from the
mounting plate and replace it with a new
one
(Figure
6:
Thermistor
Thermistor cable
with
mounting plate).
Step 5
Mounting plate
Re-assemble in reverse sequence by
pushing the protective tubing over the
initiation
needle
and
attaching
Thermistor
the
mounting plate using the two screws.
Figure 6: Thermistor with mounting
plate
Next, insert the plug of the connector cable into the connector and guide the thermistor cable
into the groove along the side. The re-attached thermistor must then be aligned.
Step 6 Aligning the thermistor probe
Alignment of the thermistor probe and the lower cooling system is of critical
importance for reproducibility of the OSMOMAT 030 cryoscopic osmometer readings. A
special tool, included in the standard accessories, is required to adjust the thermistor
probe.
The purpose of the adjustment is align the center
axis of the cooling clamp with the thermistor axis
(see Figure 7: Thermistor probe adjustment
along X-axis and Figure 8: Thermistor probe
adjustment
along
Y-axis).
Adjustment
proceeds as follows:
a)
Place the adjustment tool into the lower
cooling system, checking for a snug fit.
b)
Y
X
Carefully lower the thermistor probe. The
thermistor probe must fit exactly into
nto the
Lower cooling system
opening in the adjustment tool. If this is not the
case, the thermistor probe or the lower cooling
system must be re-aligned.
30 | Servicing the OSMOMAT 030
Figure 7: Thermistor probe
adjustment along X-axis
7
Servicing the OSMOMAT 030
If the thermistor probe is off-center along its X-axis (right or left), loosen its screws and re-adjust it
(Figure 7: Thermistor probe adjustment along X-axis). Repeat the process until the bead at the
tip of the thermistor probe is exactly in the center of the adjustment tool (see Figure 7:
Thermistor probe adjustment along X-axis), then carefully tighten the retaining screws. Remove the
adjustment tool and re-attach the upper cooling system cover with its two screws.
c)
If the thermistor probe is off-center along
its Y-axis, the lower cooling system must be
aligned. To align the lower cooling system,
Y
unscrew the lower face plate and re-align the
lower cooling system to the center of the
X
thermistor probe by loosening the grub screws
(hex socket screws) and mounting screws (hex
socket or slotted screws, depending on the
model) on the bottom of the housing (Figure 8:
Grub screws
Thermistor probe adjustment along Y-axis).
Mounting screws
Figure 8: Thermistor probe
adjustment along Y-axis
7.7 Replacing a Defective Initiation Needle
There are various reasons for which it may become necessary to work on the needle bar or even
replace the initiation needle. See Table 2: Malfunction of the cooling system component group
and Table 5: Malfunction of the switch component group
Repairs to the initiation needle must be performed by a medical device technician; it is not
enough simply to be skilled in handling equipment!
Before working on the initiation needle, please ensure the following:
Unit power supply is disconnected!
Risk of electric shock!
Unit has been decontaminated—especially the initiation needle!
Risk of injury from the tip of the needle!
In the event of injury from the tip of the needle, always consult a doctor to check
whether any infection with a pathogen occurred.
Servicing the OSMOMAT 030 | 31
7
Servicing the OSMOMAT 030
Step 1
Unscrew the upper face plate, elevator cover and mounting plate (see Figure 2: Front view of the OSMOMAT
030; see the description in chapter 7.5; Figure 4: Elevator cover and Figure 5: Mounting plate). Detach the
030;
needle bar from the motor swipt (Figure 9: Replacing an initiation needle).
Attach a new needle bar with protective tubing to the motor swipe.
Please note:
a.
The needle must be carefully aligned. Bend it into place with your hand if
necessary.
b.
After the needle bar has been tightened, it must be able to move freely on the
sleeve bearing.
Sleeve bearing
Idle
position
Upper dead
center
Photosensor
Bar
Needle
protective
tubing
Total length: needle bar + needle
Motor swipe
Round off tip of
needle with a file
2.0 mm
2,0 mm
Cooling pin
Figure 9: Replacing an initiation needle
Step 2
a.
Manually move the motor swipe to the upper dead center position.
b.
Use a pair of pliers to adjust the needle to the proper length (end of needle
approximately 2 mm under the upper edge of the cooling pin).
c.
Carefully round off the cutting edge with a file. (In the idle position of the motor
swipe, the end of the needle must not extend below the lower edge of the cooling
pin. If necessary, adjust the reflex photosensor by moving it up or down (after first
loosening the hex socket screws).
32 | Servicing the OSMOMAT 030
7
Servicing the OSMOMAT 030
Step 3
Align the thermistor probe; see chapter 7.5.
Step 4
Re-assemble the unit and run a check by pressing the MOTOR button on the back of the unit.
Note: Inititiaon needle material: stainless steel, cold-hammered quality, diameter 0.6mm
7.8 Replacing a Defective Mains Fuse
Before beginning work, unplug the main power supply! Risk of electric shock!
To replace the fuses, use a small screwdriver to remove the fuse holder on the back of the unit. The
two fuses can now be replaced. The unit has two-phase protection. Use the following fuses:
230V power supply:
0.5A slow/LAG
115V power supply:
1A slow/LAG
One set of fuses is included with the standard accessories.
Make sure to re-insert the fuse holder in its original position.
side of the fuse holder. The fuse holder must be
such
that
the
correct
voltage
indication (see nameplate, Figure 1) is located
0
inserted
POWER
1
The labels “115” and “230” are printed on either
(Figure 10: Power switch)
points to the voltage setting. The picture here
FUSE
230
small arrow
115
underneath the power cord connector. A
shows a setting for 230V.
Figure 10: Power switch
Servicing the OSMOMAT 030 | 33
7
Servicing the OSMOMAT 030
7.9 Using the Correct Measuring Vessel
One critical factor affecting the service life and precision of the measurement system is the use of the
correct measuring vessel.
7.9.1 Intended Use
The measuring vessels are intended for single use only. Re-use of the measuring vessels
can result in non-verifiable readings or even a destruction of the measurement system.
We are unaware of any reactions between the sample solution and measuring vessel (in
osmometry). However, we advise against using the measuring vessels for other purposes.
For information on the material properties, please refer to the product safety data sheet MPM30.9.0010.pdf.
7.9.2 Specification
The conic shape of the measuring vessel matches that of the lower cooling system. This ensures a
secure fit, a high standard of centricity for the measuring vessel in the lower cooling system and
consistent immersion depth of the measuring tip in the sample.
When the measuring vessel is placed on the thermistor probe, a soft clicking sound is heard
and there is a tangible resistance. If this is not the case and the measuring vessel does not fit
securely, it is possible you are using an improper measuring vessel and the measurement
results may not be verifiable.
Re-used measuring vessels also exhibit these characteristics. This is because their openings
are dilated when they are placed on the sensor.
7.9.3 Forfeiture of Measurement System Warranty
Destruction of the measurement system through use of improper measuring vessels, even during the
warranty period, shall result in forfeiture of the warranty claim of repair or replacement of the
measurement system.
34 | Servicing the OSMOMAT 030
8
8
Options
Options
8.1 OSMOMAT 030-D with Built-In Printer
The OSMOMAT 030-D is equipped with a dot matrix printer. The printer uses normal paper and an ink
ribbon cartridge. The printer paper an the continuous loop ribbon cartridge are consumables and must
eventually be replaced. The OSMOMAT 030-D is fully operable even if the printer is off. The results
can be seen on the digital display after each measurement.
8.1.1 Design and Function of the OSMOMAT 030-D
8.1.2 Overview of Display and Connectors
1
123
456
789
0
NUMBER
SPONT.CRYST.
RESULT
NO CRYST.
TIME
DATE
6
SAMPLE
0 300
ZERO
OSMOL / KG
CAL
.
PRINTER
ON / OFF
PAPER
FEED
7
8
COUNTER
RESET
2
9
3
4
OSMOMAT 030-D
CHRYOSCOPIC OSMOMETER PRINTER
5
Figure 11: OSMOMAT 030-D display
1-
Numerical keypad
2-
Key for entering sample number
3-
Key for setting time and date
4-
Thumbscrews
5-
Plexiglas shield
6-
Printer ON/OFF switch
7-
Paper feed
8-
Counter reset
9-
Paper output with tear-off edge
OSMOMAT 030-D with Built-In Printer | 35
8
Options
8.1.3 Setting the Time and Date
The time, day, month and year are set using the TIME/DATE key (3) (Figure 11: OSMOMAT 030-D
display) and the numerical keypad.
To set 08:30 on 7 March 1996, for example, input the following on the keypad:
TIME
DATE
0 8 3 0
0 7 0 3
1 9 9 6
TIME
DATE
TIME
DATE
TIME
DATE
Pressing the TIME/DATE key at the end stores the time and date.
The sample number is set using the NUMBER key (2) (Figure 11: OSMOMAT 030-D display) and the
numerical keypad.
Setting the sample number 67, for example, requires the following keypad entry.
NUMBER
0 0 6 7
NUMBER
The next reading will then be numbered 67.
Note: The sample number and the sequential number are identical. The next measurement will thus
be numbered 68, the one after that 69, and so forth.
8.1.4 Operating the Printer
Press the PRINTER ON/OFF key once to switch on the printer. If the OSMOMAT 030-D is on, the
yellow LED illuminates.
When the printer is switched on for the first time, the log header is automatically printed out. The
measurement results are automatically printed out if the RESULT LED illuminates and the results are
saved.
A sequential number is printed out along with the measurement results. Press the COUNTER RESET
key to print out a new log header and reset the numbering to 1.
Mismeasurements that do not produce a result on the digital display and during which the LED for
spontaneous crystallization or no crystallization illuminate are not counted. A plain-text explanation for
the mismeasurement is printed out.
A tear-off edge allows the printout to be torn off cleanly.
36 | OSMOMAT
SMOMAT 030-D with Built-In Printer
8
Options
8.1.5 Replacing the Printer Paper
Unscrew
A.
the
two
thumbscrews (4) to remove the
plexiglas shield (5) (Figure 11:
OSMOMAT 030-D display).
B.
123
456
789
0
NUMBER
SPONT.CRYST.
SAMPLE
0 300
RESULT
.
NO CRYST.
TIME
DATE
OSMOL / KG
PRINTER
ON / OFF
PAPER
FEED
ZERO
CAL
COUNTER
RESET
Lightly press the lower left
portion of the printer to open it
(Figure
12:
Opening
the
printer).
Figure 12: Opening the
printer
C. Remove the empty paper spool from the paper compartment (Figure 15: Printer with paper
roll). Remove any remaining paper not by pulling it out backwards but by pressing the PAPER
FEED (7) key to advance it through the opening.
D. Insert a new roll of paper. (Refer to Consumables in the appendix for supply information.)
Switch on the OSMOMAT 030-D and the printer. Cut the paper cleanly and feed the end into the
paper output slot from above. Press the PAPER FEED key (7) (Figure 11: OSMOMAT 030-D
display) to advance the paper through the opening, leaving about 1 inch / 2 cm protruding. Make
sure the roll is fed in the correct direction (Figure 15: Printer with paper roll and Figure 13:
Correct feed direction for paper roll).
Place the roll in the paper compartment and close the printer. Thread the paper through the slot of
the plexiglas shield (6) (Figure 11: OSMOMAT 030-D display) and re-attach the shield. Before
starting the next measurements, press the COUNTER RESET key (8) (Figure 11: OSMOMAT
030-D display) to print the header.
Figure 13: Correct feed
Figure 14: Incorrect feed
direction for paper roll
direction for paper roll
Figure 15: Printer with paper
roll
OSMOMAT 030-D with Built-In Printer | 37
8
Options
8.1.6 Replacing the Ribbon Cartridge
The ribbon cartridge must be replaced when the printout no longer has sufficient contrast. The
OSMOMAT 030-D can be on or off while the ribbon is replaced.
A. Tear off any paper protruding from
the slot before replacing the ribbon.
B. Remove the two thumbscrews (4)
(Figure
11:
OSMOMAT
030-D
display) and take off the plexiglas
shield (5) (Figure 11: OSMOMAT
123
456
789
0
NUMBER
SPONT.CRYST.
RESULT
SAMPLE
0 300
ZERO
OSMOL / KG
CAL
.
NO CRYST.
TIME
DATE
PRINTER
ON / OFF
PAPER
FEED
COUNTER
RESET
030-D display).
C. Press lightly on the right-hand side
of the used ribbon cartridge to
remove it (Figure 16: Replacing the
ribbon).
Figure 16: Replacing the ribbon
D. Remove the new ribbon cartridge from its packaging. (Refer to Consumables in the appendix for
supply information.)
E. Use your index finger to twist the adjuster knob clockwise and tighten the ribbon.
F. Insert the cartridge into the printer. The end of the paper must be between the ribbon and the
cartridge.
G. Twist the knob again to tighten the ribbon.
H. Re-attach the Plexiglas shield.
38 | OSMOMAT 030-D with Built-In Printer
8
Options
8.2 OSMOMAT 030-M with 15µl Sample Volume
The measurement system of the OSMOMAT 030-M is set for a microsample volume of 15µl. The
corresponding special thermistor probe is labeled 15µl.
The OSMOMAT 030-M can also be used to measure sample volumes up to 50µl.
Please note the following important restrictions and operational guidelines:
Reproducibility is not affected by using a larger sample volume. It remains unchanged at
<±2.0%
Especially careful preparation is necessary due to the minimal sample volume. In
particular: there must be no air bubbles and the measuring vessel must be seated
correctly.
Do not replace the thermistor probe with a 50µl thermistor probe. This will destroy the
measurement system.
8.2.1 Specifications
Display
4.5 digits
Measuring range
0 to approximately 3000 mOsmol/kg
Resolution
1 mOsmol/kg or 1 mOsmol/digit across the entire measuring range
Reproducibility
<±2.0%
OSMOMAT 030-M with 15µl Sample Volume | 39
8
Options
8.3 OSMOMAT 030-RS with Digital, Serial Data Output RS 232C
8.3.1 Overview of Connector Components
PIN 2 - TXD
MOTOR
RESET
PIN 6 - DSR
PIN 7 - GND
POWER / NETZ
1
1
2
6
7
14
20
PIN 20 - DTR
FUSE : 0,5A LAG
0
FUSE
FUSE : 1,0A LAG
RS232 port pin assignment
Figure 17: RS232 interface with pin assignment
8.3.2 Specifications
Baud rate:
Data format:
Signals:
Transmission speed: 1200 bits/s.
1 start bit,
8 data bits and
2 stop bits are transmitted.
TXD -
Transmit Data (output)
Idle level
–3V >> U >> –7.5V
Active level
+3V << U << +7.5V
DTR -
Data Terminal Ready (output)
40 | OSMOMAT 030-RS with Serial Data Port
8
Options
This signal indicates the transmission readiness of the OSMOMAT 030, i.e. it becomes active before a
telegram is sent.
Idle level
–3V >> U >> –7.5V
Active level
+3V << U << +7.5V
DSR -
Dataset Ready (input)
This signal can prevent transmission of a telegram. The OSMOMAT starts transmitting only after DSR
becomes active. The user does not need to activate this signal, since it is equipped with an internal
15 k-Ohm 'pull-up' resistance.
8.3.2.1
Idle level
–3V >> U >> –15V
Active level
+3V << U << +15V
Telegram Format
A telegram is sent after the completion of each measurement. Data is transmitted in the ASCII format.
Depending on whether the Option D (dot matrix printer) is activated, one of two telegram formats is
sent.
8.3.2.1.1
Printer is Off or Does Not Exist
If the printer option is not installed, it is not possible to set the sample number, date and time. Only the
measurement reading is transmitted.
8.3.2.1.2
Printer is On
If the printer is switched on, the sample number, date and time are output in addition to the
measurement reading.
8.3.2.1.3
Output Format for Faulty Measurements
In the event of faulty measurements, the cause of the error is output in plain text:
SPONTANEOUS CRYSTALLIZATION
NO CRYSTALLIZATION
8.3.3 Communication Software
We recommend using our OSMOTERM software for easy data transmission to PC and data
acquisition that is optimized for the equipment. In principle, any other terminal software can be used,
but the data format will have to be adjusted.
OSMOMAT 030-RS with Serial Data Port | 41
8
Options
8.4 OSMOMAT 030-A with Analog Data Output
8.4.1 Overview of Display and Connectors
Alignment potentiometer
for analog port
MOTOR
RESET
2
POWER / NETZ
1
4
FUSE : 0,5A LAG
0
FUSE
FUSE : 1,0A LAG
Analog port pin assignment
Figure 18: Analog interface with pin assignment
8.4.2 Specifications
Output voltage:
Maximum output:
Minimal load resistance:
1 mV = 1 mOsmol
+/- 14 V
R = 4.7 kOhm
The output voltage is independent of the storage function of the RESULT display.
The recorder cable that is included is intended only for the analog output (output port pin 2 and pin 4,
Figure 18: Analog interface with pin assignment).
The output voltage of the analog output can be aligned with the alignment potentiometer for older
flatbed recorders.
42 | OSMOMAT 030-A with Analog Data
8
Options
8.5 OSMOMAT 030-3P with Three-Point Calibration
To improve linearity across a broader measuring range, it makes sense to calibrate at three points.
Our standard model OSMOMAT 030 with a reproducibility of +/- 0.5% has linearity of +/- 1% in a
measuring range from 0 to approximately 700 mOsmol/kg.
Above 700mOsmol/kg up to about 2000mOsmol/kg, the linearity varies by +/- 2%. Measurements over
2000mOsmol/kg show a variance of +/- 3%. (Basis: two-point calibration at 0 and 300mOsmol/kg).
To extend the range with a linearity variance of +/- 1%, Option 3P allows calibration at one more point
above 0 and 300mOsmol/kg (e.g. 850mOsmol/kg). The result is a correspondingly wider range with a
linearity of +/-1%.
8.5.1 Overview of Display
SPONT.CRYST.
RESULT
SAMPLE
0 300
ZERO
OSMOL / KG
CAL1
.
NO CRYST.
CAL2
Figure 19: OSMOMAT 030-3P display
123
456
789
0
NUMBER
SPONT.CRYST.
RESULT
Two-point calibration
with calibration
solution
Three-point
calibration with
calibration solution
SAMPLE
0 300
ZERO
OSMOL / KG
CAL1
.
NO CRYST.
TIME
DATE
Calibration key
for calibrating
with water
PRINTER
ON / OFF
PAPER
FEED
COUNTER
RESET
CAL2
Figure 20: OSMOMAT 030-D-3P display
8.5.2 Calibration Modes
The OSMOMAT 030-3P can be calibrated in two different modes:
1. If you calibrate at just 0 and 300mOsmol/kg, the linearity corresponds to that of the OSMOMAT
030 as described above.
2. If you calibrate at 0 and, for example, 300 and 850mOsmol/kg, you achieve results with a linearity
variance of +/- 1% across a wider range.
OSMOMAT 030-3P with Three-Point Calibration
| 43
8
Options
When the OSMOMAT 030-3P is switched on, it displays the mode in which it was last calibrated.
1. LED on the 'CAL1' key illuminates (Figure 19: OSMOMAT 030-3P display) Æ Standard
mode (2-point calibration)
2. LED on the 'CAL2' key illuminates (Figure 19: OSMOMAT 030-3P display) Æ 3-point
calibration mode
8.5.3 Performing a Three-Point Calibration
1. Zero point
1. Press the 'Zero' key.
2. Fill the measuring vessel with 50µl* of distilled water.
3. Run measurement Æ Value is automatically calibrated by unit.
4. Control: Run another measurement with distilled water.
2. 1st calibration point of 300mOsmol/kg
1. Press the 'CAL1' key.
2. Fill the measuring vessel with 50µl* of Gonotec calibration standard 300mOsmol/kg.
3. Run measurement Æ Value is automatically calibrated by unit.
4. Control: Run another measurement with Gonotec calibration standard 300mOsmol/kg.
3. 2nd calibration point of 850 mOsmol/kg
1. Press the 'CAL2' key.
2. Fill the measuring vessel with 50µl* Gonotec calibration standard 850mOsmol/kg.
3. Run measurement Æ Value is automatically calibrated by unit.
4. Control: Run another measurement with Gonotec calibration standard 850mOsmol/kg.
* For Option M, run these measurements with a volume of 15µl.
8.5.4 Errors During Calibration
It is possible that error may occur during calibration. The individual steps should always be
controlled as described above.
The OSMOMAT 030-3P recognizes if the calibration solutions are interchanged or the same calibration solution is used at two different calibration points and displays an error message ('E.EEE'). The
measured value is rejected and the unit must be reset. Reset the unit either by pressing the RESET
button on the back of the unit (Figure 3: Rear view of the Osmomat 030
or by switching the unit off and then immediately back on again (the ON/OFF switch is also located on
the back of the unit). The OSMOMAT is then in the same state as before the faulty calibration attempt.
44 | OSMOMAT 030-3P with Three-Point Calibration
8
Options
The OSMOMAT 030-3P is unable to recognize slightly faulty calibration solutions, such as those
subjected to open storage. Calibration of such solutions is faulty and leads to incorrect results. The
inevitable result is miscalibration of the unit and thus faulty measurement results with your samples.
8.5.5 Other Calibration Points
We can guarantee the reproducibility of our OSMOMAT 030-3P using Gonotec calibration standards,
because our calibration standards are manufactured under the most stringent guidelines and undergo
continual checks.
Of course, you may use calibration standards of other manufacturers or create your own, but we
cannot make any claims for the expected measurements.
The following calibration points are possible:
1. Zero Æ always calibrated with distilled water
2. CAL1: 100, 200, 300, 500, 700, 850, 900, 1200, 1500, 1800, 2000, 2500
3. CAL2: 300, 500, 700, 850, 900, 1200, 1500, 1800, 2000, 2500, 3000
For CAL2: the minimum gap to CAL1 lies with the next but one calibration point. For example:
CAL1 = 100 mOsmol/kg: for CAL2 all calibration points from 300 mOsmol/kg onwards are possible.
CAL1 = 200 mOsmol/kg: for CAL2 all calibration points from 500 mOsmol/kg onwards are possible.
CAL1 = 300 mOsmol/kg: for CAL2 all calibration points from 700 mOsmol/kg onwards are possible.
…
CAL1 = 2000 mOsmol/kg: for CAL2 is 3000 mOsmol/kg possible.
8.6 Further Options
Most options can be combined, yielding the following potential constellations:
-
OSMOMAT 030-A-D
-
OSMOMAT 030-A-D-RS
-
OSMOMAT 030-A-RS
with or without Option M.
Restriction
Option 3P may be combined with Options D, RS and M but not with Option A!
OSMOMAT 030-3P with Three-Point Calibration
| 45
9
NaCl Calibration Solutions for Osmometry
9
NaCl Calibration Solutions for Osmometry
9.1 GONOTEC Calibration- and Reference Material
Classification of the IVD
The calibration- and reference material manufactured by Gonotec is a non-invasive in-vitro diagnostic
product according to EEC Directive 93/42 (Medical Devices Law). It is intended for use in osmometry
by qualified personnel in calibrating and/or controlling the osmometer. The calibration- and reference
material must be used in accordance with equipment specifications.
The calibration- and reference material is not named in Annex II, list A or B, of the Directive 98/79 for
in-vitro diagnostics. Compliance is declared per Annex III. Number 6 of Annex II is disregarded, as the
calibration- and reference material’s intended use does not include personal use.
EC Compliance Statement—Calibration- and Reference Material
Gonotec GmbH
Eisenacher Straße 56
D- 10823 Berlin, Germany
We hereby declare that the calibration standard for Osmomat 010/030/auto (300 and 850mOsmol/kg
NaCl/H2O) and the reference solution OSMOREF® 290 mOsmol/kg complies with Directive
98/79/EEC. Compliance is declared per Annex III of the Directive. The CE mark on the calibration- and
reference material acknowledges this.
Date:
09.11.2004
Signature of managing director:
........................................
Provisions of Certification
CE compliance requires that the calibration- and reference material be used in the manner described
in this manual and/or in the package insert. Any departure from the specifications or independent
modifications of the calibration- and reference material without the express consent of Gonotec GmbH
may result in a violation of CE requirements. Such actions invalidate the compliance statement and
transfer responsibility to the originator of said actions.
46 | NaCl Calibration Solutions for Osmometry
9
NaCl Calibration Solutions for Osmometry
9.2 Restrictions on Use of the Calibration- and Reference Material
-
The calibration- and reference material may not be used to clean contact lenses or the like.
-
The calibration- and reference material may not be used in human injections or infusions, neither
in its pure form nor in mixtures with human bodily fluid samples.
-
The calibration- and reference material may not be used to calibrate or create samples of
chemical or biological origin for administration into the human body.
9.3 Composition
Calibration standard 300, 850, 2000 mOsmol/kg and OSMOREF® 290 mOsmol/kg NaCl/H2O
300
850
2000
290
mOsmol
mOsmol
mOsmol
mOsmol
Sodium chloride
Ph.Eur./USP
9.448 kg
27.178 kg
63.960 kg
9.124 kg
Water for injection purposes as bulk
Ph.Eur./USP ad 1000 l
ad 1000 l
ad 1000 l
ad 1000 l
For precise concentrations, see the analysis certificate on the package insert of each batch.
9.4 Safety and Handling Information
The calibration- and reference material is not a dangerous substance according to EC Directive
67/548/EEC.
Poison class (Switzerland):
F
(no poison class)
German water hazard class (WGK):
nwg
(not hazardous to water)
Storage class (German association of
chemical industries, VCI):
10-13 (miscellaneous liquids and solids)
Disposing of materials:
according to GLP / institution's practice / country, state
and local requirements
Attention: The calibration- and reference material is a chemical. Observe all relevant precautions
and regulations (do not swallow, do not taste, always wear gloves, etc.)
Container:
clear glass OPC ampoules
Nominal volume:
1 ml
The ampoules have a breaking ring with a breaking ring color (blue dot). The ampoule can be opened
manually by breaking it off at this point. Follow all safety precautions for the handling of glass
(splintering, breakage, etc.).
NaCl Calibration Solutions for Osmometry | 47
9
NaCl Calibration Solutions for Osmometry
9.5 Storage and Shelf Life
When stored unopened at 5°C to 45°C, the calibration- and reference material has a shelf life up to the
expiration date indicated on the packaging.
Do not use the calibration- and reference material after its expiration date!
Once the ampoule has been opened, the calibration- and reference material shelf life is:
up to ½ hour at + 22°C.
A strong variance in calibration readings (e.g. increasing osmolality) are an indication that the shelf life
has elapsed.
9.6 Use of Other Calibration Solutions
Osmolality
Sodium chloride concentration
Freezing point depression
Milliosmol / kg H2O
g NaCl / kg H2O
in C°
100
3.088
0.1858
200
6.26
0.3716
300
9.463
0.5574
400
12.685
0.7432
500
15.916
0.9290
600
19.148
1.1148
700
22.38
1.3006
750
23.98
1.395
850
27.178
1.5793
1200
38.37
2.23
1800
57.56
3.35
2000
63.960
3.7.16
2500
79.97
4.65
Table 7: NaCl solutions for osmometry based on Geigy scientific tables, 8th edition
48 | NaCl Calibration Solutions for Osmometry
Appendix
Appendix
Consumables
Packaging
unit/qty
Article no.
Article
30.9.0010
Measuring vessel for OSMOMAT 030
30.9.0020
Calibration standard 300 mOsmol/kg (ampoules of 1 ml each)
50
30.9.0850
Calibration standard 850 mOsmol/kg (ampoules of 1 ml each)
10
30.9.2000
Calibration standard 2000 mOsmol/kg (ampoules of 1 ml each)
10
1,000
®
30.9.0290
Reference solution OSMOREF 290 mOsmol/kg (ampoules of 1 ml
each)
30.9.1010
Rolls of printer paper for OSMOMAT 030-D
8
30.9.1020
Endless ink ribbon cassette for OSMOMAT 030-D
1
10
Accessories and Replacement Parts
Packaging
Article no.
Article
30.3.0010
Thermistor probe for OSMOMAT 030 (50µl sample volume)
1
30.3.2010
Thermistor probe for OSMOMAT 030-M (15µl sample volume)
1
30.9.0030
Pasteur pipette (bellow), 10 pc.
1
30.6.0020
Initiation needle
1
20.9.0160
Data cable for RS 232 interface OSMOMAT 030/050
1
30.2.0030
Adjustment tool
1
20.9.0100
Power cord, 2 meters
1
00.9.0104
Package with 10 fine-wire fuses, 0.5 A slow, 220 V
1
00.9.0106
Package with 10 fine-wire fuses, 1.0 A slow, 110 V
1
20.9.0120
Connector cable for recorder
1
unit/qty
Appendix | 49
Appendix
Classification of the IVD
The Osmomat® 030 cryoscopic osmometer manufactured by Gonotec is a non-invasive in-vitro
diagnostic product according to EEC Directive 93/42 (Medical Devices Law). The Osmomat® 030
cryoscopic osmometer is not named in Annex II, list A or B, of the Directive 98/79/EEC for in-vitro
diagnostics. Compliance is declared per Annex III. Number 6 of Annex II is disregarded, as the unit’s
intended use does not include personal use.
EC Compliance Statement—OSMOMAT® 030
Gonotec GmbH
Eisenacher Straße 56
D- 10823 Berlin, Germany
We hereby declare that the OSMOMAT® 030 cryoscopic osmometer and its options comply with
Directive 98/79/EEC. Compliance is declared per Annex III of the Directive. The CE mark on the
unit acknowledges this.
Date:
01.10.2004
Signature of managing director:
........................................
Provisions of Certification
CE compliance requires that the unit be installed and operated in the manner described in this
manual. Any departure from the specifications or independent modifications of the unit without the
express consent of Gonotec GmbH may result in a violation of CE requirements. Such actions
invalidate the compliance statement and transfer responsibility to the originator of said actions.
50 | Appendix
Appendix
Limited Warranty
Gonotec product
Duration of limited warranty
Software
90 days
Thermistor probe
180 days
Osmometer
1 year
A.
1.
2.
3.
4.
5.
6.
7.
8.
9.
Extension of the Limited Warranty
Gonotec warrants the end user that Gonotec products
shall be free from manufacturing and material defects for
the above periods of validity from the purchase date. The
end user must provide proof of the purchase date.
For software products, Gonotec’s limited warranty applies
only to the non-execution of programming instructions.
Gonotec does not warrant that the operation of a product
will proceed without errors or interruptions.
Gonotec’s limited warranty applies only to defects that
arise during normal operation of the product. It does not
apply under the following conditions:
d. Inadequate servicing or improper modification;
e. Use of software, interfaces, print media or
accessories not supported or supplied by Gonotec;
or
f.
Use of the equipment in a manner not covered by
the product specifications.
For Gonotec osmometers, the use of measuring vessels
of manufacturers other than those of the measuring
vessels supplied by Gonotec does not void the customer’s
warranty claims or any customer support contracts
between Gonotec and the customer.
If, however, the use of measuring vessels from third-party
providers or the cleaning of recycled measuring vessels
results in malfunctions or damage to the osmometer or
thermistor probe, Gonotec shall assess the normal fees
for the time and material required to repair such
malfunctions or damage.
If Gonotec is notified within the warranty period of a defect
in a software product, in media or in a thermistor probe
and if the Gonotec warranty applies to the defect,
Gonotec shall replace the defective product. If Gonotec is
notified within the warranty period of a defect in a
hardware product and if the Gonotec warranty applies to
the defect, Gonotec shall repair or replace the defective
product at its discretion.
If Gonotec is unable to repair or replace a defective
product to which the Gonotec warranty applies, Gonotec
shall refund the purchase price of the product within a
reasonable period following notification of the respective
defect.
Gonotec is not obligated to repair or replace a product or
refund its purchase price until the customer returns the
defective product to Gonotec.
Replacement products may be new or almost new, as
long as their functionality is at least that of the replaced
product.
The Gonotec limited warranty is applicable in all countries
in which Gonotec sells the applicable product. The
following countries and regions are excepted: All
countries outside the EU. In these countries, the warranty
is only valid in the country in which the product was
purchased. Contracts for additional warranty services,
such as on-site service, may be available from an
authorized Gonotec sales partner.
B.
1.
C.
1.
2.
D.
1
2.
3.
Limitation of the Warranty
TO THE EXTENT PERMISSIBLE UNDER THE
APPLICABLE LOCAL LAWS, NEITHER GONOTEC NOR
ITS SUPPLIERS SHALL ASSUME ANY ADDITIONAL
WARRANTY SERVICES OR ACCEPT ANY OTHER
CONDITIONS, EXPRESS OR IMPLIED, WITH REGARD
TO THE GONOTEC PRODUCTS.
Limitations of Liability
To the extent permissible under the applicable local laws,
the legal remedies named here shall be the sole and
exclusive legal remedies available to the customer.
TO THE EXTENT PERMISSIBLE UNDER THE
APPLICABLE LOCAL LAWS AND WITH THE
EXCEPTION OF THE OBLIGATIONS EXPRESSLY
NAMED HERE, NEITHER GONOTEC NOR ITS
SUPPLIERS SHALL BE LIABLE FOR DIRECT OR
INDIRECT, SPECIFIC, INCIDENTAL OR
CONSEQUENTIAL LOSSES, WHETHER BASED ON A
CONTRACT, A TORTIOUS ACT OR ANOTHER LEGAL
THEORY, AND NOTWITHSTANDING PRIOR
NOTIFICATION OF THE POSSIBILITY OF SUCH A
LOSS.
Respective Jurisdiction
This warranty statement guarantees the customer certain
legal claims. The customer may have other legal claims
that go beyond those outlined here. Such claims vary by
state in the US, by province in Canada and by nation
elsewhere in the world.
Elements of this warranty statement that conflict with local
laws can be regarded as amended to comply with the
applicable laws. For this reason, certain warranty
exclusions and restrictions outlined here may be of no
relevance to the customer. In some states of the US, in
some Canadian provinces and in some countries outside
North America, for example, the following national laws
apply:
a. Exclusion of the fact that the warranty exclusions and
restrictions named here restrict the legal rights of a
customer (for example: Great Britain)
b. Restriction of the possibilities for manufacturers to
enforce such warranty exclusions and restrictions
c. Granting of additional warranty claims for the customer,
fixing of the validity period for implied warranty services
that the manufacturer may not exclude, or nonadmission
of restrictions relating to the validity period for implied
warranty services
THE FOLLOWING APPLIES TO CONSUMER
TRANSACTIONS IN AUSTRALIA AND NEW ZEALAND:
THE CONDITIONS OF THIS WARRANTY STATEMENT
NEITHER EXCLUDE LEGAL RIGHTS APPLICABLE TO
THE SALE OF GONOTEC PRODUCTS TO SUCH
CUSTOMERS NOR REPRESENT A RESTRICTION OR
AMENDMENT OF SUCH RIGHTS, BUT INSTEAD
REPRESENT A SUPPLEMENT TO THESE RIGHTS,
EXCEPT TO THE EXTENT PERMISSIBLE UNDER THE
LAW.
Appendix | 51
Appendix
Returning Parts for Warranty Repair or Credit
All products returned for repair or credit must be prepared as follows:
1
Call or write to request a free return order for equipment that is being returned to us for
warranty repair or credit.
You may also request a return order for equipment that is being returned for non-warranty
repair, but you will be liable for the cost of the return order.
2
Clean and disinfect the equipment before returning it to us. We will charge a processing fee
for cleaning and disinfecting contaminated equipment. Equipment that is greatly contaminated
will be returned at the customer’s expense.
3
Insert the protective packaging material (notched foam cushion) between the thermistor probe
and the elevator.
4
Enclose written information explaining the reason for returning the equipment.
5
If the equipment is being returned for credit, you must include all accessories (power cord,
software discs, manuals, etc.).
6
Return the equipment in its original packaging. If you no longer have the original packaging,
you may purchase a replacement from Gonotec.
Before Calling Gonotec
Note: When calling Gonotec, have your unit’s serial number ready. The serial number helps our
service technicians to more quickly record the unit and determine a procedure.
If possible, switch on the unit before calling Gonotec’s technical service. Use a telephone that is close
to the unit. You may be asked to provide detailed information while running operations or apply other
troubleshooting methods that can only be performed on the unit itself. Ensure that you have the
equipment documentation handy.
Warning: Before undertaking any work on the equipment, read the safety
notices in the appropriate chapters of this manual.
Tel.: +49 (030) 7809588-0
freecall (Germany only!):
0800-7846027
52 | Appendix
Appendix
OSMOMAT 030 Upgrade Options
The following useful options enhance the practical value of the standard model and can be factory-installed for an additional
price:
Option D:
Built-in dot matrix normal-paper printer for automatic recording of the measurement results with user-defined
four-digit sample numbering, date and time. The OSMOMAT 030-D ensures reliable recording of the
measurement results, together with and easily distinguishable from the sample numbering, and increases the
speed of series measurements.
Option A:
Analog port for continuous recording of the temperature development with a compensating recorder.
Option RS:
Digital, serial data output RS 232 C for connecting the OSMOMAT 030-RS to a computer.
Option M:
The OSMOMAT 030-M is programmed for a microsample volume of 15µl. Reproducibility is <±2%.
This option is recommended if only small sample volumes are available. If the OSMOMAT 030-M is used to
measure sample volumes up to 50µl, the reproducibility remains at <±2%.
Option 3-P:
Calibration at three points. Besides water, two other calibration points are possible.
The above options can be combined in almost any way. Only the options A and 3P cannot be combined with each other.
Specifications of OSMOMAT 030
(Options)
(Standard model)
Sample volume:
50µl to 30µl
Duration of measurement
Approx. 1 minute
Reproducibility:
< ±0.5% (50µl)
< ±1.0% (30µl)
Measurement display:
4.5 digits
Measuring range:
Up to approximately
3000mOsmol/kg
1 mOsmol/kg across the entire
measuring range
Resolution:
Crystallization resolution
Using the ice crystal-laced tip of
an automatically controlled
stainless steel needle
Option D:
Alphanumeric dot matrix printer,
5x7 matrix, date, time of each
measurement
Number of digits:
Paper:
4-digit programmable sample
number
4-digit measurement results
Normal paper, 43 mm wide
Paper feed:
Automatic or manual
Printer function:
Manual on/off key
Error message:
Printout in plain text
Option A:
Analog output via DIN standard
socket, 5-pin
Output voltage:
1 mV/mOsmol
Cooling:
Using two independent peltier
cooling systems with heat
dissipation through the air
Option RS:
Data output (serial), standard RS
232 C interface
Baud rate:
1200 bps
Lower cooling system:
Temperature controlled
electronically, consistency
better than ±0.1°C
10°C to 35°C
Data format:
1 start bit, 8 data bits, 2 stop bits
(no parity check)
Data line:
TXD
Control line:
DTR, DSR
Connector plug:
Canon, 25-pin
Ambient temperature:
Power connection:
220V (± 30V), 50/60 Hz, 120VA,
Special models: 110V, 100V
Option M:
15 µl sample volume
Dimensions:
220 x 205 x 360 mm
Reproducibility:
< ±2.0%
Weight:
Approximately 7 kg
Option 3-P:
Special version for 3-point
calibration
Appendix | 53


