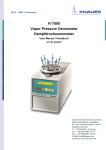
1
User Manual OSMOMAT 070 Version 1.2
1
1.1
1
THE OSMOMAT 070 VAPOR PRESSURE OSMOMETER ......................................4
The measurement method .............................................................................................................................. 4
1.2
Description of the system................................................................................................................................ 4
1.2.1
The measurement system .................................................................................................................... 4
1.2.2
The cell unit ........................................................................................................................................ 5
1.2.3
Design of the measurement cell .......................................................................................................... 6
1.2.4
The cell head ....................................................................................................................................... 8
1.2.5
Measuring probes .............................................................................................................................. 10
1.2.6
Vapor wicks ...................................................................................................................................... 12
1.2.7
Syringes............................................................................................................................................. 13
2
2.1
STARTING UP THE MEASUREMENT SYSTEM WITH THE CONTROL UNIT SA13
Starting the OSMOMAT 070 – explanation of the software ..................................................................... 14
2.2
OSMOMAT 070 molecular weight determination ..................................................................................... 16
2.2.1
Main screen ....................................................................................................................................... 16
2.2.2
Parameter dialog................................................................................................................................ 16
2.2.3
Calibration......................................................................................................................................... 18
2.2.4
Measurement ..................................................................................................................................... 19
2.2.5
Evaluation Dialog.............................................................................................................................. 20
2.3
Osmolality ...................................................................................................................................................... 21
2.3.1
Main screen ....................................................................................................................................... 21
2.3.2
Parameter Dialog............................................................................................................................... 22
2.3.3
Measurement and calibration ............................................................................................................ 22
2.3.4
Evaluation Dialog.............................................................................................................................. 23
2.4
Cleaning ......................................................................................................................................................... 24
2.5
Evaluating external data............................................................................................................................... 24
2.6
Printing .......................................................................................................................................................... 25
2.7
Printer installation ........................................................................................................................................ 25
3
PERFORMING THE MEASUREMENT ...................................................................25
3.1
Preparing the measurement system for measurement............................................................................... 25
3.1.1
Installing the vapor wicks ................................................................................................................. 25
3.1.2
Preparing the cell head ...................................................................................................................... 26
3.1.3
Installing the cell head in the measurement cell................................................................................ 26
3.1.4
Solvents and substances .................................................................................................................... 27
3.1.5
Making calibration solutions ............................................................................................................. 27
3.1.6
Making solutions for the sample measurement ................................................................................. 28
4
MOLECULAR WEIGHT DETERMINATION WITH THE CONTROL UNIT SA .......29
4.1
Calibrating the Osmomat 070 ...................................................................................................................... 30
4.1.1
Recording the parameters.................................................................................................................. 30
4.1.2
Creating the solvent........................................................................................................................... 31
4.1.3
Preparing the syringes ....................................................................................................................... 32
4.1.4
Rinsing the probes............................................................................................................................. 32
4.1.5
Starting calibration ............................................................................................................................ 33
User Manual OSMOMAT 070 Version 1.2
1
2
User Manual OSMOMAT 070 Version 1.2
4.1.6
Determining the cell constants .......................................................................................................... 36
4.2
Solution measurement .................................................................................................................................. 37
4.2.1
Entering parameters .......................................................................................................................... 37
4.2.2
Performing the measurement ............................................................................................................ 38
4.2.3
Calculating the molecular weight...................................................................................................... 39
5
DETERMINING THE TOTAL OSMOLALITY OF AQUEOUS SOLUTIONS ...........41
5.1
Preparing the measurement system............................................................................................................. 41
5.2
Calibrating the measurement system for determining osmolality ............................................................ 42
5.3
Measurement of osmolality .......................................................................................................................... 44
5.4
Evaluating the measurement results............................................................................................................ 47
6
APPENDIX ..............................................................................................................48
6.1
Suitable Solvents for Vapor Pressure Osmometry..................................................................................... 48
6.2
List of Spare Parts and Expendables........................................................................................................... 49
6.3
Specifications ................................................................................................................................................. 50
2
User Manual OSMOMAT 070 Version 1.2
User Manual OSMOMAT 070 Version 1.2
3
It should be mentioned again that the control unit is a personal
computer that is equipped with additional hardware by Gonotec, not
limited to the installation of a special interface card. The OSMOMAT
program designed specifically for this purpose ensures smooth and
reliable functioning of the measurement system provided that no
other programs are started. As a result, Gonotec cannot ensure
smooth functioning of the measurement system if additional
hardware or software is installed.
User Manual OSMOMAT 070 Version 1.2
3
4
User Manual OSMOMAT 070 Version 1.2
1 The OSMOMAT 070 Vapor Pressure Osmometer
The OSMOMAT 070 is suitable for determining the average molecular weight (Mn) of polymers in
aqueous or organic solvents. The materials used should be within a concentration range of 1x10 E-3 to
50x10 E-3 mol/kg. The substances to be measured must be fully soluble in a suitable solvent and must
not dissociate or influence chemical interactions with the solvent. Measurements can be performed in a
temperature range of 30-130°C. A molecular weight of 50-50,000 Daltons can be recorded in organic
solvents and up to about 5000 g/mol in water.
At least three solutions of each substance to be gauged must be measured in a graduated concentration.
Calibration is carried out with solutions of a known molality or osmolality.
The OSMOMAT 070 is also suitable for determining the total osmolality of aqueous solutions.
1.1 The measurement method
Two thermistors, connected as measuring probes in a differential measuring circuit, are suspended in a
thermostatically controlled measurement cell. The measuring probes, which are initially coated with
solvent drops, conform to the cell temperature so that there is no difference in their temperatures. After
one of the two solvent drops has been replaced by a drop of solution, the solvent vapor condensates as a
result of the lower solvent vapor pressure over the solution drop. The resulting heat of condensation leads
to a measurable temperature increase on the drop of solution. The temperature difference produced
between both temperature sensors, which are part of a Wheatstone bridge with a resolution of 5 x 10E 5°C, is converted into a DC voltage signal. The measured value is proportional to the solution’s osmolal
concentration, but may be affected by heat losses. The measurement system should therefore be
calibrated with solutions whose molality or osmolality is known. Because the osmotic pressure of polymer
solutions does not behave linearly according to the concentration, at least three solutions of the
substance to be gauged are measured in a graduated concentration. A subsequent statistical calculation
of the measurement results by means of a linear regression calculation eliminates nonlinear behavior.
1.2 Description of the system
1.2.1 The measurement system
The measurement system is comprised of the "OSMOMAT 070" cell unit and a control unit. The cell unit
contains the measuring probes suspended in the measurement cell, including bridge amplifiers, and all
electronic components for thermostatic regulation, while the control unit is responsible for power supply,
control, and measured value display and evaluation. The control unit SA has a monitor and a keyboard,
uses software to guide the user through the measurement, displays the data graphically, calculates the
molecular weight, and can print the measurement result with linear regression and the graphic via a
connected printer (not included in the delivery). There is a Help file for the control unit SA.
4
User Manual OSMOMAT 070 Version 1.2
User Manual OSMOMAT 070 Version 1.2
5
1.2.2 The cell unit
On the front of the OSMOMAT 070 (Figure 1-1), there are two LEDs on the left-hand side: “Power” (1) for
displaying the supply voltage und “Ready” (2) for displaying the current temperature. This LED glows red
during the heating phase if the measurement cell has not yet reached the specified target value and
changes to green if the target value has adjusted to the temperature. Pressing the Light key (3) on the
front right-hand side will activate an LED that lights up the interior for about 25 seconds. The dropwise
addition of a solution or solvent with syringes can be visually observed via a mirror (4) that is also
attached to the front of the unit.
Figure 1-1: Osmomat 070 Front
1
2
3
4
User Manual OSMOMAT 070 Version 1.2
5
6
User Manual OSMOMAT 070 Version 1.2
The following items are located on the rear of the unit:
Figure 1-2 Osmomat 070, Rear
5
6
7
10
8
11
12
9
(5) Socket for connecting the cell head
(6) Potentiometer for fine adjustment of the head temperature
(7) Connector sockets A and B for the measuring probes
(8) Power connector for plugging the cell unit into the mains voltage via the control unit
(9) Mains fuse for two-phase protection of the cell unit 230V/2.5A, 115V/4A
(10) Nameplate with information on the unit type, serial number, supply voltage, power consumption
and line frequency
(11) Connector socket for connection to the control-unit
(12) Connector socket for connection of a recorder
1.2.3 Design of the measurement cell
The beaker-shaped measurement cell is located in a thermostat with a very constant temperature that
can be adjusted in one-degree stages between 30°C and 130°C. The cell thermostat surrounds a
cylindrical beaker that contains a small amount of solvent (filling level is about 1 cm). To achieve 100%
vapor saturation, the beaker contains vapor wicks in the form of filter paper strips.
Two measuring probes with temperature sensors are suspended in the cell space saturated with solvent
vapor. The bottom ends of the measuring probes are coated with drops of solvent or solution. An even
drop size is achieved through wire coils attached to the bottom end of the measuring probes. They make
it easier to rinse the probes, because the liquid can drain off spirally and the probes can be thoroughly
wetted. The solvents or solutions are fed through glass syringes that are placed in the cell head along
with the measuring probes.
6
User Manual OSMOMAT 070 Version 1.2
User Manual OSMOMAT 070 Version 1.2
7
Figure 1-3: Osmomat 070 measurement cell
13-Syringe for dropwise addition of solvent
22-Swivel mirror
14-Syringe for dropwise addition of a solution
23-Cell cover
15-Measuring probe in position “A” for solvent
24-Cell head with separate thermostatic
16-Measuring probe in position “B” for sample
regulation
solution
25-Measuring channel for checking the cell
17-Measuring channel for checking the head
temperature externally
temperature externally
26-Beaker
18-Vapor wicks
27-Cell space with saturated solvent vapor
19-Heat-absorbing filter
28-Cell block with filament winding and
20-Solvent
temperature sensor for thermostatic control
21-Window for observing the drop size on the
measuring probes
User Manual OSMOMAT 070 Version 1.2
7
8
User Guide OSMOMAT 070 Version 1.1
There are two measuring channels in the cell and cell head for external temperature checking.
1.2.4 The cell head
The cell head has its own thermostat that automatically adjusts itself to the cell temperature. It closes
the measurement cell upward and ensures that the syringes are preheated. Fine adjustment of the
temperature to optimize the temperature difference between the cell and cell head can be carried out
with a potentiometer on the rear Figure 1-2 (6). The temperature of the cell head should be about
0.5°C lower than the cell temperature. Temperatures can be checked with an external thermometer in
the corresponding measuring channels Figure 1-6: Measurement of the head/cell temperature. To
prevent temperature effects, the cell head has a cover that is fastened with a knurled screw.
Figure 1-4: Osmomat 070 cell head
29-Teflon lip seal for sealing the cell space
30-Guide tube for aligning the syringe needles to the dropwise addition point of the measuring probes
8
User Guide OSMOMAT 070 Version 1.1
9
User Guide OSMOMAT 070 Version 1.0
Figure 1-5: Cell head/cover top view
36
34
35
37
31
32 33
40
39
38
31-Threaded bolt for screwing on the cell head (manual screwing)
32-Position A of the reference measuring probe
33-Position B of the measuring probe
34-Syringe position 0: Solvent for reference measuring probe
35-Syringe position 0: Solvent for baseline
36-Syringe position 1: Lowest concentration of the sample
37-Syringe position 2: Next highest concentration of the sample
38-Syringe position 3: Next highest concentration of the sample
39-Syringe position 4: Highest concentration of the sample
40-Knurled screw for fastening the cell cover
Figure 1-6: Measurement of the head/cell temperature
41
42
41-Hole for placing a thermometer to check the head temperature. The knurled screw (40) needs to be
removed for this.
42-Hole for placing a thermometer to check the cell temperature
User Guide OSMOMAT 070 Version 1.0
9
10
User Guide OSMOMAT 070 Version 1.1
1.2.5 Measuring probes
Thermistors acting as temperature sensors are located in the measuring probes. The probe coils keep
drops to a minimum size and ensure that the probe tip is evenly washed when drops are being added.
The thermistors’ resistance values are temperature-sensitive, and should ideally be between 5 k ohms
and 70 k ohms for measurements.
Two types of probes are therefore available for a temperature measuring range of 30-130°C.
Probe Type
Temperature Range
Resistance Value
Order No.
100
35-105°C
63 k Ohm-5 k Ohm
70.3.0010
270
60-130°C
63 k Ohm-5 k Ohm
70.3.0020
Figure 1-7: Probes
43. Shielded probe cable
44. Probe shaft
45. Probe plug
46. Probe tube
47. Probe coil
48. Probe retaining screw with
Allen head screw
10
User Guide OSMOMAT 070 Version 1.1
User Guide OSMOMAT 070 Version 1.0
11
A pair of Type 100 probes come installed with the unit. The measuring probes are matched; in other
words, the difference between their resistances should not be more than 15%. The measuring probe’s
resistance value is the first part of the serial number.
e.g.101060415
101:
Resistance value in ohms
Because the cell constant depends greatly on the built-in probes, each serial number for Positions A
and B must be noted. The probe with the lower resistance value is inserted into Position A.
If only one probe is replaced because of a defect, the serial number of the used probe must be
indicated when the order is made. To change the probes, the probe plug must firstly be removed from
the cell and the Allen head screw on the probe retaining screw loosened, after which the probe
retaining screw with probe should be unscrewed.
The measurement system must be recalibrated after the probe change.
The probes should be cleaned after a change of solvent, especially for subsequent measurement with
water. The easiest way to do this is to clean the probe tip with dishwashing detergent. If the probes
are very dirty, carefully remove the probe coil from the shaft and gently clean the tip of the shaft with
steel wool. After cleaning, replace the coil whilst ensuring that the coil ends protrude about 1 mm
above the end of the shaft. We recommend that you then clean the tip with acetone in order to make
the surface hydrophilic. This ensures that a homogeneous drop can develop and coat the probe end
via the coil.
User Guide OSMOMAT 070 Version 1.0
11
12
User Guide OSMOMAT 070 Version 1.1
1.2.6 Vapor wicks
The vapor wicks for expanding the evaporation surface are inserted in the beaker. They are composed
of absorbent filter paper and are pre-punched for insertion. A set of vapor wicks consists of two paper
strips and a round filter with two holes. They are crimped and inserted in accordance with Figure 1-8.
Vapor wicks are included as standard accessories.
Figure 1-8: Vapor wicks
12
User Guide OSMOMAT 070 Version 1.1
13
User Guide OSMOMAT 070 Version 1.0
1.2.7 Syringes
The standard syringes included with the standard accessories are suitable for organic solvents with
low vapor pressure and for aqueous solutions that do not have a very corrosive action.
Figure 1-9: Syringes
48-Glass syringe plunger
49-Plunger stop
50-Glass syringe body
51-Metal Luer needle lock
52-Springs for raising the syringes
into the upper position
2 Starting up the measurement system with the
control unit SA
The equipment has to be set up in a dry, shock-free, and draft-free area. It has to be kept from direct
sunlight as well as external heat sources such as lighting and heating equipment.
The measurement cell unit is connected to the relevant control unit via the supplied network cable and
data cable.
When using the control unit SA, the data cable from the measurement cell is connected to the socket
labeled "Cell-Unit". The network cable is used to connect the measurement cell and the control unit. A
monitor, keyboard, mouse, and possibly a printer are also connected. The power cord of the control
unit is then connected to a power outlet. The line voltage of your power supply system has to comply
with the voltage stated on the type plate of the equipment (110-115 or 220-230V).
Make sure that the equipment grounding is connected to the protective grounding of the power supply.
The supplied power cord automatically provides grounding contact. If the connector of the standard
User Guide OSMOMAT 070 Version 1.0
13
14
User Guide OSMOMAT 070 Version 1.1
power cord is replaced by another connector, you have to ensure that the grounding cable
(green/yellow) is connected to the protective grounding.
Figure 2-1
The grounding connection is absolutely necessary to prevent injury due to electric shock and
interference with the functionality of the measurement system.
2.1 Starting the OSMOMAT 070 – explanation of the software
The OSMOMAT program starts automatically after the control unit switches on and displays the
following screen:
Figure 2-2 Welcome screen
14
User Guide OSMOMAT 070 Version 1.1
User Guide OSMOMAT 070 Version 1.0
15
The different program modes can be selected and started. The choice between membrane osmometer
090 and vapor pressure osmometer 070 directs you to the system-specific program portions. For the
vapor pressure osmometer 070, the selection of measurement modes for molecular weight
determination and determination of osmolality includes the option of postprocessing data that has
already been measured and a Cleaning mode. The “Start Only” button (top right) launches a systemindependent mode for viewing old measurements. This can be selected via the mouse, or the
selection highlighted in white can be confirmed by pressing ENTER on the keyboard.
If you ended the program, the Windows user interface is displayed. You can restart the OSMOMAT
program at any time by clicking on Start, Programs, Gonotec, Osmomat.
Figure2-3: Restarting Osmomat
It should be mentioned again that the control unit is basically a personal computer that is
equipped with additional hardware by Gonotec, not limited to the installation of a special
interface card. The OSMOMAT program designed specifically for this purpose ensures smooth
and reliable functioning of the measurement system provided that no other programs are
started. As a result, Gonotec cannot ensure smooth functioning of the measurement system if
additional hardware or software is installed.
User Guide OSMOMAT 070 Version 1.0
15
16
User Guide OSMOMAT 070 Version 1.1
2.2 OSMOMAT 070 molecular weight determination
After you have selected “Molecular weight measurement” on the Start screen, you will be taken to the
part of the program that goes through molecular weight determination with the OSMOMAT 070.
2.2.1 Main screen
All dialogs necessary for the measurement are displayed on the main screen. Appropriately modified
versions guide you through the entire measurement.
The main screen displays the graphic measurement sequence and additional current information. The
left side shows the defined and measured cell temperature, the running sample time, the current
measured value (provided by the measurement cell), the history of the last four measured values for
the particular sample solution including the average, and additional control elements and buttons.
The lower left portion of the screen shows the control elements for the graphical resolution. You can
set the optimal resolution for your work here. The graphic can be optimized for subsequent printing so
that only the important part is printed (only the part visible in the screen is printed).
2.2.2 Parameter dialog
You are now in Parameter dialog, which contains all parameters needed for the measurement. Run
the Cleaning mode to clean the solvent residue of previous measurements from the measurement cell
and prepare it again.
Figure2-4: Parameter Dialog
16
User Guide OSMOMAT 070 Version 1.1
User Guide OSMOMAT 070 Version 1.0
17
If the measurement cell is prepared, you can now select the corresponding solvent from the available
list or add a new solvent to the list.
To add a new solvent to the list, click the top right button in the Parameter Dialog and select New
Solvent from the drop-down menu.
Figure 2-5: Creating a solvent
A new dialog box appears in which you need to enter all relevant parameters for the solvent. You can
use the mouse or TAB key to toggle between the input fields. Terminate the entry by clicking OK or
hitting the ENTER key.
The newly-added solvent with its associated parameters now appears in the list of solvents in the
Parameter Dialog. You can enter other parameters related to the measurement cell and add
comments about the next measurement or calibration.
Because the device has not yet been calibrated with this solvent under these parameters, you will now
be prompted to perform a calibration by clicking the Calibrate button.
You can see the parameters by clicking the Parameter button in either the Calibration mode or
Measurement mode, but you cannot edit them in these modes.
If the calibration has been performed and a cell constant (Cell Const.) determined, a message will
appear in the Parameter Dialog behind the solvent stating that the device has been calibrated with this
solvent. You can now switch to the Measurement mode.
Because calibration is sometimes a lengthy process (in the case of a complete measurement), the cell
constant is permanently saved with the solvent. You can use this solvent (with its associated
parameters) with a valid cell constant at any time for molecular weight determinations.
User Guide OSMOMAT 070 Version 1.0
17
18
User Guide OSMOMAT 070 Version 1.1
It is naturally a good idea to repeat or check the calibration after a longer period of time. Click in the
Do Calibration checkbox, then click on the Calibrate button. You can now perform the calibration
again.
If you frequently use and thus generate different solvents, the Parameter Dialog will give you a list of
solvents and their associated parameters. You can make selections from the list according to your
requirements. Please note however that only calibrated solvents (under associated parameters) have
a valid cell constant and are acceptable to use for a molecular weight determination.
You can use solvents without calibration by unchecking the Do Calibration option. To carry out a
measurement, you must now manually enter a cell constant that you are aware of. Please bear in
mind that this cell constant will not have been determined in the usual way and as such, the
subsequent results of your work should be treated with reservation. A corresponding comment
appears in both the Comments field and the printout.
If you only want to change a solvent’s parameters, you can make your entries directly in the
Parameter Dialog. Another calibration will be necessary and after you have been asked whether you
are sure you wish to proceed, a copy of the old solvent with new parameters and a new constant will
be generated. If you do not want a copy, the subsequent measurement will be performed with your
altered parameters. However, the parameters will not be saved with the solvent (in this instance, you
are only temporarily changing the measuring parameters).
To permanently change a solvent’s parameters, select “Edit Solvent” (see Figure 2-5: Creating a
solvent) and change the corresponding parameters in the subsequent dialog box. Click OK to quit the
dialog box. The new parameters will then be permanently saved with the solvent. Please note that any
calibration previously performed may be lost, because the parameters no longer correspond to the
ones with which the calibration was performed.
To delete a solvent from the list, do the same as you would for creating a solvent, but select Delete
Solvent instead of New Solvent from the menu. A prompt will appear asking whether you are sure that
you want to delete this solvent.
2.2.3 Calibration
After a solvent has been edited, the device should be calibrated with these parameters and the
solvent.
18
User Guide OSMOMAT 070 Version 1.1
User Guide OSMOMAT 070 Version 1.0
19
The device will prompt you to perform a calibration. As described in 2.2.2, you can also manually enter
a cell constant. However, because this constant was not determined by carrying out a corresponding
measurement with this program, the following results of your work should be treated with reservation
(the corresponding text will appear in both the Comments field and the printout).
The following dialog prompts you to enter the concentration of the sample solutions. You can also
enter the “Calibration Standard” and “Molecular Weight” of your calibration sample for easier
identification on measurement printouts. After entering a minimum of one or a maximum of eight
concentrations, you can exit the dialog by selecting Start.
If the temperature of the measurement cell does not match the required temperature parameter, a
message informs you that the system is waiting for the correct temperature.
A selection dialog will guide you through the following measurement procedures. The measurement
starts with a baseline adjustment, with an additional zero (hardware) adjustment during the initial
adjustment.
After rinsing the measuring probes with solvent, click Start. The selection screen disappears until a
measurement value has been applied. The measurement value is applied automatically if the “Sample
Time” has expired or if you interrupt the measurement by selecting User Interrupt. The selection dialog
re-appears. Click the arrow icon in the lower left corner of the dialog to minimize it for a better view of
the measurement graph. Click the Continue button to re-display the selection dialog.
Repeat the baseline measurement cycle until the baseline appears to be constant. You can now
measure your sample solutions one by one. While you can perform any number of measurements with
a sample solution, only the last four measurements per sample solution are recorded and identified in
the graphic on the main screen as A, B, C, and D. These last four values per sample solution are also
used for the subsequent evaluation. The sample solutions are selected by clicking the relevant Select
button or choosing Select Next Solution. The procedure is identical to the baseline adjustment. If you
have taken the measurements of your sample solutions (up to four measurement values per
concentration are saved), you also have to measure the baseline drift (baseline correction). The
procedure here is also identical to the baseline adjustment.
Instead of the “Cancel” button, you will now see a “Finish” button and can thus move on to the
Evaluation Dialog (see 2.2.5).
2.2.4 Measurement
To start a new measurement, select the File, New Measurement menu item and then 070 Molecular
Weight Measurement or click the New button (on the left side of the toolbar).
If the unit has been calibrated for the solvent used for the measurement, you can click the Start button
to enter the measurement mode.
User Guide OSMOMAT 070 Version 1.0
19
20
User Guide OSMOMAT 070 Version 1.1
The following dialog prompts you to enter the concentration of the sample solutions. You can also
enter a Sample ID and a Sample No. for easier identification on measurement printouts. After entering
a minimum of one or a maximum of eight concentrations, you can exit the dialog by selecting Start.
If the temperature of the measurement cell does not match the required temperature parameter, a
message informs you that the system is waiting for the correct temperature.
A selection dialog will guide you through the following measurement procedures. The measurement
starts with a baseline adjustment, with an additional zero (hardware) adjustment during the initial
adjustment.
After rinsing the measuring probes with solvent, click Start. The selection screen disappears until a
measurement value has been applied. The measurement value is applied automatically if the “Sample
Time” has expired or if you interrupt the measurement by selecting User Interrupt. The selection dialog
re-appears. Click the arrow icon in the lower left corner of the dialog to minimize it for a better view of
the measurement graph. Click the Continue button to re-display the selection dialog.
Repeat the baseline measurement cycle until the baseline appears to be constant. You can now
measure your sample solutions one by one. While you can perform any number of measurements with
a sample solution, only the last four measurements per sample solution are recorded and identified in
the graphic on the main screen as A, B, C, and D. These last four values per sample solution are also
used for the subsequent evaluation. The sample solutions are selected by clicking the respective
Select button or choosing Select Next Solution. The procedure is identical to the baseline adjustment.
If you have taken the measurements of your sample solutions (up to four measurement values per
concentration are saved), you also have to measure the baseline drift (baseline correction). The
procedure here is also identical to the baseline adjustment.
Instead of the “Cancel” button, you will now see a “Finish” button and can thus move on to the
Evaluation Dialog (see 2.2.5).
2.2.5 Evaluation Dialog
The evaluation dialog shows the measurement values including the respective concentrations of the
sample solutions. You can click the individual measurement values to activate and include them in the
evaluation. Activated values are displayed in bold letters, while deactivated values (excluded from the
evaluation) are displayed in plain letters. First, the values are used to establish the R/C quotient for
each sample solution. A linear regression is applied to these values. The generated value is displayed
and is factored into the molecular weight calculation (or calculation of the cell constants when a
calibration is being performed). Any drift can moreover be “removed” from the measurement values
with the Drift Correction option. The drift is regarded here as constant over time and accordingly
removed from the measurement values.
The linear regression can be graphed by clicking the Lin. Regression button.
If you are not satisfied with the results of a sample solution, you can return to the measurement by
clicking the Back to Measurement button. You can now repeat the measurement of the respective
sample solution. You must note, however, that all sample solutions following this sample solution and
the baseline drifts have to be re-measured. For example, if you repeat the measurement of sample
20
User Guide OSMOMAT 070 Version 1.1
User Guide OSMOMAT 070 Version 1.0
21
solution 4, you have to re-measure the following sample solutions (if applicable) and the baseline drift
as well.
If you are satisfied with your measurement results, complete the measurement by clicking the
Stop&Save As button. The save dialog prompts you to enter a name for your measurement. This
name is used to save the complete measurement sequence including graphic and evaluation, which
can be accessed at any time. The evaluation dialog disappears after saving, but can be re-displayed
by clicking the Measurem. Analysis button. If you make further changes (such as activation of
measurement values), you are prompted to save your changes. The Close button changes to a Save
button, which takes you back to the save dialog where the existing measurement name is displayed.
You can overwrite the previous measurement or enter a new name to create a new file.
2.3 Osmolality
After you have made a selection on the Start screen, you will be taken to the part of the program that
goes through osmolality determination with the OSMOMAT 070.
2.3.1 Main screen
All dialogs necessary for the measurement are displayed on the main screen. Appropriately modified
versions guide you through the entire measurement.
The main screen displays the graphic measurement sequence and additional current information. The
left side shows the defined and measured cell temperature, the running sample time, the current
measured value (provided by the measurement cell), the history of the last four measured values for
the particular sample solution including the average, and additional control elements and buttons.
The lower left portion of the screen shows the control elements for the graphical resolution. You can
set the optimal resolution for your work here. The graphic can be optimized for subsequent printing so
that only the important part is printed (only the part visible in the screen is printed).
User Guide OSMOMAT 070 Version 1.0
21
22
User Guide OSMOMAT 070 Version 1.1
2.3.2 Parameter Dialog
You are now in Parameter dialog, which contains all parameters needed for the measurement. Run
the Cleaning mode to clean the solvent residue of previous measurements from the measurement cell
and prepare it again. (See 2.4).
If the measurement cell is prepared, you can now enter the parameters with which the subsequent
measurement is to be performed.
Figure 2-6 Parameter Dialog
In any case, it is advisable to do a calibration. However, a calibration is not needed if there is a cell
constant. Just uncheck the Do Calibration box. After clicking “Yes” at the prompt, continue the
measurement process by clicking Next.
2.3.3 Measurement and calibration
Start a new measurement by selecting New Measurement from the File menu, followed by 070
Osmolality Measurement.
After any changes to the parameters, the device should be calibrated with these parameters. The
device will prompt you to do a calibration.
In the dialog box that now appears, you can specify the Calibration Standard, but you must enter the
Osmolality of your calibration sample. The data will be used as additional identification of your
measurement on the printout and the Osmolality value will be included in the calculation of the cell
constants.
22
User Guide OSMOMAT 070 Version 1.1
User Guide OSMOMAT 070 Version 1.0
23
You can measure up to eight samples and enter them in this dialog box with clear designations.
However, these entries are optional and are only used for identification on subsequent printouts.
Once you have entered all data, quit the input dialog box by clicking Start.
If the temperature of the measurement cell does not match the required temperature parameter, a
message informs you that the system is waiting for the correct temperature.
A selection dialog will guide you through the following measurement procedures. The measurement
starts with a baseline adjustment, with an additional zero (hardware) adjustment during the initial
adjustment.
After rinsing the measuring probes with solvent, click Start. The selection screen disappears until a
measurement value has been applied. The measurement value is applied automatically if the “Sample
Time” has expired or if you interrupt the measurement by selecting User Interrupt. The selection dialog
re-appears. Click the arrow icon in the lower left corner of the dialog to minimize it for a better view of
the measurement graph. Click the Continue button to re-display the selection dialog.
Repeat the baseline measurement cycle until the baseline appears to be constant.
Calibration can now be performed in an identical manner to the baseline adjustment. Each measured
value is displayed in the A, B, C and D fields, while the calculated cell constant is shown in the “Cell
Const.” field below. If you are satisfied with the consistency of the readings, choose your first sample
in the selection screen and start the sample measurements.
You can now measure your sample solutions one by one. While you can perform any number of
measurements with a sample solution, only the last four measurements per sample solution are
recorded and identified in the graphic on the main screen as A, B, C, and D. These last four values per
sample solution are also used for the subsequent evaluation. The sample solutions are selected by
clicking the respective Select button or choosing Select Next Solution. The procedure is identical to
the baseline adjustment.
Click Finish to go to the Evaluation Dialog.
2.3.4 Evaluation Dialog
The evaluation dialog shows the measurement values for the sample solutions and the average
measurement value.
If you are not satisfied with the results of a sample solution, you can return to the measurement by
clicking the Back to Measurement button. You can now measure the relevant sample solution again,
but the values already measured for this solution will be lost.
If you are satisfied with your measurement results, complete the measurement by clicking the
Stop&Save As button. The save dialog prompts you to enter a name for your measurement. This
name is used to save the complete measurement sequence including graphic and evaluation, which
can be accessed at any time. The evaluation dialog disappears after saving, but can be re-displayed
by clicking the Measurem. Analysis button.
User Guide OSMOMAT 070 Version 1.0
23
24
User Guide OSMOMAT 070 Version 1.1
2.4 Cleaning
The Cleaning mode is used to clean solvent residue from previous measurements out of the
measurement cell. To access this mode, start the device with Cleaning or quit the Parameter Dialog
by clicking Cancel and selecting 070 Cleaning under Options in the main menu.
After entering this mode, you should have prepared the measurement cell accordingly and there
should be no solvents in the cell. To prepare the cell, you need to enter your desired temperature
(15°C min. and 125°C max.).
The next screen displays two buttons. The first of these, BLA, is used for baseline adjustment, while
the second, Finish, is for quitting the Cleaning mode.
At this point, the software only shows you the graphic sequence and the measurement value. This
display helps you to prepare the measurement cell, because you can track temperature errors
affecting the measuring probes and the probes’ long-term stability after assembly directly on your
screen.
2.5 Evaluating external data
To evaluate existing measurement values which e.g. were acquired using the control unit B or are
available in handwritten form only, you can use the external Data mode. This mode can be accessed
via the start dialog or the File, New external Data and 070 Molecular Weight Measurement or 070
Calibration Measurement menu items. This opens the evaluation dialog where you can enter your
data.
To calculate the molecular weight or a cell constant, the measurement data have to be complemented
by the respective concentrations of the solutions and the parameter dialog has to be completed. To
open the parameter dialog, click the Parameters button. However, only the Cell Const. parameter is
necessary to calculate the molecular weight. All other parameters are optional and can be entered for
completeness. All parameters are optional when you are calculating a cell constant.
Individual measurement values can be activated or deactivated, similarly to evaluating a "real"
measurement (see 2.2.5). However, the entry field is divided by a horizontal line. Click the area above
the line to enter a new value and use the area below the line to activate or deactivate the value.
The results can be printed and saved to a file.
24
User Guide OSMOMAT 070 Version 1.1
User Guide OSMOMAT 070 Version 1.0
25
2.6 Printing
To print from the main screen, select Print from the File menu or click the printer icon in the toolbar.
When printing from the main screen, only the contents of the graphic window and some additional
information is printed.
The evaluation can be printed using the Print Analysis button in the evaluation dialog. This prints all
the parameters, concentrations, evaluation results, as well as the linear regression.
A print menu lets you select a printer. The printer set up under Windows 95 is selected by default.
2.7 Printer installation
This software can print to all Windows XP printers. If your connected printer is not listed in the list of
available printers, you have to install it. Set it as the default printer to avoid having to select the printer
from the print menu each time you print.
Exit the OSMOMAT program before installing or setting a printer as default.
To set a printer as default, select Start, Settings, Printers to display the list of installed printers. Click
the printer to select it and then select File, Set as Default Printer. Select File, Close to close the list of
printers.
To install a printer, access the list of printers as described above and double-click the New Printer
icon. You are guided through a set of dialogs to select a printer from a list of manufacturers and to set
it as Default (select Yes when prompted). Typically, the default settings can be accepted with Next
because the printer interface requires no further configuration. Print a test page for verification.
3 Performing the measurement
3.1 Preparing the measurement system for measurement
3.1.1 Installing the vapor wicks
The first step in preparing the measurement system is to remove the cell head. To do this, remove the
cell cover after loosening the knurled screw and unscrewing both nuts from the threaded bolt. After
you have disconnected the connection cable for the cell head from the socket (5) Figure 1-2, you can
remove the head from the cell. Please make sure that neither the probes nor the guide tubes for the
syringes are bent. You can remove the beaker and insert vapor wicks in it as described in Chapter
Vapor wicks 1.2.6. Next, pour about 20-40 ml of solvent over the vapor wicks and place the beaker in
the measurement cell. It is critical that the solvent used in the measurement cell and solvent
syringes comes from the same stock bottle as the solvent that was used for adding each of the
solutions.
User Guide OSMOMAT 070 Version 1.0
25
26
User Guide OSMOMAT 070 Version 1.1
Please ensure that the windows of the vapor wicks are aligned with the cell window.
3.1.2 Preparing the cell head
A standard Osmomat 070 vapor pressure osmometer is delivered with built-in Type 100 measuring
probes (see 1.2.5). Exact height adjustment of the probe is required to prepare the cell head. To test
this, insert a syringe with spring in the syringe positions 0-0-1-2-3-4 sequentially (see 1.2.4). If the
syringe is pushed right down, the end of the needle should be about 1 mm above the probe coil (see
1.2.5). It may be necessary to correct the height of the probe slightly. You can correct the height by
loosening the Allen screws in the probe screws. Once you have adjusted the height, carefully tighten
the Allen screws again, using as little force as possible. At the same time, check whether the needle
ends close to the probe tube so that the solutions can reach the top end of the coil. Any corrections
can be made by carefully aligning the guide tubes by hand.
3.1.3 Installing the cell head in the measurement cell
Insert the prepared cell head with measuring probes so that the two probes protrude through the holes
of the vapor wick and the connection cables are guided to the rear panel from the probes and cell
head in the grooves of the black cell ring
The bottom end of the head is immersed in the beaker, which presses against the inside of the glass
wall with the teflon lip seal and thus seals the cell space. When making the insertion, apply some
pressure to make the seal fit the inner diameter of the beaker.
Fix the cell head in place by manually screwing both nuts to the threaded bolt.
Connect the probe cables to the sockets in the rear panel, making sure that the Position “A” probe is
plugged into the “A” socket and the position “B” probe is plugged into the “B” socket.
The connection cable of the heating head is also plugged into the rear panel in Position “HEAD”
(Figure 1-2 Osmomat 070, Rear) and the plug secured with the collar.
To prevent damage, do not twist the plug or pull on the cables.
26
User Guide OSMOMAT 070 Version 1.1
User Guide OSMOMAT 070 Version 1.0
27
3.1.4 Solvents and substances
Please note the following points for choosing a suitable solvent.
The substance must fully dissolve in the chosen solvent. The substances must not chemically interact
with the solvent and should be chemically and thermally stable. The solvent itself must be chemically
and thermally stable and should contain no impurities of any kind that have a high intrinsic vapor
pressure. Try to use solvents that neither have a tendency to form peroxides nor are hygroscopic.
Use toluene if possible, because this solvent is especially suitable.
3.1.5 Making calibration solutions
The first step in determining molecular weights with the OSMOMAT 070 vapor pressure osmometer is
to carry out a calibration measurement with a suitable calibration solution that has a known molecular
weight.
You will need 4 solutions of the calibrating substance in a concentration range of 1 mMol/kg to
30 mMol/kg for this.
A standard concentration series for these solutions is
2 mMol/kg, 4 mMol/kg, 8 mMol/kg und 12 mMol/kg.
Pour the solutions into small glass containers that are easy to close and have a volume of about
25 ml.
Use an analytical scale to record the precise net weight. The sole aim of this is to accurately record
the respective net weights of the substance and solvent, and not to check exact compliance with the
molal concentration specified above.
The result of a calibration measurement is the cell constant.
The cell constant indicates the measuring sensitivity of the entire measurement system under the
selected measuring conditions.
This cell constant has the dimension
“Digit 10E3 per mol of the substance, dissolved in 1 kg of solvent”
Benzyl, with a molecular weight of 210.23 g/mol, has proved a suitable substance for calibration
measurement of all standard solvents.
The benzyl made by Merck Darmstadt is recommended for synthesis with a concentration greater
than 99%.
Calculation of each net weight:
The molecular weight of benzyl is 210.23 g/mol.
For a solvent net weight of 1 mMol/kg, the molecular weight will thus be
210.23 mg of benzyl / solvent kg.
User Guide OSMOMAT 070 Version 1.0
27
28
User Guide OSMOMAT 070 Version 1.1
Take 20-25 g of solvent when using glass containers with a volume of about 25 ml.
Example for making calibration solutions:
Using 20 g of solvent results in a net weight of 4.2046 mg or 0.00420 g for a concentration of 1
mMol/kg.
The following net weights should be produced as a result:
2 mMol / kg
=
0.00840 g / 20 g of solvent
4 mMol / kg
=
0.01681 g / 20 g of solvent
8 mMol / kg
=
0.03363 g / 20 g of solvent
12 mMol / kg
=
0.05045 g / 20 g of solvent
When making these solutions, try not to use less than 25 ml of solution, because the net weights will
otherwise be too low and the measurement may not be accurate.
The glass containers, and especially the covers, must be suitable for this application.
The covers must close tightly and the sealing material (PTFE) must not dissolve in the solvent being
used.
Record the net weight as follows.
Place the glass jar with cover (screw-cap lid with PTFE foil seal) on the weighing pan and tare the
scale to zero. Next, weigh out the required quantity of benzyl. Make a note of the exact net weight.
After resetting the scale to zero, pipette the required quantity of solvent into the glass jar. Then put the
lid on the jar. Weigh the solvent amount and note its weight.
The following calculation is generated for this solution:
Net weight of benzyl
0.0084 g
Net weight of Toluol
21.6750 g (25 ml, specific weight: 0.867 g/ml)
Weight concentration =
0.0084 g / 21.6750 g x 1000 = 0.388 g/kg
Molal concentration
0.388 / 210.23 = 0.001846 mol/kg or 1.85 mMol/kg
=
For the solutions to be accurate, both the substances and solvents have to be weighed out.
Never make solutions with dilution series or volumetric measurement of the solvent.
3.1.6 Making solutions for the sample measurement
Solutions for determining molecular weight are made in the same way as calibration solutions.
As much as possible, you should use the same molal concentrations as you did for calibration. A
standard concentration series for these solutions is
2 mMol/kg, 4 mMol/kg, 8 mMol/kg und 12 mMol/kg.
28
User Guide OSMOMAT 070 Version 1.1
29
User Guide OSMOMAT 070 Version 1.0
If an approximate magnitude of the molecular weight is already known, you can make solutions
according to the concentrations shown in the table.
Table for calculating net weights for corresponding molecular weight ranges
Molecular
weight
2 mMol / kg
4 mMol / kg
8 mMol / kg
12 mMol / kg
[ g/mol]
[ g/kg]
[ g/kg]
[ g/kg]
[ g/kg]
210.23
0.42
0.8405
1.6815
2.5225
1,000
2
4
8
12
10,000
20
40
80
120
20,000
40
80
160
240
50,000
100
200
400
600
If no information is available for the substance to be measured, you should firstly perform a
measurement with a solution of any concentration in order to determine the magnitude of the
molecular weight.
4 Molecular weight determination with the control
unit SA
After the measurement system has been installed as described in (Chapter 2 Page 13) and the cell
prepared for measurement (Chapter 2 Page 13), you can start measuring the solutions.
The OSMOMAT 070 is delivered with a cell constant. This means that a cell constant for benzyl in a
toluene solvent has been determined for the built-in probes at a measuring temperature of 45°C and a
sampling time of 4 minutes. However, this cell constant is only the result of a test calibration for final
inspection. You can use this cell constant to perform a test measurement for practice. But in any
case, the device should be recalibrated with newly added solutions for molecular weight determination
(Chapter 4.1 Page 30). Recalibration is also required when just one of the entered parameters
(temperature, measuring time, solvent, probe) are changed.
User Guide OSMOMAT 070 Version 1.0
29
30
User Guide OSMOMAT 070 Version 1.1
4.1 Calibrating the Osmomat 070
4.1.1 Recording the parameters
Figure 4-1: Example: Entering parameters
After you have switched on the control unit and selected “Molecular weight measurement” on the Start
screen (Chapter 2.2 Page3), you will be taken to the part of the program that goes through molecular
weight determination with the OSMOMAT 070. Select a solvent from the solvent menu (right dropdown arrow) or create a new solvent (2.2.2 Page 16) by clicking your right mouse button on the righthand button and selecting New solvent. You will also need to enter the desired measurement
temperature (cell set temperature) and measuring time (sampling time). The serial numbers of the
probes should also be noted, because they are saved in conjunction with the cell constant. If you
accept the parameter page without making any changes, the saved cell constant is used for
measurement and you should check the Do Calibration box to perform a calibration. If a parameter is
changed, the Do Calibration box is automatically checked and you can start calibration by clicking the
Calibration button.
4.1.1.1
Cell temperature
Please bear the following points in mind when adjusting the cell temperature:
The temperature can be adjusted from 15-130°C in one-degree stages. The lower limit of the cell
temperature should be at least 5°C above room temperature. The maximum working temperature is
130°C.
30
User Guide OSMOMAT 070 Version 1.1
User Guide OSMOMAT 070 Version 1.0
31
The upper limit must be at least 5°C below the boiling temperature of the solvent. If the correct boiling
temperature for the solvent is entered, the software will only allow temperatures up to 5°C below the
boiling point.
The optimal temperature range for vapor pressure osmometry is 37-45°C if the selected solvent allows
this. Temperature selection depends on the type of solvent and the substance to be measured. A
higher temperature normally results in higher measurement effects and faster adjustment times. But a
higher temperature may also result in decomposition of the solvent or substance, which leads to
longer adjustment times and inaccurate measurement results. Temperature control begins
immediately after a calibration or measurement has been started. The unit begins to heat up and the
Heating LED on the front panel of the measurement cell changes color from green to red (Figure 1-1).
Depending on the temperature chosen, it takes about 5-30 minutes for the measurement temperature
to be reached and another 10-30 minutes before a stable reading appears.
4.1.1.2
Determining the measuring time (sampling time)
The sampling time is the time required to reach the baseline again after a temperature error caused by
rinsing. The existing reading is saved after the sampling time has expired. A bridge balance may also
be carried out automatically when the baseline is rinsed. The sampling time is an empirically
determined value. The empirical value for toluene is 4 minutes for a measurement temperature of
45°C. If there are no experiences with other solvents, the sampling time should be set to about 10
minutes and the adjustment characteristics observed on the screen. After the measurement has
started, the sampling time proceeds in the form of a countdown. If a stable baseline has appeared,
you can terminate the countdown by pressing the F2 key or clicking the “User Interrupt” button. The
adjustment time can be read on the X axis and entered as a new sampling time.
4.1.2 Creating the solvent
If you are not using a solvent from the list, you can create a new solvent by clicking on the top right
button with your right mouse button and entering the required parameters in the screen form.
User Guide OSMOMAT 070 Version 1.0
31
32
User Guide OSMOMAT 070 Version 1.1
Figure 4-2: Example: Creating the solvent
4.1.3 Preparing the syringes
Fill two syringes with solvent and up to four syringes with the prepared solutions. The syringes must
be clean and dry and should be filled without air bubbles. Insert the two syringes with the solvent in
Positions “0” and “0” (Figure 1-5).
Place the four syringes with solutions in Positions 1-4, starting with the solution that has the lowest
concentration.
4.1.4 Rinsing the probes
Dropwise addition and rinsing of solvents and solutions must be performed very conscientiously and
within the same timeframe.
Before every rinsing process, press the “Light” key on the front panel of the device to switch on the
interior lighting for about 20 seconds and observe the dropwise addition through the mirror. Because
measurement effects are measured with a temperature resolution of about 1x10E-5°C, any
temperature errors should be reduced to a minimum. For a reproducible measurement, the size of the
drop around the end of the probe is extremely important. To generate an optimal reproducible drop
size and efficiently rinse the measuring probe, you should proceed as follows.
During rinsing, press the syringe down securely so that the end of the needle is above the probe coil.
Carefully press down the plunger and turn it slightly at the same time to apply the liquid to the probe
coil. Rinse the temperature sensor and moisten it with liquid. After two or three drops have dripped off,
stop the inflow for a moment while a drop is falling. The afterflow of the liquid causes a medium-sized
32
User Guide OSMOMAT 070 Version 1.1
User Guide OSMOMAT 070 Version 1.0
33
drop to remain suspended. This drop surrounds the temperature sensor. Carefully let go of the syringe
and return it to its original position.
The homogeneity of the drop size is critical for the measurement’s reproducibility.
Figure 4-3: Rinsing the probes
Always follow the same procedure when carrying out a complete rinsing process.
Firstly, rinse the right measuring probe with two or three drops, then the left reference probe with one
drop and the right measuring probe again with two or three drops.
After applying the drops, click the Start button to start the sampling time.
4.1.5 Starting calibration
After you have entered all parameters for the solvent and clicked OK to confirm your entries, start the
calibration measurement by clicking the Calibrate button.
In the next dialog window, you will be prompted to enter the concentration of the solutions for your
calibration standard. Enter the known molal concentration in mMol/kg.
User Guide OSMOMAT 070 Version 1.0
33
34
User Guide OSMOMAT 070 Version 1.1
Figure 4-4: Example: Calibration and entering concentrations
Begin calibration by clicking Start.
Rinse the baseline first, followed by the individual solutions. Don’t start rinsing the solutions until the
baseline is sufficiently stable.
Figure 4-5: Example: Calibration: rinsing the baseline
34
User Guide OSMOMAT 070 Version 1.1
35
User Guide OSMOMAT 070 Version 1.0
nd
Figure 4-6: Calibration: measuring solutions. Example: 2
solution
The first reading is taken after the sampling time has run its course. After another dropwise addition
and when the sampling time has run its course, a second reading is saved. Repeat the rinsing process
until a reproducible measurement has appeared. This normally takes three or four rinsings. Up to
eight, but at least three solutions are thus measured in a graduated concentration. Only rinse the
baseline again after rinsing the final solution.
Figure 4-7: Example: Finished calibration
User Guide OSMOMAT 070 Version 1.0
35
36
User Guide OSMOMAT 070 Version 1.1
4.1.6 Determining the cell constants
After you have rinsed the baseline again, the calibration is terminated. Click Finish to access the
Evaluation Dialog. The result of a calibration measurement is a cell constant that indicates how large
-3
the measurement effect is if a solution was measured with a 1x10
Mol/kg concentration. At least
three solutions with an increasing osmolal concentration must be measured to determine the
molecular weights of polymer substances. Because substances with an increasing concentration more
frequently exhibit less than ideal behavior, the measurement effect is not proportional to the
concentration. For this reason, the osmolal concentrations of calibration solutions should be in a
narrow range and should match the feasible osmolal concentration of the substance to be measured
as closely as possible.
The measurement results are calculated with a special evaluation method to eliminate the nonlinear
effect. This evaluation method opposes the concentration/measuring effect quotient to the particular
concentration. If the measurement effect behaves in proportion to the concentration, a horizontal curve
is generated. With polymers, a curve with a negative or positive increase is displayed. The curve is
extrapolated up to a concentration of zero and thus eliminates the effect of the concentration. The
software performs a linear regression. The intercept determined from the regression calculation is the
cell constant. A graph of the calibration and readings is displayed at the end of the calibration
measurement. The measured values can be seen here and you can click to suppress individual values
if you wish. These values are not used for calculation. Use the Lin. Regression button to toggle
between the graph and measurement values. The cell constant is accepted after the calibration has
been saved and is now available for the subsequent measurements.
At the start and finish of the measurement, the program calculates the drift from the baseline values
and corrects it. You can also switch off this drift compensation if you don’t want it.
It is important to perform the measurement under the same conditions (temperature, probes, sampling
time, solvent) as the calibration.
36
User Guide OSMOMAT 070 Version 1.1
User Guide OSMOMAT 070 Version 1.0
37
Figure 4-8: Example: Linear regression
4.2 Solution measurement
4.2.1 Entering parameters
You can start a measurement after calibrating the measurement system. Click on File, then New
Measurement, and then on 070 Molecular Weight Measurement to access the Parameter Dialog.
Figure 4-9: Example: Entering parameters for measurement
User Guide OSMOMAT 070 Version 1.0
37
38
User Guide OSMOMAT 070 Version 1.1
Enter the parameters for measurement in the Parameters screen. The values of the last calibration are
preallocated. If you change a parameter, you will see a warning message that the device is not
calibrated with these parameters and that it is not advisable to perform a measurement under these
conditions.
If all parameters on the screen correspond to the test setup, you can start the measurement by
clicking Measure.
The screen for entering a sample net weight appears. Enter the sample name, a sample number and
the net weights of the different sample concentrations. Net weights should entered in the form of
grams of the sample per kilograms of the solvent. Chapter 3.1.6 explains how to make a sample for
molecular weight determination.
Figure 4-10: Example: Entering sample net weights
4.2.2 Performing the measurement
A requirement for determining molecular weights is that the measurement system should be prepared
for a measurement and a cell constant determined by calibration. It is important to perform the
measurement under the same conditions (temperature, probe numbering and A/B positioning,
sampling time, solvent) as the calibration.
The substances to be measured must be fully soluble and should not chemically interact with the
solvent.
When making solutions, you should set the osmolal concentrations as high as possible. At least three
different concentrations that are 2 and 3 times greater than the lowest concentration must be
measured. Perform the measurement in the same way as the calibration.
38
User Guide OSMOMAT 070 Version 1.1
User Guide OSMOMAT 070 Version 1.0
39
After clicking the Start button, begin by rinsing the baseline, just as you would when performing a
calibration. If the baseline is stable (siehe Figure 4-5 / Figure 4-6), start measuring the individual
solutions. Then rinse the baseline again. The reading is taken automatically each time after the
sampling time has run its course.
You can accept the reading prematurely by clicking User Interrupt (F2). This interrupt key is helpful if
you discover after the dropwise addition that the wrong syringe has been used. The reading thus
accepted can later be suppressed when the measurement is being evaluated and you can repeat a
rinse with the right syringe.
Figure 4-11: Example: Measuring the baseline and rinsing it again
To end the measurement, click Finish.
4.2.3 Calculating the molecular weight
Use the same procedure to evaluate the sample measurement that you did with the calibration. The
quotients from the measurement effects to the corresponding concentrations of the measured
solutions are compared with the relevant concentrations. Extrapolate up to a concentration of zero to
get the measurement result while eliminating the concentration effect.
User Guide OSMOMAT 070 Version 1.0
39
40
User Guide OSMOMAT 070 Version 1.1
Figure 4-12: Example: Result: Molecular weight
Linear regression is performed automatically. The intercept is the result that indicates how great the
measurement effect is for a substance concentration of 1g/kg of solvent.
Figure 4-13: Example: Linear regression
To calculate the molecular weight, the results of the calibration measurement [(measurement
effect)/(mol/kg)] are compared with the result of the sample measurement [(measurement
effect)/(g/kg)]. The final result is the number average of the molecular weight Mn determined by the
program.
40
User Guide OSMOMAT 070 Version 1.1
41
User Guide OSMOMAT 070 Version 1.0
Measurement effect (mol/kg_
Mn = ---------------------------------- =
Measurement effect/ (g/kg )
(g)
------( kg )
After finishing the measurement, save it by clicking the Save As button in the My Documents folder.
You can open it again at any time by selecting Open from the File menu.
5 Determining the total osmolality of aqueous
solutions
5.1 Preparing the measurement system
The OSMOMAT 070 is suitable for directly determining the total osmolality of aqueous solutions. The
osmolal concentration of all particles in the solution is recorded. These can be electrolytes or even
water-soluble polymers. If the electrolytes are partially dissociated, the measurement result is
determined by the sum of all the measured particles (ions and molecules).
The vapor pressure osmometer is prepared as described in Chapter 3.1. Insert new dry vapor wicks
into the beaker and fill it with 20-40 ml of water. The vapor wicks must be completely saturated with
water. Insert the cell head as described. We recommend that you carefully clean the ends of the
measuring probes beforehand to make the surface hydrophilic. This enables better wetting of the
probes with the drops of water and allows a homogeneous drop to form. Insert the syringes with
User Guide OSMOMAT 070 Version 1.0
41
42
User Guide OSMOMAT 070 Version 1.1
distilled water into Positions 0-0 to rinse the baseline. You can place the calibration standard and
samples to be measured in Positions 1-4 first.
5.2 Calibrating the measurement system for determining
osmolality
Start osmolality measurement by clicking File and then selecting New Measurement-070 followed by
Osmolality Measurement.
Figure 5-1: Osmolality measurement Start screen
In the Start screen, you will be prompted to enter the measurement temperature, sampling time and
probe serial numbers. A measurement temperature of 37°C is recommended for measuring the
osmolality of aqueous solutions. The sampling time is determined in the same manner as described in
Chapter 4.1.1.2. You can enter comments.
If a calibration has already been carried out previously, the cell constant is entered and it is not
absolutely essential to perform another calibration. You can start the measurement immediately.
However, it is advisable to check the calibration occasionally. The cell constant is the result of the
calibration and indicate the number of digits that correspond to a mOsmol. After you have entered the
parameters, quit the screen dialog by clicking Next.
42
User Guide OSMOMAT 070 Version 1.1
User Guide OSMOMAT 070 Version 1.0
43
Figure 5-2: Entering the used calibration standard
Enter the concentration of the calibration standard in the next screen. The osmolality indication in
mOsmol/kg is required to calculate the cell constants and it is absolutely essential that you enter this.
After you have clicked Start to confirm, you will be prompted to rinse the baseline.
Figure 5-3: Rinsing the baseline
User Guide OSMOMAT 070 Version 1.0
43
44
User Guide OSMOMAT 070 Version 1.1
You can start calibration after the baseline is stable. Different calibration standards are available. See
Appendix Just as with molecular weight determination, two drops of the calibration standard can be
added to the right probe and a drop of water to the left probe, followed by another two drops of the
calibration standard to the right probe. At the end of the sampling time, a reading is generated that is
immediately converted into a cell constant. The cell constant indicates the number of digits
corresponding to 1 mOsmol. Because the measurement effects behave proportionally to the osmolal
concentration, a one-point calibration is adequate. You should check the calibration several times and
correct it if necessary until a reproducible measurement value has appeared.
Figure 5-4: Calibration with a calibration standard
5.3 Measurement of osmolality
After the cell constant has been determined and the system calibrated with it, the samples can quickly
be measured sequentially. You should fill four syringes with the sample solutions and insert them in
Positions 1-4. Readjust the baseline by rinsing it 2-5 minutes after inserting the syringes, then
measure the samples again. The measured values are displayed on the screen. Examples are shown
in the following illustrations Figure 5-5 to Figure 5-7.
44
User Guide OSMOMAT 070 Version 1.1
User Guide OSMOMAT 070 Version 1.0
45
Figure 5-5: Example: Sample measurement 290 mOsmol
Figure 5-6: Example: Sample measurement 850 mOsmol
User Guide OSMOMAT 070 Version 1.0
45
46
User Guide OSMOMAT 070 Version 1.1
Figure 5-7: Example: Sample measurement 2000 mOsmol
46
User Guide OSMOMAT 070 Version 1.1
User Guide OSMOMAT 070 Version 1.0
47
5.4 Evaluating the measurement results
A total of 8 samples can be measured and their measurement results saved.
Clicking Finish takes you to an overview of the 8 last measured samples. The measurement values
and mean are displayed. Save the measurement as a file by clicking Stop and Save.
User Guide OSMOMAT 070 Version 1.0
47
48
User Guide OSMOMAT 070 Version 1.1
6 APPENDIX
6.1 Suitable Solvents for Vapor Pressure Osmometry
Solvent
Boiling
Point (°C)
Recommended
Working Temperature
(°C)
Approximate Values for
Measurement Effects *
(Digits)
1,3,5-Trimethylbenzene
90-130
164.6
(Mesitylene)
Acetone
56.2
37- 45
Acetonitrile
81.6
37- 60
24-30
Ethanol
78.32
45- 60
24-30
Ethylacetate
77.1
37- 60
32-40
Ethylene chloride
83.6
25- 60
Ethyl bromide
38.3
25
Ethylene bromide
131.6
60- 90
Benzene
80.2
25- 60
48-60
Bromobenzene
156.2
60-130
Bromoform
149.5
37- 90
Butanone; (2)-Methyl ethyl ketone
79.6
37- 60
Butyl acetate
126.1
45- 90
Chlorobenzene
131.7
60- 90
Chloroform
61.2
25- 45
56-70
Cyclohexane
80.8
37- 60Chl
60-75
Diethyl ether
34.6
25- 30
40-50
Dimethyl sulfoxide
1 00
60- 90
8-10
Dioxane
101
60
Furane
32
25
48-60
Methanol
64.7
45
20-25
Methylene bromide
96.5
37- 60
Methyl isobutyl ketone
116.9
45- 60
Methylene chloride
40.6
25
56-70
N,N-dimethyl formamide
155
90-120
36-45
n-heptane
98.34
37- 60
n-hexane
68.8
37- 60
n-propanol
97.2
45- 60
28-35
o-dichlorobenzene
179.5
90-130
56-70
o-xylene
143
90
Pyridine
115.5
60- 90
36-45
Carbon disulfide
46.25
25- 37
60-75
Tert. butanol
82.55
45- 60
Carbon tetrachloride
76.7
25- 45
48-60
Toluene
110.8
37- 90
40-50
Trichloroethylene
87
37- 60
48-60
Water
100.
37- 60
8 -1 0
* Measurement effect for a solution with a concentration of 1x10⁻³ mol/kg The size of the
measurement effects depends a great deal on the measurement temperature. Higher measurement
temperatures cause higher measurement effects.
48
User Guide OSMOMAT 070 Version 1.1
User Guide OSMOMAT 070 Version 1.0
49
6.2 List of Spare Parts and Expendables
00.9.0100
00.9.0101
00.9.0107
00.9.0109
00.9.0111
Package with 10 fine-wire fuses, 0.1A slow
Package with 10 fine-wire fuses, 0.2A slow
Package with 10 fine-wire fuses, 2.5A slow
Package with 10 fine-wire fuses, 4.0A slow
Package with 10 fine-wire fuses for cell PC board, 6.3A fast
20.9.0100
20.9.0120
20.9.0130
20.9.0190
Power cord, 2 meters
Connector cable for recorder
Mains connection cable for cell and control unit SA or B
Data cable for connecting the cell and control unit SA (from 06/91)
70.2.6027
70.6.0040
70.9.0060
70.9.0100
70.9.0110
70.9.0130
70.3.0010
70.3.0020
70.3.0030
Lip seal for cell head
Resistor plug for balancing the cell
Handle for lifting the cell
Allen wrench for securing measuring probes, 1.5 mm
Probe retaining screw, complete
Cover screw
Measuring probe Type 100 for 37-105°C
Measuring probe Type 270 for 60-105°C
Measuring probe Type 30 for 0-70°C
Measuring probes are used in pairs in the cell unit. When making further orders for individual measuring probes,
please indicate the number on the nameplate of the remaining measuring probe.
70.9.0010
70.9.0020
70.9.0030
70.9.0040
Glass syringes with glass plungers (exchangeable), complete with Luer cone
6 needles for glass syringes with springs
25 vapor wicks
Special cylindrical beaker for cell unit
30.9.0020
30.9.0290
30.9.0850
30.9.2000
50 ampoules calibration standard 300 mOsmol/kg
10 ampoules reference solution OSMOREF 290 mOsmol/kg
10 ampoules calibration standard 850 mOsmol/kg
10 ampoules calibration standard 2000 mOsmol/kg
User Guide OSMOMAT 070 Version 1.0
49
50
User Guide OSMOMAT 070 Version 1.1
6.3 Specifications
Molecular weight range:
50-50,000 Daltons in organic solvents
50-5,000 Daltons in water
Minimum detectable concentration:
-5
3.3 x 10 mol/kg in toluene
-4
1.7 x 10 mol/kg in water
Concentration range
of solutions to be measured:
Specific vapor pressure of the
substance to be measured
Sample volume:
0.1-1.5 Osmol/kg in water
-3
-2
1x10 - 3x 10 Osmol/kg in organic solvents
< 0.1% of the used solvent
Solvent quantity:
Approx. 1 ml per solution, at least three solutions in
graduated concentration
5°C above room temperature up to 130°C in 1°C
stages
At least 20-40 ml
Analog output:
1 mV/digit, 10V max.
Calibration substance for molecular weight
determination:
Benzyl/benzoic acid/naphthalene
Temperature range:
Measuring range for osmolality determination: Up to 3000 mOsmol with control unit SA
Up to 1500 mOsmol with control unit B
Calibration solution for osmolality determination: Sodium chloride
50
User Guide OSMOMAT 070 Version 1.1