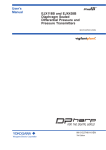
Download User`s Manual FN510 Field Wireless Multi
Transcript
User’s Manual FN510 Field Wireless Multi-Function Module IM 01W03E01-01EN IM 01W03E01-01EN 1st Edition i FN510 Field Wireless Multi-Function Module IM 01W03E01-01EN 1st Edition Contents 1. 2. Introduction................................................................................................ 1-1 1.1 Safe Use of This Product.................................................................................. 1-2 1.2 Warranty.............................................................................................................. 1-2 Notes on Handling..................................................................................... 2-1 2.1 Check the Model Name and Configuration..................................................... 2-1 2.2 Transport............................................................................................................. 2-1 2.3 Storage................................................................................................................ 2-2 2.4 Selecting the Installation Location.................................................................. 2-2 2.5 Use of a Transceiver.......................................................................................... 2-3 3. Component Names................................................................................... 3-1 4. Installation.................................................................................................. 4-1 5. 4.1 Precautions......................................................................................................... 4-1 4.2 Mounting............................................................................................................. 4-1 4.2.1 Installation of FN110........................................................................... 4-1 4.2.2 Mounting of FN510............................................................................. 4-2 Wiring.......................................................................................................... 5-1 5.1 Notes on Wiring.................................................................................................. 5-1 5.2 Cable Selection.................................................................................................. 5-1 5.3 Installation and Connection of FN110............................................................. 5-1 5.4 5.3.1 Installation of FN110........................................................................... 5-1 5.3.2 Connection of FN110.......................................................................... 5-3 Connecting Input Signal Cable......................................................................... 5-3 5.4.1 5.5 6. Connecting Input Terminal and Grounding Terminal.......................... 5-3 Grounding........................................................................................................... 5-6 Operation.................................................................................................... 6-1 6.1 Preparation for Starting Operation.................................................................. 6-1 6.2 Starting Operation............................................................................................. 6-2 6.3 Connecting to the Field Wireless Network...................................................... 6-2 6.4 Display Contents of the Integral Indicator...................................................... 6-4 6.5 Shutting Down.................................................................................................... 6-4 1st Edition: Dec. 2014(KP) All Rights Reserved, Copyright © 2004, Yokogawa Electric Corporation IM 01W03E01-01EN ii 7. Setting Parameters.................................................................................... 7-1 7.1 Preparation for Parameter Setting................................................................... 7-1 7.2 Preparing Software............................................................................................ 7-1 7.3 7.4 8. 7.2.1 Softwares for the Field Wireless Configuration Tool and the Device Configuration Tool............................................................................... 7-1 7.2.2 Software Download............................................................................. 7-1 Setting Parameters............................................................................................ 7-2 7.3.1 Parameter Usage and Selection......................................................... 7-2 7.3.2 Function Block and Menu Tree........................................................... 7-3 7.3.3 Parameters for Wireless Communication........................................... 7-7 7.3.4 Tag and Device Information................................................................ 7-7 7.3.5 Setup the Integral Indicator................................................................. 7-7 7.3.6 Sensor Type........................................................................................ 7-7 7.3.7 Parameters for Function..................................................................... 7-8 7.3.8 Write Protect....................................................................................... 7-8 7.3.9 Switching to the Deep Sleep Mode..................................................... 7-8 7.3.10 Switching to the Silence Mode............................................................ 7-9 Self-Diagnostics............................................................................................... 7-10 7.4.1 Identify Problems by Using the Device Configuration Tool............... 7-10 7.4.2 Alert Report....................................................................................... 7-10 7.4.3 Checking with Integral Indicator........................................................ 7-11 Maintenance............................................................................................... 8-1 8.1 General................................................................................................................ 8-1 8.2 Recommended Products List........................................................................... 8-1 8.3 Replacing the Battery Pack.............................................................................. 8-1 8.4 Replacing the Batteries..................................................................................... 8-2 8.5 Handling Batteries............................................................................................. 8-2 8.6 Switching LCD Display...................................................................................... 8-3 8.7 Replacing the FN110.......................................................................................... 8-4 8.8 Replacing the FN510.......................................................................................... 8-4 8.9 Replacing the Connected Device..................................................................... 8-4 8.10 Troubleshooting................................................................................................. 8-4 8.10.1 Basic Troubleshooting Flow................................................................ 8-5 8.10.2 Example of Troubleshooting Flow...................................................... 8-5 8.10.3 Errors and Countermeasures............................................................. 8-6 9. Parameter Summary................................................................................. 9-1 10. General Specifications........................................................................... 10-1 10.1 Standard Specifications.................................................................................. 10-1 10.2 Model and Suffix Codes.................................................................................. 10-3 10.3 Optional Specification (For Explosion Protected Type).............................. 10-3 10.4 Optional Specifications................................................................................... 10-3 10.5 Optional Accessories...................................................................................... 10-3 IM 01W03E01-01EN iii 10.6 Dimensions....................................................................................................... 10-4 10.7 LCD Display Character List............................................................................ 10-5 Revision Information................................................................................................i IM 01W03E01-01EN 1. Introduction This manual describes how to use the FN510 Field Wireless Multi-Function Module (hereafter simply referred to as FN510). FN510 was precisely calibrated at the factory before shipment. To ensure both safety and efficiency, please read this manual carefully before you operate this product. FN510 works by utilizing the FN110 Field Wireless Communication Module (hereafter simply referred to as FN110). Please attach FN110 before use. Table1.1 summarizes the related document list of this manual. Table 1.1 1-1 <1. Introduction> Related Document List Title FieldMate Versatile Device Management Wizard User’s Manual YFGW710 Field Wireless Integrated Gateway User’s Manual YFGW410 Field Wireless Management Station User’s Manual FN110 Field Wireless Communication Module General Specifications Document No. IM 01R01A01-01E IM 01W01F01-01EN IM 01W02D01-01EN GS 01W03B01-01EN Regarding This Manual • This manual should be provided to the end user. • The contents of this manual are subject to change without prior notice. • All rights reserved. No part of this manual may be reproduced in any form without Yokogawa’s written permission. • Yokogawa makes no warranty of any kind with regard to this manual, including, but not limited to, implied warranty of merchantability and fitness for a particular purpose. • If any question arises or errors are found, or if any information is missing from this manual, please inform the nearest Yokogawa sales office. • Please note that changes in the specifications, construction, or component parts of this product may not immediately be reflected in this manual at the time of change, provided that postponement of revisions will not cause difficulty to the user from a functional or performance standpoint. • Yokogawa assumes no responsibilities for this product except as stated in the warranty. • If the customer or any third party is harmed by the use of this product, Yokogawa assumes no responsibility for any such harm owing to any defects in the product which were not predictable, or for any indirect damages. • The following safety symbols are used in this manual: WARNING Indicates a potentially hazardous situation which, if not avoided, could result in death or serious injury. CAUTION Indicates a potentially hazardous situation which, if not avoided, may result in minor or moderate injury or physical damage. It may also be used to alert against unsafe practices. IMPORTANT Indicates that operating the hardware or software in this manner may damage it or lead to system failure. NOTE Draws attention to information essential for understanding the operation and features. • The specifications covered by this manual are limited to those for the standard type under the specified model number break-down and do not cover custom-made products. IM 01W03E01-01EN 1.1 Safe Use of This Product For the safety of the operator and to protect this product and the system, please be sure to follow this manual’s safety instructions when handling this product. If these instructions are not heeded, the protection provided by this product may be impaired. In this case, Yokogawa cannot guarantee that this product can be safely operated. Please pay special attention to the following points: (a) Installation • This product may only be installed by an engineer or technician who has an expert knowledge of this product. Operators are not allowed to carry out installation unless they meet this condition. • With high process temperatures, care must be taken not to burn yourself by touching this product or its casing. • All installation shall comply with local installation requirements and the local electrical code. (b) Wiring • This product must be installed by an engineer or technician who has an expert knowledge of this product. Operators are not permitted to carry out wiring unless they meet this condition. (c) Maintenance • Please carry out only the maintenance procedures described in this manual. If you require further assistance, please contact the nearest Yokogawa office. • Care should be taken to prevent the build up of dust or other materials on the display glass and the nameplate. To clean these surfaces, use a soft, dry cloth. (d) Modification • Yokogawa will not be liable for malfunctions or damage resulting from any modification made to this product by the customer. 1.2 Warranty • The warranty shall cover the period noted on the quotation presented to the purchaser at the time of purchase. Problems occurring during the warranty period shall basically be repaired free of change. 1-2 <1. Introduction> • If any problems are experienced with this product, the customer should contact the Yokogawa representative from which this product was purchased or the nearest Yokogawa office. • If a problem arises with this product, please inform us of the nature of the problem and the circumstances under which it developed, including the model specification and serial number. Any diagrams, data and other information you can include in your communication will also be helpful. • The party responsible for the cost of fixing the problem shall be determined by Yokogawa following an investigation conducted by Yokogawa. The purchaser shall bear the responsibility for repair costs, even during the warranty period, if the malfunction is due to: - Improper and/or inadequate maintenance by the purchaser. - Malfunction or damage due to a failure to handle, use, or store this product in accordance with the design specifications. - Use of the product in question in a location not conforming to the standards specified by Yokogawa, or due to improper maintenance of the installation location. - Failure or damage due to modification or repair by any party except Yokogawa or an approved representative of Yokogawa. - Malfunction or damage from improper relocation of the product in question after delivery. - Reason of force majeure such as fires, earthquakes, storms/floods, thunder/ lightening, or other natural disasters, or disturbances, riots, warfare, or radioactive contamination. Trademarks In this document, trademarks or registered trademarks are not marked with “™” or “®”. Product names and company names in this document are trademarks or registered trademarks of the respective companies. Authorized Representative in the EEA The Authorized Representative for this product in the EEA is: Yokogawa Europe B.V. Euroweg 2, 3825 HD Amersfoort, THE NETHERLANDS. IM 01W03E01-01EN 2-1 <2. Notes on Handling> 2. Notes on Handling The FN510 is fully factory-tested before shipment. When the FN510 delivered, check the appearance for damage, and also check that the mounting parts shown in Figure 2.1 are included with your shipment. If “No Mounting Bracket” or “Horizontal connection” is indicated, no mounting bracket is included. Bracket fastening bolt Bundled Items • User’s Manual (IM01W03E01-01EN) • FN510 mounting hardware When specified mounting bracket. • Protection cap (optional specifications) • Wired tag plate(optional specifications) 2.1 Check the Model Name and Configuration FN510 fastening bolt FN510 mounting bracket The model name and configuration are indicated on the nameplate. Verify that the configuration indicated in the “Model and Suffix Code” in subsection 10.2 is in compliance with the specifications written on the order sheet. Manual number omitting the language code at the end is printed on the nameplate. U-bolt nut F0202.ai Figure 2.2 Bracket fastening nut F0201.ai Figure 2.1 FN510 Mounting Hardware Table 2.1 FN510 Mounting Hardware Item FN510 mounting bracket FN510 fastening bolt Bracket fastening bolt Bracket fastenig nut Spring washer U-bolt U-bolt nut 2.2 Transport U-bolt Spring washer Nameplate To prevent damage while in transit, leave the FN510 in the original shipping container until it reaches the installation site. For transportation of batteries, refer to subsection 8.5 “Handling Batteries”. Qty 1 4 2 2 2 1 2 IM 01W03E01-01EN 2.3 Storage When storing this product, observe the following precautions. 1. Chose a storage location that satisfies the following requirements. • A location that is not exposed to rain or water. • A location subject to a minimum of vibration or impact. • The following temperature and humidity range is recommended. Ordinary temperature and humidity (25°C, 65%) are preferable. Temperature: -40 to 85°C Humidity : 0 to 100% RH (no condensation) 2. If at all possible, store the FN510 in factoryshipped condition, that is, in the original shipping container. 3. Preferably remove the batteries for storage. For maximum battery life, the storage temperature should not exceed 30°C. 2-2 <2. Notes on Handling> 2.4 Selecting the Installation Location Although this product is designed to operate in a harsh environment, to maintain stability and accuracy, the following is recommended. Wireless Communication NOTE The installation location of this product must meet the following conditions: • Install this product to be perpendicular to the ground. • When using a remote antenna cable, regardless of the installing direction of the FN510, install the FN110 to be perpendicular to the ground. • Install the FN110 at least 1.5 m above the ground or floor. When storing FN510 with a battery pack, it is recommended to put the FN510 in Deep Sleep mode to conserve the batteries. For details on how to switch to Deep Sleep mode, refer to subsection 7.3.9 “Switching to the Deep Sleep Mode”. 1.5m or more NOTE F0203.ai • Ensure that there are no obstacles such as walls or pipes within a 30 cm radius of the FN110. • Confirm that each field wireless equipment can see the antenna of other devices which locate within its own communication range. IM 01W03E01-01EN <2. Notes on Handling> 2-3 Ambient Temperature It is preferable to not to expose the instrument to extreme temperatures or temperature fluctuations. If FN510 is exposed to radiation heat a thermal protection system or appropriate ventilation is recommended. Environmental Requirements Do not allow FN510 to be installed in a location that is exposed to corrosive atmospheric conditions. When using this product in a corrosive environment, ensure the location is well ventilated. The unit and its wiring should be protected from exposure to rainwater. Impact and Vibration It is recommended that the FN510 be installed in a location that is subject to a minimum amount of impact and vibration. 2.5 Use of a Transceiver IMPORTANT Although FN510 has been designed to resist high frequency electrical noise, if a radio transceiver is used near the FN510 or its external wiring, the FN510 may be affected by high frequency noise pickup. To test this, start out from a distance of several meters and slowly approach the FN510 with the transceiver while observing the measurement loop for noise effects. Thereafter use the transceiver outside the range where the noise effects were first observed. IM 01W03E01-01EN 3-1 <3. Component Names> 3. Component Names Grounding teminal FN110 teminal 3 Integral indicator 2 5 Pin 1 2 3 1 4 4 5 Magnet switch 1 Signal Frame Ground * Signal Ground Power Supply Transmit/Receive Data positive Transmit/Receive Data negative * Wired to the grounding terminal inside the FN510 housing. Magnet switch 2 F0301.ai Battery terminal Grounding terminal Slide Switch Input terminal Hardware Write Protection Switch Initialization F0302.ai Hardware Write Protection Switch (WR) Write Protection Switch Position *1 Write Protection *1: *2: F0303.ai No (Write enabled) Terminal F0304.ai Yes *2 (Write disabled) Initialization switch is not used. Set to D side (disabled) always. When the switch is D side (write protection setting), provisioning is acceptable. For details of provisioning, refer to subsection 6.3 “Connecting to the Field Wireless Network”. AI Signal DIDO PULSE 1 No Connection Input Signal1 + Input Signal + 2 No Connection Input Signal1 - Input Signal - 3 No Connection Input Signal2 + No Connection 4 No Connection Input Signal2 - No Connection 5 Input Signal + Output Signal + No Connection 6 Input Signal - Output Signal - No Connection Frame Ground IM 01W03E01-01EN 4. <4. Installation> 4-1 Installation 4.1 Precautions 4.2 Mounting • Before installing FN510, read the cautionary notes in subsection 2.4 “Selecting the Installation Location”. FN510 is installed on a 50A (2-inch) pipe with mounting bracket. Refer to subsection 4.2.2 “Mounting of FN510” for details. For detail on how to install FN110, refer to subsection 4.2.1 “Installation of FN110”. For using remote antenna cable, refer to subsection 5.3 “Installation and Connection of FN110”. • For additional information on the ambient conditions allowed at the installation location, refer to subsection 10.1 “Standard Specifications”. IMPORTANT Connector Protection The FN110 terminal is covered with a cap during shipping. Keep the cap attached until connecting the FN110 or remote antenna cable to protect the inside connection part. The unscrewed cap should be stored in order to replace it immediately after the FN110 or remote antenna cable is removed. If there is a possibility that get wet with water, order FN510 with optional specification for a protection cap. Installation Work • When performing on-site pipe fitting work that involves welding, use case to prevent the welding current to damage the FN510. • Do not use the FN510 as a foothold. 4.2.1 Installation of FN110 Install FN110 to the FN110 terminal of FN510. Before installation, remove the unscrewed cap attached to the connector and remove the battery pack from FN510. The installation procedure is as follows. 1. Check the direction of the pin, connect FN110 to FN510. 2. Tighten the lock nut to torque of 1.2 N•m. Removal is the reverse procedure of the installation. Lock nut 2 1 NOTE • Before using FN510, install FN110. For detail on how to install FN110, refer to subsection 4.2.1 “Installation of FN110”. • To connect FN510 to the field wireless network, information for connecting to the field wireless devices needs to be set beforehand. Refer to subsection 6.3 “Connecting to the Field Wireless Network”. F0401.ai Figure 4.1 Installation of FN110 and Sealing of the Connector IM 01W03E01-01EN <4. Installation> 4-2 CAUTION • To maintain a good connection between the modules, protect the connector from the corrosive atmosphere by the following treatment. 1. Clean the connection to be protected. 2. Wind the butyl rubber self-bonding tape around the connection. See the manual of the tape about the winding. 3. To protect the butyl rubber self-bonding tape from the environment such as ultraviolet rays and so on, wind vinyl tape (or a vinyl type self-bonding tape) on it. 4. When the tape is necessary, prepare appropriate tape for the installing environment. Do not cover the nameplate by the tapes. • When a remote antenna cable is used for installing FN110, refer to subsection 5.3 “Installation and Connection of FN110”. • Remove the battery pack before installing FN110. Refer to subsection 8.3 “Replacing the Battery Pack” for the battery pack removing. • When installing FN110, fix the FN110 by tightening the lock nut. Screwing by holding the FN110 housing may cause failure such as cable disconnection. The same manner should be taken when removing the FN110. 4.2.2 Mounting of FN510 Bracket fastening bolt FN510 fastening bolt FN510 mounting bracket U-bolt nut Spring washer Bracket fastening nut 2-inch pipe U-bolt Figure 4.2 F0402.ai Vertical Pipe Mounting IM 01W03E01-01EN <4. Installation> 4-3 Bracket fastening bolt FN510 fastening bolt U-bolt nut FN510 mounting bracket Spring washer Bracket fastening nut 2-inch pipe U-bolt F0403.ai Figure 4.3 Horizontal Pipe Mounting To install FN510 on a 50A (2-inch) pipe, follow the procedure below. 1) Assemble the FN510 mounting bracket. 2) Install FN510 to the mounting bracket using provided bolt (4) with a torque 1.4 N•m. 3) Install FN510 mounting bracket to the 2-inch pipe by U-bolt. IM 01W03E01-01EN 5. <5. Wiring> 5-1 Wiring 5.1 Notes on Wiring IMPORTANT • Apply a waterproofing sealant to the threads of the connection port. (It is recommended that you use non-hardening sealant made of silicon resin for waterproofing.) • Lay wiring as far away as possible from electrical noise sources such as large transformers, motors and power supplies. • Remove the wiring connection dust-caps before wiring. • To prevent electrical noise, the signal cable and the power cable must not be housed in the same conduit. NOTE • When wiring where the ambient temperature is high or low, use the cable or wire that appropriate to that place. • When the maximum operating temperature is more than 60°C, use the cable of 85°C or higher temperature rating. 5.2 Cable Selection For wiring the sensor and the FN510, use a shielded multi-core cable of AWG22 to 14. 5.3 Installation and Connection of FN110 IMPORTANT The FN110 connection terminal is covered with a cap at the time of deliverty. Keep the cap attached until connecting the FN110 or remote antenna cable to protect the inside connection part. The unscrewed cap should be stored in order to replace it immediately after the FN110 or remote antenna cable is removed. If there is a possibility that get wet with water, order FN510 with optional specification for a protection cap. 5.3.1 Installation of FN110 Location of FN110 Mount the FN110 at the proper location according to the wireless environment described in subsection 2.4 “Selecting the Installation Location”. The mounting to the pipe such as 50A (2-inch) pipe needs to secure the enough strength to endure a strong wind, vibration and so on. The FN110 must be mounted vertically. Fixing of FN110 Fix the FN110 on a 50A (2-inch) pipe with the mounting bracket provided as the remote antenna cable option. Applicable Cables Cables for industrial equipment such as; • Control cables: JIS C 3401 Use the following grounding cable. Applicable Cables Insulated cables for industrial equipment such as; • 600V polyvinyl chloride insulated wires (IV); JIS C3307 • Polyvinyl chloride insulated wires for electrical apparatus (KIV); JIS C3316 • 600V grade heat-resistant polyvinyl chloride insulated wires (HIV); JIS C3317 • Heatproof vinyl insulated wires VW-1 (UL1015/ UL1007) Wire size • Core: AWG14 to 13 (2mm2 to 2.6mm2) Termination • Use a ring tongue terminal for M4 terminals: with an insulation sleeve IM 01W03E01-01EN 5-2 <5. Wiring> FN110 holder bolt FN110 FN110 mounting bracket FN110 holder Remote antenna cable Bracket fastening bolt U-bolt nut 2-inch pipe mounting bracket Spring washer Bracket fastening nut U-bolt Figure 5.1 2-inch pipe 2-inch pipe F0501.ai Horizontal Pipe Mounting of FN110 Bracket fastening nut Spring washer U-bolt nut FN110 holder bolt FN110 mounting bracket FN110 U-bolt 2-inch pipe mounting bracket Remote antenna cable Bracket fastening bolt FN110 holder Figure 5.2 F0502.ai Vertical Pipe Mounting of FN110 To install FN110 with mounting bracket, follow the procedure below. 1) Assemble the mounting bracket and fix it on a 50A (2-inch) pipe. 2) Connect the remote antenna cable to the FN110. 3) Protect the connection as necessary. For details of the protection, refer to subsection 4.2.1 “Installation of FN110”. 4) Fix the FN110 to the mounting bracket. IM 01W03E01-01EN 5-3 <5. Wiring> 5.3.2 Connection of FN110 5.4 To install FN110 with remote antenna cable, follow the procedure below. Strip the insulated cover of the cable end. Remove the battery pack from FN510 before connecting the remote antenna cable. 1. Connect the FN110 and the FN510 with the dedicated remote antenna cable. Tighten the connector of the remote antenna cable with a torque of 1 to 1.2 N•m. The minimum bending radius should be more than 100 mm. 2. Protect the connectors of the FN110 and remote antenna cable as necessary. For details of the protection, refer to subsection 4.2.1 “Installation of FN110”. 3. Fix the remote antenna cable to an appropriate structure to protect the cable from the vibration, wind, and so on. The minimum bending radius for fixing in the state maintained for a long period should be more than 100 mm. Connecting Input Signal Cable 5.4.1 Connecting Input Terminal and Grounding Terminal Vertical Connection After stripping the insulated cover, keep a length of about 50mm for input signal cables, and about 65mm for grounding cable. Grounding terminal Input terminal F0504.ai Figure 5.4 F0503.ai Figure 5.3 Connection example when using DIDO Function The cable gland is not included. Prepare a cable gland with a flat gasket matching the electrical connection. When M20 female is selected for vertical connection, tighten the cable gland with a torque of 2 N•m. When G 1/2 female or 1/2 NPT female is selected for vertical connection, fix the hexagonal shape part by tool and tighten the cable gland as shown in Figure 5.5. Sealing of the Remote Antenna Cable CAUTION • Use the dedicated remote antenna cable provided by Yokogawa as accessories for FN110. • The remote antenna cable and other cables should not be bundled together. • Remove the battery pack before installing FN110. Refer to subsection 8.3 “Replacing the Battery Pack” for the battery pack removing. F0505.ai Figure 5.5 Tightening the Cable Gland IM 01W03E01-01EN 5-4 <5. Wiring> IMPORTANT When using a cable gland, apply a water proofing sealant to the threads of the cable gland. (It is recommended that you use nonhardening sealant made of silicon resin for waterproofing.) Input Terminal Input terminal is a spring terminal. When using a solid conductor cable or with sleeve, connect the cable to the input terminal. When using a standard conductor, push down the top of a cable inlet and insert the cable. To unplug the cable, push down the top of a cable inlet and unplug the cable. Wiring to Input Terminals:1 (with sleeve) The sleeve can prevent cable leads from untwist when you connect the cable. Select a sleeve to match the cable size. If the length of cable leads does not match the length of sleeve (l2), strip the cable to the correct length. Strip the cable for a length so that the core wire slightly extends from the metal tube of the sleeve. If this causes the length of the metal tube of the sleeve to be slightly shorter than the stripping length, this is no problem. The wiring cables and applicable sleeves are listed in the table below. Use the same manufacturer for sleeves and tools. Example of tool: Phoenix Contact’s CRIMPFOX6 For details on sleeves and crimp tools, contact to Phoenix Contact Inc. l1 d2 s2 s1 d1 l2 F0507.ai Figure 5.7 Sleeve Length Wiring to Input Terminals:2 (without sleeve) F0506.ai Figure 5.6 Connecting to the Input Terminal • When using a solid conductor cable, strip the insulated cover and connect it. Strip the insulated cover for 8mm. • When using a stranded conductor, strip the insulated cover and twist and connect it. Strip the insulated cover for 8mm. Never solder the stranded conductor when connecting cables. Be careful not to cause the loosely stranded conductor to come in contact with adjacent terminals or others. Insert the cable leads into the terminal block securely. Cable Core Length of exposed wire F0508.ai Figure 5.8 Length of Exposed Wire IM 01W03E01-01EN Table 5.1 Corresponding Sleeve and Input Cables AWG Cable Strip length (mm) l1 l2 24 22 20 18 18 16 14 8 8 8 8 8 8 8 10.5 12.5 14 14 14 14 14 6 8 8 8 8 8 8 Connect external device as Figure 5.9. Input 2 3 4 5 + AI - - 4-20mA Analog Device + - 3 + 4 - 5 + DIDO 6 - Load Dry contact + 1 + 2 3 4 External Power Source 5 F0510.ai 2 2 2.5 2.8 3 3.4 4.2 0.25 0.25 0.25 0.25 0.3 0.3 0.3 Phoenix Contact’s type AI 0.25-6 BU AI 0.34-8 TQ AI 0.5-8 WH AI 0.75-8 GY AI 1-8 RD AI 1.5-8 BK AI 2.5-8 BU CAUTION • Remove the battery pack before wiring. Refer to subsection 8.3 “Replacing the Battery Pack” for the battery pack removing. • Connect the devices to the correct terminals. Operating with incorrect connection may cause damage to FN510 or connected devices. 6 - NOTE PULSE Dry contact 0.15 0.15 0.15 0.15 0.15 0.15 0.15 S2 F0509.ai * A power supply to the 4-20 mA Analog Device is necessary. 2 0.8 0.8 1.1 1.3 1.5 1.8 2.3 d2 • Do not apply external voltage to the DI, DO and PULSE terminals. • The DO output is an open drain output. Ensure that the applied current or voltage to the DO terminals is within the specification range. 6 + 1 Dimensions (mm) d1 S1 IMPORTANT Wiring 1 Figure 5.9 5-5 <5. Wiring> F0511.ai Input Terminal Wire Connection Diagram Strip the insulated cover of the input cable inside the FN510 so as not to interfere with the battery pack. Wiring to Ground Terminal Protect the cable of the ground terminal by using heat-shrink tubing, etc. Use a ring tongue terminal for M4 terminals with an insulation sleeve. IM 01W03E01-01EN <5. Wiring> 5-6 5.5 Grounding Class D grounding with the grounding resistance of 100Ω or less is necessary. To connect the grounding cable to FN510 directly, use the ground terminal on the top of the housing. Do not share the ground wiring with other devices. Ground Wiring Connect the grounding cable to ground terminal on the top of the housing. Grounding terminal F0512.ai Figure 5.10 Grounding Terminal CAUTION Grounding is required for safe operation. Input Cable Wiring The input cable shield should be connected to grounding terminal inside of the housing. • The input cable shield should not be connected to grounding terminal inside of the connected sensor. • Connection to the ground terminal of the connected device housing, refer to the User's Manual. IM 01W03E01-01EN 6. 6-1 <6. Operation> Operation 6.1 Preparation for Starting Operation NOTE • Before using FN510, connect FN110. For detail on how to install the FN110, refer to subsection 4.2.1 “Installation of FN110”. • It is required to set security and network information to enable this product to be connected to the field wireless network. For more details, refer to subsection 6.3 “Connecting to the Field Wireless Network”. ISA100 devices display self-diagnostic information in an easy-to-understand manner using four categories (Function check, Maintenance required, Failure, and Out of specification) according to NAMUR NE107* * NAMUR NE107 “Self-Monitoring and Diagnosis of Field Devices” Confirm operation status by integral indicator If the FN510 is faulty, an error code is displayed. (1) Checking Installation and Wiring Ensure that the FN510, FN110 and the connected device are installed correctly according to the procedures described in section 4 “Installation”, and section 5 “Wiring”. (2) Power On and Connecting to the Field Wireless Network Insert batteries into the battery case, and install to the FN510. For details of installation of battery, refer to subsection 8.3 “Replacing the Battery Pack” and subsection 8.4 “Replacing the Batteries”. Provisioning is to set the security and network information. For details of provisioning, refer to section 6.3 “Connecting to the Field Wireless Network”. (3) Checking the parameter of the FN510 Use the device configuration tool and confirm that the connected device and the FN510 operate properly. Check parameter values or change the setpoints as necessary. IMPORTANT Use the device configuration tool and confirm that the Sensor Type parameter setting in TRANCEDUCER block matches the input wiring. If the parameter is not properly set, change the parameter to match the input type. After changing the parameter, FN510 will restart automatically. F0601.ai Figure 6.1 Integral Indicator with Error Code NOTE If any of the above errors are indicated on the display of the integral indicator or the device configuration tool, refer to subsection 8.10.3 “Errors and Countermeasures” for the corrective action. Verify and Change the FN510 Setting and Values The followings are the required settings of the FN510. These parameters must be set before starting operation. • TRANSDUCER block:Sensor Type Select from DIDO, DI Pulse Count, 4-20 mA or “Not Used” the type of the device to be connected to FN510. Connect the device to the proper terminals of FN510 depending on the selection. Select “Not Used” when using as a routing device without the connected device. The integral indicator can be used to confirm that this product is operating properly. For details on how to confirm this, refer to subsection 7.4 “SelfDiagnostics”. IM 01W03E01-01EN 6-2 <6. Operation> 6.2 Starting Operation Provisioning Work Ensure that the installation, the wiring, the network connection, and the behavior of the FN510 are correct before starting operation. This subsection describes provisioning work using FieldMate as the provisioning device. Provisioning work performs provisioning for each field wireless device using FieldMate and an infrared adapter. When using the Yokogawa recommended near infrared adapter for the provisioning device, the distance between the front panel of this product and the infrared surface of the near infrared adapter should be within 30 cm. For details on the Yokogawa recommended infrared adapter, refer to subsection 8.2 “Recommended Products List”. Perform the following provisioning tasks. • Setting provisioning information • Creating a provisioning information file IMPORTANT Close the front panel. Tighten each screws to a torque of 0.7 N•m. 6.3 Connecting to the Field Wireless Network Preparation Work Prior to Connecting to a Field Wireless Network FN510 does not need to be connected with a physical wire. Instead of physical wiring, to set security and field network information is required. This procedure is called a provisioning. FN510 supports provisioning via infrared communication using a provisioning device and can be securely connected to a network. If the provisioning information is not set, the FN510 cannot be connected to the field wireless network. NOTE Before provisioning, connect the FN110. For detail on how to install the FN110, refer to subsection 4.2.1 “Installation of FN110”. For details on provisioning using a provisioning device, connecting to a field wireless network and the setting procedure, refer to the User’s Manual, FieldMate Versatile Device Management Wizard (IM 01R01A01-01E), YFGW710 Field Wireless Integrated Gateway (IM 01W01F01-01EN), and YFGW410 Field Wireless Management Station (IM 01W02D01-01EN). n thi Wi cm 30 (1) Setting provisioning information Set the device tag and Network ID using a FieldMate provisioning function. The device tag, Network ID, and join key are set in the field wireless device. It is not necessary to input a join key because FieldMate automatically generates it. • Setting device tag The device tag is used for the user to recognize the field wireless device. • Setting Network ID This is the Network ID for the field wireless network to which the field wireless device is connected. Set a value from 2 to 65535. The field wireless device is connected to the field wireless network corresponding to the Network ID set by provisioning work. (2) Creating a provisioning information file The following provisioned information is stored in the provisioning information file. • Network ID • Device tag • EUI64 • Join key • Provisioner (name of the user who performed provisioning work by Field Mate) • Date (Time and date when provisioning was performed by FieldMate) This provisioning information file is required to load from the field wireless configurator to the field wireless integrated gateway. Store the file carefully. F0602.ai Figure 6.2 Provisioning Example IM 01W03E01-01EN 6-3 <6. Operation> (b) Ready and Pause Connecting to a Field Wireless Network The action after installing the battery pack varies depending on the silence setting. Mounting the battery pack automatically starts a search for the field wireless network and the device goes into the join state when the field wireless gateway is found. If the field wireless gateway is not found and a specified time based on the silence mode has elapsed, a cycle of 18-minute pause and 36-second search is repeated until the device can join the field wireless network. For details on the silence setting, refer to subsection 7.3.10 “Switching to the Silence Mode”. F0605.ai Figure 6.5 Display showing Ready and Pause State (c) Confirm Connecting Status Mounting battery pack Boot Infrared communication or Magnet switch F0606.ai Search failure for 120 minutes Pause (b) Infrared communication 18 minutes passed Display showing Confirm Connecting Status State (d) Join Search failure for 36 seconds Ready 1: Searching (b) Infrared communication Deep sleep (a) (Disconnect) (Disconnect) Ready 2: Searching (b) (Connect) F0607.ai (Connect) Operation (d) Figure 6.7 Display showing Join State Confirm connecting status: Join (c) (Publish) F0603.ai * By using a magnet switch or field device configuration tool, transitions to the Deep sleep state from any state. Figure 6.3 Figure 6.6 Wireless Status Transition (a) Deep Sleep NOTE If the FN510 searches the field wireless network for long time low ambient temperature condition, sometimes error “AL.20 LOWBAT” is displayed on the integral indicator. It occurs because of battery characteristics even when using new batteries. After joining to the field wireless network, this error will be cleared within one hour if battery has no failure. F0604.ai Figure 6.4 Display showing Deep Sleep State Displays for 2 seconds in deep sleep setting, and then turns off. IM 01W03E01-01EN 6-4 <6. Operation> 6.4 Display Contents of the Integral Indicator Startup When the FN510 powers on or recovers from the deep sleep mode, the following is displayed for 2 seconds. Write Protect Status When the write protection is enabled, the lock icon is displayed in the upper left corner of the integral indicator. For details on how to enable write protection, refer to subsection 7.3.8 “Write Protect”. F0610.ai Wireless Communication Status Figure 6.10 Display after Power On The status of wireless communication is indicated by the segments on the top of the integral indicator. Possible status are shown in Table 6.1. Setting the Find Device Table 6.1 Wireless Communication Status List Integral Indicator No display Wireless Communication Status • RePause (Silence mode) • ReOperation (Published) • Ready • Joining • Confirm connecting status • Startup • Alert Process Value The process value obtained from the sensor is displayed. For detail information about the display settings, refer to section 7 “Setting Parameters”. When sensor data is more than five orders of magnitude, scroll automatically after 2 seconds. F0608.ai Figure 6.8 Example of Data Scrolling When publish is not configured, following is displayed. When UAPMO.Find Device is set from FieldMate or PRM, following is displayed. The duration the display can be changed. For detail on how to display, refer to section 7 “Setting Parameters”. F0611.ai Figure 6.11 Display when Find Device is set 6.5 Shutting Down When shut down the FN510, remove the battery pack or set the FN510 to deep sleep mode by the device configuration tool or magnet switch. NOTE • Refer to subsection 8.3 “Replacing the Battery Pack” for the battery pack removing. • When storing the FN510 with a battery pack inserted, it is recommended to put the FN510 into deep sleep mode to conserve battery power. For details on how to switch to deep sleep mode, refer to subsection 7.3.9 “Switching to the Deep Sleep Mode”. F0609.ai Figure 6.9 Display when Publish is not Configured IM 01W03E01-01EN <7. Setting Parameters> 7. Setting Parameters FN510 can remotely handle sensor type changes, Tag No. setup, monitoring of self-diagnostic results, according to communication with the field wireless configuration tool or the device configuration tool. 7.1 7-1 Preparation for Parameter Setting This product can be set parameters via infrared port or field wireless network. When setting parameters via field wireless network, connect this product to the field wireless network. For details on how to connect to the field wireless network, refer to subsection 6.3 “Connecting to the Field Wireless Network”. When setting parameters via infrared port, use the infrared port on front of this product. 7.2 Preparing Software 7.2.1 Softwares for the Field Wireless Configuration Tool and the Device Configuration Tool Before using the device configuration tool, confirm that CF/DD and DeviceDTM for this product are installed in the device configuration tool. Refer to the following website for the latest information on CF/DD and DeviceDTM. <http://www.field-wireless.com/> CF(Capabilities File)/DD(Device Description) A CF file contains information, such as the vendor of the field device, its model and revision, available types of process data (flow rate, temperature, pressure, etc.), and number of data items. A DD file contains the information on parameters, such as data structures and attributes. DeviceDTM DeviceDTM, (Device Type Manager) is driver software for field devices provided based on the FDT (Field Device Tool) technology. Infrared port F0701.ai Figure 7.1 Connecting the Configuration Tool The field wireless configuration tool or the device configuration tool allows to read the device information. Refer to subsection 8.2 “Recommended Products List” for the field wireless configuration tool or the device configuration tool of our recommendation. Refer to the following website for the latest configuration tool and DeviceFile. <http://www.field-wireless.com/> 7.2.2 Software Download Software download function allows to update wireless field device software via ISA100.11a wireless communication. For details, refer to YFGW710 Field Wireless Integrated Gateway (IM 01W01F01-01EN) or YFGW410 Field Wireless Management Station (IM 01W02D01-01EN). IM 01W03E01-01EN 7-2 <7. Setting Parameters> 7.3 Setting Parameters 7.3.1 Parameter Usage and Selection Before setting a parameter, please see the following table for a summary of how and when each parameter is used. IMPORTANT After setting and sending data with the field wireless configuration tool or the device configuration tool, wait 30 seconds before turning off the FN510. If it is turned off too soon, the setting will not be stored in the FN510. Table 7.1 Parameter Usage and Selection Item Tag No. Description Sets the Tag No. for Device Tag (software tag). The Tag No. can be set sixteen characters (alphanumeric characters, including – ). Output mode Allows outputting process value and self-diagnostic information via field wireless network. Either or all of sensor value (AI1 block: Process Value, BI1/BI2 block: Process Value Binary, BO1 block: Read Back Value Binary), and self-diagnostic information (UAPMO block: Diagnostic Status) can be set output data. Input mode Allows inputting process value via field wireless network. Sensor value (BO1:Output Value Binary) can be set as input data. Integral indicator display setting Sets the process value to display on the LCD. Software write protect Prohibit writing the setting data. Memo field Memo field available to write the check date, checker and others (as an adjustment information), or anything. Operational mode Set the operational mode of the sensor and integral indicator, etc. NOTE Some of the parameter setting are in the dialogue form called method, by following the on-line instructions you can configure the parameters easily. IM 01W03E01-01EN <7. Setting Parameters> 7-3 7.3.2 Function Block and Menu Tree (1) Function Block The function of FN310 is shown below. Some functions may not be available depending on the device configuration tool used. When the device configuration tool of our recommendation is used, the software attached to the Field Wireless Integrated Gateway or Field Wireless Management Station is necessary for setting the dotted line part. Refer to subsection 8.2 “Recommended Products List” for the field wireless configuration tool of our recommendation. Menu (Online) (UAPMO) (Configuration) • UAPMO • UDO • CO • TRANSDUCER • AI1 • BI1 • BI2 • BO1 • Configuration • Diagnostics • Alerts • Power Status • Identification • Others • UAP Option • Hardware Write Protect • Static Revision • Reset Energy Left • Energy Harvest Type (Diagnostics) (Alerts) • Diagnostic Status • Diagnostic Status Detail1 • Diagnostic Status Detail2 • Diagnostic Switch • Diagnostic Configuration • Other Faults Alert • Faults Non-Compliance Alert • Faults Process Influence Alert • Simulation Active Alert • Soft Update Incomplete Alert • Power Low Alert • Power Critical Low Alert • Fault Prediction Alert • Environmental Conditions Alert • Outside Sensor Limits Alert • Out of Service Alert • Calibration Problem Alert • Faults Sensor or Actuator Alert • Faults Electronics Alert (Power Status) • Energy Left • Power Supply Status • Power Supply Voltage (Identification) • Version Revision • CTS Version • ITS Version • Identification Number (Others) • Set Find Device • Antenna Temperature • Adapter Temperature • Temperature Unit (UDO) (APP Download) • APP Download • DESCRIPTION • STATE • MAX_BLOCK_SIZE • LAST_BLOCK_DOWNLOADED • ERROR_CODE (CO) (Configuration) (COMM_ENDPOINT) • Configuration • Others • COMM_ENDPOINT • COMM_CONTRACT • PUB_ITEM_MAX • PUB_ITEM_NUM • PUB_ITEM • Network address of remote endpoint • Transport layer port at remote endpoint • Object ID at remote endpoint • Stale data limit • Data publication period • Ideal publication phase • Publish Auto Retransmit • Configuration status (COMM_CONTRACT) • Contract ID • Contract Status • Actual Phase (PUB_ITEM) • Object ID • Attribute ID • Attribute Index • Size (Others) • REVISION (DIS) (Configuration) (COMM_ENDPOINT) • Configuration • Others • COMM_ENDPOINT • SUB_ITEM_MAX • SUB_ITEM_NUM • SUB_ITEM • Network address of remote endpoint • Transport layer port at remote endpoint • Object ID at remote endpoint • Stale data limit • Data publication period • Ideal publication phase • Publish Auto Retransmit • Configuration status (SUB_ITEM) • Object ID • Attribute ID • Attribute Index • Size (Others) • REVISION F0702.ai IM 01W03E01-01EN Menu (Online) (Continued) 7-4 <7. Setting Parameters> (TRANSDUCER) (Block Info) • Block Info • Configuration/Calibration • Others • Tag Description (Configuration/Calibration) • Model • Serial Number • Wireless Status • Display Selection • LCD Intermittent Time • LCD Exp Mode • Measurement Rate • Sensor Type (Others) • Special Cmd • Change Sensor Type (AI1) (Block Info) • Block Info • Block Mode • Dynamic Variables • Configuration • Tag Description (Block Mode) • Mode.Target • Mode.Actual • Mode.Permitted • Mode.Normal (Dynamic Variables) • Process Value • Simulation (Process Value) • Process Value.Status • Process Value.Value (Simulation) • Simulate Switch • Simulate Value (Configuration) • Block Mode • Concentrator OID • Scale * • Sensor Range • Sensor Serial • Reset Pulse Count • PV Energy Left Enable (Simulate Value) • Simulate Value.Status • Simulate Value.Value (Block Mode) • Mode.Target • Mode.Actual • Mode.Permitted • Mode.Normal (Scale) • Scale.EU at 100% * • Scale.EU at 0% * • Scale.Units Index * • Scale.Decimal * (Sensor Range) • Sensor Range.EU at 100% • Sensor Range.EU at 0% • Sensor Range.Units Index • Sensor Range.Decimal (BI1/BI2) (Block Info) • Block Info • Block Mode • Dynamic Variables • Configuration (Block Mode) • Tag Description • Mode.Target • Mode.Actual • Mode.Permitted • Mode.Normal (Dynamic Variables) • Process Value Binary • Simulation (Process Value Binary) • Discrete Value.Status • Discrete Value.Value (Simulation) • Simulate Switch • Simulate Value Binary (Configuration) • Block Mode • Concentrator OID • Options • Sensor Serial (BO1) (Block Info) • Block Info • Block Mode • Dynamic Variables • Configuration • Tag Description (Simulate Value Binary) • Discrete Value.Status • Discrete Value.Value (Block Mode) • Mode.Target • Mode.Actual • Mode.Permitted • Mode.Normal (Block Mode) • Mode.Target • Mode.Actual • Mode.Permitted • Mode.Normal (Dynamic Variables) • Process Value Binary • ReadBack Value Binary (Process Value Binary/ReadBack Value Binary) • Discrete Value.Status • Discrete Value.Value (Configuration) • Block Mode • Concentrator OID • Options • Fault State Time • Fault State Value • Sensor Serial (Block Mode) • Mode.Target . • Mode.Actual • Mode.Permitted • Mode.Normal F0703.ai * When the data of these parameters is rewritten, it is necessary to set the operational mode of the block to O/S (Out of Service). IM 01W03E01-01EN <7. Setting Parameters> 7-5 (2) Menu Tree The menu tree of our recommended device configuration tool is shown below. Refer to subsection 8.2 “Recommended products list” for the device configuration tool of our recommendation. Online Menu • Device Configuration • Diagnostics • Process Variable (Device Configuration) (UAPMO) (Configuration/Setup) • UAPMO • TRANSDUCER • AI1 • BI1 • BI2 • BO1 • Configuration/Setup • UAP Option • Hardware Write Protect • Static Revision • Reset Energy Left • Energy Harvest Type (Identification) • Version Revision • CTS Version • ITS Version • Identification Number (Alerts) • Other Faults Alert • Faults Non-Compliance Alert • Faults Process Influence Alert • Simulation Active Alert • Soft Update Incomplete Alert • Power Low Alert • Power Critical Low Alert • Fault Prediction Alert • Environmental Conditions Alert • Outside Sensor Limits Alert • Out of Service Alert • Calibration Problem Alert • Faults Sensor or Actuator Alert • Faults Electronics Alert (Others) • Set Find Device • Antenna Temperature • Adapter Temperature • Temperature Unit (TRANSDUCER) (Block Info) • Configuration/Setup • Tag Description (Configuration/Calibration) • Model • Serial Number • Wireless Status • Display Selection • LCD Intermittent Time • LCD Exp Mode • Measurement Rate • Sensor Type (Others) • Special Cmd • Change Sensor Type (AI1) (Block Info) • Configuration/Setup • Tag Description (Block Mode) • Mode.Target • Mode.Actual • Mode.Permitted • Mode.Normal (Configuration) (Block Mode) • Block Mode • Concentrator OID • Scale * • Sensor Range • Sensor Serial • Reset Pulse Count • PV Energy Left Enable • Mode.Target • Mode.Actual • Mode.Permitted • Mode.Normal (Scale) • Scale.EU at 100% * • Scale.EU at 0% * • Scale.Units Index * • Scale.Decimal * (Sensor Range) • Sensor Range.EU at 100% • Sensor Range.EU at 0% • Sensor Range.Units Index • Sensor Range.Decimal F0704.ai IM 01W03E01-01EN Online Menu (Continued) 7-6 <7. Setting Parameters> Device Configuration (Continued) (BI1/BI2) • Configuration/Setup (Block Info) • Tag Description (Block Mode) • Mode.Target • Mode.Actual • Mode.Permitted • Mode.Normal (Configuration) (Block Mode) • Block Mode • Concentrator OID • Options • Sensor Serial • Mode.Target • Mode.Actual • Mode.Permitted • Mode.Normal (BO1) (Block Info) • Configuration/Setup • Tag Description (Block Mode) • Mode.Target • Mode.Actual • Mode.Permitted • Mode.Normal (Configuration) • Block Mode • Concentrator OID • Options • Fault State Time • Fault State Value • Sensor Serial (Diagnostic) (UAPMO) (Diagnostics) • UAPMO • Device Diagnostics • Diagnostic Status • Diagnostic Status Detail1 • Diagnostic Status Detail2 • Diagnostic Switch • Diagnostic Configuration (Block Mode) • Mode.Target • Mode.Actual • Mode.Permitted • Mode.Normal (Power Status) • Energy Left • Power Supply Status • Power Supply Voltage (Process Variable) (AI1) (Dynamic Variables) (Process Value) • AI1 • BI1 • BI2 • BO1 • Process Variable • Process Value • Simulation • Process Value.Status • Process Value.Value (Simulation) (Simulate Value) • Simulate Switch • Simulate Value • Simulate Value.Status • Simulate Value.Value (BI1/BI2) (Dynamic Variables) (Process Value Binary) • Process Variable • Process Value Binary • Simulation • Discrete Value.Status • Discrete Value.Value (Simulation) (Simulate Value Binary) • Simulate Switch • Simulate Value Binary • Discrete Value.Status • Discrete Value.Value (BO1) (Dynamic Variables) (Output Value Binary/ReadBack Value Binary) • Process Variable • Output Value Binary • ReadBack Value Binary • Discrete Value.Status • Discrete Value.Value F0705.ai * When the data of these parameters is rewritten, it is necessary to set the operational mode of the block to O/S (Out of Service). IM 01W03E01-01EN 7.3.3 Parameters for Wireless Communication (1) Network Information CO block: Configuration The network-related information can be checked. DIS block: Configuration Information related to the communication handled by DO can be checked. (2) Update Time CO block: Data publication period DIS block: Data publication period For AI, DI Pulse Count, and DI, set the update time value to the data publication period in the CO block within the range of 1 to 3600 seconds. For DO, set the update time value to the data publication period in the DIS block within the range of 2 to 3600 seconds. NOTE If you want to use DI and DO together, the update time value of DI should be set to 2 seconds or more. The setting affects the battery life. When update time is set 0 second, FN510 stops updating process variables via the field wireless network. And it also stops the acquisition of process variables from the connected device. (3) Remaining Battery Life UAPMO block: Energy Left The number of days of battery life remaining is indicated assuming ambient temperature condition as 23 °C. It takes several days for the value to be stabilized after the power on and initialization of the remaining battery life. UAPMO block: Reset Energy Left When changing batteries, the remaining battery life is initialized by Reset Energy Left parameter. 7-7 <7. Setting Parameters> NOTE When the FN510 detects AL.01, AL.02 and AL.03 error, the LCD display does not dim regardless of the status in LCD mode. See Table 8.4 for details. 7.3.4 Tag and Device Information You can specify the Device Tag when ordering the corresponding FN110 Field Wireless Communication Module. Device Tag and device information can be checked as follows. Procedure to Read the Device Tag and Device Information • Device Tag (Software Tag) This is specified by writing characters (up to 16 characters) that differs from those specified in Tag No. to the module. For details how to confirm this, refer to subsection “Connecting to the Field Wireless Network”. • Tag Description This is a universal parameter to store the comment that describes the content of the tag located in the TRANSDUCER and AI1/BI1/BI2/ BO1 blocks. Limitation of Device Information When changing the device information, input the information based on the following limitation on the number of characters. • Message function (up to 32 characters) TRANSDUCER block: Tag Description AI1/BI1/BI2/BO1 block: Tag Description 7.3.5 Setup the Integral Indicator TRANSDUCER block: LCD Exp Mode Set the display method of the PV on the integral indicator. Index display or base display is selectable. (4) LCD Display 7.3.6 Sensor Type TRANSDUCER block: LCD Intermittent Time The integral indicator has three modes: Continuous, Intermittent, and Off. These modes are switched by LCD Intermittent Time parameter. The intermittent mode repeats on/off at defined seconds. In any mode, current process value is displayed by magnet switch operation. After displaying current process value, returns to the configured mode. Refer to subsection 8.6 “Switching LCD Display” for details. Process values are assigned as shown in the table below depending on the Sensor Type. Table 7.2 Block Assignment Sensor Type DIDO DI Pulse Count 4-20mA Not Used Assignment to Block BI1 block (IN1) BI2 block (IN2) BO1 block (OUT) AI1 block AI1 block AI1 block (Energy Left *1) *: Valid if PV Energy Left Enable of AI1 block is set to Enable. IM 01W03E01-01EN 7.3.7 Parameters for Function DI Pulse Count AI1 block: Reset Pulse Count When this parameter is set to Reset, DI Pulse Count value will be reset if the Sensor Type is set to DI Pulse Count. The count range is 0 to 999999. NOTE When restart FN510 by removing the battery pack, start counting from 0. 4-20 mA AI1 block: Scale To change the scaling range, change the following parameters. Before changing these parameters, it is necessary to set the operational mode of AI1 block to O/S (Out of Service). • Parameter for lower limit AI1 block: Scale:EU at 0% • Parameter for upper limit AI1 block: Scale:EU at 100% Specify the parameters for lower limit (EU at 0%) and upper limit (EU at 100%) in the unit set in the unit parameter (Units Index). DI BI1/BI2 block: Options Output value will be inverted if Invert parameter is set. DO BO1 block: Output Value Binary A value written via field wireless network will be stored. BO1 block: Read Back Value Binary The DO output value will be stored. This parameter can be specified as a parameter to be published to the field wireless network. BO1 block: Options, Fault State Time, Fault State Value Inverts the DO output, sets the DO output value at failure or startup and sets the time until that value will be valid. DIS block: Stale data limit Writing to BO1 block via field wireless network is not performed within the time multiplied by the Stale data limit in the Data publication period, FN510 sends alert. 7-8 <7. Setting Parameters> IMPORTANT • When restart FN510 by removing the battery pack, output value follows the specified Options parameter in the BO1 block. • When switching to the deep sleep mode or silence mode, FN510 holds the output value set from field wireless gateway just before or specified Options parameter in the BO1 block. • To minimize the consumption of the battery, set the output value of BO1 block Off (Open), and then switch to the deep sleep mode. • When stopping the use of BO1 block, delete the settings related to BO1 block from field wireless gateway, and then restart the FN510 by removing the battery pack. Routing Device AI block: PV Energy Left Enable FN510 can be used as a routing device if Sensor Type is set to Not Used. In this setting, Energy Left can be stored in AI1.PV.Value, and then published to the field wireless network. 7.3.8 Write Protect Hardware write protection and software write protection functions are available for FN510. Hardware Write Protection Hardware Write Protection is set by slide switch on the front panel back. Software Write Protection Software Write Protection is set by the parameter of software write protect of UAP Option in UAPMO block. For the relationship between hardware write protection and software write protection, refer to section 9 “Parameter Summary”. 7.3.9 Switching to the Deep Sleep Mode When the FN510 will not be used for a long time, switch the FN510 to the deep sleep mode to conserve battery power. There are two methods of switching to the deep sleep mode. To switch to deep sleep mode, follow the procedure below. IM 01W03E01-01EN 7-9 <7. Setting Parameters> Magnet Switch Operation 7.3.10 Switching to the Silence Mode Procedures for switching to the deep sleep mode using a magnet switch are as follows. 1. Touch the magnet switch 1 for 5 seconds by a magnet (LCD displays “SLEEP” flashing). 2. Touch the magnet switch 1 for an additional 5 seconds by a magnet (LCD displays “SLEEP”). 3. Touch the magnet switch 2 within next 5 seconds by a magnet. This is a function to pause the FN510 when it cannot join the field wireless network after a specified time has elapsed. This function is effective in conserving battery power when, for example, the installation of the Field Wireless Integrated Gateway is delayed compared to that of field wireless devices. When the FN510 fails to search the network for about 120 minutes, it switches to silence mode automatically. Thereafter, a cycle of 18 minutes pause and 36 seconds search is repeated until the FN510 can join the field wireless network. To minimize the consumption of the battery, the FN510 turns off the integral indicator and stops the measurement. To start from the silence mode, either removes and inserts the battery pack, or receiving infrared communication. Use the device configuration tool (for infrared) or device provisioning tool. Write Parameter TRANSDUCER block: Special Cmd Set deep sleep mode to Special Cmd parameter. There are three methods to start from the deep sleep mode. Restart Restart by re-connection of the battery pack. Infrared Communication Start by receiving infrared communication. Use the wireless field device configuration tool (for infrared) or device provisioning tool. Magnet Switch Operation Start by touching a magnet to magnet switch 1 for 10 seconds. CAUTION After setting the deep sleep mode by infrared device configuration tool, keep the infrared port of device away from any other infrared signals. NOTE • After switching to deep sleep mode, the FN510 stops any field wireless communication. For this reaon, there is the case that an error is display on field wireless configuraiton tool. • To wake up from deep sleep mode by reconnection of battery pack, please pull battery pack and wait more than 30 seconds before attaching battery pack. IM 01W03E01-01EN 7.4 Self-Diagnostics 7.4.1 Identify Problems by Using the Device Configuration Tool The device configuration tool allows checking the self-diagnostic results and settings of the FN510. First, check Diagnostic Status of the self-diagnostic results. Procedure to Call Up the Self-Diagnostic Parameter UAPMO block: Diagnostic Status Any of the four categories (Function check, Maintenance required, Failure, and Out of specification) according to NAMUR NE107 is supplied to Diagnostic Status of each diagnostic result. Checking the Diagnostic Status category allows taking the proper action. The Diagnostic Status contents are common for all ISA devices, and the setting for the Diagnostic Status category can be changed. For further details, refer to Diagnostic Status Detail. In Diagnostic Status Contents that can be diagnosed by the FN510, the alert category set in Out of Service can be changed to Function check. To do so, follow the procedures below. 1. UAPMO block: UAP Option Enable diagnostic status configuration select “enable”. 2. UAPMO block: Diagnostic Configuration change Out of Service from “Failure” to “Function check”. 3. UAPMO block: UAP Option Enable diagnostic status configuration select “disable”. In Diagnostic Configuration setting, select one from the followings; F: Failure Status C: Function check status O: Out of specification status M: Maintenance required status The contents of Diagnostic Status are defined either valid or invalid at Diagnostic Switch parameter. Follow the example below to change “Out of Service” to invalid. 1. UAPMO block: UAP Option Enable diagnostic status configuration select “enable”. 2. UAPMO block: Diagnostic Switch turn “Off” for Out of Service. 3. UAPMO block: UAP Option Enable diagnostic status configuration select “disable”. <7. Setting Parameters> 7-10 NOTE Be careful when changing the alert category and turning detection on and off as described above. Be sure to set UAP Option Enable diagnostic status configuration to disable again to prevent setting errors. 7.4.2 Alert Report FN510 generates alert information related to Diagnostic Status and automatically sends to a field wireless gateway. To use this function, the following alert setting is necessary. When “Out of Service” for Diagnostic Status alert is required, choose “FALSE” for [Out of Service. Alert Disable] in the UAPMO block. Refer to the field wireless gateway User’s Manual for the setting procedure to obtain the alert information from the gateway. The alert report consists of the list of parameter name as shown Table 7.3. Table 7.3 Contents of Alert Report Parameter name DetectObjectTLPort DetectObject DetectTime AlertDirection AlertPriority AlertType AlertValue Description Alert detection port UAP (0xF0B2) fixed Alert detection block UAPMO (1) fixed Time stamp 1: generated, 0: clear Alert priorities set by users Alert types, see Alert Type in Table 7.5 NAMUR107 category 0: Failure 1: Function Check 2: Out Of Specification 3: Maintenance Required CAUTION For a wireless gateway which does not support the alert report function, the alert setting in UAPMO block for this product must be set to “Disable”. Note that YFGW710 Field Wireless Integrated Gateway does not have the alert report function. IM 01W03E01-01EN 7-11 <7. Setting Parameters> 7.4.3 Checking with Integral Indicator NOTE If an error is detected by running self-diagnostics, an error number is displayed on the integral indicator. If there is more than one error, the error number changes at 2 seconds interval. See table 8.4 regarding the alarm codes. F0706.ai Figure 7.2 Error Check with Integral Indicator Table 7.4 Diagnostic Status Bits Bit31(MSB) Bit30 Bit29 Bit28 Bit27 Bit26 Bit25 Bit24 Bit23 Bit22 Bit21 Bit20 Bit19 Bit18 Bit17 Bit16 Bit15 Bit14 Bit13-Bit09 Bit08-Bit01 Bit00 Contents F:Failure status C:Function check status O:Out of specification status M:Maintenance required status Faults in electronics Faults in sensor or actuator element Installation, calibration problem Out of service Outside sensor limits Environmental conditions out of device specification Fault prediction: Maintenance required Power is critical low: maintenance need short-term Power is low: maintenance need mid-term Software update incomplete Simulation is active Faults due to process influence Faults due to non-compliance with specified operating conditions Other faults reserved by WCI vendor specific area Detail information available 1: available 0: no available NAMUR NE107 Categorization* --------F F C C O O M M M C C F F F ------- * NAMUR NE107 “Self-Monitoring and Diagnosis of Field Devices” IM 01W03E01-01EN Table 7.5 <7. Setting Parameters> 7-12 Diagnostic Results Summary Faults in electronics 78 NAMUR NE107 Diagnostic Status Detail Category* F ADAPTER FAIL ANTENNA FAIL RS485 FAIL Faults in sensor or actuator element 77 F Diagnostic Status Contents Alert Type M ADAPTER TEMP HI ADAPTER TEMP LO ANTENNA TEMP HI ANTENNA TEMP LO CRITICAL LOWBAT FN510 failure FN110 failure Communication failure between FN110 and FN510 Communication failure between FN510 and connected devices mA value is in the following range, which is not within the specification. 1.0 ≤ mA < 3.6, 21 < mA AI1 O/S Mode BI1 O/S Mode BI2 O/S Mode BO1 O/S Mode mA value is in the following range, which is not within the specification. 3.6 ≤ mA < 4.0, 20 < mA ≤ 21 FN510 temperature is above +85°C FN510 temperature is below -40°C FN110 temperature is above +85°C FN110 temperature is below -40°C Low battery alert 70 M LOWBAT_ALM Low battery 68 C 67 F AI1 SIMULATION ACTIVE BI1 SIMULATION ACTIVE BI2 SIMULATION ACTIVE BO_STALE_LIMIT_FAIL AI1 Simulation Mode BI1 Simulation Mode BI2 Simulation Mode Detect Stale Limit SENSOR FAIL mA_FAIL Out of service 75 C Process Value out of 74 limits O Environmental conditions out of device specification 73 O Power is critical low: maintenance need short-term Power is low: maintenance need mid-term Simulation is active 71 Faults due to process influence Description AI1 OUT OF SERVICE BI1 OUT OF SERVICE BI2 OUT OF SERVICE BO1 OUT OF SERVICE mA_OUTSIDE_LIMIT * NAMUR NE107 “Self-Monitoring and Diagnosis of Field Devices” IM 01W03E01-01EN 8. 8-1 <8. Maintenance> Maintenance 8.1 General Removing This chapter describes the procedures of replacing batteries and the status check method required for maintenance of FN510. Please carefully and thoroughly read the following sections for information on how to properly handle this product while performing maintenance. 1. Loosen the four screws on the front panel. 2. Pull out the battery connector from the front panel back. 3. Pull the battery pack. 8.2 Recommended Products List Table 8.1 lists the recommended products of our equipment needed to set up and use the FN510. Table 8.1 Recommended Products List Yokogawa-recommended Instrument Provisioning Device Tool •FieldMate (R3.01 or later) •Provisioning Device Tool •Infrared Adapter certified by Yokogawa Supplier: ACTiSYS Product name: IrDA InfraRed USB Adaptor Product number: IR224UN-LN96 (9600bps) Field Wireless Configuration Tool •Field Wireless Integrated Gateway attached Software Field Wireless Configurator Field Wireless Management Tool •Field Wireless Management Station attached Software Field Wireless Management Console Device Configuration Tool •FieldMate (R3.01.11 or later) DeviceFile (R3.06.01 or later) Field Wireless System related Product •Plant Resource Manager (PRM) (scheduled to be supported) DeviceFile (scheduled to be supported) 8.3 Replacing the Battery Pack Preparation Initialize the value of remaining battery life. To initialize the battery life, set the Reset Energy Left parameter in UAPMO block. When the FN510 stop working because of low battery, initialize the remaining battery life immediately after replacing the battery pack. In the case of initialize the remaining battery life after replacing the battery pack, perform warm restart after initializing. For details on how to warm restart, refer to field wireless gateway User’s Manual (IM 01W02D01-01EN for YFGW410, IM 01W01F01-01EN for YFGW710). F0801.ai Figure 8.1 Removing the Battery Pack CAUTION After pulling out the battery connector, remove the battery pack. Remounting 1. Insert the new battery pack. The orientation of the battery pack, CAUTION display is the front and connector cable is left side. 2. Plug the battery connector into the terminal on the front panel back. Connect facing down the white surface of the connector. Push the connector until it touches the back of the front panel then slide it to the left. 3. Close the front panel and tighten the four screws to a torque of 0.7 N • m. CAUTION The opening and closing the front panel, be careful not to pinch your finger. IM 01W03E01-01EN 8-2 <8. Maintenance> 8.4 Replacing the Batteries The batteries in the battery pack can be replaced. Batteries are not installed when shipped from the factory. Assemble the battery pack as follows. WARNING Be sure to replace the batteries or open and close the battery pack in a non-hazardous area. Doing so in a hazardous area could cause an explosion. CAUTION When replacing the batteries, be sure to replace the two batteries at the same time and do not use an old and a new battery together. Disassembling 1. Loosen a battery case fixing screw. 2. Remove old batteries. Remove the battery by pushing up the negative side of the battery as shown in Figure 8.2. F0803.ai Figure 8.3 Assembling the Battery Pack 8.5 Handling Batteries This battery pack uses two primary lithiumthionyl chloride batteries. Each battery contains approximately 5 grams of lithium, for a total of 10 grams in each pack. Under normal conditions, the battery materials are self-contained and are not reactive as long as the batteries and the pack integrity are maintained. Care should be taken to prevent thermal, electrical or mechanical damage. Protect the electrode of the battery pack to avoid rapid electrical discharge. Discharged a battery may lead to fluid leakage and excessive heat. Batteries should be stored in a clean and dry area. For maximum battery life, storage temperature should not exceed 30°C. WARNING F0802.ai Figure 8.2 Remove Batteries Assembling 1. Insert new batteries into the battery case. Check the orientation of the battery and push straight. 2. As shown in Figure 8.3, engage the hooks on the opposite side of the screw. 3. Tighten the screw to a torque of 0.7 N • m. Handling the battery pack The following precautions must be observed in order to safely and effectively use a battery pack. Improper use may lead to fluid leakage, excessive heat, ignition, or explosion. • Never charge it. • Do not short-circuit it. • Do not disassemble, transform, or modify it. • Do not heat it or throw it into a fire. • Do not soak it in fresh water or seawater. CAUTION Observe the following precautions for the safe disposal of batteries. • Do not incinerate the battery, and do not expose it to a high temperature of 100°C or more. This may lead to fluid leakage or explosion. • Dispose of the battery according to laws and regulations. IM 01W03E01-01EN 8-3 <8. Maintenance> Use the following dedicated parts for the battery pack and batteries. Procedure to replace and dispose of the batteries of the product Battery Pack Below an explanation about the new EU Battery Directive (DIRECTIVE 2006/66/EC). This directive is only valid in the EU. Batteries are used for this product. When you remove batteries from this product and dispose them, discard them in accordance with domestic law concerning disposal. Take a right action on waste batteries, because the collection systems in the EU on waste batteries are regulated. Battery type: Primary lithium-thionyl chloride battery Crossed-out dustbin symbol Part number: F9090FD*1 (with batteries) Part number: F9090GD*2 (without batteries) Batteries Part number: F9915NR Alternatively, following batteries may be purchased and used. • Tadiran TL-5930/S or SL-2780/S • VITZROCELL SB-D02 *1: If you need F9090FC, please purchase F9090FD. F9090FD is a set of F9090FC and instruction manual. *2: If you need F9090GC, please purchase F9090GD. F9090GD is a set of F9090GC and instruction manual. Transportation of products containing lithium batteries Batteries used for this product contain lithium. Primary lithium batteries are regulated in transportation by the U.S. Department of Transportation, and are also covered by the International Air Transport Association (IATA), the International Civil Aviation Organization (ICAO), and the European Ground Transportation of Dangerous Goods (ARD). It is the responsibility of the shipper to ensure compliance with these or any other local requirements. Consult current regulations and requirements before shipping. When transporting this product with the battery pack inserted, keep it in deep sleep mode in order to conserve battery power. For details on how to switch to deep sleep mode, refer to subsection 7.3.9 “Switching to the Deep Sleep Mode”. NOTE The symbol (see above), which is marked on the batteries, means they shall be sorted out and collected as ordained in ANNEXII in DIRECTIVE 2006/66/EC Procedure to remove the batteries safely Refer to subsection 8.3 “Replacing the Battery Pack” and subsection 8.4 “Replacing the Batteries”. 8.6 Switching LCD Display The process value and the wireless communication status are displayed on the LCD by touching a magnet to the magnet switch1. The contents of the display changes as follows every two seconds. If the Sensor Type in TRANSDUCER block is set to DIDO; 1. Wireless Communication Status. See Table 8.2. 2. Object Name (BI1) 3. Process Value Binary of BI1 block 4. Object Name (BI2) 5. Process Value Binary of BI2 block 6. Object Name (BO1) 7. Read Back Value Binary of BO1 block 8. Tag No. (If specified when ordering) After display, return to normal display contents. If the Sensor Type in TRANSDUCER block is set to other than DIDO; 1. Wireless Communication Status. See Table 8.2. 2. Object Name (AI1) 3. Process Value of AI1 block 4. Tag No. (If specified when ordering) After display, return to normal display contents. IM 01W03E01-01EN Table 8.2 8-4 <8. Maintenance> Wireless Status Integral Indicator F0804.ai F0805.ai Description Searching for Backbone Router or Router to connect. It is not connected to the field wireless network. Discovering the connection destination, and is doing the Join process. It is not connected to the field wireless network. Complete the Join process and is doing the Publish settings. F0806.ai The publish setting is complete and has been sent the PV value to the field wireless network. F0807.ai F0808.ai Silence Mode. For more information about silence mode, refer to subsection 7.3.10 “Switching to the Silence Mode”. 8.7 Replacing the FN110 This subsection describes the procedure for replacing the FN110. Replace the FN110 as follows. 1. Back up the configuration of the FN510. 2. Remove the battery pack. 3. Remove the FN110, and install a new FN110. 4. Remounting the battery pack. 5. Restore the backed up configuration of the FN510. 6. Performing provisioning work. 7. Update the configuration of field wireless gateway. To back up the configuration, use the device configuration tool, such as FieldMate. Performing provisioning work is necessary when replacing the FN110. Update the configuration information of the target device by using field wireless configuration tool. For details of provisioning, refer to subsection 6.3 “Connecting to the Field Wireless Network”. 8.8 Replacing the FN510 This subsection describes the procedure for replacing the FN510. Replace the FN510 as follows. 1. Back up the configuration of the FN510. 2. Remove the battery pack. 3. Remove the FN110 and the connected device, and install them to the new FN510. 4. Remounting the battery pack. 5. Restore the backed up configuration of the FN510. 8.9 Replacing the Connected Device This subsection describes the procedure for replacing the connected device. Replace the connected device as follows. 1. Remove the battery pack. 2. Remove the connected device from the FN510 3. Install a new one. 4. Remounting the battery pack. 8.10 Troubleshooting If any abnormality appears in the measured values, use the troubleshooting flow chart below to isolate and resolve the problem. Since some problems have complex causes, these flow charts may not identify all. If you have difficulty isolating or correcting a problem, contact Yokogawa service personnel. IM 01W03E01-01EN 8-5 <8. Maintenance> 8.10.1 Basic Troubleshooting Flow 8.10.2 Example of Troubleshooting Flow First determine whether the process variable is actually abnormal or a problem exists in the measurement system. If the problem is in the measurement system, isolate the problem and decide what corrective action to take. FN510 is equipped with a self-diagnostic function which will be useful in troubleshooting, and this product is equipped with an integral indicator and it will show an alarm code as a result of selfdiagnosis. See subsection 8.10.3 “Errors and Countermeasures” for the list of alarms. The following shows an example of the flow for troubleshooting. Refer to this example and Table 8.3. Locate the problem and take the corresponding countermeasure. : Areas where self-diagnostic offers support Abnormalities appear in measurement YES Inspect the process system Measurement system problem Is process variable itself abnormal? Error in measurement NO system The following phenomena indicate that this instrument may be out of operation. [Example] • No output signal is delivered. • Process variable changes but the output signal remains unchanged. • The assessed value of the process variable and the output are not coincident. • If a built-in indicator is attached, check the display of the error code. • Connect the device configuration tool and check self-diagnosis. Did self-diagnosis find an error? NO Isolate problem in measurement system Environmental condition Check/correct environmental conditions Transmitter itself Is the Connected Device correctly connected? YES Check transmitter Operation conditions Check/correct operating conditions Is the wireless device connection correct? F0809.ai Figure 8.4 YES Basic Troubleshooting Flow YES Refer to the error message list and check for recovery measures. NO Check the Connected Device connection and correct it. NO Connect the wireless devices again. Refer to our service personnel for details. F0810.ai Figure 8.5 Table 8.3 Example of Troubleshooting Flow Cause and Countermeasure Observed Problems Outputs fixed current. Parameters cannot be changed. Possible Cause The simulation function is set to ON. This product is in write protect status. Sensor Type is not properly set. Countermeasure Related Parameter Set the simulation function • Simulate Switch to OFF. Release write protect. • UAP Option • Hardware Write Protect Set the Sensor Type • Sensor Type properly. The status of the output is Out of Service even if the Modo.Targetis is set to Auto. Energy Left value does not Reset Energy Left function Execute the Reset Energy increase after replacing the battery has not been executed. Left function. pack. • Reset Energy Left IM 01W03E01-01EN <8. Maintenance> 8-6 8.10.3 Errors and Countermeasures Table 8.4 Error Message Summary Integral indicator NAMUR Diagnostic NE107 Bit Status category *1 AL.01 *3 F 27 Faults in electronics Diagnostic Status Detail Cause AL.02 *3 ADAPTER FAIL FN510 failure ANTENNA FAIL FN110failure AL.03 *3 RS485 FAIL Communication failure between FN110 and FN510 Release/ recovery conditions (except restart) *2 None Contact Yokogawa service personnel. Check the connection between FN110 and FN510 Check if the connected device is properly connected to FN510. Replace the device if it is properly connected. Recovers Normal action Check writing when write to to BO1 block BO1 block is via field successful wireless network has been successful. Recovers Output value: Check the when the mA Normal input current value returns Output status: within the BAD Sensor specification Failure F 26 Faults in sensor or actuator element SENSOR FAIL Disconnection or communication error, between the connected device and FN510 AL.11 F 16 Faults due to process influence BO_STALE_ LIMIT_FAIL Detects Stale Limit in the communication to the BO1 block. AL.12 F 26 Faults in sensor or actuator element mA_FAIL AL.20 M 20 Power is critical low: maintenance need short-term 19 Power is low: maintenance need mid-term 23 Process Value out of limits CRITICAL LOWBAT mA value is in the following range, which is not within the specification 1.0 ≤ mA < 3.6, . 21 < mA Low None remaining battery voltage AL.41 O Action Output value: Hold previous value Output status: BAD Device Recovers communication Failure between FN110 and FN510 None Output value: Hold previous value Output status: BAD Sensor Failure AL.10 Low remaining battery voltage mA_OUTSIDE_ mA value LIMIT is in the following range, which is not within the specification. 3.6 ≤ mA < 4.0, 20 < mA ≤ 21 Output Operation Normal action Replace the batteries. LOWBAT ALM Recovers when the mA value returns within the specification Output value: Check the input current Normal Output status: Uncertain: Range Limits Exceeded IM 01W03E01-01EN NAMUR Diagnostic Integral NE107 Bit Status indicator 1 category * AL.45 AL.60 AL.61 8-7 <8. Maintenance> O C C Diagnostic Status Detail Cause 22 Environmental ADAPTER conditions TEMP HI out of device specification FN510 temperature is above +85°C ADAPTER TEMP LO FN510 temperature is below -40°C ANTENNA TEMP HI FN110 temperature is above +85°C ANTENNA TEMP LO FN110 temperature is below -40°C AI1 OUT OF SERVICE BI1 OUT OF SERVICE AI1 block is O/S mode BI1 block is O/S mode BI2 OUT OF SERVICE BI2 block is O/S mode BO1 OUT OF SERVICE BO1 block is O/S mode 24 Out of service 17 Simulation is AI1 active SIMULATION ACTIVE BI1 SIMULATION ACTIVE BI2 SIMULATION ACTIVE Simulate Switch of AI1 block is enabled Simulate Switch of BI1 block is enabled Simulate Switch of BI2 block is enabled Release/ recovery conditions (except restart) *2 Recovers when the temperature returns to +85°C below Recovers when the temperature returns to -40°C or more Recovers when the temperature returns to +85°C below Recovers when the temperature returns to -40°C or more Recover when the mode target of alert block is other than O/S Recover when the Simulate Switch of target block is set to disable Output Operation Action Normal action Check the ambient temperature of the FN510 Check the ambient temperature of the FN110 Output value: Hold previous value Output status: BAD Configuration Err Output Simulate Value of AI1 block Output Simulate Value of BI1 block Output Simulate Value of BI2 block Check the AI1 block setting A Check the BI1 block setting Check the BI2 block setting Check the BO1 block setting Check the AI1 block setting Check the BI1 block setting Check the BI2 block setting *1: “NAMUR NE107 category” refers to the four categories (C: Function check, M: Maintenance required, F: Failure, and O: Out of specification) according to NAMUR NE107 “Self-Monitoring and Diagnosis of Field Devices”. *2: Except for the restart *3: When the device detects “AL.01”, “AL.02”, and “AL.03”, integral indicator displays regardless of the LCD Mode. IM 01W03E01-01EN 9. Parameter Summary Table 9.1 Parameter Summary Object ID 1. UAPMO block 9-1 <9. Parameter Summary> Attribute Label Description ID 1 Version Revision Indicates the application revision of FN510. This revision changes when the application software is downloaded. 10 Static Revision Indicates the revision level of the fixed parameters of UAP. Used, for example, to check whether parameters have been changed. 64 Identification Indicates the vendor ID, model ID, and revision of Number the device. 65 CTS Version Indicates the version of the communication stack test system (CTS). 66 ITS Version Indicates the version of the interoperability test system (ITS). 67 Diagnostic Indicates the diagnostic results of the device based Status on the NAMUR NE107 *2 model. Setting Enable diagnostic status configuration in UAP Option to Enable allows turning OFF and ON the display of the diagnostic results for each summary, and changing Categorize. 68 UAP Option Allows setting the Diagnostic Status and write protection of UAP. 1. Software write protect 1: On, 0: Off (default) 2. Enable hardware write protect 1: Enable, 0: Disable (default) 3. Enable diagnostic status configuration 1: Enable, 0: Disable (default) The following table shows the relationship between the hardware write protection and software write protection. Enable hardware write protect Disable Disable Enable Enable 69 Diagnostic Switch 70 Diagnostic Configuration 71 Find Device Hardware Software write Write protect protect Off or On Off or On Off On Off On Off or On Off or On Default value Handling *1 --- R --- R --- R 0 R 0 R --- R 1. Off 2. Disable 3. Disable W(P) On W(P) Refer to Table 9.2. W(P) 0 W write protect No Protected No Protected Allows setting On/Off for each summary of Diagnostic Status when Enable diagnostic status configuration in UAP Option is set to Enable. 1: On (default), 0: Off Allows Categorize for each summary of Diagnostic Status when Enable diagnostic status configuration in UAP Option is set to Enable. 0x08: F:Failure status 0x04: C:Function check status 0x02: O:Out of specification status 0x01: M:Maintenance required status When set a value other than 0, FN510 displays “Squ.” on the LCD. The value means the display duration. After displaying, this value returns to 0. Unit: second Range: 0 to 60 IM 01W03E01-01EN 9-2 <9. Parameter Summary> Object Attribute Label ID ID 1. 102 Diagnostic UAPMO Status Detail block 103 Energy Left (continued) 104 Reset Energy Left 105 Power Supply Status 106 Energy Harvest Type Power Supply Voltage Hardware Write Protect 107 110 111 112 113 135 136 137 138 139 Antenna Temperature Adapter Temperature Temperature Unit Description Detailed information on Diagnostic Status. Default value Refer to Table 9.2 --- Handling *1 W Indicates the number of days of remaining battery life assuming ambient temperature condition as 23 degrees Celsius. Unit: day Resets the remaining battery power calculation to restore it to a remaining battery power calculation which is based on new batteries. 0: Continue 1: Reset Indicates remaining battery life and power supply of device. 0: line powered 1: battery powered, greater than 75% remaining capacity 2: battery powered, between 25% and 75% remaining capacity 3: battery powered, less than 25% remaining capacity Available to write note into this parameter. --- R --- W(P) Indicates the measured power supply voltage (V). --- R Indicates the status of the hardware write protection --switch. 0: Off 1: On Indicates the temperature of the FN110. --- R R Indicates the temperature of the FN510. --- R °C W(P) 1. Off 2. 15 W(P) 1. Off 2. 15 W(P) 1. Off 2. 15 W(P) 1. Off 2. 15 W(P) 1. Off 2. 15 W(P) Selects the temperature unit to be indicated on Antenna Temperature and Adapter Temperature. 1000: K 1001: °C (default) 1002: °F 1003: °R Other Faults The On/Off or priority for Other Faults Alert can be Alert set. 1. On/Off setting 0: On, 255: Off (default) 2. Alert report priority: 0 to 15 (default: 15) Faults NonThe On/Off or priority for Faults Non-compliance compliance Alert Alert can be set. 1. On/Off setting 0: On, 255: Off (default) 2. Alert report priority: 0 to 15 (default: 15) Faults Process The On/Off or priority for Faults Process Influence Influence Alert Alert can be set. 1. On/Off setting 0: On, 255: Off (default) 2. Alert report priority: 0 to 15 (default: 15) Simulation The On/Off or priority for Simulation Active Alert can Active Alert be set. 1. On/Off setting 0: On, 255: Off (default) 2. Alert report priority: 0 to 15 (default: 15) Soft Update The On/Off or priority for Soft Update Incomplete Incomplete Alert Alert can be set. 1. On/Off setting 0: On, 255: Off (default) 2. Alert report priority: 0 to 15 (default: 15) R 0 (reading W(P) value is always 0) IM 01W03E01-01EN 9-3 <9. Parameter Summary> Object Attribute Label Description ID ID 1. 140 Power Low Alert The On/Off or priority for Power Low Alert can be UAPMO set. block 1. On/Off setting (continued) 0: On, 255: Off (default) 2. Alert report priority: 0 to 15 (default: 15) 141 Power Critical The On/Off or priority for Power Critical Low Alert Low Alert can be set. 1. On/Off setting 0: On, 255: Off (default) 2. Alert report priority: 0 to 15 (default: 15) 142 Fault Prediction The On/Off or priority for Fault Prediction Alert can Alert be set. 1. On/Off setting 0: On, 255: Off (default) 2. Alert report priority: 0 to 15 (default: 15) 143 Environmental The On/Off or priority for Environmental Conditions Conditions Alert Alert can be set. 1. On/Off setting 0: On, 255: Off (default) 2. Alert report priority: 0 to 15 (default: 15) 144 Outside Sensor The On/Off or priority for Outside Sensor Limits Limits Alert Alert can be set. 1. On/Off setting 0: On, 255: Off (default) 2. Alert report priority: 0 to 15 (default: 15) 145 Out of Service The On/Off or priority for Out of Service Alert can Alert be set. 1. On/Off setting 0: On, 255: Off (default) 2. Alert report priority: 0 to 15 (default: 15) 146 Calibration The On/Off or priority for Calibration Problem Alert Problem Alert can be set. 1. On/Off setting 0: On, 255: Off (default) 2. Alert report priority: 0 to 15 (default: 15) 147 Faults Sensor or The On/Off or priority for Faults Sensor or Actuator Actuator Alert Alert can be set. 1. On/Off setting 0: On, 255: Off (default) 2. Alert report priority: 0 to 15 (default: 15) 148 Faults The On/Off or priority for Faults Electronics Alert Electronics Alert can be set. 1. On/Off setting 0: On, 255: Off (default) 2. Alert report priority: 0 to 15 (default: 15) 2 DESCRIPTION Indicates the version and model information of the 2. downloaded data. UDO block 3 STATE Indicates the status of UDO block. 0: Idle 1: Downloading 3: Applying 4: DL Complete 6: DL Error 5 MAX_BLOCK_ Maximum block size. This value is smaller than the SIZE maximum data size of APDU. 14 LAST_BLOCK_ Indicates the last downloaded block number. 0 DOWNLOADED means that no block has been downloaded. 16 ERROR_CODE Indicates the error codes for DL Error. 0: no Error 1: Timeout 2: Client Abort 64: Apply failure Default value Handling *1 1. Off 2. 15 W(P) 1. Off 2. 15 W(P) 1. Off 2. 15 W(P) 1. Off 2. 15 W(P) 1. Off 2. 15 W(P) 1. Off 2. 15 W(P) 1. Off 2. 15 W(P) 1. Off 2. 15 W(P) 1. Off 2. 15 W(P) --- R --- R --- R --- R --- R IM 01W03E01-01EN Object ID 3. CO block 9-4 <9. Parameter Summary> Attribute Label ID 1 REVISION 2 COMM_ ENDPOINT 3 COMM_ CONTRACT 4 PUB_ITEM_ MAX PUB_ITEM_ NUM PUB_ITEM 5 6 4. 1 TRANSDUCER 2 block 3 4 Tag Description Model Serial Number Display Selection Description Indicates the revision number such as COMM_ ENDPOINT, etc. Indicates the Endpoint information. The following shows the components. 1. Network address of remote endpoint 2. Transport layer port at remote endpoint 3. Object ID at remote endpoint 4. Stale data limit 5. Data publication period 6. Ideal publication phase 7. Publish Auto Retransmit 8. Configuration status Indicates the Contract information. The following shows the components. 1. ContractID 2. Contract_Status 3. Actual_Phase Maximum PUB_ITEM value. Handling *1 --- R --- W --- R 9 R PUB_ITEM number. 0 R Indicates the PUB_ITEM information. The following shows the components. 1. ObjectID 2. AttributeID 3. AttributeIndex 4. Size Memo field available to write anything. Indicates the model name of the FN510. Indicates the serial number of the FN510. Select PV Value displaying on the integral indicator. Following value can be selected depending on the Sensor Type. --- W Transducer ----BI1 W(P) R R W(P) Intermittent mode (off: 60 seconds, display: 2 seconds) W(P) SensorType DIDO DI Pulse Count 4-20mA Not Used 5 Default value Value 32:BI1(Default) 33:BI2 64:BO1 0:AI1(Default) 0:AI1(Default) 0:AI1(Default) LCD Intermittent Select the off time of the integral indicator. Time 0: Continuous mode 1: Intermittent mode (off: 5 seconds, display: 2 seconds) 2: Intermittent mode (off: 10 seconds, display: 2 seconds) 3: Intermittent mode (off: 30 seconds, display: 2 seconds) 4: Intermittent mode (default) (off: 60 seconds, display: 2 seconds) 5: Off mode IM 01W03E01-01EN Object Attribute Label ID ID 4. 6 LCD Exp Mode TRANSDUCER block (continued) 7 Wireless Status Description Select the notation of the integral indicator. 0: radix notation (default) 1: exponential notation Indicates the wireless communication status. Bits Contents Bit7-3 reserved Bit2 Contract status (Client/Server) Bit1 Contract status (Publish) Bit0 Join status 8 5. DIS block 9-5 <9. Parameter Summary> 10 Measurement Rate Special Cmd 11 Sensor Type 1 REVISION 2 COMM ENDPOINT 3 SUB_ITEM_ MAX SUB_ITEM_ NUM SUB_ITEM 4 5 Default value Handling *1 radix notation W(P) -- R --- R Normal mode W DIDO W(P) --- R Value --0: Not established 1: Established 0: Not established 1: Established 0: Idle 1: Joined Indicates the publish period. Unit: second Special function parameter. 0: Normal mode (default) 1: Deep-sleep mode Select the type of sensor to be connected to the FN510. 40: DIDO (default) 41: DI Pulse Count 44: 4-20 mA 45: Not Used Indicates the revision number such as COMM_ ENDPOINT, etc. Indicates the Endpoint information. The following shows the components. 1. Network address of remote endpoint 2. Transport layer port at remote endpoint 3. Object ID at remote endpoint 4. Stale data limit 5. Data publication period 6. Ideal publication phase 7. Publish Auto Retransmit 8. Configuration status Maximum SUB_ITEM value. --- W 8 R SUB_ITEM number. 0 R Indicates the SUB_ITEM information. The following --shows the components. 1. ObjectID 2. AttributeID 3. AttributeIndex 4. Size W IM 01W03E01-01EN Object ID 20. AI1 block 9-6 <9. Parameter Summary> Attribute Label ID 1 Process Value 2 3 4 102 103 104 105 106 107 108 Description Output object of AI1(DI Pulse Count or 4-20 mA). 1. Value: output value of the object. 2. Status: indicates the status of the object’s output value. Block Mode Select the block’s operation status. O/S and Auto can be selected. 1. Target: Specify object mode of the object. 2. Actual: Indicates current mode of the object. 3. Permitted: Indicates the mode selected by Target of the object. 4. Normal: Indicate normal status mode of the object. Concentrator Indicates the Concentrator object value that OID corresponds to the data update of the PV value. Scale Allows specifying the upper or lower limit for the PV scaling, unit code, etc. When the data of these parameters is rewritten, it is necessary to set the operational mode of the block to O/S (Out of Service). 1. EU at 100%: Indicate the upper limit of the PV value 2. EU at 0%: Indicate the lower limit of the PV value 3. Units Index: Indicate the setting unit used for the PV value 4. Decimal: Indicate the digit number below the decimal point displayed in the integral indicator Tag Description A universal parameter to store the comment that describes the tag. Up to 32 characters can be used. Simulate Switch A simulation function switch for the object. 1: Disable (default) 2: Enable Simulate Value When Simulate Switch is set to Enable, this value is used as the input value for the object. The input value can be changed. When Simulate Switch is set to Disable, the output value of the device connected to mAIN port is used as the input value for the object. Sensor Range Indicates the information about the measurement range. 1. EU at 100%: Indicate the upper limit of the input value 2. EU at 0%: Indicate the lower limit of the input value 3. Units Index: Indicate the unit used for the input value 4. Decimal: Indicate the digit number below the decimal point displayed in the integral indicator PV Energy Left Allows assign the Energy Left to AI1.PV.Value when Enable Sensor Type in TRANSDUCER block is set to “Not Used”. 0: Disable (default) 1: Enable Sensor Serial Indicates the serial number of the sensor, which corresponds to its tag. Reset Pulse Resets the output value to AI1 when Sensor Type in Count TRANSDUCER block is set to “DI Pulse Count”. Default value Handling *1 1. --2. --- R 1. Auto 2. Auto 3. O/S|Auto 4. Auto W(P) --- R 1. 100 2. 0 3. % 4. 2 W(P) AI1 W(P) Disable W(P) --- W(P) 1. 20 2. 4 3. mA 4. 2 R W(P) --- W(P) Normal W(P) IM 01W03E01-01EN Object ID 10. BI1 block 11. BI2 block Attribute Label ID 1 Process Value 2 3 102 103 104 105 107 30. BO1 block 9-7 <9. Parameter Summary> 1 2 4 5 102 Description Output object of BI1 and BI2. 1. Discrete Value: output value of the object. 0: Off(Open), 255: On(Close) 2. Discrete Status: indicates the status of the object’s output value. Block Mode Select the block’s operation status. O/S and Auto can be selected. 1. Target: Specify object mode of the object. 2. Actual: Indicates current mode of the object. 3. Permitted: Indicates the mode selected by Target of the object. 4. Normal: Indicate normal status mode of the object. Concentrator Indicates the Concentrator object value that OID corresponds to the data update of the PV value. Tag Description A universal parameter to store the comment that describes the tag. Up to 32 characters can be used. Simulate Switch A simulation function switch for the object. 1: Disable (default) 2: Enable Simulate Value When Simulate Switch is set to Enable, this value is used as the input value for the object. When Simulate Switch is set to Disable, the output values of the devices connected to IN1/IN2 ports are used as the input values for the objects. Options Option parameter for the object 1. Invert 0: Normal(default), 1: Invert(Inverts the output value) Sensor Serial Indicates the serial number of the sensor, which corresponds to its tag. Output Value Input object of BO1. Binary 1. Discrete Value: input value of the object. 0: Off(Open), 255: On(Close) 2. Discrete Status: indicates the status of the object’s output value. Block Mode Select the block’s operation status. O/S and Auto can be selected. 1. Target: Specify object mode of the object. 2. Actual: Indicates current mode of the object. 3. Permitted: Indicates the mode selected by Target of the object. 4. Normal: Indicate normal status mode of the object. Read Back Read Back Value of BO1. Value Binary 1. Discrete Value: Read Back value of the object. 0: Off(Open), 255: On(Close) 2. Discrete Status: indicates the status of the object’s output value. Concentrator Indicates the Concentrator object value that OID corresponds to the data update of the Read Back value. Tag Description A universal parameter to store the comment that describes the tag. Up to 32 characters can be used. Default value Handling *1 1. --2. --- R 1. Auto 2. Auto 3. O/S|Auto 4. Auto W(P) --- R BI1:BI1 BI2:BI2 Disable W(P) W(P) --- W(P) Normal W(P) --- W(P) --- W 1. Auto 2. Auto 3. O/S|Auto 4. Auto W(P) --- R --- R BO W(P) IM 01W03E01-01EN 9-8 <9. Parameter Summary> Object Attribute Label ID ID 30. 103 Options BO1 Block (continued) 104 105 107 Description Default value Option parameter for the object 1. Invert 0: Normal(default), 1: Invert(Inverts the output value) 2. Fault State supported 0: Off(default), 1: On(Sets Fault Status Value to the input on detection of device failure or Stale Limit) 3. Use Fault State Value 0: Off(default), 1: On(Sets Fault Status Value to the input at startup.) Fault State Time If Fault State supported is set to On, the time from the detection of the Fault State until the Fault Status Value is applied is specified by this parameter. Fault State If Fault State supported is set to On, this value is Value used as an input value to the object when Faut State is detected. 1: Off (Open), 255:On(Close) Sensor Serial Indicates the serial number of the sensor, which corresponds to its tag. Handling *1 1.Normal 2.Off 3.Off W(P) 0 W(P) Off W(P) --- W(P) *1: R: Read only, W: Read and Write, (P): Target of the write protection *2: NAMUR NE 107 “Self-Monitoring and Diagnosis of Field Devices” AI Object (AI1 block) Scale function is valid if the Sensor Type in the TRANSDUCER block is set to 4-20 mA. AI algorithm Operator Mode and PV.Status handling Mode.Target Simulate PV Switch O/S Simulate Value Scale Transducer Sensor Type PV PV AI Publish Auto Scale F0901.ai Figure 9.1 Example schema of Analog Input Object IM 01W03E01-01EN 9-9 <9. Parameter Summary> BI Object (BI1/BI2 block) BI algorithm Operator Mode and PV_B.Status handling Mode.Target PV_B Simulate Switch O/S Simulate Value Invert Transducer PV_B Auto Options.Invert Figure 9.2 PV_B Publish F0902.ai Example schema of Binary Input Object BO Object (BO1 block) BO algorithm Operator Mode.Target Mode and ReadBack.Status handling ReadBack O/S Transducer ReadBack ReadBack Publish Auto Invert AUTO Transducer OP_B FState Publish O/S OP_B Options.Invert Options.FaultStateSupported FSTATE VALUE F0903.ai Figure 9.3 Example schema of Binary Output Object IM 01W03E01-01EN Table 9.2 Bit <9. Parameter Summary> 9-10 Diagnostic Status Detail Diagnostic Status Detail Diagnostic Status Detail.1 31 ADAPTER FAIL 30 ANTENNA FAIL 28 RS485 FAIL 27 SENSOR FAIL 23 9 8 7 6 5 4 1 BO_STALE_LIMIT_FAIL LOWBAT_ALM CRITICAL LOWBAT ADAPTER TEMP HI ADAPTER TEMP LO ANTENNA TEMP HI ANTENNA TEMP LO mA_FAIL 0 mA_OUTSIDE_LIMIT Diagnostic Status Detail.2 31 AI1 OUT OF SERVICE 27 BI1 OUT OF SERVICE 26 BI2 OUT OF SERVICE 25 BO1 OUT OF SERVICE 15 AI1 SIMULATION ACTIVE 11 BI1 SIMULATION ACTIVE 10 BI2 SIMULATION ACTIVE Description Diagnostic NAMUR status NE107 assignment bit Category * FN510 failure FN110 failure Communication failure between FN110 and FN510 Disconnection or communication error, between the connected device and FN510 Detect Stale Limit Low remaining battery voltage Low remaining battery voltage FN510 temperature is above +85°C FN510 temperature is below -40°C FN110 temperature is above +85°C FN510 temperature is below -40°C mA value is in the following range, which is not within the specification. 1.0 ≤ mA < 3.6, 21 < mA mA value is in the following range, which is not within the specification. 3.6 ≤ mA < 4.0, 20 < mA ≤ 21 Bit27 Bit27 Bit27 F F F Bit26 F Bit16 Bit19 Bit20 Bit22 Bit22 Bit22 Bit22 Bit26 F M M O O O O O Bit23 O AI1 O/S Mode BI1 O/S Mode BI2 O/S Mode BO1 O/S Mode AI1 Simulate Mode BI1 Simulate Mode BI2 Simulate Mode Bit24 Bit24 Bit24 Bit24 Bit17 Bit17 Bit17 C C C C C C C * NAMUR NE 107 “Self-Monitoring and Diagnosis of Field Devices” IM 01W03E01-01EN 10-1 <10. General Specifications> 10. General Specifications Please refer to GS 01W03E01-01EN for the latest information. 10.1 Standard Specifications POWER SUPPLY SPECIFICATIONS Battery: Dedicated battery pack. Rated voltage: 7.2 V Rated capacity: 19 Ah Battery Pack: 2x primary lithium-thionyl chloride batteries With battery case (batteries sold separately) PERFORMANCE SPECIFICATIONS Update Period: 1 to 3600 s selectable* *: When using the digital output, more than 2 s is accepted. Battery Characteristics: Typical battery life when using analog input or digital input is 10 years*1 or 7 years*2 and when using digital output with always on is 3 years*3 or 2 years*1 in the following conditions.*4 • Ambient temperature: 23 ±2°C • Device role: IO mode • LCD display: off *1: Update period: 10 s *2: Update period: 5 s *3: Update period : 30 s *4: Environmental condition such as vibration and the type of connected device may affect the battery life. Accuracy: See Table 10.1. FUNCTIONAL SPECIFICATIONS Power Supply: Power supply to the FN110 Supply voltage: 3.5 V Supply current: 50 mA Integral Indicator (LCD display): 5-digit numerical and status display. Display contents and display on/off can be controlled with a magnet (not included). The indicator displays the following information: Wireless communication status, device status, write protection, sensor data and alarm message Diagnosis Functions: Power failures, wired communication failures, firmware internal errors, memory errors, battery alarm, abnormal temperature Software Download Function: Software download function permits to update wireless field device software via ISA100 Wireless communication. INSTALLATION ENVIRONMENT Ambient Temperature Limits: Operating: -40 to 85°C (attitude up to 3000 m) -30 to 80°C (LCD visible range) Storage: -40 to 85°C Ambient Humidity Limits: Operating: 0 to 100%RH (non-condensation) Storage: 0 to 100%RH (non-condensation) Ambient Temperature Gradient: Operating: ±10°C/h or less Storage: ±20°C/h or less Vibration Resistance: 0.21 mm P-P (10 - 60 Hz), 3G (60 - 2 kHz) Shock Resistance: 50 G 11 ms Input: See Table 10.1. Output: Communication specifications between this product and FN110 are below. Communication Mode: Half-duplex communication (RS485 compliant) Communication Speed: 9600 bps Connector: 5-pin round connector dedicated Cable: Max 20 m (dedicated cable) IM 01W03E01-01EN <10. General Specifications> REGULATORY COMPLIANCE STATEMENTS This product satisfies the following standards. * Please confirm that an installation region fulfills an applicable standard. If additional regulatory information and approvals are required, contact a Yokogawa representative. CE Conformity: EMC: EN61326-1 Class A Table 2 (For use in industrial locations), EN55011 Class A Safety: EN61010-1 (Indoor/Outdoor use) Degrees of Protection: IP66 IP66 rating applies when the connector is properly tightened. Explosion-Proof Types: TIIS, FM (United States or Canada), ATEX, IECEx (approvals under pending) Table 10.1 10-2 PHYSICAL SPECIFICATIONS Connections: Refer to “MODEL AND SUFFIX CODES” Housing Material: Plastic (Polycarbonate) Weight: 500 g (without mounting bracket and battery) Monting: 2-inch pipe mounting Input / Output Function Summary Function 4-20 mA Analog Input (AI) *1 Digital Input (DI) *1 *2 Item Number of input channels Input signal Range Internal shunt resistor Accuracy Temperature coefficient Number of input channels Input signal Maximum on resistance Minimum off resistance Current value when contact is on Digital Output(DO) *1 *3 Pulse Input (PULSE) *1 *2 Number of output channels Output signal Maximum load current Maximum load voltage Number of input channels Input signal Maximum on resistance Minimum off resistance Minimum detection time *4 Maximum input frequency Counter range IN1 IN2 Specifications 1 4 to 20 mA DC 0 to 25 mA 10 ohm ±16 uA ±3.2 uA/10°C 2 Dry contact input 200 Ω 50 kΩ 0.2 mA 1 mA 1 Dry contact output 125 mA DC 30 V DC 1 Dry contact input *2 200 Ω 50 kΩ 5 ms 100 Hz 0 to 999999 *1: The input channels are non-isolated and share one common ground. *2: Do not apply a voltage to a DI or PULSE from the outside. *3: The digital output terminal is configured as open-drain. The voltage and current applied to a digital output terminal should be within the specified range. *4: Minimum time required to detect an eternal contact becomes off. IM 01W03E01-01EN 10-3 <10. General Specifications> 10.2 Model and Suffix Codes Model FN510 General Specification Suffix Code ���������������������������������������������������������������������������� Inter module -A1����������������������������������������� communication ---A���������������������������������������� Housing material 0������������������������������������� Electrical connection 0���������������������������������� 1���������������������������������� 2���������������������������������� 6���������������������������������� Measurement *3 Integral indicator Mounting bracket --------Option codes A������������������������������ -D������������������������� J����������������������� K����������������������� N����������������������� A������������������� A���������������� -A����������� A�������� Descriptions Field Wireless Multi-Function Module Digital communication for FN series Always A Plastic (Polycarbonate) Horizontal connection: blind plug, Vertical connection: G 1/2 female *1 Horizontal connection: blind plug, Vertical connection: 1/2 NPT female *1 Horizontal connection: blind plug, Vertical connection: M20 female *1 Horizontal connection: blind plug, Vertical connection: blind plug *2 One analog input, two digital input, one digital output, one pulse input Digital indicator 316 SST 2-inch pipe mounting (for horizontal piping) 316 SST 2-inch pipe mounting (for vertical piping) None Always A Always A Always A Always A / Optional specifications *1: Cable gland is not included. Prepare the cable gland with a flat gasket. *2: Select when use as a routing device. *3: Analog input and pulse input are able to use exclusively with other functions. 10.3 Optional Specification (For Explosion Protected Type) Item United States Factory Mutual (FM) Canada ATEX IECEx Description Intrinsically Safe Intrinsically Safe Intrinsically Safe Intrinsically Safe Code – – – – 10.4 Optional Specifications Protection cap * Wired tag plate Item Description Metal waterproof cap 316 SST tag plate wired onto module Code CP N4 *: When protection cap is not specified, dust-cap is attached. 10.5 Optional Accessories Item Battery pack assembly Batteries Battery case *2 Magnet Parts Number F9090FD F9915NR F9090GD F9840PA Description Battery case, Lithium-thionyl chloride batteries *1 2 pieces Lithium-thionyl chloride batteries *1, 2pieces Battery case only For magnet switch operation *1: Tadiran TL-5930/S *2: Alternatively, Tadiran SL-2780/S, TL-5930/S or VITZROCELL SB-D02 batteries can be purchased from your local distributor. IM 01W03E01-01EN 10-4 <10. General Specifications> 10.6 Dimensions 2-inch pipe mounting (for horizontal piping) 112 (4.41) 48 (1.90) 29 (1.12) 100 (3.94) Unit: mm (approx. inch) FN110 Grounding terminal Blind plug 79 (3.09) 148 (5.83) 93 (3.66) 269 (10.59) Integral indicator Electrical connection 47 (1.85) Magnet switch 2 Magnet switch 1 40 (1.57) 80 (3.15) Mounting bracket 93 (3.66) 2-inch pipe F1001.ai 2-inch pipe mounting (for vertical piping) 112 (4.41) 48 (1.90) Unit: mm (approx. inch) 47 (1.85) Grounding terminal Integral indicator 106 (4.18) FN110 93 (3.66) 80 (3.15) 29 (1.12) 100 (3.94) 170 (6.69) 73 (2.87) Blind plug 47 (1.83) 50 (1.97) Electrical connection Magnet switch 1 Magnet switch 2 Mounting bracket 2-inch pipe F1002.ai IM 01W03E01-01EN 10-5 <10. General Specifications> 10.7 LCD Display Character List A B C D E F G H I J K L M N O P Q R S T U V W X Y Z 1 2 3 4 5 6 7 8 9 0 . (Period) - (Minus) F1009.ai IM 01W03E01-01EN i Revision Information Title : FN510 Field Wireless Multi-Function Module Manual No. : IM 01W03E01-01EN Edition 1st Date Dec. 2014 Page ― Revised item New Publication IM 01W03E01-01EN


