1
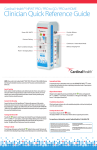
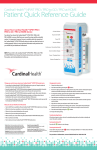
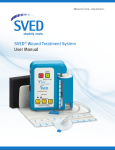
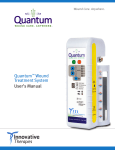
INSTRUCTIONS FOR USE
NOTE: Please refer to the User’s Manual for detailed
instructions and review the Precautions and
Contraindications before use.
1
Plug unit’s power supply into a suitable
power outlet. Plug power cable into
right side of unit. For battery operation,
please refer to the User’s Manual.
2
Canisters are single-patient use only.
Insert canister in holder by sliding up
bottom right side of unit. Canister
should “click” into place and lock. To
remove canister, press canister release
button, grasp canister at bottom and
pull downwards. Canister may also be
changed when the device is mounted in
the I.V. Pole adapter. NOTE: Canister
release button may need to be
depressed to permit canister insertion.
3
Connect the distal end of the
SpeedConnect Tube with the blue
tapered connector to the patient port
of the Canister. Gently twist and push
connector on just enough to seal it.
Make sure that the clamp on the
SpeedConnect Tube is open. NOTE:
Please refer to the User’s Manual for
instructions on how to properly
dress the wound.
4
Press the ON (“I”) button to start
therapy. Adjust desired suction level by
pressing the UP/DOWN arrow keys A
green LED will begin flashing next to
the therapy setting lighting steadily
when pressure is achieved. The LED will
flash if pressure cannot be maintained.
5
To lock therapy setting, press and hold
the ON button for three seconds. The
unit will beep three times indicating
therapeutic setting is locked. Repeat
process to unlock therapy setting.
6
To operate the unit in intermittent mode,
press the CONTINUOUS/INTERMITTENT
selection button. An amber LED will light
indicating the device is in intermittent
mode. Repeat process to return to
continuous mode.
7
If device begins to alarm, please refer
to troubleshooting table to identify
and correct the alarm condition.
8
To turn device off, momentarily press the
red OFF (“O”) button. The LED display will
flash “o-F-F” three times while the device
is preparing to shut down.
NOTE: Each time the device is turned ON, the LED display will flash the number of days
and hours of therapy remaining in the following format: d XX H YY.
Notice to Users:
As with any prescription medical device, failure to follow product instructions or adjusting settings and
performing therapy applications without the express direction and/or supervision of your trained
clinical caregiver may lead to improper product performance and the potential for serious or fatal injury.
For Questions and Information contact:
INNOVATIVE THERAPIES, INC.
GAITHERSBURG, MARYLAND
20877 U.S.A.
866-484-9678
www.ITIMEDICAL.com
Quantum™ INSTRUCTIONS FOR USE
NOTE: Please refer to the User’s Manual for detailed instructions and review the Precautions and
Contraindications before use.
Alarm Type
FLASHING “0”
THERAPY TIME OUT
FLASHING “1”
LOW PRESSURE /
DRESSING LEAK
Indication
• Device is ready to be checked
and serviced.
• LED display flashes “1”
accompanied by an
intermittent single-tone
audible beep.
• Unit will continue to alarm
until the low pressure/leak
condition is corrected or the
alarm is cleared.
FLASHING “2”
CANISTER FULL
Corrective Action
• Return device to
representative for service.
• Pat around drape to check for
leaks. If leak is found, patch
with extra drape material.
• Check all tubing connections
between the therapy unit
and dressing.
• Check to ensure the canister
is fully seated and locked.
Check for cracks in the
canister or lid separation.
• LED display flashes “2”
• Turn unit off by pressing the
accompanied by an intermittent OFF button.
two-tone audible beep.
• Remove canister and replace
• Unit will continue to alarm
as necessary.
until the canister is replaced.
• Press the ON button to
resume therapy.
• If conditions persist, the
problem may be related to the
device.
FLASHING “3”
LOW BATTERY
• The LED display flashes “3”
accompanied by an
intermittent three-tone
audible beep.
• The unit will continue to alarm
until connected to an A.C.
power source.
• Utilizing an approved ITI A.C.
Adapter, connect unit to an
A.C. power source to provide
operating power and to
recharge the internal battery.
• When the charge falls below a
critical level, the therapy will
be discontinued.
NOTE: Pressing the ON (MUTE) button after an alarm will silence the beeper for 5 minutes.
• Defibrillation: Remove the wound dressing if defibrillati0n is required in the area of dressing placement.
Failure to remove the dressing may inhibit electrical current transmission and/or patient resuscitation.
• Magnetic Resonance Imaging (MRI): The Quantum™ Wound Treatment Unit is not MRI-compatible. Do not
take into the MRI area.
• Hyperbaric Oxygen Therapy (HBO): NEVER allow a device—whether on or off—inside a hyperbaric
chamber. The device must be disconnected from the patient prior to HBO treatment. Refer to the Clinical
Guidance for the Innovative Therapies Wound Treatment Systems for more information on use with HBO
therapy.