1
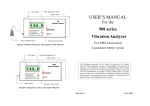
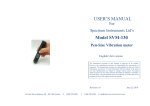
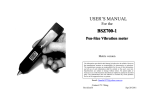
USER’S MANUAL
For the
SERIES-908
2
2
Model SVM-140
A Portable Vibration Analyzer
True RMS measurement
4 parameters Metric version
2
2
The information provided in this Manual is believed to be reliable.
However, the manufacturer assumes no responsibility for inaccuracies or
omissions. The manufacturer assumes no responsibility for the use of this
information, and all use of such information shall be entirely at the user's
own risk. Specifications are subject to change without notice. No patent
rights or licences to any of the functions described are implied or granted to
any third party. The manufacturer does not authorise or warrant any of the
products for use in life support devices or systems.
1. Preparation
1). Check the voltage of the battery:
Press <Measure> key, observe the display on the screen. If
there is an arrow on the top left corner, you need to replace the
battery with a new one.
2). Set-up probe
The standard SVM-140 has two probes while outside sensor
has 1 probe and 1 magnetic mount. When changing, take hold of
the screw cover to avoid rotation and damage of the sensor.
2. Measurement
1). Select the measure parameters:
The SVM-140 has 4 vibration parameters. They are:
a) Displacement (unit: µm = 1/1000 mm): Equivalent peak-peak
value
b) Velocity (unit: mm/s) : True RMS Value;
c) Acceleration (unit: m/s2): Equivalent peak
d) High Frequency Acceleration (unit: m/s2): Equivalent peak
2). Functions of the <Measure> key:
a). Key press: Power on and begin measuring;
b). Key release: Hold the measured value for twenty seconds
and then power off automatically.
3). Stick the probe to the measured object (the pressure should be
about 0.5—1 kg.)
3. Notes
1). Avoid intense impact, high temperature and immersed in water.
2). Keep the sensor plug clean and dry, and use it carefully.
3). Low battery indication: a bar will appear at the upper left corner
of the LCD
4). Install the battery:
a) Open the small back cover of battery cabinet (2 screws at the
end far away from the sensor at backside, see figure);
b) Place a battery (6F22, 9V) correctly according to the polarity;
c) Close the back cover and screw the screws tightly;
d) If it has been put aside long-term, please take out the battery
in case of the outflow of the battery liquid;
5) If the sensor has been used for over one year, please re-calibrate
the vibrometer to ensure the precision.
4. Specifications
1). Measurement condition:
Temperature:5-50oC, Humidity<85%, Non-causticity environment,
without strong electric-magnetic field & strong impact
2). Amplitude Ranges:
Displacement 1−1999
µm
peak-peak (*)
Velocity
0.1−199.9 mm/s true RMS
Acceleration and High Frequency Acceleration:
0.1−199.9 m/s2 peak (*)
*Note: peak-peak and peak are equivalent value means:
peak-peak=2.828*RMS while peak=1.414*RMS
3). Measurement accuracy: ± 5% of display ± 2 digits
Noise Level (without input): ACC<0.3 m/s2, VEL<0.5mm/s, Disp<3µm
Frequency response accuracy: ±5 %; ±10% fo r ACC 4.5kHz -10kHz
Non-linearity: ±5%
4). Sensor type: Piezoelectric Accelerometer
5). Frequency response: 10−1000Hz(Inside accelerometer)
10−5000Hz (Outside accelerometer, depending on model)
High Frequency Acceleration: 1000-5000Hz ±10%
6). Battery: 9V 6F22, 25 hours of continuous operation.
7). Configuration:
Standard: Inside accelerometer with 2 handheld probes
Optional: Outside accelerometer with magnetic mount and probe
8). Dimensions: 13×6×2.3 cm; Weight: 200 g.
5. Warranty
1 year but not include those caused by mishandling.