1
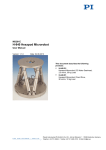
MS203E H-206 Hexapod User Manual Version: 1.2.0 Date: 03.06.2013 This document describes the following product: H-206.F1 Hexapod for 6-D Precision Alignment and Micromanipulation Physik Instrumente (PI) GmbH & Co. KG · Auf der Römerstr. 1 76228 Karlsruhe, Germany Telephon +49 721 4846-0 · Telefax +49 721 4846-1019 · E-Mail [email protected] Physik Instrumente (PI) GmbH & Co. KG is the owner of the following trademarks: PI®, PIC®, PICMA®, PILine®, PIFOC®, PiezoWalk®, NEXACT®, NEXLINE®, NanoCube®, NanoAutomation®, Picoactuator®, PInano® © 2013 Physik Instrumente (PI) GmbH & Co. KG, Karlsruhe, Germany. The text, photographs and drawings in this manual are protected by copyright. With regard thereto, Physik Instrumente (PI) GmbH & Co. KG retains all the rights. Use of said text, photographs and drawings is permitted only in part and only upon citation of the source. Original instructions First printing: 03.06.2013 Document number: MS203E, BRo, version 1.2.0 Subject to change without notice. This manual is superseded by any new release. The latest release is available for download (p. 3) on our website. Contents 1 About this Document 1.1 1.2 1.3 1.4 2 3 Goal and Target Audience of this User Manual ...................................................1 Symbols and Typographic Conventions ...............................................................1 Other Applicable Documents ................................................................................2 Downloading Manuals ..........................................................................................3 Safety 2.1 2.2 5 Intended Use ........................................................................................................5 General Safety Instructions ..................................................................................5 2.2.1 Organizational Measures ....................................................................6 2.2.2 Safety Measures during Transport .....................................................6 2.2.3 Safety Measures during Installation ...................................................6 2.2.4 Safety Measures during Start-Up .......................................................8 2.2.5 Safety Measures during Maintenance ................................................8 Product Description 3.1 3.2 3.3 3.4 3.5 3.6 1 9 Features and Applications ....................................................................................9 Model Overview ..................................................................................................10 Product View.......................................................................................................11 Scope of Delivery ...............................................................................................12 Accessories ........................................................................................................13 Technical Features .............................................................................................14 3.6.1 Struts ................................................................................................14 3.6.2 Reference Point Switch and Limit Switches .....................................14 3.6.3 Control ..............................................................................................14 3.6.4 Motion ...............................................................................................15 4 Unpacking 19 5 Installation 21 5.1 5.2 5.3 5.4 5.5 5.6 5.7 5.8 5.9 6 Start-Up 6.1 6.2 7 General Notes on Installation .............................................................................21 Determining the Permissible Load and Working Space .....................................23 Grounding the Hexapod .....................................................................................24 Mounting the Hexapod on a Surface ..................................................................24 Mounting the Moving Platform ............................................................................25 Affixing the Load to the Hexapod .......................................................................28 Affixing a Stationary Component to the Hexapod ..............................................31 Affixing the P-611.3SF NanoCube® Stage to the Hexapod...............................32 Connecting the Cable Set to the Hexapod .........................................................37 39 General Notes on Start-Up .................................................................................39 Starting Up the Hexapod System .......................................................................40 Maintenance 7.1 7.2 7.3 41 Carrying out a Maintenance Run ........................................................................41 Packing the Hexapod for Transport ....................................................................42 Cleaning the Hexapod ........................................................................................48 8 Troubleshooting 49 9 Customer Service 51 10 Technical Data 53 10.1 10.2 10.3 10.4 Specifications......................................................................................................53 10.1.1 Data Table ........................................................................................53 10.1.2 Maximum Ratings .............................................................................54 Ambient Conditions and Classifications .............................................................54 Dimensions .........................................................................................................55 Pin Assignment ...................................................................................................56 10.4.1 Power Supply Connection ................................................................56 10.4.2 Data Transmission Connection ........................................................56 11 Old Equipment Disposal 59 12 Glossary 61 13 Appendix 65 13.1 13.2 Explanations of the Performance Test Sheet .....................................................65 EC Declaration of Conformity .............................................................................66 1 About this Document 1 About this Document In this Chapter Goal and Target Audience of this User Manual ............................................................ 1 Symbols and Typographic Conventions ........................................................................ 1 Other Applicable Documents ......................................................................................... 2 Downloading Manuals ................................................................................................... 3 1.1 Goal and Target Audience of this User Manual This manual contains information on the intended use of the H-206. It assumes that the reader has a fundamental understanding of basic servo systems as well as motion control concepts and applicable safety procedures. The latest versions of the user manuals are available for download (p. 3) on our website. 1.2 Symbols and Typographic Conventions The following symbols and typographic conventions are used in this user manual: CAUTION Dangerous situation If not avoided, the dangerous situation will result in minor injury. Actions to take to avoid the situation. NOTICE Dangerous situation If not avoided, the dangerous situation will result in property damage. H-206 Hexapod Actions to take to avoid the situation. MS203E Version: 1.2.0 1 1 About this Document INFORMATION Information for easier handling, tricks, tips, etc. Symbol/Label Meaning 1. Action consisting of several steps whose sequential order must be observed 2. Action consisting of one or several steps whose sequential order is irrelevant List item p. 5 Cross-reference to page 5 RS-232 Labeling of an operating element on the product (example: socket of the RS-232 interface) Warning sign on the product which refers to detailed information in this manual. 1.3 Other Applicable Documents The devices and software tools which are mentioned in this documentation are described in their own manuals. 2 Description Document C-887 Hexapod controller MS204E User Manual C-887 Hexapod controller MS204Equ User Manual Short Version Version: 1.2.0 MS203E H-206 Hexapod 1 About this Document 1.4 Downloading Manuals INFORMATION If a manual is missing on our website or if there are problems in downloading: Contact our customer service department (p. 51). The current versions of the manuals are found on our website. To download a manual, proceed as follows: 1. Open the website http://www.pi-portal.ws. 2. Click Downloads. 3. Click the corresponding category (e. g. H-Hexapods). 4. Click the corresponding product code (e. g. H-206). An overview of the available file types is shown for the selected product. 5. If (0 Files) is shown in the Documents line, log in as follows to display and download the documents: a) b) c) d) e) f) Insert the product CD in the corresponding PC drive. Open the Manuals directory. Open the Release News (e. g. C-887_Releasenews_V_x_x_x.pdf) on the CD of the product. Find the user name and password in the User login for software download section in the Release News. In the User login area on the left margin in the website, enter the user name and the password in the corresponding fields. Click Login. If Documents (0 Files) is still being displayed, no manuals are available: − Contact our customer service department (p. 51). 6. Click Documents. 7. Click the desired manual and save it on the hard disk of your PC or on a data storage medium. H-206 Hexapod MS203E Version: 1.2.0 3 2 Safety 2 Safety In this Chapter Intended Use ................................................................................................................. 5 General Safety Instructions ........................................................................................... 5 2.1 Intended Use The Hexapod for 6-D alignment (short: "Hexapod") is a laboratory device as defined by DIN EN 61010-1. It is intended to be used in interior spaces and in an environment which is free of dirt, oil, and lubricants. Based on its design and realization, the Hexapod is intended for positioning, adjusting and shifting of optical components (hereafter referred to as "load") in six axes at various velocities. The Hexapod is part of a Hexapod system. The intended use of the Hexapod is only possible in connection with the Hexapod controller, which is part of the Hexapod system and coordinates all motions of the Hexapod. 2.2 General Safety Instructions The H-206 is built according to state-of-the-art technology and recognized safety standards. Improper use can result in personal injury and/or damage to the H-206. Only use the H-206 for its intended purpose, and only use it if it is in a good working order. Read the user manual. Immediately eliminate any faults and malfunctions that are likely to affect safety. The operator is responsible for the correct installation and operation of the H-206. H-206 Hexapod MS203E Version: 1.2.0 5 2 Safety 2.2.1 Organizational Measures User manual Always keep this user manual available by the H-206. The latest versions of the user manuals are available for download (p. 3) on our website. Add all information given by the manufacturer to the user manual, for example supplements or Technical Notes. If you pass the H-206 on to other users, also turn over this user manual as well as other relevant information provided by the manufacturer. Only use the device on the basis of the complete user manual. Missing information due to an incomplete user manual can result in minor injury and property damage. Only install and operate the H-206 after having read and understood this user manual. Personnel qualification The H-206 may only be started up, operated, maintained and cleaned by authorized and qualified staff. 2.2.2 Safety Measures during Transport Impermissible mechanical load can damage the Hexapod. Only transport the Hexapod when the moving platform has been removed from the Hexapod and the transport lid has been affixed to the Hexapod. Only ship the Hexapod in the original packaging. Avoid impacts that affect the Hexapod. Do not drop the Hexapod. 2.2.3 Safety Measures during Installation Exceeding the specified operating temperature can damage the Hexapod. Adhere to the values specified (p. 53) during and after installation of the Hexapod. 6 Version: 1.2.0 MS203E H-206 Hexapod 2 Safety Impermissible mechanical load and collisions between the Hexapod, the load to be moved, and the environment can damage the Hexapod. Only install the Hexapod in horizontal orientation, so that the load has a vertical effect on the moving platform. Avoid lateral forces on the moving platform of the Hexapod. Only hold the Hexapod by the three angle brackets for affixing stationary components or by the base plate. Do not remove the transport lid until the Hexapod has been mounted on a surface at its place of application (p. 19). Tighten the screws with a maximum torque of approx. 0.2 Nm when mounting the moving platform. Before installing the load, determine the limit value for the load of the Hexapod with a simulation program (p. 23). Before installing the load, determine the work space of the Hexapod with a simulation program (p. 23). Make sure that the installed load observes the limit value determined with the simulation program. Avoid high forces and torques on the moving platform during installation of the Hexapod and the load. Make sure that no collisions between the Hexapod, the load to be moved and the environment are possible in the work space of the Hexapod. The Hexapod can be damaged by excessively long screws. When selecting the screw length, observe the thickness of the mounting plate or of the moving platform (p. 55) together with the load to be mounted. Only use screws that do not project under the mounting plate or moving platform after being screwed in. Only mount the Hexapod and the load on the mounting fixtures (holes) intended for this purpose. H-206 Hexapod MS203E Version: 1.2.0 7 2 Safety 2.2.4 Safety Measures during Start-Up There is a risk of minor injuries caused by crushing which can occur between the moving parts of the Hexapod and a stationary part or obstacle. Keep your fingers away from areas where they can get caught by moving parts. The geometrical data used by the Hexapod controller must be adapted to the Hexapod. If incorrect geometrical data is used, the Hexapod can be damaged by uncontrolled motions or collisions. The geometrical data is adapted before delivery. Check whether the Hexapod controller matches the Hexapod. A label on the rear panel of the controller indicates for which Hexapod the controller is intended. Only operate the Hexapod with a Hexapod controller whose geometrical data is adapted to the Hexapod. Collisions can damage the Hexapod, the load to be moved, and the surroundings. Make sure that no collisions between the Hexapod, the load to be moved, and the surroundings are possible in the working space of the Hexapod. Do not place any objects in areas where they can get caught by moving parts. Immediately stop the motion if a malfunction occurs in the Hexapod controller (see user manual of the Hexapod controller). 2.2.5 Safety Measures during Maintenance The Hexapod can become misaligned as a result of improper maintenance. The specifications (p. 53) can change as a result. Only loosen screws according to the instructions in this manual. 8 Version: 1.2.0 MS203E H-206 Hexapod 3 Product Description 3 Product Description In this Chapter Features and Applications ............................................................................................. 9 Model Overview ........................................................................................................... 10 Product View ............................................................................................................... 11 Scope of Delivery ........................................................................................................ 12 Accessories ................................................................................................................. 13 Technical Features ...................................................................................................... 14 3.1 Features and Applications The H-206 Hexapod is ideally suited for applications concerning the fiber alignment of optical components. Flexure joints guarantee the highest precision. The parallel kinematics structure and the free choice of the pivot point offer the following advantages: Positioning operations in six independent axes (three translational axes, three rotational axes) with short settling times Pivot point is maintained for rotations and moves along with linear motions High accuracy and step resolution in all axes No addition of the errors of individual axes No friction and torques from moving cables The Hexapod is controlled with the Hexapod controller, which is part of the Hexapod system. The position commands to the Hexapod controller are entered in Cartesian coordinates. H-206 Hexapod MS203E Version: 1.2.0 9 3 Product Description 3.2 Model Overview Hexapod and Hexapod controller are only available together as a system. Possible system components Standard version of the H-206 Hexapod: Model Name H-206.F1 Hexapod for 6-D Precision Alignment and Micromanipulation Standard versions of the C-887 Hexapod controller: Model Name C-887.11 6-D Hexapod Controller, Control of 2 Additional Servo-Motor Axes Included, TCP/IP and RS-232 Interface, 19'' Chassis C-887.21 6-D Hexapod Controller, TCP/IP and RS-232 Interface, Bench-Top Standard cable set: Cable Set for Hexapod, 3 m, consisting of: Data transmission cable, MDR68 to MDR68, 1:1 (K040B0034) Power supply cable, M12m to M12f (K060B0112) Available Hexapod systems The following Hexapod systems are available as combinations of Hexapod, Hexapod controller and cable set: System Hexapod – 10 Hexapod controller Standard cable set H-206.F1 C-887.11 C-887.21 – H-206.F11 x x – x H-206.F12 x – x x Version: 1.2.0 MS203E H-206 Hexapod 3 Product Description 3.3 Product View Figure 1: Product view 1 Mounting plate for fast replacement of different assemblies 2 Moving platform 3 LEDs (arranged from top to bottom): Limit switch status: red = limit switch is activated, off = correct operation Ready state: green = Hexapod is ready for operation, off = Hexapod is not ready for operation 4 Panel plug for power supply cable 5 Socket for data transmission cable 6 Case 7 Base plate 8 Angle brackets for affixing stationary components INFORMATION The mounting plate (1) is held on the moving platform (2) by two magnets. Adjustment elements guarantee accurate fitting of the mounting plate. Additional mounting plates are available as optional accessories (p. 13). Thus, fast replacement of the load to be aligned is possible. H-206 Hexapod MS203E Version: 1.2.0 11 3 Product Description 3.4 Scope of Delivery The following table contains the scope of delivery of the Hexapod. The scope of delivery of the Hexapod controller is listed in the user manual of the Hexapod controller. For the scope of delivery of the cable set that belongs to the Hexapod system, see the list of the standard cable set in "Model Overview" (p. 10). Order Number Items H-206 Hexapod according to your order (p. 10) The moving platform is removed and wrapped separately with the following parts: Mounting plate for fast mounting of loads to be aligned Phillips-head screwdriver, size 1 12 M2.5x8 countersunk screws ISO 7046 A2 for mounting of the moving platform plus 4 spare screws Packaging, consisting of: – Transport lid, installed on H-206 with 4 M3x5 screws Transport plate made of wood, mounted on H-206 with 4 M6 screws Inner box Cover and insert for inner box, made of corrugated cardboard Two pads for sliding onto the inner box Outer box Pallet Documentation, consisting of: H206T0001 Technical note on unpacking the Hexapod MS203E User manual for the Hexapod (this document) 12 Version: 1.2.0 MS203E H-206 Hexapod 3 Product Description Order Number Items Screw sets, delivered in the packaging of the Hexapod controller: 000034605 Mounting accessories: 000036450 6 M6x30 hex-head cap screws ISO 4762 1 Allen wrench 5.0 DIN 911 Accessories for connection to the grounding system: 1 M4x8 flat-head screw with cross recess ISO 7045 2 washers, form A-4.3 DIN 7090 2 safety washers, Schnorr Ø 4 mm N0110 3.5 Accessories Order Number F-206.TMU Mounting plate for fast replacement of different assemblies F-206.NCU Only for the H-206.F11 Hexapod system: Fast 3-axis piezo-nanopositioning system for use in combination with Hexapod systems, consisting of: P-611.3SF NanoCube® XYZ Nanopositioning System, 100 x 100 x 100 µm, Strain Gauge Sensors, integrated Fiber Adapter Interface E-760.3S0 NanoCube® Piezo Controller Board, ISA Bus Mounting bracket for P-611.3SF NanoCube® (F20601127) Extension cable 1.5 m (P-611K006) Technical Note F206T0021 on handling the piezo nanopositioning system F-603.11 Objective holder F-603.22 Ferrule holder F-603.60 Fiber holder with magnetic clamping All holders are equipped with a 3 mm wide tongue that fits in a corresponding slot machined into the moving platform of H-206 and P-611.3SF NanoCube®. M3 screws and miniature cleats are used to fasten these accessories quickly. To order, contact our customer service department (p. 51). H-206 Hexapod MS203E Version: 1.2.0 13 3 Product Description 3.6 Technical Features 3.6.1 Struts The Hexapod has six struts with moveable base points. Each base point carries out linear motions. Each set of settings of the six struts defines a position of the moving platform in six degrees of freedom (three translational axes and three rotational axes). Each strut is preloaded and equipped with flexure joints. The motion of the base points is generated and monitored for each strut via the following components: DC motor Drive screw Precision guiding Encoder Reference point and limit switches 3.6.2 Reference Point Switch and Limit Switches The reference point switches of the struts function independently of each other. When a limit switch is activated, the power source of the motor is switched off to protect the Hexapod against damage from malfunctions. 3.6.3 Control The Hexapod is intended for operation with the Hexapod controller which belongs to the Hexapod system. The Hexapod controller makes it possible to command motion of individual axes, combinations of axes or all six axes at the same time in a single motion command. The Hexapod controller calculates the settings for the individual struts from the target positions given for the translational and rotational axes. The velocities and accelerations of the struts are calculated in such a way that all struts start and stop at the same time. After the Hexapod controller has been switched on or restarted, the Hexapod has to complete a reference move in which each strut moves to its reference point switch. After the reference move, the moving platform is in the reference position and can be commanded to move to absolute target positions. For more information, see the user manual of the Hexapod controller. 14 Version: 1.2.0 MS203E H-206 Hexapod 3 Product Description 3.6.4 Motion The platform moves along the translational axes X, Y and Z and around the rotational axes U, V and W. Figure 2: XYZ coordinate system with origin (0,0,0), rotations to the rotation coordinates U, V and W Translation Translations are described in the spatially-fixed XYZ coordinate system. The translational axes meet at the origin of the XYZ coordinate system (0,0,0). For more information, see the glossary (p. 61). Rotation Rotations take place around the rotational axes U, V and W. The rotational axes meet at the pivot point. For more information on the pivot point, see the glossary (p. 61). In contrast to the spatially fixed translational axes, the rotational axes and thus the pivot point as well move along with the platform; see also the example below for consecutive rotations. A given rotation in space is calculated from the individual rotations in the sequence U > V > W. H-206 Hexapod MS203E Version: 1.2.0 15 3 Product Description INFORMATION The dimensional drawing (p. 55) contains the following: Alignment of the XYZ coordinate system Position of the pivot point after the reference move, when the standard settings of the Hexapod controller are used Example: Consecutive rotations INFORMATION For a clearer view, the figures have been adapted as follows: XYZ coordinate system shown shifted Pivot point in the top left corner of the platform 1. The U axis is commanded to move to position 3. The rotation around the U axis tilts the rotational axes V and W. Figure 3: Rotation around the U axis Platform in reference position Platform position: U = 3 (U parallel to spatially fixed X axis) 16 Version: 1.2.0 MS203E H-206 Hexapod 3 Product Description 2. The V axis is commanded to move to position –3. The rotation takes place around rotational axis V, which was tilted during the previous rotation. The rotation around the V axis tilts the rotational axes U and W. Figure 4: Rotation around the V axis Platform in reference position Platform position: U = 3, V = –3 (U and V parallel to the platform level) H-206 Hexapod MS203E Version: 1.2.0 17 3 Product Description 3. The W axis is commanded to move to position 3. The rotation takes place around the rotational axis W, which was tilted during the previous rotations. The W axis is always vertical to the platform level. The rotation around the W axis tilts the rotational axes U and V. Figure 5: Rotation around the W axis Platform in reference position Platform position: U = 3, V = –3, W = 3 (U and V parallel to the platform level, W vertical to the platform level) For more data on the travel ranges, see the "Specifications" section (p. 53). 18 Version: 1.2.0 MS203E H-206 Hexapod 4 Unpacking 4 Unpacking The Hexapod is delivered in a special packaging with installed transport lid and plate. The moving platform is removed. It is wrapped separately with the mounting plate and mounting accessories, see "Mounting the Moving Platform" (p. 25). NOTICE Impermissible mechanical load! Impermissible mechanical load can damage the Hexapod. Only hold the Hexapod by the following components: − Three angle brackets for affixing stationary components − Base plate − Transport plate Avoid impacts that affect the Hexapod. Do not drop the Hexapod. Do not remove the transport lid until the Hexapod has been mounted on a surface at its place of application (p. 24). Figure 6: Hexapod with transport lid and transport plate H-206 Hexapod 1 Angle bracket for affixing stationary components 2 Base plate 3 Wooden transport plate 4 Transport lid MS203E Version: 1.2.0 19 4 Unpacking Tools and accessories Allen wrench 5.0 from the supplied screw set (p. 12) (included in the packaging of the Hexapod controller). Unpacking the Hexapod 1. Open the outer box. 2. Lift the inner box with the side pads out of the outer box. 3. Remove the side pads. 4. Open the inner box. 5. Remove the foam cover. 6. Remove the moving platform (wrapped separately in foil). 7. Remove the corrugated cardboard cover. 8. Remove the corrugated cardboard insert. 9. Hold the Hexapod by the wooden transport plate and take it out of the inner box. 10. Compare the contents against the items covered by the contract and against the packing list. If parts are incorrectly supplied or missing, contact PI immediately. 11. Inspect the Hexapod for signs of damage. If you notice signs of damage, contact PI immediately. 12. Remove the wooden transport plate: a) b) c) d) e) Use the 5.0 Allen wrench to loosen the four M6 screws that attach the transport plate to the base plate of the H-206. Remove the 4 loosened screws and the corresponding plastic flat washers. Remove the H-206 from the transport plate. Slide a plastic washer onto each M6 screw. Screw the 4 M6 screws into the T-nuts in the wooden transport plate, in order to prevent losing the screws and washers. 13. Do not remove the transport lid yet. 14. Keep all packaging materials and the transport plate in case the product needs to be transported again later. 20 Version: 1.2.0 MS203E H-206 Hexapod 5 Installation 5 Installation In this Chapter General Notes on Installation ...................................................................................... 21 Determining the Permissible Load and Working Space .............................................. 23 Grounding the Hexapod .............................................................................................. 24 Mounting the Hexapod on a Surface ........................................................................... 24 Mounting the Moving Platform ..................................................................................... 25 Affixing the Load to the Hexapod ................................................................................ 28 Affixing a Stationary Component to the Hexapod ....................................................... 31 Affixing the P-611.3SF NanoCube® Stage to the Hexapod........................................ 32 Connecting the Cable Set to the Hexapod .................................................................. 37 5.1 General Notes on Installation NOTICE Damage when exceeding the permissible operating temperature! Exceeding the specified operating temperature can damage the Hexapod. H-206 Hexapod Adhere to the values specified (p. 53) during and after installation of the Hexapod. MS203E Version: 1.2.0 21 5 Installation NOTICE Impermissible mechanical load and collisions! Impermissible mechanical load and collisions between the Hexapod, the load to be moved, and the environment can damage the Hexapod. Only install the Hexapod in horizontal orientation, so that the load has a vertical effect on the moving platform. Avoid lateral forces on the moving platform of the Hexapod. Only hold the Hexapod by the three angle brackets for affixing stationary components or by the base plate. Do not remove the transport lid until the Hexapod has been mounted on a surface at its place of application (p. 25). Before installing the load, determine the limit value for the load of the Hexapod with a simulation program (p. 23). The limit values determined with the simulation program are only valid when the Hexapod controller has the servo mode switched on for the axes of the moving platform of the connected Hexapod. Before installing the load, determine the work space of the Hexapod with a simulation program (p. 23). The limits of the work space vary depending on the current position of the Hexapod (translational and rotational coordinates) and the current coordinates of the pivot point. Avoid high forces and torques on the moving platform during installation. Make sure that no collisions between the Hexapod, the load to be moved and the environment are possible in the work space of the Hexapod. INFORMATION The optionally available PIVeriMove software for collision checking can be used to mathematically check possible collisions between the Hexapod, the load and the environment. The use of the software is recommended when the Hexapod is located in a limited installation space and/or operated with a spatially limiting load. For details regarding the activation and configuration of the PIVeriMove software for collision checking, see Technical Note C887T0002 (included in the scope of delivery of the software). 22 Version: 1.2.0 MS203E H-206 Hexapod 5 Installation 5.2 Determining the Permissible Load and Working Space Tools and accessories PC with Windows operating system on which the simulation program Hexapod Simulation Software is installed. For more information, see the manual of the Hexapod controller. Determining the working space and permissible load of the Hexapod Follow the instructions in the manual of the Hexapod controller to determine the working space and the limit value for the load of the Hexapod with the simulation program. The limit values in the following table are for orientation. They only apply when the center of mass is at the origin of the XYZ coordinate system (0,0,0). Servo mode switched on for Hexapod – Servo mode switched off for Hexapod – max. load capacity max. holding force Fulfilling the specifications Reduced Specified accuracy accuracy for reached for all extreme target target positions positions – H-206.F1 1.5 kg 10 N 1.2 kg If you need help in determining the limit value for the load or determining the work space: Contact our customer service department (p. 51). H-206 Hexapod MS203E Version: 1.2.0 23 5 Installation 5.3 Grounding the Hexapod The Hexapod is not grounded via the power supply cable. If a functional grounding is required for potential equalization: 1. Connect the base plate to the grounding system: − For connection, use the supplied accessories (p. 12) and the M4 hole with an 8 mm depth marked with the ground connection symbol (p. 55). 2. Connect the moving platform to the grounding system: − Use one of the mounting holes in the moving platform (p. 55) for connection. or − If the moving platform and the load are conductively connected with each other, connect the load to the grounding system. 5.4 Mounting the Hexapod on a Surface Figure 7: Mounting holes in the base plate, two of four holes visible 24 Version: 1.2.0 MS203E H-206 Hexapod 5 Installation Prerequisite You have read and understood the General Notes on Installation (p. 21). You have removed the transport plate from the Hexapod, see "Unpacking" (p. 19). Tools and accessories Allen wrench 5.0 and four of the supplied screws (p. 12) delivered in the packaging of the Hexapod controller. Mounting the Hexapod 1. Provide 4 M6 threaded holes in the support for mounting with M6x30 screws. The arrangement of the four mounting holes can be found in the dimensional drawing (p. 55). 2. Mount the Hexapod on the four mounting holes in the base plate using the included M6x30 screws. 5.5 Mounting the Moving Platform The Hexapod is delivered with an installed transport lid, see "Unpacking" (p. 19). The moving platform is removed and wrapped separately. NOTICE Impermissible mechanical load! Impermissible mechanical load can damage the Hexapod. Avoid high forces and torques while mounting the moving platform. Tighten the screws with a maximum torque of approx. 0.2 Nm when mounting the moving platform. H-206 Hexapod MS203E Version: 1.2.0 25 5 Installation INFORMATION The mounting plate (4) is held to the moving platform (3) by two magnets. Figure 8: Moving platform, disassembled and wrapped separately, with mounting plate and mounting accessories 1 Phillips-head screwdriver, size 1 2 16 M2.5x8 countersunk screws, covered with a drying agent here 3 Moving platform 4 Mounting plate for fast mounting of loads to be aligned INFORMATION The moving platform has recesses on the bottom side for an exact fit on the carrier plate. Figure 9: Bottom side of the moving platform, markings indicate the positions of the counter-sunk holes for affixing to the carrier plate 26 Version: 1.2.0 MS203E H-206 Hexapod 5 Installation Prerequisite You have read and understood the General Notes on Installation (p. 21). You have mounted the Hexapod at its place of application, see "Mounting the Hexapod on a Surface" (p. 25). Tools and accessories Moving platform with the following mounting accessories included in the scope of delivery (p. 12): − 12 M2.5x8 countersunk screws − Phillips-head screwdriver, size 1 Allen wrench 2.5 Mounting the Moving Platform 1. Remove the transport lid: a) b) c) Use the 2.5 Allen wrench to loosen the four M3x5 screws that attach the transport lid to the side angle brackets of the H-206. Remove the 4 loosened screws and the corresponding metal flat washers. Remove the transport lid. Figure 10: H-206 after the transport lid has been removed 1 Carrier plate for moving platform, made of carbon 2 Holding fixture for mounting screws, 6 pieces provided The carrier plate for the moving platform is accessible. H-206 Hexapod MS203E Version: 1.2.0 27 5 Installation 2. Mount the moving platform: a) b) c) d) Remove the moving platform and the mounting accessories from the wrapping. Remove the mounting plate from the moving platform. Carefully place the moving platform on the carrier plate (1) so that the six holding fixtures for the mounting screws (2) fit in the respective recesses in the bottom side of the moving platform. Fasten the moving platform to the carrier plate with 12 M2.5x8 screws with a maximum torque of 0.2 Nm each. The positions of the countersunk holes for mounting can be found in the figure showing the bottom side of the moving platform. Figure 11: Moving platform mounted on the H-206 3. Keep the transport lid, the corresponding screws and washers in case the Hexapod needs to be transported again later. 5.6 Affixing the Load to the Hexapod NOTICE Impermissible mechanical load and collisions! Impermissible mechanical load and collisions between the Hexapod, the load to be moved, and the environment can damage the Hexapod. 28 Make sure that the installed load observes the limit value resulting from the load test (p. 23). Install the load so that it applies a vertical force to the moving platform. Avoid high forces and torques on the moving platform during installation. Make sure that no collisions between the Hexapod, the load to be moved and the environment are possible in the work space of the Hexapod. Version: 1.2.0 MS203E H-206 Hexapod 5 Installation NOTICE Screws that are too long! The Hexapod can be damaged by excessively long screws. When selecting the screw length, observe the thickness of the mounting plate or of the moving platform, or the depth of the mounting holes (p. 55) together with the load to be mounted. Only use screws that do not project under the mounting plate or moving platform after being screwed in. Only mount the Hexapod and the load on the mounting fixtures (holes) intended for this purpose. INFORMATION The load to be aligned can be affixed to the mounting plate or directly to the moving platform. Affixing to the mounting plate is recommended. The mounting plate is held to the moving platform by two magnets. The following adjustment elements guarantee accurate fitting of the mounting plate: Three guidings on the top side of the moving platform Three balls on the bottom side of the mounting plate Additional mounting plates are available as optional accessories (p. 13). Thus, fast replacement of the load to be aligned is possible. Figure 12: M3 mounting holes with 6 mm depth for fixing the load 1 Mounting plate 2 Moving platform H-206 Hexapod MS203E Version: 1.2.0 29 5 Installation Prerequisites You have read and understood the General Notes on Installation (p. 21). You have determined the permissible load and the work space of the Hexapod (p. 23). You have designed the load and the environment of the Hexapod so that the permissible load of the Hexapod is observed and no collisions can occur. You have mounted the moving platform (p. 25). Tools and accessories M3 screws with suitable length Suitable tools for fastening the screws If you want to affix multiple loads to be aligned in quick succession: One additional mounting plate each per assembly, available as optional accessories (p. 13). Affixing the Load 1. If necessary, remove the mounting plate from the moving platform. 2. Align the load so that the selected mounting holes in the top side of the mounting plate or in the moving platform can be used for affixing it. The arrangement of the mounting holes in the mounting plate and in the moving platform of the Hexapod can be found in the dimensional drawing (p. 55) as well as in the corresponding figure. 3. Affix the load to the selected mounting holes in the top side of the mounting plate or in the moving platform using the screws. 4. When you have affixed the load to the mounting plate: − 30 Carefully place the mounting plate on the moving platform so that the three balls on the bottom side of the mounting plate are in the guidings on the top side of the moving platform. Version: 1.2.0 MS203E H-206 Hexapod 5 Installation 5.7 Affixing a Stationary Component to the Hexapod The Hexapod has three angle brackets for affixing stationary components on the sides and rear panel of the case. These angle brackets can be used e. g. to attach optical components to which the load is to be aligned. Figure 13: Angle brackets for stationary components on the H-206 Hexapod 1 Side angle brackets for affixing stationary components 2 Angle bracket on the rear panel for affixing stationary components Prerequisites You have read and understood the General Notes on Installation (p. 21). You have designed the stationary component so that no collision can occur. Tools and accessories M3 screws with suitable length Suitable tools for fastening the screws Affixing a stationary component to the Hexapod 1. Align the component to be affixed so that the mounting holes of the selected angle bracket can be used. The arrangement of the mounting holes in the three angle brackets can be found in the dimensional drawing (p. 55). 2. Affix the component to the mounting holes of the angle bracket using the M3 screws. H-206 Hexapod MS203E Version: 1.2.0 31 5 Installation 5.8 Affixing the P-611.3SF NanoCube® Stage to the Hexapod If the Hexapod is operated with the C-887.11 Hexapod controller (H-206.F11 Hexapod system), the optional accessory F-206.NCU can (p. 13) be used. The P-611.3SF NanoCube® stage included in the F-206.NCU option is affixed to the Hexapod using a special mounting bracket. CAUTION Dangerous voltage and residual charge on piezo actuators! The P-611.3SF NanoCube® stage, included in the F-206.NCU option, is driven by piezo actuators. Temperature changes and compressive stresses can induce charges in piezo actuators. After being disconnected from the electronics, piezo actuators can stay charged for several hours. Touching or short-circuiting the contacts in the connector of the P-611.3SF NanoCube® stage can lead to minor injuries. The piezo actuators can be destroyed by an abrupt contraction. 32 Do not open the stage. Discharge the piezo actuators of the stage before installation: Connect the stage to the switched-off PI controller, which is equipped with an internal discharge resistor. Do not pull out the connector from the electronics during operation. Do not touch the contacts in the connector. Secure the connector of the stage with screws against being pulled out of the controller. Version: 1.2.0 MS203E H-206 Hexapod 5 Installation CAUTION Risk of electric shock if the protective earth conductor is not connected! If a protective earth conductor is not or not properly connected, dangerous touch voltages can occur and there is a risk of electric shock. In the case of malfunction or failure of the system, touching the P-611.3SF stage NanoCube® can result in minor injuries. Connect the stage to a protective earth conductor before start-up. Do not remove the protective earth conductor during operation. Use electrically conductive materials (e. g. screws and flat washers) for mounting the protective earth conductor. Make sure that contact resistance is < 0.1 ohm at 25 A at all connection points relevant for mounting the protective earth conductor. If the protective earth conductor has to be temporarily removed (e.g. for modifications), reconnect the stage to the protective earth conductor before restarting. NOTICE Impermissible mechanical load! Impermissible torques and forces can damage the stage. Only hold the stage at the suitable surfaces, see figure below. Avoid torques and forces >15 Nm that affect the moving platform of the stage. Avoid forces that affect the active elements of the stage, see figure below. Avoid pull forces on the cable exit. Keep the junctions between active and inactive elements of the stage free of stickers. H-206 Hexapod MS203E Version: 1.2.0 33 5 Installation Figure 14: P-611.3SF NanoCube® stage 1 Surface suitable for holding the stage 2 Moving platform 3 Active element INFORMATION The settings of the E 760 controller card that is part of the F-206.NCU option were calibrated to the P-611.3SF NanoCube® stage included in the scope of delivery before delivery. Only affix the P-611.3SF NanoCube® stage to the Hexapod if you received it with the E 760-controller card which is installed in the C-887.11 Hexapod controller. INFORMATION The orientation of the directions of motion of the Hexapod does not match that of the P-611.3SF NanoCube® stage. 34 See the dimensional drawing (p. 55) for the orientation of the XYZ coordinate system of the Hexapod. See the product labeling for the orientation of the motion directions of the P611.3SF NanoCube® stage. Note the different orientations of the directions of motion when you command the motion of the axes of the Hexapod and the P-611.3SF NanoCube® stage using the Hexapod controller. Version: 1.2.0 MS203E H-206 Hexapod 5 Installation Prerequisites You have read and understood the General Notes on Installation (p. 21). You have read and understood the handling instructions for the P-611.3SF NanoCube® stage, see F-206T0021 Technical Note (included in the scope of delivery of the F-206.NCU option). Tools and accessories P-611.3SF NanoCube® stage that was delivered as part of the F-206.NCU option Mounting accessories that were delivered as part of the F-206.NCU option: − Mounting bracket for P-611.3SF NanoCube® (F20601127) − 4 M3x12 hex-head cap screws − 4 washers, form A 3.2 − Allen wrench 2.5 2 locating pins Ø 2x8 mm H7 for alignment of the mounting brackets on the rear panel of the Hexapod case; locating pins not included in the scope of delivery Allen wrench 3.0 Affixing the P-611.3SF NanoCube® stage to the Hexapod 1. Remove the angle bracket for affixing stationary components that is attached to the rear panel of the Hexapod case (see figure in "Affixing a Stationary Component to the Hexapod" (p. 31)): a) b) c) Use the 3.0 Allen wrench to loosen the two M4x12 screws with which the angle bracket is affixed to the rear panel of the Hexapod case. Remove the 2 loosened screws and the corresponding plastic flat washers. Pull the angle bracket away from the Hexapod perpendicularly to the rear panel of the case to avoid that the 2 locating pins of the angle bracket get jammed. 2. Attach the mounting bracket for the P-611.3SF NanoCube® to the Hexapod: a) b) H-206 Hexapod Insert the 2 locating pins into the locating holes in the rear panel of the Hexapod case. Slide the plastic washers onto both M4x12 screws that were removed in step 1. MS203E Version: 1.2.0 35 5 Installation c) d) Place the mounting bracket with its narrow side on the rear panel of the Hexapod case. At the same time, insert the locating pins into the respective locating holes of the bracket. Both Ø 4.5-mm countersunk holes have to be positioned above the M4 holes in the Hexapod case. Affix the mounting bracket to the two M4 holes with both M4x12 screws. Figure 15: P-611.3SF stage on the mounting bracket, with F-603 holders on P-611.3SF and mounting plate of the Hexapod 1 Mounting holes in the P-611.3SF NanoCube® stage, with M3x12 screws, three of four holes visible 2 Moving platform of the P-611.3SF NanoCube® stage. 3. Affix the P-611.3SF NanoCube® stage to the mounting bracket: a) b) c) 36 Discharge the piezo actuators of the stage by connecting the stage to the E-760 controller card while the C-887.11 Hexapod controller is powered down (see user manual of the Hexapod controller). Hold the stage at the suitable surfaces. Place the stage on the mounting bracket so that the stage is oriented as follows: − The cable exit of the stage points away from the Hexapod (see figure above). − The mounting holes in stage and mounting bracket are aligned with each other. Version: 1.2.0 MS203E H-206 Hexapod 5 Installation d) e) Insert one A 3.2 flat washer and one M3x12 screw each into each of the four mounting holes in the stage. Insert the 2.5 Allen wrench from above through each of the respective holes in the moving platform of the stage and fasten the screws in the mounting holes. 4. Connect the P-611.3SF NanoCube® stage to the protective earth conductor. 5.9 Connecting the Cable Set to the Hexapod Prerequisites The cable set is not connected to the Hexapod controller. Tools and accessories Cable set that belongs to the Hexapod system (p. 10) Connecting the Cable Set to the Hexapod 1. Connect the data transmission cable to the MDR68 socket in the front panel of the Hexapod case: a) b) c) d) Press the latches together on both sides of the connector. Insert the connector into the socket on the Hexapod. Check that the connector correctly fits. Release the latches. 2. Connect the M12 socket of the power supply cable to the 4-pin M12 panel plug in the front panel of the Hexapod case. H-206 Hexapod − Observe the mechanical coding of the socket and panel plug. − Do not use force. MS203E Version: 1.2.0 37 6 Start-Up 6 Start-Up In this Chapter General Notes on Start-Up .......................................................................................... 39 Starting Up the Hexapod System ................................................................................ 40 6.1 General Notes on Start-Up CAUTION Risk of crushing by moving parts! There is a risk of minor injuries caused by crushing which can occur between the moving parts of the Hexapod and a stationary part or obstacle. Keep your fingers away from areas where they can get caught by moving parts. NOTICE Incorrect configuration of the Hexapod controller! The configuration data used by the Hexapod controller (e. g. geometrical data and servo-control parameters) must be adapted to the Hexapod. If incorrect configuration data is used, the Hexapod can be damaged by uncontrolled motions or collisions. The configuration data is adapted before delivery. Check whether the Hexapod controller matches the Hexapod. A label on the rear panel of the controller indicates for which Hexapod the controller is intended. When you have established the communication via TCP/IP or RS-232 or use the user interface of the C-887, send the CST? command. The response shows the Hexapod to which the controller is adapted. H-206 Hexapod Only operate the Hexapod with a Hexapod controller whose configuration data is adapted to the Hexapod. MS203E Version: 1.2.0 39 6 Start-Up NOTICE Damage from collisions! Collisions can damage the Hexapod, the load to be moved, and the environment. Make sure that no collisions between the Hexapod, the load to be moved and the environment are possible in the work space of the Hexapod. Do not place any objects in areas where they can get caught by moving parts. If the Hexapod controller malfunctions, stop the motion immediately. INFORMATION In rare cases, the limit switches of the Hexapod struts can be activated, in particular if the Hexapod is exposed to strong vibrations during transport. If at least one limit switch is activated, the red LED for the limit switch status in the front panel of the Hexapod case lights up when the Hexapod controller is switched on. In order to deactivate the limit switches, a successful reference move of the Hexapod is required. Start up the Hexapod system (p. 40). Start-up also includes a reference move (see user manual of the Hexapod controller). If the red LED stays on and/or the reference move is not successfully performed: Contact our customer service department (p. 51). 6.2 Starting Up the Hexapod System Prerequisite You have read and understood the General Notes on Start-Up (p. 39). The Hexapod has been correctly installed (p. 21). You have read and understood the user manual of the Hexapod controller. Accessories Hexapod controller belonging to the Hexapod system PC with suitable software (see user manual of the Hexapod controller) Starting up the Hexapod system 1. Connect the Hexapod to the Hexapod controller (see user manual of the Hexapod controller). 2. Start up the Hexapod controller (see user manual of the Hexapod controller). 3. Operate a few motion cycles for testing purposes (see user manual of the Hexapod controller). 40 Version: 1.2.0 MS203E H-206 Hexapod 7 Maintenance 7 Maintenance In this Chapter Carrying out a Maintenance Run ................................................................................. 41 Packing the Hexapod for Transport ............................................................................. 42 Cleaning the Hexapod ................................................................................................. 48 NOTICE Damage due to improper maintenance! The Hexapod can become misaligned as a result of improper maintenance. The specifications can change as a result (p. 53). Only loosen screws according to the instructions in this manual. Depending on the operating conditions and the period of use of the Hexapod, the following maintenance measures are required. 7.1 Carrying out a Maintenance Run Frequent motions over a limited travel range can cause the lubricant to be unevenly distributed on the drive screw. Carry out a maintenance run over the entire travel range at regular intervals (see user manual of the Hexapod controller). The more often motions are carried out over a limited travel range, the shorter the time between the maintenance runs has to be. H-206 Hexapod MS203E Version: 1.2.0 41 7 Maintenance 7.2 Packing the Hexapod for Transport NOTICE Impermissible mechanical load! Impermissible mechanical load can damage the Hexapod. Avoid high forces and torques when removing the moving platform. Only transport the Hexapod when the moving platform has been removed from the Hexapod and the transport lid has been affixed to the Hexapod. Only ship the Hexapod in the original packaging. Only hold the Hexapod by the following components: − Three angle brackets for affixing stationary components − Base plate − Transport plate Avoid impacts that affect the Hexapod. Do not drop the Hexapod. Accessories Original packaging (p. 12) Allen wrench 5.0 from the supplied screw set (p. 12) Phillips-head screwdriver, size 1, included (p. 12) Allen wrench 2.5 Packing the Hexapod 1. Power down the Hexapod controller. 2. Remove the data transmission cable and the power supply cable from the Hexapod controller and the Hexapod. 42 Version: 1.2.0 MS203E H-206 Hexapod 7 Maintenance Figure 16: Moving platform, markings indicate the positions of the 12 screws with which the moving platform is fastened to the carrier plate 3. Remove the moving platform: a) b) c) d) e) H-206 Hexapod Remove the mounting plate with the load from the moving platform. If the load is affixed directly to the moving platform, remove the load. Use the Phillips-head screwdriver to completely loosen the 12 M2.5x8 screws with which the moving platform is affixed to the carrier plate. Remove the moving platform, including the 12 screws, from the Hexapod. Wrap the moving platform, the 12 screws and, if necessary, the mounting plate in foil. MS203E Version: 1.2.0 43 7 Maintenance Figure 17: Hexapod with transport lid 1 Side mounting flange of the transport lid 2 M3x5 screw with metal washer 4. Affix the transport lid to the Hexapod: a) b) c) 44 Place the transport lid on the Hexapod so that the three mounting flanges of the lid lie on the three angle brackets for affixing stationary components. Align the transport lid so that the four holes in both side mounting flanges lie exactly above the corresponding holes in the side angle brackets. Fasten four M3x5 screws, including the corresponding washers, to the aligned holes using the 2.5 Allen wrench. Version: 1.2.0 MS203E H-206 Hexapod 7 Maintenance Figure 18: Wooden transport plate and transport plate with Hexapod 1 Wooden transport plate 2 Hexapod on transport plate 5. Affix the Hexapod to the wooden transport plate: a) b) c) d) e) Loosen the four M6x30 screws with which the Hexapod is mounted on the surface. Remove the 4 M6x30 screws. Make sure that the flanges of the four T-nuts in the wooden transport plate are facing downwards. Place the Hexapod on the transport plate so that the four holes in its base plate lie above the T-nuts in the transport plate. Affix the Hexapod with the 4 M6x30 screws and the corresponding washers to the T-nuts. 6. Open the outer box. 7. Lift the inner box with the side pads out of the outer box. 8. Remove the side pads from the inner box. 9. Open the inner box. 10. Remove the foam cover. 11. Remove the cover and insert made of corrugated cardboard. 12. Hold the Hexapod by the wooden transport plate and place it in the inner box. H-206 Hexapod MS203E Version: 1.2.0 45 7 Maintenance Figure 19: Hexapod in inner box with corrugated cardboard insert 13. Place the corrugated cardboard insert into the inner box. Figure 20: Inner box with corrugated cardboard cover 14. Place the corrugated cardboard cover into the inner box. 46 Version: 1.2.0 MS203E H-206 Hexapod 7 Maintenance Figure 21: Inner box with cover and wrapped mounting plate 15. Place the moving platform which is wrapped separately in foil on the corrugated cardboard cover. 16. Insert the foam cover in the inner box. 17. Close the inner box. 18. Slide the side pads onto the inner box. Figure 22: Inner box with side pads H-206 Hexapod MS203E Version: 1.2.0 47 7 Maintenance 19. Insert the inner box with the side pads in the outer box. Figure 23: Inner box with side pads in outer box 20. Close the outer box. 21. Secure the box on the pallet. 7.3 Cleaning the Hexapod Prerequisites You have disconnected the Hexapod from the controller. Cleaning the Hexapod When necessary, clean the Hexapod surface with a towel lightly dampened with a mild cleanser or disinfectant. Do not use any organic solvents. 48 Version: 1.2.0 MS203E H-206 Hexapod 8 Troubleshooting 8 Troubleshooting Problem Possible Causes Solution Unexpected Hexapod behavior. Cable broken Connector or soldered connection has become detached Check the data transmission and power supply cables. Replace the cables by cables of the same type and test the function of the Hexapod. Contact our customer service department (p. 51). The Hexapod does not achieve the specified accuracy. Increased wear due to small motions over a long period of time Carry out a maintenance run over the entire travel range (p. 41). The Hexapod does not move. Foreign body has entered the drive of a strut Faulty motor Carry out a strut test (see user manual of the Hexapod controller). The strut test should be carried out in the reference position, unless the malfunction occurs at the maximum or minimum displacement of the platform in Z. Dirty encoder Contact our customer service department (p. 51). At least one limit switch is activated. Perform a reference move (step of the startup of the Hexapod system (p. 39), see also the user manual of the Hexapod controller). If the red LED stays on and/or the reference move is not successfully performed: Contact our customer service department (p. 51). The red LED for the limit switch status lights up. Broken joint If the problem with your Hexapod is not listed in the table or it cannot be solved as described, contact our customer service department (p. 51). H-206 Hexapod MS203E Version: 1.2.0 49 9 Customer Service 9 Customer Service For inquiries and orders, contact your PI sales engineer or send us an e-mail (mailto:[email protected]). If you have questions concerning your system, have the following information ready: Product codes and serial numbers of all products in the system Firmware version of the controller (if present) Version of the driver or the software (if present) Operating system on the PC (if present) The latest versions of the user manuals are available for downloading (p. 3) on our website. H-206 Hexapod MS203E Version: 1.2.0 51 10 Technical Data 10 Technical Data In this Chapter Specifications .............................................................................................................. 53 Ambient Conditions and Classifications ...................................................................... 54 Dimensions .................................................................................................................. 55 Pin Assignment ............................................................................................................ 56 10.1 Specifications 10.1.1 Data Table H-206.F1x Active axes Unit Tolerance X, Y, Z, θX, θY, θZ Motion and positioning Travel range* X -8 to 5.7 mm Travel range* Y ±5.7 mm Travel range* Z ±6.7 mm Travel range* θX ±5.7 ° Travel range* θY ±6.6 ° Travel range* θZ ±5.5 ° Single-actuator design resolution 33 nm Min. incremental motion X, Y, Z 0.1 µm Min. incremental motion θX, θY, θZ 2 µrad (0.4") Bidirectional repeatability X, Y, Z 0.3 µm typ. Bidirectional repeatability θX, θY, θZ 6 µrad typ. Max. velocity X, Y, Z 10 mm/s Load (baseplate horizontal) 1.5 kg typ. typ. max. Miscellaneous Operating temperature range 5 to 35 Material Aluminum Mass 5.8 kg ±5% Cable length 3 m ±10 mm H-206 Hexapod MS203E °C Version: 1.2.0 53 10 Technical Data Technical data specified at 20±3°C. Ask about custom designs! * The travel ranges of the individual coordinates (X, Y, Z, θX, θY, θZ) are interdependent. The data for each axis in this table shows its maximum travel, where all other axes are at their zero positions. If the other linear or rotational coordinates are not zero, the available travel may be less. 10.1.2 Maximum Ratings The Hexapod is designed for the following operating data: Maximum operating voltage Maximum operating frequency (unloaded) Maximum current consumption 24 V DC 5A 10.2 Ambient Conditions and Classifications 54 Degree of pollution: 2 Transport temperature: –15°C to +55°C Storage temperature: –15°C to +55°C Humidity: Maximum relative humidity of 80% at temperatures of up to 31°C, linearly decreasing until relative humidity of 50% at 40°C Degree of protection according to IEC 60529: IP20 Area of application: For indoor use only Maximum altitude: 2000 m Version: 1.2.0 MS203E H-206 Hexapod 10 Technical Data 10.3 Dimensions All figures show the Hexapod in the reference position. Dimensions in mm. Note that the decimal places are separated by a comma in the drawings. Figure 24: H-206 Hexapod (dimensions in mm) The (0,0,0) coordinates refer to the origin of the XYZ coordinate system. When the default settings of the Hexapod controller are used and the Hexapod is in the reference position, the pivot point is located at the origin of the XYZ coordinate system. H-206 Hexapod MS203E Version: 1.2.0 55 10 Technical Data 10.4 Pin Assignment 10.4.1 Power Supply Connection Power supply via 4-pin, A-coded M12 panel plug Pin Function 1 GND 2 GND 3 24 V DC 4 24 V DC 10.4.2 Data Transmission Connection Data transmission between the Hexapod and the Hexapod controller MDR68 socket Function Socket All signals: TTL 56 Version: 1.2.0 MS203E H-206 Hexapod 10 Technical Data Pin assignment H-206 Hexapod MS203E Version: 1.2.0 57 11 Old Equipment Disposal 11 Old Equipment Disposal In accordance with the applicable EU law, electrical and electronic equipment may not be disposed of with unsorted municipal wastes in the member states of the EU. When disposing of your old equipment, observe the international, national and local rules and regulations. To meet the manufacturer’s product responsibility with regard to this product, Physik Instrumente (PI) GmbH & Co. KG ensures environmentally correct disposal of old PI equipment that was first put into circulation after 13 August 2005, free of charge. If you have old PI equipment, you can send it postage-free to the following address: Physik Instrumente (PI) GmbH & Co. KG Auf der Römerstr. 1 D-76228 Karlsruhe, Germany H-206 Hexapod MS203E Version: 1.2.0 59 12 Glossary 12 Glossary Work space The entirety of all combinations of translations and rotations that the Hexapod can approach from the current position is referred to as the work space. The work space can be limited by the following external factors: Installation space Dimensions and position of the load Pivot point The pivot point describes the center of rotation (intersection of the rotational axes U, V and W). When the standard settings for the pivot point coordinates are used, the pivot point is located at the origin of the XYZ coordinate system after a reference move, see the dimensional drawing (p. 55) for more information. The pivot point is shifted along with the platform during translations. Rotations do not change the position of the pivot point. The pivot point coordinates remain unchanged in both cases. The pivot point coordinates can be changed in the Hexapod controller. XYZ coordinate system The position and orientation of the Cartesian XYZ coordinate system cannot be changed, which is why the system is referred to as spatially fixed. The axes X, Y and Z are referred to as translational axes. The intersection of the axes of the spatially-fixed Cartesian XYZ coordinate system (0,0,0) is referred to as the origin. The Z axis is always perpendicular to the base plate of the Hexapod. H-206 Hexapod MS203E Version: 1.2.0 61 12 Glossary The following example figures of the H-810 Hexapod show that the XYZ coordinate system does not move along with motions of the platform. Figure 25: H-810 Hexapod in the reference position. 1 62 Cable outlet Version: 1.2.0 MS203E H-206 Hexapod 12 Glossary Figure 26: H-810 Hexapod, the platform of which has been moved in X. 1 H-206 Hexapod Cable outlet MS203E Version: 1.2.0 63 13 Appendix 13 Appendix In this Chapter Explanations of the Performance Test Sheet .............................................................. 65 EC Declaration of Conformity ...................................................................................... 66 13.1 Explanations of the Performance Test Sheet The Hexapod is tested for the positioning accuracy of the translational axes before delivery. The performance test sheet is included in the scope of delivery. The following figure shows the test setup used. Figure 27: Test setup for measuring the X or Y axis. 1 Laser interferometer 2 Mirror 3 Bench The following test cycles are performed: H-206 Hexapod Movement over the entire travel range with at least 20 measuring points, in at least five cycles. Movement over partial sections, e. g. ±1 mm in increments of e. g. 10 µm MS203E Version: 1.2.0 65 13 Appendix 13.2 EC Declaration of Conformity 66 Version: 1.2.0 MS203E H-206 Hexapod