1
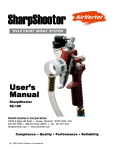
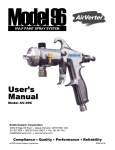
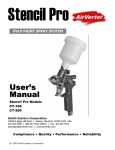
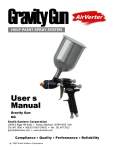
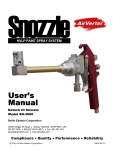
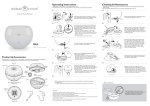
MicroFlex HVLP PAINT SPRAY SYSTEM User’s Manual Detach III MicroFlex Model MF-3100 US Patents 4,850,809 • 4,991,776 • 5,217,564 5,044,557 • 5,053,807 • 5,393,345 • 5,609,302 Smith Eastern Corporation 10630-S Riggs Hill Road • Jessup, Maryland 20794-9425 USA 301-497-7600 • 800.937.HVLP (4857) • Fax 301.497.7613 [email protected] • www.airverter.com Compliance • Quality • Performance • Reliability 2001 Smith Eastern Corporation 2002-03-18 AirVerter Detach III MicroFlex Spray Gun DO NOT OPERATE SPRAY GUNS WITHOUT PERSONAL SAFETY EQUIPMENT AirVerter Detach III MicroFlex Spray Gun Please Read This Owner’s Manual BEFORE Using Your MicroFlex Spray Gun Who Should Use A MicroFlex? ® The AirVerter Detach III MicroFlexTM Spray Gun is a precision instrument. It requires meticulous care and maintenance to achieve its outstanding results. The MicroFlex uses "micro" fittings and tiny air and fluid passages to spray small amounts of material. Consequently, the MicroFlex must be faithfully cleaned and maintained. The MicroFlex requires extremely little fluid and air pressure and requires precise adjustment. These adjustments, while not able to be adequately described in this manual, are second nature to trained technicians. WARRANTY Smith Eastern Corporation warrants to the Purchaser that the AirVerter® Detach III MicroFlexTM MF-3100 Spray Gun is free from defects in material or workmanship under normal use and service for a period of twelve (12) months from the date of purchase. Should any failure appear during this period, Smith Eastern shall, if given prompt written notice by the Purchaser, correct such nonconformity by repair or replacement of the nonconforming part, F.O.B. Smith Eastern’s repair facility. Repair parts are warranted for ninety (90) days from the date of shipment, but repairs or replacements to original equipment shall not renew or extend the warranty period of such equipment. Equipment and parts furnished by Smith Eastern but manufactured by others shall be limited to the warranty offered by the manufacturer thereof. Smith Eastern reserves the right to limit this warranty in cases of misuse or abuse. Any modifications to spray guns or recommended procedures will void the warranty. The foregoing warranty is exclusive and in lieu of other warranties of quality or performance, expressed, implied or statutory, including any warranties of merchantability or of fitness for a particular purpose. DO NOT OPERATE AIRVERTER SPRAY GUNS WITHOUT USING PROPER PERSONAL SAFETY EQUIPMENT INCLUDING RESPIRATOR, GOGGLES AND SAFETY CLOTHING. OBSERVE ALL PRECAUTIONS RELATED TO SPRAYING. THIS EQUIPMENT IS OPERATED USING PRESSURIZED AIR. ALWAYS DISCONNECT SPRAY GUN FROM AIR AND FLUID HOSES AND DEPRESSURIZE SYSTEM PRIOR TO DISASSEMBLY OR MAINTENANCE. DO NOT OPERATE SPRAY GUNS WITHOUT PERSONAL SAFETY EQUIPMENT AirVerter Detach III MicroFlex Spray Gun EQUIPMENT REQUIREMENTS 1. Air Compressor that will hold a minimum of 20 PSI at the gun. Important: Position a pressure gauge at the end of your air hose next to the gun to be assured of the PSI required to satisfactorily spray your coating. 2. High Pressure Air Hose: a. Air hose lengths up to 50 feet MUST have an I.D. of 3/8 inch. b. Air hose lengths greater than 50 feet MUST have an I.D. of 1/2 inch. 3. Pressure Pot or Diaphragm Pump - Be certain to follow manufacturer's instructions to ensure proper use. START-UP Using A Remote Pressure Pot or Diaphragm Pump 1. Attach the fluid hose from your pressure pot to the Fluid Fitting (DT-3113). 2. Attach the air source to the base of the Metering Valve (AV-175). . BEFORE SPRAYING 1. Before you use your paint, make certain it is properly mixed. This is particularly true of multi-component paints. Use a paint shaker, rotary mixer, or paint paddle to achieve a homogeneous mixture. We recommend splitting your paint into two parts; the top will typically be lighter and the bottom will be heavier. Completely stir the bottom half of the paint and slowly add small amounts of the top half into the heavier bottom. 2. Strain your paint to remove impurities. Use a cone strainer, or a 100-mesh nylon bag or equivalent strainer. 3. Thin your paint according to the manufacturer’s specifications. 4. Needle packings (BCR-043) are preset at the factory and self adjusting. Replace packing cartridge when necessary. SPRAYING 1. Air pressure forces paint from the paint container into the fluid chamber of the gun and out through the nozzle where the flow of air breaks the paint stream into tiny particles (atomization), creating the spray. a. Needle position controls the amount of paint flowing through the fluid nozzle. b. Trigger action controls needle position. c. The Fluid Control Knob (DT-3012) at the rear of the spray gun controls trigger action. Turning to the right will reduce fluid flow; turning to the left increases flow. 2. Regulate the air entering the gun by using the Metering Valve (AV-175). Adjust the air until you have the desired atomization. Too much air or fluid pressure will cause the gun to spray improperly and will create unnecessary overspray! You need only a small amount of air as you are atomizing only a small amount of paint. 3. Align the Flexible Extension (MF-008) to the desired position. 4. If you are having problems with the operation of your paint gun, check the Trouble Shooting Guide at the end of the manual for possible causes and solutions. DO NOT OPERATE SPRAY GUNS WITHOUT PERSONAL SAFETY EQUIPMENT AirVerter Detach III MicroFlex Spray Gun Vertical Fan Pattern MF-202 Horizontal Fan Pattern MF-202 Round Pattern MF-203 CLEANING YOUR DETACH III™ MICROFLEX SPRAY GUN Spray gun performance is directly related to how well it is cleaned after each use. This is particularly true for the small orifices in the MicroFlex. WARNING! Always de-pressurize system prior to any maintenance or disassembly procedure. Disconnect all air and fluid hoses prior to performing any maintenance operation. 1. Run or pump solvent through the gun to completely remove paint from the fluid chamber. Flush passages thoroughly, as brushes or other devices will not reach most parts of the fluid chamber. Note: The Fluid Hose provided is not designed for repeated detachment and reattachment to the Hose Barb or Spray Head. If flushing with solvent cannot clear a clogged Fluid Hose, replace the Fluid Hose. 2. Unscrew the Connector Stud (using knob DT-014) to detach the Spray Head Assembly from the Handle (DT-3300) and set the Spray Head Assembly aside. 3. Wipe the Handle and Needle (DT-3007) clean with solvent and a clean soft cloth. Use caution to avoid damaging or bending the needle. Re-lubricate the needle with Vaseline. 4. Unscrew the Pattern Control Ring (AV-101) from the Spray Head Assembly to separate the Adapter Collar (MF-002) from the Spray Head Assembly exposing the Fluid Hose (MF-010). 5. With the wrench provided, remove the Needle Seat (MF-3006) from the Spray Head Assembly. Use caution to avoid damaging or bending the Hose Barb (MF012). Be careful not to lose the AntiFriction Washers (MF-003). 6. Unscrew the Hose Barb from the Needle Seat. Clean the Needle Seat with brush provided. 7. Unscrew the MicroFlex Air Cap (MF-202 or MF-203) and clean with solvent ensuring all passages are absolutely clean. 8. Unscrew the MicroFlex Spray Head (MF200) from the Flexible Extension (MF-008). 9. Clean the MicroFlex Spray Head (MF-200) with solvent ensuring all passages are clean and free of obstructions. Use caution to avoid damaging or bending the fluid nozzle tip. 10. Use the round brush supplied to clean Needle Packings (BCR-043). 11. Inspect to make certain that all paint residue has been removed from the fluid chambers in the Spray Head Assembly. 12. Wipe all parts dry with a clean cloth before reassembling. Important! If using a gun washer, remove the needle from the handle and insert into the Needle Packings. This ensures solvent will pass through the Fluid Hose. DO NOT OPERATE SPRAY GUNS WITHOUT PERSONAL SAFETY EQUIPMENT AirVerter Detach III MicroFlex Spray Gun Re-Assembly 1. Screw the Spray Head into the Flexible Extension and attach the Air Cap to the Spray Head. 2. Attach the Fluid Hose and Hose Barb to the Needle Seat. 3. Remember to place the larger of the two Anti-Friction Washers between the Spray Head (DT-3403) and the Adapter Collar (MF-002) 4. Reattach the Needle Seat to the Spray Head. 5. Replace the MicroFlex Adapter Collar, Rigid Extension, Flexible Extension, AntiFriction Washers and Pattern Control Ring on the Spray Head Assembly observing that the Fluid Hose inside the Adapter Collar is not kinked. 6. Carefully align the spray head and handle and insert the needle into the Packing Nut. 7. Tighten the connector stud. DO NOT OPERATE SPRAY GUNS WITHOUT PERSONAL SAFETY EQUIPMENT AirVerter Detach III MicroFlex Spray Gun CLEANING ANCILLARY EQUIPMENT 1. Clean all paint residue from the pressure pot or pump. 2. All fluid passages must be clean and free of obstructions. 3. All gauges and valves must be clean and in proper working order. LUBRICATION INSTRUCTIONS 1. Use Vaseline or a non-silicone grease to lubricate the gun. 2. Lubricate all threaded connections for ease of maintenance. 3. Lubricate the needle where it passes through the needle packing. 4. DO NOT allow lubricant to get into areas where paint may come into contact with lubricant. MICROFLEX MAINTENANCE A C B B A A Legend A A – Must Clean B – Lubricate C – High Wear DO NOT OPERATE SPRAY GUNS WITHOUT PERSONAL SAFETY EQUIPMENT MF-202 Air Cap Fan Pattern (not to scale) Air Cap Round Pattern (not to scale) Needle Seat MF-3006 Fluid Tube DT-3402 MF-203 Hose Barb and Nylon Washer MF-012 Air Cap MF-202/3 DT-018 Atomizer Air Connector DT-3113 Socket Head Cap Screw and Nylon Washer DT-004 Fluid Fitting Needle Packing Cartridge DO NOT OPERATE SPRAY GUNS WITHOUT PERSONAL SAFETY EQUIPMENT DT-3026 Plug, Low Pressure Channel DT-027 Metering Valve AV-175 AV-220A Connector Nipple Trigger Air Control Valve DT-3011 DT-3012 Fluid Control Knob Needle Tension Spring Connector Stud Knob DT-014 DT-017 Handle DT-3300 Needle Guide Sleeve DT-030 DT-3010 Fluid Needle Guide DT-3403 Trigger Screws DT-016 MF-003 Anti-Friction Washers Connector Stud DT-015 MF-002 Adapter Collar AV-101 Pattern Control Ring Spray Head BCR-043 Flexible Extension MF-008 Fluid Hose Rigid Extension Spray Head Body w/ Hose Barb MF-010 MF-005 MF-200 AirVerter Detach III MicroFlex Spray Gun ® AirVerter Detach III™ MicroFlex Spray Gun TROUBLESHOOTING Trouble Paint Will Not Flow Inconsistent Spray Pattern (Spits And Sputters) Leakage at Front of Gun Distorted Spray Pattern Probable Cause 1. 2. Blockage in fluid nozzle Loss of air pressure in cup 3. 4. 5. 6. 1. Loose fluid nozzle Paint hose loose, damaged or clogged Coating is too thick Loose Needle Packing Running out of paint 2. 3. Loose fluid tube Loss of fluid pressure 4. 5. Loose needle packing Damaged air pressure tube 1. 2. 3. 4. 5. Damaged fluid needle Dirty fluid nozzle Impurities in paint Loose fluid tube Fluid adjustment screwed all the way out 6. Needle not firmly seated in the spray head 7. Packing too tight 1. Dirty or damaged spray head 2. Dirty or damaged fluid tube or needle 3. Fluid tube partially clogged Remedy 1. Clean or replace; strain paint 2. Search for air leaks and check cup gasket 3. Tighten 4. Tighten, replace or clean; strain paint 5. Thin the coating 6. Replace packing 1. Fill cup or pot, but never to the top (3/4 max.) 2. Tighten 3. Search for air leaks or blockages 4. Replace packing 5. Air pressure tube requires replacing or close inspection 1. Replace 2. Clean 3. Strain paint 4. Tighten 5. Rotate Fluid Control Knob (DT-3012) on rear of gun clockwise 6. Check for spray head obstruction 7. Replace Packing 1. Clean or replace 2. Clean or replace 3. Clean DO NOT OPERATE SPRAY GUNS WITHOUT PERSONAL SAFETY EQUIPMENT ® AirVerter Detach III™ MicroFlex Spray Gun Notes DO NOT OPERATE SPRAY GUNS WITHOUT PERSONAL SAFETY EQUIPMENT ® AirVerter Detach III™ MicroFlex Spray Gun Notes DO NOT OPERATE SPRAY GUNS WITHOUT PERSONAL SAFETY EQUIPMENT