1
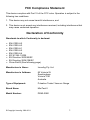
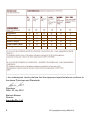
innovAg
MiniTest II
Dairy Vacuum
&
Pulsation Meter
User Manual
Part No. DR51-0028-05
© Copyright InnovAg 1996-2011
1
FCC Compliance Statement
This device complies with Part 15 of the FCC rules. Operation is subject to the
following two conditions:
1. This device may not cause harmful interference, and
2. This device must accept any interference received, including interference that
may cause undesired operation.
Declaration of Conformity
Standards to which Conformity is declared:
•
•
•
•
•
•
•
•
•
EN 61000-4-2
EN 61000-4-3
EN 61000-6-1
EN 61000-6-2
EN 61000-6-4
IEC 61326-1:2005
EU Directive 2002/95/EC
EU Directive 2004/108/EC
China RoHS (See following page)
Manufacturer’s Name:
InnovAg Pty. Ltd.
Manufacturer’s Address:
82 Victoria St.
Sandringham
Victoria 3191
Australia
Type of Equipment:
Pulsation Tester/ Vacuum Gauge
Brand Name:
MiniTest II
Model Number:
DR40-0080
© Copyright InnovAg 1996-2011
1
Enclosure
O
O
O
O
O
O
LCD
Silicone Tubing
O
O
O
O
O
O
O
O
O
O
O
O
Metal Fittings
Front Panel Label
O
O
O
O
O
O
O
O
O
O
O
O
Rating Labels
O
O
O
O
O
O
I, the undersigned, hereby declare that the equipment specified above conforms to
the above Directives and Standards.
Signature
Date: 30 July 2010
Braham Basser
Director
InnovAg Pty. Ltd
2
© Copyright InnovAg 1996-2011
Contents
1.
2.
3.
4.
5.
6.
7.
8.
9.
10.
11.
12.
13.
14.
What is MiniTest?
Safety Precautions
Maintenance and Calibration
The Front Panel.
Vacuum – Setting up.
Checking Vacuum
Pulsators – Setting up.
Checking Pulsation
Software Version and Calibration Date
Replacing the batteries
Repairs
Problems with your MiniTest
Specifications
Warranty
3
4
4
5
6
7
8
9
10
11
12
13
14
15
All rights reserved. No part of this manual may be reproduced, transmitted, stored in a retrieval
system, or translated into any language in any form by any means without the written permission of
InnovAg Pty. Ltd.
1. What is MiniTest?
MiniTest is a small, light, hand-held instrument for testing vacuum
supplies and pulsators in dairies. It uses the same high-accuracy
analysis of its ‘big brother’ DairyTest Professional, but in a smaller,
lighter, lower-cost format. It is intended for use by personnel with
technical knowledge of dairy operation as an accessory to a
professional test kit, i.e. for bench-testing of pulsators and to do a
quick check on the dairy’s performance. It has only a single
vacuum port and cannot be connected to a PC or printer.
Within Australia we have a Freecall help line which is there if you
have problems (1800 061 167). International users should call their
local distributor or contact us via fax +613 9521 8009, or email
[email protected]
© Copyright InnovAg 1996-2011
3
2. Safety Precautions
MiniTest is intended to be used in the milking stall – always allow
for the unpredictable nature of the animals.
During the measurements sharp needles may be used. Take care
they do not hurt people or animals. Always ask the dairy farmer
about the behaviour of the animals and milking method used.
If using MiniTest in wet tests, always keep the unit above the test
point to prevent fluid entry. Damage to the unit from fluid entering
the sensor is not covered under the warrantee.
3. Maintenance and Calibration
Maintenance
Clean the MiniTest with a moist cloth. Do not use cleaning agents.
MiniTest performs a self test when turned on, lighting up all
segments of the LCD. If an error message is displayed
(E-01 for example), or you suspect the unit is damaged, contact
InnovAg or the local distributor for further information.
Calibration
MiniTest automatically performs a zero calibration when turned on.
Do not turn on your MiniTest with vacuum connected. If the unit
reads other than zero on start-up a manual ‘force-zero’ feature can
be used. See the ‘Problems with your MiniTest’ section.
A complete calibration should be performed with an approved and
certified calibration test instrument every 24 months. This can be
organised by InnovAg or the local distributor.
4
© Copyright InnovAg 1996-2011
4. The Front Panel.
In Pulsation Mode MiniTest can measure six pulsation parameters
(A+B, B, C, D ratios, rate and Max Vacuum) and provide indication
of B-phase drop and pulsation stability. In Vacuum Mode three
vacuum parameters are measured (Minimum, Average and
Maximum). The picture below shows the front panel indicators and
controls.
Low-Battery Indication
If the remaining battery capacity is getting low the Battery symbol
will flash. Replace/recharge the batteries.
© Copyright InnovAg 1996-2011
5
5. Vacuum – Setting up.
MiniTest can display vacuum in either kiloPascals (kPa) or inchesof-mercury (inHg) units as required. The units setting can only be
changed in Vacuum mode.
Changing/checking the setting.
1. Make sure the unit is turned ON and in Vacuum mode (Min,
Avg or Max displayed).
key for about 3 seconds to enter setup
2. Press and hold the
mode. The display will show
5. Press either the
inHg.
6. Press the
operation.
or
vNt(Units).
key to change between kPa and
key to save the changes and return to normal
Auto Exit
MiniTest will automatically exit Setup mode after 1 minute if you
don’t press any keys.
Startup Mode
Vacuum mode defaults to Average (Avg) on startup. The setting is
kept when the mode is changed to Pulsation but is reset when the
unit is turned off or the batteries run flat.
6
© Copyright InnovAg 1996-2011
6. Checking Vacuum
When set to Vacuum mode MiniTest will display the Minimum (Min),
Average (Avg) or Maximum (Max) vacuum level on the digital
display.
Press the
key until the required parameter is selected.
Auto-power OFF
If there is no vacuum on the port and you don’t push any keys the
unit will automatically turn OFF after 10 minutes to save battery life.
What is it measuring?
All vacuum measurements are taken over a rolling 1.6 second
period, sampled 1000 times per second.
© Copyright InnovAg 1996-2011
7
7. Pulsators – Setting up.
MiniTest can display Pulsation Ratios (A+B, B, C and D) as either
percentage (%) of the total cycle, or in milliseconds (ms). The
selected method applies to all ratio parameters (A+B, B, C and D).
Rate measurement is fixed in Cycles-per-minute (CPM).
Changing/checking the setting.
1. Make sure MiniTest is turned ON and in Pulsation mode.
2.
Press and hold the
key for about 3 seconds to enter setup
mode. The display will show
rat(Ratio).
3. Press either the
or
key to set the required Ratio
display method; percentage (%) or milliseconds (ms).
4. Press the
operation.
key to save the changes and return to normal
Auto Exit
The tester will automatically exit Setup mode after 1 minute if you
don’t press any keys.
Saved Settings
Settings are kept until changed by you. They do not reset when the
unit is turned off or the batteries run flat.
8
© Copyright InnovAg 1996-2011
8. Checking Pulsation
MiniTest can display Pulsation Ratios A+B, B, C and D as well as
Rate (in CPM).
Press the
key until the required parameter is selected.
Note: Use Vacuum Mode to measure Maximum Vacuum of the pulsation
waveform.
Stability Indication
If the current reading varies from the average by more than 5% then
the pulsation being measured is not stable. ‘Avg’ will flash to warn
the user to wait until the readings settle. If ‘Avg’ does not stop
flashing there is a problem with the pulsation being measured.
B-Phase Drop Indication
If a vacuum drop of more than 4kPa is detected within the B Phase
then the pulsation is not within ISO specification and ‘B’ will flash to
warn the user.
Auto-power OFF
If there is no vacuum on the port and you don’t push any keys
MiniTest will automatically turn OFF after 10 minutes to save
battery life.
What is it measuring?
All Pulsation measurements are taken using 4kPa thresholds,
sampled 1000 times per second. Readings conform to ISO
standards by averaging over 5 cycles. A ‘rolling’ system is used
where measurements from the current cycle and the four previous
ones are averaged together, which means ISO requirements are
met while the screen still continuously updates.
© Copyright InnovAg 1996-2011
9
9. Software Version and Calibration Date
To display both MiniTest ‘s software version number and last
Calibration Date use the following sequence:
1. With MiniTest turned off, press and hold all three buttons. After
3 seconds the display will show the version number, e.g. P01
means Program version 01.
2. Release the buttons.
3. The last Calibration date will then be shown in 4 steps:
CAL
23-11
-10
10
Calibration date follows.
rd
Calibration Day, e.g. 23 .
Calibration Month, e.g. November.
Calibration Year, e.g. 2010.
© Copyright InnovAg 1996-2011
10. Replacing the batteries
When it’s time to replace MiniTest’s batteries, the battery symbol
will start to flash. We recommend the batteries be replaced as soon
as possible once the low battery indicator starts to prevent
unreliable readings or operation.
Batteries should not be left in the unit for extended periods in case
of leakage. Use quality Alkaline or NiMH ‘AA’ rechargeable cells.
© Copyright InnovAg 1996-2011
11
11. Repairs
DO NOT OPEN THE CASE – THERE ARE NO USER
SERVICABLE PARTS INSIDE AND YOU MAY VOID YOUR
WARRANTEE. Defective units should always be sent to InnovAg or
your nearest distributor.
Smaller repairs that can be performed by your distributor are:
•
•
•
Changing parts of the housing.
Replacing hoses
Calibration (only if a certified original calibrator is used)
For other defects, please contact the manufacturer for further
instructions:
InnovAg
82 Victoria St.
Sandringham
VIC 3191
Australia
12
Ph.
+613 9521 9383
Fax
+613 9521 8009
email: [email protected]
© Copyright InnovAg 1996-2011
12. Problems with your MiniTest
Before returning your MiniTest for repair, check the following:
• The unit does not turn on or won’t stay on – replace batteries.
• The Battery symbol is flashing – Batteries are getting low.
•
MiniTest reads vacuum with no vacuum connected –
Disconnect from the vacuum supply and turn it off and on
again to reset the zero.
• Damaged MiniTests should be returned for repair. There are
no user serviceable parts inside the case, and opening it may
void your warrantee.
• If you have a question or problem you cannot solve, contact
InnovAg or your local distributor.
© Copyright InnovAg 1996-2011
13
13. Specifications
Pulsation:
Rate Range:
40 to 500 CPM.
Rate accuracy:
± 0.5%.
Ratio accuracy:
± 0.5% of calculated value.
Time (ms) accuracy: ± 0.3%.
Sample rate:
1000 samples/sec.
Pressure:
Range:
+10 to -80 kPa at 1 atm.
Accuracy:
± 0.5 kPa
Repeatability:
± 0.3 kPa
Resolution:
0.1 kPa
General:
Operating Temperature: 5 to 45°C
Storage Temperature:
0 to 60°C
Automatic turn-off time: 10 minutes after last key press
if no vacuum on port.
Batteries:
Two ‘AA’ Alkaline or
NiCd/NiMH rechargeable cells.
Operating voltage:
1.4V to 5VDC
Specifications are subject to change without notice.
14
© Copyright InnovAg 1996-2011
14. Warranty
InnovAg Pty. Ltd. (“INV”) provides the following limited one-year warranty (“Warranty”) to the original
purchaser (“Purchaser”) of MT (“Product”). This warranty cannot be assigned or transferred to
subsequent purchasers. The registration form must be completed and returned to INV in order to be
able to claim under this Warranty.
WHAT WE WILL DO
If MT (“Product”) fails under normal use and service because of a manufacturing defect in materials
or workmanship within the warranty period, INV will, at its option either repair or replace the Product
with an equivalent product. The repaired or replacement product will be warranted under the terms of
this Warranty for the remainder of the applicable warranty period. Repair may include the
replacement of parts or components with functionally equivalent reconditioned parts or components.
WARRANTY PERIOD
The term of this warranty is one (1) year from the date of purchase.
WHAT IS NOT COVERED
This Warranty does not cover any failures of equipment not supplied by INV, nor does it cover any
failures of or damage to the Product due to:
(i) improper handling, misuse, neglect, accident, improper installation , non-compliance with the
directions for use;
(ii) any internal or external alteration or modification of any kind which in the opinion of INV will affect
the ability to service the Product; or
(iii) repair by anyone other than an authorised InnovAg Service Centre.
RIGHTS UNDER THE TRADE PRACTICES ACT
Under applicable State, Territory and Commonwealth law, certain conditions and warranties may be
implied in this contract and rights and remedies conferred upon you as user in relation to the Product
which cannot be excluded, restricted or modified by agreement (“Non-excludable Rights”). Any rights
conferred upon you by this Warranty are in addition to and do not detract from those Non-excludable
Rights.
INV disclaims all express or implied conditions and warranties in relation to the Product other than
the express terms of this Warranty and any Non-excludable Rights. With respect to Non-excludable
Rights, INV’s responsibility to the Purchaser, where permitted, is limited to the undertakings as
stated in the clause headed ‘WHAT WE WILL DO’.
Subject to the above, in no event shall INV be liable (whether before or after discharge of the
contract for supply of the Product or otherwise) for any loss or damage suffered by you as the user
arising from or caused or contributed to by the negligence of INV, its servants or agents, nor shall
INV be liable for special, incidental, indirect or consequential loss or damages suffered by you as
user as a result of breach by INV of this Warranty or otherwise including but not limited to economic
or moral loss, loss of profits or revenue or costs arising from the loss of use of the Product or the
cost of substitute products.
© Copyright InnovAg 1996-2011
15