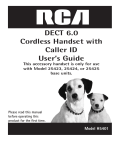
1
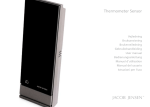
Telephone 80
DECT
User manual
Generation to generation…
JACOB JENSEN
TM
Accessories & ContentS
The following items are included in the package
of JACOB JENSENTM Telephone 80, with country
adaptor (optional):
1.
2.
3.
4.
5.
6.
7.
8.
1.
2.
5.
6.
3.
4.
Telephone Handset
Base Station
Wall mount plate + screws and plugs
Power supply unit
Li-ion 3.7V 650mAh Battery
Combo jack
Combo cord
Line cord
7.
8.
Illustration Diagram
Important Safety Instruction
Handset
1.
2.
3.
4.
5.
6.
7.
Earpiece
Side speaker
LCD Screen
Function Keys
Dial Number Keys
Microphone
Battery Compartment
(under the handset)
8. Handset charging contact
When using your telephone equipment, basic safety precautions
should always be followed to reduce the risk of fire, electric shock
and injury to persons, including the following:
1.
2.
•
•
3.
Base
9. Base charge contacts
10. Charge indicator
11. Page key
Main feature list
•
•
•
•
•
•
•
•
•
•
•
•
•
•
•
•
•
•
•
•
7.
•
4.
•
5.
12 hours talk time
7 days standby time
Low radiation
LCD type, 14 digit X 3 line + icons
Flash selectable 80-800 ms
6.
Caller ID Type 1&2 and DTMF
Call Log List
Hands-free
Speaker and ringer volume
100 phonebook memory locations
HS intercom
3-Party conference
Call Transfer between HS
Alarm call and date reminder
7 midi/polyphonic ringtones
Room monitor
Equalizer
Li-ion battery
Pan-European approved:
EN 55022 and EN 55024
• US: FCC Part 68 rules
(including tone/pulse selection)
•
•
•
9.
8.
•
10.
•
11.
•
Do not use this product near water, for example, near a
bath tub, wash bowl, kitchen sink or laundry tub, in a wet
basement or near a swimming pool. Do not allow the handset
to come into contact with liquids or moisture.
Avoid using a telephone (other than a cordless type) during
an electrical storm. There may be a remote risk of electric
shock from lightning.
Do not use the telephone to report a gas leak in the vicinity
of the leak.
Use only the power cord and batteries indicated in this
manual. Do not dispose of batteries in a fire. They may
explode. Check with local codes for possible special disposal
instructions.
Plug the adaptor to a socket-outlet that is close to the
equipment and easily accessible.
Do not open the handset, base station or charger. This could
expose you to high voltage.
Do not allow the charging contacts of the charger or the
battery to come into contact with extraneous conductive
materials.
Young children should be supervised to ensure that they do
not play with the telephone.
Since the phone works by sending radio signals between
the base unit and the handset, wearers of hearing aids may
experience interference in the form of a humming noise.
We advise that this phone should not be used near intensive
care medical equipment or by persons with pacemakers.
Your phone can interfere with electrical equipment such as
answering machines, TV, and radio sets if placed too close. It
is recommended that you position the base unit at least one
meter form such appliances.
SAVE THESE INSTRUCTIONS
US
A.Installation and start-up . . . . . . . . . . . . . . . . . . . . . . . . . . . . . . . . . . . 4
Congratulations on your new JACOB JENSENTM Telephone.
B.
Display symbols and their indication . . . . . . . . . . . . . . . . . . . . . . . . 6
C.
Buttons and their functions . . . . . . . . . . . . . . . . . . . . . . . . . . . . . . . . 7
The Telephone 80 is designed in Denmark by Jacob Jensen, whose products have
gained international recognition for their original, simple and classic design. It is a
state of art device created with consideration of form and function. The Telephone
80 is designed for both desktop and wall mounting and a wall mounting bracket is
included in the gift box.
D.Preparation before use . . . . . . . . . . . . . . . . . . . . . . . . . . . . . . . . . . . . . . 9
E.Normal operation . . . . . . . . . . . . . . . . . . . . . . . . . . . . . . . . . . . . . . . . . 11
F.Phone book . . . . . . . . . . . . . . . . . . . . . . . . . . . . . . . . . . . . . . . . . . . . . . . . 13
G.Caller identification memory (CALLER ID) . . . . . . . . . . . . . . . . . . . . 14
H.Personalizing your phone . . . . . . . . . . . . . . . . . . . . . . . . . . . . . . . . . . 14
I.
The Telephone 80 is powered with the latest digital technology – DECT system
(Digitally Enhanced Cordless Telecommunication). It brings you digital sound,
penetrating range and user-friendly menu-driven functions. According to the DECT
system standard (GAP compatible), six different handsets can be registered to a single
base unit to perform function of a mini-PABX system which offers you functions of
intercom and call transfer between handsets. In addition, its built-in Caller ID decoder,
Phone Book, Redial List and Caller ID memory provide you great convenience to
manage your phone calls.
Advanced operation . . . . . . . . . . . . . . . . . . . . . . . . . . . . . . . . . . . . . . . 15
J.Reverting to factory default setting . . . . . . . . . . . . . . . . . . . . . . . 16
K.Maintenance . . . . . . . . . . . . . . . . . . . . . . . . . . . . . . . . . . . . . . . . . . . . . . . 17
The Telephone 80 is equipped with a low radiation feature in both the base and the
handset. It works intelligently by detecting and adjusting the strength of the radio
frequency signal (RF) depending on the distance between the handset and the base as
well as the number of handsets attached. This is done automatically so that the system
will always adjust the strength of the RF-signal to the lowest possible.
L.Troubleshooting . . . . . . . . . . . . . . . . . . . . . . . . . . . . . . . . . . . . . . . . . . 17
A.Installation and start-up
M.Environmental care . . . . . . . . . . . . . . . . . . . . . . . . . . . . . . . . . . . . . . . . 17
N.
WarrANty and services . . . . . . . . . . . . . . . . . . . . . . . . . . . . . . . . . . . . . 18
The cordless phone system can only work under constant power supply to the base
station. It is advisable that another corded phone (works without mains power supply)
is connected to your phone system for emergency call purpose in case of power failure.
O.FCC compliance . . . . . . . . . . . . . . . . . . . . . . . . . . . . . . . . . . . . . . . . . . . . 18
Caution
•
Use only the Ktec Model KSLFB0750035W1US power adaptor unit that came with
the unit. Using other power adaptors may damage the unit and invalidate your
warranty.
•
Plug the adaptor to a socket-outlet that is close to the equipment and easily
accessible.
1.Connect the combo cord to the RJ45 jack of the combo jack.
A.1. Wall mounting
1.If you desire wall mounting, replace the desktop cover with the wall mounting plate.
Mount the plate using the enclosed screws and plugs for 6 mm drill.
2.Plug the power supply unit into the main wall outlet and connect the other end
to the RED jack of the combo jack.
3.Connect one end of the telephone line cord to the BLACK jack of the combo jack;
connect the other end of the telephone line cord to the country telephone plug
adaptor (optional).
4.Connect the country telephone plug adaptor to the wall outlet for telephone.
Caution
•
Risk of explosion if the battery is replaced by an incorrect type. Use only the RTX
battery model 60020437, 3.7V 650mAh Li-ion rechargeable battery pack.
•
Dispose of used batteries according to the instructions.
•
You must install the handset battery before using the cordless handset.
•
Li-ion batteries must be disposed of in accordance with the applicable waste
disposal regulations.
•
Do not dispose of the battery in fire. It may explode. Check with the local codes
for possible special disposal instructions.
•
Keep batteries out of the reach of children
2.On the handset, firmly slide and remove the handset back cover, install the
rechargeable battery pack into the battery compartment. Slide back the handset
back cover. The LCD screen will light up as soon as the battery is installed.
3.Put the handset into the base unit, according to the picture shown below. Make
sure that the LED charge indicator on the base unit lights up to show charging is in
progress. The charging icon
also appears on the screen of the handset. While
charging, the bars in the icon scrolls and when the handset is fully charged, all the
bars of the battery will be filled.
3.Observe polarity marks inside the battery compartment, and insert the rechargeable
battery. It is not possible to connect the battery with wrong polarity.
4.Replace the handset back gently; making sure the orientation of the battery
compartment cover is correct.
OR
Important notice
•
To obtain the best battery performance, keep the handset being charged for
six hours after first time installation.
•
When the handset is removed from the base, the LED in the base will stay on
for approximately five seconds before it will fade out.
•
Remove the battery from this product if storing over 30 days.
B.
Display symbols and their indication
In standby / Idle mode:
A.2.Setting language
After the initial charging of six hours you can start using your telephone. If you
would like to choose another language than the pre-set English, do as follows:
Press
and press
three times to select Display
press
press
twice to select Select Lang. Press
press
to select your desired
language: English, Deutsch, Français, Italiano, Nederlands, Español, Dansk, Svenska,
Türkçe, Norsk and press
.
A.3.Replacement of battery
Depending on your usage, it is recommended to change the rechargeable battery
every year to achieve the best performance.
To replace the battery, follow the instructions below:
1.Prepare one rechargeable battery, 3.7V 650mAH Li-ion battery, part number
60020437.
2.Gently remove the handset back cover, remove the old battery.
SymbolIndication
01/20 It shows the current date in month/date format.
02:05
It shows the current time in 12 hours format.
Always displays when your handset is on, shows the battery status.
SymbolIndication
Battery fully charged.
Battery half charged.
Empty and you hear a warning tone – the battery capacity is low and needs
charging. Remains steady when the line is in use.
C.
Buttons and their functions
Before going through the following keypad functions, it is a good idea to understand
that multiple functions may be assigned to a single button in order to reduce buttons
cluster. On some buttons, short and long push on one button gives you different
functions in different modes. Pay attention to the following description regarding long
and short push. Short push means push and release immediately. Long push means
push and hold for approximately two seconds.
Displayed when the ringer volume is set to OFF.
Phone book review mode. It shows when Phone Book records are being
viewed.
Flashes while connecting and receiving calls.
It shows that the phone’s microphone is muted.
Message Waiting Indicator. Depending on your operator’s service, this symbol
turns on when a voice message is left in your message box registered with the
telephone operator.
Hands-free speaker phone is on.
Keypad lock. It shows when the keypad is locked.
Intercom/internal call. It shows when intercom is in use.
A constant receiving power symbol shows good reception and transmission
power of radio signal.
Button
In standby mode
In conversation mode
In programming /
viewing mode
Push this button to
access the menus.
To enter:
Mute, Internal call,
Sound Enhancer,
Flash, Redial
In programming
mode, press this
button to confirm a
setting.
To enter digit 0-9
To enter digit 0-9
To enter digit 0-9 or
to enter alphabet
characters.
On Handset unit
Long push toggles
“P” for pause.
This button functions
as
when a
short push is given.
To enter
This button switches
the handset keypad
lock on and off after
a long push.
To enter
To enter
Button
In standby mode
In conversation mode
In programming /
viewing mode
In standby mode, a
short push to this
button will bring you
redial function. Last
10 called numbers will
be kept in the redial
memory. Numbers
stored in the redial
list can be up to 24
digits long.
Use
and
to select the
desired number. Press
to dial the
displayed number.
In conversation mode,
this button functions
as “volume up” for
both the earpiece or
the speaker phone
volume.
In programming &
memory review mode,
this button functions
as “scroll up” when
a short push is given.
Use to scroll through
the phonebook,
menu, redial list, or
caller ID log.
In standby mode, a
short push on this
button will show you
the phone book list.
The display shows
the first alphabetical
entry in the phone
book.
Use
and
to scroll
through the entries
and display the entry
you want. Or search
alphabetically for
the entry by entering
the first letter of the
name you want using
the keypad.
In conversation mode,
this button functions
as “volume down”
for both the earpiece
or the speaker phone
volume.
Button
In conversation mode
In programming /
viewing mode
Press to transfer a call
to another extension
on a PABX.
In programming
mode, this button
functions as Cancel
or Delete. Press it to
delete incorrect digits
or letters. Press this to
go back to previous
menu.
Press to end a call.
Press to exit the menu
mode and return to
standby.
Press and hold to turn
the handset on or off.
When the handset
is turned off, you
cannot make or
receive calls on that
handset.
To turn the handset
on again, press and
hold this button once
again or simply place
the handset in the
charger.
In programming
& memory review
mode, this button
functions as “scroll
down” when a short
push is given. Use to
scroll through the
phonebook, menu,
redial list, or caller
ID log.
While the phone
rings, press and
hold this button for
three seconds to
turn off the ringer
temporarily.
Press to make and
receive calls.
On Base unit
Press and hold for
5 sec to enable
registration mode
In standby mode
Push this button to
make a page ring at
the handset.
D.Preparation before use
Attention
Your DECT phone is protected by PINs (personal identification numbers). Never change
the PINs of your base unit unless you are familiar with electronics products and you
have a real need to protect your phone by special PINs. A forgotten PIN could stop
operation of your DECT phone and may result in expensive technical support services.
For details please refer to section I. ADVANCED OPERATION.
D.1.The OK/MENU button
This DECT phone is built with a user-friendly MENU function. All essential functions of
this phone can be programmed via the MENU button
by a question & answer
(Q&A) approach.
By pushing
on the handset, it leads you to browse through the following
function menus in a circular manner. You may push
to browse upward and
to browse downward.
Call Log List > Internal Call> Audio Setting >Display > Auto Talk > Time & Alarm > Add.
Settings > Setting Base > Baby Monitor >
Throughout the remaining part of this Instruction For Users, a quick Key Map will lead
you to different programming areas where you will be asked to make your selections.
D.2.Changing language
English is factory-programmed display language. To change the language setting:
Display language on handset
Key Map:
Display
Select Lang.
Select your desired language
1. Use
/
to browse through available languages
2. When desired language is shown, push
again to confirm.
time for use of this DECT phone in countries with FSK caller ID system as the date/time
information will be received automatically from the caller ID signal.
For use in countries with DTMF caller ID system (or countries with FSK system where
date/time is not sent from the telephone operator), go through the following
procedures to set date/time information:
Key Map:
Time & Alarm
Set Date & Time
Date/Time
12 Hours AM/PM mode
Use the numeric buttons on the handset to enter DATE information (MM/DD/YY
format), e.g. 060307 for 3rd June 2007, push
again to enter TIME information
(12:00 hour format). Use
to select between AM/PM. When finished, push
again to confirm. Press
to return to standby mode.
D.4.Keypad lock
You may lock the keypad of your handset to avoid accidental operation. To lock the
keypad of your handset, give a long push on
on your handset.
When your keypad is locked, the keylock symbol will show on the screen. When the
keypad lock is on, you can still receive calls by pressing
.
To unlock your keypad, repeat the above procedure and the keypad will be unlocked.
D.5. Automatic call pick-up
Key Map:
Auto Talk
select On/Off
Incoming call may be taken automatically when the handset is lifted from the base
unit. This is on condition that “Auto Talk” is set to “On”. If the automatic call pick-up
is off, you have to press
to answer a call, even if a handset is on the base or
charger. The default setting is “Off”.
Press
to return to standby mode.
D.3.Setting date/time
Depending on country and telephone operator, usually every caller ID memory will be
stored with its incoming date and time information. It is not necessary to set the date/
D.6.Sound enhancer
Key Map:
SoundEnhancer
select the tone options
You can adjust the Audio Tone of the earpiece. Your phone gives you four audio tone
options: Normal, Bass, Alto, or Treble.
1.Press
or during a call, press
to access the main menu.
2.Press
/
to select “SoundEnhancer”. Press
3.Press
/
to select one from Normal, Bass, Alto, or Treble.
Press
to confirm.
D.7.Mute/Unmute
Key Map:
Mute/Unmute
1.During a call, press
to access the main menu.
2.Select “Mute”. Press
3.The mute icon
will show on the screen.
4.To unmute the phone, follow the above procedure and select the “Unmute”.
Press
. The mute icon will disappear from the screen.
D.8. Appointment
Key Map:
Time & Alarm
Set Appointm. – Select your appointment
The date and time must be set before you can access the Calendar menu option. To
set date and time, see section D.3. Setting date/time. Your phone allows you to set 5
personalized date and time appointments.
1.Press
to access the main menu.
2.Press
/
to select “Time & Alarm”. Press
3.Press
/
to select “Set Appointm.”. Press
4.Press
/
to select one from “Appointment 1” to “Appointment 5”.
Press
5.Press
/
to select “On”. Press
6.Enter date and time for the appointment. Refer to D.3. Setting date/time. Press
7.Enter the appointment name using the keypad (up to 13 characters). Press
10
D.9. Handset name
Key Map:
Display
Handset Name
enter the handset name
You can change the name your phone displays on the screen. If you have more than
one handset, you can use the name to identify your handset.
1.Press
to access the main menu.
2.Press
/
to select “Display”. Press
3.Press
/
to select “Handset Name”. Press
4.“Handset Name” appears. Enter the name using the number keypad. Press
5.Press
to exit and return to standby mode.
D.10.Talk display
You can select the type of information displayed during a call – the time or the call or
the caller’s number (if available). The default setting is “Time”.
Key Map:
Display
1.Press
2.Press
3.Press
4.Press
5.Press
Talk Display
select Time/Number
to access the main menu.
/
to select “Display”. Press
/
to select “Talk Display”. Press
/
to select “Time” or “Number”. Press
to exit and return to standby mode.
D.11.Tones
Key Map:
Audio Setting
select On/Off
Tones
select your option
You can switch on or off the tones for key touch, confirmation, call waiting, and outof-range alarm. For example, when the key tone is set to “On”, you will hear a tone
each time you press a keypad button.
1.Press
to access the main menu.
2.Press
/
to select “Audio Setting”. Press
3.Press
/
to select “Tones”. Press
4.Press
/
to select the option (i.e. “Warning”, “Call waiting”, “Range
Alarm”) and
to confirm.
5.Press
/
to display either “On” or “Off” and press
to confirm. For
“Key”, select from “pattern 1-3” or “Off” and press
6.Press
to exit and return to standby mode.
D.12. DIAL mode
You can set your phone to use either “Tone” or “Pulse” dialing. The pre-set setting is
“Tone” dialing, where you will hear a tone beep each time you dial a number. Most
modern exchanges and switchboards use “Tone” dialing, so you should not need to
change this setting. Only change it if your switchboard uses “Pulse” dialing or if you
cannot make a call using “Tone” dialing.
Key Map:
Setting Base
Tone/Pulse
1.Press
2.Press
3.Press
4.Press
displayed.
5.Press
6.Press
Additional
to access the main menu.
/
to select “Setting Base”. Press
/
to select “Additional”. Press
/
to select “Dial Mode”.Press
Dial Mode
select
Key Map:
Setting Base
the number
Additional
1.Press
to access the main menu.
2.Press
/
to select “Setting Base”. Press
3.Press
/
to select “Additional”. Press
4.Press
/
to select “Prefix Dial”.Press
displayed.
5. Enter the number using the number keypad or press
Press
to confirm.
6.Press
to exit and return to standby mode.
Prefix Dial
enter
. The current setting is
to clear.
D.15.Call barring
When switched on, Call Barring prevents calls from being made to a specific number,
area code or international code.
Key Map:
Setting Base
select On/Off
Call Barring
enter the number
. The current setting is
/
to select either “Tone” or “Pulse”. Press
to exit and return to standby mode.
to confirm.
D.13.Tone dialing Switch-Over
If you have set your phone to use “Pulse” dialing, you can switch temporarily to
“Tone” dialing for the duration of a call:
1.Press
2.Enter the number you want. Press and hold
“D” will be displayed. Any digits
entered after the “D” will be dialed using tone dialing.
D.14.Prefix dialing
If you need to add a prefix to the number for a long distance call, or if you need to
add your saved area code to the number, do the following:
1.Press
to access the main menu.
2.Press
/
to select “Setting Base”. Press
3.Press
/
to select “Call Barring”. Press
4.Enter the number using the number keypad or
confirm.
5.Press
/
to select “On” or “Off”. Press
6.Press
to exit and return to standby mode.
to clear. Press
to
to confirm.
E.NORMAL OPERATION
E.1.To make a new call
1.You can only make a call with your handset. You cannot make a call from your base
unit.
2.On the handset, enter the telephone number to be called and press
(if you
press
again, you can toggle to speaker phone). The entered number will be
dialed automatically. After a short delay, the call timer will start timing the call, if
“Time” is selected in “Talk Display” menu.
11
3.Press
to exit and return to standby mode.
E.2. Hands-free operation from the base
When the handset is placed in the base you have a unique feature enabling you to
make and receive calls in speaker phone mode. During a call you can pick up the
handset and it will automatically shift to earpiece mode.
E.3.To receive a call
1.You may receive calls through the handset only. When you receive a call, the
handset(s) will ring as long as the handset ring volume is not set to “Off”. The
telephone icon on the handset screen will flash.
2.If you have subscribed to caller ID service with your telephone operator, caller’s
number will show on the screen while the handset is ringing. If the caller’s number
is stored already in the Phone Book of your handset (refer to F. PHONE BOOK), the
matched name will be displayed on the handset display screen when the phone
receives a call.
3.Simply push
to answer the call or simply lift the handset from the base.
(providing the automatic call pick-up is set to “On”, refer to D.5. Automatic call pickup). After a short delay, the call timer will start timing the call.
4.To end a call, push
on the handset to disconnect the line.
E.4.To make & receive internal calls (Intercom)
Internal communication (INTERCOM) can be made between handsets – like intercom,
call transfer & conference conversation. Your handset is given an individual extension
number. This individual extension number will be used when making intercom, call
transfer & conference conversation. Extension number for handset(s) starts from 1 to 6.
In a standard package, your phone comes with one handset and one base unit.
E.5.To make an internal call from one handset to another handset
You may make an internal call from your handset to a specific handset extension.
1.On the handset, press
and select the “Internal Call”
. The
icon is
displayed and you will hear the internal call dialing tone.
2.Use
or
to select the name, number, or the handset you want to call.
Press
or
. The handset will ring.
3.When the called handset answers, press
or place the handset back on the
base to end the call.
4.To answer an intercom ring, simply push
on the called extension unit.
12
E.6.To page all handsets from the base
You can only page all registered handsets at the same time by pushing the PAGE
button on the base unit. If you have misplaced your handset, you may also use the
PAGE function from the base unit to make a page ring at the handset.
E.7.Call Transfer & Conference Conversation
Transferring a call
You can transfer an external caller from your handset to another handset
During an external call:
1.Press
and select the “Internal Call”. The external caller is put “on hold”
2.Press
or
to select name, number or the handset you want to transfer
the call to and press
or
. The called handset will ring.
Note: If you do not select another handset to transfer the call to within 60 seconds,
your caller will automatically be taken off of hold allowing you to continue your
conversation.
3.When the called handset answers, press
to transfer the call. If the called
handset does not answer, press
to return to the external caller.
Conference call
You can hold a three-part conversation (conference call) between your handset, an
external caller and another internal handset user.
During an external call:
1.Press
and select “Internal Call. The external caller is put “on hold”
2.Press
or
to select name, number or the handset you want to have a
conference call with and press
or
. The called handset will ring.
3.When the called handset answers, press
scroll down to “Flash” and press
to start your conference call.
4.Any handset can press
at any time to leave the conference call.
E.8.Call Transfer/Switching via a switchboard (PABX) to a new extension
If your phone is connected to a switchboard, an external call can be put through to a
local extension by doing so:
1.Press
. The display will now show a great R.
2.Dial the requested extension. You will now be able to talk with the chosen extension
and transfer the call. To transfer the call, press
and the external call is
transferred to the chosen extension.
F.PHONE BOOK
There are 100 phone book memory banks built inside this DECT phone (13 characters
& 24 digits). You may store frequently used numbers into these memory banks.
If more than one handset comes with your product package (refer to information on
the package), the phone book memories are independent among the handsets. The
phone book memory will not be automatically transferred from one handset to the
others.
F.1.To make a new entry
Key Map:
Phone book
3.If necessary, you can edit the number using
enter new ones using the keypad.
4.Press
/
to select a distinctive ring.
5.When finished, push
again to complete.
6.Press
to exit and return to standby mode.
to delete any incorrect digits and
To add/remove area code, please see section G.3. Caller ID number conversion.
F.3.To make a call from the Phone Book Memory
Key Map:
/
to select number
New Entry
<Enter Name>
1.Use the alphanumeric buttons (2 to 9) to enter a name for the record in the same
manner as you manage alphabet input from your mobile phone. Push
again
to confirm. Press
to delete an incorrect letter.
If you enter a letter and the next letter is on the same button, press
to move
the cursor to the right or wait three seconds for the cursor to move. To switch
between upper and lower case, press
.
2.Use the numeric buttons to enter phone number (timed pause can be inserted inside
telephone number after connected to a PABX. Press and hold
until the display
shows P), push
again to save the record. Press
to delete an incorrect
letter.
3.Press
to select a tone type and press
to confirm.
4.Press
to select “Store” or “Back” and press
to confirm.
5.The phonebook entry is now stored. Press
to return to standby model.
F.2.To make a new entry from Caller ID Memory and Redial List
You may copy a number stored in the Caller ID memory and the Redial list to the
Phone Book. (Consult sections of Caller ID and Last Number Redial for more details)
1.When a desired number is shown while you are reviewing caller ID memory or redial
list, push
once. “Save to Phb.” is displayed. Press
. Enter a name using
the keypad and press
to confirm.
If you enter a name that is already stored in the phonebook, you will be prompted
to enter another name.
2.The number is displayed. To confirm and save the entry to the phone book, press
to confirm.
1.Use the alphanumeric keypad to enter the first letter of a desired name inside the
phone book. First record starting with the entered letter will be shown on the
screen.
2.Use
/
to start browsing until desired name is shown.
3.Push
to make the call.
F.4.To delete the Phone Book Memory
Key Map:
/
to select number
Erase Entry
Yes
1.Use
/
to scroll until the desired name is shown on the screen.
2.Push
to confirm or press
to go back to the menu screen without
deleting. You will be asked to confirm permanent deletion of phone book record.
To confirm, push
again and the selected phone book record is deleted and a
long beep will be heard.
F.5.To change the Phone Book Memory
Key Map:
/
to select number
to enter the correct letters
Edit
Numeric keypad
1.Use
/
to scroll until desired name is shown on the screen.
2.Push
to confirm.
3.You may use
to delete letters of the name entry and make a correction.
13
4.When name entry is finished, push
. You may use
the phone number entry and make a correction.
5.Push
again to save the record.
6.Select a tone type and press
to delete numbers of
G.CALLER IDENTIFICATION MEMORY (CALLER ID)
If Caller ID service is available from your service operator and you have subscribed
to this service, the telephone number of the caller will be shown on the screens of
handset when there is an incoming call. In FSK caller ID system, name of the caller and
date time stamp will also be displayed and stored if they are available. Only the first 13
letters of the caller’s name are displayed.
This DECT phone stores the last 30 Caller ID records into the Caller ID memory. It can
store up to 24 digits long and names up to 13 characters long. The oldest record will
be replaced by the newest record. If the caller has withheld their listing, “Unavailable”
or “Private” will be displayed or, if the number is unavailable the display will show
“Unavailable”. You will not be able to dial back an entry with one of these messages.
Call waiting tone
This model has a special call waiting tone in addition to the one you typically hear
from your local service provider. This tone will be heard after the standard tone when
you receive a call waiting notification. This tone is provided as an extra feature and
will have to be turned on in order to activate as the default setting is set to “Off”.
To turn this feature on, go to the menu, select “Audio Setting”, “Tones”, and “Call
Waiting” – then set the feature to “On”. When activated you can toggle between calls
by pressing
Flash
.
G.1.To review Caller ID records
Caller ID records can be reviewed at only one handset at a time because the records
are only stored in the base unit.
To review Caller ID records in the handset, press
and select the “Call Log List”.
Use
/
to scroll among records, or press
to exit and return to
standby.
G.2.To make a call from Caller ID records
You may make a call from the Caller ID records. Press
and select the “Call Log
List”. Push
on the handset to dial the desired caller’s number (or name) when
reviewing Caller ID records.
G.3.Caller ID number conversion
Use
to add or remove the stored area code. Select between 7 - 8 - 10 - 11 digits
for storing or recall.
G.4.To store a number from Caller ID records to Phone Book memory
You may store a number from the Caller ID record to a new Phone Book memory.
Please refer to F. PHONE BOOK section for details.
G.5.To delete Caller ID memory
You may delete either a single or all records in the Caller ID memory.
On the handset
1.Press
and select the “Call Log List”. Use
/
to scroll and select the
desired entry you intend to delete. If you want to delete all entries, skip this step.
2.Press
to select “Erase Entry” or “Erase List”.
3.Press
to select “Yes” or “No”. Then press
to confirm.
G.6.Message Waiting Indicator (MWI)
If Voice Message service is available from your service operator and you have
subscribed to this service, the symbol of Message Waiting
will be shown on the
screen when a voice message is left in your message box registered with the telephone
operator.
Depending on your service operator’s service, Message Waiting Indicator should turn
off automatically when you have checked your left message in the operator’s server.
H.PERSONALIZING YOUR PHONE
This DECT phone is built with features to offer you personalized settings, such as ringer
type, ringing volume, key click and key lock.
Referring to the description of the MENU button in previous section, all these
personalized settings can be programmed via Menu Programming mode.
14
H.1.Setting Ringer Volume & Ringer Type
Different ringer volumes and ringer types can be programmed to each handset.
Handset Ringer Volume
Key Map:
Audio Setting
Ringer Volume
select the volume
1.To arrive at this menu, push
in standby mode, and use
/
to start
browsing until “Audio Setting” is shown on the screen. Press
2.Press
/
to select “Ringer Volume” and press
3.Press
/
to select the volume you want. (you will hear a sample of each
as you scroll through), then press
to confirm.
4.Press
to exit and return to standby. If you select Volume “Off”,
will be
displayed.
Handset Ringer Type
Key Map:
Audio Setting
select the ringer type
Ringer Type
select the option
1.To arrive at this menu, push
in standby mode, and use
/
to start
browsing until “Audio Setting” is shown on the screen. Press
2.Press
/
to select “Ringer Type” and press
3.Press
/
to select the “External”, “Internal”, “Paging”, “Alarm”, or
“Appointment” and press
to confirm.
4.Press
/
to select the melody you want. (you will hear a sample of each
as you scroll through), then press
to confirm your selection.
5.Press
to exit and return to standby.
I.
I.1.To register a new handset
When you register a new handset to your base, you will be asked to enter your base
PIN code. To enable registration mode on the base unit, press and hold the PAGE
button for five seconds. Before registration, make sure the new handset is fully
charged and that you have the base and the handset in front of you. Also, make sure
that all handsets and the base are in standby.
On the handset you want to register:
Key Map:
Add. Settings
Register
1.Press
2.Press
3.Press
4.Press
select the base number
to access the main menu.
/
to select “Add. Settings” and press
/
to display “Register” and press
to confirm.
/
to select your base number and press
to confirm.
If the base already has the maximum number of 6 handsets registered, you will need
to deregister one of the existing handsets before you can register the new handset.
See section I.2. Deregister a handset or a base.
On the handset:
Enter the base PIN code.
Pre-set base PIN code is 0000.
When in standby, the new handset number will be displayed.
The handset will automatically be allocated with the next available handset number.
If the registration is unsuccessful, the display will show “Searching” and you will need
to follow the registration procedure again.
ADVANCED OPERATION
Special Attention!!
The following sections are only for users who are familiar with electronics products.
Failure in following steps correctly may stop your DECT phone from normal operation.
I.2. Deregister a handset or a base
If you have more than one handset registered to your base or more than one base
registered to your handset(s), you can deregister both the handset from the base or
the base from the handset. Before deregistration, make sure that all handsets and the
base are in standby.
15
Key Map:
Add. Settings
select Yes
1.Press
2.Press
3.Press
4.Press
5.Press
6.Press
Deregister
select the handset or base
to access the main menu.
/
to select “Add. Settings” and press
/
to display “Deregister” press
to confirm.
/
to select “Handset” or “Base” and press
to confirm.
/
to select “Yes” and press
.
to exit and return to standby.
I.3.Changing the PIN code
Key Map:
Setting Base
Base PIN
enter a new PIN code
The default Base Pin code is 0000. If you want to change to a new PIN code, follow the
above procedures while you enter a new 4 digits base PIN code.
I.4.Selecting a base
You can register the handset with up to 4 bases, e.g. one at work and one at home or
one upstairs and one in the garage, and switch between them. Once your handset is
registered with other bases, you can either specify the base you want to use or, select
“Automatic” for your handset to choose your base with the strongest signal.
If you have more than one handset registered to your base and you complete the
following procedure, only the handset you reset and the base will go back to the
default settings.
For the base
Key Map:
Setting Base
1.Press
2.Press
3.Press
4.Press
5.Press
Base Reset
select Yes
to access the main menu.
/
to select “Setting Base” and press
/
to display “Base Reset” press
to confirm.
/
to select “Yes” and press
to confirm.
to exit and return to standby.
For the handset
Key Map:
Add. Settings
Handset Reset
select Yes
1.Press
to access the main menu.
2.Press
/
to select “Add. Settings” and press
3.Press
/
to display “Handset Reset” press
to confirm.
4.Press
/
to select “Yes” and press
to confirm.
5.The display shows “Cleared” and returns to factory default.
Key Map:
Add. Settings
Base number
1.Press
2.Press
3.Press
4.Press
confirm.
Base Select
J.REVERTING TO FACTORY DEFAULT SETTING
Automatic or
to access the main menu.
/
to select “Add. Settings” and press
/
to select “Base Select” press
to confirm.
/
to select “Automatic” or the Base Number. Press
to
I.5.Resetting your phone
If you reset your phone, both the base and the handset will return to their default
settings. The time, date, handset, and phonebook will not return to default.
16
You may change all settings in your DECT phone back to the factory default setting.
The only way to reset the handset or the base is to go into the menu and choose
“Handset Reset” or “Base Reset”. Please refer to the above section I.5. Resetting
your phone. All programming and settings you have made to the phone will be lost
automatically. It could be useful if you have programmed too many things at the same
time, making conflicts between your settings and affecting normal operation.
The following memory banks will remain unchanged after resetting to factory default:
- Caller ID memory
- Last Number Redial List
- Base unit and handsets registration
To change all settings back to factory default, go to section I.5. Resetting your phone.
K.MAINTENANCE
•
•
•
•
•
Do not expose this product to dust, strong sunlight, humidity, high temperature, or
mechanical shock.
Do not use corrosive or abrasive cleansers on this product. Keep the unit dust free by
wiping it with a soft, dry cloth.
Do not disassemble this product, it contains no user-serviceable parts.
In case of a thunderstorm, it is advised to disconnect the power adapter, as the
product warranty does not cover damage caused by lightning/surge.
Only use adapter and battery pack that comes with the package.
L.TROUBLESHOOTING
Q1.My phone does not work!
A1. Make sure that you have NOT locked the keypad of your handset. When the keypad
lock is turned on, a symbol will show on the screen. To remove the keypad lock,
push and hold
on your handset for approximately two seconds and release the
button.
A1. Make sure that all connections of the adapter and the line cord are connected securely
to the jacks.
A1. Make sure that you have inserted the battery pack into the handset battery
compartment, and that it is charged and inserted with the correct polarity.
A1. If you have connected more than one phone to the same telephone line, make sure
that all other telephones connected are put on hook. In some telephone systems,
when the first phone on the same telephone line is used, all other telephones are
electrically disconnected.
A1. Try to connect another telephone to the telephone socket, if the problem persists
and it appears that there is a problem with your telephone line system, consult your
network provider.
A1. If the person on the other end of the conversation does not hear your voice, make
sure you have not activated the MUTE function. To test, activate the MUTE function
once more and your phone should resume to normal operation.
on the screen is flashing. If it is at a weak level,
A1. Check if the receiving symbol bar
it indicates your handset is too far away from the base unit and the radio signal is too
weak. You should get nearer to the base unit and try again.
A1. If your handset fails to dial a number, check if that number is barred (Refer to D.15
Call Barring).
A1. Occasionally, if the handset is without normal battery charging for a prolonged period
of time, it may lock itself when the battery level becomes too low. Try to disconnect
the battery and put it back on again and put the handset on the charger for six hours
to resume.
Q2.My phone does not ring!
A2. Check if the ringing volume is set to “Off” (Refer to H.1. Setting Ringer Volume &
Ringer Type). Your phone will not ring if the ringing volume is set to “Off”. Change
the ringing volume to higher setting ranges.
A2. Make sure that your handset is not switched off.
A2. Make sure that the connection of the line cord is connected securely to the jacks.
A2. Check if you have selected the right base unit via the base selection function (if you
have registered more than one base unit to your handset).
Q3.The phone book memories do not work as expected!
A3. Make sure that you do not enter a telephone number longer than the limits
mentioned in the phone book section.
A3. If your phone is connected behind a PABX system, consult your system provider for
information of timed pause delay required to make an external call.
Q4.Caller’s number does not show on my phone!
A4. Make sure your phone line is provided with caller ID function from the phone service
provider. In most countries, caller ID function must be paid and subscribed separately
from normal phone function. For details, please consult the phone service provider.
A4. Callers may suppress their caller’s number when making their phone call. Caller’s
number does not necessarily display when a call is received. For details, please consult
the phone service provider.
A4. If a call is made from abroad, caller’s number cannot be transmitted.
Q5.My handset does not work after I have registered my handset to a base unit from
different maker!
A5. According to DECT standard (GAP compatible), handsets can be registered to any
DECT system base unit. However, maker specific functions may not be compatible
between the products. It may happen that only basic function can be operated if
handset and base unit from two makers are registered together.
A5. Check if the other base unit is GAP compatible according to DECT standard. Only GAP
compatible products can be compatible to each other.
M.Environmental Care
Please remember to observe the local regulations regarding the disposal of your packaging
materials, exhausted batteries and old phones and, where possible, promote their recycling.
We have marked the packaging with standard symbols designed to promote the recycling
and appropriate disposal of your eventual waste.
17
N.
Warranty and Services
Warranty
The warranty is the only warranty applicable to this product. All other warranties, express
or implied (including all implied warranties of merchantability or fitness for a particular
purpose) are hereby disclaimed. No verbal or written information given by Bell Xpress A/S.,
its agents, or employees shall create a guaranty or in any way increase the scope of this
warranty.
Repair or replacement as provided under this warranty is the exclusive remedy of the
consumer. Bell Xpress A/S shall not be liable for incidental or consequential damages
resulting from the use of this product or arising out of any breach of any express or implied
warranty on this product. Except to the extent prohibited by applicable law, any implied
warranty of merchantability or fitness for a particular purpose on this product is limited to
the applicable warranty period of 12 months.
- The contents of this manual are subject to change without notice.
Service Center
Improvee Corporation
5289 Ne Elam Young Parkway Ste G200
Hillsboro, OR 97124
Email: [email protected]
Toll-Free phone: 888 880 8090
O.FCC Compliance
Your telephone equipment is approved for connection to the public switched telephone
network and is in compliance with parts 15 and 68, FCC Rules and Regulations and the
Technical Requirements for Telephone Terminal Equipment published by ACTA.
United States FCC Compliance
This equipment has been tested and found to comply with the limits for a Class B digital
device, pursuant to Part 15 of the FCC Rules. These limits are designed to provide reasonable
protection against harmful interference in a residential installation. This equipment
generates uses and can radiate radio frequency energy and, if not installed and used in
accordance with the instructions, may cause harmful interference to radio communications.
However, there is no guarantee that interference will not occur in a particular installation.
If this equipment does cause harmful interference to radio or television reception, which can
be determined by turning the equipment off and on, the user is encouraged to try to correct
the interference by one or more of the following measures:
18
•
•
•
•
Reorient or relocate the receiving antenna.
Increase the separation between the equipment and receiver.
Connect the equipment into an outlet on a circuit difference from that to which the
receiver is connected.
Consult the dealer or an experienced radio/TV technician for help.
Any changes or modifications to the equipment not expressly approved by the party
responsible for compliance could void the user’s authority to operate the equipment.
The information shown in FCC Declaration of Conformity paragraph below is a requirement
of the FCC and is intended to supply you with information regarded the FCC approval of
this device. The phone numbers listed are FCC-related questions only and not intended for
questions regarding the connection or operation for this device, Please contact your cable
service provider for any questions you may have regarding the operation or installation of
this device.
This device complies with Part 15 of the FCC Rules. Operation is subject to the following
two conditions: (1) this device may not cause harmful interference, and (2) this device must
accept any interference received, including interference that may cause undesired operation.
Privacy of communications may not be ensured when using this phone.
FCC Declaration of Conformity
This device complies with Part 15 of the FCC Rules. Operation is subject to the following
two conditions: (1) this device may not cause harmful interference, and (2) this device must
accept any interference received, including interference that may cause undesired operation.
Privacy of communications may not be ensured when using this phone.
Hearing Aid Compatibility (HAC)
This equipment is hearing aid compatible as defined in FCC CFR 47 Section 68.316.
Important! Assure that all telephones and phone lines used with this equipment have been
disconnected from the public telecommunications networks.
FCC RF Radiation Exposure Statement
This equipment complies with FCC RF radiation exposure limits set forth for an uncontrolled
environment. This equipment should be installed and operated with a minimum distance of
20 cm between radiator and your body. This transmitter must not be co-located or operating
in conjunction with any other antenna or transmitter.
For hand held operation, this phone has been tested and meets the FCC RF exposure
guidelines. Use of other accessories may not ensure compliance with FCC RF exposure
guidelines.
Consumer Information
a) This equipment complies with Part 68 of the FCC rules and the requirements adopted
by the ACTA. On the bottom of this equipment is a label that contains, among other
information, a product identifier in the format US:T7HW400BCT9180. If requested, this
number must be provided to the telephone company.
b) An applicable certification jacks Universal Service Order Codes (USOC) for the equipment
is provided (i.e., RJ11C) in the packaging with each piece of approved terminal
equipment.
c) A plug and jack used to connect this equipment to the premises wiring and telephone
network must comply with the applicable FCC Part 68 rules and requirements adopted by
the ACTA. A compliant telephone cord and modular plug is provided with this product.
It is designed to be connected to a compatible modular jack that is also compliant. See
installation instructions for details.
d) The REN of Telephone 80 is 0.0. It is used to determine the number of devices that may
be connected to a telephone line. Excessive RENs on a telephone line may result in the
devices not ringing in response to an incoming call. In most but not all areas, the sum
of RENs should not exceed five (5.0). To be certain of the number of devices that may
be connected to a line, as determined by the total RENs, contact the local telephone
company.
e) If this equipment Telephone 80 causes harm to the telephone network, the telephone
company will notify you in advance that temporary discontinuance of service may be
required. But if advance notice isn’t practical, the telephone company will notify the
customer as soon as possible. Also, you will be advised of your right to file a complaint
with the FCC if you believe it is necessary.
f) The telephone company may make changes in its facilities, equipment, operations
or procedures that could affect the operation of the equipment. If this happens the
telephone company will provide advance notice in order for you to make necessary
modifications to maintain uninterrupted service.
g) Should you experience trouble with this equipment, please contact Improvee
Corporation, 5289 Ne Elam Young Parkway Ste G200, Hillsboro, OR 97124 and phone
number 888 880 8090 for repair or warranty information. If the equipment is causing
harm to the telephone network, the telephone company may request that you
disconnect the equipment until the problem is resolved.
h) Please follow instructions for repairing if any (e.g. battery replacement section);
otherwise do not alternate or repair any parts of device except specified.
i) Connection to party line service is subject to state tariffs. Contact the state public utility
commission, public service commission or corporation commission for information.
j)
NOTICE: If your home has specially wired alarm equipment connected to the telephone
line, ensure the installation of this DECT Phone does not disable your alarm equipment.
If you have questions about what will disable alarm equipment, consult your telephone
company or a qualified installer.
k) This equipment is hearing aid compatible according to FCC § 68.4.
This is your guarantee of an authentic JACOB JENSENTM Telephone.
The individual number below matches the one on your telephone.
Individual No.:
......................................................................
Name:
......................................................................
Address:
......................................................................
......................................................................
......................................................................
Bought from:
......................................................................
......................................................................
Date of purchase:
......................................................................
IMJT80US.24102007
DECT 6.0
The telephone is compliant with the DECT 6.0 Standard which operates
in the 1.92GHz to 1.93GHz frequency range.
19
Product by: Bell Xpress A/S · Sletvej 50 · 8310 Tranbjerg J · Denmark
www.jacobjensen.com