1
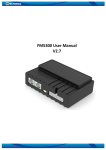
FM5300 User Manual
DRAFT v0.1
Table of contents
1
INTRODUCTION .................................................................................................................... 4
1.1
1.2
1.3
1.4
2
BASIC DESCRIPTION .............................................................................................................. 5
2.1
2.2
2.3
2.4
2.5
3
SIM CARD INSERT SCHEME ...................................................................................................... 10
INSTALLING FM5300 DRIVERS ................................................................................................ 12
NAVIGATE LED..................................................................................................................... 13
STATUS LED ........................................................................................................................ 13
SOCKET 2 10 PINOUT ........................................................................................................... 14
USB ................................................................................................................................... 15
FIRMWARE ......................................................................................................................... 16
4.1
4.2
5
PACKAGE CONTENTS ................................................................................................................ 6
BASIC CHARACTERISTICS ........................................................................................................... 6
MECHANICAL FEATURES ........................................................................................................... 7
ELECTRICAL CHARACTERISTICS .................................................................................................... 8
ABSOLUTE MAXIMUM RATINGS ............................................................................................... 10
CONNECTION AND PINOUT ................................................................................................. 10
3.1
3.2
3.3
3.4
3.5
3.6
4
ATTENTION ............................................................................................................................ 4
INSTRUCTIONS OF SAFETY ......................................................................................................... 4
LEGAL NOTICE ........................................................................................................................ 5
ABOUT DOCUMENT ................................................................................................................. 5
UPDATING FIRMWARE USING USB CABLE .................................................................................. 16
UPDATING FIRMWARE VIA GPRS ............................................................................................. 17
OPERATIONAL BASICS ......................................................................................................... 18
5.1
OPERATIONAL PRINCIPLES ....................................................................................................... 18
5.2
OPERATIONAL MODES ........................................................................................................... 18
5.3
ACCELEROMETER .................................................................................................................. 18
5.4
VIRTUAL ODOMETER ............................................................................................................. 19
5.5
VOICE FUNCTIONALITY ........................................................................................................... 19
5.6
PROFILES ............................................................................................................................. 20
5.7
FEATURES ............................................................................................................................ 20
5.7.1
Scenarios ................................................................................................................ 20
5.7.2
Trip.......................................................................................................................... 20
5.7.3
Geofencing.............................................................................................................. 21
5.7.4
iButton list .............................................................................................................. 21
6
CONFIGURATOR ................................................................................................................. 21
6.1
STARTUP........................................................................................................................... 21
6.2
CONFIGURATOR STRUCTURE .................................................................................................... 22
6.2.1
Buttons area ........................................................................................................... 23
6.2.2
Information area .................................................................................................... 24
6.2.3
Profiles/global parameters selection area ............................................................. 24
6.3
PARAMETERS CONFIGURATION ................................................................................................ 25
6.3.1
Global parameters Settings .................................................................................... 25
6.3.2
Settings and configurable parameters menu ......................................................... 26
6.3.2.1 System Settings................................................................................................................... 26
6.3.2.2 GSM Settings ...................................................................................................................... 27
6.3.2.2.1 GPRS ........................................................................................................................... 27
6.3.2.2.2 SMS............................................................................................................................. 27
6.3.2.2.3 Operator List............................................................................................................... 28
6.3.2.3 Features .............................................................................................................................. 29
6.3.2.3.1 Mode .......................................................................................................................... 29
6.3.2.3.2 Scenarios .................................................................................................................... 30
6.3.2.3.3 Trip ............................................................................................................................. 31
2
6.3.2.3.4 Geofencing ................................................................................................................. 31
6.3.2.3.4.1 Geofencing settings............................................................................................ 31
6.3.2.3.4.2 AutoGeofencing settings .................................................................................... 32
6.3.2.3.5 iButton List ................................................................................................................. 33
6.3.2.4 I/O ....................................................................................................................................... 34
6.3.2.4.1 FM5300 available I/O list ............................................................................................ 34
6.3.2.4.2 I/O configuring ........................................................................................................... 36
7
PROFILE SWITCHING ........................................................................................................... 39
7.1
DEPENDING ON GSM OPERATOR PROFILE SWITCHING ................................................................ 39
7.2
DEPENDING ON I/O EVENT PROFILE SWITCHING ......................................................................... 41
7.2.1
Example #1 ............................................................................................................. 41
7.2.2
Example #2 ............................................................................................................. 41
8
DATA ACQUISITION ............................................................................................................ 42
8.1
GPS DATA ACQUISITION ......................................................................................................... 42
8.1.1
Min. Period ............................................................................................................. 43
8.1.2
Min. Distance .......................................................................................................... 44
8.1.3
Min. Angle .............................................................................................................. 45
8.2
I/O DATA ACQUISITION .......................................................................................................... 45
8.2.1
Configuration .......................................................................................................... 45
8.2.2
Event generation .................................................................................................... 46
9
DATA SENDING – GPRS ....................................................................................................... 47
9.1
DATA PROTOCOLS ............................................................................................................ 47
9.1.1
AVL data packet...................................................................................................... 47
9.1.2
AVL Data Array ....................................................................................................... 47
9.1.3
AVL data ................................................................................................................. 48
9.1.4
Priority .................................................................................................................... 48
9.1.5
GPS Element ........................................................................................................... 48
9.1.6
I/O Element............................................................................................................. 49
9.1.6.1
Example .............................................................................................................................. 49
9.2
SENDING DATA OVER TCP ..................................................................................................... 50
9.2.1
Communication with server .................................................................................... 50
9.3
SENDING DATA OVER UDP..................................................................................................... 51
9.3.1
UDP Channel Protocol ............................................................................................ 51
9.3.2
Sending AVL data using UDP channel..................................................................... 52
9.3.3
Communication with server .................................................................................... 53
10
DATA SENDING – SMS .................................................................................................... 54
10.1 24 POSITION SMS DATA PROTOCOL ......................................................................................... 54
10.1.1
Encoding ................................................................................................................. 54
10.1.2
Structure ................................................................................................................. 54
10.1.3
Decoding GPS position ............................................................................................ 55
11
DEEP SLEEP MODE .......................................................................................................... 56
12
FEATURES AND SCENARIOS. ........................................................................................... 57
12.1 ECO DRIVING SCENARIO ......................................................................................................... 57
12.1.1
Mounting Requirements ......................................................................................... 57
12.1.2
Configuration .......................................................................................................... 59
12.2 OVERSPEEDING SCENARIO ...................................................................................................... 60
12.2.1
Mounting Requirements and Working Conditions ................................................. 61
12.2.2
Configuration. ......................................................................................................... 61
12.3 IMMOBILIZER SCENARIO ......................................................................................................... 61
12.3.1
Configuration. ......................................................................................................... 61
12.4 AUTHORIZED DRIVING SCENARIO ............................................................................................. 61
12.4.1
Configuration. ......................................................................................................... 62
13
CHANGE LOG .................................................................................................................. 63
3
1
INTRODUCTION
1.1 Attention
Do not disassemble the device. If the device is
damaged, the power supply cables are not isolated or
the isolation is damaged, before unplugging the power
supply, do not touch the device.
All wireless data transferring devices produce
interference that may affect other devices which are
placed nearby.
The device must be connected only by qualified
personnel.
The device must be firmly fastened in the predefined
location.
The programming must be performed using a second
class PC (with autonomic power supply).
The device is susceptible to water and humidity.
Any installation and/or handling during a lightning
storm are prohibited.
FM5300 has USB interface;
Please use cables provided with FM5300 device.
Teltonika is not responsible for any harm caused by
using wrong cables for PC <-> FM5300 connection.
1.2 Instructions of safety
This chapter contains information on how to operate FM5300 safely. By following these
requirements and recommendations, you will avoid dangerous situations. You must read these
instructions carefully and follow them strictly before operating the device!
To avoid mechanical damage, it is advised to transport the FM5300 device in an impactproof package. Before usage, the device should be placed so that its LED indicators are visible,
which show the status of operation the device is in.
4
When connecting the connection (2x10) cables to the vehicle, the appropriate jumpers of
the power supply of the vehicle should be disconnected.
Before dismounting the device from the vehicle, the 2x10 connection must be
disconnected.
The device is designed to be mounted in a zone of limited access, which is inaccessible for
the operator. All related devices must meet the requirements of standard EN 60950-1.
The device FM5300 is not designed as a navigational device for boats.
1.3 Legal Notice
Copyright © 2011 Teltonika. All rights reserved. Reproduction, transfer, distribution or
storage of part or all of the contents in this document in any form without the prior written
permission of Teltonika is prohibited.
Other products and company names mentioned here may be trademarks or trade names
of their respective owners.
1.4 About document
This document contains information about the architecture, possibilities, mechanical
characteristics, and configuration of the FM5300 device.
Acronyms and terms used in document
PC – Personal Computer.
GPRS – General Packet Radio Service.
GPS – Global Positioning System.
GSM – Global System for Mobile Communications.
SMS – Short Message Service.
AC/DC – Alternating Current/Direct Current.
I/O – Input/Output.
Record – AVL data stored in FM5300 memory. AVL data contains GPS and I/O information
AVL packet - Data packet that is being sent to server during data transmission. AVL packet
contains from 1 to 24 records.
Geofence – is a virtual geographic area of interest that can be defined by a radius or
polygon for the location. In this document term “Geofence” is often used as functionality, which
generates an event when crossing defined area.
2
BASIC DESCRIPTION
FM5300 is a terminal with GPS and GSM connectivity, which is able to determine the
object’s coordinates and transfer them via the GSM network. This device is perfectly suitable for
applications, which need location acquirement of remote objects. It is important to mention that
FM5300 has additional inputs and outputs, which let you control and monitor other devices on
remote objects. FM5300 also has a USB port for device status log output and entering
configurations.
5
2.1 Package contents1
Usually the FM5300 device sample is supplied to the customer in a cardboard box
containing all the equipment that is necessary for operation. The package contains:
FM5300 device;
input and output power supply cable with a 2x10 connection pins;
4 screws for assembling device
GPS/GLONASS antenna;
GSM antenna;
USB cable;
Port 1/2 cable
Port 3 cable
card with link to drivers and configurator.
2.2 Basic characteristics
GSM / GPRS features:
Teltonika TM11Q quad band module (GSM 850 / 900 / 1800 / 1900 MHz);
GPRS class 10;
SMS (text, data).
GPS features:
GPS/GLONASS receiver
Protocol NMEA-0183:;
Up to -161 dBm sensitivity.
Hardware features:
Cortex®-M3 processor;
4 MB internal Flash memory;
Built-in accelerometer.
Interface features:
Power supply: 10 ÷ 30V;
USB port;
4 digital inputs;
4 analog input;
4 open collector digital outputs;
1Wire® temperature sensor
1Wire® iButton
LEDs indicating device status.
2xRS232 ports
Audio interface
1
Package content depends on Order Code, and can be customized by customer needs.
6
2.3 Mechanical features
Table 1 FM5300 physical interfaces and operation environment
Part name
Physical specification
Navigation LED
LED
Modem LED
LED
GPS
GPS antenna connector MCX
GSM
GSM antenna connector SMA female
outer shell, female inner pin
Socket 2x10
Tyco Micro MATE-N-LOK™
or similar
USB
Mini USB socket
Port1
RS232 port channel 1 (RJ45 socket)
Port2
RS232 port channel 1 (RJ45 socket)
Audio port
RJ11
Operation environment
Operation temperature:
-25:C … +55:C
Storage temperature:
-40:C … +70:C
Storage relative humidity 5 … 95 %
(non condensating)
Figure 1. FM5300 view & dimensions in mm (tolerance ±2mm)
7
2.4 Electrical characteristics
Table 2 Electrical characteristics
VALUE
Min.
Typ.
Max.
Unit
Supply Voltage (Recommended Operating Conditions)
11.8
-
30
V
Supply Voltage
(for internal rechargable battery charging proper
functioning)
9.5
-
30
V
-
1.5
4
mA
-
-
315
mA
-
-
245
mA
-
-
158
mA
-
-
123
mA
-
1.5
4
mA
-
-
566
mA
-
-
245
mA
-
-
283
mA
-
-
123
mA
Drain current (Digital Output OFF)
-
-
120
uA
Drain current (Digital Output ON, Recommended
Operating Conditions)
-
-
300
mA
Static Drain-Source resistance (Digital Output ON)
-
-
300
mOhm
Input resistance (DIN1, DIN2, DIN3)
15
-
-
kOhm
Input Voltage (Recommended Operating Conditions)
0
-
Supply
voltage
V
CHARACTERISTIC DESCRIPTION
SUPPLY VOLTAGE
POWER SUPPLY CURRENT (HARDWARE VERSION WITH INTERNAL BATTERY)
Deep Sleep, average, Icc.ds
Ucc=12.6V, all modules fully working, internal battery is
charging, Icc1
Ucc=12.6V, all modules fully working, internal battery is
charged, Icc2
Ucc=25.2V, all modules fully working, internal battery is
charging, Icc3
Ucc=25.2V, all modules fully working, internal battery is
charged, Icc4
SUPPLY CURRENT (HARDWARE VERSION WITH EXTERNAL BATTERY)
Deep Sleep, average, Icc.ds
Ucc=12.6V, all modules fully working, internal battery is
charging, Icc5
Ucc=12.6V, all modules fully working, internal battery is
charged, Icc6
Ucc=25.2V, all modules fully working, internal battery is
charging, Icc7
Ucc=25.2V, all modules fully working, internal battery is
charged, Icc8
DIGITAL OUTPUT (OPEN DRAIN GRADE)
DIGITAL INPUTS
8
VALUE
Min.
Typ.
Max.
Unit
Input Voltage threshold (DIN1)
-
7,5
-
V
Input Voltage threshold (DIN2, DIN3, DIN4)
-
2,5
-
V
Input Voltage (Recommended Operating Conditions),
Range1
0
-
10
V
Input resistance, Range1
-
120
-
kOhm
Input Voltage (Recommended Operating Conditions)
Range2
0
-
30
V
Input resistance, Range2
-
147
-
kOhm
3,3
-
3,9
V
Output inner resistance
-
7
-
Ohm
Output current (Uout > 3.0V)
-
30
-
mA
Short circuit current (Uout = 0)
-
130
-
mA
-
No
-
Ohm
Differential input resistance
19
30
52
kOhm
Recessive output voltage
2
2.5
3
V
Differential receiver threshold
voltage
0.5
0.7
0.9
V
Common mode input voltage
-30
-
30
V
CHARACTERISTIC DESCRIPTION
ANALOG INPUTS
OUTPUT SUPPLY VOLTAGE 1-WIRE2
Supply Voltage
CAN INTERFACE
Internal terminal resistors CAN bus
2-
1-wire Supply voltage PIN is dedicated for 1-wire devices ONLY, do not use it for any other purpose.
9
2.5 Absolute Maximum Ratings
Table 3 Absolute maximum ratings
VALUE
CHARACTERISTIC DESCRIPTION
Typ.
Max.
Unit
32
V
Supply Voltage (Absolute Maximum Ratings)
-32
Digital output clamp threshold voltage (Absolute
Maximum Ratings), (Idrain = 2mA)
36
Digital Input Voltage (Absolute Maximum Ratings)
-32
32
V
Analog Input Voltage (Absolute Maximum Ratings)
-32
32
V
0
10
V
0
10
V
-58
58
V
Voltage on Supply Voltage 1-Wire (Absolute
Maximum Ratings)
Voltage on Data Input/Output 1-Wire (Absolute
Maximum Ratings)
Voltage on CANH, CANL (Absolute Maximum
Ratings)
3
Min.
V
CONNECTION AND PINOUT
3.1 SIM card insert scheme
Gently open FM5300 case using screwdrivers
10
Take off FM5300 case and insert
SIM card as shown
Assemble device as shown and put
screws into the holes
Screw all 4 screws
Device is ready
11
3.2 Installing FM5300 drivers
Software requirements
• Operating system 32-bit and 64-bit: Windows XP with SP3 or later, Windows Vista,
Windows 7.
• MS .NET Framework V3.5 or later (http://www.microsoft.com or
http://avl1.teltonika.lt/downloads/tavl/Framework/dotnetfx35setupSP1.zip).
Drivers
Please
download
Virtual
COM
Port
drivers
from
http://avl1.teltonika.lt/downloads/FM11/vcpdriver_v1.3.1_setup.zip
Teltonika
website:
Installing drivers
Extract and run VCPDriver_V1.3.1_Setup.exe. This driver is used to detect FM5300 device
connected to the computer. Click 'Next' in driver installation window (figures below):
Figure 2. Driver installation window
This will launch device driver installation wizard. In the following window click ‘Next’
button again:
Figure 3. Driver installation window
12
Setup will continue installing drivers and will display a window about successful process in
the end. Click 'Finish' to complete setup:
Figure 4. Driver installation window
You have now installed drivers for FM5300 device successfully.
3.3 Navigate LED
Table 4 Navigate LED operation
Behaviour
Permanently switched on
Blinking every second
Off
Meaning
GPS signal is not received
Normal mode, GPS is working
GPS is turned off because:
Deep sleep mode
Or
GPS antenna short circuited
3.4 Status LED
Table 5 Status LED Operation
Behaviour
Blinking every second
Blinking every 2 seconds
Blinking fast for a short time
Blinking fast constantly
Off
Meaning
Normal mode
Deep sleep mode
Modem activity
Boot mode
Device is not working
Or
Device firmware being flashed
13
3.5 Socket 2 10 pinout
(-)EXT. BAT
10
20
(+) EXT. BAT
OUT 2
9
19
OUT 1
OUT 3
8
18
OUT 4
AIN 2
7
17
AIN 1
AIN 4
6
16
AIN 3
DIN 2
5
15
DIN 1
DIN 4
4
14
DIN 3
1W. PWR
3
13
1W. data
CAN L
2
12
CAN H
(-)GND
1
11
(+)VCC (10 30)V DC
Figure 5 2x10 socket pinout
Table 6 2x10 SOCKET PINOUT DESCRIPTION
Pin
Nr.
1
2
3
4
5
6
7
8
9
Pin Name
Description
(-)GND
CAN L
1W. PWR
DIN 4
DIN 2
AIN 4
AIN 2
OUT 3
OUT 2
( - ) Ground pin. (10…30) V DC*
SAE J1939 CAN interface Low channel
Power supply pin for Dallas 1-Wire® devices
Digital input. Channel 4
Digital input. Channel 2
Analog input, channel 4. Input range: 0 - 30V/ 0 - 10V DC
Analog input, channel 2. Input range: 0 - 30V/ 0 - 10V DC
Digital output. Channel 3. Open collector output
Digital output. Channel 2. Open collector output
This pin is used connected with pin 20 (Ext. Battery (+)). Function of
those pins is to disconnect the internal accumulator during shipment or
storage. When pin 10 and pin 20 are connected, the internal
accumulator is on, while disconnected – the internal accumulator is off.
Power supply pin
SAE J1939 CAN interface High channel
Data channel for Dallas 1-Wire® devices
Digital input, channel 3
Digital input, channel 1 (RESERVED FOR IGNITION LINE)
Analog input, channel 3. Input range: 0 - 30V/ 0 - 10V DC
Analog input, channel 1. Input range: 0 - 30V/ 0 - 10V DC
10
Ext. Battery (―)
11
12
13
14
15
16
17
(+)VCC (10...30) V DC
CAN H
1W. data
DIN 3
DIN 1
AIN 3
AIN 1
14
Pin
Nr.
18
19
20
Pin Name
Description
OUT 4
OUT 1
Digital output. Channel 4. Open collector output
Digital output. Channel 1. Open collector output
This pin is used connected with pin 10 (Ext. Battery (―)). Function
of those pins is to disconnect the internal accumulator during shipment
or storage. When pin 10 and pin 20 are connected, the internal
accumulator is on, while disconnected – the internal accumulator is off.
Ext. Battery (+)
3.6 USB
FM5300 connected to PC creates STM Virtual COM Port, which can be used as system port
(to flash firmware and configure the device).
Figure 6. COM-Ports
15
4
FIRMWARE
4.1 Updating firmware using USB cable
FM5300 functionality is always improving, new firmware versions are developed. Current
module firmware version can be retrieved from configurator. See configuration description for
details.
Contact sales manager to get the latest firmware.
Updater is needed to update the firmware. It can be downloaded from:
http://avl1.teltonika.lt/downloads/FM53/
Firmware must to be copied to “Firmware updater” folder.
Connect FM5300 to PC with USB cable. Launch “Firmware Updater”, select COM port, click
connect and update. Update process may take up to several minutes.
Figure 7. FM updater screen
Figure 8. FM firmware updating finished
16
4.2 Updating firmware via GPRS
Firmware can also be updated over GPRS using RILS system.
RILS stands for Remote Imlet Loading System, which is used to update FM5300 processor
firmware. In order to update firmware, server sends a SMS to the FM5300 and directs it to
connect to the server and download new firmware. The special web interface is used for this
operation. Address of the web application is: http://212.47.99.62:5002/RILS-web/.
For RILS login and password please contact your sales manager.
Figure 9. Remote Configuration
After logging in click on ‘Upload FM4’, click Browse, select FM5300 firmware file from hard
disk, click OK and then Upload. Select uploaded firmware from the list (last one) and click next.
Enter necessary parameters in the fields:
Server IP: 212.47.99.62
Server port: 5009
Module number is GSM number of FM SIM in worldwide standard, for example:
+37069912345.
Enter your APN, APN (chap) login and password. After entering all parameters, click ‘Add
Module’. To operate multiple devices, enter new IMEI and GSM number and click ‘Add Module’
again. Otherwise click ‘Next’ and if all data is correct, in next window click ‘Upload’.
17
5
OPERATIONAL BASICS
5.1 Operational principles
FM5300 module is designed to acquire records and send them to server. Records contain
GPS and I/O information. Module uses GPS receiver to acquire GPS data and is powered with 3
data acquire methods: time-based, distance-based, angle-based methods. Method’s details are
described in Data Acquisition 8 chapter. All data is stored in flash memory and later can be sent
via GPRS or SMS channels. GPRS mode is most preferred data sending mode. SMS mode is mostly
used in areas without GPRS coverage or GPRS usage is too expensive.
GPRS and SMS settings are described in Data Sending – GPRS 6.3.2.2.1 and Data Sending –
SMS 6.3.2.2.2 chapters. FM5300 communicates with server using special data protocol. Data
protocol is described in “FMXXXX Protocols” document and in 9.1 chapter.
FM5300 can be managed by SMS commands (SMS Command list is described in SMS
Command List section) and GPRS commands (GPRS Command list is described in GPRS Command
List section). Module configuration can be performed over TCP or via SMS. Configuration
parameters and modes are described in “FMXXXX Protocols” document.
5.2 Operational Modes
FM5300 is designed to operate in two different modes: Normal Mode and Deep Sleep
Mode (Standby mode). Normal Mode means that FM5300 is fully functional and performs all the
functionality mentioned above in Operational principals section.
Deep Sleep Mode is designed to dramatically reduce power consumption. It is separate
mode and certain conditions must be fulfilled to switch from Normal operation and enter this
mode. Detailed information about how FM5300 enters/exits Deep Sleep Mode and what
functions does FM5300 perform while in this mode will be found in 11 chapter.
5.3 Accelerometer
FM5300 has a built in 3 axis accelerometer which allows device to indicate if vehicle is
moving or not as well as measure acceleration. Accelerometer sensitivity can be configured – it
has 3 configurable global parameters: Movement Sensitivity and start/stop timeouts define time
intervals in seconds. To indicate that vehicle is moving, FM5300 constantly (in frequency of 10
Hz) checks for g force change on X, Y and Z. If measured g force keeps exceeding the defined limit
in “Movement Sensitivity” (Figure 10) for defined time interval in “Movement Filter Start” field,
then vehicle is considered as moving. Same settings for idle indication apply – if g force change is
less than the one defined in “Movement Sensitivity” field for time interval defined in “Movement
Filter Stop” field, then vehicle is considered as idle (not moving).
Example for default parameters: Movement Filter Start = 1 and Movement Filter Stop = 30
means that movement will be detected after 1 second and stop will be detected after 30 seconds
of inactivity.
18
Figure 10. Accelerometer settings
5.4 Virtual Odometer
Virtual odometer is used to calculate travelled distance in FM5300 as a separate I/O
element. When FM5300 detects movement, it starts counting distance using GPS signal: every
second it checks current location and calculates distance between current and previous point. It
keeps adding these intervals until it is time to make a record, then FM5300 records its location
and adds odometer value, which is equal to the sum of all distances, measured every second.
When record is made, odometer resets to zero and distance calculation starts all over again.
Virtual odometer as an I/O element can be also used with Trip feature, read chapter 5.7.2.
5.5 Voice Functionality
FM5300 has functionality to receive and make voice calls. To enable this functionality
telephone handset with electret microphone and RJ-11 connector must be connected to “Audio”
port.
In “Global Parameters”, “Call Settings” section (Figure 11) has four parameters: “Call
number”, “Call trigger”, “Ringtone”, and “Auto answer”. To initiate a call an appropriate digital
input has to be selected as a “Call Trigger”. To trigger the call selected input has to be connected
to the ground. When the call is triggered, FM5300 dials the number which is defined in “Call
Number” field. To initiate a call to FM5300 dial a number of the SIM card that is inserted in
FM5300. When FM5300 has an incoming call it can play a selected tone from the “Ringtone” list.
FM5300 will auto answer the call after number of rings defined in “Auto answer” field.
“Voice Settings” (Figure 11) section includes settings for “Microphone level” to regulate
microphone sensitivity and “Speaker level” to define how load will be the speaker.
For detailed “Voice Functionality” configuration parameters descriptions refer to chapter
5.5
Figure 11. Voice and Call Settings
19
5.6 Profiles
FM5300 has 4 profiles saved in Flash memory of the module. Every profile has a list of
parameters, which enables FM5300 to operate in different modes while using different profiles.
The easiest way to understand what is profile is to compare it to a list of instructions that are
written for different cases. You are allowed to setup up to 4 different module behaviours. Global
parameters contain settings that are common for all 4 profiles. This means that if FM5300 is set
to call to predefined number, you will be able to call it while using any profile.
Profile 3 is default profile for FM5300. It is always loaded on very first start-up and further
profile switching is proceeded after operator scan or I/O element changes.
Switching between profiles (changing behaviour) can be performed by GSM Operator
(mostly used for roaming applications), or by Profile switching depending on I/O Event (on I/O
value changing). More information about Profile switching functionalities can be found in
chapters 7.1 (switching by GSM Operator) and (switching by I/O Element) 7.2.
5.7 Features
Using available features can greatly increase FM5300 usability options.
5.7.1
Scenarios
Four scenarios are available on FM53 device:
a. Digital Output No.1 is used by scenarios - Eco Driving or Over Speeding;
b. Digital Output No.2 is used by scenarios - Authorized Driving or Immobilizer.
Eco Driving Scenario. Gives the ability to periodically monitor driving characteristics and
warn the driver against over accelerating, braking or cornering. This scenario also features
adaptive and auto calibration. More about Eco Driving read in chapter 12.1
Over Speeding Scenario. Helps to prevent from exceeding fixed speed and inspects driver if
needed. DOUT1 is controlled by scenario for user needs, to manage buzzer, LED etc.
Authorized Driving Scenario. Gives ability to use vehicle only for 50 specific iButton owners
(specified in iButton list). DOUT2 is controlled by scenario for user needs, to manage buzzer, LED
etc.
Immobilizer Scenario. Vehicle can be used only if iButton is connected. In this scenario
iButton list is not used; connect any iButton to pass Immobilizer security. DOUT2 is controlled by
scenario for user needs.
5.7.2
Trip
Trip customizable feature enables user extended monitoring of performed trips (from
engine start at present location to engine stop at arrived location), log their start and stop points,
view driven total distance. Event will be generated (included into send records) only when trip
starts and finish.
20
5.7.3
Geofencing
Geofencing is another feature which is highly customizable and can detect wherever car
enters or leaves customized areas. More about Geofencing can be read in 5.7.3 chapter.
Auto Geofencing feature if enabled is activated automatically by turning off car ignition.
Next time before driving user has to disable Auto Geofencing with iButton or by turning on car
ignition. In case of theft car leaves Auto Geofencing zone without authorization FM5300 device
automatically sends high priority record to AVL application.
5.7.4
iButton list
IButton list is used to enter authorized iButton ID codes, which are used to authenticate
driver in Authorized driving and Auto Geofencing options.
6
CONFIGURATOR
6.1
STARTUP
FM5300 configuration is performed via FM5300 Configurator program. FM5300
Configurator version can be downloaded from http://avl1.teltonika.lt/downloads/FM53/.
Contact sales manager to get the latest FM5300 Configurator version. FM5300 configurator
operates on Microsoft Windows OS and uses MS .Net Framework 3.5 or higher. Please ensure
that MS .Net Framework 3.5 or later is installed on your PC before starting configurator. Latest
MS .Net Framework version can be downloaded from official Microsoft web page.
Module configuration is performed over USB cable or COM1. Configuration process starts
from starting FM5300 Configurator program and then connecting to FM5300 device via
“Connect” button located on the top left corner of configurator. If one of the communication
sources (USB cable or COM1) is connected to the device configurator will detect it automatically
and if connected successfully IMEI, Version fields which were empty, now are filled with certain
numbers depending on Modem IMEI and firmware version of your device (Figure 12).
21
Figure 12. FM5300 Configurator window
If both USB cable and COM1 are connected to the device you will be prompted to select
communication source (Figure 13).
Figure 13. FM5300 Communication source selection
6.2 Configurator structure
FM5300 has four user editable profiles, which can be both loaded and saved to the device.
User can also revert to default settings, by pressing Load Defaults button. After any modification
of configuration settings it has to be saved to FM5300 device, otherwise it will not be written to
device flash memory.
FM5300 Configurator is divided into 5 main areas (Figure 14):
Buttons area;
Information area;
Profiles or global parameters selection area;
Settings menu;
22
Configurable parameters and values menu.
Figure 14. FM5300 Configurator window structure
6.2.1
Buttons area
Table 7 Configurator buttons area description
Main Buttons
Button
Connect
Load
Save
Load Defaults
Save to File…
Load from File…
Reset device
Description
connects the device
reads configuration parameters from FM5300 Flash memory
saves configuration parameters to FM5300 Flash memory
loads default FM5300 settings that later can be modified
allows user to save currently entered settings to .XML file for later usage
allows user to load configuration saved in .XML extension file
reboots FM5300 and displays processor firmware version
Additional Buttons
Button
SIM PIN
Add Keyword3 /
Change Keyword /
Switch Security Off
Description
allows to enter PIN code if inserted SIM card has activated PIN code
security
buttons are used to protect configurator from unauthorized access to
configuration
3
Keyword is 4 -10 symbol length. It If keyword is set, every time user reconnects FM5300 to USB or COM1
port he will be asked to enter valid keyword when connecting FM5300 to configurator. User is given 5 attempts to
enter valid keyword before blocking configurator.
23
6.2.2
Information area
FM5300 information area is divided into 2 parts located on the top right and bottom of the
configurator. When configurator is connected to the device via USB or COM1 port all necessary
information about device is shown here:
IMEI – unique number for every FM5300 and usually servers recognize different
devices by this number;
SOURCE – configuration source (device or file);
VERISON – firmware version of the device;
STATUS – status bar
SECURITY STATUS – status of the configurator security;
SIMPIN STATUS – status of SIM card in the device
6.2.3
Profiles/global parameters selection area
FM5300 has 4 user editable profiles stored in Flash no. 1-4 memories and one extra profile
stored in Flash no. 0 which cannot be edited by user. Profile from Flash no. 0 is used by system
and cannot be selected as active, while profiles from Flash no. 1-4 are fully editable and can be
selected as active.
Reading profiles and Global parameters from Flash memory is very simple procedure. By
pressing “Load” button all 4 profiles and Global parameters are loaded to the configurator
(Figure 15). To configure 3rd profile choose a TAB named “Profile 3” and all configurable
parameters of this profile will be available to change.
Figure 15. FM5300 Configurator profiles loading window
After changing profile and global parameters, changes can be saved to FM5300 Flash. By
pressing “Save” button all 4 profiles and Global parameters are saved to the Flash (Figure 16).
24
Figure 16 FM5300 Configurator profiles saving information
6.3 Parameters Configuration
6.3.1
Global parameters Settings
Global parameters do not depend on selected profile; they are common for all profiles. To
configure these parameters choose a TAB named “Global Parameters” and make all necessary
changes (Figure 17)
Figure 17. FM53 Global parameters
Table 8 Global parameters description
Parameter Name
Profile change on
event
Voice settings
Parameter description
Allows selecting profile switching method. When 'Profile change on
event' is disabled – FM5300 switches profiles depending on GSM
operator code method. Otherwise it switches profiles depending on I/O
events (see details in chapter 7).
Allows to setup microphone sensitivity and speaker loudness level.
25
Parameter Name
Call Settings
Record Settings
Analog input
settings
Accelerometer
settings
Static Navigation
settings
GNSS Settings
COM1 Settings
COM2 Settings
Temperature
Settings
6.3.2
Parameter description
Allows entering one number to which FM5300 will be able to call to.
Call trigger defines input, which will be used to receive or make a call.
Usually to that input a button is connected (“Digital Input 1” is not
allowed, because this input is dedicated for ignition).
Are used to switch between two data sending modes: starting from
newest records or starting from oldest record. Active data link timeout
defines how many seconds should FM5300 keep connection to the
server before disconnecting after successful data transfer. Note that
even if it disconnects from server, it always keep active GPRS session.
Defines maximum input voltage on analog input. Possible cases are: all
inputs 0-30V, 0-10V, two inputs 0-10V while other two 0-30V maximum
input range has impact on precision – values on 0-10V input are
measured more precisely than 0-30V (higher resolution).
Defines accelerometer sensitivity range (0.5g, 1g, 1.5, 2g), how many
seconds should movement be detected by accelerometer in order to
set movement for FM5300 application and how many seconds after
movement is not detected by accelerometer FM5300 application
should treat like movement is still there.
Allows enabling or disabling functionality.
Allows choosing compatibility mode and satellite System.
Allows configuring COM1 baud rate, parity and flowing control.
Allows configuring COM2 baud rate, parity mode, end line, binary
timeout and 3 prefixes.
When two or three temperature sensors are connected to FM5300 it is
necessary to define sensor ID to certain property separately. This way
FM5300 will know which temperature sensor is which property.
FM5300 automatically updates ID’s field if any sensors are connected
while configuring device via configurator.
Settings and configurable parameters menu
Every FM53 profile has four main groups of parameters:
1. System – main parameters for all device;
2. GSM has 3 subgroups
a. GPRS
b. SMS
c. OPERATOR LIST
3. Features
4. IO
6.3.2.1 System Settings
System settings have 2 configurable parameters (Figure 18):
Deep sleep settings, where user can turn deep sleep on or off.
26
Object Motion Detection Settings, where user can configure 3 ways how FM5300 will
detect stopped movement. This parameter is used for autogeofencing.
Figure 18. System Settings Configuration
6.3.2.2 GSM Settings
6.3.2.2.1
GPRS
‘GPRS’ define main parameters for FM5300: GSM operator APN and GPRS username and
password (optional – depending on operator), destination server Domain (can be entered either
IP or domain name) and port. Also both TCP and UDP protocols are supported.
Some operators use specific authentication for GPRS session – CHAP or PAP. If any of these
is used, APN should be entered as ‘<APN>:c’ or ‘<APN>:p’. I.e. if operator is using APN ‘internet’
with CHAP authentication, it should be entered as ‘internet:c’. Information about APN and
authentication type should be provided by your GSM operator.
Figure 19. GSM->GPRS Settings Configuration
6.3.2.2.2
SMS
Essential fields in ‘SMS’ part is ‘Login’ and ‘Password’ (Figure 20). This login and password is
used with every SMS sent to FM5300. If login and password are not set, every SMS sent to
FM5300 device has to include two spaces before command (<space><space><command>).
Command structure: <login><space><password><space><command>.
Examples:
1. SMS login and password are set - “asd 123 getgps”
2. SMS login and password are not set - “ getgps”
Phone numbers has to be written in international standard, without using “+”
or “00” signs in prefix. If none numbers are entered configuration and
commands SMS are allowed to be sent from all GSM numbers.
27
Figure 20. GSM->SMS Settings Configuration (1)
SMS data sending Settings enables or disables periodic data and event SMS sending to
server (Figure 21). Configuration is divided into 3 main parts:
1. Enable/Disable functionality;
2. SMS Week Time button (can be pressed only if functionality is Enabled);
3. Server Phone Number (has to be written in first position of Authorized phone
numbers);
Figure 21. GSM->SMS Settings Configuration (2)
Using these settings FM5300 can send SMS with 24-coordinates in one SMS; it is used in
areas where no GPRS coverage is available. Module collects data and sends to server binary SMS
containing information about last 24 collected points. SMS sending schedule is set in SMS Week
Time tab. 24-Coordinates SMS decoding is described in “FMXXXX Protocols” document.
6.3.2.2.3
Operator List
FM5300 is able to use GPRS with all operators but if at least one operator is entered in the
list, FM5300 is allowed to connect to GPRS only while operating in listed operator’s network. Also
28
operator list has influence on profile switching (see details in chapter 7) if Global parameter
“Profile switching on event” is disabled .
Figure 22. FM53 Operator List Configuration
6.3.2.3 Features
6.3.2.3.1
Mode
FM5300 is able to collect records using three methods at the same time: time, distance and
angle based data acquisition (chapter 8). Send and Save Parameters configuration is available in
Features->Mode category (Figure 23):
Min Period – time period change that initializes record save.
Min Angle – angle change that initializes record save (only if vechicle is moving)..
Min Distance – distance change that initializes record save (only if vechicle is moving).
Send period – GPRS data sending to server period. Module makes attempts to send
collected data to server every defined period. If it does not have enough records
(depend on parameter Min. Saved Records described above), it tries again after
defined time interval.
GPRS Context Week Time tab – most GSM billing systems charge number of bytes
(kilobytes) transmitted per session. During the session FM5300 makes connection
and transmits data to a server. FM5300 tries to handle session as much as possible.
Session can last hours, days, weeks or session can be closed after every connection in
certain GSM networks – this depends on GSM network provider. GPRS Context Week
Time defines session re-establish schedule if session was closed by network. New
GPRS context is opened if time is 10 minutes till time checked in table. Therefore if all
boxes are checked, FM5300 is able to open new connection anytime. At scheduled
time match FM5300 checks for GPRS session activity. If GPRS session is alive, FM5300
sends data to server according to Send period parameter. If it is not, FM53 checks if it
is able to re-establish the session.
29
Figure 23. FM53 Features->Mode Configuration
6.3.2.3.2
Scenarios
In Scenarios window four different scenarios are available, two per each Digital Output
(DOUT). Only one per digital output can be active at a same time, e.g. DOUT1 can have either
ECO driving or Over Speeding enabled, DOUT2 can have either Authorized Driving or Immobilizer
enabled.
Scenarios configurable parameters are shown in Figure 24. All values of these parameters
are described in chapter 12.
Figure 24. FM53 Features->Scenarios Configuration
30
6.3.2.3.3
Trip
Trip window offers user to configure Trip feature. If Trip is enabled configuration of
parameters is available:
Start Speed – speed, which is detected as minimum speed to indicate Trip start.
Ignition Off Timeout – timeout to wait if ignition was off, to detect Trip stop.
Continuous distance counting – Not or Continuous can be chosen. For this feature
I/O Odometer must be enabled.
Figure 25. FM53 Features->Trip Configuration
If I/O Odometer is enabled and Continuous distance counting variable is set to Continuous,
Trip distance is going to be counted continuously (from Trip start to Trip stop). This value is
written to I/O Odometer value field. When Trip is over and next Trip begins, Odometer value is
not reset to zero, it is counted continuously again.
If I/O Odometer is enabled and Continuous Distance Counting variable is set to Not, then
distance is going to be counted only between every record made. This value is written to I/O
Odometer value field and reset to zero every new record until Trip stops. If later all Odometer
values are summed up manually user gets distance driven over whole Trip period.
6.3.2.3.4
Geofencing
6.3.2.3.4.1
Geofencing settings
FM5300 has 20 configurable Geofence zones and it can generate event when defined
Geofence zone border has been crossed.
Figure 26. FM53 Features->Geofencing Configuration (1)
31
Configuration of the parameters is available in Features->Geofencing (Figure 26)
Frame border – frame border is an additional border around Geofence zone. It is
additional area around defined zone used to prevent false event recording when
object stops on the border of the area and because of GPS errors some records are
made inside area and some – outside. Event is generated only when both borders are
crossed. See figure for details: track 1 is considered to enter the area while track 2
does not.
Figure 27. Geofence border
Shape – can be rectangular or circle
Priority – priority of Geofence event: low, high or panic. These levels define priority of
event information sending to server. See I/O element description for more details
about priorities.
Generate event (On entrance, On exit, On Both) – choose when record will be
generated;
X1 – geofence zone left bottom corner X coordinate;
Y1 – geofence zone left bottom corner Y coordinate;
X2 or R – geofence zone upper right corner X coordinate (radius of circle when
Circular zone used);
Y2 – geofence zone upper right corner Y coordinate;
6.3.2.3.4.2
AutoGeofencing settings
“AutoGeofence| – the last known position after movement = off. If your car’s being taken
away – you can be notified. The shape and size of the geofence zones are parameters. Possibility
to state whether entering in or out of the geofence triggers an asynchronous message.”
32
Figure 28. FM53 Features->Geofencing Configuration (2)
Auto Geofencing option can be configured by following parameters (Figure 28):
Activate – Enable or Disable Autogeofence functionality
Activation TMO – Time period before Geofence is activated after vehicle stops.
Deactivate By :
Ignition – If ignition becomes high it will drop AutoGeofenze Zone
iButton – if iButton is attached it will drop AutoGeofence Zone
Edit iButton List – if list is not empty attached iButton is tested against a iButton list,
if match is found AutoGeofence zone is dropped.
Priority – Priority of generated event, which will be applied to saved record.
Generate Event:
Enter Event – Event generation on Geofence entrance.
Exit Event – Event generation on Geofence exit.
On Both - Event generation on Geofence entrance Or exit.
Auto Geofencing does not require entering coordinates, instead it requires GPS visibility. If
vehicle stopped and activation timeout is passed, Auto Geofence will be created around vehicle
last position by set Radius value. Auto Geofence event generation works the same as Geofencing
mentioned above.
6.3.2.3.5 iButton List
iButton list is used to enter authorized iButton ID codes, which are used to authenticate
driver in Authorized driving and Auto Geofencing options.
33
Figure 29. Features->iButton Configuration
iButton value must be entered as it is written on it.
6.3.2.4 I/O
If all I/O elements are disabled AVL packet comes with GPS information only. After enabling
I/O element(s) AVL packet in couple with GPS information contains current value(s) of enabled
I/O element.
6.3.2.4.1 FM5300 available I/O list
Table 9 PERMANENT I/O elements list description
Permanent I/O elements
(are always sent (with every record) to server if enabled)
Property
ID in AVL
packet
Property Name
Bytes
Description
1
2
3
4
9
10
11
19
21
22
24
50
51
66
67
68
70
Digital Input Status 1
Digital Input Status 2
Digital Input Status 3
Digital Input Status 4
Analog Input 1
Analog Input 2
Analog Input 3
Analog Input 4
GSM signal level
Actual profile
Speedometer
Digital Output Status 3
Digital Output Status 4
External Power Voltage
Internal Battery Voltage
Internal Battery Current
PCB Temperature
1
1
1
1
2
2
2
2
1
1
2
1
1
2
2
2
4
71
GNSS status
1
72
73
74
76
Dallas Temperature 1
Dallas Temperature 2
Dallas Temperature 3
Fuel Counter
4
4
4
4
Logic: 0 / 1
Logic: 0 / 1
Logic: 0 / 1
Logic: 0 / 1
Voltage: mV, 0 – 30 V
Voltage: mV, 0 – 30 V
Voltage: mV, 0 – 30 V
Voltage: mV, 0 – 30 V
Value in scale 1 – 5
Value in scale 1 – 4
Value in km/h, 0 – xxx km/h
Logic: 0 / 1
Logic: 0 / 1
Voltage: mV, 0 – 30 V
Voltage: mV
Voltage: mA
10 * Degrees ( °C )
0-off/ 1-restarting/ 2-ready(on, no fix)/ 3-working/ 4sleep
10 * Degrees ( °C ), -55 - +115, if 3000 – Dallas error
10 * Degrees ( °C ), -55 - +115, if 3000 – Dallas error
10 * Degrees ( °C ), -55 - +115, if 3000 – Dallas error
Difference of generated impulses on two signal lines
34
Permanent I/O elements
(are always sent (with every record) to server if enabled)
Property
ID in AVL
packet
Property Name
Bytes
Description
iButton ID number
Logic: 0 / 1
Logic: 0 / 1
Probability * 10; 0-500
Probability * 10; 0-500
Distance between two records: m
0 – not deep sleep mode, 1 – deep sleep mode
GSM base station ID
Location Area code (LAC), it depends on GSM operator.
It provides unique number which assigned to a set of
base GSM stations. Max value: 65536
0 – not moving, 1 – moving.
Currently used GSM Operator code
78
179
180
181
182
199
200
205
iButton Input
Digital output 1 state
Digital output 2 state
PDOP
HDOP
Odometer
Deep Sleep
Cell ID
8
1
1
2
2
4
1
2
206
Area Code
2
240
241
Movement
Current Operator Code
1
4
Table 10 EVENTUAL I/O elements list description
Eventual IO elements
(generated and send record to server only if appropriate conditions are met)
Property
ID in AVL
packet
140
141
142
143
144
145
146
147
148
149
150
151
152
153
150
155
156
157
158
159
160
Property Name
CAN 0
CAN 1
CAN 2
CAN 3
CAN 4
CAN 5
CAN 6
CAN 7
CAN 8
CAN 9
CAN 10
CAN 11
CAN 12
CAN 13
CAN 10
Geofence zone 01
Geofence zone 02
Geofence zone 03
Geofence zone 04
Geofence zone 05
Geofence zone 06
4
Bytes
Varying4
Varying
Varying
Varying
Varying
Varying
Varying
Varying
Varying
Varying
Varying
Varying
Varying
Varying
Varying
1
1
1
1
1
1
Description
ID Specific data
ID Specific data
ID Specific data
ID Specific data
ID Specific data
ID Specific data
ID Specific data
ID Specific data
ID Specific data
ID Specific data
ID Specific data
ID Specific data
ID Specific data
ID Specific data
ID Specific data
Event: 0 – target left zone, 1 – target entered zone
Event: 0 – target left zone, 1 – target entered zone
Event: 0 – target left zone, 1 – target entered zone
Event: 0 – target left zone, 1 – target entered zone
Event: 0 – target left zone, 1 – target entered zone
Event: 0 – target left zone, 1 – target entered zone
CAN property length can vary depending on filter settings. Data can be sent as 1, 2, 4 or 8 byte property.
35
Eventual IO elements
(generated and send record to server only if appropriate conditions are met)
Property
ID in AVL
packet
Property Name
Bytes
Description
Event: 0 – target left zone, 1 – target entered zone
Event: 0 – target left zone, 1 – target entered zone
Event: 0 – target left zone, 1 – target entered zone
Event: 0 – target left zone, 1 – target entered zone
Event: 0 – target left zone, 1 – target entered zone
Event: 0 – target left zone, 1 – target entered zone
Event: 0 – target left zone, 1 – target entered zone
Event: 0 – target left zone, 1 – target entered zone
Event: 0 – target left zone, 1 – target entered zone
Event: 0 – target left zone, 1 – target entered zone
Event: 0 – target left zone, 1 – target entered zone
Event: 0 – target left zone, 1 – target entered zone
Event: 0 – target left zone, 1 – target entered zone
Event: 0 – target left zone, 1 – target entered zone
Event: 0 – target left zone, 1 – target entered zone
1 – trip start, 0 – trip stop
1 – iButton connected
1 – authorized iButton connected
1 – harsh acceleration, 2 – harsh braking, 3 - harsh
cornering
Depending on green driving type: if harsh acceleration,
braking and cornering – g*10 m/s2
At over speeding start km/h, at over speeding end
km/h
161
162
163
164
165
166
167
168
169
170
171
172
173
174
175
250
251
252
Geofence zone 07
Geofence zone 08
Geofence zone 09
Geofence zone 10
Geofence zone 11
Geofence zone 12
Geofence zone 13
Geofence zone 14
Geofence zone 15
Geofence zone 16
Geofence zone 17
Geofence zone 18
Geofence zone 19
Geofence zone 20
Auto Geofence
Trip
Immobilizer
Authorized driving
1
1
1
1
1
1
1
1
1
1
1
1
1
1
1
1
1
1
253
ECO driving type
1
254
ECO driving value
2
255
Over Speeding
2
There are two types of operations with Permanent I/O elements: simple
monitoring and event generating. Monitoring method is used when current I/O
information needed with regular GPS coordinates. Event generating method is
used when additional AVL packet is needed when current value of I/O exceeds
predefined High and Low levels. I/O settings allow defining I/O event criteria.
6.3.2.4.2
I/O configuring
I/O configuration has 8 main parts (Figure 30):
36
Figure 30. FM53 I/O Configuration (1)
Table 11 I/O Configuration window description
Pos.
Nr.
1.
2.
3.
4.
5.
6.
7.
DESCRIPTION
Property inputs list
Enable/Disable chosen property input - allows enabling I/O element so it is added to the
data packet and is sent to the server. By default, all I/O elements are disabled and
FM5300 records only GPS part. It is also possible to set CAN message instead of any I/O
element – this way CAN element will be sent to the server instead of chosen element.
See CAN description below for more details (…).
Priority - AVL packet priority. There are Low, High, Panic, SW21, SW22, SW23 and SW24
priorities. Regular packets are sent as Low priority records. When low priority event is
triggered, FM5300 makes additional record with indication that the reason for that was
IO element change. When High priority is selected, module makes additional record with
high priority flag and sends event packet immediately to the server. First it tries it send
using GPRS, if GPRS fails, it sends AVL packet using SMS mode if SMS is enabled in SMS
settings. Panic priority event forces module to send AVL packet to server and switch
operating profile to Profile 4. (for details see chapter 7). SW2X priorities switch profiles
on event.
High Level - define I/O value range. If I/O value enters or exits this range, FM5300
generates event.
Low Level – define I/O value range. If I/O value enters or exits this range, FM5300
generates event.
Generate event – defines when to generate event. When value enters defined range,
exits it or both enters and exits.
Averaging Constant – it is an I/O event delay parameter. In some applications there is no
need to generate events on every I/O range enter/exit immediately. Sometimes it is
necessary to wait some time interval before event generating to be ensuring that
current event is not short time event. Averaging constant allows setting I/O event delay
(averaging). If I/O value is entering or leaving predefined range, it must have same value
for Averaging constant time. One unit of averaging constant value equals 20
milliseconds.
37
Pos.
Nr.
DESCRIPTION
Selected data source value input averaging constant are calculated by following
formula:
Where:
VALMean – Value calculated during actual cycle5;
VALMean-1 – Value calculated during previous cycle;
CONST – averaging constant;
REALVALUE – Real value detected on digital input.
CAN - Controller Area Network (CAN or CAN-bus) is a computer network protocol and
bus standard designed to allow microcontrollers and devices to communicate with each
other and without a host computer (…)
8.
There are only 14 IO parameters that could use Averaging Constant:
Digital Inputs (1-4); Analog Inputs (1-4); Battery Voltage; Battery Current;
External Voltage ; PDOP; HDOP; Speedometer.
I/O parameters: “Current Profile”, “Digital Output 1..4”, “GMSS Status”,
“Movement”, “Active GSM Operator”, “iButton ID”, “GSM Signal”, “Deep
Sleep”, “Cell ID”, “Area Code”, “PCB Temperature”, “Temperature Sensor
0..2”, “Fuel Counter” cannot use Averaging constant functionality.
5
One cycle equal to 20 ms.
38
7
PROFILE SWITCHING
FM5300 has 4 profiles saved in Flash memory of the module. Every profile has a list of
parameters, which enables FM5300 to operate in different modes while using different profiles.
The easiest way to understand what is profile is to compare it to a list of instructions that are
written for different cases. You are allowed to setup up to 4 different module behaviours. Global
parameters contain settings that are common for al 4 profiles. This means that if you set FM5300
to call to predefined number, you will be able to call it while using any profile. Basic scheme of
Global parameters and profiles is shown below. According to the scheme, every profile has a list
of parameters. Global parameters are common for all profiles. (Figure 31)
Figure 31. FM5300 profile structure
Switching between profiles (changing behaviour) can be performed by Profile switch
depending on GSM operator code (mostly used for roaming applications), or by Profile switch
depending on I/O event (on I/O value changing).
Profile 3 is default profile for FM5300. It is always loaded on very first startup and further profile switching is proceeded after operator scan or I/O
element changes (although device remembers which profile it used after
that).
7.1 Depending on GSM Operator Profile Switching
GSM Operator code profile switching is mostly used in roaming applications, when the
purpose is to have information from module both from Home and Roaming operator network for
reasonable price. This method allows you to define different module behaviour in Home
network, Roaming network and unknown operator areas. See figure below for details.
Profile 1 is configured for home network. Data acquisition and send intervals are quite
frequent here. To make profile use effective, it is wise to set more optimized parameters in
roaming profile (Profile 2) – this usually includes larger coordinate recording intervals, packets
with greater number of coordinates sending, and in some cases GPRS context available only for
certain time interval. Profile 3 can either contain operator codes (rarely used) or have empty list.
39
Profile 4 is not used (profile 4 can only be used when FM5300 encounters a 'panic' priority event
(see 7.2 chapter)).
In the example (Figure 32) FM5300 connects to operator with code 24702. It checks profile
1 operator list, but there is only one operator code entered which does not mach. Then it checks
profile 2 list. This code is entered there, so FM5300 switches to profile 2.
Figure 32. GSM Operator code profile switching (…)
If there are no operator codes entered in all profiles after operator search task FM5300 will
check all 3 profiles and won’t find any operators in a list. In such case FM5300 will switch to
profile 3. Note that before switching to profile 3 device detaches GPRS session.
Operator search is performed every 15 minutes. If no operators are entered in
any profile it can have influence on GPRS sessions. IF GPRS sessions are
attaching/detaching every 15 minutes it means configuration of FM5300 is
performed incorrectly.
40
7.2 Depending on I/O Event Profile Switching
Another profile switch method is based on I/O event. Events happen when the value of
enabled I/O intersects thresholds (enter, exit, on both) predefined by High and Low level
thresholds. SW21, SW22, SW23, SW24 stand for “Switch to profile No. X” – after event happens,
FM5300 switches to defined profile. Using profile switching you can create smart applications.
SW2X actions can be performed only if “Profile change on event” is enabled in Global
parameters. Pictures below illustrate profile switching depending on digital events:
Figure 33. Digital input event criteria
7.2.1
Example #1
Configuration of Profile1 to switch to Profile2 on DIN1 value change from 0 to 1:
Figure 34. Switch to profile on event (1)
7.2.2
Example #2
Configuration of Profile2 to switch to Profile1 on DIN1 value change from 1 to 0:
41
Figure 35. Switch to profile on event (2)
8
DATA ACQUISITION
Data can be acquired using GPS or IO elements. GPS data is for basic vehicle tracking, data
acquisition by IO elements gives more specific information.
8.1 GPS data acquisition
There are three ways of GPS data acquisition which are configured in Features > sMode
menu (Figure 36).
Device checks angle, distance and time differences with last saved record. If differences are
greater than configured record are generated. Checking sequence: First is checked angle then
distance and the last - time differences.
Figure 36 GPS acquisition configuration window
42
Actual configuration parameters are marked in blue.
8.1.1
Min. Period
Time based data acquiring (Figure 37) – records are being acquired every time when
defined interval of time passes. Entering zero means that data will be recorded as fast as possible
(every second). This method is suit best for basic position update.
Figure 37 Time based tracking
43
8.1.2
Min. Distance
Distance based data acquiring (Figure 38) – records are being acquired when the distance
between previous coordinate and current position is greater than defined parameter value.
Entering zero means that data won’t be recorded. This method is suit for non-urban territories
where moving trajectory is straight.
Figure 38 Distance based tracking
44
8.1.3
Min. Angle
Angle based data acquiring (Figure 39) – records are being acquired when angle difference
between last recorded coordinate and current position is greater than defined value. Entering
zero disables data acquisition depending on angle. This method is suit for urban territories. Note
that record generation by angle is performed if vehicle is moving at least 6 km/h.
Figure 39 Angle based tracking
8.2 I/O data acquisition
Data also can be acquired using input output elements (it’s change) . All base elements are
declared in Table 9 PERMANENT I/O elements list description and in Table 10 EVENTUAL I/O
elements list description
8.2.1
Configuration
Data acquisition by I/O elements can be configured selected IO menu in configurator (refer
to chapter 6.3.2.4.2).
Priority: Low – as a regular data; High – generated record are sent immediately to server;
Panic - generated record are sent immediately to server and simultaneously the same record as
SMS message;
High Level: High range of value input;
45
Low Level: Low Range of value input;
Averaging constant: (see detailed description in chapter 6.3.2.4.2)
8.2.2
Event generation
There are five record event generation types examples (I/O speed is taken as I/O value
example), please refer to Figures below.
Figure 40 Event On Zone exit
Figure 42 vent On both
Figure 41 Event On Zone entrance
Figure 43 Monitoring
Figure 44 Evenet on Hysteresis
46
Event on Zone Entrance: record is generated then actual source value input is between
High and Low level ranges which are set in configuration;
Event on Zone Exit: record is generated then actual source value input increases and
become higher than High level and Low level values;
Event on Both: record is generated then actual source value input increases/decreases and
becomes higher/less than high and low level declared values;
Monitoring: no event at all; I/O values are recorded only when other trigger will work (GPS
acquisition or other I/O trigger)
Hysteresis: record is generated then actual source value input becomes higher than High
level value, and decreasing becomes less than low level value
Event on Change: record is generated on every source value change.
9
DATA SENDING – GPRS
9.1
DATA PROTOCOLS
9.1.1
AVL data packet
AVL packet (Table 12) is used to encapsulate AVL data and send it to server.
Table 12 AVL Data packet
Constant Prefix Field
Data Field
(5.1.2 subsection)
Cyclic Redundancy Check
Four Zeros
Data Length Field
Data
CRC-16
Four Zeros
Data Length Field
Data
CRC-16
4 Bytes
4 Bytes
…
4 Bytes
Four zeros – four zero bytes: 0x00 0x00 0x00 0x00;
Data length – number of bytes in data field;
Data – any AVL data array;
CRC – 16 bit CRC value of data (Integer). Polynomial 0xA001.
9.1.2
AVL Data Array
Because the smallest information amount that can be written is one bit, there can be
some bits left unused when result is byte array. Any unused bits should be left blank.
Table 13 AVL Data Array structure
Codec ID
Number of Data
Data
(5.1.3 subsection)
Number of Data
1 Byte
1 Byte
…
1 Byte
Codec ID – packet ID: 0x08;
Number of Data – number of encoded data (number of records): variable;
47
Data – encoded data: variable.
9.1.3
AVL data
Table 14 AVL Data structure
Timestamp
Priority
(5.1.4 subsection)
GPS Element
(5.1.5 subsection)
I/O Element
(5.1.6 subsection)
8 Bytes
1 Byte
15 Bytes
...
Timestamp – difference, in milliseconds, between the current time and midnight, January
1, 1970 UTC.
9.1.4
Priority
Table 15 Priority field description
Value
0
1
2
3
9.1.5
Priority
Low
High
Panic
Security
GPS Element
Table 16 GPS element structure
Longitude
Latitude
Altitude
Angle
Satellites
Speed
4 Bytes
4 Bytes
2 Bytes
2 Bytes
1 Byte
2 Bytes
Longitude6: X;
Latitude4: Y;
Altitude – in meters above sea level4;
Angle – in degrees, 0 is north, increasing clock-wise 4;
Satellites – number of visible satellites4;
Speed – speed in km/h. 0x0000 if GPS data is invalid7;
Longitude and latitude are integer values built from degrees, minutes, seconds and milliseconds
by formula.
ms
ms
d
p
60
3600
3600000
where, d – degrees, m – minutes, s – seconds, ms – milliseconds, p – precision (10000000)
6
If record is without valid coordinates – (there were no GPS fix in the moment of data acquisition) – Longitude,
Latitude and Altitude values are last valid fix, and Angle, Satellites and Speed are 0.
7
If record is without valid coordinates – (there were no GPS fix in the moment of data acquisition) – Longitude,
Latitude and Altitude values are last valid fix, and Angle, Satellites and Speed are 0.
48
If longitude is in west or latitude in south, multiply result by –1. To determine if the
coordinate is negative, convert it to binary format and check the very first bit. If it is 0, coordinate
is positive, if it is 1, coordinate is negative.
Example:
Received value: 0x20 0x9c 0xca 0x80;
Converted to binary format: 00100000 10011100 11001010 10000000 first bit
(bold) is 0, which means coordinate is positive;
Converted to decimal format: 547146368;
For more information see two's compliment arithmetics.
9.1.6
I/O Element
N8’th IO ID
N8’th IO Value
8 Bytes
1’st IO Value
8 Bytes
1 Byte
N8 of Eight Bytes
1’stIOIO ID
1 Byte
…
N4’th IO Value
4 Bytes
1 Byte
N4’th IO ID
1’st IO Value
4 Bytes
1 Byte
N4 of Four Bytes
1’stIOIO ID
1 Byte
…
N2’th IO Value
2 Bytes
1 Byte
N2’th IO ID
1’st IO Value
2 Bytes
1 Byte
N2 of Two Bytes
1’stIOIO ID
1 Byte
…
N1’th IO Value
1 Byte
1 Byte
N1’th IO ID
1’st IO Value
1 Byte
1 Byte
N1 of One Byte
1’stIOIO ID
1 Byte
…
N of Total IO
1 Byte
1 Byte
Event IO ID
1 Byte
Table 17 I/O element structure
Event IO ID – if data is acquired on event – this field defines which IO property has
changed and generated an event. If data cause is not event – the value is 0;
N – total number of properties coming with record (N=N1+N2+N4+N8);
N1 – number of properties, which length is 1 byte;
N2 – number of properties, which length is 2 bytes;
N4 – number of properties, which length is 4 bytes;
N8 – number of properties, which length is 8 bytes.
9.1.6.1 Example
Received data:
080400000113fc208dff000f14f650209cca80006f00d60400040004030101150
316030001460000015d0000000113fc17610b000f14ffe0209cc580006e00c005
00010004030101150316010001460000015e0000000113fc284945000f150f002
09cd200009501080400000004030101150016030001460000015d0000000113fc
267c5b000f150a50209cccc000930068040000000403010115001603000146000
0015b0004
49
08 – Codec ID;
o 04- Number of Data (4 records);
1’st record data;
00000113fc208dff – Timestamp in milliseconds
(1185345998335 → 1185345998,335 in Unix Timestamp = 25 Jul
2007 06:46:38 UTC);
00 – Priority;
GPS Element;
0f14f650 – Longitude 253032016 = 25,3032016º N;
209cca80 – Latitude 547146368 = 54,7146368 º E;
006f – Altitude 111 meters;
00d6 – Angle 214º;
04 – 4 Visible sattelites;
0004 – 4 km/h speed;
IO Element;
00 – IO element ID of Event generated (in this case when 00 – data
generated not on event);
04 – 4 IO elements in record;
03 – 3 IO elements, which length is 1 Byte;
01 – IO element ID = 01;
01 – 1’st IO element’s value = 1;
15 – IO element ID = 21;
03 – 21’st IO element’s value = 3 ;
16 – IO element ID = 22;
03 – 22’nd IO element’s value = 3;
00 – 0 IO elements, which value length is 2 Bytes;
01 – 1 IO element, which value length is 4 Bytes;
46 – IO element ID = 70;
0000015d – 70’th IO element’s value = 349;
00 – 0 IO elements, which value length is 8 Bytes;
2’nd record data;
00000113fc17610b000f14ffe0209cc580006e00c005000100040301
01150316010001460000015e00;
3’d record data;
00000113fc284945000f150f00209cd200009501080400000004030
101150016030001460000015d00;
4’th record data;
00000113fc267c5b000f150a50209cccc00093006804000000040301
01150016030001460000015b00;
o 04- Number of Data (4 records).
9.2 Sending Data Over TCP
9.2.1
Communication with server
50
First when module connects to server, module sends its IMEI. IMEI is sent the same way as
encoding barcode. First comes short identifying number of bytes written and then goes IMEI as
text (bytes).
For example IMEI 123456789012345 would be sent as:
000F313233343536373839303132333435.
After receiving IMEI, server should determine if it would accept data from this module. If yes
server will reply to module 01 if not 00. Note that confirmation should be sent as binary packet.
Then module starts to send first AVL data packets. After server receives packets and parses
its, server must report to module number of data received as integer (four bytes).
If sent data number and reported by server doesn’t match module closes connection with
server.
Example:
1. Module connects to server and sends IMEI;
FM 000F313233343536373839303132333435
2. Server accepts the module;
01 Server
3. Module sends data packet:
FM 00000000000000FE0802...(data elements)...0200008612
00000000 – four zero bytes;
000000FE – data length hexadecimal, converted to decimal: 254;
08 – codec ID;
02 – number of data (encoded using continuous bit stream. Last byte padded to
align to byte boundary);
...(data elements)... – AVL data array;
02 – number of data (encoded using continuous bit stream. Last byte padded to
align to byte boundary);
00008612 – CRC;
4. Server acknowledges data reception (2 data elements):
00000002 Server
9.3 Sending Data Over UDP
9.3.1
UDP Channel Protocol
UDP channel is a transport layer protocol above UDP/IP to add reliability to plain UDP/IP
using acknowledgment packets. The packet structure is as follows:
51
5.7 table. UDP packet structure
Data Field
(5.3.1 subsection)
Constant Prefix Field
Data Length Field
Packet ID
Packet Type
Data
2 Bytes
2 Bytes
1 Byte
…
Data Length Field – Packet length (excluding this field) in big endian byte order;
Packet ID – Packet id unique for this channel;
Packet Type – Type of this packet;
Data – encoded data: variable.
5.8 table. Packet type field values
Value
Packet Type
0
Data packet requiring acknowledgment
1
Data packet NOT requiring acknowledgment
2
Acknowledgment packet
Acknowledgment packet should have the same packet id as acknowledged data packet and
empty data payload. Acknowledgement should be sent in binary format (5.9 table).
5.9 table. Acknowledgment message
Constant Field
Data Length Field
Packet ID
Packet Type
2 Bytes
2 Bytes
1 Byte
Data Length Field: 0x0003;
Packet ID – same as in data packet;
Packet Type: 0x02.
9.3.2
Sending AVL data using UDP channel
AVL data are sent encapsulated in UDP channel packets (5.10 table).
5.10 table. UDP channel packet structure
AVL data encapsulated in UDP channel packet
AVL packet ID
Module IMEI
AVL data array
1 Byte
16 Bytes
…
52
AVL packet ID – id identifying this AVL packet;
Module IMEI – IMEI of a sending module encoded the same as with TCP;
AVL data array – array of encoded AVL data.
5.11 table. Server response message structure
Server response to AVL data packet
AVL packet ID
Number of accepted AVL elements
1 Byte
1 Byte
AVL packet ID – id of received AVL data packet;
Number of accepted AVL data elements – number of AVL data array entries from the
beginning of array, which were accepted by the server.
9.3.3
Communication with server
Module sends UDP channel packet with encapsulated AVL data packet (Packet type=1 or 0). If
packet type is 0, server should respond with valid UDP channel acknowledgment packet. Since
server should respond to the AVL data packet, UDP channel acknowledgment is not necessary in
this scenario, so Packet type=1 is recommended.
Server sends UDP channel packet with encapsulated response (Packet type=1 – this packet
should not require acknowledgment)
Module validates AVL packet id and Number of accepted AVL elements. If server response
with valid AVL packet id is not received within configured timeout, module can retry sending.
Example:
1. Module sends data packet:
FM 00FDCAFE01DD000F31333435363738393031323334350802…(data
elements)…02
00FD – data length converted to decimal: 253;
CAFE – packet ID;
01 – packet type (without acknowledgment);
DD – AVL packet ID;
000F3133343536373839303132333435 – IMEI;
08 – codec ID;
02 – number of data (encoded using continuous bit stream);
…(data elements)… - AVL data array;
02 – number of data.
2. Server acknowledges data reception:
0005ABCD01DD02 Server
0005 – packet length;
ABCD – packet ID;
01 – packet type;
DD – AVL packet ID;
02 – number of accepted data.
53
10 DATA SENDING – SMS
AVL data or events can be sent encapsulated in binary SMS. TP-DCS field of these SMS should
indicate that message contains 8-bit data (for example: TP-DCS can be 0x04).
6.1 table. SMS data
SMS data (TP-UD)
AVL Data Array
IMEI
…
8 Bytes
AVL Data Array – array of encoded AVL data;
IMEI – IMEI of sending module encoded as a big endian 8-byte long number.
10.1 24 position SMS data protocol
24-hour SMS is usually sent once every day and contains GPS data of last 24 hours. TP-DCS
field of this SMS should indicate that message contains 8-bit data (i.e. TP-DCS can be 0x04).
Note, that 24 position data protocol is used only with subscribed SMS. Event SMS use
standard AVL data protocol.
10.1.1
Encoding
To be able to compress 24 GPS data entries into one SMS (140 octets), the data is encoded
extensively using bit fields. Data packet can be interpreted as a bit stream, where all bits are
numbered as follows:
6.2 table. 24 GPS data entries structure
Byte 1
Byte 2
Byte 3
Bytes 4-…
Bits 0-7
Bits 8-15
Bits 16-24
Bits 25-…
Bits in a byte are numbered starting from least significant bit. A field of 25 bits would
consist of bits 0 to 24 where 0 is the least significant bit and bit 24 – most significant bit.
10.1.2
Structure
6.3 table. SMS data structure
SMS Data Structure
Codec ID Timestamp
8 bits
35 bits
Element Count
GPS Data
5 bits
Element Count
Byte – align padding IMEI
64 bits
Codec ID – packet ID: 4;
Timestamp – Time corresponding to the first (oldest) GPS data element, represented in
seconds elapsed from 2000.01.01 00:00 EET;
Element Count – Number of GPS data elements;
GPS Data – GPS data elements;
Byte – align padding – Padding bits to align to 8-bits boundary;
54
IMEI – IMEI of sending device as 8-byte long integer.
The time of only the first GPS data element is specified in Timestamp field. Time
corresponding to each further element can be computed as elementTime = Timestamp + (1 hour
* elementNumber).
6.4 table. GPS data
GPS Data
Valid Element
Differential
Cords
Longitude Diff
Latitude Diff Longitude
Differential Cords = 1
1 bit
1 bit
14 bits
14 bits
Latitude
Speed
Differential Cords = 0
21 bits
20 bits
8 bits
Valid Element – Valid Element=1, there is a valid GPS Data following, Valid Element=0, no
element at this position;
Differential Cords - format of following data;
Longitude Diff – Difference from previous element‘s longitude. Longitude Diff =
prevLongitude – Longitude + 213 – 1;
Latitude Diff – Difference from previous element‘s latitude Latitude Diff = prevLatitude,
Latitude + 213 – 1;
Longitude – longitude={(LongDegMult + 18 * 108) * (221 – 1)} over {36*108};
Latitude – latitude=(LatDegMult + 9*108) * (220 – 1) over {18*108};
Speed – Speed in km/h.
Longitude – longitude field value of GPS Data;
Latitude – latitude field value of GPS Data;
LongDegMult – longitude in degrees multiplied by 107 (integer part) ;
LatDegMult – latitude in degrees multiplied by 107 (integer part);
prevLongitude – longitude field value of previous GPS Data;
prevLatitude – latitude field value of previous GPS Data.
10.1.3
Decoding GPS position
When decoding GPS data with Differential Cords=1, Latitude and Longitude values can be
computed as follows: Longitude=prevLongitude – LongitudeDiff + 213 – 1, Latitude=prevLatitude –
LatitudeDiff + 213 – 1.
If there were no previous non-differential positions, differential coordinates should be
computed assuming prevLongitude=prevLatitude=0.
When Longitude and Latitude values are known, longitude and latitude representation in
degrees can be computed as follows (6.1 and 6.2):
Longitude
*
360
LongDeg
180
(6.1)
21
21
55
Latitude
*
180
LatDeg
90
20
21
(6.2)
11 DEEP SLEEP MODE
While in deep sleep mode, FM5300 sets GPS receiver to sleep mode and turns off
GSM/GPRS module (it is not possible to wake up device via SMS), therefore records with last
good coordinates are being saved and send to AVL server if configured (GSM/GPRS module is
turned on to send data and after turned off). Depending on two configurable parameters, send
period and min period, in Deep Sleep mode power usage can be decreased to save vehicle’s
battery.
FM5300 can enter deep sleep mode (standby mode) if ALL of these conditions are met:
FM1100 has to be configured to work in Deep Sleep mode;
Startup timeout has elapsed (5 minutes after every restart of the device);
No movement by accelerometer is detected;
Ignition (DIN1) is off (driven logic low);
Send period in stop mode is more than 60 seconds (Data Acquisition Mode
settings);
USB cable is not connected.
FM5300 exits deep sleep mode when if ONE of following conditions are true:
Movement by accelerometer is detected (depends on accelerometer start settings);
Ignition (DIN1) is turned on (driven logic high);
USB cable is connected;
HIGH or PANIC priority eventual record is detected;
While being in deep sleep mode FM5300:
can save periodical or eventual records;
send data to server;
Note: If there is no need to save or send periodical data FM53 have to be
configured to switch to another profile on Deep Sleep Event where Min Period
and Send Period parameters are 0 or big enough.
Note: In order to save GPRS traffic records saved in deep sleep mode contains
below listed I/O elements information:
Digital Inputs (1-4), Analog Inputs (1-4), Battery Voltage, Battery Current,
Digital Outputs (1-4), External Voltage, Movement Sensor, Deep Sleep.
Also, Deep Sleep I/O is always LOW PRIORITY!
56
12 FEATURES AND SCENARIOS.
12.1 Eco Driving Scenario
Four scenarios are available on FM11 device.
Digital Output No.1 is used by scenarios - Eco Driving or Over Speeding;
Digital Output No.2 is used by scenarios - Authorized Driving or Immobilizer.
Eco Driving Scenario. Helps to prevent and inspect driver about harsh driving. Scenario
continuously monitors: accelerating, braking and cornering forces. Inspects driver if needed.
Monitoring sensitivity is configurable.
DOUT1 is controlled by scenario for user needs, buzzer or LED for example. Output
activation time after harsh event is also configurable.
Because functionality generally is dependent on accelerometer it is important to calibrate
it on time. User can choose from two different calibration methods or use them both.
To save GPRS traffic Green Driving event will be generated (included into send records)
only when FM1100 measured values are higher than those set in configuration, without
additional I/O settings.
To prevent generating false events, Eco Driving only functioning when special conditions
are fulfilled – mentioned below.
12.1.1
Mounting Requirements
PLEASE PAY ATTENTION, that ECO driving functionality will operate correctly
only if device is mounted into the vehicle in proper position.
Eco Driving functionality operation is based on accelerometer. It is important to mount
FM5300 device correctly to avoid functionality malfunctions (first condition). In the picture
below (Figure 45) mounting recommendations are displayed. Please note that beside those
recommendations
1. You can choose how FM5300 is deployed. It means that that there is no effect to
measurements if FM5300 top/bottom side pointing up or down.
2. Device can be deployed at any place in the car.
57
Figure 45 Correct mounting position of the FM5300 in the vehicle
To Eco Driving work properly device connection pins socket must be pointing towards
vehicle front side. Deviation of +/- 2o are allowed. But it should be as straight as possible.
Deviation of max. +/- 15o is allowed (Figure 46).
Figure 46 MAX deviation from horizon plane of FM5300 mounting
58
Figure 47 Horizontal position MAX deviation of FM5300 mounting
Horizontal position must be as flat as possible – parallel with vehicle plain.
12.1.2
Configuration
Parameters used with Eco driving functionality.
Figure 48
59
Table 18 ECO Driving parameters description
ECO driving
configuration
parameter name
Eco Driving
Description
Enable/Disable Eco Driving functionality
Value which can be reached while accelerating without triggering harsh
Max Acceleration Force
acceleration event.
Value which can be reached while braking without triggering harsh
Max Braking Force
braking event.
Value which can be reached while cornering without triggering harsh
Max Cornering Force
cornering event.
Enable/Disable Adaptive Calibration. This method of calibration
monitors vehicle horizontal plain position. Usually vehicle position
Adaptive Calibration
changes while driving uphill or downhill. If required level of horizontal
plain position change is detected, FM5300 device automatically adapts
to new position.
Enable/Disable Automatic Calibration. FM53 device calibrates itself
Auto Calibration
periodically. Independent from vehicle position.
Auto Calibration Period Set how often calibration is carried out.
Lower the value to increase sensitivity. Increasing sensitivity means
Acceleration Detection
that more acceleration can/will be detected on the same period of
Sensitivity
time. Response time decreases.
Lower the value to increase sensitivity. Increasing sensitivity means
Braking Detection
that more braking can/will be detected on the same period of time.
Sensitivity
Response time decreases.
Lower the value to increase sensitivity. Increasing sensitivity means
Cornering Detection
that more cornering can/will be detected on the same period of time.
Sensitivity
Response time decreases.
Acceleration Active
Set active ouput duration after harsh acceleration event detected
Output Duration
Braking Active Output
Set active ouput duration after harsh braking event detected
Duration
Cornering Active
Set active ouput duration after harsh cornering event detected
Output Duration
Example: Set Acceleration Detection Sensitivity to “0.5”. In this case driver can accelerate not
longer than 0.5 second so Eco Driving functionality can detect acceleration. If acceleration lasts
1.2 seconds two harsh acceleration events will be detected/generated.
12.2 Overspeeding Scenario
Overspeeding. Helps to prevent from exceeding fixed speed and inspects driver if needed.
DOUT1 is controlled by scenario for user needs, to manage buzzer, LED etc.
60
12.2.1
Mounting Requirements and Working Conditions
1. Only one scenario on corresponding Digital Output can be enabled at once .
2. Scenarios on Digital Output No.1 and Digital Output No.2 can be used
simultaneously.
3. Device module mounting position doesnt have any influence for correct scenarios
activity
12.2.2
Configuration.
Figure 49 Overspeeding configuration parameters
Overspeeding. Enable/Disable Overspeeding.
Max Allowed Speed. Set speed limit to reach without triggering Overspeeding event.
12.3 Immobilizer Scenario
Immobilizer. Vehicle can be used only if iButton is connected. In this scenario iButton list is
not used; connect any iButton to pass Immobilizer security. DOUT2 is controlled by scenario for
user needs.
12.3.1
Configuration.
Figure 50 Immobilizer configuration parameters
Immobilizer. Enable/Disable Immobilizer Scenario.
12.4 Authorized Driving Scenario
Authorized Driving. Gives ability to use vehicle only for 50 specific iButton owners
(specified in iButton list). DOUT2 is controlled by scenario for user needs, to manage buzzer, LED
etc.
61
12.4.1
Configuration.
Figure 51Authorized driving configuration parameters
Authorized Driving. Enable Disable Authrized Driving.
Edit iButtons List. Enter authorized iButtons
62
13 CHANGE LOG
Nr.
1
2
Date
2011-11-16
2011-11-27
Version
0.0
0.1
Comments
Preliminary draft release.
Added 5-12 chapters, minor changes in 1-4 chapters
63