1
ASSEMBLY
INSTRUCTIONS
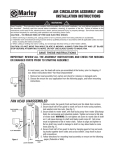
1. After removing the heater from its carton, carefully inspect it
for possible shipping damage. Return damaged units to point
of purchase.
2. Remove one plastic support leg and thermostat knob from
packaging in bottom of heater. The right hand support leg is
pre-assembled to the power cord and requires only to be
snapped into place as shown in Figure 1.
Figure 1
3. Fit left hand support leg onto heater and snap into position
as shown in Figure 1.
1. Your heater is provided with a Pilot Light (ON/OFF) switch
and a temperature control thermostat.
4. Position thermostat knob onto thermostat shaft as shown in
Figure 1.
2. To operate your heater simply:
NOTE: The knob will only fit onto shaft in one way.
a. Plug heater power supply cord into 120 volt outlet (see
warning 1).
OPERATING
INSTRUCTIONS
b. Push on/off switch to on position. NOTE: The Pilot Light
(ON/OFF) switch will illuminate when in the ON position.
c. Rotate thermostat knob in a clockwise direction until it
stops.
IMPORTANT NOTICE: This heater is a major electrical appliance and requires adequate electrical power. The outlet to
which this heater is connected must be a 120 volt (AC) circuit
protected by a 15 or 20 amp fuse or circuit breaker. No other
major electrical appliance should be operated in the same circuit
as the heater.
3. Allow the heater to operate normally until the room temperature is comfortable to you. Then simply rotate the knob counterclockwise until an audible click is heard. The thermostat
will automatically cycle the heater on and off as needed to
maintain the desired room temperature.
NOTE: You may notice a new smell coming from your heater
during initial use. Operate the heater on its highest setting for at
least one hour to minimize the new smell. You may also notice it
does not heat up immediately. Because of the special tubular
element design, it takes a few minutes before you can feel the
warmth through the cabinet.
Care must be given in locating and using the heater to avoid
blocking the heater in any way to allow air to flow freely through
the heater. Keeping the heater clean will also improve the efficiency and prevent overheating - see Maintenance Instructions.
1. The heater plug must fit tightly into outlet. A loose fitting or
worn outlet may allow for the plug connection to heat, damage to the plug and/or outlet and may cause a fire. If outlet
is loose or worn, discontinue using heater until the outlet
can be replaced.
2. CAUTION – High Temperature, Keep Electrical Cords,
Drapes, And Other Furnishings Away From Heater. Do not
allow curtains or other furnishing to contact heater.
Maintain at least 6 inches (152 mm) clearance around the
heater at all times.
3. To reduce the risk of fire, do not store or use gasoline or
other flammable vapors and liquids in the vicinity of the
heater.
4. Do not operate heater without support legs attached as
shown in Figure 1.
5. Do not allow heater to operate in any position except as
shown in this manual.
6. Do not use this heater near water (as in a wet basement or
swimming pool area) or in a very humid environment.
7.
This heater is to be used on the floor only. Do not use on a
shelf, table, or any location except the floor.
2