1
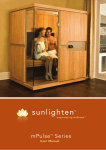
Armana. User’s manual
Congratulations
Table of Contents
Installation
4
Assembly
Placing the bottom panel
5
Plugging main power cable
5
Placing the rear panel
6
Connecting the left side panel
6
Connecting the front panel
7
Congratulations! You are now the owner of a Sunlight Sauna. Are you
Connecting the right side panel
7
ready to experience ultimate relaxation and rejuvenation? The unique
Installing the bench panel
8
Placing the top panel
9
Installing the door handle
9
Connecting the stereo, speakers and lighting
9
Sunlight Saunas™ door handle is your entrance to a healthier lifestyle.
Just follow our installation and assembly instructions and soon you’ll be
in Sunlight Sauna heaven!
Quick Start
Controller operation
10 - 12
Do not use this sauna to treat any health problems prior to consulting with
Sauna Specifications
13
your physician. Sunlight Saunas, Inc. does not provide medical advice,
Warranty
14
education or treatment. Our information should not be relied on in making
decisions about your health. Always consult your physician for medical advice.
Return policy
15 - 16
Frequently asked questions
16 - 19
Prior to sauna use:
After sauna use:
Do not adjust the default time and temperature. The controls will be preset to 60
minutes at 150° F. The temperature will never reach 150° F, but you will get the best
sauna experience keeping it set to this temperature. Allow sauna to warm up for
15-20 minutes. Drink plenty of water, at least 8 oz.
Use a clean Sunlight Spungi® microfiber towel to dry off. Drink plenty of water, at
least 8 oz. Take a lukewarm shower to remove sweat and toxins.
During sauna use:
Place Sunlight Spungi™ microfiber towel over the bench and backrest to
reduce clean up time. Relax and enjoy your sauna experience.
Other recommendations:
Start slow. Begin with 30 minutes every other day, however 10-15 minutes may
be appropriate your first few sessions.
*Be aware of excessive detoxifying. Listen to your body. If you begin to
feel symptoms such as nausea, fatigue, or flu like, during your sauna session
discontinue use immediately. If these symptoms continue consult your physician.
Important Installation Information
Assembly
Please read the instructions thoroughly before attempting to assemble
A
your sauna. Assembly of the sauna requires at least 2 adults. 3 adults
are recommended for the corner and luxury units. Find a dry and level
location where you have an easy access to the main power cord. If
WARNING:
you have questions during the assembly process, please feel free to
Floor cover must be installed prior to
stepping on the floor.
visit us online:
www.sunlightsaunas.com/site/assembly.htm
CLEANING AND MAINTENANCE
1. Wipe the inside of the sauna with a damp cloth before your first use.
2. Place a Spungi™ towel on the floor, bench and backrests of the
1
sauna to help absorb perspiration during a sauna session.
Placing the bottom panel
Place bottom of Sauna on a smooth flat surface. Floor heater indicates
front side of sauna base. Before proceeding double check to ensure that
the base location is in its final position.
3. Scratches and stains on the interior of the sauna can be removed
(A) Install the floor heater and cover.
by using a fine grade sand paper.
2
Plugging main power cable
Connect the main power cable to the wall outlet found at the lower rear
area of the sauna.
4
It is recommended to plug the sauna electrical outlet into a wall outlet that
is not shared with any other electrical device; a dedicated electrical outlet.
5
Assembly
Assembly
E-1
A
B
3
D
5
Placing the rear panel
Connecting the front panel
(A) Place rear panel into recessed groove in base. Center its location
with raised area on interior floor. One person is required to hold wall
while other person continues to the next step.
C
Left Wall Heater
Bench Heater
C-1
E-2
Place front panel carefully into the groove on the front of the base. Pay careful
attention to the power cords making sure they are safely out of the way.
(D) Place U shaped rod into grooves on top panels to secure them together.
(E-1) If you are setting up an Armana 3 or Luxury connect 3 power cords
on the sauna front floor corner with front wall. (E-2) If you are setting up an
Armana 1, 2 or C connect 2 power cords on the sauna front floor corner
with front wall.Slide small board into position to conceal power connections
into front wall.
Back Wall Heater
Left Wall Heater
G
Back Wall Heater
Bench Heater
4
F
Connecting the left side panel
While rear panel is being held in position, place the left panel into the
grooved base and gently raise into position. The magnet system will help to
pull the panels together.
(B) Place the U shaped piece of stainless steel into the groove on top of the
panels to hold them together. Once the U shaped rod is installed correctly
you can let go of the panels.
(C) Plug left side panel and rear panel into floor outlets. To ensure proper
performance plug appropriate cord into specified recepticle as shown in
above photo. (C-1) represents the plug configuration for the Luxury model.
6
6
Connecting the right side panel
Place the right panel into the grooved base at a slight angle and raise
gradually until magnets click into position.
(F) Place U shaped rods into the two remaining grooves on the panels top corners.
(G) Plug right side panel into floor outlet. You may have some outlets
remaining after this step depending on your sauna.
7
Assembly
Assembly
H
8
Placing the top panel
Lower the top panel onto the assembled sides. The roof grooves should
fit over the wall panels.
Make sure that connections in roof do not get pinched between roof
and walls during installation.
9
I-1
Left Wall Heater
(K) Align two handles on either side of the glass
K
door to the holes and screw them together.
J
Back Wall Heater
Installing the Sunlight Saunas™ door handle
L
Bench Heater
I-2
Armana C bench
fits in front of
support block
L-1
7
Installing the bench panel
L-3
You may need to temporarily remove the side heater on one or both side
walls to install the bench heater and bench top.
(H) Install bench heater so Solocarbon heat panel is facing toward door.
(I-1) Armana 2, 3, C, Luxury - Plug bench panel into floor outlet. You may
have some outlets remaining after this step depending on your sauna.
(I-2) Armana Corner - Plug corner bench heater cords together.
(J) Place bench seat on top of bench heater panel.
Be careful not to scratch side panels while installing bench heater and top bench.
Please replace the side wooden heater grate on the wall.
8
10
Connecting the stereo, antenna, and signal line
(L) Open tongue and groove insert on front roof of sauna to reveal
connection areas. This piece will be held in with touch fastener.
Connect Antenna, and the stereo.
Connect power connection (white color) with white socket (AC IN), and
connect signal connection with black socket (SIGNAL LINE). These two
connections come out from the CD box. Replace tongue and groove insert.
Touch fastener will hold insert in place.
9
Control Panel
Control Panel
POWER: On/Off
1.POWER light on indicates the sauna is on
2.POWER light off indicates the sauna is off
10
TIMER CONTROL:
Default time is 60 minutes. Press [▲] or [▼] to change the time. The
3
timer will automatically count down to 00 then the sauna will shut off
2
2
by itself.
4
1
5
1
● [▲] Increase time: Press once to increase the time by 5 minutes.
The maximum set up time is 60 minutes.
● [▼] Decrease time: Press once to decrease the time by 5 minutes.
6
The minimum set up time is 5 minutes.
TEMPERATURE CONTROL:
7
•Default temperature is 150˚F. Press[▲] or [▼] to change the temperature.
9
8
•°Fahrenheit/°Celsius: Press[▲]and[▼] at the same time to switch
˚F/˚C modes. Fahrenheit mode is indicated by the ˚F light; Celsius
mode is indicated by the ˚C light.
OUTSIDE PANEL
INSIDE PANEL
● [▲]: Increase temperature
1. In<˚F> mode, pressing this button once increases the temperature
by 10 °F and it can be up to maximum 150˚F.
Sunlight Saunas Control Panel Instructions
Number
10
Function
Number
Function
1
Power On/Off
6
Temperature Display
2
Power Indicator
7
Temperature Control
3
Time Display
8
Interior Light Power
4
Timer Control
9
Exterior Light Power
5
Audio Input
10
Thermometer
(Be careful not to break it.)
2. In < ˚C > mode, pressing this button once increases the temperature by
5˚C and it can be up to maximum 65˚C.
● [▼]: Decrease temperature
1. In <˚F> mode, pressing this button once decreases the temperature by
10 ˚F down, the minimum temperature is 100 °F.
2. In <˚C> mode, pressing this button once decreases the temperature by
5˚C down, the minimum temperature is 40˚C.
11
Control Panel
Temperature Display:
Specifications
SUNLIGHT SAUNAS SPECIFICATIONS:
Within 15 seconds after powering on the sauna, the temperature display
will show your temperature setting. (LED flashes). After 15 seconds, the
Item
Armana 1
Dimensions
44.2 in x 40.5 in x 75.75 in
112.5 cm × 103 cm × 193 cm
(WidthxDepthxHeight)
temperature display will show actual interior temperature.
■ INTERIOR: Interior light power on/off
■ EXTERIOR: Exterior light power on/off
(Interior/Exterior lights may still be controlled when the sauna is off)
■ Automatic memory:
The sauna will memorize the most recent “ time reservation mode,”
“setting use time,” “temperature” as well as “°C ⁄ °F mode”. Unplugging
the power cords will return to default settings.
■ Audio-Input:
You can connect a MP3 Player or other audio outputs to play audio
from the sauna speakers.
■ Make a reservation mode:
Power
120v, 1000w, 8a (15A outlet)
240v, 1600w, 6.5a
Item
Armana 2
Dimensions
53 in x 51 in x 75.75 in
135 cm × 130 cm × 193 cm
Power
120v, 1600w, 13.3a (15A outlet)
240v, 1600w, 6.5a
Item
Armana 3
Dimensions
63.25 in x 51 in x 75.75 in
161 cm × 130 cm × 193 cm
Power
120v, 1840w, 15.3a (20A outlet)
240v, 1840w, 7.7a
Item
Armana C
Dimensions
66.4 in (back) x 39.8 in (corner) x 37.8 in (front)
x 75.75 in
169 cm (back) x 101 cm (corner) x 96 cm (front)
x 193 cm
Power
120v, 2125w, 17.7a (20A outlet)
240v, 2125w, 8.4a
Item
Luxury Armana
Dimensions
85 in x 63 in x 75.75 in
216 cm × 160 cm × 193 cm
Power
240v, 2800w, 11.5a (15A outlet)
In “OFF” mode, Press [time▲] and [time▼] at the same time toggles
will be in reservation mode, press once to remove the setting; Default
time is 24 hours, press [time▲] increases the time up to a maximum of 36
hours. Press [time▼] decrease the time down to a minimum of one hour.
Setting time will automatically memorized. After starting reservation
mode, the timer will automatically count down until 00. Sauna will
automatically start again according to the memory setting.
WARNING:
5)
1)
6)
If the temperature becomes unbearable, decrease the temperature or shutoff
the sauna immediately.
2)
12
Do not splash water on the heaters or any component inside the sauna.
Do not bring wet towels into your sauna or any substances that could harm
the interior of your sauna.
Do not use if pregnant or have serious inflammation, a fever, a communicable
7)
Do not install a lock on your sauna.
disease, acute bleeding, or intoxicated. See contraindications on sunlightsaunas.com.
8)
Do not install your sauna outdoors without an authorized cover from Sunlight Saunas.
3)
Consult physician prior to use.
9)
Do not use the sauna for more than (30) thirty minutes.
4)
Do not consume alcohol or drugs when using the sauna.
10) All repairs need to be authorized by a Sunlight Saunas representative.
13
Warranty
USA and Canada Residential Use Warranty:
Lifetime on cabinetry, electrical and heaters
USA and Canada Commercial Use Warranty:
5 years on cabinetry, electrical and heaters
Return Policy
Except for custom orders, Buyer may cancel and return the Goods to
Seller, subject to the terms and conditions of this document, if Buyer
provides written notice to Seller within thirty (30) days of Buyer’s receipt of
the Goods that Buyer does not accept the Goods.
Outside USA and Canada Warranty:
7 years on cabinetry, electrical and heaters
Golden Wave International Trading Limited warrants Sunlight Saunas to be
free of defects in material and workmanship.
This warranty extends only to the original retail or wholesale purchaser of
Custom orders
EXCEPT AS EXPRESSLY PROVIDED HEREIN, IN NO EVENT MAY CUSTOM
ORDERS BE CANCELLED OR RETURNED TO SELLER AND NO DEPOSITS NOR
PAYMENTS MADE BY BUYER TO SELLER FOR CUSTOM ORDERS SHALL BE
REFUNDED TO BUYER. BUYER SHALL AT ALL TIMES REMAIN FULLY LIABLE FOR
the sauna and terminated upon transfer of ownership. The sauna must be
FULL PAYMENT OF THE CUSTOM ORDER. A “custom order” shall mean any
purchased and used within one year of the manufactured date. Freight
order from a Buyer that is designed or manufactured in whole or in part to
charges to and from the customer are the responsibility of the customer. This
Buyer’s specifications--OR--any non-custom order received by Buyer and
includes freight charges for parts shipped to enable the services of the sauna.
which Buyer alters the appearance and/or condition of sauna.
This warranty is void if the sauna has been altered, misused, abused or
exposed to water. Such instances shall include operation or maintenance
of the sauna in deviation to the published instructions. The warranty
extends only to the manufacturing defects and does not cover the
damages resulting from mishandling of the product by the owner.
In the event the Buyer elects to cancel the order and return the
Goods pursuant to this Paragraph, Buyer shall assume all risk of loss and
transportation and handling charges in connection therewith. Seller reserves
the right to refuse to refund any deposit or payment or cancel any payment
due and owing until such time as Seller (a) is in receipt of the Goods; (b) has
Sunlight Saunas Corp. shall not be liable for the loss of use of the sauna or
inspected the Goods; and, (c) in Seller’s discretion, has found such Goods
other incidental or consequential damages. Under no circumstances shall
to be free of damage. ALL RETURNED GOODS MUST BE IN THEIR ORIGINAL
Sunlight Saunas Corp. or any of its representatives be held liable for injury
PACKAGING. In addition to other legal and equitable remedies available
to any persons or damages to any properties. Specifications are subject to
to Seller, Seller may refuse to refund all or any portion of any deposit or
change without notice.
payment or cancel any payment due and owing if the Buyer fails to fully
ATTENTION: Shipping damage must be notated on the Bill of Lading (BOL).
comply with or violates the terms and conditions of this document.
Sunlight Saunas must be notified of any damage to your sauna within three
(3) business day’s of signing the BOL. Failure to notify Sunlight Saunas within
the established time frame will result in the owner taking full responsibility for
cost of ALL REPLACEMENT PARTS including shipping and handling fees.
14
15
Return Policy
Frequently Asked Questions
Shipping & handling fee
Why do the lights not work? Where do I plug them in?
All cancelled or returned Goods shall be subject to shipping costs (to
The slide hatch on the outside located on the roof in the front left corner
and from) and handling fees in the event Buyer cancels Buyer’s order
has the plugs for the inside lights, outside lights, speaker connections,
after five (5) days of such order being placed with Seller.
and the antenna plug. Often the slide hatch is making contact with the
plug for the inside light, open, adjust the plug, and close.
ETL AND ETL-C Safety Certified
Electrical Testing Laboratories (ETL) was founded in 1896 by Thomas Edison,
What is the wattage, voltage, and amps of my sauna?
and is one of the oldest product safety testing laboratories in the world.
All of the wattage should be available online and in the literature
Certification by ETL and ETL-C assures you that all Armana models have
often available at shows. The wattages are as follows:
been tested to meet both US and Canadian safety and performance
Armana 1: 120v, 1000 watts, 8 amps (15A outlet)
standards. For your information, the control number is 3069343.
Armana 2: 120v, 1600 watts, 13.3 amps (15A outlet)
Armana 3: 120v, 1840 watts, 15.3 amps (20A outlet)
SAFETY
CERTIFIED
Armana C: 120v, 2125 watts, 17.7 amps (20A outlet)
C
Armana Luxury: 220-240v, 2800 watts, 11.5 amps (15A outlet)
3082499
Also most saunas in the US will be 120 volt and outside the US 240 volt.
Frequently Asked Questions
Why is the handle shaped like an “S”?
The unique Sunlight Saunas door handle is your entrance to a healthier
lifestyle. The “S” shaped handle represents the “S” in Sunlight Saunas™
and our focus on SUPERIOR quality, design, and technology.
Why does the bench heater not work as well as the others?
The bench heater is actually a 200 watt heater, the back panel
heaters are 300 watts, and the front panel heaters are 100 watts.
16
How long does it take for my sauna to warm up?
Do not adjust the the default time and temperature. The controls will be
preset to 60 minutes at 150° F and the optimal sauna experience will occur at
this temperature. Allow the sauna to warm up for 15 - 20 minutes at which time
it should be approximately 100° F. If placed outside the sauna may require
additional time to warm it up, depending upon weather conditions. If you
prefer the sauna hotter, let it warm up longer. Drink plenty of water, at least 8 oz.
Can I use the sauna everyday?
Yes. We suggest drinking increased amounts of water to keep yourself
hydrated. As long as you feel fine use the sauna daily and enjoy.
17
Frequently Asked Questions
Frequently Asked Questions
How long can I use it for each day?
How do I clean the sauna?
We suggest using up to 30 minutes per day. It makes no difference
Wipe the inside with a damp cloth. Furniture polish will do for the
whether you use during the day or at night.
outside. Do not use anything with chemicals as the heat will warm
What micron does the heater put out?
The sauna puts out a micron range of 4 - 20 microns.
What is the best temperature to use my sauna?
these products. Using Spungi™ towels on a regular basis will keep the
sauna clean.
Can I place my sauna outdoors and not void the warranty?
Yes, if you protect it with a Sunlight Saunas canvas cover. If you place
We recommend leaving your sauna at its default temperature setting,
your sauna outdoors without an authorized Sunlight Saunas cover your
150 F. Although your sauna will not get this hot, this setting will assure
warranty will be voided.
constant emmission of far-infrared heat. Remember, temperature is
not important; the fact that you are receiving far-infrared heat is.
What is the heater made of?
The heater is made of organic black carbon that is first cut into
I received my sauna, but I have not received the cover yet,
can I place the sauna outside?
NO, do not install your sauna outdoors prior to receiving your cover.
Doing so will void the warranty!
pliable sheets. Then electrical heater wiring is added.
How much will the sauna cost me to run a month?
The sauna runs on the same wattage as a blow dryer and will cost
very little to run monthly.
If I do use it everyday, what else do I have to do?
Just drink plenty of fluids to replace the ones you will be loosing with
Do I need to use Spungi™ microfiber towels?
Yes. Placing Spungi™ towels will make your sauna experience more
comfortable and prevent sweat from staining the sauna. Regular
Spungi™ usage keeps the sauna clean. Use them on the benches and
backrests for optimum comfort and cleanliness.
Order Sunlight Sauna Spungi™ towels online at www.Sunlightspa.com
everyday usage. If you like, take a warm shower to help accelerate
the sweat glands opening to be even more refreshed.
18
19
WWW.SUNLIGHTSAUNAS.COM
14119 Marshall Drive, Lenexa, Kansas 66215
phone 913.754.0831 fax 775.514.4314 toll-free 877.292.0020
CERTIFIED TO:
CAN/CSA STD C22-2 No. 164
TM
CONFORMS TO:
UL STD 875