1
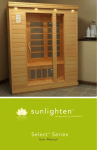
mPulse Series
TM
User Manual
Congratulations! You are now the owner of an mPulse™ sauna.
Are you ready to experience ultimate relaxation and rejuvenation? Just follow our
installation and assembly instructions and soon you’ll be in Sunlighten heaven! All
saunas should be assembled with at least 2 people to avoid personal injury or damage
to the sauna.
WARNING:
Do not use this sauna to treat any health problems without consulting your physician.
Sunlighten, Inc. does not provide medical advice, education or treatment. Our information
should not be relied on in making decisions about your health. Always consult your physician for
medical advice.
2
7
1
2
3
6
5
4
8
FSC-US-0152
1
Solocarbon™ Custom Sp e c t r u m
H eating Technology
The most advanced heater on the market, it gives
you personalized access to the health benefits
associated with the full spectrum of infrared heat.
5
F S C - C e r t i f i e d Wo o d
Whether you choose basswood, cedar or teak,
take comfort in knowing that the wood used
to build your sauna has been replanted in a
sustainable forest.
2
Bio-Feedback Capabilitie s
Built-in monitor measures heart rate and
calories burned. Data is wirelessly transmitted
to a personal wellness website, where progress
can be tracked.
6
Carbonized Bamboo Heater Cover Backrests
This eco-friendly strand fabric not only
provides ultimate comfort & support, but it is
anti-bacterial to neutralize odors and improve
air quality.
3
LCD Touch-Screen Contro l P a n e l
This intuitively simple interface allows you to
choose exactly the health benefit you want for a
given session. You can even watch DVDs on this
full color 7” screen.
7
Fully Dimmable Lighting
The interior halogen lights can be used for
reading at full brightness, and can also be
dimmed to set a more relaxing mood to help
you unwind.
4
Ergonomic, Floating Ben c h e s
A chiropractor was consulted in designing a
bench that minimizes stress points and floats
for additional legroom. Plus, it’s easy to remove
for stretch poses.
8
Patented Magne-Seal™ Assembly
Prolong cabinetry, increase sturdiness and
assemble your sauna in a snap with our
patented magnetic system.
3
Ta b l e o f C o n t e n t s
Pre-Installation
Specifications
5
Pre-installation information
6
Installation Procedure
Parts list 7
Assembly 7
Instructions for Use
LCD Control Panel
15
Warm up time and usage guidelines
27
F requently Asked Questions
29
Warranty
31
Teak Care Instructions
34
After sauna use:
Use a clean Sunlighten Spungi® microfiber towel to dry off. Drink plenty of water or a sports drink,
at least 8 oz. Take a lukewarm shower to remove sweat and toxins.
Other recommendations:
Start slow. 10-15 minutes in the sauna everyday or every other day may be appropriate for
your first few sessions.
*Listen to your body. Be aware of excessive detoxifying. If you begin to feel symptoms such as
nausea, fatigue, or flu-like symptoms during your sauna session, discontinue use immediately. If
these symptoms continue, consult your physician.
4
mPulse Series Specifications
aSPIRE
Dimensions
1
43.6 in x 41.6 in x 76.6 in
(Width x Depth x Height)
110.7 cm × 105.6 cm × 194.6 cm
Power
120v; 1800 watts max, 1440 watts
continuous; 15a (15A outlet)
5-15R
USA/CANADA
DEDICATED 120V 15A CIRCUIT AND OUTLET REQUIRED. SEE IMAGE 1 FOR REFERENCE
2
bELIEVE
Dimensions
51.7 in x 47.6 in x 76.6 in
(Width x Depth x Height)
131.3 cm × 120.9 cm × 194.6 cm
Power
120v; 2400 watts max, 1920 watts
continuous; 20a (20A outlet)
5-20R
USA/CANADA
DEDICATED 120V 20A CIRCUIT AND OUTLET REQUIRED. SEE IMAGE 2 FOR REFERENCE
3
cONQUER
Dimensions
70.6 in x 47.6 in x 76.6 in
(Width x Depth x Height)
179.3 cm × 120.9 cm × 194.6 cm
Power
240v; 3840 watts max, 3072 watts
continuous; 20a (20A outlet)
6-20R
USA/CANADA
DEDICATED 240V 20A CIRCUIT AND OUTLET REQUIRED. SEE IMAGE 3 FOR REFERENCE
4
dISCOVER
Dimensions
70.6 in x 70.6 in x 76.6 in
(Width x Depth x Height)
179.3 cm × 179.3 cm × 194.6 cm
Power
240v; 3840 watts max, 3072 watts
continuous; 20a (20A outlet)
6-20R
USA/CANADA
DEDICATED 240V 20A CIRCUIT AND OUTLET REQUIRED. SEE IMAGE 4 FOR REFERENCE
5
eMPOWER
Dimensions
85.6 in x 70.6 in x 76.6 in
(Width x Depth x Height)
217.4 cm × 179.3 cm × 194.6 cm
Power
240v; 3840 watts max, 3072 watts
continuous; 20a (20A outlet)
6-20R
USA/CANADA
DEDICATED 240V 20A CIRCUIT AND OUTLET REQUIRED. SEE IMAGE 5 FOR REFERENCE
5
Pre-Installation Information
1. Be sure a certified electrician installs a dedicated outlet for your sauna.
2. Remember your sauna should be assembled by 2 or more people.
3. Do not place plumbing or plumbing fixtures in the sauna.
4. Keep all liquids away from the heating panels and electronics.
5. Install sauna on a level surface.
6. Install sauna in an area that is dry and protected from the weather.
7. Keep flammable objects and corrosive chemicals away from the sauna.
8. Installation of the sauna in an area below room temperature can
increase warm up time
Unpack Your Sauna & Write Down Serial Number
Refer to the parts list as you unpack your sauna to confirm all pieces arrived
undamaged in transit. We make every effort to ensure that your sauna arrives
safely. If damaged, please call Sunlighten Customer Service within 2 business
days at 877.292.0020 x127 or your local Sunlighten representative. Photos
of any damaged panels and the shipping boxes are required to process a
replacement request. Please do not discard loose parts, fabric, or original
boxes and packaging before contacting us.
Unpack your sauna in a large area free of obstructions. Lay boxes flat on the
ground and undo any bands or tape. Once unpacking is complete, proceed
to installation instructions.
Back Panel
Left Panel
Right Panel
Front Panel
Floor Panel (base)
6
Installation of mPulse
aSPIRE, bELIEVE, cONQUER, dISCOVER, eMPOWER
Parts List
Quantity
Part
1
Front panel
1
Back panel
1
Left side panel
1
Right side panel
1
Roof panel
1
Floor panel (base)
1
Glass door w/side glass panel (2 doors for dISCOVER)
1
Bench panel (2 for dISCOVER, 3 for eMPOWER)
1
Door handle w/2 screws & 1 hex tool (2 for dISCOVER)
5
C clips
1
Main power cord
(The following pictures are for your reference. The dISCOVER and eMPOWER
models have additional steps. Note: dISCOVER has 2 glass doors. Please review
before assembling your sauna.)
1. Installing the Feet (optional)
Install screw through wooden feet into designated holes on the bottom of
the floor panel.
1A. Placing the Floor Panel
Place floor panel on a smooth flat surface. Floor heater indicates front side
of sauna base. Before proceeding, double check that the base location is in
its final position. Make sure the base is level to avoid any parts becoming
misaligned. Leave enough room around your sauna to plug in the power
cord and for any maintenance once it is assembled.
Warning!
Heater grate must be installed prior to
stepping on the floor.
*Make a note of the serial number
for keypad setup and future use
7
2. Placing the Back Panel
Begin by removing the small wooden wiring covers at the bottom of each
panel before you assemble the wall panels.
(A) Place the back panel into the groove in base. Center its location with the
raised area on interior floor. One person should hold the wall while the other
person continues to the next step.
A
B
3. Connecting the Right Side Panel
While the rear panel is being held in position, place the right panel into the
grooved base and gently raise into position. The magnet system will help to
pull the panels together.
(B) Place the C shaped piece of stainless steel (C clip) into the groove on
top of the panels to further hold them together. Once the C clip is installed
correctly, you can let go of the panels.
4. Connecting the Front Panel
Place the front panel into the groove on the front of the base. DO NOT lift
by the thin horizontal pieces that become the top and bottom of the door
frame. The top of the door frame has a hole that should slide onto a dowel
which protrudes from the top of the left wall.
Additional steps for eMPOWER - The eMpower uses a small block to hold the front
wall accent glass in place. This must be removed before the glass is installed. The
front wall accent glass can be installed after the all the walls are in place. The left
wall glass must be in the wall before the left wall is placed on the base.
8
Pay careful attention to the power
cords, making sure they are safely
out of the way.
(D) Place C clips into grooves on
top panels to secure the walls
together.
D
5. Connecting the Left Side Panel
First, slide the accent piece of glass into the wall. Place the left panel into
the grooved base at a slight angle
and gradually bring to vertical
position until magnets click into
place - making sure you do not
hold on to glass when doing
so. Be careful not to damage
the dowel and hole connection
between the front & side walls.
F
(F) Place C clip into the two
remaining grooves on the panels’
top corners.
6. Insert the Front & Rear Electrical Covers
The left and right edges of the rear floor electrical cover must first be slid
under the tongue and groove on the side walls. The edges that meet in
the middle will be joined and then
fall into place (you can screw down
the cover with a few woodscrews if
it seems too loose). This will keep a
tight fit for the wall. The front floor
electrical cover is a single piece,
and slides under wall tongue and
groove in the same way.
Front floor electrical cover
9
6.5. Connecting the Heater Connections
Attach connectors at the bottom of each panel, then install the small wood cover over the opening. This step should be repeated for each of the four walls as they are installed. Note: The lower heater covers may need to be removed to place electrical cover.
7. Installing the Bench *If SO Sound was purchased, refer to SO Sound manual at this time
You will need to temporarily remove the magnetic heater covers on both
side walls and the back wall to install the bench.
Slide bench on side rails until it sits in the grooves. Be careful not to scratch
the side panels while installing the bench. Reinstall all heater covers on
side and back walls after the bench is in place.
Additional steps for dISCOVER - Install longer full frame bench against the
wall opposite to the control panel. The second bench interlocks with the
first bench.
Additional steps for eMPOWER - First install the bench along the back
wall of the sauna (the largest bench section). Next install the smaller
interlocking right wall bench. The left wall bench will be installed in a
similar manner to the right wall bench. Finally the L-Bracket support arm
should be placed under the bench. Using the hex key tighten the bolts
through the support and fasten the support to the wall.
10
8. Placing the Roof Panel
Lower the top panel onto the assembled sides. The roof grooves should fit over
the wall panels. The side with the speakers and lights should be facing down,
and speakers should be over the bench. Make sure that electrical connections
in the roof do not get pinched between roof and walls during installation.
After the back of the sauna is securely
in place, one person will hold up the
front of the unit while the two roof
wires are fed to the top of the unit.
You have one 2-pin connector and
one screw type barrel connector.
9. Installing the Door Handle
Align two handles and gasket on either side of the glass door with pre-drilled
holes. Ensure gasket material is located between the handle and the door on
both sides of the glass. Then screw them together using the hex tool. You may
eliminate the plastic spacers inside the handle if they do not fit.
11
10. Installing the Glass Door *Please read entire section before attempting
Note: Use extra caution when moving and mounting the glass door. This is an
expensive replacement item and will not be covered by warrantly if shattered.
The glass door is heavy and will take 2 people to install. Begin by opening the
hinges so they face out. The glass door cutout and top hinge should then be fit
together. Using the hex tool, install the top screw and turn 2 or 3 turns. With the
metal plate hanging by the top screw, insert the cork and rubber gaskets between
the glass door and the outer hinge plate (with the cork against the glass and plastic
against the hinge), then install the bottom screw and lightly tighten both screws.
The door should still move within the top hinge.
With the top hinge plate lightly secured, close the door halfway. This will
allow the door to rotate past the trim stop. After the door slides back you
will be able to align the lower hinge cutout and lower hinge. You may have
to lift up on the door. At this point, the cutout in the glass door for the
bottom hinge should be able to rest on the lower hinge and you can now
install the bottom metal plate.
Cork and rubber gaskets
Hex tool tightens hinge
Open hinges (so if door is attached, door is open)
12
Slide gaskets in place
You may have to partially close the door
to line up with the bottom hinge
Tighten hinge with hex tool
Put wooden spacer on the bottom edge of the door frame. Lift the door
while closing so that the bottom edge of the glass is sitting on top of the
spacer. This will ensure the door is the proper height within the door frame.
With the door in place, push the door toward the hinges leaving 1 mm
between the edge of the door and the side of the frame where the hinges
are attached. After the door is correctly positioned fully tighten the top and
bottom hinges. When finished, open door and remove the spacer (which
should be saved for future use). If the gaskets are installed incorrectly or the
screws are not fully tightened the door will slip over time.
Put wooden spacer in door frame
Tighten hinges while door rests on spacer
13
Additional steps for dISCOVER - The corner sauna has an additional screw
at the end of the door frame to prevent the frame from contacting the
door.
11. Connecting the Exterior Control Panel
Make the connection from the hole in the front of the sauna to the back
of the exterior control panel. It should simply click into place. Once that
connection is made, simply push the control panel over the top of the
plastic frame that has been screwed around the hole. The control panel
should simply snap into place, and is ready to use.
12. Plugging in the Main Power Cable
Connect the main power cord at the lower rear area of the floor panel to
your outlet.
Make sure plug is FULLY inserted!
Your sauna should be connected into a wall outlet that is not shared with
any other electrical device. Have your electrician install a dedicated outlet
for best results.
The physical assembly is complete. Please refer to the following operating
instructions to activate your control panel and software.
If you are installing SO Sound or Chromotherapy, consult the separate
manual provided with each.
14
LCD Interior Control Panel
1. Turn on Control Panel
On the first use of your sauna, the screen will turn on automatically. Press
the “+” sign in the upper right and lower left corners of the screen to enter
set-up. You will not have to go through the same process each time you use
the control panel - additional information is needed for the first use only.
2. Set-Up
On the first set up of your sauna, or if your sauna has been unplugged,
you will go through the Set-Up screens. Make sure to enter in your serial
number correctly - the heater programs and customization depend on the
model of sauna you are using.
If you enter information incorrectly, or need to change your Set-Up
information, you can do so through the Options tab. Write down your serial
number in the back of your manual. The serial number is located on the
sauna boxes and on the back panel.
15
3. Home Screen
When set-up is complete, you will see the home screen. This will give the
critical information you need when inside your sauna: the temperature, set
time, clock, program selected, and a single piece of biometric information.
You can also control the interior lights, or utilize “QUICK START,” which
runs a session at whatever settings the previous session ended.
4
6
5
7
8
3
9
2
10
1
11
1. Quick Start Button
6. Options Tab
Press this button to repeat the last sauna session run.
Press to access the Schedule, Heater Customization,
Audio/Video, and more.
2. Sauna Timer
Counts down the amount of time remaining in the
current sauna session.
7. Clock
3 . Te m p e r a t u re S e t t i n g / R e a d i n g
8 . L i g h t i n g C o n t ro l
Shows the current temperature within the cabin. When
temp is being adjusted, it displays the set temperature for
a moment, then goes back to current temperature.
9 . U s e r N a m e & P ro g r a m
Displays the current time.
Use the up and down arrows to control the interior lights.
Displays the current user and program running.
4 . B i o m e t r i c s Ta b
Press for access to biometric information and user
settings.
10. Biometric Display
5 . P ro g r a m s Ta b
11. Power Button
Displays a selected piece of biometric information.
Press to turn off the LCD display and your sauna.
Press to access the six pre-programmed sauna sessions each targeting specific health needs.
16
4. Biometrics Menu
Pressing the Biometrics Tab give you access to the Biometrics drop-down
menu. From this menu, you have several options:
View Data: The “view data” screen allows you to view any pieces of
biometric information that your accessories support (note: without
Sunlighten biofeedback-accessories, you will not be able to see any data.
Some data will be unlocked on later software/hardware upgrades).
Create New User: The set-up process gave you the opportunity to create
a user. You can also create additional users. Having multiple users will allow
you to utilize multiple biofeedback accessories simultaneously, and keep
custom settings for each user.
17
Select User: The “select user” screen allows you to select from any user you
have stored, or select “Guest” if you would prefer to be without a user.
Edit User: If you have already created a user and wish to make changes,
you can user the “edit user” option. This lets you go back through the
information you entered when you created the user and edit it.
Delete User: If you have already selected a user, you can use the “Delete
User” option to remove it from your system.
18
5. Programs Screen
Pressing the Programs Tab give you access to the program selection screen.
There are six programs to choose from - each targeting a specific health
benefit.
Cardio: As the body tries to cool itself, you should notice an increase in
heart rate, cardiac output and metabolic rate.
Detoxification: Detox can be used as a tool to help relieve symptoms AND
as a preventive tool to increase overall health.
Pain Relief: Heat activates neurological, vascular and metabolic mechanisms
to mediate the transmission of pain.
Relaxation: Relax in comfort with an invigorating deep tissue sweat.
Weight Loss: It has been estimated that a 30 minute infrared sauna session
can burn over 200 calories.
Skin Health: Infrared heat easily penetrates human tissue to help with acne,
eczema, psoriasis, burns, cuts and more.
19
To run a program, first press the program you would like. A brief description
is shown and the button is highlighted. Then press the “start” button to
begin the program. The active program will display on your Home screen
and the temperature and timer will adjust.
6. Options Menu
Pressing the Options Tab gives you access to the Options drop-down
menu. From this menu, you have several choices:
Schedule: The “schedule” button will open a second drop down, allowing
you to choose between either a “daily” session, or “one time” session - or
you can “view sessions”.
A “one time” session will simply schedule a single sauna session for anytime
within the next 7 days.
20
You begin by selecting the day you want your session scheduled for. You
then select the time, followed by the program, and then your program is
set. It can be confirmed with the “view session” button.
The “daily” session will involve the same steps - but instead of selecting a
specific day of the week, it automatically schedules the session for every day
of the week. Just like the “one time” session, you select the time, select the
program, and see a confirmation screen. You can schedule a maximum of
three sessions per-day, per-user.
The “view sessions” option lets you see all programs that you have
scheduled. Pressing the up and down arrows allows you to scroll through
the days of the week, and pressing the “x” to the right of any session will
give you the option to delete it.
21
Customize Heaters: Along with the provided heater programs, we also
allow for you to customize the heaters to your specific needs. This section
allows you to access each “zone”, and to decide on the levels of infrared
you are getting for infinite possibilities for each sauna session.
5 6
4
3
7
2
8
9
1
1. Back Button
6 . M i d I n f r a re d A d j u s t m e n t
Press this button to return to the previous screen.
Press the up and down arrows to increase or decrease
the intensity of mid infrared from the wall (note: mid
infrared is not dependent on the heating zone - it is
controlled one wall at a time).
2 . L e a r n M o re A b o u t I R
Press this button to access a screen that gives a brief
description of near, mid, and far infrared.
7 . N e a r I n f r a re d A d j u s t m e n t
Press the button to turn on and off the near infrared
for the selected wall - red indicating on, and green off
(note: near infrared arrays are only on specific walls - the
rectangle with two horizontal lines indicates an NIR array).
3 . Wa l l S e l e c t i o n A r ro w s
The arrows allow you to view the different walls of the
sauna that you can customize.
4. Heating Zone
8. Set Button
Most walls have two heating zones: an upper and lower.
Simply press the zone you want to access, and a white
outline will tell you that it is selected.
When you have completed your adjustments press the
“set” button to confirm the settings.
9. Home Button
5 . F a r I n f r a re d A d j u s t m e n t
The “home” button returns you to the home screen.
Press the up and down arrows to increase or decrease
the intensity of far infrared from the selected zone.
Quick Infrared Guide for Customization:
22
To customize, use the arrows to view the desired wall. Then press the
heating zone (either the upper or lower will be outlined in white to indicate
it is selected) you want to adjust and use the panel on the right side of the
screen to adjust the near, mid, and far infrared.
Upper
Lower
Note that upper section is highlighted above
Audio/Video: The “audio/video” button will open a second drop down,
allowing you to choose between either an “audio plug-in,” “cd,” “dvd” or
“SO Sound” (vibrational therapy).
The “audio plug-in” allows you to play your mp3 player, or other portable
device through the sound system of your sauna. Simply plug-in to the
audio input on the front of your stereo, and the volume can be adjusted on
the LCD.
23
The “cd” and “dvd” are controlled using the same interface. If a cd or dvd
is in your stereo, you can control it using these screens. When playing a
dvd, touching the screen will bring up the control screen. Pressing “play”
will then take you back to the video.
SO Sound can only be used by those who have purchased SO Sound
therapy and have it installed in their sauna. If it is, the SO Sound control
screen lets you control the volume of the system as well as the intensity of
the SO Sound vibrations.
Exterior Lights: The “exterior lights on/off” button allows you to control
the exterior LED lights. Pressing this button will turn the lights on when they
are off, and off when they are on.
24
Settings: The “settings” button accesses a drop down which lets you turn
on or off “quick heat”, or go back through the options that were selected
on the first start up of the sauna.
Quick Heat: The “quick heat” button allows you to turn on and off quick
heat - which turns your sauna heaters to max power while the sauna is
heating up. Some users prefer a slower warm up, so they may want quick
heat turned off.
Set Up: The “Set Up” button allows you to go back through those settings
you went through at the first start up of the sauna. Among the options that
can be changed here: the serial number, measurement, country and time.
7. Exterior Control Panel
The exterior control panel can also be used for simple functions of the
sauna. The display is oriented in the same way as your “home screen” on
the interior LCD control panel, and will give you the same information.
Note: this screen is inactive when a program is running on the interior panel.
25
Power Bu t t o n
Biometric Button
Press this button to turn on both the
interior and exterior control panels.
Use to scroll through different biometric
data (requires Sunlighten biofeedback
accessories.
Quick St a r t B u t t o n
Exterior Lights Button
Press to turn on or off the lights on the
exterior of the sauna.
Press this button to repeat the last
sauna session run.
The exterior control panel can be used for simple functions - but we
recommend using the interior panel for the majority of operations.
WARNING:
1. If the temperature becomes unbearable, decrease it or shut off the
sauna immediately.
2. Do not use if pregnant or if you have serious inflammation, a fever, a
communicable disease or acute bleeding. See contraindications on
sunlighten.com for additional information.
3. Consult physician prior to use if you have a medical condition.
4. Do not consume alcohol or drugs when using the sauna.
5. Do not splash water on the heaters or any component inside the sauna.
6. Do not bring wet towels into your sauna or any substances that could harm
the interior of your sauna.
7. Do not install a lock on your sauna.
8. Do not install your sauna outdoors without an authorized water resistant
cover from Sunlighten.
9. All repairs need to be authorized by a Sunlighten representative or you
may void your warranty.
10. Do NOT touch the heater surface while the heaters are ON.
26
Warm-Up Time and Usage Guidelines
If placed in an outside or cooler environment, the sauna may require additional
time to warm up. Placing on top of or near cool surfaces will also impact warmup time. If you prefer the sauna hotter, let it warm up longer. Drink at least
8oz of water or sports drink to provide proper hydration before and after your
sauna session.
Optimizing your sauna experience
Step 1: Make sure you plug your sauna into a dedicated outlet installed by your electrician.
Step 2: Close the vent located in the ceiling.
Step 3: When the sauna reaches a desirable temperature, get in and start your sauna session.
Note: Even if your sauna is set to the maximum temperature (167 degrees F),
it is not intended to reach that temperature within the cabin. Our programs are
based on infrared wavelength, and not cabin temperature.
If your sauna is outside or in an unheated garage, sun room, basement or
patio, additional time may be required to warm up the sauna depending upon
the ambient temperature of the area. You are required to have an authorized
Sunlighten cover on your sauna if it is outside or exposed to the weather in
order to maintain your warranty.
Clean the heat sink annually
We suggest using compressed air to clean out any dust from the heat sink at the
rear of the sauna base once a year.
Cleaning the LCD screen
Use only cleaners approved for use on LCD screens.
Static build up
We suggest unplugging your sauna for an hour every six months to help avoid
static build up inside the controls.
27
What is the voltage and amperage of my sauna?
The wattages are as follows:
aSPIRE: 120v, 15 amps (15A outlet)
bELIEVE: 120v, 20 amps (20A outlet)
cONQUER: 240v, 20 amps (20A outlet)
dISCOVER: 240v, 20 amps (20A outlet)
eMPOWER: 240v, 20 amps (20A outlet)
Most saunas in the US will be 120 volt and outside the US 240 volt.
How long does it take for my sauna to warm up?
The sauna is designed around infrared wavelength and power. Cabin temperature does
not affect performance. Because of all the factors involved, there is no set time and
temperature the cabin will reach. The temperature controls are preset to 60 minutes
at 167° F. Generally, a good rule of thumb is about 60° of temperature increase in
60 minutes. If placed outside, the sauna may require additional time to warm up,
depending upon weather conditions. If you prefer the sauna hotter, let it warm up
longer. Drink plenty of fluids, at least 8 oz.
Note: If the sauna is in a cool environment, the temperature shown on the key pad may
be below cabin temperature.
Can I use the sauna everyday?
Yes. We suggest drinking increased amounts of fluids to keep yourself hydrated.
Just like exercise, as long as you feel fine, use the sauna daily and enjoy.
How do I clean the sauna?
Wipe the inside and fabric with a damp cloth. We recommend doing this at
least every six months. You may dust the outside of the sauna with a dry dust
cloth. We do not recommend using chemical cleaners on your sauna. Using
Spungi™ towels on a regular basis will keep the sauna clean. Light sandpaper
can be used to treat stains on the interior of the sauna.
Can I place my sauna outdoors?
Yes, if you protect it with a Sunlighten canvas cover. If you place your sauna
outdoors without an authorized Sunlighten cover, your warranty will be void.
28
Frequently Asked Questions
What wavelength range does the heater put out?
The sauna emits a variable micron range between 0.8 & 30 microns depending
on the setting.
What is the best temperature at which to use my sauna?
First, it is important to understand that the mPulse has been designed to provide
specific levels of infrared, regardless of cabin temperature. That being said, we
recommend starting at a lower temperature and increasing it gradually in subsequent
sessions, if you feel the need to do so. Everyone has different preferences and
tolerances for heat. The most important thing is to listen to your body.
How much will the sauna cost me to run a month?
The sauna runs on the same wattage as a blow dryer and will cost very little to
run monthly. Divide the maximum wattage used by your sauna by 1,000 to find
the kW used, then multiply by the cost per kilowatt on your electric bill.
If I do use it everyday, what else do I have to do?
Just drink plenty of fluids to replace the water & electrolytes you will be sweating out
with everyday usage.
Can I touch the heaters?
Do NOT touch the heater surface when the heaters are on, or have recently been on.
Is it normal to see cracks in the wood?
Yes, wood is a living material that continues to respond to climate conditions, even
after being manufactured into a sauna. During normal operation, wood may crack
slightly due to changes in moisture level. These cracks may appear or disappear with
the changing seasons, but will not affect the structural integrity of the sauna. Our
saunas are shipped around the globe, and can experience slight blemishes, scratches,
or scuffs from the transit of this sauna. In most cases these blemishes on the exterior
of the room can be concealed by using a small amount of furniture polish, oil, or other
furniture treatment. The interior blemishes, scratches, or scuffs can be either left alone,
sanded, or combination of gluing and sanding. Please avoid any treatment containing,
benzene, or a high concentration of alcohol. However, if you detect major cracking or
damage that jeopardizes the functionality of your sauna, please contact Sunlighten
Customer Service.
29
I received my sauna, but I have not received the cover yet, can I place
the sauna outside?
NO, do not install your sauna outdoors prior to receiving your cover. Doing so
will void the warranty.
How much room is required around my sauna for set-up & best performance?
We recommend 12 inches of clearance around the back, sides and top of the
sauna to access plugs and for general maintenance. Make sure to leave at least
4 inches behind the unit to allow the electronics to cool. If placed near or on
cool surfaces (like concrete and basement walls), warm-up can be impacted.
What surfaces can I set my sauna on?
You can set your sauna on tile, concrete, carpet, laminate or wood. Make sure
that your sauna is level, regardless of its location for optimal use. If your sauna
is placed outdoors, make sure there is adequate drainage so that water cannot
pool around the base of the sauna. Do NOT place the sauna on grass, gravel
or rock. If placed near or on cool surfaces (like concrete and basement walls),
warm-up can be impacted.
Why do you recommend using Spungi™ microfiber towels?
Using Spungi™ towels will make your sauna experience more comfortable
and prevent sweat from staining the sauna. Regular Spungi™ usage keeps
the sauna clean. Use Spungi accessories on the bench, floor and backrests for
optimum comfort and cleanliness.
How do I care for the heater fabric?
The heater fabric remains as a covering over the heater panels. This is to protect
the heater surfaces from any scratches, etc. It is also there to prevent physical
contact between the skin and the heaters as the sauna is being used. To clean,
wipe fabric with slightly damp cloth. We recommend doing so at least once
every six months. Only do so when sauna is turned off.
Order Sunlighten Spungi™ towels online at www.sunlightdayspa.com or
call 877.292.0020.
Learn more about our bio-freedback accessories at sunlighten.com or
contact us for further assistance at 877.292.0020.
30
Warranty
USA and Canada Residential Use Warranty:
Lifetime on cabinetry, electrical and heaters; 3 years for LCD; 1 year for stereo.
USA and Canada Commercial Use Warranty:
5 years on cabinetry, electrical and heaters. 1 year for LCD screen & stereo.
Outside USA and Canada Warranty:
Please check with your local Sunlighten representative.
ATTENTION: Shipping damage must be notated on the Bill of Lading (BOL). Sunlighten
must be notified of any damage to your sauna within two (2) business days of signing
the BOL. Failure to notify Sunlighten within the established time frame will result in the
owner taking full responsibility for the cost of ALL REPLACEMENT PARTS, including
shipping and handling fees. Sunlighten reserves the right to repair or replace any parts
at our discretion during service. We will use technician approved and tested parts if
replacements are provided.
Sunlighten warrants the saunas to be free of defects in material and workmanship.
This warranty extends only to the original retail or wholesale purchaser of the sauna
and is terminated upon transfer of ownership. The sauna must be purchased and
used within one year of the manufactured date to keep warranty eligible. Freight
charges to and from the customer are the responsibility of the customer. This includes
freight charges for parts shipped to enable the services of the sauna.
This warranty is void if the sauna has been altered, misused, abused or
exposed to water. Such instances shall include, but not limited to, operation
or maintenance of the sauna in deviation to the published instructions. The
warranty extends only to the manufacturing defects and does not cover the
damages resulting from mishandling of the product by the owner, or natural
imperfections that are inherent in any wood product. All natural wood products
have variations in the color, the grain, and irregularities such as small knots and
fine cracks. These characteristics are a part of the natural beauty of the wood,
and in no way should be considered defective.
*When your sauna is placed outdoors, failure to utilize the .004 plastic sheet
supplied as additional water protection for your sauna will void your warranty.
The fabric used for the roof of the waterproof cover is resistant to water
penetration, however it is sewn to the acrylic canvas sides. It is required to place
the plastic sheet included directly over the sauna roof prior to installing the
cover and placing an object on the sauna roof to give the fabric elevation for
water run off as further protection.
31
Sunlighten Inc. shall not be liable for the loss of use of the sauna or other
incidental or consequential damages. Under no circumstances shall Sunlighten
Corp. or any of its representatives be held liable for injury to any persons or
damages to any properties. Specifications are subject to change without notice.
Returns
Except for custom orders, Buyer may cancel and return the Goods to Seller, subject
to the terms and conditions of this document, if Buyer provides written notice to
Seller within thirty (30) days of Buyer’s receipt of the Goods that Buyer does not
accept the Goods.
Custom Orders
EXCEPT AS EXPRESSLY PROVIDED HEREIN, IN NO EVENT MAY CUSTOM
ORDERS BE CANCELLED OR RETURNED TO SELLER AND NO DEPOSITS NOR
PAYMENTS MADE BY BUYER TO SELLER FOR CUSTOM ORDERS SHALL BE
REFUNDED TO BUYER. BUYER SHALL AT ALL TIMES REMAIN FULLY LIABLE
FOR FULL PAYMENT OF THE CUSTOM ORDER. A “custom order” shall mean
any order from a Buyer that is designed or manufactured in whole or in part to
Buyer’s specifications--OR--any non-custom order received by Buyer and which
Buyer alters the appearance and/or condition of sauna.
In the event the Buyer elects to cancel the order and return the Goods pursuant to this
paragraph, Buyer shall assume all risk of loss and transportation and handling charges
in connection therewith. Seller reserves the right to refuse to refund any deposit or
payment or cancel any payment due and owing until such time as Seller (a) is in receipt
of the Goods; (b) has inspected the Goods; and, (c) in Seller’s discretion, has found
such Goods to be free of damage. ALL RETURNED GOODS MUST BE IN THEIR
ORIGINAL PACKAGING. In addition to other legal and equitable remedies available
to Seller, Seller may refuse to refund all or any portion of any deposit or payment or
cancel any payment due and owing if the Buyer fails to fully comply with or violates the
terms and conditions of this document.
32
Shipping & Handling Fee
All cancelled or returned goods shall be subject to shipping costs (to and from)
and handling fees in the event buyer cancels buyer’s order after three (3) days
of such order being placed with seller.
ETL Safety Certified
Electrical Testing Laboratories (ETL) was founded in 1896 by Thomas Edison, and is
one of the oldest product safety testing laboratories in the world. Certification by ETL
and ETL-C assures you that all mPulse models have been tested to meet both US
and Canadian safety and performance standards.
SAFETY
CERTIFIED
33
Teak Care Instructions (does not apply to cedar or basswood owners)
Note: If placed outdoors, all Sunlighten saunas must have a cover on at all times or
your warranty will be voided
Teak is a tropical hardwood that has a rich, golden honey color when new. As it
begins to age and is exposed to the elements, the natural, beautiful color changes
to a silvery gray patina. In fact, this is how you can distinguish finely aged outdoor
teak furniture! The key with teak is that if you were to leave this silvery gray color on
the teak sauna without it being treated, you would never be able to get the lustrous
honey, caramel back.
Although the color change does not affect the strength and durability of the piece, it does
give teak a whole new look. Therefore, you first want to decide if you want to maintain
the original golden brown color or let it acquire a silver gray patina as it weathers.
To extend the beautification of the lustrous honey color, a leading manufacturer, KingsleyBate, recommends using a protector (consult your local hardware store for details).
Kingsley-Bate does not recommend using a teak oil on outdoor furniture because of the
high maintenance involved in this process. Every three months, teak oil will need to be
reapplied to maintain the brown finish. Kingsley-Bate also states “oiling outdoor furniture
may cause mildew or irregular coloring.”
When left outdoors without a teak protector or teak oil, teak will turn silvery-gray. This
process takes approximately 9 months and depends on the exposure to certain elements
such as humidity and sun. If this is the look you wish to maintain, the only care needed for
your teak sauna is a periodic cleaning.
The recommended cleaning solution is a 75/25 mixture of a mild laundry detergent with
bleach in water. Only a soft bristle brush should be used. When your sauna is clean, wipe
the entire piece well enough to remove any dirt or cleaning solution residue. This process
is adequate for general cleaning of your furniture regardless of if it is golden brown or
has weathered.
34
The great thing about teak is that since it is a dense hardwood, it naturally resists warping,
shrinkage, swelling and rot. In addition, it contains a high oil content that continually
preserves the wood. The smooth finish does not splinter and looks absolutely beautiful.
Take care of your investment properly as this is intended to last for years.
Article Source: http://EzineArticles.com/?expert=Jennifer_Akre
Serial Number: _____________________________________________________
Sales Order #: __________________________________________________
NOTES:
35
sunlighten
empowering wellness
sunlighten.com
version 20110118
US/CAN
7373 W. 107th St., Overland Park, KS 66212 USA
phone 913.754.0831 fax 775.514.4314 toll-free 877.292.0020
INTERNATIONAL: [email protected] or contact your local Sunlighten representative