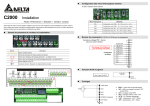
1
Preface Thank you for choosing DELTA’s IBLM Series (Integrated BrushLess Motor). The IBLM Series is manufactured with high-quality components and materials and incorporate the latest microprocessor technology available. This manual is to be used for the installation, parameter setting, troubleshooting, and daily maintenance of the IBLM. To guarantee safe operation of the equipment, read the following safety guidelines before connecting power to this product. To ensure the safety of operators and equipment, only qualified personnel familiar with IBLM are to do installation, trial run and parameter setting. Always read this manual thoroughly before using IBLM series, especially the WARNING, DANGER and CAUTION notes. Failure to comply may result in personal injury and equipment damage. If you have any question, please contact your dealer. This product sold to U.S is only suitable for dryer, washing machine, conveyer and elevator door application. PLEASE READ PRIOR TO THE INSTALLATION FOR SAFETY PURPOSE. DANGER! DC input power must be disconnected before any wiring to IBLM is made. Never reassemble internal components or wiring. Ground the IBLM series using the ground terminal. The grounding method must comply with the laws of the country where IBLM series is to be installed. Refer to the Basic Wiring Diagram. IBLM series shall NOT be used for life support equipment or any life safety situation. To prevent personal injury, please keep children and unqualified people away from the equipment. WARNING! DO NOT use Hi-pot test for internal components. The semi-conductor used in IBLM easily damage by high-voltage. A charge may still remain in the DC-link capacitors with hazardous voltages, even if the power has been turned off. To prevent personal injury, please ensure that power has turned off before opening IBLM and wait for the capacitors to discharge to safe voltage levels. Only qualified persons are allowed to install, wire and maintain IBLM. CAUTION! DO NOT install the IBLM in a place subjected to high temperature, direct sunlight, high humidity or liquids. Only use IBLM series within specification. Failure to comply may result in fire, explosion or electric shock. NOTE To describe the internal components of the product, it will show the product picture without cover or safe components in the manual. To guarantee safe operation of this product, please wire and install the cover correctly during operation. The picture in this manual may be different from the product you receive but it still has the same product guarantee. Table of Contents Preface ............................................................................................................. i Table of Contents .......................................................................................... iii Chapter 1 Introduction ................................................................................ 1-1 1.1 Receiving and Inspection..................................................................... 1-2 1.1.1 Drive Appearance ....................................................................... 1-2 1.1.2 Nameplate Information................................................................ 1-2 1.1.3 Model Explanation ...................................................................... 1-2 1.1.4 Series Number Explanation ........................................................ 1-4 1.2 Preparation for Installation and Wiring ................................................. 1-5 1.2.1 Ambient Conditions..................................................................... 1-5 1.2.2 Installation Environment.............................................................. 1-5 1.3 Dimensions .......................................................................................... 1-6 1.4 External Wiring .................................................................................... 1-8 Chapter 2 Communication.......................................................................... 2-1 2.1 How to Use Communication ................................................................ 2-1 2.2 Operation Method ................................................................................ 2-2 Chapter 3 Parameters ................................................................................. 3-1 3.1 Summary of Parameter Settings.......................................................... 3-2 3.2 Descriptions of Parameter Settings ..................................................... 3-7 Appendix A Specifications ........................................................................ A-1 Appendix B VFDSoft Software .................................................................. B-1 B.1 Installation........................................................................................... B-1 B.2 How to uninstall .................................................................................. B-5 B.3 Communication Method ...................................................................... B-6 B.4 Communication Operation .................................................................. B-9 Chapter 1 Introduction The IBLM should be kept in the shipping carton or crate before installation. In order to retain the warranty coverage, the IBLM should be stored properly when it is not to be used for an extended period of time. Storage conditions are: CAUTION! Store in a clean and dry location free from direct sunlight or corrosive fumes. Store within an ambient temperature range of -40 °C to +70 °C. Store within a relative humidity range of 0% to 100% and non-condensing environment. DO NOT place on the ground directly. It should be stored properly. Moreover, if the surrounding environment is humid, you should put exsiccator in the package. DO NOT store in an area with rapid changes in temperature. It may cause condensation and frost. If the IBLM is stored for more than 3 months, the temperature should not be higher than 30 °C. Storage longer than one year is not recommended, it could result in the degradation of the electrolytic capacitors. When the IBLM is not used for more than one year, it needs to recharge the drive capacity before operation. It is recommended to recharge for each year for good capacity. Before recharging the capacity, please make sure that the storage environment is clean and dry. Revision Oct. 2010, IHE0 1-1 Chapter 1 IntroductionIBLM Series 1.1 Receiving and Inspection This IBLM has gone through rigorous quality control tests at the factory before shipment. After receiving the IBLM, please check for the following: Inspect the unit to assure it was not damaged during shipment. Make sure that the part number indicated on the nameplate corresponds with the part number printed on the shipping carton or crate. 1.1.1 Drive Appearance N a m e pla te D riv e S p ind le D C b r u s h l e s s m o to r F ix e d sc r ew s 1.1.2 Nameplate Information Example for IBLM-A51407A 1-phase 1.0HP BLDC MOTOR MODEL : IBLM-A51 407A VOTAGE: 200 ~24 0V PH:1 IN SUL. CLASS B H.P.:1.0 FLA THERM. PORT.:N/A RPM:105 0 IP:54 Switch for mo tor co il overheat Insulatio n cl ass Inpu t vo ltage Ma x. speed Horsep owe r Inpu t pha se Hz:50/6 0 5%:7 .2A A51407A0T9280001 WEIGHT:6.0KG Portect ion L evel Rated current DELTA ELECTRONICS, INC. MADE I N TAIWAN Weigh t Serial number Inpu t freque ncy Mo del n ame 1.1.3 Model Explanation 1-2 Revision Oct. 2010, IHE0 Chapter 1 Introduction IBLM Series IBLM A5 14 07 A In teg rat ed Bru shL e ss Mo tor IBL M Se rie s F rame si ze 10= 10 0mm; 1 2 = 120mm ;13 = 1 30mm 14= 14 0mm; 1 8 = 180mm ; 22 = 2 20mm Revision Oct. 2010, IHE0 Ve rsi on R ate d o ut pu t po we r 03: 1/3 HP (0.2 5kW ) 04: 1/2 HP (0.4 kW) 06: 3/4 HP (0.6 kW) 07: 1HP(0. 75k W) 1-3 Chapter 1 IntroductionIBLM Series 1.1.4 Series Number Explanation A51407A 0 T 9 28 0 001 P r o d u ct io n n u m b e r P r od u ctio n w e e k P r o d u ct io n y e ar 2 0 0 9 T : T ao y ua n , W : W u jian g S : S h an g ha i P r o d u c t i o n f a c to r y 0 : s ta nd ard m o de l 3 : B M C m od e l 6 : l e a d - fr e e m o d e l M od el ty p e M od el n u m b er If the nameplate information does not correspond to your purchase order or if there is any problem, please contact your distributor. 1-4 Revision Oct. 2010, IHE0 Chapter 1 Introduction IBLM Series 1.2 Preparation for Installation and Wiring 1.2.1 Ambient Conditions Install the IBLM in an environment with the following conditions: 1. It needs to reserve enough space for temperature rise situation to prevent overheating due to bad ventilation. 2. To prevent overheating, it needs to have heat sink equipment when it doesn’t have enough space for heat dissipation. 3. To prevent vibration, it needs to have vibration absorbers or anti-vibration rubber when there is any vibration. 4. If there is any interference, such as big magnetic switches or welders, it needs to add an EMI filter. Air Temperature Relative Humidity Operation Atmosphere pressure Installation Site Altitude 0 to 100%(RH), no condensation allowed 86 ~ 106 kPa <1000m Vibration <20Hz: 9.80 m/s2 (1G) max 20 ~ 50Hz: 5.88 m/s2 (0.6G) max Temperature -40°C ~ +70°C Relative Humidity Storage Transportation Atmosphere pressure Vibration Pollution Degree -40 ~ +60°C 0 to 100%, no condensation allowed 86 ~ 106 kPa <20Hz: 9.80 m/s2 (1G) max 20 ~ 50Hz: 5.88 m/s2 (0.6G) max 2: good for a factory type environment. 1.2.2 Installation Environment A3 series (indoor): IBLM-A31403A, IBLM-A31404A, IBLM-A31406A, IBLM-A31407A A5 series (outdoor HAVC): IBLM-A51403A, IBLM-A51404A, IBLM-A51406A, IBLM-A51407A 1. Install in a well ventilation place 2. Install in a clean and dry location free from corrosive fumes, oil and iron powder 3. Install in a place without vibration 4. Install in a place without magnetic interference Revision Oct. 2010, IHE0 1-5 Chapter 1 IntroductionIBLM Series NOTE 1. Too tight wiring of IBLM may cause drive damage due to the vibration during operation. 2. Ensure that every component has been fixed. 3. Please make sure that the connection between the motor shaft and transmitter is correct and the space between shaft and mechanism is suitable. 4. Please contact your dealer if you have any problem during installation. 1.3 Dimensions Dimensions are in millimeter and [inch] 1. A3 series: IBLM-A31403, IBLM-A31404B, IBLM-A31406B, IBLM- A31407B mm 1-6 inch L L1 1/3HP 164.1(6.46) 134.5(5.30) 1/2HP 171.1(6.74) 141.5(5.57) 3/4HP 177.1(6.97) 147.5(5.81) 1HP 182.1(7.1) 152.5(6.00) L2 70.0(2.76) 70.0(2.76) 70.0(2.76) 70.0(2.76) Revision Oct. 2010, IHE0 Chapter 1 Introduction IBLM Series 2. A5 series: IBLM-A51403A, IBLM-A51404A, IBLM-A51406A, IBLM-A51407A 1/3HP 1/2HP 3/4HP 1HP L 116.1(4.57) 171.1(6.74) 177.1(6.97) 182.1(7.17) L1 135.5(5.33) 141.5(5.57) 147.5(5.81) 152.5(8.00) L2 70.0(2.76) 70.0(2.76) 70.0(2.76) 70.0(2.76) L3 53.6(2.11) 99.6(3.92) 99.6(3.92) 99.6(3.92) L4 35.6(1.40) 89.0(3.50) 89.0(3.50) 89.0(3.50) Revision Oct. 2010, IHE0 1-7 Chapter 1 IntroductionIBLM Series 1.4 External Wiring L1 L2 GND G re e n Red B la c k ( R e d ) :S P E E D (B l u e ) :R U N /S T O P (G re e n ): G N D ( Y e l lo w ): F G Fro m top to do w n 1. Red 2 . B lue 3 . G ree n 4 . Y ello w F r o nt v iew d ia gr am P IN P IN 8← 1 P IN P IN P IN R J -4 5 P IN P IN To p r e v e n t d e f o rm d u e t o P IN e x t r u s i o n d u r in g s h i p p in g 1: 2: 3: 4: 5: 6: 7: 8: R e s e rv e d R e s e rv e d R e s e rv e d S GS G+ fo r e x ter na l + 5 V D C GND R e s e rv e d P r ot e ct iv e co v e r Terminal Descriptions Black wire Functions Mains power for the IBLM. AC 230V 1-phase 60Hz. L1 Power Power Terminal Red wire Mains power for the IBLM. AC 230V 1-phase 60Hz. Power Terminal Red color. L2 Green wire GND Earth Ground for IBLM. Connection 1-8 Revision Oct. 2010, IHE0 Chapter 1 Introduction IBLM Series Terminal Descriptions Functions To control the speed by setting Pr.01-00(source of operation/speed command) to 1(external terminals). SPEED Red wire 24VDC: input frequency of PWM pulse signal can be Speed Control 80 to 120Hz and duty cycle= 20% to 95%. When the Terminal duty cycle=20%, it corresponds to Pr.01-05 min. operation frequency. When the duty cycle=95%, it corresponds to Pr.01-04 max. operation frequency. To control the speed by setting Pr.01-00(source of Control Blue wire operation/speed command) to 1(external terminals). RUN/ Start/Stop STOP Control 0VDC: stop running Terminal 24VDC: start running Green wire Common for digital inputs. GND Digital Signal Green color. Common Yellow wire FG Pin1 to 3 Communication Pin 4 Pin 5 FG(Frequency Generation) outputs frequency in Hz Output to show current speed (RPM) as shown in the following diagram. Terminal FG Reserved SG+ for SG+: communication data input Communication SG – for SG -: communication data output Communication Pin 6 +5VDC User needs to input +5VDC for communication power Pin 7 GND +5VDC GND Pin 8 Reserved Revision Oct. 2010, IHE0 1-9 Chapter 1 IntroductionIBLM Series Sp eed (RP M) 150 0 100 0 500 0 100 200 300 400 500 600 700 800 Output F requenc y ( Hz ) FG output frequenc y v s. cor responding speed ( RPM) 1-10 Revision Oct. 2010, IHE0 Chapter 1 Introduction IBLM Series This page intentionally left blank Revision Oct. 2010, IHE0 1-11 Chapter 2 Communication Make sure that the wiring is correct. Verify that no other equipment is connected to the motor. It should be stopped when fault occurs during running. 2.1 How to Use Communication There are two ways to use communication: 1. connect IBLM to human machine interface device, 2. connect IBLM to PC. It needs to connect to PC via VFD-USB01 or IFD8500 converter with Delta software VFDSoft (refer to Appendix B for details). After set-up, please set the communication as follows. 1. Set the communication speed to baud rate 4800 bits/sec 2. Set the communication format to ASCII (8, N, 1). The communication protocol ASCII (American Standard Code for Information Interchange) mode: Each byte data is the combination of two ASCII characters. For example, a 1-byte data: 64 Hex, shown as ‘64’ in ASCII, consists of ‘6’ (36Hex) and ‘4’ (34Hex). 3. ASCII mode: it is hexadecimal. Each character indicates an ASCII code as shown in the following. Character ‘0’ ‘1’ ‘2’ ‘3’ ‘4’ ‘5’ ‘6’ ‘7’ ASCII code 30H 31H 32H 33H 34H 35H 36H 37H Character ASCII code ‘8’ 38H ‘9’ 39H ‘A’ 41H ‘B’ 42H ‘C’ 43H ‘D’ 44H ‘E’ 45H ‘F’ 46H 4. Communication data frame ASCII mode: STX Revision Oct. 2010, IHE0 Start character ‘:’ (3AH) Address Hi Communication address: Address Lo 8-bit address consists of 2 ASCII codes Function Hi Command code: Function Lo 8-bit command consists of 2 ASCII codes 2-1 Chapter 2 Communication IBLM Series DATA (n-1) to Contents of data: Nx8-bit data consist of 2n ASCII codes DATA 0 n<=20, maximum of 40 ASCII codes (20 x 8-bit data) LRC CHK Hi LRC check sum: LRC CHK Lo 8-bit check sum consists of 2 ASCII codes END Hi End characters: END Lo END Hi= CR (0DH), END Lo= LF(0AH) 2.2 Operation Method The operation method can be set via either RS485 interface or external terminals. The source of operation command can be set by parameter 01-00 (source of operation/speed command). When Pr.01-00 is set to 0: the source of operation/speed command is from RS485 interface (refer to Appendix B for details) When Pr.01-00 is set to 1: the source of operation/speed command is from external terminals (refer to following explanation for details) Pin 1: SPE ED (Red) P i n 2 : R U N / S T O P (B lu e ) Pin 3: GND (G re e n ) P in 4: FG P r .0 1 - 0 0 S o u r c e o f o p e r a ti o n / s p e e d c o m m a n d s e t t i n g 1 : o p e r a te d b y e x t e r n a l t e r m i n a l s (Y e llo w ) R S - 4 8 5 c o m m u n i c a t io n P r .0 1 - 0 0 S o u r c e o f o p e r a ti o n / s p e e d c o m m a n d s e t t i n g 0 : o p e r a te d b y R S 4 8 5 c o m m u n i c a ti o n P r .0 1 - 0 A C o m m u n i c a t i o n t i m e - o u t d e t e c t i o n S e t ti n g 0 : d i s a b l e . I t w o n 't e x e c u te t h i s f u n c t i o n . T h e r e fo r e , i t d o e s n 't n e e d to c o n n e c t R S 4 8 5 . 2-2 Revision Oct. 2010, IHE0 Chapter 2 Communication IBLM Series Terminal Descriptions Functions To control the speed by setting Pr.01-00(source of operation/speed command) to 1(external terminals). Red Wire Red wire Speed Control SPEED 24VDC: input frequency of PWM pulse signal can be 80 to 120Hz and duty cycle= 20% to 95%. When the duty cycle=20%, it corresponds to Pr.01-05 min. operation frequency. When the duty cycle=95%, it corresponds to Pr.01-04 Control max. operation frequency. To control the speed by setting Pr.01-00(source of operation/speed command) to 1(external Blue wire RUN/STOP Start/Stop Control terminals). 0VDC: stop running 24VDC: start running Green wire GND Common for digital inputs. Digital Signal Common Green color. Yellow wire FG(Frequency Generation) outputs frequency in Hz to show current speed (RPM) as shown in FG FG Output Terminal the following diagram. Sp eed (RP M) 150 0 100 0 500 0 100 200 300 400 500 600 700 800 Output F requenc y ( Hz ) FG output frequenc y v s. cor responding speed ( RPM) Revision Oct. 2010, IHE0 2-3 Chapter 2 Communication IBLM Series NOTE In the identity code A08B of Pr.00-00, if it shows 0 in A, it means that it is the model with 5 I/O. These 5 I/O external terminals can be used for multi-speed switch. When Pr.01-00 is set to 1 (External terminals), it can switch the speed by setting Pr.02-07 (1st Step Speed/Torque) to Pr.02-0B (5th Step Speed/Torque). 2-4 Revision Oct. 2010, IHE0 Chapter 3 Parameters The IBLM parameters are divided into 5 groups by property for easy setting. In most applications, the user can finish all parameter settings before start-up. The 5 groups are as follows: Group 00: System Parameters Group 01: Basic Parameters Group 02: Multi-Step Speed and Torque Parameters Group 03: Protection Parameters Group 04: Start-up Parameters Revision May 2009, 06EE, V0.50 3-1 Chapter 3 Parameters IBLM Series 3.1 Summary of Parameter Settings : The parameter can be set during operation. Group 00 System Parameters Explanation 00-00 Identity Code of the IBLM Read-only (depend on models) #.## 00-01 Rated Current Display of the IBLM Read-only (depend on models) #.## 00-02 Rate Torque Display Read-only (depend on models) of the IBLM #.## 00-03 Software Version #.## 3-2 Settings Factory Customer Setting Parameter Read-only Revision Oct. 2010, IHE0 Chapter 3 Parameters IBLM Series Group 01 Basic Parameters Parameter 01-00 Explanation Source of Operation/Speed Command 01-01 Communication Address 01-02 Control Mode Settings Factory Customer Setting 0: RS485 communication 1 1: External terminals 1 to 254 1 0: Speed mode 1: Torque mode 0 2: Airflow mode 01-03 Motor Direction Control 0: Forward operation (CCW) (view from motor shaft) 0 1: Reverse operation (CW) 01-04 Max. Operation Speed 80 to 1500 RPM 1050 01-05 Min. Operation Speed 80 to 1500 RPM 150 01-06 Acceleration Time 0.2 to 15.0 sec 5.0 01-07 Deceleration Time 0.2 to 15.0 sec 5.0 01-08 Brake Speed 80 to 1500 RPM 150 01-09 Stop Speed 80 to 1500 RPM 200 01-0A Communication Time-out Detection 0.01 to 8.00 sec (0: disable) 8.00 01-0B Parameter Reset 0: Disable 0 1: All parameters are reset to factory settings 5: Save parameters to EEPROM 01-0C Auto-learning at Start-up 0: Disable 0 1: Execute auto-learning again 2: Execute auto-learning again and again Revision Oct. 2010, IHE0 3-3 Chapter 3 Parameters IBLM Series Group 02: Multi-Step Speed and Torque Parameters Parameter 02-00 Explanation Speed/Torque Command Settings 0 to 250% Factory Customer Setting 100 3 02-01 Airflow Command 0 to 65535 m /H 0 02-02 First Point of Airflow Graph 0 to 65535 m3/H 0 02-03 Second Point of Airflow Graph 0 to 65535 m3/H 0 02-04 Third Point of Airflow Graph 0 to 65535 m3/H 0 02-05 Fourth Point of Airflow Graph 0 to 65535 m3/H 0 02-06 Fifth Point of Airflow Graph 0 to 65535 m3/H 0 02-07 1st Step Speed/Torque 0 to 250% 02-08 2nd Step Speed/Torque 0 to 250% 02-09 3rd Step Speed/Torque 0 to 250% 02-0A 4th Step Speed/Torque 0 to 250% 02-0B 5th Step Speed/Torque 0 to 250% 02-0C Test Speed 0 to 1500 RPM 3-4 0 0 0 0 0 0 Revision Oct. 2010, IHE0 Chapter 3 Parameters IBLM Series Group 03 Protection Parameters Parameter Explanation Settings Factory Customer Setting 00: No fault 01: Over current (oc) 03-00 Present Fault Record 02: Over voltage (ov) 03: Overheat (oH) 04: Overload (oL) 05: Low voltage (Lv) 06: Start-up failure 07: EEPROM error 03-01 Second Most 08: U phase is shorted to P Recent Fault Record 09: U phase is shorted to N 0 10: V phase is shorted to P 11: V phase is shorted to N 12: W phase is shorted to P 03-02 Third Most Recent Fault Record 13: W phase is shorted to N 14: U phase is shorted to V 15: V phase is shorted to W 16: W phase is shorted to U Revision Oct. 2010, IHE0 3-5 Chapter 3 Parameters IBLM Series Group 04: Start-up Parameters Parameter 3-6 Explanation 04-00 Start-up Current 04-01 Reserved 04-02 Reserved Settings Factory Customer Setting 1 to 250% 10 04-03 Reserved 04-04 DC Brake Time 10 to 250 100 04-05 DC Brake Current Level 1 to 250% 10 Revision Oct. 2010, IHE0 Chapter 3 Parameters IBLM Series 3.2 Descriptions of Parameter Settings This parameter can be set during operation. Group 00: System Parameters 00-00 Identity Code of the IBLM Settings Read Only Factory setting: #.## The complete code format is “A08BH” as shown in the following. A 08 B H I d e n ti t y c o d e 1 : 1 /3H P 2.4 A 2 : 1 /2H P 3.6 A 3 : 3 /4H P 5.4 A 4 : 1 H P 7 .2A F ix e d co d e 0 : m o d e l w i t h 5 I /O s 1 : m o d e l w i t h 2 I /O s 00-01 Rated Current Display of the IBLM 00-02 Rated Torque Display of the IBLM Settings Settings Read Only Factory setting: #.## Read Only Factory setting: #.## Parameter 00-00 displays the identity code of the IBLM. The capacity, rated current, rated voltage and the max. carrier frequency relate to the identity code. Users can use the following table to check how the rated current, rated voltage and max. carrier frequency of the IBLM correspond to the identity code. Parameter 00-01 displays the rated current of the IBLM. By reading this parameter the user can check if the IBLM is correct. kW 0.25 0.4 0.75 0.25 0.4 0.6 0.75 HP 1/3 1/2 3/4 1 1/3 1/2 3/4 1 Pr.00-00 0081 0082 0083 0084 1081 1082 1083 1084 Rated Current 2.4 3.6 5.4 7.2 2.4 3.6 5.4 7.2 Rated Torque 2.28 3.55 5.10 6.76 2.28 3.55 5.10 6.76 Max. Carrier Frequency 00-03 0.6 15kHz Software Version Settings Read Only Display #.## Revision Oct. 2010, IHE0 3-7 Chapter 3 Parameters IBLM Series This parameter can be set during operation. Group 01: Basic Parameters 01-00 Source of Operation/Speed Command Factory Setting: 1 Settings RS485 communication 1 External terminals This parameter is set the source of operation and speed command. 01-01 Communication Address Settings 0 1 to 254 Factory Setting: 1 If the IBLM is controlled by RS-485 serial communication, the communication address for this drive must be set via this parameter. And the communication address for each IBLM must be different and unique. Address (Communication Address) 00H: broadcast to all drives 01H: drive of address 01 0FH: drive of address 15 10H: drive of address 16 : FEH: drive of address 254 ASCII mode: STX Address Hi Address Lo Function Hi Function Lo DATA (n-1) to DATA 0 3-8 Start character ‘:’ (3AH) Communication address: 8-bit address consists of 2 ASCII codes Command code: 8-bit command consists of 2 ASCII codes Contents of data: Nx8-bit data consist of 2n ASCII codes n<=20, maximum of 40 ASCII codes (20 x 8-bit data) LRC CHK Hi LRC check sum: LRC CHK Lo 8-bit check sum consists of 2 ASCII codes END Hi End characters: END Lo END Hi= CR (0DH), END Lo= LF(0AH) Revision Oct. 2010, IHE0 Chapter 3 Parameters IBLM Series Function (Function code) and DATA (data characters) The format of data characters depends on the function code. 03H: read data from register 06H: write single register 08H: loop detection The available function codes and examples for IBLM are described as follows: (1) 03H: multi read, read data from registers. Example: reading continuous 2 data from register address 2102H, drive address is 01H. ASCII mode: Command message: STX Address Function Starting data address Number of data (count by word) LRC Check END Response message: ‘:’ ‘0’ ‘1’ ‘0’ ‘3’ ‘2’ ‘1’ ‘0’ ‘2’ ‘0’ ‘0’ ‘0’ ‘2’ ‘D’ ‘7’ CR LF STX Address Function Number of data (Count by byte) Content of starting address 2102H Content of address 2103H LRC Check END ‘:’ ‘0’ ‘1’ ‘0’ ‘3’ ‘0’ ‘4’ ‘1’ ‘7’ ‘7’ ‘0’ ‘0’ ‘0’ ‘0’ ‘0’ ‘7’ ‘1’ CR LF (2) 06H: single write, write single data to register. Example: writing data 6000(1770H) to register 0100H. drive address is 01H. ASCII mode: Command message: STX ‘:’ ‘0’ Address ‘1’ ‘0’ Function ‘6’ ‘0’ ‘1’ Data address ‘0’ ‘0’ Data content ‘1’ ‘7’ ‘7’ Revision Oct. 2010, IHE0 Response message: STX ‘:’ ‘0’ Address ‘1’ ‘0’ Function ‘6’ ‘0’ ‘1’ Data address ‘0’ ‘0’ Data content ‘1’ ‘7’ ‘7’ 3-9 Chapter 3 Parameters IBLM Series Command message: ‘0’ ‘7’ LRC Check ‘1’ CR END LF Response message: ‘0’ ‘7’ LRC Check ‘1’ CR END LF Address list The contents of available addresses are shown as below: Content Address Parameters GGnnH Function GG means parameter group, nn means parameter number, for example, the address of Pr 04-01 is 0401H. 00B: No function Bit 0-1 01B: Stop 10B: Run 11B: No function Bit 2-3 Reserved 2000H 00B: No function Bit 4-5 Command Bit 6-15 2001H 2002H 2003H Read only 10B: No function 11B: Change direction Write only Status monitor 01B: No function No function Reserved Bit 0 No function Bit 1 1: Reset Bit 2-15 Reserved Test mode command Error code: 2100H 00: No fault 01: Over current (oc) 02: Over voltage (ov) 03: Overheat (oH) 04: Overload (oL) 05: Low voltage (Lv) 06: Start-up failure 3-10 Revision Oct. 2010, IHE0 Chapter 3 Parameters IBLM Series Content Address Function 07: Reserved 08: U phase is shorted to P 09: U phase is shorted to N 2100H 10: V phase is shorted to P 11: V phase is shorted to N 12: W phase is shorted to P 13: W phase is shorted to N 14: U phase is shorted to V 15: V phase is shorted to W 16: W phase is shorted to U Status of AC drive 00: RUN LED is off, STOP LED is on (IBLM stops) 01: RUN LED blinks, STOP LED is on (When IBLM decelerates to stop) Bit 0-1 10: RUN LED is on, STOP LED blinks (When IBLM is standby) 11: RUN LED is on, STOP LED is off (When IBLM runs) 2101H Bit 2 Reserved Bit 3-4 00: FWD LED is on, REV LED is off (When IBLM runs forward) 01: FWD LED is on, REV LED blinks (When IBLM runs from reverse to forward) 10: FWD LED blinks, REV LED is on (When IBLM runs from forward to reverse) 11: FWD LED is off, REV LED is on (When IBLM runs reverse) Bit 5-15 Reserved 2102H Output speed (rpm) 2103H Feedback speed (rpm) 2104H Output current (A) 2105H DC BUS voltage (VDC) 2106H IGBT temperature (oC) Revision Oct. 2010, IHE0 3-11 Chapter 3 Parameters IBLM Series Content Address 2107H Function Communication Fault Code 01: Illegal function code 02: Illegal data address 03: Illegal data value 04: illegal command 06: Check sum error 09: Data length error 10: Frame error 2108H Torque command (%) 2109H Torque feedback (%) 210AH 01-02 Software information Control Mode Factory Setting: 0 Settings 0 Speed mode 1 Torque mode 2 Airflow mode When setting to 0: user can give the speed command by requirement to control speed. When setting to 1: user can give the torque command by requirement to control torque. When setting to 2: user can execute airflow control by requirement. 01-03 Motor Direction Control Factory Setting: 0 Settings 0 Forward operation (CCW) (view from motor shaft) 1 Reverse operation (CW) This parameter is used to enable one direction of rotation of the IBLM direction of rotation to prevent damage due to operation errors. M o t o r d ire ct io n S e t to 0 : C o u n te r c l o c k w is e (C C W ) 01-04 3-12 Maximum Operation Speed V i e w fr o m m o t o r s h a f t Unit: rpm Revision Oct. 2010, IHE0 Chapter 3 Parameters IBLM Series Settings 80 to 1500 RPM This parameter determines the IBLM’s Maximum Output Speed. 01-05 Unit: rpm Minimum Operation Speed Settings Factory Setting: 1050 80 to 1500 RPM Factory Setting: 150 This parameter determines the IBLM’s Minimum Output Speed. 01-06 Acceleration Time Unit: second 01-07 Deceleration Time Unit: second Settings 0.2 to 15.0 sec Factory Setting: 5.0 The Acceleration Time is used to determine the time required for the IBLM to accelerate from Minimum Operation Speed (Pr.01-05) to Maximum Operation Speed (Pr.01-04). The Deceleration Time is used to determine the time required for the IBLM to decelerate from the Maximum Operation Speed (Pr.01-04) down to Minimum Operation Speed (Pr.01-05). If the setting of the deceleration time is too short, it may cause over-current during deceleration or over voltage of the IBLM and damage the motor or trigger the protection function. The definition of acceleration/deceleration time is shown as follows. 01-04 Max imum Speed operation speed 02-00 S peed/torque command 01-05 Mi nimum operation speed 01-08 Brake Speed Settings 01-09 80 to 1500 RPM Stop Speed Settings Time accel. ti me decel. time 01-06 01-07 Acc eleration/deceler ation time 80 to 1500 RPM Unit: rpm Factory Setting: 150 Unit: rpm Factory Setting: 200 When IBLM receives a STOP command, the IBLM will decelerate by the setting of Pr.01-07 until the speed reaches Pr.01-08 and feedback speed (calculated from internal IBLM) is less than Pr.01-09. Then, it will free run to stop. Revision Oct. 2010, IHE0 3-13 Chapter 3 Parameters IBLM Series F ree r un to stop Stop acc ording to deceleration time Output Speed 01-08 Br ak e Speed 01-09 Stop Speed Time Oper ation Command F ree r un to stop Stop acc ording to deceleration time Speed F eedback STO P RU N Oper ation Command Time RUN STO P Br ak e Speed v s. Stop Speed 01-0A Communication Time-out Detection Settings 0.01 to 8.00 sec (0: disable) Unit: second Factory Setting: 8.00 After executing RUN command, it will start to detect. If there is no communication data during the communication time-out detection (set by Pr.01-0A), the motor will deceleration by Pr.0107 deceleration time. This parameter is only valid when Pr.01-00(source of operation/speed command) is set to 0 (RS485 communication). 01-0B Parameter Reset Factory Setting: 0 Settings 0 Disable 1 All parameters are reset to factory settings 5 Save parameters to EEPROM When the parameter settings are abnormal, all parameters can be reset to factory setting by setting Pr.01-0B to 1. When Pr.01-0B is set to 5, it can save all parameters to EEPROM to prevent parameter settings loss during power failure. Pleaser notice that Pr.01-0B will be reset to 0 after saving parameter settings in EEPROM as Pr.01-0B is set to 5. Therefore, it needs to set Pr.01-0B to 5 whenever you want to save parameters in EEPROM. 3-14 Revision Oct. 2010, IHE0 Chapter 3 Parameters IBLM Series 01-0C Auto-learning at Start-up Factory Setting: 0 Settings 0 Disable 1 Execute auto-learning again 2 Execute auto-learning again and again The start-up fails if it fails to try the current from the start-up current to max. start-up current. It will try from the min. current to max. current until start-up successfully. If it changes the setting from 1 or 2 to 0, the original trial value will be reset to the factory setting. Revision Oct. 2010, IHE0 3-15 Chapter 3 Parameters IBLM Series Group 02: Multi-Step Speed and Torque Parameters 02-00 This parameter can be set during operation. Unit: % Speed/Torque Command Settings 0 to 250% Factory Setting: 100 This parameter is used to set the speed and torque command. When Pr.01-02 (control mode) is set to 0(speed mode) or 2(torque mode), it can set speed command and torque command by this parameter or change parameters from Pr.02-07 1st Step Speed/Torque to Pr.02-0B 5th Step Speed/Torque via external terminal. 02-01 Airflow Command Unit: m3/H 02-02 First Point of Airflow Graph Unit: m3/H 02-03 Second Point of Airflow Graph Unit: m3/H 02-04 Third Point of Airflow Graph Unit: m3/H 02-05 Fourth Point of Airflow Graph Unit: m3/H 02-06 Fifth Point of Airflow Graph Unit: m3/H 3 Factory Setting: 0 Settings 0 to 65535 m /H When Pr.01-02(control mode) is set to 1(airflow mode), it needs to set Pr.02-01 airflow command, 5 points of airflow graph (Pr.02-02 to Pr.02-06) and multi-step speed/torque (Pr.0207 to Pr.02-0B) to control airflow. 02-07 1st Step Speed/Torque Unit: % 02-08 2nd Step Speed/Torque Unit: % 02-09 3rd Step Speed/Torque Unit: % 02-0A 4th Step Speed/Torque Unit: % 02-0B 5th Step Speed/Torque Unit: % Settings 0 to 250% Factory Setting: 0 In the identity code A08B of Pr.00-00, if it shows 0 in A, it means that it is the model with 5 I/O. These 5 I/O external terminals can be used for multi-speed switch. When Pr.01-00 is set to 1 (External terminals), it can switch the speed by setting Pr.02-07 (1st Step Speed/Torque) to Pr.02-0B (5th Step Speed/Torque). 02-0C Test Speed Settings 3-16 Unit: rpm 0 to 1500 RPM Factory Setting: 0 Revision Oct. 2010, IHE0 Chapter 3 Parameters IBLM Series This speed is used to get the 5 points of airflow graph (Pr.02-02 to Pr.02-06) and multi-step speeds/torque (Pr.02-07 to Pr.02-0B). Revision Oct. 2010, IHE0 3-17 Chapter 3 Parameters IBLM Series Group 03: Protection Parameters 03-00 Present Fault Record 03-01 Second Most Recent Fault Record 03-02 Third Most Recent Fault Record This parameter can be set during operation Factory Setting: 0 Displays 3-18 Descriptions 00 No fault 01 Over-current (oc) 02 Over-voltage (ov) 03 Overheat (oH) 04 Overload(oL) 05 Low voltage (Lv) 06 Start-up failure 07 EEPROM error 08 U phase is shorted to P 09 U phase is shorted to N 10 V phase is shorted to P 11 V phase is shorted to N 12 W phase is shorted to P 13 W phase is shorted to N 14 U phase is shorted to V 15 V phase is shorted to W 16 W phase is shorted to U Revision Oct. 2010, IHE0 Chapter 3 Parameters IBLM Series Group 04: Start-up Parameters 04-00 Unit: % Speed/Torque Command Settings This parameter can be set during operation. 1 to 250% Factory Setting: 10 This parameter is used to set the start-up current according to motor nameplate. The factory setting is 10% drive rated current. 04-01 Reserved 04-02 Reserved 04-03 Reserved 04-04 Settings Unit: sec DC Brake Time 0.10 to 2.50 sec Factory Setting: 1.00 This parameter is used to set the continuous time to put the DC brake current into motor at drive start-up. 04-05 Unit: % DC Brake Current Level Settings 1 to 250% Factory Setting: 10 This parameter sets the level of DC brake current output to the motor during start-up. When setting DC Brake Current, the Rated Current (Pr.00-01) is regarded as 100%. It is recommended to start with a low DC Brake Current Level and then increase until proper holding torque has been achieved. Please NOTE that the DC Brake Current Level can’t exceed the motor rated current to prevent motor damage. Revision Oct. 2010, IHE0 3-19 Chapter 3 Parameters IBLM Series This page intentionally left blank 3-20 Revision Oct. 2010, IHE0 Appendix A Specifications All IBLM series are 230V 1-phase models. It is divided into A3 and A5 series with power range 1/3 to 1HP. Refer to the following specifications for details. A3 Series Voltage Class Model Number IBLM-A314_ _A Max. Applicable Motor Output (kW) Output Rating Rated Output Torque (Nm/oz-ft) Input Rating Max. Applicable Motor Output (hp) Rated Input Current (A) 230V Class 03 04 06 07 0.25 0.4 0.6 0.75 1/3 1/2 3/4 1 2.28 3.55 5.10 6.76 Maximum Output Voltage (V) 242V 1-phase Proportional to the Input Voltage 60Hz Output Speed (RPM) 1~1500 RPM Carrier Frequency (kHz) 15 2.4 3.6 5.4 7.2 10%(198~242V) Voltage Tolerance 5%(47~63 Hz) Frequency Tolerance Cooling Method Natural Cooling Control Method Fixed airflow Enclosure Rating IP20 Efficiency (%) 85.9% at 1,050rpm/80 oz-ft A5 Series Voltage Class Model Number IBLM-A514_ _A Max. Applicable Motor Output (kW) Input Rating Output Rating Max. Applicable Motor Output (hp) Rated Output Torque (Nm/oz-ft) 230V Class 03 04 06 07 0.25 0.4 0.6 0.75 1/3 1/2 3/4 1 2.28 3.55 5.10 6.76 Maximum Output Voltage (V) 242V 1-phase Proportional to the Input Voltage 60Hz Output Speed (RPM) 1~1500 RPM Carrier Frequency (kHz) Rated Input Current (A) Voltage Tolerance Frequency Tolerance 15 2.4 3.6 5.4 5%(47~63 Hz) Cooling Method Natural Cooling Control Method Fixed torque Enclosure Rating Efficiency (%) Revision Oct. 2010, IHE0 7.2 10%(198~242 V) IP54 83.5% at 1,050rpm/16.1 oz-ft A-1 Appendix A Specifications IBLM Series General Specifications Control Characteristics Control System 1 RPM Output Speed Resolution 1 RPM Torque Characteristics Overload Endurance Operating Characteristics Accel/Decel Time 150% of rated current for 1 minute 0.2 to 15 seconds Communication By RS-485 External Signal By external terminals Operation Setting Signal Communication By RS-485 External Signal By external terminals Built-in Functions Environmental Conditions Starting torque can be 150% rated torque at 80RPM Speed Setting Protection Functions A-2 Sensorless Speed Setting Resolution Pollution Degree Installation Location Over voltage, over current, low voltage, motor overload, ground fault, drive overload and drive overheating Built-in AVR, 3 fault records, forward/reverse operation setting, output speed upper/lower limits, parameter reset, abnormal reset 2 Altitude 1,000 m or lower, indoor/outdoor (keep from corrosive gasses, liquid and dust) Ambient Temperature -40oC to 60oC (40oC for side-by-side mounting) Non-Condensing and not frozen Storage Temperature -40 oC to 70 oC Ambient Humidity Vibration 0 to 100% RH (non-condensing) 9.80665m/s2 (1G) less than 20Hz, 5.88m/s2 (0.6G) at 20 to 50Hz Revision Oct. 2010, IHE0 Appendix B VFD PC Software Make sure that the wiring is correct. Verify that no other equipment is connected to the motor. Do NOT operate with humid hands. It should be stopped when fault occurs during running. B.1 Installation Step 1. Please download the installation file from Delta’s website: http://www.delta.com.tw/ Step 2. Please execute the installation file by double clicking on the icon Step 3. Detecting system information Revision Oct. 2010, IHE0 B-1 Appendix B VFD PC Software IBLM Series Step 4. This is a welcome dialogue box; please click to continue this installation process. Step 5. If you want to change the folder’s installation destination, please click to go to step 6; or click B-2 to go to step 7. Revision Oct. 2010, IHE0 Appendix B VFD PC Software IBLM Series Step 6. Please select a destination folder according to your preference. Step 7. Ready to install, please click Revision Oct. 2010, IHE0 to continue if all settings are OK. B-3 Appendix B VFD PC Software IBLM Series Step 8. It’s installing Step 9. This installation has been completed; please click B-4 to end this program. Revision Oct. 2010, IHE0 Appendix B VFD PC Software IBLM Series B.2 How to uninstall 1. Open executable file 2. If you really want to uninstall, please click 3. Uninstalling Revision Oct. 2010, IHE0 B-5 Appendix B VFD PC Software IBLM Series B.3 Communication Method 1. Before connecting a PC to IBLM, it needs to prepare RS485/232/USB converter, RS232 cable or USB cable to connect to IBLM via RJ45. Figure 1 RJ45 connector 2. The IBLM is connected to a PC via RS485/232/USB converter. In RS485(RJ45), PIN6 must be +5VDC external power and PIN7 must be grounded as shown in the following. 1: Reserv ed 2: Reserv ed 3: Reserv ed R J-4 5 4: SG 5: SG + R S- 485 6: +5V s erial inte rfa ce 7: G ND 8 1 8: Reserv ed Figure 2 3. After executing VFDSoft, you’ll get the following display (figure 3). It’ll display figure 4 after pressing “Advance”. Figure 3 B-6 Revision Oct. 2010, IHE0 Appendix B VFD PC Software IBLM Series Figure 4 VFD Soft - Adva nce 4. After pressing “Protocol” button, you’ll get the following display for communication setting and test. Figure 5 VFDSoft - Prot ocol Revision Oct. 2010, IHE0 B-7 Appendix B VFD PC Software IBLM Series Figure 6 Communuication settings 5. Please set COM port and protocol correctly. In the baudrate and protocol, please set it to “Manual” and “ASCII, 4800, 8, N, 1”. Then pressing successful communication connection with connecting to drive. If it displays for communication test. After , please press for after communication test, please check if there is anything wrong in communication port or wiring. B-8 Revision Oct. 2010, IHE0 Appendix B VFD PC Software IBLM Series B.4 Communication Operation 1. Monitor Drive Status Step 1. Input the suitable command in the field of “Input any data to send” (please refer to Pr.01-01: communication address). Then, press on the right of the field to execute this command. Step 2. Please choose “Others”. Step 3. Press Step 4. The status after drive start-up will be displayed in this area. Revision Oct. 2010, IHE0 B-9 Appendix B VFD PC Software IBLM Series 2. After pressing “label B”, it will show the following display. Step 1. Input the communication command into “Command to Send” (refer to Pr.01-01) Step 2. You can choose check or not in the front square Step 3. Then it’ll execute those commands with . after pressing . Step 4. If inputting “1” into the field “Repeat times”, it means that it will execute after pressing B-10 items . Revision Oct. 2010, IHE0 Appendix B VFD PC Software IBLM Series 3 4 2 1 NOTE Example: 010602070014, 010601060032, 010601070032 06: write command (03: read command) 0207: parameter position (1st step speed/torque setting) 0106: acceleration time setting 0107: deceleration time setting 0014=1*16+4*1=20% for 1st step speed/torque setting 0032=3*16+2=50*0.1=5.0 sec for acceleration/deceleration time (because it has a decimal place setting, it needs to *0.1) Step 5. It can return to the display of “Monitor Drive Status” by pressing “A”. Input the suitable command in the field of “Input any data to send” (please refer to Pr.01-01: communication address). Then, press on the right of the field to execute this command. Revision Oct. 2010, IHE0 B-11 Appendix B VFD PC Software IBLM Series B-12 Revision Oct. 2010, IHE0