1
Connecting the ioSafe Solo G3
1.
2.
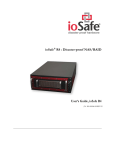
Connect. Use the supplied USB 3.0/2.0 cable to connect the Solo G3 to a computer port.
Verify that the Drive Mounts. Before storing data on the ioSafe Solo G3, the drive must
be “mounted” (physically connected and recognized by the OS) to the computers
operating system.
For Windows PC, once the ioSafe Solo G3 is connected, you will see a blue light on the drive
and the drive should mount in a few moments. A new drive icon/letter will appear on
the desktop or in My Computer/Windows Explorer.
For Mac, once the ioSafe Solo G3 for Mac is powered on the operating system should mount
the drive in a few moments. A new drive icon will appear on the Desktop and in the
Finder. The ioSafe Solo G3 not specifically “for Mac” should be reformatted for the Mac
OS (See page 17 - Formatting the ioSafe Solo G3 for Mac OS).
3.
The ioSafe Solo G3 is ready to use. Save or drag and drop files to the drive as you would
4.
Or select the ioSafe Solo G3 as the backup target for any automated backup target
to any other drive attached to your computer.
program (like Genie Timeline for PC or Time Machine for Mac)
15