1
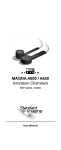
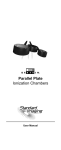
A3 / A4 / A5 / A6 Spherical
Ionization Chambers
REF 92717 / 92715 / 92724 / 92716
R
User Manual
WWW.
.COM
A3 / A4 / A5 / A6 Spherical
Ionization Chambers
REF 92717 / 92715 / 92724 / 92716
STANDARD IMAGING INC.
7601 Murphy Drive
Middleton, WI 53562-2532
Feb / 2005 ©2005 Standard Imaging Inc.
DOC #80360-03
TEL 800.261.4446
TEL 608.831.0025
FAX 608.831.2202
General Precautions
Warnings and Cautions alert users to dangerous conditions that can occur if instructions in the manual are
not obeyed. Warnings are conditions that can cause
injury to the operator, while Cautions can cause damage to the equipment.
!
WARNING:
Electrical shock hazard when connected to 300
V bias supply.
!
CAUTION:
Proper use of this device depends on careful
reading of all instructions and labels.
!
CAUTION:
Do not drop, mishandle, or disassemble unit
since it may result in change of calibration factor, or damage. Refer all servicing to qualified
individuals.
!
CAUTION:
Do not sharply bend triax cable. Damage to the
cable may result in high leakage currents.
4
Table of Contents
PAGE
4
5
6
7
11
12
13
14
General Precautions
General Operation
Parts and Accessories
Features and Specifications
Service Notes
Service Policy
Customer Responsibility
Warranty
7601 MURPHY DRIVE
MIDDLETON, WI 53562-2532 USA
WWW.STANDARDIMAGING.COM
General Operation
The Exradin A3 and A4 Spherical Chambers are attached
to a 1.5 m length of low-noise flexible triaxial cable that is
terminated by a triaxial or coaxial connector. The Exradin
A5 and A6 Spherical Chambers utilize the exact same triaxial cable, however, it is only 22.9 cm long and concealed
inside the chamber’s stem. The cable is terminated by the
triaxial connector mounted directly to the end of the stem.
In either case, the collector of the chamber is common
with the center wire of the cable and the center contact of
the connector. The guard is common with the inner cable
braid and the middle connector contact in the case of triaxial
connectors, and the connector body in the case of coaxial
connectors. The shell (outer electrode), usually ground, is
common with the outer braid of the cable and the connector body in the case of triaxial connectors, and the pigtail
extending out the rear of coaxial connectors.
Operating Instructions
1. With nothing connected to the input jack of the electrometer, turn the power on and wait at least 15 minutes
for warm up.
2. Verify the leakage of the electrometer is within the
manufacturer’s stated acceptable limits.
3. Connect the ionization chamber to the electrometer and
apply 100% voltage bias.
4. Allow the electrometer and ionization chamber system at
least 10 minutes to stabilize, making certain that all cabling
is lying flat and unkinked.
5
General Operation Continued
5. Verify the leakage of the ionization chamber is within the
manufacturer’s stated acceptable limits. If measured in the
presence of background sources, note that this signal will
add to the leakage of the chamber.
6. Some electrometers, such as the Standard Imaging
MAX-4000 Electrometer, allow the user to zero the device
at any time. If desired, perform this system zeroing now.
7. Check the system leakage. Take a reading without exposing the chamber to radiation. This reading should be
less than 0.1% of the final signal expected. If it is not, the
leakage should be subtracted from the signal.
8. Measure atmospheric temperature and pressure. For
well chambers, measure the temperature in the well of
the chamber.
9. Insert the ion chamber and take at least 3 measurements.
Generally, the measurements should not be moving in only
one direction (i.e. three readings that continue to drop and
hence may not yet be stabilized). If a current measurement
is done, allow sufficient time for value to stabilize.
10. Analyze the data taking into account the average
of the readings, system leakage, temperature/pressure
corrections, calibration factors and any other appropriate
corrections to be made. Keep in mind that the calibration
factor consists of the electrometer calibration and the ionization chamber calibration factor.
11. When all measurements are completed, set bias voltage to 0 VDC, turn off the electrometer and disconnect the
ionization chamber.
Parts and Accessories
REF
Description
72106
72107
72108
72109
72110
72111
72113
70004
A3 Co-60 Buildup Cap, 2.3 mm, C552
A3 Buildup Cap, 5.6 mm, Delrin
A3 Buildup Cap, 8.5 mm, Delrin
A3 Buildup Cap, 11.5 mm, Delrin
A4 Co-60 Buildup Cap, 2.0 mm, C552
A4 Buildup Cap, 11.0 mm, Delrin
A5 Buildup Cap, 8.5 mm, Delrin
10 m Triaxial Extension Cable - BNC
connectors with protective caps
6
Features and Specifications
MODEL
R
mm
r
mm
w
mm
D
mm
A3
A4
A5
A6
9.7
19.1
28.4
57.2
1.0
2.0
3.0
5.8
0.25
0.50
3.0
3.0
7.9
9.5
15.9
22.2
Calibration
Stem Collecting Factor*
Diameter Volume
R/nC
mm
cc
(nominal)
7.9
9.5
15.9
15.9
3.6
30
100
800
0.9
0.09
0.03
0.004
*nominal calibration factors for energies greater than 200 keV
Collecting Volume:
Collector Diameter:
Shell Wall Thickness:
Shell, Collector, and Guard
Material:
Stem (A3 & A4):
Stem (A5 & A6):
Waterproof:
Venting:
Buildup Caps Available:
Connector:
Low-Noise Triaxial Cable:
Nominal Inherent Leakage
Currents:
Maximum Polarizing
Potential:
Temperature Range:
Humidity Range:
Pressure:
See table
2r (see table for values of r)
w (see table for values of w)
Shonka air-equivalent plastic
C552
Black phenolic; see table for
diameters; length is 22.9 cm; not
removable
Delrin; see table for diameters;
length is 22.9 cm; not removable
No; this sort of chamber is not
used in water
Two holes, open to the ambient,
are located on the neck of the
chamber
A3 – 2.3 mm wall C552 (Co-60),
5.6 mm wall Delrin, 8.5 mm wall
Delrin, 11.5 mm wall Delrin
A4 – 2.0 mm wall C552 (Co-60),
11.0 mm wall Delrin
A5 – 8.5 mm wall Delrin
A6 – None
Triaxial BNC Plug (2-Lug Male)
and protective cap connected by
chain (standard); others available
upon request
1.5 m long (A3 & A4 only); 50
ohms; 29 pF/ft
10-15 A
1000 V
15-32 oC
20-80%, non-condensing
650 to 770 mm Hg
7
Features and Specifications
Recommended Bias for
Chamber Use:
Nominal Collection
Efficiency:
Product Standards:
1
Designed to Meet
A3 - 300V
A4 - 500V
A5 - 800V
A6 - 1000V
100% at recommended bias
IEC 60601-11
8
Notes
9
Notes
10
Service Notes
Buildup Caps
To remove buildup caps from these ionization chambers,
use the following procedure: Hold the buildup cap in one
hand, allowing the chamber handle to hang freely. Insert
a small screwdriver or similar tool into the neck hole and
simply pry the cap open. The prying force is to act between
the cap and handle. In this manner, buildup caps are readily removed without stressing the chamber proper. It is
important that the handle is not held while opening buildup
caps. Hold chamber by cap and permit handle to respond
freely to prying force.
Stem
The stem is an integral part of the ionization chamber
assembly and is not to be removed under any circumstances.
Venting
The chamber volume is vented to the ambient via (2) vent
holes located on the neck of the shell.
!
Service and Maintenance
There are no user-serviceable parts within these
ionization chambers. Under no circumstance should
the user attempt to repair or disassemble the chamber
and/or connector, as the warranty will become void
and the calibration factor will change. Under normal
use, the chambers should provide years of troublefree service.
If assistance is desired in the proper disposal of this
product (including accessories and components), after
its useful life, please return to Standard Imaging.
11
Service Policy
If service, including recalibration, is required, please contact Standard Imaging’s Customer Service department by
phone or email prior to shipping the product. Standard
Imaging’s Customer Service and Technical Service staff will
attempt to address the product issue via phone or email. If
unable to address the issue, a return material authorization (RMA) number will be issued. With the RMA number,
the product can be returned to Standard Imaging. It is the
responsibility of the customer to properly package, insure
and ship the product, with the RMA number clearly identified on the outside of the package. The customer must
immediately file a claim with their carrier for any shipping
damage or lost shipments. Return shipping and insurance
is to be pre-paid or billed to the customer, and the customer
may request a specific shipper. Items found to be out of
warranty are subject to a minimum service fee of 1 hour
labor (excluding recalibrations) for diagnostic efforts and
require a purchase order (PO) before service is performed.
With concurrence from customer, the product may be replaced if it is unserviceable or if the required service is
cost prohibitive. Products incurring service charges may
be held for payment. Standard Imaging does not provide
loaner products. See the Standard Imaging Warranty and
Customer Responsibility for additional information.
12
Customer Responsibility
This product and its components will perform properly and
reliably only when operated and maintained in accordance
with the instructions contained in this manual and accompanying labels. A defective device should not be used.
Parts which may be broken or missing or are clearly worn,
distorted or contaminated should be replaced immediately
with genuine replacement parts manufactured by or made
available from Standard Imaging Inc.
!
CAUTION: Federal law in the U.S.A. and Canadian law restrict the sale, distribution, or
use of this product to, by, or on the order of a
licensed medical practitioner. The use of this
product should be restricted to the supervision
of a qualified medical physicist. Measurement of
high activity radioactive sources is potentially
hazardous and should be performed by qualified personnel.
Should repair or replacement of this product become
necessary after the warranty period, the customer should
seek advice from Standard Imaging Inc. prior to such repair or replacement. If this product is in need of repair, it
should not be used until all repairs have been made and
the product is functioning properly and ready for use. After
repair, the product may need to be calibrated. The owner
of this product has sole responsibility for any malfunction
resulting from abuse, improper use or maintenance, or
repair by anyone other than Standard Imaging Inc.
The information in this manual is subject to change without
notice. No part of this manual may be copied or reproduced
in any form or by any means without prior written consent
of Standard Imaging Inc.
13
Warranty
Standard Imaging, Inc. sells this product under the warranty herein
set forth. The warranty is extended only to the buyer purchasing
the product directly from Standard Imaging, Inc. or as a new product
from an authorized dealer or distributor of Standard Imaging, Inc.
For a period provided in the table below from the date of original delivery to
the purchaser or a distributor, this Standard Imaging, Inc. product, provided
in the table is warranted against functional defects in design, materials and
workmanship, provided it is properly operated under conditions of normal
use, and that repairs and replacements are made in accordance herewith.
The foregoing warranty shall not apply if the product has been altered,
disassembled or repaired other than by Standard Imaging, Inc. or if the
product has been subject to abuse, misuse, negligence or accident.
Product
Standard Imaging
Ionization Chambers
Standard Imaging Well
Chambers
Standard Imaging
Electrometers
Standard Imaging
Software Products
All Other Standard
Imaging Products
Standard Imaging
Custom Product
Consumables
Serviced Product
Resale Products
ADCL Product
CalibrationADCL
Product Calibration
(Standard Imaging
uses the UW-ADCL
for recalibrations
required under warranty)
Warranty Period
2 years
2 years
2 years
1 year
1 year
90 days
90 days
90 days
As defined by the Original Equipment Manufacturer
0 - 90 days = 100% of ADCL Calibration Costs
91 - 182 days = 75% of ADCL Calibration Costs
183 – 365 days = 50% of ADCL Calibration Costs
366 – 639 days = 25% of ADCL Calibration Costs
(days from date of shipment to customer)
Standard Imaging’s sole and exclusive obligation and the purchaser’s sole
and exclusive remedy under the above warranties are, at Standard Imaging’s option, limited to repairing, replacing free of charge or revising labeling
and manual content on, a product: (1) which contains a defect covered by
the above warranties; (2) which are reported to Standard Imaging, Inc. not
later than seven (7) days after the expiration date of the warranty period in
the table; (3) which are returned to Standard Imaging, Inc. promptly after
discovery of the defect; and (4) which are found to be defective upon examination by Standard Imaging Inc. Transportation related charges, (including,
but not limited to shipping, customs, tariffs, taxes, and brokerage fees) to
Standard Imaging are the buyer’s responsibility. This warranty extends to
every part of the product except consumables (fuses, batteries, or glass
breakage). Standard Imaging, Inc. shall not be otherwise liable for any
damages, including but not limited to, incidental damages, consequential
damages, or special damages. Repaired or replaced products are warranted for the balance of the original warranty period, or at least 90 days.
This warranty is in lieu of all other warranties, express or implied,
whether statutory or otherwise, including any implied warranty of fitness for a particular purpose. In no event shall Standard Imaging,
Inc. be liable for any incidental or consequential damages resulting
from the use, misuse or abuse of the product or caused by any defect,
failure or malfunction of the product, whether a claim of such damages is based upon the warranty, contract, negligence, or otherwise.
This warranty represents the current standard warranty of Standard
Imaging, Inc. Please refer to the labeling or instruction manual of your
Standard Imaging, Inc. product or the Standard Imaging, Inc. web page
for any warranty conditions unique to the product.
14