Download Manual - Teclime ApS
Transcript
Manual
TDF-2511/3011/4011
TDF-2511 Inox
TFF-4011
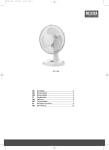
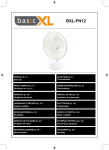
Electric fan
Elektrisk fläkt
SE
GB
ANVÄNDARHANDBOK
USER MANUAL
Feiyue Group Europé Aps
Sundsholmen 14
DK 9400 Nørresundby, Denmark
Bruksanvisning (SE)..................................................................................................................................................................... 3
1. Specifikation .............................................................................................................................................................................. 3
2. Konstruktion ............................................................................................................................................................................. 4
TDF-2511 .......................................................................................................................................................................... 4
TDF-3011/4011 ................................................................................................................................................................. 4
TDF 2511 Inox .................................................................................................................................................................. 5
TFF-4011 .......................................................................................................................................................................... 5
3. Användning ................................................................................................................................................................................ 6
4. Säkerhetsvarning ..................................................................................................................................................................... 6
5. Rengöring ................................................................................................................................................................................... 7
6. Garantivillkor ............................................................................................................................................................................ 7
7. Miljöskydd .................................................................................................................................................................................. 7
Directions for Use (GB) ............................................................................................................................................................... 8
1. Specification............................................................................................................................................................................... 8
2. Components ............................................................................................................................................................................... 9
TDF-2511 .......................................................................................................................................................................... 9
TDF-3011/4011 ................................................................................................................................................................. 9
TDF 2511 Inox ................................................................................................................................................................ 10
TFF-4011 ........................................................................................................................................................................ 10
3. Operation instruction........................................................................................................................................................... 11
4. Safety warnings ...................................................................................................................................................................... 11
5. Cleaning.................................................................................................................................................................................... 12
6. Warranty Provisions ............................................................................................................................................................ 12
7. Environmental Protection .................................................................................................................................................. 12
SE
GB
Funktionerna i denna bruksanvisning publiceras med reservation för ändringar.
The features described in this manual are published with reservation to modifications.
2
Bruksanvisning (SE)
Dessa produkter är endast avsedda för användning i hushållet.
Läs denna bruksanvisning noggrant innan du använder produkten.
Spara bruksanvisningen för framtida behov.
1. Specifikation
Bordsfläkt
Modell nr.
TDF-2511
TDF-3011
TDF-4011
Beskrivning
Bordsfläkt Ø23 cm
Bordsfläkt Ø30 cm
Bordsfläkt Ø40 cm
Spänning / Frekvens
230V~/50Hz
230V~/50Hz
230V~/50Hz
Effekt nominell
25W
40W
50W
Bordsfläkt Inox
Modell nr.
TDF-2511 Inox
Beskrivning
Bordsfläkt Ø25 cm
Spänning / Frekvens
230V~/50Hz
Effekt nominell
30W
Golvfläkt
Modell nr.
TFF-4011
Beskrivning
Golvfläkt Ø40 cm
Spänning / Frekvens
230V~/50Hz
Effekt nominell
50W
3
2. Konstruktion
TDF-2511
1.
2.
3.
4.
5.
6.
7.
8.
9.
10.
Frontskydd
Fläkt
Mutter för skydd
Bakre skydd
Motoraxel
Motorhus
Ocilleringsreglage
Stativ
Hastighetsväljare
Fot
TDF-3011/4011
1.
2.
3.
4.
5.
6.
7.
8.
9.
10.
Frontskydd
Fläkt
Mutter för skydd
Bakre skydd
Motoraxel
Motorhus
Ocilleringsreglage
Stativ
Hastighetsväljare
Fot
Montering av TDF-2511/3011/4011
1.
2.
3.
4.
Lossa muttern för skyddet från motorn.
Placera bakre skyddet mot motorhuset
och skruva fast det ordentligt med
muttern
Sätt på fläkten på motoraxeln. Fäst den genom att vrida den moturs. Kontrollera att den roterar lätt och
utan att skrapa i.
Fixera frontskyddet mot bakre skyddet och fast det med clipsen
4
TDF 2511 Inox
1.
2.
3.
4.
5.
6.
7.
8.
9.
10.
11.
Frontskydd
Fläkt
Mutter för skydd
Bakre skydd
Motoraxel
Motorhus
Ocilleringsreglage
Kåpa
Fot
Hastighetsväljare
Dekal
Montering av TDF-2511 Inox
1.
2.
3.
4.
Lossa muttern för skyddet från motorn.
Placera bakre skyddet mot motorhuset och skruva fast det ordentligt genom att skruva på muttern
medurs.
Tryck på fläkten på motoraxeln. Var försiktig så att inte bladen skadas eller böjs. Kontrollera att den
roterar lätt och utan att skrapa i.
Fixera frontskyddet mot bakre skyddet och fast det med clipsen
TFF-4011
1.
2.
3.
4.
5.
6.
7.
8.
9.
10.
11.
12.
13.
14.
Frontskydd
Fläkt
Mutter för skydd
Bakre skydd
Motoraxel
Motorhus
Ocilleringsreglage
Hastighetsväljare
Reglagehus
Låsskruv
Rör
Röranslutning
Nedre rör
Fot
Montering av TFF-4011
1. Montera ihop stativet och fläkthuset. Drag åt höjdregleringsskruven och se till att
stativet star stadigt på golvet.
2.
3.
4.
5.
Lossa muttern för skyddet från motorn.
Placera bakre skyddet mot motorhuset och skruva fast det ordentligt genom att vrida muttern medurs.
Sätt på fläkten på motoraxeln. Fäst den genom att vrida den moturs. Kontrollera att den roterar lätt
och utan att skrapa i.
Fixera frontskyddet mot bakre skyddet och fäst det med clipsen.
5
3. Användning
•
•
•
•
Kontrollera att apparatens spänning överensstämmer med elnätets spänning innan du sätter i
stickkontakten.
Rikta in fläkten och se till att den står stadigt.
Välj hastighet med hastighetsväljaren
För att stoppa väljer du OFF/0 på hastighetsväljaren.
Oscillering
•
•
Tryck oscilleringsknappen på motorhusets ovansida nedåt för att starta oscillering under drift (se resp
fig).
Dra oscilleringsknappen uppåt för att stoppa oscilleringen.
Riktning
Luftströmmens riktning kan justeras vertikalt:
• Flytta motorenheten "K" uppåt eller nedåt för att ändra den vertikala vinkeln (fig. 4). Ett klickande ljud
hörs under justeringen.
Höjdjustering (enbart TFF-4011)
• Lossa höjdjusteringsskruven "10" och justera fläkten till önskad höjd genom att dra upp eller trycka
•
ned det inre röret. Kom ihåg att hålla i fläktstommen medan du lossar skruven.
Dra åt höjdjusteringsskruven "10" efter justeringen.
4. Säkerhetsvarning
Följ dessa punkter för att säkerställa en bekväm funktion och för att undvika fara orsakat av
felaktig användning.
1. Läs bruksanvisningen noggrant före användning
2. Försäkra dig om att apparatens märkspänning på typskylten på baksidan överens
stämmer med den spänning den skall kopplas till.
3. Se till att stickkontakten är ordentligt isatt i ett jordat strömuttag.
4. Uttag och säkringar skall vara dimensionerade för den ström som apparaten förbrukar.
Ta också hänsyn till eventuella andra förbrukare som är inkopplade på samma
strömkrets.
5. Lämna inte barn utan uppsikt när apparaten är påkopplad. Välj placering med hänsyn till
barns säkerhet och låt inte nätkabeln hänga ner inom räckhåll för barnen.
6. Använd inte apparaten utomhus. Använd endast enheten till det den är avsedd för.
7. Apparaten får under inga omständigheter doppas i vatten eller andra vätskor.
Rör inte apparat, stickkontakt eller kabel med våta händer.
8. Har nätkabeln blivit skadad eller sliten skall den bytas ut innan apparaten används
vidare. Kontakta inköpsstället för anvisning till auktoriserat service center.
9. Om produkten mot förmodan inte fungerar tillfredställande kontakta inköpsstället för
åtgärd. Försök inte skruva isär produkten och laga den själv.
10. Vid rengöring stäng av apparaten, drag ur stickkontakten och vänta tills plattan svalnat
helt.
6
5. Rengöring
•
•
•
•
•
Drag ur stickkontakten ur vägguttaget före rengöring.
Doppa aldrig apparaten, kabel eller stickkontakt i vatten eller andra vätskor.
Torka av apparaten med en fuktig trasa. Vid behov kan rengöringsmedel användas.
Använd inte slipande rengöringsmedel eller slipande svamp.
Skall apparaten ställas undan, se till att den är kallt rent och torr innan den ställs på en
torr ventilerad förvaringsplats.
6. Garantivillkor
Garantitiden för denna produkt är 1 år från och med inköpsdatum. Under denna period
repareras alla defekter i material eller utförande kostnadsfritt. Följande villkor gäller rörande
denna garanti:
1. Vi tillbakavisar uttryckligen alla övriga ersättningskrav, inklusive ersättning för
följdskador.
2. Garantin förlängs inte i samband med reparationer eller byten av delar som sker inom
garantiperioden.
3. Om produkten modifieras, tillförs delar som inte är original eller repareras av en tredje
part gäller inte garantin längre.
4. Garantin gäller endast om daterat köpebevis i original visas upp och om detta köpebevis
inte innehåller några ändringar.
5. Garantin täcker inte skador som uppstått genom hantering som inte är i enlighet med
bruksanvisningen, försummelse eller skadegörelse
6. Köparen står för transportkostnader och ansvarar för eventuella risker i samband med
att produkten eller dess delar förflyttas.
För att undvika onödiga kostnader rekommenderar vi att du alltid först läser igenom
bruksanvisningen noga. Om denna inte erbjuder någon lösning bör du ta med produkten till
återförsäljaren för reparation.
7. Miljöskydd
När apparaten inte längre fungerar måste den kasseras på ett sådant sätt att
den skadar miljön i minsta möjliga mån och i enlighet med de regler som
gäller i din kommun.
7
Directions for Use (GB)
Please read the instructions carefully before using the product and keep it for future reference.
This product is intended for household use only.
1. Specification
Desk fan
Model No.
TDF-2511
TDF-3011
TDF-4011
Description
Desk Fan Ø23 cm
Desk Fan Ø30 cm
Desk Fan Ø40 cm
Voltage / Frequency
230V~/50Hz
230V~/50Hz
230V~/50Hz
Power rated
25W
40W
50W
Table fan Inox
Model No.
TDF-2511 Inox
Description
Floor Fan Ø25 cm
Voltage / Frequency 230V~/50Hz
Power rated
Floor fan
Model No.
Description
30W
TFF-4011
Floor Fan Ø40 cm
Voltage / Frequency 230V~/50Hz
Power rated
50W
8
2. Components
TDF-2511
11.
12.
13.
14.
15.
16.
17.
18.
19.
20.
FRONT GUARD
FAN BLADE
GUARD MOUNTING NUT
REAR GUARD
MOTOR SHAFT
MOTOR HOUSING
OSCILLATION KNOB
STAND
SPEED SWITCH
BASE
TDF-3011/4011
1.
2.
3.
4.
5.
6.
7.
8.
9.
10.
FRONT GUARD
FAN BLADE
GUARD MOUNTING NUT
REAR GUARD
MOTOR SHAFT
MOTOR HOUSING
OSCILLATION KNOB
STAND
SPEED SWITCH
BASE
Assembly TDF-2511/3011/4011
5.
6.
7.
8.
Loosen the Guard Mounting Nut from the
Motor Housing.
Position the rear guard firmly to the
motor housing and then fasten it by turning the guard mounting nut clockwise tightly.
Push the blade along motor shaft. Fasten it firmly with the spinner by turning it counter clockwise. Check
that it rotates easy.
Hang the front guard to rear guard with the position fixer provided at the rim of guard. Fix together with
the clips provided.
9
TDF 2511 Inox
1.
2.
3.
4.
5.
6.
7.
8.
9.
10.
11.
FRONT GUARD
BLADE
GUARD MOUNTING NUT
REAR GUARD
MOTOR SHAFT
MOTOR
OSCILLATION KNOB
REAR COVER
BASE
CONTROL SWITCH
DECORATIVE PLATE
Assembly TDF-2511 Inox
1.
2.
3.
4.
Loosen the Guard Mounting Nut from the Motor Housing.
Position the rear guard firmly to the motor housing and then fasten it by turning the guard mounting
nut clockwise tightly.
Push the blade onto the motor shaft. Be careful not to bend the fan blades.
Hang the front guard to rear guard with the position fixer provided at the rim of guard. Fix together
with the clips provided
TFF-4011
15.
16.
17.
18.
19.
20.
21.
22.
23.
24.
25.
26.
27.
28.
FRONT GUARD
FAN BLADE
GUARD MOUNTING NUT
REAR GUARD
MOTOR SHAFT
MOTOR HOUSING
OSCILLATION KNOB
SPEED SWITCH
FAN HEAD NECK
SECURING KNOB
POLE
PIPE CONNECTOR
LOWER PIPE
BASE
Assembly TFF-4011
6. Assembly the stand and main body. Secure screws and make sure it is standing stable on
the floor.
7.
8.
Loosen the Guard Mounting Nut from the Motor Housing.
Position the rear guard firmly to the motor housing and then fasten it by turning the guard mounting
nut clockwise tightly.
9. Push the blade along motor shaft. Fasten it firmly with the spinner by turning it counter clockwise.
10. Hang the front guard to rear guard with the position fixer provided at the rim of guard. Fix together
with the clips provided
10
3. Operation instruction
All fans
1. Placed the fan on a stable and flat surface
2. Direct the fan according to your need.
The fan head can be tilted to your optimal need.
The floor fan can be adjusted to different height. Be sure you hold the main body
before loosening the height locking screw.
3. Plug in to the mains outlet
4. Select fan speed with the speed selector
5. If oscillation is needed push down the oscillation knob.
Stop oscillation by pulling up the knob again
6. Switch off the fan by pressing the OFF/0 button
4. Safety warnings
In order to use the product more conveniently and avoid any danger caused by wrong operation,
please pay attention to the notices
• Read the manual carefully before use.
• The appliance should be placed on a stable and flat surface when operating to avoid
overturning.
• Under no circumstances must the appliance be placed immersed in water or other liquid, or
come into contact with such. Do not use the appliance with wet or moist hands.
• Before connecting of the appliance check that voltage indicated on the rating label
corresponds to the mains voltage in your home.
• Do not use the appliance in damp places with high humidity like bathrooms and not
outdoors.
• Never touch the blades with hand or any object!
• Use the appliance only for the intended purpose.
• Always remove the plug from the power supply whenever the appliance is not in use, before
cleaning the appliance or whenever a disturbance occurs. Switch off the appliance
beforehand. Pull on the plug, not on the cord.
• In order to protect children from the dangers of electrical appliance shock, never leave them
unsupervised with the appliance. When selecting the location for your appliance, do so in
such a way that children do not have access to the appliance. Take care to ensure the cord
does not hang down.
• Test the appliance and the cord regularly for damage. If there is damage of any kind, the
appliance should not be used.
• Keep the appliance and the cord away from heat and moisture.
• Never leave the appliance unsupervised. Switch off the appliance whenever you are not
using it, even if this is only for a moment.
• If the appliance becomes moist or wet, remove the mains plug from the power supply immediately.
• If the function of the unit is in trouble, please send the product to maintenance center or
after-sale service. Please don’t disassemble the unit and change the spare parts by yourself.
• If the supply cord is damaged, it must be replaced by the manufacturer or its service agent or
a similarly qualified person in order to avoid a hazard.
。
11
5. Cleaning
•
•
•
•
•
Always unplug from wall socket before cleaning.
Never immerse the appliance, cord or plug in water or other liquids.
Clean the outside with a damp cloth. Use washing-up liquid in case of hard stains.
The fan guards and the fan blade can be removed for cleaning. Be careful not to damage the
fan blade.
Do not use scratching cleaning agent or any corrosive chemicals.
6. Warranty Provisions
This product comes with a 12-month warranty starting on the date of purchase. Within this
period any defects in material or workmanship will be repaired without any charge. The
following provisions shall apply regarding this warranty:
1. We expressly dismiss all other claims for damage, including consequential damages;
2. Any repairs or replacements of components within the term of the warranty will not
result in an extension of the term of the warranty;
3. The warranty will no longer apply if the product has been modified, non-original parts
have been used, or if it has been repaired by third parties;
4. The warranty will only apply, when you present the original, dated proof of purchase,
provided no changes have been made to it;
5. The warranty will not apply to damage caused by actions not in compliance with the
Directions for Use, neglect, vandalism;
6. Transportation costs and the risk involved during the transportation of the product or its
components will always be the responsibility of the purchaser.
In order to avoid unnecessary costs, we recommend that you always read the Directions for Use
carefully first. If they offer no solution, please take the product to your dealer for repair.
7. Environmental Protection
Waste electrical products should not be disposed of with household waste.Please
recycle where facilities exist. Check with your Local Authority or retailer for
recycling advice.
12


