Download User`s MANUAL - avic security
Transcript
NOW WITH
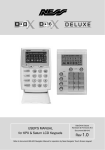
Ness D8x / D16x alarm control panel
User's MANUAL
A$15.00
Revision 6.2
Head Office:
Ness Security Products Pty Ltd
ABN 28 069 984 372
4 / 167 Prospect Hwy
Seven Hills NSW 2147 Australia
Ph +61 2 8825 9222
Admin Fax +61 2 9838 8508
[email protected]
www.ness.com.au
SYDNEY
Ph 02 8825 9222
Fax 02 9674 2520
[email protected]
MELBOURNE
Ph 03 9875 6400
Fax 03 9875 6422
[email protected]
BRISBANE
Ph 07 3399 4910
Fax 07 3217 9711
[email protected]
“Australia’s largest designer
and manufacturer of
high quality security products”
N55
PERTH
Ph 08 9328 2511
Fax 08 9227 7073
[email protected]
Adelaide
Ph 08 8152 0000
Fax 08 8152 0100
[email protected]
D8x/D16x USER Manual
Rev 6.2, Nov09
Document Part Number: 890-006
WARNING
ADSL NOTICE
Installation and maintenance shall be performed by
qualified service personnel only.
ADSL broadband data can interfere with the
operation of your alarm dialler.
CAUTION
It is recommended that a quality ADSL filter
be installed as per the filter manufacturer's
guidelines in all premises with an alarm
dialler installed.
Risk of explosion if battery is replaced by an
incorrect type. Dispose of used batteries according
to the instructions on the battery.
Copyright Notice
All rights reserved. No part of this publication may be reproduced, transmitted or stored in a retrieval system in any form or by any
means, electronic, mechanical, photocopying, recording, or otherwise, without the prior written permission of Ness.
Ness reserves the right to make changes to features and specifications at any time without prior notification in the interest of
ongoing product development and improvement.
© 2009 Ness Security Products Pty Ltd ABN 28 069 984 372
CONTENTS
Features........................................................................ 4
Introduction .................................................................. 5
Keypad.......................................................................... 6
Visual Indicators............................................................ 7
Operation.............................................................. 8, 9
Arming..................................................................... 10
Disarming................................................................ 11
Home (Monitor) Mode............................................. 12
Keypad Panic........................................................... 13
Keypad Duress........................................................ 13
Keypad Fire Alarm................................................... 14
Keypad Medical Alarm............................................ 14
Excluding Zones...................................................... 15
View Memory........................................................... 16
Temporary Day Zones............................................. 17
AutoTime Features.................................................. 18
AutoTime Operation................................................ 19
PROGRAMMING......................................................... 20
Programming Options Table................................... 21
User Code programming........................................ 22
Entry/Exit Timer programming................................ 23
Telephone Number programming........................... 23
Real Time Clock programming............................... 24
Monitoring, Central station / Audible ......................... 25
Remote operation by telephone........................... 26, 27
Ness Accessories.................................................. 28, 29
Troubleshooting.......................................................... 30
Installation Record...................................................... 31
Operation Summary............................................. 32
Ness D8x and D16x Features
•8 or 16 alarm zones (D8x / D16x).
•Supports up to 3 remote LCD keypads.
•56 user codes can be programmed to
operate by keypad PIN, radio key or
access card.
•Optional Ness Radio Interface for fully
integrated wireless security.
•Programmable 2 Area partitioning can
split the panel into two independent areas
plus a common area.
•Real Time Clock with AutoTime features
Automatically arm/disarm and control
auxiliary outputs on a daily or weekly
basis.
•3 Door Access Controller onboard with
support for Weigand prox or fingerprint
readers.
•Home Mode allows partial arming, (eg,
perimeter security overnight).
•Day Mode feature allows daytime
monitoring of fire doors, coolrooms etc.
•Temporary Day Zone feature allows easy
enabling/disabling of Day Mode.
•4 programmable auxiliary outputs can be
operated automatically by AutoTime or
manually by keypad.
•Enhanced serial data input/output via
RS232. Interface with third party products.
• Automatic reset fuses / no glass fuses to
replace.
•Programmable siren/reset lockout
complies with noise regulations.
•30 event memory can be reviewed by
keypad.
•Easy programming by keypad or
NessComms™ software.
•All programming data is permanently
stored in a non-volatile memory.
•All inputs and outputs are heavily
protected against lightning and high
voltage supply transients.
•Optional output expander for even more
auxiliary outputs.
DIALLER
•Keypad Panic feature.
•Full remote upload/download by PC and
modem using NessComms™ software.
•Keypad Duress feature.
•Remote control of outputs by telephone.
•Two button arming feature.
•Arm/disarm remotely by telephone
•Fire Alarm feature with different siren
tones.
•Contact ID Format for central station
monitoring. Supports two 14 digit phone
numbers plus one “follow me” number for
audible monitoring.
•Highly flexible zone to output mapping.
•Multiple programmable EOL resistor
values from 0k to 22k. An installer's
favourite.
•Onboard Vibration Sensor Analyser
with programmable sensitivity. Use with
Nessensor™ vibration sensors.
•Audible Voice reporting feature.
•Phone line integrity monitoring can
activate an output if the phone line is
disconnected.
•Dialler ‘Listen in’ option for installers.
•Siren chirp and strobe flash on arming
with radio key.
•Auto Test calls daily, weekly or any
interval.
•Quiet chirps option on arm/disarm by
radio key.
•Pulse or DTMF dialling.
•True Dynamic Battery Test actively tests
the battery under load every hour.
•True dial tone detection.
Ness D8x / D16x Control Panel – User's Manual
Introduction
The Ness D8x and D16x microcomputer based
8 or 16 zone control panel is the heart of your
security system to which all your detection
devices connect.
Each Zone of the panel can be connected to one
or more detection devices to protect separate
rooms of your premises.
Detection devices may be wired to the panel or
you can use optional wireless detectors.
Passive Infra-Red motion detectors (PIRs) are
used to detect motion of people or animals.
Pet Aware motion detectors can ignore pets
and still detect people. Reed Switches are
fitted to windows and doors to detect opening.
Vibration sensors such as the Nessensor™ can
be used to detect glass breakage or forcing of
windows or doors.
Normally a zone is considered Sealed. Activation
of a detection device will cause the zone to be
Unsealed and may cause an alarm.
Detectors such as fire detectors and panic
buttons must be able to generate an alarm at
all times regardless of the panel setting. A zone
with this assignment is called a 24 hour zone.
Some detection devices may be required to
generate an alarm or warning only when the
panel is Disarmed. A zone with this assignment
is called a Day zone.
Before leaving the premises you must "Arm"
(turn on) the panel. After arming, the panel will
ignore detectors during the Exit Delay Time to
allow you to exit without triggering an alarm.
The system can be armed and disarmed using
the keypad supplied or by optional Radio Keys
or Access Cards or Fobs.
When you enter the premises the panel will
ignore selected zones for the Entry Delay Time
and will not alarm unless you disarm the panel
during this allowed time.
When an alarm occurs, it can be reset with a
User Code1 or by optional Radio Key or Access
Card/Fob2, otherwise it will reset at the end of
Alarm Reset Time. Resetting an alarm stops the
sirens and strobe light. If an alarm is not reset
the sirens will stop after the programmed time
(default is 5 minutes) and the strobe light will
stop after 72 hours.
Home Mode (also called Monitor mode)
allows you to Arm selected zones while others
are ignored. Typically, perimeter zones (doors
and windows) can be monitored while you are
at home.
If you wish to split your alarm system into two
areas with access limited to each area by code
numbers then Area operation is used. Radio
Keys can also Arm and Disarm Areas.
The control panel housing and the covers
over external sirens are protected by tamper
switches to detect someone attempting to
disable the security system. Activation of these
switches will cause an instant tamper alarm.
If there is a problem with a detector, you can
Exclude the associated zone so that it is
totally ign ored and cannot generate an alarm.
Including the zone will enable it to generate an
alarm again.
The control panel is fitted with a rechargeable
backup battery to ensure your security system
continues to operate if the mains power is
interrupted. This control panel automatically
tests the battery every hour and whenever
you Arm/Disarm the panel. (Dynamic Battery
Test).
All alarms are stored in memory and can be
viewed at any time in Memory Mode.
Keypad codes programmed as Arm Only will
not reset the panel.
1
Access Cards/Fobs can reset the panel if
the Disarm By Access Card option has been
enabled by your installer.
2
Ness D8x / D16x Control Panel – User's Manual
Keypad
The D8x and D16x control panels are supplied with an LCD Keypad which provides important visual
and audible indications and is the main interface for operating and programming the control panel.
Up to three keypads can be connected to a D8x or D16x panel.
Keypad Beeps
Beeps
Meaning
Any key press.
1 BEEP
3 BEEPS
––
..10..
Valid Command.
1 LONG BEEP Error.
10 BEEPS
Mains Power is off
or Panel Battery is low
or A Radio Device
has sent a low battery
signal
or Telephone Line Fail
has been detected.
An AutoTime action is
... ... ...
Constant slow beeps due to begin.
. . .
Constant fast beeps
An AutoTime action
will begin in one
minute.
Display TEST
To display all the keypad icons press and hold the
will be on while the
button is held down.
button for at least 2 seconds. All the icons
Display Test can be activated at any time either in operating mode or any program mode.
Ness D8x / D16x Control Panel – User's Manual
Keypad indicators
Keypad Display Indicators in Operating Mode
keypad Icon
Display
ZONeS
1-8 (or 1-16)
OFF
ON
Flashing
Zone is sealed.
Zone is unsealed.
OK
Zone/s are unsealed.
or Power fault.
or Panel is armed.
or phone line fault.
Ready to Arm
ARMED
Panel is disarmed,
or Area 1 is disarmed, if
using Areas.
Panel is armed,
or Area 1 is armed, if
using Areas.
Area 2 is disarmed.
Area 2 is armed if using
Areas.
Home Mode is
disarmed.
Panel is armed in Home
Mode.
Day Mode enabled, (see
page 20).
Normal.
Memory mode selected.
New alarm/s in memory.
Normal.
Receiving a radio signal.
(If radio fitted.)
A Radio Key or other
radio device has low
battery.
READY TO ARM
ARMED
HOME
Zone is in alarm.
MEMORY
Normal.
Internal Tamper: Double
Flash with long pause.
External Tamper: Steady
flash.
TAMPER
Normal.
Zone/s are Excluded.
Normal.
The backup battery
is low.
Normal.
Mains power is off.
EXCLUDE
LOW
BATTERY
MAINS
OFF
PROG
LINE
Normal.
User Program Mode.
Installer Program Mode.
Normal
Dialler is on line.
Phone line fault or
failure to communicate.
See page 16 for keypad indicators in Memory Mode.
Ness D8x / D16x Control Panel – User's Manual
Operation
This section describes the operation of a typical control panel installation. Keep in mind that
your installation may vary depending on the selected options and equipment. The operating
instructions which follow will cover the most common options.
Consult your installation company if you require further information.
All control panel operations are controlled by the keypad. You may also have optional Radio Keys
or Access Control equipment installed.
Operating Rules
Generally, the panel will be Disarmed. Armed
and Home modes provide different levels of
security for your premises when you are home or
away. Three other temporary modes: Program,
Memory and Exclude, allow you to perform
various operations. The panel will automatically
exit from these temporary modes if you do not
press any buttons on the keypad in a 4 minute
period.
If you make a mistake while entering any codes,
press the Enter or E button and start again.
When you are required to enter your access
code, you are given five opportunities to enter it
correctly. After the fifth invalid attempt the alarm
is activated (requiring the correct code + E
to silence the alarm). This prevents anyone
trying to guess your code by entering random
numbers.
Area Partitioning
Area Partitioning allows the zones to be split into
two partitions; Area1 and Area2.
The panel then effectively operates as two
separate systems sharing only the siren outputs
and dialler.
User Code Assignment
A User Code assigned to an Area can Arm
and Disarm only that Area. User Codes
assigned to both Areas will operate both Areas
simultaneously.
Common Area zones
Zones assigned to both Areas are Armed only
when Area1 and Area2 are both Armed. This
allows the Common Area zone/s to be shared
by both Areas.
For example, Office A and Office B operate as
separate areas but the entrance foyer used by
both offices is assigned to both areas meaning
it will automatically Arm when both Areas have
Armed. The Common Area then automatically
disarms when either Area1 or Area2 Disarms.
Area Operation
Arming and Disarming is carried out as normal
from a single keypad or separate keypads
installed in both areas or by Radio Key.
Area operation only applies to zones when they
are in the Armed state. This means that Day,
24hr and Home zones are independent of the
area operations.
Note: Area partitioning is in addition to Home
Mode. Any zone may be allocated to any area.
Ness D8x / D16x Control Panel – User's Manual
Operation
Ness KPX LCD Keypad
The Ness LCD keypad uses a large illuminated LCD display to
show system and zone status. The large easy to read buttons
are backlit for and a hinged flap covers the keys. The LCD icon
display provides information on zone condition, armed state,
mains and battery condition and other information.
Supplied with the D8x and D16x panels. Also available
separately.
Ness Radio Keys
The optional Ness Radio Keys give you the convenience of
remote control operation. Multi-button operation allows you
to Arm, Disarm and activate PANIC.
100–664
Ness RK3
Radio Key
100–067
Ness RK4
Radio Key
The RK4 Radio Key can also be programmed by your installer
to activate an auxiliary output on the control panel.
Ness Access Control
D8x and D16x also have an access control option for arming/
disarming and controlling electric door locks.
The panels have built-in software and hardware support for
up to 3 Ness Weigand proximity card readers and up to 55
proximity cards or fobs.
Note: Radio Keys and Access cards and readers are optional and are not supplied with any Ness control panel as
standard. Ness radio products require a Ness Radio Interface (100-200) to be fitted to the control panel.
Ness D8x / D16x Control Panel – User's Manual
Operation
to Arm the panel
by keypad
Press
by radio key
by Access card or
Fob
+
(If the Arming Shortcut is enabled).
Press the ON button once.
or press
+[User Code]+
Present a Card or Fob
twice.
The strobe light will flash
briefly.
If programmed, the
external siren will chirp
once.
(If Home Arming by
Radio Key is enabled, the
(If Code Only Arming has been enabled chirp will be delayed by
5 seconds).
by your installer).
or press [User Code] +
Or, present a Card
or Fob once + press
button.
Depending on which
option has been enabled
by your installer.
The Armed light will turn on.
Leave the premises within the Exit Delay Time. 3 beeps will sound at the end of Exit Delay Time.
The control panel must be armed in order to
detect intruders.
Before arming, all zones should be Sealed by
making sure there is no movement in rooms
protected by motion detectors. Doors or
windows protected by reed switches should
be closed.
The panel cannot be armed if in Program, Home
(Monitor), Memory or Exclude modes or if it is
in alarm. (User codes that are programmed to
be Arm Only codes can arm the panel either the
disarmed state or from Home Mode.
A keypad is supplied with the panel. Operation
by Radio keys and access cards is optional.
Siren Warning:
At the end of the exit time, all zones should be
Sealed. If any are Unsealed, the siren will sound
for 2 seconds to indicate that those zones have
been automatically excluded. You should disarm
the panel, check the premises and then arm
again. Continual warnings could mean there is
a problem with a detection device - that zone
may have to be manually excluded.
If a zone is Unsealed at the end of exit time and
the auto-exclude option is disabled, the siren
will sound for the duration of siren time, (default
is 5 minutes).
10
10 beeps when you arm means
Mains Power is turned off or the backup battery
is low.
One long beep when you arm could
mean the panel is already armed or the keypad
code is wrong, (if not using Shortcut Arming).
10
Ness D8x / D16x Control Panel – User's Manual
Operation
to Disarm the panel
by keypad
by radio key
by Access card or
Fob
Press the OFF button once.
Present a Card or Fob
once. (if the installer has
enabled disarming by
access card).
Enter the premises through a
Delay Zone.
Press [User Code] +
The ARMED light will turn off.
The strobe light will flash briefly.
If required, your installer can
program the external siren to
chirp 3 times when disarming.
When you enter the protected premises through
a delay zone, the keypad responds with regular
beeps1 as a reminder to Disarm. You then have
your programmed entry delay time to disarm
the panel.
If the panel is not disarmed by the end of the
entry delay time, an alarm will occur.
By using the optional radio keys you may disarm
your system from within your premises or from
outside your entrance door. There is also the
option to ‘Chirp’ the outside siren three times
and briefly flash the strobe light to indicate that
you have disarmed your system.
If you make a mistake when entering your
keypad code, then you must press E (or Enter)
and start again. Five incorrect entries will cause
an alarm.
Arm Only codes
User codes can optionally be programmed to be
Arm Only codes. An Arm Only code can Arm the
system but it cannot Disarm. (See page 22 for
User Codes programming). However if an Arm
Only code is assigned to a radio key, the radio
key OFF button will arm and disarm.
Auto Re-Arm
Your panel may optionally be programmed
for Auto Re-Arm to help prevent accidental
disarming.
Auto Re-Arm checks that you have entered the
premises after disarming. If all zones remain
sealed for a period as set by the entry delay time
then the panel will re-arm. This is most useful
when used with radio keys where the OFF button
might be accidentally pressed after you have
armed and are leaving the premises.
The panel can be reset and the siren/s silenced
by disarming the panel.
1
If you arrive at your premises and find the strobe
light flashing2 (if installed), reset the panel as
above. To check the cause of the alarm, you
can view the alarms in memory by entering
Memory Mode.
If Entry Beeps are enabled.
In the event of an alarm, the strobe light will flash for
72 hours or until the panel is reset.
2
Ness D8x / D16x Control Panel – User's Manual
11
Operation
to arm HOME Mode
by keypad
by radio key
Home Monitor arming by radio key must be
enabled by your installer.
Press
+
(If the Home Monitor Shortcut is enabled).
Press either the OFF
button or the ON button
twice within 4 seconds.
or press
+ [User Code] +
Or press the AUX
button once. (If
enabled, RK4
radio key only).
The strobe light will flash briefly.
If required, your installer can program the
external siren to chirp twice when arming
Home mode.
Home mode allows you to Arm selected zones
while others are ignored. Typically, perimeter
zones (doors and windows) can be monitored
while you are at home.
Your installer must program which zones will be
active in Home mode.
If an alarm occurs while in Home mode, entering
[User Code]
will silence the alarm. This will
also Disarm the panel, so remember to re-arm
Home mode again if needed.
Using the optional Radio Keys you can enter
Home Mode by pressing either the OFF button
or the ON button twice within 4 seconds or
by pressing the AUX button, (RK4 radio key
only). These options must be enabled by your
installer.
12
Note: Home Mode and Area arming
Home Mode can be used if the panel is fully
disarmed or if only Area2 is armed. Home Mode
is not available when Area 1 is armed.
The panel can be armed in Home mode if Area2
is already armed on these conditions:
• Area 1 must be OFF.
• Area 2 must be armed first, and then Home
Mode armed – not the reverse.
• Zones assigned to both Home mode and to
Area 2 will act as Home Mode zones when both
Area 2 and Home Mode are armed.
Note: Home Mode arming when Area2 is armed
cannot be done by Radio Key or by keyswitch.
Ness D8x / D16x Control Panel – User's Manual
Operation
Panic alarm
by keypad
by radio key
Press
or press
Press and hold the
PANIC button for at
least 4 sec.
star keys together.
+ [User Code] +
NOTE. Your panel may be programmed for
Double Press Radio Panic.
or press
+
(If Keypad Panic Shortcut is enabled).
To operate, press and hold the Panic button until
the transmit LED turns on. Release the Panic
button and immediately press and hold again until
the transmit LED turns on a second time.
This requirement meets regulations in some
states of Australia.
The keypad panic function may have been
programmed to be either Audible to activate
the sirens, or Silent to send a PANIC report by
dialler if your system is monitored by a Central
Station.
Panic cannot be used while the panel is in
Program, Memory or Exclude mode.
Note: Your installer may have installed a separate
panic button. To activate the panic alarm simply
press that button.
Keypad Duress alarm
by keypad
Press [5, 6, 8 or 9]+[User Code] +
Add one these digits in front of a user code when disarming.
This sequence will disarm the panel and send a Duress report by dialler if the system is monitored
by a central station.
The DURESS alarm can be used to send a silent
alarm to the central station that you are being
forced to disarm the panel against your will. That
is; you are disarming under “duress.”
To disarm and send a DURESS alarm, prefix
your User Code with one of the digits 5, 6, 8 or
9 when Disarming.
* The Keypad DURESS is normally not
enabled. To enable this function, consult
your installer.
* DURESS alarms can only used by systems
which are monitored by a Central Station.
* The DURESS alarm can be programmed to
sound the internal siren (Reset output).
This option is Off by default.
Ness D8x / D16x Control Panel – User's Manual
13
Operation
Keypad Medical alarm
by keypad
Press
+
Sends a Medical Alarm report by dialler.
(If this option has been enabled by your installer and the system is monitored by a central
station).
The Medical Alarm does not sound the sirens.
Keypad Fire alarm
by keypad
Press
+
Sounds the siren using the Fire Alarm sound.
(If Keypad Fire Alarm has been enabled by your installer).
And sends a Fire Alarm report by dialler.
(If this option has been enabled by your installer and the system is monitored by a central
station).
14
Ness D8x / D16x Control Panel – User's Manual
Operation
How to Exclude zones
by keypad
Press
+
(If the Exclude Shortcut is enabled)
or press
+ [User Code] +
The Exclude light will turn on.
then press [Zone No.]+
then press
[Zone No.]+
(Enter the zone number/s to be excluded.)
to exit Exclude mode
The Exclude light flashes constantly while zones are excluded. Excluded zones are automatically
Included next time the panel is disarmed.
If there is a problem with a detection device and
the zone cannot be sealed when arming the
panel, then that zone can be Excluded so that it
does not generate alarms.
When zones have been Excluded, the EXCLUDE
light flashes continuously while the panel is
Disarmed and also when Armed.
Zone Exclude is not permanent. Excluded zones
are automatically included next time the panel
is Disarmed.
Zones can be manually included by the
same method as Excluding. Simply use the
[Zone No.]+
sequence to turn OFF the zone
lights to be Included.
Zones can be excluded while the panel is either
Disarmed or Armed. See notes below.
NOTEs
• EXCLUDE E works only when the panel is Disarmed.
• EXCLUDE [User Code] E works in any state.
• EXCLUDE [User Code] E can only exclude the zones in the Area assigned to that code.
Ness D8x / D16x Control Panel – User's Manual
15
Operation
Viewing the Event Memory
by keypad
Press
+
or press
(If the View Memory Shortcut is enabled).
+ [User Code] +
The Memory light will turn on.
Press
...The most recent event will be displayed.
Press
...The next most recent event will be displayed.
Press
...and so on, up to 30 events.
Press
to exit Memory Mode.
The panel stores a comprehensive event
memory, including Arming, Disarming, Low
Battery, Mains Fail and Alarm events.
The memory is constantly upgraded and the last
30 events are always available for viewing.
This memory display can only be selected while
the panel is in the Disarmed state.
To Clear the Memory light
The MEMORY light flashes continuously when
an alarm has occurred as a reminder to view the
alarm memory.
The MEMORY light stops flashing after the
memory is viewed as shown above. and the
MEMORY light is automatically cleared next
time the panel is Armed.
When reviewing the event memory, the keypad lights will show the stored events as shown in this
table.
Keypad Display Indicators in Memory Mode
Keypad ICON
MEMORY EVENT
Zone numbers 1–8 or 1–16
Zone alarm
(no icons displayed)
Panel Disarmed
ARMED
Panel Armed (or Area 1 Armed)
ARM2
Area 2 Armed
MAINS
Mains power failure
BATTERY
Low Battery
TAMPER + 1
Internal Tamper alarm
TAMPER + 2
External Tamper alarm
EXCLUDE
Panic alarm
LINE
Telephone line fail
RADIO, EXCLUDE
Radio Key Panic alarm
RADIO, BATTERY, ZONE
Radio Device battery low, (Device number is indicated by zone lights)
RADIO, BATTERY, ARM
Radio Key battery low, (Radio Key number is NOT indicated)
RADIO, TAMPER, ZONE
Radio Device tamper alarm (Device number is indicated by zone lights)
RADIO, HOME, ZONE
Radio Supervision alarm (Device number is indicated by zone lights)
HOME, ZONE
Wired Zone Supervision alarm (Zone number is indicated by zone lights)
16
Ness D8x / D16x Control Panel – User's Manual
Temporary day Zones
The Ness D8x and D16x have a Temporary Day
Zone feature which allows easy and flexible Day
Zone selection and operation.
Temporary Day Zones operate in addition to
Permanent Day Zones which are usually setup
by the installer.
While remaining in normal operating mode,
the user can add and remove ‘Temporary Day
Zones’.
As an extra feature, the user can easily enable
or disable Day Mode, (which includes both
Temporary and Permanent Day Zones).
Day Zones can be programmed by your installer
to beep the keypad, or briefly sound the siren/s
or flash the strobe light, or to sound an optional
buzzer. (Although the keypad beeper provides
sufficient warning in most situations).
Typical Applications
Day Zones are useful for a variety of applications
such as a shop door beeper, triggered by a reed
switch on the door.
For example, in a shop you could enable Day
Mode to alert you when a customer enters the
front door.
You can also enable additional Temporary Day
Zones to monitor switches on, for example, the
rear door or the fridge doors.
commandS
(Accessed from normal operating mode).
Enter Selection Mode.
+
Press P followed by E when in operating
mode to enter Temporary Day Zone selection
mode.
Zone Selection.
[Zone No.]+
To select or deselect zones to be Temporary
Day Zones. The selected zones are indicated
by the corresponding zone number.
Permanent Day Zones, (installer option
P53E), are not displayed in selection mode.
Permanent Day Zones can be selected as
Temporary Day Zones but this has no effect
as those zones are already day zones.
Exit Selection Mode.
Saves changes and returns to normal
operating mode.
Enable Day Mode.
+
This enables/disables both Temporary and
Permanent Day Zones.
When Day Mode is enabled, any unsealed
day zone will sound the programmed
output for 2 seconds. When Day Mode is
disabled, an unsealed day zone will simply
be indicated on the keypad as an unsealed
zone.
The MONITOR icon flashes continuously
when Temporary Day Mode is enabled.
Ness D8x / D16x Control Panel – User's Manual
17
Operation
AUto-Time Features
D8x/D16x V6 onwards features sophisticated new automation features making full use of the onboard
Real Time Clock and a set of powerful yet simple to program options.
ARMED
ARMED
HOME
Arm or Disarm automatically at pre-programmed times of day
or day of the week.
This feature can save a site manager many headaches and hours of
travel time. There is no need to rely on staff remembering to arm or
disarm the system.
Turn AUX outputs on or off at pre-programmed times - every
day, once a week, anytime. Automate doors, sprinkler systems, lights
and more.
Enable/disable user codes depending on the time of day or day
of the week. Allows managers to grant users access to the system at
selected times and deny after hours entry.
If you find that the panel sometimes does not respond to user codes, or the panel arms
or disarms itself or auxiliary outputs turn on automatically - then your panel may have
been programmed for AutoTime events.
Ask your install to check the installer-level programming settings and reprogram the
system to suit your needs.
18
Ness D8x / D16x Control Panel – User's Manual
Operation
Auto-Time Operation
Warning Period (Optional function - must be enabled by your installer.)
When an AutoTime event is about to begin, your keypad (or keypads) will begin a constant
slow beep as a warning that the automatic event is about to happen. The warning beeps can be
programmed to start up to 99 minutes prior to the AutoTime event.
Press any key on the keypad to stop the beeps during the warning period. The beeps will start again
for the final minute at a faster rate.
Final Minute beeps. In the last minute prior to the AutoTime event, the keypad will beep at a
faster rate to warn that the event is about to start.
To Delay The AutoTime Event (Optional function - must be enabled by your installer.)
To delay the AutoTime event, enter a valid user code on its own. (The user code must be assigned
to an Area to work). This will suspend the warning beeps and the AutoTime event for 1 hour - when
the warning process will start again.
Example: Your panel is programmed to Auto Arm at 6pm every weekday and the Warning Period is
programmed for 5 minutes. You are working back late and at 5:55pm your keypad begins to beep.
Since you're not ready to arm the system yet, enter your user code (without pressing E) at the keypad.
The warning beeps will stop and arming will be delayed by one hour. At 6:55pm the warning beeps
will start again, followed by automatic arming if you don't delay the event again.
Any AutoTime event can be postponed, not just arming. You can also delay the automatic turn (or
off) of one of the AUX outputs in the same manner.
Manual Operation Of the Aux Outputs (Optional function - must be enabled by your
installer.)
As well as automatic operation by Auto Time, the four auxiliary outputs can also be operated
manually by keypad. Use the keypad commands below to turn outputs on or off or pulse on1.
To turn On or Pulse
To turn OFF
AUX1
AUX2
AUX3
AUX4
Manual operation of outputs works in conjunction with AutoTime schedules, if programmed. For
example, if AutoTime has turned an output on as scheduled (say, a light) you can manually turn it
off (and back on again) any time you wish. At the scheduled turn OFF time, if the output is still on
it will be turned off.
Whether an output "Pulses" or "Turns On" depends on the how that output has been
programmed by your installer.
1
Ness D8x / D16x Control Panel – User's Manual
19
Programming
Programming your Ness D8x or D16x is a simple
process using the keypad.
To enter program mode you need to know your
Master Code, which is user code number 1, (see
the table on the next page).
To Enter Program Mode
press
+[Master Code]+
If you forget your Master Code it can be reset
The factory default
by your installer.
Master Code is: 123
To EXIT Program Mode
press
+
The panel will automatically exit Program Mode if
the keypad is inactive for 4 minutes.
Timers
You can also re-program the Entry Delay Time
and Exit Delay Time if you need more or less
time to exit and enter the premises.
Real Time Clock
Some features such as AutoTime rely on the
onboard Real Time Clock. Set the current
date and time to ensure events take place as
expected.
You will need to adjust the Hours setting when
Daylight Savings starts and ends.
Telephone Number
If your panel is programmed for Audible
Monitoring, the panel's dialler will make alarm
calls to the Primary and Secondary telephone
numbers programmed by your installer.
If a ‘Follow Me’ Telephone Number is
programmed, the Primary and Secondary
telephone numbers will be ignored. All Audible
Alarm calls will be sent to the Follow Me
telephone Number.
User Codes
The panel has 56 user codes which can be
operated by keypad code (3-6 digit PIN), by
optional radio key or by optional access cards.
This is handy if you, for example, stay at a
relative's house overnight and you want the
panel to call you there in the event of an alarm.
When you delete the Follow Me Telephone
Number, alarm calls will again be made to the
Primary and secondary telephone numbers.
To add, change or delete a keypad code, follow
the steps on page 22.
If your Ness panel is monitored by a Central
Station, the Follow Me number is ignored.
The factory default Master Code is 123. You
should re-program this code with a new code
of your own choice.
For all other programming changes, talk to
your installer.
20
Ness D8x / D16x Control Panel – User's Manual
Programming Options Table
User Code
1 (Master Code)
Option no.
Keypad PIN
123
Option no.
29
P229E
2
P202E
30
P230E
3
P203E
31
P231E
4
P204E
32
P232E
5
P205E
33
P233E
6
P206E
34
P234E
7
P207E
35
P235E
8
P208E
36
P236E
9
P209E
37
P237E
10
P210E
38
P238E
11
P211E
39
P239E
12
P212E
40
P240E
13
P213E
41
P241E
14
P214E
42
P242E
15
P215E
43
P243E
16
P216E
44
P244E
17
P217E
45
P245E
18
P218E
46
P246E
19
P219E
47
P247E
20
P220E
48
P248E
21
P221E
49
P249E
22
P222E
50
P250E
23
P223E
51
P251E
24
P224E
52
P252E
25
P225E
53
P253E
26
P226E
54
P254E
27
P227E
55
P255E
28
P228E
56
P256E
Option no.
P201E
User Code
Description
Default
P26E
Entry Delay Time 1
20 (20 sec)
P27E
Entry Delay Time 2
6 (60 sec)
P28E
Exit Delay Time
60 (60 sec)
P00E
Follow Me Phone No.
blank
Keypad PIN
Comment
This option works in multiples of 10. (6 = 60 sec).
Ness D8x / D16x Control Panel – User's Manual
21
Programming
Programming User Codes
Step Keystrokes
Description
Comment
1
+[Master Code]+
Enters User Program Mode.
The Program light will turn
on.
2
+[Option No.]+
Enter the 3 digit option number
for the user code being programmed.
The existing user code, if
any, will be displayed by the
keypad one digit at a time.
Enter the new user code twice
for verification. Keypad codes
can be 3-6 digits long.
The new user code will be
displayed by the keypad
one digit at a time.
3
[New Code]+
[New Code]+
User codes must
NOT start with zero!
4
To exit User Program Mode.
+
A keypad code can be deleted by pressing
+
The Program light will turn
off.
at STEP 3 above.
A keypad code only needs to be deleted if you're not replacing it with a new code.
Examples
The panel must be in program mode.
• To program User Code 1 to be 1234: Press P201E 1234 E 1234 E
• To delete User Code 2 without programming a new code: P202E Memory E
User Code programming rules
• Up to 56 Keypad Codes can be used at up to 3 wired keypads for controlling all panel functions
including Arming/Disarming, Home Mode, Panic, memory recall and much more.
• Keypad Codes can be 3 to 6 digits in length and can be individually programmed and deleted.
• User Code 1 is also the Master Code which is used to enter Client Program mode.
• All 56 User Codes are Keypad Codes by default. User Codes can be programmed to be Radio
Codes or Access Cards as required. Ask your installer.
Notes
1. User codes must NOT start with zero. (The panel will allow codes beginning with zero to be
programmed but they will not operate the panel. This is an alternative method for disabling user codes.)
2. All codes must be unique to each other. Codes are rejected if already used. Some codes that are
similar to existing codes may also be rejected.
3. When re-programming a Keypad Code, the old code does not need to be deleted first. The new
22
Ness D8x / D16x Control Panel – User's Manual
Programming
Programming Timers
Step Keystrokes
Description
Comment
1
+[Master Code]+
Enters User Program Mode.
The Program light will turn
on.
2
+
Enter the option number for
Entry Delay Time 1.
The existing time, if any, will
be displayed by the keypad
one digit at a time.
3
4
+
...or
+
+
Or enter the option number for
Entry Delay Time 2.
...or
+
+
Or enter the option number for
Exit Delay Time.
[New Time]+
+
Enter the new time in seconds.
Example, enter 25 seconds as
25 + E.
The new time will be displayed by the keypad one
digit at a time.
To exit User Program Mode.
The Program light will turn
off.
Factory default timer settings are listed on page 21.
Programming the Follow Me telephone Number
Step Keystrokes
Description
Comment
1
+[Master Code]+
Enters User Program Mode.
The Program light will turn
on.
2
+
Enter the option number for Follow Me Telephone Number.
The existing telephone
number, if any, will be displayed by the keypad one
digit at a time.
Enter the new telephone
number.
The new telephone number,
if any, will be displayed by
the keypad one digit at a
time.
To exit User Program Mode.
The Program light will turn
off.
3
4
+
[New Telephone Number]+
+
The Follow Me telephone number is only used in Audible Dialling mode. If the Follow Me number
is programmed, then the primary & secondary numbers are ignored. Ask your installer for further
information.
Ness D8x / D16x Control Panel – User's Manual
23
Programming
Programming Real Time Clock
Step Keystrokes
Description
Comment
1
+[Master Code]+
Enters User Program Mode.
The Program light will turn
on.
2
+
Enter the option number for
one of the real Time Clock
options.
The existing value, if any,
will be displayed by the
keypad one digit at a time.
Enter the new time in
seconds. Example, enter 25
seconds as 25 + E.
The new time will be displayed by the keypad one
digit at a time.
To exit User Program Mode.
The Program light will turn
off.
+
P340E Minutes. Enter a value
between 00 and 59.
P341E Hours. Enter a value
between 00 and 23.
P342E Day of the month.
Enter a value between 01 and 31.
Ensure that the setting does not
exceed the days in the current
month. The panel does not crosscheck this setting.
P343E Month. Enter a value
between 01 and 12.
P344E Year. Enter a value
between 00 and 63. (2000–2063).
P345E Day of the week.
Enter a value between 1 and 7.
(1=Sunday).
3
4
[New Value]+
+
Set the current date and time to ensure that AutoTime events take place as expected.
You will need to adjust the Hours setting when Daylight Savings starts and ends.
Clock memory is retained on power down.
24
Ness D8x / D16x Control Panel – User's Manual
Monitoring
Central Station Monitoring
The Ness D8x and Ness D16x control panels
have an on-board digital dialler which can send
detailed alarm messages to a Central Monitoring
Station.
The digital messages can include information
about the zone or zones which caused the alarm,
tamper alarms, low battery or mains failure
reports, and it can also (by user number) identify
the users who arm and disarm the system.
Central station monitoring is highly recommended
and is the most effective method of monitoring
your alarm system.
For further information about 24 hour monitoring,
contact your installer or Ness Security
Products.
Audible Monitoring
As a lower security alternative to central
station monitoring, the panel can be programmed to send audible messages to a fixed
or mobile phone.
When programmed for audible monitoring,
the pane calls a pre-programmed number (or
numbers) and sounds an audible alarm message and a series of beeps over the phone.
These beeps can identify the zone or zones
which caused the alarm and well as several
other alarm types.
The Audible Message
When triggered by an alarm, the panel will
dial the programmed telephone number/s and
output the audible message "ALARM, ALARM,
ALARM" and beeps for 45 seconds or until it
is acknowledged.
Acknowledging the alarm
The person receiving the call can acknowledge
the alarm by pressing the
key on their
telephone.
Press the
message.
key during gaps in the alarm
Once you successfully acknowledge the alarm
the panel will hang up and not ring any other
telephone numbers.
If you do not acknowledge the alarm the panel
will ring you again and then it will ring the next
programmed telephone number, (if any).
Note: If the alarm is not acknowledged, the
LINE light on the keypad will flash continuously
until the panel is next armed.
The "Follow Me" telephone
number
If your panel is programmed for Audible
Monitoring, it will make alarm calls to the
Primary and Secondary telephone numbers
programmed by your installer.
If a Follow Me Telephone Number is programmed, the Primary and Secondary telephone numbers will be ignored. All alarm
calls will be sent to the Follow Me telephone
Number.
If your panel is monitored by a Central Station,
the Follow Me number is ignored.
Ness D8x / D16x Control Panel – User's Manual
25
Remote Operation
The D8x/D16x will allow a user to call in to the
panel, using a standard DTMF telephone, and
remotely Arm or Disarm all areas and also turn
on or off Aux outputs 1, 2, 3 or 4.
Sequence of Operation.
1. Phone the panel telephone number and listen
for the required number of rings and then
hang up.
To maintain panel security, remote operations
can only be activated after entering a valid user
code.
2. Wait 10 seconds and then call the number
again within 50 seconds.
To operate the panel by telephone, you need a
DTMF capable telephone, a valid user code and
you must know the telephone number of the line
to which the panel is connected.
NOTEs
• If the panel does not receive commands for
periods longer than 10 seconds it will assume
that the call is finished and it will hang up.
• If an alarm occurs which requires the panel
to dial out while attempting remote control, the
panel will treat the alarm as a priority, give a
constant tone as a warning and then hang up.
• When all remote control commands are
finished press
to force the panel to
hang up.
3.The panel will answer the second call
immediately, sound a beep for 2 seconds
then, after a pause, it will sound a lower
frequency tone. The panel is now ready to
receive telephone commands.
button on the telephone. This
4.Press the
tells the panel that telephone commands will
follow. The panel will respond with either 3
beeps if all OK (One long beep means try
again).
5. Now enter a valid User Code (that is normally
used for Arming or Disarming the panel)
followed by the
button.
The panel will respond with 3 beeps if it
recognises the code or 1 long beep to signal
the code was invalid and to try again.
6.Enter the required command. See the
summary of telephone commands on the next
page.
to finish. This tells the panel to
7. Press
hang up. Also hang up your telephone.
26
Ness D8x / D16x Control Panel – User's Manual
Remote Operation
Audible Feedback
3 beeps
1 long beep
1 short beep
Summary of telephone commands
• The User Code is valid
Prepare to receive commands
• Successful Arming or
Disarming
Arm Areas
• An Auxiliary output has
been turned ON.
Disarm Areas
• Panel is already Armed
Turn ON or Pulse AUX1
• Invalid code. Try again.
Turn OFF AUX1
• Remote AUX operation is
not enabled
Turn ON or Pulse AUX2
• An Auxiliary output has
been turned OFF.
Turn OFF AUX2
Turn ON or Pulse AUX3
Turn OFF AUX3
Turn ON or Pulse AUX4
Turn OFF AUX4
Finished – hang up
EXAMPLE: Arming the Panel by telephone
1. Dial the panel telephone number. Listen for one double ring then hang up.
2. Wait 10 seconds, then dial the telephone number again.
The panel will answer immediately and gives a 2 second beep followed by low tone.
3. PRESS
To prepare the panel (
4. PRESS [User Code]
3 beeps)
to authorise the next command (
5. PRESS
to arm the panel (
6. PRESS
to finish and hang up
3 beeps)
3 beeps)
Ness D8x / D16x Control Panel – User's Manual
27
Ness Accessories
Ness Quantum Detectors
Ness CCTV Products
The Ness Quantum™ range of high-tech motion
detectors includes passive infrared detectors, dual
technology microwave and infrared, as well as ceiling
mounted 360° detectors.
The wide range of Ness CCTV equipment allows your
installer to design a professional state‑of‑the‑art system
for your home, office, shop or factory.
All Ness detectors are designed and manufactured
using the most modern technology and techniques to
ensure superior reliability and performance.
The Ness Quantum™ Pet Aware PIR and Pet Aware
Dual have a superior ability to discriminate between
household pets and unwanted human intruders.
Ness Pet Aware detectors make it possible to protect
your premises with your pets indoors. (Up to 25kg
animal).
Ness cameras include dome cameras, Infra-red
illuminated cameras, miniature hidden cameras and
professional digital cameras.
Video monitors are available in CRT or flat screen LCD
styles in sizes to suit all applications.
Ness' acclaimed Digital Video Recorders store video
footage on hard disk drives for fast and easy to retrieve
‘tapeless’ recording.
Ness DVRs are available in 4, 6, 9 and 16 channel
models to suit all applications and all budgets, even
mobile models for use in vehicles such as buses and
trucks.
Most DVR models are 'Internet Ready' for instant
connection to a LAN and broadband internet connection
for remote viewing.
Ness CCTV means Consistent Commitment To Value.
28
Ness D8x / D16x Control Panel – User's Manual
Wireless Products
Optional Radio Accessories
Ness Radio Keypad
A unique fully portable radio keypad.
The Ness Radio Keypad provides
totally wireless Arming/Disarming of
the control panel.
Ask your installer about the range of Ness radio devices
for the optional extra convenience of wireless remote
control and wireless detection.
Operating your Ness security system can be as
convenient as opening your car door. Ness Radio
Keys™ provide the benefits of separate ON, OFF and
PANIC buttons as well as optional control of auxiliary
outputs - all in a slim, waterproof remote control.
* Ness radio products require a Ness Radio Interface
(100-200) to be fitted to the control panel.
RK4
Radio Key
Also operates Home Mode and
provides a Panic alarm.
The Ness Radio Keypad is suitable for use as a portable
keypad or for adding an extra keypad in areas where it
is not possible to install wires.
RK3
Radio Key
Radio Keys
R12 Radio PIR
Fully waterproof, ultra slim 3 or 4 button Radio Keys for
remote control of the control panel.
With separate buttons for ON (Arm), OFF (Disarm),
PANIC and AUX functions (RK4 only). Including long
life lithium battery.
Radio Key Pendant
Fully waterproof pendant style
transmitter can be used as a
portable wireless Panic button.
Supplied with a neckchain as
well as wristwatch straps. Ideal
for use as a medical alarm for
RK1 Radio
the elderly or infirm. (Central
Key Pendant
Station Monitoring is especially
recommended when used for medical alarm purposes).
Includes long life lithium battery.
Radio Reed Switch
Ness Radio Reed Switch for
wireless door and window
protection. Includes long life
lithium battery.
R15 Radio PIR
Radio Motion Detectors
Ness R15 Radio PIR and Ness R12 Radio PIR for
wireless motion detection.
Can be used in combination with Ness hardwired
detectors in areas where it is not possible to install
wires. Includes long life lithium battery.
The Ness R15PET Pet Aware model detects humans
but is immune to household pets. Allows you to protect
your home with your pets inside.
Radio Smoke Detector
The Ness Radio Smoke Detector
provides a fully wireless smoke
detection option which can trigger
the panel's siren/s and dialler if
required (or as programmed by your installer.)
The Ness Radio Smoke Detector uses Photo-electric
smoke detection technology. On board sounder and
test button for the sounder and radio transmitter. A
single battery powers the smoke detector and the
transmitter. Includes 9V lithium battery.
Top: RR2 Mini Radio Reed
Switch
Bottom:
RR3 Micro Radio Reed Switch
Ness D8x / D16x Control Panel – User's Manual
29
Troubleshooting
SYMPTOM
POSSIBLE CAUSE
REMEDY
When arming, a zone light is
on or the keypad gives a long
beep.
One or more detection device
(a PIR or reed switch) may be
unsealed.
Find the cause of movement or close
the door or window.
• 10 beeps from keypad.
• MAINS light is flashing.
• BATTERY light is flashing.
The mains power may be off, ...or
the panel’s backup battery may be
low, ...or a Radio Device battery
may be low.
Make sure the plug pack is plugged
in and the power point is turned on.
The backup battery may need replacing, call your installer.
1 long beep from the keypad.
Invalid keypad entry.
Press the E button and try again.
2 second siren at the end of
Exit Delay time.
A zone was unsealed at the end of
exit delay time.
Disarm the panel and check all
zones.
The strobe light is flashing.
There has been an alarm within the
last 72 hours.
Reset the alarm by disarming the
panel and check the Alarm Memory
Siren sounds while the panel
is disarmed.
A 24 hour zone has been alarmed.
(Siren Tamper, Box Tamper, Panic
Button).
Reset the alarm by disarming the
panel and call your installer.
EXCLUDE light is flashing.
A zone/s has been Excluded.
This is to indicate that one or more
zones have been Excluded.
Cannot arm and the
EXCLUDE light is on steady.
You are in Exclude mode.
Press E to exit Exclude mode.
TAMPER light flashing
The 24 hour Tamper input has
alarmed. (Siren tamper or box
tamper).
Call your installer.
ALARM MEMORY light is
flashing.
There are alarms in memory.
To clear the ALARM MEMORY light,
view the Alarm memory otherwise
the light will clear next time you arm
the panel.
Cannot enter Program Mode.
The panel is armed.
Disarm the panel before attempting
to enter Program Mode.
Or you may be attempting to enter
program mode using one of the
user codes.
Try again using the Master Code.
When I arm by radio key, the
Armed light on the keypad
does not turn on immediately.
The panel is waiting 5 seconds for
a second press of the ON button to
enter Monitor mode.
This is normal operation when arming of Monitor mode by radio key is
enabled.
The keypad is making a
continuous slow beep.
This is the AutoTime warning beep
which can be programmed to start
from 1 to 99 minutes before an
AutoTime event is due to begin.
The beeps will continue during the
AutoTime warning period changing
to faster beep in the final minute prior
to the AutoTime event.
The panel re-arms itself a
short time after disarming.
Auto Re-Arm is enabled.
Enter the premises after disarming.
Auto Re-Arm is designed to re-arm
the panel if you don't enter the
premises after disarming.
30
Ness D8x / D16x Control Panel – User's Manual
DATE PURCHASED:
INSTALLATION RECORD
DATE INSTALLED:
INSTALLATION COMPANY:
TELEPHONE:
MONITORING COMPANY:
NESS D8 ALARM CONTROL PANEL
P74E Report (dialler)
Entrance, bedroom1, etc
P57E SIREN OUTPUT
DESCRIPTION
P55E STROBE OUTPUT
PIR, Reed
switch, etc
P54E RESET OUTPUT
DEVICE TYPE
P52E 24 HOUR
ZONES
P46E AREA 2
Minutes
P51E MONITOR
Seconds
P29E SIREN RESET TIME
P45E AREA 1
Seconds
P28E EXIT DELAY TIME
P40E INSTANT
Seconds
P27E ENTRY DELAY TIME 2
P42E HANDOVER
P26E ENTRY DELAY TIME 1
P43E ENTRY DELAY 2
User programming options
P41E ENTRY DELAY 1
ZONE ASSIGNMENT
Installer programming options
TIMERS
P56E SONALERT OUTPUT
TELEPHONE:
NESS D16 ALARM CONTROL PANEL
1
2
D8 & D16
3
4
5
6
7
8
9
10
11
D16
12
13
14
15
16
USER
CODE
1
Master
Code
Extra Options Assigned
OPTION No E.g. Radio Code,
Arm Only, etc.
P201E
USER
CODE
Extra Options Assigned
OPTION No E.g. Radio Code,
Arm Only, etc.
USER
CODE
Extra Options Assigned
OPTION No E.g. Radio Code,
Arm Only, etc.
20
P220E
39
P239E
2
P202E
21
P221E
40
P240E
3
P203E
22
P222E
41
P241E
4
P204E
23
P223E
42
P242E
5
P205E
24
P224E
43
P243E
6
P206E
25
P225E
44
P244E
7
P207E
26
P226E
45
P245E
8
P208E
27
P227E
46
P246E
9
P209E
28
P228E
47
P247E
10
P210E
29
P229E
48
P248E
11
P211E
30
P230E
49
P249E
12
P212E
31
P231E
50
P250E
13
P213E
32
P232E
51
P251E
14
P214E
33
P233E
52
P252E
15
P215E
34
P234E
53
P253E
16
P216E
35
P235E
54
P254E
17
P217E
36
P236E
55
P255E
18
P218E
37
P237E
56
P256E
19
P219E
38
P238E
© 2004 Ness Security Products
Ness D8x / D16x Control Panel – User's Manual
31
Keypad Operation Summary
Operation by keypad
to Arm
Press
The panel must initially be
disarmed.
(If the Arming Shortcut is enabled)
+
or press
+ [User Code] +
or press [User Code] +
(If Code Only Arming has been enabled for that user code)
to DisArm
To disarm and/or reset
alarms.
to arm Home Mode
The panel must initially be
disarmed.
See page 12 for more
information on arming
Home Mode.
PANIC alarm
Press [User Code] +
Press
+
(If the Home mode Shortcut is enabled)
or press
+ [User Code] +
Press both
Panic keys together
Keypad Duress
Press [5, 6, 8 or 9]+[User Code] +
Keypad Duress allows the
user to send a silent duress
report while disarming,
(if the system is being
monitored by a central
station).
Add one these digits in front of a user code when disarming.
Exclude Zones
Press
Exclude + E can only
be used when the panel is
disarmed.
(Enter the zone number/s to be excluded.)
This sequence will disarm the panel and send a Duress report by
dialler to the central station.
(Report Keypad Duress must be enabled)
+
then [Zone No.]+
(If the Exclude Shortcut is enabled)
[Zone No.]+
then press
to exit Exclude mode
Exclude + CODE + E can
The Exclude light flashes constantly while zones are excluded.
be used any time.
Excluded zones are automatically Included next time the panel is
disarmed.
* If a user code is assigned to a radio key and has Extra Option 4E enabled, (Code Only arming),
then pressing OFF toggles the panel arm/disarm state.


