1
Adobe® Flash® Professional CC Help
Legal notices
Legal notices
For legal notices, see http://help.adobe.com/en_US/legalnotices/index.html.
Last updated 6/12/2015
iii
Contents
Chapter 1: What's New
New features summary . . . . . . . . . . . . . . . . . . . . . . . . . . . . . . . . . . . . . . . . . . . . . . . . . . . . . . . . . . . . . . . . . . . . . . . . . . . . . . . . . . . . . . . . . . . . . . . . .1
New features summary - 2014
. . . . . . . . . . . . . . . . . . . . . . . . . . . . . . . . . . . . . . . . . . . . . . . . . . . . . . . . . . . . . . . . . . . . . . . . . . . . . . . . . . . . . . . . . .9
What's new in Flash Professional CS6
New features summary
. . . . . . . . . . . . . . . . . . . . . . . . . . . . . . . . . . . . . . . . . . . . . . . . . . . . . . . . . . . . . . . . . . . . . . . . . . . . . . . . . . 15
. . . . . . . . . . . . . . . . . . . . . . . . . . . . . . . . . . . . . . . . . . . . . . . . . . . . . . . . . . . . . . . . . . . . . . . . . . . . . . . . . . . . . . . . . . . . . . . 18
Chapter 2: Platforms
Convert to other document formats
Custom Platform Support
. . . . . . . . . . . . . . . . . . . . . . . . . . . . . . . . . . . . . . . . . . . . . . . . . . . . . . . . . . . . . . . . . . . . . . . . . . . . . . . . . . . 27
. . . . . . . . . . . . . . . . . . . . . . . . . . . . . . . . . . . . . . . . . . . . . . . . . . . . . . . . . . . . . . . . . . . . . . . . . . . . . . . . . . . . . . . . . . . . . 28
Creating and publishing an HTML5 Canvas document
Creating and publishing a WebGL document
Packaging applications for AIR for iOS
. . . . . . . . . . . . . . . . . . . . . . . . . . . . . . . . . . . . . . . . . . . . . . . . . . . . . . . . . . . . . . . . . . . . . . . . . . . . . . . . . 41
Publishing AIR for Android applications
Publishing for Adobe AIR for desktop
ActionScript publish settings
. . . . . . . . . . . . . . . . . . . . . . . . . . . . . . . . . . . . . . . . . . . . . . . . . . . . . . . . . . . . . . . . . . . . . . . . . . . . . . . 46
. . . . . . . . . . . . . . . . . . . . . . . . . . . . . . . . . . . . . . . . . . . . . . . . . . . . . . . . . . . . . . . . . . . . . . . . . . . . . . . . . 51
. . . . . . . . . . . . . . . . . . . . . . . . . . . . . . . . . . . . . . . . . . . . . . . . . . . . . . . . . . . . . . . . . . . . . . . . . . . . . . . . . . . . . . . . . 57
Custom Platform Support API Reference
Creating accessible content
. . . . . . . . . . . . . . . . . . . . . . . . . . . . . . . . . . . . . . . . . . . . . . . . . . . . . . . . . . . . . . . . . 29
. . . . . . . . . . . . . . . . . . . . . . . . . . . . . . . . . . . . . . . . . . . . . . . . . . . . . . . . . . . . . . . . . . . . . . . . . . 36
. . . . . . . . . . . . . . . . . . . . . . . . . . . . . . . . . . . . . . . . . . . . . . . . . . . . . . . . . . . . . . . . . . . . . . . . . . . . . . 63
. . . . . . . . . . . . . . . . . . . . . . . . . . . . . . . . . . . . . . . . . . . . . . . . . . . . . . . . . . . . . . . . . . . . . . . . . . . . . . . . . . . . . . . . . . . 64
Best practices - Accessibility guidelines
Accessibility in the Flash workspace
Debugging ActionScript 3.0
. . . . . . . . . . . . . . . . . . . . . . . . . . . . . . . . . . . . . . . . . . . . . . . . . . . . . . . . . . . . . . . . . . . . . . . . . . . . . . . . 76
. . . . . . . . . . . . . . . . . . . . . . . . . . . . . . . . . . . . . . . . . . . . . . . . . . . . . . . . . . . . . . . . . . . . . . . . . . . . . . . . . . . 80
. . . . . . . . . . . . . . . . . . . . . . . . . . . . . . . . . . . . . . . . . . . . . . . . . . . . . . . . . . . . . . . . . . . . . . . . . . . . . . . . . . . . . . . . . . 83
Writing and managing scripts
. . . . . . . . . . . . . . . . . . . . . . . . . . . . . . . . . . . . . . . . . . . . . . . . . . . . . . . . . . . . . . . . . . . . . . . . . . . . . . . . . . . . . . . . . 87
Enabling Support for Custom Platforms
. . . . . . . . . . . . . . . . . . . . . . . . . . . . . . . . . . . . . . . . . . . . . . . . . . . . . . . . . . . . . . . . . . . . . . . . . . . . . . . 97
Working with Custom Platform Support Plug-in
. . . . . . . . . . . . . . . . . . . . . . . . . . . . . . . . . . . . . . . . . . . . . . . . . . . . . . . . . . . . . . . . . . . . . . 102
Best practices - Organizing ActionScript inan application
. . . . . . . . . . . . . . . . . . . . . . . . . . . . . . . . . . . . . . . . . . . . . . . . . . . . . . . . . . . . . 104
Enabling Support for Custom Platforms
. . . . . . . . . . . . . . . . . . . . . . . . . . . . . . . . . . . . . . . . . . . . . . . . . . . . . . . . . . . . . . . . . . . . . . . . . . . . . . 105
Export to HTML5 from Flash Professional
. . . . . . . . . . . . . . . . . . . . . . . . . . . . . . . . . . . . . . . . . . . . . . . . . . . . . . . . . . . . . . . . . . . . . . . . . . . . . 110
Using SWC files to build large Flash and AIR projects with multiple SWF files for iOS
. . . . . . . . . . . . . . . . . . . . . . . . . . . . . . . . . . . 110
Chapter 3: Workspace and workflow
Using the Stage and Tools panel . . . . . . . . . . . . . . . . . . . . . . . . . . . . . . . . . . . . . . . . . . . . . . . . . . . . . . . . . . . . . . . . . . . . . . . . . . . . . . . . . . . . . 111
Flash workflow and workspace
Timelines and ActionScript
. . . . . . . . . . . . . . . . . . . . . . . . . . . . . . . . . . . . . . . . . . . . . . . . . . . . . . . . . . . . . . . . . . . . . . . . . . . . . . . . . . . . . . . 114
. . . . . . . . . . . . . . . . . . . . . . . . . . . . . . . . . . . . . . . . . . . . . . . . . . . . . . . . . . . . . . . . . . . . . . . . . . . . . . . . . . . . . . . . . . 122
Working with multiple timelines
Set preferences in Flash
. . . . . . . . . . . . . . . . . . . . . . . . . . . . . . . . . . . . . . . . . . . . . . . . . . . . . . . . . . . . . . . . . . . . . . . . . . . . . . . . . . . . . . . . . . . . . . 127
Using Flash authoring panels
Timeline layers
. . . . . . . . . . . . . . . . . . . . . . . . . . . . . . . . . . . . . . . . . . . . . . . . . . . . . . . . . . . . . . . . . . . . . . . . . . . . . . . . . . . . . 126
. . . . . . . . . . . . . . . . . . . . . . . . . . . . . . . . . . . . . . . . . . . . . . . . . . . . . . . . . . . . . . . . . . . . . . . . . . . . . . . . . . . . . . . . 132
. . . . . . . . . . . . . . . . . . . . . . . . . . . . . . . . . . . . . . . . . . . . . . . . . . . . . . . . . . . . . . . . . . . . . . . . . . . . . . . . . . . . . . . . . . . . . . . . . . . . . . 136
Moving and copying objects
. . . . . . . . . . . . . . . . . . . . . . . . . . . . . . . . . . . . . . . . . . . . . . . . . . . . . . . . . . . . . . . . . . . . . . . . . . . . . . . . . . . . . . . . . 142
Sync Flash Professional Preferences with Creative Cloud
Working with Adobe Color panel
Templates
. . . . . . . . . . . . . . . . . . . . . . . . . . . . . . . . . . . . . . . . . . . . . . . . . . . . . . . . . . . . . . 143
. . . . . . . . . . . . . . . . . . . . . . . . . . . . . . . . . . . . . . . . . . . . . . . . . . . . . . . . . . . . . . . . . . . . . . . . . . . . . . . . . . . . . 147
. . . . . . . . . . . . . . . . . . . . . . . . . . . . . . . . . . . . . . . . . . . . . . . . . . . . . . . . . . . . . . . . . . . . . . . . . . . . . . . . . . . . . . . . . . . . . . . . . . . . . . . . . . . 149
Create a sprite sheet
. . . . . . . . . . . . . . . . . . . . . . . . . . . . . . . . . . . . . . . . . . . . . . . . . . . . . . . . . . . . . . . . . . . . . . . . . . . . . . . . . . . . . . . . . . . . . . . . . 150
Find and Replace in Flash
. . . . . . . . . . . . . . . . . . . . . . . . . . . . . . . . . . . . . . . . . . . . . . . . . . . . . . . . . . . . . . . . . . . . . . . . . . . . . . . . . . . . . . . . . . . . 151
Undo, redo, and the History panel
. . . . . . . . . . . . . . . . . . . . . . . . . . . . . . . . . . . . . . . . . . . . . . . . . . . . . . . . . . . . . . . . . . . . . . . . . . . . . . . . . . . . 154
Last updated 6/12/2015
iv
FLASH PROFESSIONAL
Contents
Keyboard shortcuts
. . . . . . . . . . . . . . . . . . . . . . . . . . . . . . . . . . . . . . . . . . . . . . . . . . . . . . . . . . . . . . . . . . . . . . . . . . . . . . . . . . . . . . . . . . . . . . . . . . 157
Creating HTML extensions
. . . . . . . . . . . . . . . . . . . . . . . . . . . . . . . . . . . . . . . . . . . . . . . . . . . . . . . . . . . . . . . . . . . . . . . . . . . . . . . . . . . . . . . . . . . 158
Chapter 4: Animation and Interactivity
Bone tool . . . . . . . . . . . . . . . . . . . . . . . . . . . . . . . . . . . . . . . . . . . . . . . . . . . . . . . . . . . . . . . . . . . . . . . . . . . . . . . . . . . . . . . . . . . . . . . . . . . . . . . . . . . 161
Animation Guide
. . . . . . . . . . . . . . . . . . . . . . . . . . . . . . . . . . . . . . . . . . . . . . . . . . . . . . . . . . . . . . . . . . . . . . . . . . . . . . . . . . . . . . . . . . . . . . . . . . . . 171
Working with classic tween animation
Motion tween animation
. . . . . . . . . . . . . . . . . . . . . . . . . . . . . . . . . . . . . . . . . . . . . . . . . . . . . . . . . . . . . . . . . . . . . . . . . . . . . . . 174
. . . . . . . . . . . . . . . . . . . . . . . . . . . . . . . . . . . . . . . . . . . . . . . . . . . . . . . . . . . . . . . . . . . . . . . . . . . . . . . . . . . . . . . . . . . . 184
Editing Motion Tweens using Motion Editor
Shape tweening
. . . . . . . . . . . . . . . . . . . . . . . . . . . . . . . . . . . . . . . . . . . . . . . . . . . . . . . . . . . . . . . . . . . . . . . . . . 203
. . . . . . . . . . . . . . . . . . . . . . . . . . . . . . . . . . . . . . . . . . . . . . . . . . . . . . . . . . . . . . . . . . . . . . . . . . . . . . . . . . . . . . . . . . . . . . . . . . . . . 209
Frames and keyframes
. . . . . . . . . . . . . . . . . . . . . . . . . . . . . . . . . . . . . . . . . . . . . . . . . . . . . . . . . . . . . . . . . . . . . . . . . . . . . . . . . . . . . . . . . . . . . . . 214
Frame-by-frame animation
. . . . . . . . . . . . . . . . . . . . . . . . . . . . . . . . . . . . . . . . . . . . . . . . . . . . . . . . . . . . . . . . . . . . . . . . . . . . . . . . . . . . . . . . . . 217
Custom Brushes
. . . . . . . . . . . . . . . . . . . . . . . . . . . . . . . . . . . . . . . . . . . . . . . . . . . . . . . . . . . . . . . . . . . . . . . . . . . . . . . . . . . . . . . . . . . . . . . . . . . . . 219
Animation basics
. . . . . . . . . . . . . . . . . . . . . . . . . . . . . . . . . . . . . . . . . . . . . . . . . . . . . . . . . . . . . . . . . . . . . . . . . . . . . . . . . . . . . . . . . . . . . . . . . . . . 222
Creating buttons
. . . . . . . . . . . . . . . . . . . . . . . . . . . . . . . . . . . . . . . . . . . . . . . . . . . . . . . . . . . . . . . . . . . . . . . . . . . . . . . . . . . . . . . . . . . . . . . . . . . . 226
Working with multiple timelines
Working with scenes
. . . . . . . . . . . . . . . . . . . . . . . . . . . . . . . . . . . . . . . . . . . . . . . . . . . . . . . . . . . . . . . . . . . . . . . . . . . . . . . . . . . . . 229
. . . . . . . . . . . . . . . . . . . . . . . . . . . . . . . . . . . . . . . . . . . . . . . . . . . . . . . . . . . . . . . . . . . . . . . . . . . . . . . . . . . . . . . . . . . . . . . . 230
Best practices - Advertising with Flash
Add interactivity with code snippets
Using mask layers
. . . . . . . . . . . . . . . . . . . . . . . . . . . . . . . . . . . . . . . . . . . . . . . . . . . . . . . . . . . . . . . . . . . . . . . . . . . . . . . . 231
. . . . . . . . . . . . . . . . . . . . . . . . . . . . . . . . . . . . . . . . . . . . . . . . . . . . . . . . . . . . . . . . . . . . . . . . . . . . . . . . . 234
. . . . . . . . . . . . . . . . . . . . . . . . . . . . . . . . . . . . . . . . . . . . . . . . . . . . . . . . . . . . . . . . . . . . . . . . . . . . . . . . . . . . . . . . . . . . . . . . . . . 236
Five steps to learning Flash Professional
. . . . . . . . . . . . . . . . . . . . . . . . . . . . . . . . . . . . . . . . . . . . . . . . . . . . . . . . . . . . . . . . . . . . . . . . . . . . . . 238
Learn Flash Professional CS6 video tutorials
Altering the Curve of a motion
Animation Learning Guide for Flash
. . . . . . . . . . . . . . . . . . . . . . . . . . . . . . . . . . . . . . . . . . . . . . . . . . . . . . . . . . . . . . . . . . . . . . . . . . . . . . . . . . 238
Graphic Effects Learning Guide for Flash
Spring for Bones
. . . . . . . . . . . . . . . . . . . . . . . . . . . . . . . . . . . . . . . . . . . . . . . . . . . . . . . . . . . . . . . . . . . . . . . . . . 238
. . . . . . . . . . . . . . . . . . . . . . . . . . . . . . . . . . . . . . . . . . . . . . . . . . . . . . . . . . . . . . . . . . . . . . . . . . . . . . . . . . . . . . . 238
. . . . . . . . . . . . . . . . . . . . . . . . . . . . . . . . . . . . . . . . . . . . . . . . . . . . . . . . . . . . . . . . . . . . . . . . . . . . . 239
. . . . . . . . . . . . . . . . . . . . . . . . . . . . . . . . . . . . . . . . . . . . . . . . . . . . . . . . . . . . . . . . . . . . . . . . . . . . . . . . . . . . . . . . . . . . . . . . . . . . . 239
Text Layout Framework
Using the Deco Tool
. . . . . . . . . . . . . . . . . . . . . . . . . . . . . . . . . . . . . . . . . . . . . . . . . . . . . . . . . . . . . . . . . . . . . . . . . . . . . . . . . . . . . . . . . . . . . . 239
. . . . . . . . . . . . . . . . . . . . . . . . . . . . . . . . . . . . . . . . . . . . . . . . . . . . . . . . . . . . . . . . . . . . . . . . . . . . . . . . . . . . . . . . . . . . . . . . . 239
Avoiding common authoring mistakes in Flash Professional
. . . . . . . . . . . . . . . . . . . . . . . . . . . . . . . . . . . . . . . . . . . . . . . . . . . . . . . . . . 239
Chapter 5: Multimedia and Video
Working with video cue points . . . . . . . . . . . . . . . . . . . . . . . . . . . . . . . . . . . . . . . . . . . . . . . . . . . . . . . . . . . . . . . . . . . . . . . . . . . . . . . . . . . . . . . 240
Add video to Flash
. . . . . . . . . . . . . . . . . . . . . . . . . . . . . . . . . . . . . . . . . . . . . . . . . . . . . . . . . . . . . . . . . . . . . . . . . . . . . . . . . . . . . . . . . . . . . . . . . . . 241
Create video files for use in Flash
Using sounds in Flash
. . . . . . . . . . . . . . . . . . . . . . . . . . . . . . . . . . . . . . . . . . . . . . . . . . . . . . . . . . . . . . . . . . . . . . . . . . . . . . . . . . . . . 247
. . . . . . . . . . . . . . . . . . . . . . . . . . . . . . . . . . . . . . . . . . . . . . . . . . . . . . . . . . . . . . . . . . . . . . . . . . . . . . . . . . . . . . . . . . . . . . . . 252
Transforming and combining graphic objects
Working with the library
Draw lines and shapes
Check spelling
. . . . . . . . . . . . . . . . . . . . . . . . . . . . . . . . . . . . . . . . . . . . . . . . . . . . . . . . . . . . . . . . . . . . . . . . . . . . . . . . . . . . . . . . . . . . . . . 269
. . . . . . . . . . . . . . . . . . . . . . . . . . . . . . . . . . . . . . . . . . . . . . . . . . . . . . . . . . . . . . . . . . . . . . . . . . . . . . . . . . . . . . . . . . . . . . . . . . . . . . . 281
Working with Photoshop PSD files in Flash
3D graphics
. . . . . . . . . . . . . . . . . . . . . . . . . . . . . . . . . . . . . . . . . . . . . . . . . . . . . . . . . . . . . . . . . . . . . . . . 259
. . . . . . . . . . . . . . . . . . . . . . . . . . . . . . . . . . . . . . . . . . . . . . . . . . . . . . . . . . . . . . . . . . . . . . . . . . . . . . . . . . . . . . . . . . . . . 264
. . . . . . . . . . . . . . . . . . . . . . . . . . . . . . . . . . . . . . . . . . . . . . . . . . . . . . . . . . . . . . . . . . . . . . . . . . . 282
. . . . . . . . . . . . . . . . . . . . . . . . . . . . . . . . . . . . . . . . . . . . . . . . . . . . . . . . . . . . . . . . . . . . . . . . . . . . . . . . . . . . . . . . . . . . . . . . . . . . . . . . . 291
Apply patterns with the Spray Brushtool
Arranging objects
. . . . . . . . . . . . . . . . . . . . . . . . . . . . . . . . . . . . . . . . . . . . . . . . . . . . . . . . . . . . . . . . . . . . . . . . . . . . . 298
. . . . . . . . . . . . . . . . . . . . . . . . . . . . . . . . . . . . . . . . . . . . . . . . . . . . . . . . . . . . . . . . . . . . . . . . . . . . . . . . . . . . . . . . . . . . . . . . . . . 299
Automating tasks with the Commands menu
Drawing in Flash
. . . . . . . . . . . . . . . . . . . . . . . . . . . . . . . . . . . . . . . . . . . . . . . . . . . . . . . . . . . . . . . . . . . . . . . . . 301
. . . . . . . . . . . . . . . . . . . . . . . . . . . . . . . . . . . . . . . . . . . . . . . . . . . . . . . . . . . . . . . . . . . . . . . . . . . . . . . . . . . . . . . . . . . . . . . . . . . . 303
Drawing with the Pen tool
. . . . . . . . . . . . . . . . . . . . . . . . . . . . . . . . . . . . . . . . . . . . . . . . . . . . . . . . . . . . . . . . . . . . . . . . . . . . . . . . . . . . . . . . . . . 309
Embed fonts for consistent text appearance
. . . . . . . . . . . . . . . . . . . . . . . . . . . . . . . . . . . . . . . . . . . . . . . . . . . . . . . . . . . . . . . . . . . . . . . . . . 315
Last updated 6/12/2015
v
FLASH PROFESSIONAL
Contents
Drawing preferences
. . . . . . . . . . . . . . . . . . . . . . . . . . . . . . . . . . . . . . . . . . . . . . . . . . . . . . . . . . . . . . . . . . . . . . . . . . . . . . . . . . . . . . . . . . . . . . . . 317
Scaling and caching symbols
Graphic filters
. . . . . . . . . . . . . . . . . . . . . . . . . . . . . . . . . . . . . . . . . . . . . . . . . . . . . . . . . . . . . . . . . . . . . . . . . . . . . . . . . . . . . . . . 318
. . . . . . . . . . . . . . . . . . . . . . . . . . . . . . . . . . . . . . . . . . . . . . . . . . . . . . . . . . . . . . . . . . . . . . . . . . . . . . . . . . . . . . . . . . . . . . . . . . . . . . . 321
Exporting SVG files
. . . . . . . . . . . . . . . . . . . . . . . . . . . . . . . . . . . . . . . . . . . . . . . . . . . . . . . . . . . . . . . . . . . . . . . . . . . . . . . . . . . . . . . . . . . . . . . . . . 329
Sharing library assets across files
. . . . . . . . . . . . . . . . . . . . . . . . . . . . . . . . . . . . . . . . . . . . . . . . . . . . . . . . . . . . . . . . . . . . . . . . . . . . . . . . . . . . . 332
Reshape lines and shapes
. . . . . . . . . . . . . . . . . . . . . . . . . . . . . . . . . . . . . . . . . . . . . . . . . . . . . . . . . . . . . . . . . . . . . . . . . . . . . . . . . . . . . . . . . . . . 335
Strokes, fills, and gradients
. . . . . . . . . . . . . . . . . . . . . . . . . . . . . . . . . . . . . . . . . . . . . . . . . . . . . . . . . . . . . . . . . . . . . . . . . . . . . . . . . . . . . . . . . . . 338
Working with Fireworks files inFlash
. . . . . . . . . . . . . . . . . . . . . . . . . . . . . . . . . . . . . . . . . . . . . . . . . . . . . . . . . . . . . . . . . . . . . . . . . . . . . . . . . . 345
Using Flash Professional with Adobe Scout
. . . . . . . . . . . . . . . . . . . . . . . . . . . . . . . . . . . . . . . . . . . . . . . . . . . . . . . . . . . . . . . . . . . . . . . . . . . 348
Working with Text Layout Framework (TLF) text
Working with Illustrator AI files in Flash
Working with InDesign files inFlash
Working with symbol instances
Working with symbols
. . . . . . . . . . . . . . . . . . . . . . . . . . . . . . . . . . . . . . . . . . . . . . . . . . . . . . . . . . . . . . . . . . . . . . 349
. . . . . . . . . . . . . . . . . . . . . . . . . . . . . . . . . . . . . . . . . . . . . . . . . . . . . . . . . . . . . . . . . . . . . . . . . . . . . . . 362
. . . . . . . . . . . . . . . . . . . . . . . . . . . . . . . . . . . . . . . . . . . . . . . . . . . . . . . . . . . . . . . . . . . . . . . . . . . . . . . . . . 371
. . . . . . . . . . . . . . . . . . . . . . . . . . . . . . . . . . . . . . . . . . . . . . . . . . . . . . . . . . . . . . . . . . . . . . . . . . . . . . . . . . . . . . 371
. . . . . . . . . . . . . . . . . . . . . . . . . . . . . . . . . . . . . . . . . . . . . . . . . . . . . . . . . . . . . . . . . . . . . . . . . . . . . . . . . . . . . . . . . . . . . . . 376
Working with Adobe Premiere Proand After Effects
. . . . . . . . . . . . . . . . . . . . . . . . . . . . . . . . . . . . . . . . . . . . . . . . . . . . . . . . . . . . . . . . . . . 381
Chapter 6: Exporting and Publishing
About exporting from Flash . . . . . . . . . . . . . . . . . . . . . . . . . . . . . . . . . . . . . . . . . . . . . . . . . . . . . . . . . . . . . . . . . . . . . . . . . . . . . . . . . . . . . . . . . . 385
Publishing Flash documents
Exporting Sounds
. . . . . . . . . . . . . . . . . . . . . . . . . . . . . . . . . . . . . . . . . . . . . . . . . . . . . . . . . . . . . . . . . . . . . . . . . . . . . . . . . . . . . . . . . 387
. . . . . . . . . . . . . . . . . . . . . . . . . . . . . . . . . . . . . . . . . . . . . . . . . . . . . . . . . . . . . . . . . . . . . . . . . . . . . . . . . . . . . . . . . . . . . . . . . . . 391
Export QuickTime video files
. . . . . . . . . . . . . . . . . . . . . . . . . . . . . . . . . . . . . . . . . . . . . . . . . . . . . . . . . . . . . . . . . . . . . . . . . . . . . . . . . . . . . . . . . 394
Best practices - Tips for creating content for mobile devices
Best practices - Structuring FLA files
Best practices - Behaviors conventions
. . . . . . . . . . . . . . . . . . . . . . . . . . . . . . . . . . . . . . . . . . . . . . . . . . . . . . . . . . . . . . . . . . . . . . . . . . . . . . . 403
Best practices - SWF application authoring guidelines
Best practices - Optimizing FLAfiles for SWF output
Best practices - Video conventions
. . . . . . . . . . . . . . . . . . . . . . . . . . . . . . . . . . . . . . . . . . . . . . . . . . . . . . . . . . . . . . . . 405
. . . . . . . . . . . . . . . . . . . . . . . . . . . . . . . . . . . . . . . . . . . . . . . . . . . . . . . . . . . . . . . . . . . 409
. . . . . . . . . . . . . . . . . . . . . . . . . . . . . . . . . . . . . . . . . . . . . . . . . . . . . . . . . . . . . . . . . . . . . . . . . . . . . . . . . . . 419
Controlling external video playback with ActionScript
Working with Flash Pro and FlashBuilder
Exporting Projector files
. . . . . . . . . . . . . . . . . . . . . . . . . . . . . . . . . . . . . . . . . . . . . . . . . . . . . . . . . . . 395
. . . . . . . . . . . . . . . . . . . . . . . . . . . . . . . . . . . . . . . . . . . . . . . . . . . . . . . . . . . . . . . . . . . . . . . . . . . . . . . . . . 401
. . . . . . . . . . . . . . . . . . . . . . . . . . . . . . . . . . . . . . . . . . . . . . . . . . . . . . . . . . . . . . . . 420
. . . . . . . . . . . . . . . . . . . . . . . . . . . . . . . . . . . . . . . . . . . . . . . . . . . . . . . . . . . . . . . . . . . . . . . . . . . . . 425
. . . . . . . . . . . . . . . . . . . . . . . . . . . . . . . . . . . . . . . . . . . . . . . . . . . . . . . . . . . . . . . . . . . . . . . . . . . . . . . . . . . . . . . . . . . . . 428
ActionScript publish settings
. . . . . . . . . . . . . . . . . . . . . . . . . . . . . . . . . . . . . . . . . . . . . . . . . . . . . . . . . . . . . . . . . . . . . . . . . . . . . . . . . . . . . . . . 429
Exporting Video with Flash Professional CS6
HTML publishing templates
. . . . . . . . . . . . . . . . . . . . . . . . . . . . . . . . . . . . . . . . . . . . . . . . . . . . . . . . . . . . . . . . . . . . . . . . . . 435
. . . . . . . . . . . . . . . . . . . . . . . . . . . . . . . . . . . . . . . . . . . . . . . . . . . . . . . . . . . . . . . . . . . . . . . . . . . . . . . . . . . . . . . . . . 437
Last updated 6/12/2015
1
Chapter 1: What's New
New features summary
The 2015 release of Adobe® Flash Professional® CC reintroduces the IK bone tool that enables you to create bone
armatures using symbols or shapes that can be easily turned into life-like animation. The release also comes with H.264
video import, universal document type converter, integration with the latest Flash Player and AIR SDK, and many more
enhancements. Continue reading for a quick introduction to new features available with the latest update to Flash
Professional CC, and links to other resources that provide more information.
Adobe Flash Professional CC 2015 release provides you capabilities to create great cartoon characters with lifelike movements using the new bone tool, convert your projects to any document type using the universal document
type converter, import H.264 videos, work with the latest Flash Player and AIR SDK, and many more cool capabilities
that help you to take your graphics and animation projects to the next level.
Adobe Flash Professional CC 2015 Release
Bone tool
New in Flash Professional CC 2015
The Flash Professional CC 2015 Release offers you the capability to lend life-like movements to your animation
characters using the all-new bone tool.
The bone tool gives you inverse kinematics (IK) capabilities within Flash. IK is a way of animating objects using bones
chained into linear or branched armatures in parent-child relationships. When one bone moves, connected bones move
in relation to it. Inverse kinematics lets you easily create natural motion. To animate using inverse kinematics, specify
the start and end positions of bones on the Timeline. Flash automatically interpolates the positions of the bones in the
armature between the starting and ending frames.
You can use IK in the following ways:
• By using a shape as a container for multiple bones. For example, you can add bones to a drawing of a snake so that
it slithers realistically. You can draw these shapes in Object Drawing mode.
• By chaining symbol instances. For example, you can link movie clips showing a torso, arm, lower arm, and hand so
that they move realistically in relation to each other. Each instance has only one bone.
Last updated 6/12/2015
2
What's New
Bone tool comes with on-stage controls to ensure greater precision in movements. The onstage controls allows you to
switch between Locked, Open, and Constrained states for Rotation and Translation properties of individual bones in
the IK armature. You can now directly adjust these constraints on stage with accuracy using clear visual feedback.
For more information on using the bone tool, see Bone tool
Import H.264 videos with audio
New in Flash Professional CC 2015
In addition to FLV videos, this release also introduces an option to embed H.264 videos in the timeline. When an H.264
video is embedded, the frames of the video are rendered on the stage when you scrub the timeline. This feature enables
you to use videos as a guide to synchronize your animation on stage. Since the Flash Player and other run-times do not
support rendering embedded H.264 videos, they are not published. Importing H.264 videos is a design-time-only
feature.
Audio playback is enabled for H.264 videos. You can now select the ‘Include audio’ option while importing H.264
videos. Once imported to the stage (with ‘place instance on stage’ option selected), scrubbing the timeline must play
the audio for the relevant frames. Playing the timeline (Enter) must play back the animation at the fps of the imported
video so that the audio is in sync with the video frames on stage.
To learn more about importing H.264 videos, see Add video to Flash.
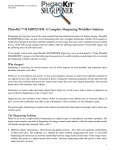
To import video:
Click File > Import > Import Video and select the Embed H.264 video in the timeline (design time only – the video
cannot be exported) option as shown in the following image:
Last updated 6/12/2015
3
What's New
For more information about using audio, see Using sounds in Flash.
Export bitmaps as spritesheet for HTML5 Canvas
New in Flash Professional CC 2015
Export sprite sheet as bitmap allows you to pack all the bitmaps in canvas document in to a sprite sheet. A new Export
the Bitmap as Sprite Sheet check box has been added and enabled by default. You can specify the maximum size of the
sprite sheet by giving the height and width values in the publish settings. This enhancement reduces the number of
server requests, which in turn results in improved performance.
Last updated 6/12/2015
4
What's New
Brush scaling with stage zoom
With this release, Flash Professional scales the brush size proportionately to the changing zoom level of the stage.
Proportionate zooming allows you to draw seamlessly adjusting to any zoom level and preview your work as you draw.
If you want to revert to the earlier default behavior of brushes maintaining a constant pixel size even when you change
the zoom level of the stage, you must disable the 'Stage zoom level' checkbox in the brush Property Inspector.
A Increase/decrease brush size B Brush size preview C Option to scale brush size according to the zoom level of the stage
Universal document type converter
New in Flash Professional CC 2015
The universal document type converter enables conversion of your existing FLA projects (of any type) to any other
document type such as HTML5 Canvas or WebGL.
To use this feature, click Commands > Convert to Other Document Formats and then select the target document type
and specify the path of the converted file.
To learn more about universal document type converter, see .
Last updated 6/12/2015
5
What's New
Improved audio workflows
New in Flash Professional CC 2015
Enhanced import workflow
In earlier versions of Flash Pro, you had to import the audio file in to the library and then add it to a layer on the
timeline. In this release, you can directly import audio in to your stage/timeline by dragging and dropping the file to a
layer or by using the File > Import > Import to Stage option.
Split Audio option in context menu
The stream audio embedded on the timeline can be split at ease using the Split Audio context menu. Split Audio enables
you to pause the audio when it is necessary and then resume the audio playback from the point it was stopped at a later
frame on the timeline.
Remember audio sync options in PI
Flash Pro now remembers the sync options in property inspector. If a sound is selected from the “Sound” section of the
Property Inspector, then on trying to set another sound on a new keyframe from the Property Inspector, Flash
remembers the sync options “Stream” or “Event” of the previous sound.
Improved Motion Editor
New in Flash Professional CC 2015
The Paste functionality has been enhanced as follows:
• Paste: Until the 2014.1 release, when you copy a curve in the Motion Editor and use the Paste option to paste it in a
new range, it pastes within the current curve’s range and not with absolute values. In this release, the Paste option
pastes the curve with absolute values.
• Paste to fit current range: This option now replicates the old Paste operation and pastes the curve within the
current curve’s range and not with absolute values.
Panel locking
A new option, Lock/Unlock, has been added to the fly-out menu of the panels to lock the dock. Once a dock is locked,
all the panels in the dock can be resized, but cannot be moved. This feature helps you prevent accidental drag and resize
of panels.
Last updated 6/12/2015
6
What's New
Code snippet support for WebGL
From this release, code snippets are available for some commonly used actions in the WebGL document type.
Note: This enhancement is available only in the English language version.
Enhancements in Custom Platform Support SDK
This release includes the following enhancements to Custom Platform Support SDK and the sample plug-in:
• Ability to query the type of a library symbol: ILibraryItem::GetProperties() returns an additional key "SymbolType"
for symbols. The value of key can be "Button," "MovieClip," or "Graphic."
• Ability to distinguish between button and movie-clip: Until the previous release, the button instances were treated
as movie clips by both the DOM and the IFrameCommandGenerator service. Starting with Flash Pro CC 2015, an
interface has been added to support button instances. If the IMovieClip instance also implements the IButton
interface, then it can be treated as a button instance. The four states of a button namely, Up, Over, Down, and Hit
are always mapped to the frames 0, 1, 2, and 3 respectively. See the file IButton.h to know more about the button
instance.
• New API to get the bounds of IClassicText objects: The AddClassicText function in ITimelineBuilder interface now
returns an object of CLASSIC_TEXT_INFO_2 (instead of the old CLASSIC_TEXT_INFO), which contains a new
field "bounds" representing the bounds of the IClassicText object.
Last updated 6/12/2015
7
What's New
Integration of latest Flash Player and AIR SDK
This release comes to you with the Flash Player version 17.0 and AIR SDK 17.0 integrated.
Integration of latest CreateJS libraries
This release of Flash Professional comes with the latest CreateJS libraries integrated.
Since the latest libraries are not yet hosted via CDN, clear the Hosted LIbraries checkbox under the Advanced section
of the Publish Settings dialog box (Edit > Publish Settings > Advanced) to see the output.
Other enhancements
New in Flash Professional CC 2015
Save optimizations
This release comes with the following Save optimizations:
• Save algorithm optimization resulting in faster saving of FLA
• File corruption issues while saving files over the network are now resolved
Auto-recovery optimizations
The following auto-recovery enhancements are part of this release:
• Flash Professional does not create unnecessary auto-recovery files. An auto-recovery file is created only if the
document is modified after the last auto-recovery files were created.
• Progress bar is displayed only when the Flash Pro application is in focus.
• Auto-recovery file is removed only after completing a successful save operation.
The following auto-recovery changes help you avoid continuous loop of auto-recovery for short auto-recovery
duration:
• At each auto-recovery interval, snapshot for all files modified after last auto-recovery are created.
• Next auto recovery timer is started only after this process is completed.
Organize imported GIFs in library
This enhancement allows you to import Animated GIF files in a more organized way so that you can keep your library
in proper order. In previous releases, the imported GIF assets were placed in the library root folder without proper
naming. In this release, a folder with the GIF filename is created and all the associated bitmaps are organized under it.
As shown in the following image, the bitmaps are now named appropriately based on their sequence.
Library search by linkage name
In this release, the library search panel has been enhanced to include searching for symbols by ActionScript linkage
names in addition to searching by symbol names.
Last updated 6/12/2015
8
What's New
Invert selection
This new option in the Edit menu and the Stage context menu inverts the selection of currently selected objects or
shapes on the stage.
Paste and overwrite frames
New in Flash Professional CC 2015
The new 'Paste and Overwrite Frames' timeline context menu option enables you to paste the copied frames by
replacing the exact number of frames without pushing the frames forward. This replaces the existing way of selecting
the exact number of frames which you want to replace with the same number of copied frames. For example, if you
want to copy ten frames from a timeline and replace the exact number of frames in another timeline, copy the ten
frames and use the Paste and Overwrite Frames frames to paste it at the starting frame-the next ten frames are
overwritten with the copied frames.
Reset timeline zoom to the default level
You can now reset the timeline zoom to the default level with one click as shown in the image.
Last updated 6/12/2015
9
What's New
System Requirements
See the system requirements for Adobe Flash Professional CC 2015 at System Requirements | Flash Professional .
More Help topics
Flash Professional CC 2015 Release Notes
What's new in Flash Professional CC | 2014
New features summary - 2014
The 2014 release of Adobe® Flash Professional® CC provides an authoring environment for creating animation and
multimedia content for the Web, enabling visual designers to build interactive experiences that present consistently
across desktops and mobile devices. Continue reading for a quick introduction to new features available with the latest
update to Flash Professional CC, and links to other resources that provide more information.
Adobe Flash Professional CC 2014 update for July 2014 exposes the Web Graphics Library (WebGL) runtime API
that allows you to add interactivity to your WebGL animation by modifying elements in a scene and controlling the
playback.
Adobe Flash Professional CC 2014 | February 2015 Release
New in Flash Professional CC 2014 | February 2015 Release
The February 2015 update to Flash Professional CC 2014 Release offers you the capability to package 64-bit binaries to
comply with the mandatory requirement of Apple® starting February 1, 2015. The AIR 16.0 for iOS allows you to
generate 64-bit binaries using the Enable Faster Packaging option under the Deployment tab of AIR for iOS Setting
dialog, which is enabled by default.
Note: Since AIR 16.0 has not been released for Android yet, shared runtime is not available for the version. You can use
the embedded AIR runtime for Android applications.
Last updated 6/12/2015
10
What's New
For more information on packaging AIR for iOS, see Packaging applications for AIR for iOS.
HTML5 Canvas optimizations
New in Flash Professional CC 2014 | February 2015 Release
This release helps you optimize the HTML5 Canvas document type output by not exporting the unused media assets
such as sound and bitmaps present in the library. This setting is on by default, which means that any unused media
without linkages are not exported and only the media items (sound, bitmaps) that are used on the stage are included in
the output. This results in large savings in the output size, particularly if you had a large number of such media items
in the library that were unused.
Flash Professional CC does not export the following items in your HTML5 Canvas library:
• All unused library-items such as symbols, sounds, and bitmaps with no linkages
• Assets on guide layers
• Assets on the hidden layer, if ‘Include hidden layers’ not selected in Publish Settings
• Assets on unused frames of graphic symbols
If your content has assets that fall into any of the above-mentioned categories, Flash Professional optimizes the size of
your published output by leaving out all unused and hidden assets.
For more information about this feature, see Creating and publishing an HTML5 Canvas document.
Audio splitting
New in Flash Professional CC 2014 | February 2015 Release
You can split the stream audio embedded on the timeline using the Split Audio context menu. Split Audio enables you
to pause the audio when it is necessary and then resume the audio playback from the point it was stopped at a later
frame on the timeline.
To split an audio clip on your timeline:
1 Select File > Import > Import to library.
2 Select the audio clip and import it to library.
3 Create a new layer on your timeline and add the clip to the layer.
4 Under Properties > Sound, select the Sync type as Streaming.
5 Right-click on the frame at which you want to split the audio and click Split Audio.
For more information about audio splitting, see Using sounds in Flash.
Masking support in Custom Platform Support SDK
New in Flash Professional CC 2014 | February 2015 Release
This release supports masking in the IFrameCommandGenerator service. The new interface ITimelineBuilder2 that is
from the existing ITimelineBuilder interface contains the functions that the plugin has to implement to make this
feature work.
Download the CustomPlatformSupport_Eshwar_M04.zip file from the downloads section to work with the latest
custom platform support SDK and sample plugin.
For more information about using the custom platform support SDK, see Enabling Support for Custom Platforms.
Last updated 6/12/2015
11
What's New
Adobe Flash Professional CC 2014 | October Release
New in Flash Professional CC 2014 | October Release
Flash Professional CC 2014 October Release offers you the Custom Platform Support development kit that will help
you extend the capabilities of the poweful Flash platform to custom formats that are not natively supported by Flash.
The Custom Platform Support APIs and the sample code in the development kit allow you to create plugins for new
formats and distribute them through the Adobe Add-ons website. Users can download the appropriate plugin for their
publishing requirements from the Adobe Add-ons page, install the plugin with Flash Professional CC 2014, and start
creating and publishing creative assets.
For more information on Custom Platform Support see Custom Platform Support
To learn how to build a plugin using the Custom Platform Support development kit, see Enabling Support for Custom
Platforms.
For instructons to download, install and use custom platform support plugins, see Working with Custom Platform
Support Plug-in.
For complete reference documentation for the custom platform support APIs. see Custom Platform Support API
Reference.
Animation Guide
New in Flash Professional CC 2014 | October Release
The animation guide in Adobe Flash Professional CC now helps you enhance the animation you create by defining a
path for the objects you animate. This is particularly helpful when you are working on an animation that follows a path
that is not a straight line. This process requires two layers to carry out an animation. One layer containing the object
that you are about to animate, and the other defining the path, which the object is supposed to follow during the
animation. Animation guide works only on Classic Tweens.
For more information on Animation Guide and examples, see Animation Guide
Custom Brush
New in Flash Professional CC 2014 | October Release
The Brush Tool (B) in Adobe Flash Professional CC allows you to custom-define a brush by setting parameters of the
brush such as shape and angle. This enables you to create natural artwork in your projects by customizing the brush
tool to suit your drawing needs. You can create a custom brush in Flash Professional by selecting the Brush tool in the
toolbox of the Property Inspector.
For more information on creating and modifying custom brushes, see Custom Brushes
Audio and scripting support in WebGL documents
New in Flash Professional CC 2014 | October Release
The WebGL document type has been enhanced with the following features:
Audio: The WebGL document type in Flash Professional now supports audio playback. You can import and embed
audio into your WebGL document, control the playback via different sync settings (event, start and stop) and play the
timeline audio at runtime.
Scripting: You can now write Javascript code in the Actions panel, which will be executed on the player enters the
frame. The 'this' variable in the context of frame scripts refers to the instance of the MovieClip it belongs to. In addition,
frame scripts can access Javascript functions and variables declared in the container HTML file. When you copy a frame
or layer from an ActionScript document and paste it in a WebGL document, the scripts will be commented out.
Last updated 6/12/2015
12
What's New
Code hinting: The WebGL document type now comes with code hinting support, which eases WebGL coding with
contextual code suggestions.
Performance: The optimized publishing process for WebGL enables faster publishing. This release also includes several
performance enhancements to the WebGL documents that help them run faster on devices.
For more information on creating and publishing interactive WebGL documents, see Creating and publishing a WebGL
document
Usability enhancements
New in Flash Professional CC 2014 | October
This release contains the following usability enhancements:
• The Flip Horizontal and Flip Vertical options have been added to the Transform Panel.
• The context menu has been enhanced by adding the missing options such as Transform, Arrange, and Align.
• The Motion Editor context menu now contains the Flip option that helps you flip the motion property curves.
Publish applications for Intel x86-based Android devices
New in Flash Professional CC 2014 | October
This release of Flash Professional allows application developers to package their AIR applications in captive as well as
shared runtime modes for Intel x86-based Android devices.
Publish AIR applications with shared runtime
New in Flash Professional CC 2014 | October
Starting with this release, application developers can use the shared runtime option for packaging their AIR
applications. Shared runtime helps reduce the size of the application as compared to captive runtime, which bundles
AIR. When you select the shared runtime option while publishing, the installer downloads the runtime from a specified
location during installation.
Import SWF files
New in Flash Professional CC 2014 | October
You can now import SWF files into Flash Professional. The SWF import feature has been one of the most-requested
functionalities among the Flash Professional user community. This will help bring assets in a primitive form into Flash
Professional for further modifications.
However, since SWF is a rendered file, many types of data such as sound, tweens, layering details, and motion paths
cannot be reimported into Flash.
Adobe Flash Professional CC 2014 | July Release
New in Flash Professional CC 2014 | July
Flash Professional CC July 2014 offers you the Web Graphics Library (WebGL) runtime API library. The API allows
you to modify the elements in a scene and control the playback in the GPU-accelerated animations that you create in
the WebGL document format.
For more information on the WebGL runtime API, WebGL Runtime API Reference - Index.
Follow the steps described in the Getting Started with WebGL Animation page to learn how to create an interactive
WebGL animation.
Last updated 6/12/2015
13
What's New
New and improved Motion Editor
New in Flash Professional CC 2014 | June
Flash Professional CC June 2014 reintroduces the Motion Editor in a highly intuitive and streamlined form. The new
Motion Editor is designed to provide a smoother experience when refining Motion Tweens. Besides being easily
accessible from within the Timeline, the Motion Editor has been greatly improved to facilitate simpler and focused
editing of Property curves. With the new Motion Editor you can create complex and engaging tweens in simple steps
to emulate real world behavior of objects.
For more information, see Editing Motion Tweens using Motion Editor.
Creating and publishing WebGL content
New in Flash Professional CC 2014 | June
Flash Professional CC offers native support for Web Graphics Library (WebGL) format. You can now create and publish
WebGL content from within Flash Professional CC. The latest update, adds a new WebGL (preview) document type
that contains preset document and publish settings. You can now work with the familiar Timeline, Workspace, Tools,
and other functionalities of Flash Pro, and produce WebGL content.
Flash Professional CC leverages the GPU accelerated usage of processing and rendering of WebGL content, which is
integrated with most modern-day browsers.
For more information, see Creating and publishing a WebGL document.
NOTE: The WebGL document type is an experimental feature only available as Preview, and includes limited support
for interactivity.
Exporting to SVG format
New in Flash Professional CC 2014 | June
Flash Professional CC allows you to export artwork to Scalable Vector Graphics (SVG) format. SVG is an open web
standard for creating and publishing vector graphics. With SVG, you can create and easily embed high quality artwork
within most web pages.
Common image formats such as JPEG, PNG, BMP, and GIF offer low resolution artwork and are generally bulky,
affecting load-times of web pages. With SVG support, Flash Professional CC allows you to produce graphics of superior
quality that do not rasterize on scaling (resolution-independent).
For more information, see Exporting SVG files.
Last updated 6/12/2015
14
What's New
Enhancing strokes using Variable Width Tool
New in Flash Professional CC 2014 | June
Enhance strokes using the Variable Width Tool in Flash Professional CC. The Width tool allows you to add widths of
varying forms and thickness to drawings on Stage. By adding variable width, simple strokes can be easily transformed
into rich artwork. Flash Professional CC allows you to create and save Width profiles, which can be used to apply
variable width to drawings on stage.
For more information, see Enhancing strokes using the Width tool .
Tweening strokes with Variable Width
You can now shape-tween strokes with Variable Width. Earlier, Flash Pro only allowed tweening of Solid Strokes.
However, you can now tween fancy strokes created using the Variable Width Tool. Flash Pro also allows you to tween
solid strokes that are associated with default or custom Width Profiles.
For more information, see Shape tweening strokes with Variable Width .
Kuler Panel
New in Flash Professional CC 2014 | June
Last updated 6/12/2015
15
What's New
Flash Professional CC is now integrated with Kuler panel, a cloud-based application to create color themes using
iPhone or desktop browser. With Kuler panel, you can sync your color inspirations right to Flash Professional CC via
Creative Cloud. To create color themes using Kuler, visit this link.
For more information, see .
Creating HTML5 extensions for Flash Professional CC
Enhanced in Flash Professional CC 2014 | June
You can extend Flash Professional CC using HTML extensions. Earlier, Flash Professional CC could only be integrated
with SWF extensions packaged using Adobe Extension Builder. However, with Adobe Extension Builder 3 you can
create and package HTML extensions that can be submitted to Adobe Exchange. Flash Professional CC has been
enhanced to leverage HTML extensions packaged using Extension Builder 3. These extensions can be downloaded
using Adobe Exchange and managed using Adobe Extension Manager from within Flash Professional CC.
For more information, see Creating HTML extensions.
Synchronizing Workspaces with Adobe Creative Cloud
Enhanced in Flash Professional CC 2014 | June
You can now sync the Flash Professional CC Workspace settings with Creative Cloud. You can customize the workspace
to suit your design needs, and via Creative Cloud, you can replicate the customizations across multiple machines.
For more information, see Sync Flash Professional Preferences with Creative Cloud.
Other key enhancements
The Object level undo option has been re-enabled and can be accessed on the Preferences dialog. For more
information, see Undo, Redo, and Repeat commands.
Exporting projector files has now been re-enabled, as well. Note that the option to export projector files is
available within the Commands menu. For more information, see Exporting Projector files.
System Requirements
See the system requirements for Adobe Flash Professional CC 2014 at System Requirements | Flash Professional .
More Help topics
What's new in Flash Professional CC | 2013
What's new in Flash Professional CS6
This article gives you an overview of What's new with Adobe Flash Professional CS6.
Support for Adobe AIR 3.4 (Flash Professional CS6 Update 12.0.2 only)
By virtue of Flash Professional CS6 Update 12.0.2, Flash Professional extends support for AIR 3.4 and Flash Player 11.4.
This update also allows Flash Professional to leverage features exposed by AIR 3.4 that enhance application
development workflow for iOS devices.
• Deploying AIR applications on iOS devices directly
Last updated 6/12/2015
16
What's New
• Testing and debugging AIR applications using the native iOS simulator
• Publishing AIR applications for devices with High Resolution Retina Display support
Toolkit for CreateJS 1.2
The Toolkit for CreateJS 1.2 release extends support for converting Buttons to HTML5. The update also includes fixes
to several JSX related errors. Other issues such as omission of multiple empty keyframes have also been addressed in
this update.
You can download and install Toolkit for CreateJS 1.2 from Adobe Extension Manager CS6. For more information on
the Toolkit, see Using the Flash Professional Toolkit for CreateJS.
Mobile content simulation for AIR
The new mobile content simulator allows you to simulate Hardware keys, acceleromenter, Multi-touch, and Geolocation.
Choose network interface for remote debugging for AIR
When you publish an AIR app to an Android or iOS device, you can choose the network interface to use for remote
debugging. Flash Pro will package the IP address of the selected network interface into the debug mode mobile
application. The app can then auto-connect to the host IP to start a debug session when it launches on the target mobile
device. To access the setting, choose File > Publish Settings, and then select the Deployment tab in the AIR Settings
dialog box. For more information, see Packaging applications for AIR for iOS and Publishing for Adobe AIR for
desktop articles.
Toolkit for CreateJS
The Adobe Flash Professional Toolkit for CreateJS is an extension for Flash Professional CS6 that enables designers and
animators to create assets for HTML5 projects using the open source CreateJS JavaScript libraries. The extension
supports most of the core animation and illustration capabilities of Flash Professional, including vectors, bitmaps,
classic tweens, sounds, motion guides, animated masks, and JavaScript timeline scripting. With one click, the Toolkit
for CreateJS exports the contents on the stage and in the library as JavaScript that can be previewed in the browser to
help you start building expressive HTML5-based content in noTime.
The Toolkit for CreateJS is designed to help Flash Pro users make the transition to HTML5. It turns symbols in the
Library and content on the Stage into cleanly formatted JavaScript that is understandable, editable and easily reusable
by developers who can add interactivity using JavaScript and the CreateJS APIs that will be familiar to ActionScript 3
users. The Toolkit for CreateJS also publishes a simple HTML page that provides a quick way to preview the assets. For
more information, see this article.
Export sprite sheets
You can now export a sprite sheet by selecting a symbol in the Library or on the Stage. A sprite sheet is a single graphic
image file that contains all the graphic elements used in the selected symbol. The elements are arranged in tiled format
in the file. You can also include bitmaps in the Library when selecting a symbol in the Library. To create a sprite sheet,
follow these steps:
1 Select a symbol in the Library or on the Stage.
2 Right-click and choose Export Sprite Sheet.
Last updated 6/12/2015
17
What's New
High efficiency SWF compression
For SWFs that target Flash Player 11 or later, a new compression algorithm, LZMA, is available. The new compression
can be up to 40% more efficient, particularly for files that contain a lot of ActionScript or vector graphics.
1 Choose File > Publish Settings
2 In the Advanced section of the dialog box, select the Compress movie option and choose LZMA from the menu.
Direct Mode publishing
A new window mode called Direct is available which enables hardware accelerated content using Stage3D. (Stage3D
requires Flash Player 11 or later.)
1 Choose File > Publish Settings
2 Select HTML Wrapper.
3 Select Direct from the Window Mode menu.
For more information see this article.
Support for Direct render mode in AIR plugins
This feature brings Flash Player's Direct mode rendering support for StageVideo/Stage3D to AIR applications. A new
renderMode=direct setting can be used in the application descriptor file of an AIR application. Direct mode can be set
for AIR for Desktop, AIR for iOS and AIR for Android.
Debug iOS through Wi-Fi
You can now debug AIR applications on iOS through Wi-Fi, including breakpoints, step-in and step-out, variable
watcher, and trace.
For more information about debugging AIR applications, see AIR Debug Launcher.
Support for captive runtime for AIR
The Publish Settings dialog for AIR now has an option for embedding the AIR runtime into the application package.
An application with the runtime embedded can run on any desktop, Android, or iOS device without the shared AIR
runtime installed.
Adobe recommends:
View the videos Adobe AIR with Captive Runtime Support for Mobile and Desktop.
Native extensions for AIR
You can incorporate native extensions into the AIR applications you develop in Flash Pro. By using native extensions,
your applications can access all of the features of your target platform, even if the runtime itself doesn't have built-in
support for them.
Adobe recommends:
View these videos: Android Native Extensions, Part 1 and Part 2.
Last updated 6/12/2015
18
What's New
Get latest Flash Player from within Flash Pro
You can now go directly to the Flash Player download page on Adobe.com from the Help menu in Flash Pro.
Export PNG sequence
Use this feature to generate image files that Flash Pro or other applications can use to generate content. For example,
PNG sequences are often used in gaming applications. This feature allows you to export a sequence of PNG files from
a Library item or individual movie clips, graphic symbols, and buttons on the Stage.
1 Select a single movie clip, button or graphic symbol in the Library or the Stage
2 Right-click it to display the context menu.
3 Choose Export PNG Sequence.
4 In the system Save dialog, choose a location for the output. Click OK.
5 In the Export PNG dialog box, set your options. Click Export to export the PNG sequence.
New features summary
The 2015 release of Adobe® Flash Professional® CC reintroduces the IK bone tool that enables you to create bone
armatures using symbols or shapes that can be easily turned into life-like animation. The release also comes with H.264
video import, universal document type converter, integration with the latest Flash Player and AIR SDK, and many more
enhancements. Continue reading for a quick introduction to new features available with the latest update to Flash
Professional CC, and links to other resources that provide more information.
Adobe Flash Professional CC 2015 release provides you capabilities to create great cartoon characters with lifelike movements using the new bone tool, convert your projects to any document type using the universal document
type converter, import H.264 videos, work with the latest Flash Player and AIR SDK, and many more cool capabilities
that help you to take your graphics and animation projects to the next level.
Adobe Flash Professional CC 2015 Release
Bone tool
New in Flash Professional CC 2015
The Flash Professional CC 2015 Release offers you the capability to lend life-like movements to your animation
characters using the all-new bone tool.
Last updated 6/12/2015
19
What's New
The bone tool gives you inverse kinematics (IK) capabilities within Flash. IK is a way of animating objects using bones
chained into linear or branched armatures in parent-child relationships. When one bone moves, connected bones move
in relation to it. Inverse kinematics lets you easily create natural motion. To animate using inverse kinematics, specify
the start and end positions of bones on the Timeline. Flash automatically interpolates the positions of the bones in the
armature between the starting and ending frames.
You can use IK in the following ways:
• By using a shape as a container for multiple bones. For example, you can add bones to a drawing of a snake so that
it slithers realistically. You can draw these shapes in Object Drawing mode.
• By chaining symbol instances. For example, you can link movie clips showing a torso, arm, lower arm, and hand so
that they move realistically in relation to each other. Each instance has only one bone.
Bone tool comes with on-stage controls to ensure greater precision in movements. The onstage controls allows you to
switch between Locked, Open, and Constrained states for Rotation and Translation properties of individual bones in
the IK armature. You can now directly adjust these constraints on stage with accuracy using clear visual feedback.
For more information on using the bone tool, see Bone tool
Import H.264 videos with audio
New in Flash Professional CC 2015
In addition to FLV videos, this release also introduces an option to embed H.264 videos in the timeline. When an H.264
video is embedded, the frames of the video are rendered on the stage when you scrub the timeline. This feature enables
you to use videos as a guide to synchronize your animation on stage. Since the Flash Player and other run-times do not
support rendering embedded H.264 videos, they are not published. Importing H.264 videos is a design-time-only
feature.
Audio playback is enabled for H.264 videos. You can now select the ‘Include audio’ option while importing H.264
videos. Once imported to the stage (with ‘place instance on stage’ option selected), scrubbing the timeline must play
the audio for the relevant frames. Playing the timeline (Enter) must play back the animation at the fps of the imported
video so that the audio is in sync with the video frames on stage.
To learn more about importing H.264 videos, see Add video to Flash.
To import video:
Click File > Import > Import Video and select the Embed H.264 video in the timeline (design time only – the video
cannot be exported) option as shown in the following image:
Last updated 6/12/2015
20
What's New
For more information about using audio, see Using sounds in Flash.
Export bitmaps as spritesheet for HTML5 Canvas
New in Flash Professional CC 2015
Export sprite sheet as bitmap allows you to pack all the bitmaps in canvas document in to a sprite sheet. A new Export
the Bitmap as Sprite Sheet check box has been added and enabled by default. You can specify the maximum size of the
sprite sheet by giving the height and width values in the publish settings. This enhancement reduces the number of
server requests, which in turn results in improved performance.
Last updated 6/12/2015
21
What's New
Brush scaling with stage zoom
With this release, Flash Professional scales the brush size proportionately to the changing zoom level of the stage.
Proportionate zooming allows you to draw seamlessly adjusting to any zoom level and preview your work as you draw.
If you want to revert to the earlier default behavior of brushes maintaining a constant pixel size even when you change
the zoom level of the stage, you must disable the 'Stage zoom level' checkbox in the brush Property Inspector.
A Increase/decrease brush size B Brush size preview C Option to scale brush size according to the zoom level of the stage
Universal document type converter
New in Flash Professional CC 2015
The universal document type converter enables conversion of your existing FLA projects (of any type) to any other
document type such as HTML5 Canvas or WebGL.
To use this feature, click Commands > Convert to Other Document Formats and then select the target document type
and specify the path of the converted file.
To learn more about universal document type converter, see .
Last updated 6/12/2015
22
What's New
Improved audio workflows
New in Flash Professional CC 2015
Enhanced import workflow
In earlier versions of Flash Pro, you had to import the audio file in to the library and then add it to a layer on the
timeline. In this release, you can directly import audio in to your stage/timeline by dragging and dropping the file to a
layer or by using the File > Import > Import to Stage option.
Split Audio option in context menu
The stream audio embedded on the timeline can be split at ease using the Split Audio context menu. Split Audio enables
you to pause the audio when it is necessary and then resume the audio playback from the point it was stopped at a later
frame on the timeline.
Remember audio sync options in PI
Flash Pro now remembers the sync options in property inspector. If a sound is selected from the “Sound” section of the
Property Inspector, then on trying to set another sound on a new keyframe from the Property Inspector, Flash
remembers the sync options “Stream” or “Event” of the previous sound.
Improved Motion Editor
New in Flash Professional CC 2015
The Paste functionality has been enhanced as follows:
• Paste: Until the 2014.1 release, when you copy a curve in the Motion Editor and use the Paste option to paste it in a
new range, it pastes within the current curve’s range and not with absolute values. In this release, the Paste option
pastes the curve with absolute values.
• Paste to fit current range: This option now replicates the old Paste operation and pastes the curve within the
current curve’s range and not with absolute values.
Panel locking
A new option, Lock/Unlock, has been added to the fly-out menu of the panels to lock the dock. Once a dock is locked,
all the panels in the dock can be resized, but cannot be moved. This feature helps you prevent accidental drag and resize
of panels.
Last updated 6/12/2015
23
What's New
Code snippet support for WebGL
From this release, code snippets are available for some commonly used actions in the WebGL document type.
Note: This enhancement is available only in the English language version.
Enhancements in Custom Platform Support SDK
This release includes the following enhancements to Custom Platform Support SDK and the sample plug-in:
• Ability to query the type of a library symbol: ILibraryItem::GetProperties() returns an additional key "SymbolType"
for symbols. The value of key can be "Button," "MovieClip," or "Graphic."
• Ability to distinguish between button and movie-clip: Until the previous release, the button instances were treated
as movie clips by both the DOM and the IFrameCommandGenerator service. Starting with Flash Pro CC 2015, an
interface has been added to support button instances. If the IMovieClip instance also implements the IButton
interface, then it can be treated as a button instance. The four states of a button namely, Up, Over, Down, and Hit
are always mapped to the frames 0, 1, 2, and 3 respectively. See the file IButton.h to know more about the button
instance.
• New API to get the bounds of IClassicText objects: The AddClassicText function in ITimelineBuilder interface now
returns an object of CLASSIC_TEXT_INFO_2 (instead of the old CLASSIC_TEXT_INFO), which contains a new
field "bounds" representing the bounds of the IClassicText object.
Last updated 6/12/2015
24
What's New
Integration of latest Flash Player and AIR SDK
This release comes to you with the Flash Player version 17.0 and AIR SDK 17.0 integrated.
Integration of latest CreateJS libraries
This release of Flash Professional comes with the latest CreateJS libraries integrated.
Since the latest libraries are not yet hosted via CDN, clear the Hosted LIbraries checkbox under the Advanced section
of the Publish Settings dialog box (Edit > Publish Settings > Advanced) to see the output.
Other enhancements
New in Flash Professional CC 2015
Save optimizations
This release comes with the following Save optimizations:
• Save algorithm optimization resulting in faster saving of FLA
• File corruption issues while saving files over the network are now resolved
Auto-recovery optimizations
The following auto-recovery enhancements are part of this release:
• Flash Professional does not create unnecessary auto-recovery files. An auto-recovery file is created only if the
document is modified after the last auto-recovery files were created.
• Progress bar is displayed only when the Flash Pro application is in focus.
• Auto-recovery file is removed only after completing a successful save operation.
The following auto-recovery changes help you avoid continuous loop of auto-recovery for short auto-recovery
duration:
• At each auto-recovery interval, snapshot for all files modified after last auto-recovery are created.
• Next auto recovery timer is started only after this process is completed.
Organize imported GIFs in library
This enhancement allows you to import Animated GIF files in a more organized way so that you can keep your library
in proper order. In previous releases, the imported GIF assets were placed in the library root folder without proper
naming. In this release, a folder with the GIF filename is created and all the associated bitmaps are organized under it.
As shown in the following image, the bitmaps are now named appropriately based on their sequence.
Library search by linkage name
In this release, the library search panel has been enhanced to include searching for symbols by ActionScript linkage
names in addition to searching by symbol names.
Last updated 6/12/2015
25
What's New
Invert selection
This new option in the Edit menu and the Stage context menu inverts the selection of currently selected objects or
shapes on the stage.
Paste and overwrite frames
New in Flash Professional CC 2015
The new 'Paste and Overwrite Frames' timeline context menu option enables you to paste the copied frames by
replacing the exact number of frames without pushing the frames forward. This replaces the existing way of selecting
the exact number of frames which you want to replace with the same number of copied frames. For example, if you
want to copy ten frames from a timeline and replace the exact number of frames in another timeline, copy the ten
frames and use the Paste and Overwrite Frames frames to paste it at the starting frame-the next ten frames are
overwritten with the copied frames.
Reset timeline zoom to the default level
You can now reset the timeline zoom to the default level with one click as shown in the image.
Last updated 6/12/2015
26
What's New
System Requirements
See the system requirements for Adobe Flash Professional CC 2015 at System Requirements | Flash Professional .
More Help topics
Flash Professional CC 2015 Release Notes
What's new in Flash Professional CC | 2014
Last updated 6/12/2015
27
Chapter 2: Platforms
Convert to other document formats
Convert your Flash Professional document to another document format
The universal document type converter enables conversion of your existing FLA projects (of any type) to any other
document type such as HTML5 Canvas, ActionScript/AIR, WebGL, or a custom document type. When you convert to
a format, you can take advantage of the authoring features that Flash Professional offers for that document type.
Converting your Flash document using the document type converter
To convert your Flash document to another document type:
1 Open the document that you want to convert and click Commands > Convert to Other Document Formats. The
Document Type Converter dialog box appears.
2 In the Convert your document to drop-down, select the document type that you want the convert the document to.
3 Click Browse to select the directory in which you want to save the converted file and click OK.
Note: When you try to convert any multi-scene document to HTML5 Canvas doctype, all the scenes are saved as
separate files because HTML5 Canvas document type does not support multiple scenes. Place all your scenes within
separate symbols if you want to use them in a single document.
You can convert your existing Flash projects to another format or reuse assets in a project by simply copying and pasting
layers and library symbols.
Last updated 6/12/2015
28
Platforms
Custom Platform Support
Flash Professional supports creating rich graphics and animations using document types such as ActionScript,
HTML5, and WebGL. The Custom Platform Support feature helps to extend the power of Flash Professional CC to
support platforms that are not native to Flash.
Custom Platform Support can be added to Flash Professional by implementing a plugin using a set of Application
Programming Interfaces (APIs) that are provided as part of the Custom Platform Support Development Kit. The
developers can create custom platform support plugins for Flash using these interfaces and referring to the the sample
code. By installing a platform support plugin for a new document type, users can create their art using the rich feature
set of Flash Professional and publish it in the output format of the custom platform.
Workflows
The Custom Platform Support feature includes two parts: one for the developer who creates custom platform support
plugins and the other for the user who installs and uses the plugin.
Developer
If you are a developer who builds add-ons for Flash Professional, you can use the following workflow to develop and
distribute your plugins:
Note: For instructions on how to develop Custom Platform Support plugins using the development kit, see Enabling Support
for Custom Platforms.For detailed documentation of APIs in the development kit, see Custom Platform Support API
Reference.
User
Last updated 6/12/2015
29
Platforms
If you are a Flash Pro user, you can acquire a Custom Platform Plugin using one of the following methods:
• Download the Custom Platform Support plugin for a platform of your choice from the Adobe Add-ons page. The
Adobe Add-on page allows you to acquire a plugin and install it using the Adobe Creative Cloud application.
• Get a .zxp file from a plugin developer and install it using the Adobe Extension Manager application.
The following workflow illustrates how you can install a custom platform support plugin and create your custom
platform document.
More Help topics
Enabling Custom Platform Support
Custom Platform Support API Reference
Working with Custom Platform Support Plugins
Creating and publishing an HTML5 Canvas document
Last updated 6/12/2015
30
Platforms
What is HTML5 Canvas?
Canvas is a new element in HTML5, which provides APIs that allow you to dynamically generate and render graphics,
charts, images, and animation. The presence of the Canvas API for HTML5, strengthens the HTML5 platform by
providing two-dimensional drawing capabilities. These capabilities are supported on most modern operating systems
and browsers.
Essentially, Canvas is a bitmap rendering engine, and the drawings are final and cannot be resized. Furthermore, objects
drawn on Canvas are not part of the web page's DOM.
Within a web page, you can add Canvas elements using the <Canvas> tag. These elements can then be enhanced using
JavaScript to build interactivity. For more information, see this link.
The new HTML5 Canvas document-type
Flash Professional CC enables you to create an HTML5 Canvas document with rich artwork, graphics, animations, and
so on. A new document type (HTML5 Canvas) has been added to Flash Pro that provides native support for creating
rich and interactive HTML5 content. It means that you can use the traditional Flash Professional timeline, workspace,
and tools to create content, but produce HTML5 output. With a few simple clicks, you are ready to create an HTML5
Canvas doc and generate a fully functional output. To its end, within Flash Pro, the document and publish options are
preset to generate HTML5 output.
Flash Professional CC is integrated with CreateJS, which enables rich interactive content on open web technologies via
HTML5. Flash Pro CC generates HTML and JavaScript for content (includes bitmaps, vectors, shapes, sounds, tweens,
and so on) created on stage. The output can be run on any device or browser that supports HTML5 Canvas.
Flash Professional and the Canvas API
Flash Pro publishes to HTML5 by leveraging the Canvas API. Flash Pro seamlessly translates objects created on stage
in to their Canvas counterparts. By providing a 1-to-1 mapping of Flash features with the APIs within Canvas, Flash
Pro enables you to publish complex content to HTML5.
Creating an HTML5 Canvas document
To create an HTML5 Canvas document, do the following:
1 Launch Flash Professional CC.
2 On the Welcome Screen, click the HTML5 Canvas option. This opens a new FLA with Publish Settings modified to
produce HTML5 output.
3 Alternatively, select File> New to display the New Document dialog. Click the HTML5 Canvas option.
You can now begin creating HTML5 content using the tools within Flash Pro. As you begin working with the HTML5
Canvas document, you will notice that certain features and tools are not supported and are disabled. This is because,
Flash Professional supports those features that are in-turn supported by the Canvas element within HTML5. For
example, 3D transformations, dotted lines, bevel effects are not supported.
Adding interactivity in HTML5 Canvas document
Flash Professional CC publishes HTML5 content using the CreateJS libraries. CreateJS is a suite of modular libraries
and tools which enable rich interactive content on open web technologies via HTML5. The CreateJS suite comprises
of: EaselJS, TweenJS, SoundJS, PreloadJS, and Zoë. CreateJS converts content created on stage to HTML5 using these
individual libraries to produce HTML and JavaScript output files. You can also manipulate this JavaScript file to
enhance your content.
Last updated 6/12/2015
31
Platforms
However, Flash Professional CC allows you to add interactivity to objects on stage created for HTML5 Canvas from
within. It means that you can actually add JavaScript code to individual objects on stage from within Flash Pro and
preview at author-time. In turn, Flash Pro provides native support for JavaScript with useful features within the codeeditor to help improve workflow efficiency of programmers.
You can choose individual frames and keyframes on the Timeline to add interactivity to your content. For an HTML5
Canvas document, you can add interactvity using JavaScript. For more information about writing JavaScript code, see
this link.
JavaScript code can be written directly in the Actions panel, and it supports the following features while writing the
JavaScript code:
Code Hinting Allows you to quickly insert and edit JavaScript code and without mistakes. As you type characters in the
Actions Panel, you can see a list of candidates that possibly complete your entry.
Additionally, Flash Professional also supports some features inherent to Actions Panel when working with HTML5
Canvas. These features help improve workflow efficiency when adding interactivity to objects on stage. They are:
Syntax Highlighting Displays code in different fonts or colors according to the syntax. This feature allows you to write
code in a structured manner, helping you visually distinguish correct code and syntax errors.
Code Coloring Displays code in different colors according to the syntax. This allows you to visually distinguish various
parts of a syntax.
Bracket Automatically adds closing brackets and parentheses for open when writing JavaScript code.
You can add interactivity to shapes or objects on stage using JavaScript. You can add JavaScript to individual frames and
keyframes.
1 Select the frame you want to add JavaScript to.
2 Select Window > Actions to open the Actions Panel.
Using JavaScript Code Snippets
You can add interactivity using JavaScript code snippets available within Flash Professional CC. To access and use Code
Snippets, select Windows > Code Snippets. For more information about adding JavaScript code snippets, see this
article .
Last updated 6/12/2015
32
Platforms
References to CreateJS documentation
CreateJS Library
API Documentation
Code Samples on Github
EaselJS
http://createjs.com/Docs/EaselJS/modules/Ea https://github.com/createjs/easeljs/
selJS.html
TweenJS
http://createjs.com/Docs/TweenJS/modules/
TweenJS.html
https://github.com/createjs/tweenjs/
SoundJS
http://createjs.com/Docs/SoundJS/modules/
SoundJS.html
https://github.com/createjs/soundjs/
PreloadJS
http://createjs.com/Docs/PreloadJS/modules
/PreloadJS.html
https://github.com/createjs/preloadjs/
Publishing animations to HTML5
To publish the content on stage to HTML5, do the following:
1 Select File > Publish Settings.
2 On the Publish Settings dialog, specify the following settings:
Output The directory the FLA is published to. This defaults to the same directory as the FLA, but can be changed by
clicking the browse button "...".
Loop Timeline If checked the timeline loops, if not it stops when it plays to the end.
Publish HTML If deselected, the HTML file is not generated.
Asset Export Options The relative URLs to export images, sounds, and supporting CreateJS JavaScript libraries to. If
the check box to the right is not checked, those assets are not exported from the FLA, but the specified path is still used
to assemble their URLs. It expedites publishing from an FLA with many media assets, or avoid overwriting modified
JavaScript libraries.
The Export all bitmaps as Spritesheets option allows you to pack all the bitmaps in canvas document in to a sprite sheet,
which reduces the number of server requests and improves performance. You can specify the maximum size of the
sprite sheet by giving the height and width values.
Last updated 6/12/2015
33
Platforms
JavaScript Namespaces The namespace in which symbols, images, and the CreateJS libraries are placed into and
referenced from.
Hosted Libraries If checked, it uses copies of the libraries hosted on the CreateJS CDN at code.createjs.com. It allows
the libraries to be cached and shared between various sites.
Include Hidden Layers If deselected, hidden layers are not included in the output.
Compact Shapes If checked, vector instructions are outputted in a compact form. Deselect to export readable, verbose
instructions (useful for learning purposes).
Multiframe bounds If checked, timeline symbols include a frameBounds property containing an array of Rectangles
corresponding to the bounds of each frame in the timeline. Multiframe bounds significantly increases publish time.
❖ Click Publish to publish your content to the specified location.
Note: An animation designed using nested timelines, with a single frame, cannot be looped.
Optimizing HTML5 Canvas output
Flash Professional optimizes HTML5 Canvas output size and performance by:
• Exporting bitmaps and sprite sheet by selecting the option under Asset Export Options.
• Excluding hidden layers (by deselecting the Include hidden layers check box) and guide layers from published
output (default).
• Excluding all unused assets such as sounds and bitmaps, and all assets on unused frames (default).
• Specifying not to export the assets from the FLA by deselecting the asset export options for images, sounds, and
supporting CreateJS JavaScript libraries and using the relative URLs to export.
Last updated 6/12/2015
34
Platforms
Note: Starting Flash Professional CC 2015 release, the Optimize Graphic check box has been removed from the Publish
Settings dialog box as Flash Professional performs this optimization implicitly while publishing HTML5 Canvas
documents.
Export bitmaps as sprite sheet
Exporting a number of bitmaps that you have used in your HTML5 Canvas document as a single sprite sheet reduces
the number of server requests, reduces the output size, and improves performance. You can specify the maximum size
of the sprite sheet by giving the height and width values.
1 Under Asset Export Options, select the Export all bitmaps and Spritesheets check box.
2 In Maximum size of Spritesheets, specify the maximum height and width of the sprite sheet.
Understanding the HTML5 Canvas output
The published HTML5 output contains the following files:
HTML file Contains definitions for all shapes, objects, and artwork within the Canvas element. It also invokes the
CreateJS namespace to convert Flash to HTML5 and the corresponding JavaScript file that contains interactive
elements.
JavaScript file Contains dedicated definitions and code for all interactive elements of the animation. Also defined
within the JavaScript file are, code for all types of tweens.
These files are copied to the same location as that of the FLA by default. You can change the location by providing the
output path on the Publish Settings dialog (File > Publish Settings).
Migrating existing content to HTML5 Canvas
You can migrate existing content within Flash Pro to generate an HTML5 output. To its end, Flash Pro allows you to
migrate content by manually copying or importing individual layers, symbols, and other library items. Alternatively,
you could run the Convert AS3 to HTML5 Canvas document command to automatically port existing ActionScript
content to a new HTML5 Canvas document. For more information, see this link .
However, when working the HTML5 document type in Flash Professional CC, you can notice that certain Flash
features are not supported. This is because, the features within Flash do not have corresponding features within the
Canvas API. And hence, these features cannot be used within the HTML5 Canvas document type. This may affect you
during content migration, when you attempt to:
Copy content (layers or library symbols) from a traditional Flash document type (such as ActionScript 3.0, AIR for
Android, AIR for Desktop, and so on) into an HTML5 document. In this case, an unsupported content-type is either
removed or converted to supported defaults.
For example, copying 3D animation will remove all 3D transformations applied to objects on stage.
Import a PSD or AI file that contain unsupported content. In this case, the content is either removed or converted to
supported defaults.
Last updated 6/12/2015
35
Platforms
For example, import a PSD file that has Gradient Bevel effect applied. Flash Pro removes the effect.
Work with multiple document types (for example, ActionScript 3.0 and HTML5 Canvas) simultaneously, you switch
documents with an unsupported tool or option selected. In this case, Flash Pro CC visually indicates that the feature is
not supported.
For example, you created a dotted line in an ActionScript 3.0 document and switch to HTML5 Canvas with the Line
tool still selected. Observe the pointer and the the Properties Inspector, they display icons to indicate that dotted line
is not supported within HTML5 Canvas.
Scripts ActionScript components are removed and the code is commented out. And also, if you have JavaScript written
within the comment block (for Toolkit for CreateJS with Flash Professional CC 13.0), ensure that you manually
uncomment the code.
For example, if you copied layers that contain buttons, they are removed.
Changes applied to content after migrating
The following are the types of changes that are applied when you migrate legacy content to an HTML5 Canvas
document.
Content is removed Content types that are not supported in HTML5 Canvas are removed. For example:
• 3D Transformations are removed
• ActionScript code is commented out
• Videos are removed
Content is modified to a supported default value Content type or feature is supported, but a property of the feature is
not. For example:
• Overlay Blendmode is not supported; is modified to Normal.
• Dotted Line is not supported; is modified to Solid.
For a full list of features that are not supported and their fallback values during migration, see this article .
Converting ActionScript 3 to HTML5 Canvas document using JSFL script
Flash Professional CC provides a JSFL script to convert an AS3 document to HTML5 Canvas document. When run,
the JSFL script does the following:
• Creates a new HTML5 Canvas document.
• Copies all layers, symbols, and library items to the new HTML5 Canvas document.
• Applies defaults to unsupported features, sub-features, or feature-properties.
• Creates separate FLA files for each scene, because HTML5 Canvas document does not support multiple scenes.
To convert an AS3 document to HTML5 Canvas document, do the following:
1 Open the ActionScript 3 document in Flash Professional CC.
2 Select Commands > Convert AS3 to HTML5 Canvas document.
Note: Ensure that you read through Warnings in the Output panel. These warnings give you information about changes
that were applied to content during the conversion.
Last updated 6/12/2015
36
Platforms
Creating and publishing a WebGL document
What is WebGL?
WebGL is an open web standard for rendering graphics on any compatible browser, without the need for additional
plug-ins. WebGL is integrated completely into all the web standards of the browser allowing GPU accelerated usage of
image processing and effects as part of the web page canvas. WebGL elements can be embedded with other HTML
elements and composited with other parts of the page.
Although, most modern-day browsers support WebGL, visit this link to know more details about the exact versions
that are supported.
Some browsers do not have WebGL enabled by default. To enable WebGL on your browser, see this article.
Note: Ensure that you enable WebGL on your browser, because some browsers disable WebGL by default.
The WebGL document type
Flash Professional CC allows you to create and publish rich interactive content to the Web Graphics Library (WebGL)
format. Since WebGL is fully integrated into browsers, it allows Flash Professional to leverage GPU accelerated usage
of graphics processing and rendering, as part of the web page canvas.
In Flash Professional CC, a new document type has been added for WebGL. This allows you to create content and
quickly publish to a WebGL output. You can leverage powerful tools within Flash to create rich content, but render
WebGL output that runs on any compatible browser. This means that you can use the traditional Flash timeline,
workspace, and drawing tools to natively author and produce WebGL content. Most commonly used browsers support
WebGL, there by, allowing Flash Pro to render content on most web platforms.
Creating a WebGL document
In Flash Professional CC, the WebGL document allows you to quickly create and publish content for the WebGL
format. To create a WebGL document:
1 Launch Flash Professional CC.
2 On the Welcome Screen, click the WebGL(Preview) option. Alternatively, select File > New menu option to display
the New Document dialog. Click the WebGL(Preview) option.
Previewing WebGL content on browsers
You can use the Test Movie feature of Flash Pro to preview or test your content. To preview, do the following:
❖ Within Flash Professional CC, press Ctrl+Enter on Windows and CMD+Enter on MAC. This launches your default
browser and renders the WebGL content.
Flash Professional CC requires a web server to run WebGL content. Flash Pro CC has a built-in Web Server that is
configured to run WebGL content on Port #8090. If a server is already using this port, Flash Pro automatically detects
and resolves the conflict.
Publishing content to the WebGL format
Flash Pro allows you to create and publish WebGL content natively from within.
Last updated 6/12/2015
37
Platforms
To publish your WebGL document, do the following:
1 Select File> Publish Settings to display the Publish Settings dialog. Alternatively, select File > Publish. if you have
already specified Publish Settings for WebGL.
2 On the Publish Settings dialog, specify values for:
Output file Provide a meaningful name for the output. Also, browse to or enter the location where you want to publish
the WebGL output.
Overwrite HTML Lets you specify whether to overwrite the HTML Wrapper or not everytime you publish your WebGL
project. You may uncheck this option if you have made any external changes to the published HTML file and wish to
retain them while updating any changes made to the animation or assets in Flahs Pro.
Include Hidden Layers Includes all hidden layers in the WebGL output. Deselecting Include Hidden Layers prevents all
layers (including layers nested inside movie clips) marked as hidden from being exported in the resulting WebGL. This
lets you easily test different versions of WebGL document by making layers invisible.
Loop Timeline Repeats the content when it reaches the last frame. Deselect this option to stop the content when it
reaches the last frame.
❖ Click Publish to publish WebGL content to the specified location.
Note: The maximum FPS that could specified for WebGL content that run on browsers is 60FPS.
Understanding the WebGL output
The published WebGL output contains the following files:
HTML Wrapper file It includes the runtime, calls for assets, and also, initializes the WebGL renderer. The file is named
as <FLA_name>.html by default. You can provide a different name for the HTML file in the Publish Settings dialog
(File > Publish Settings).
The HTML file is placed in the same directory as that of the FLA by default. You can provide a different location on the
Publish Settings dialog.
JavaScript File (WebGL Runtime) Renders published content on WebGL. Is published in the libs/ folder of the WebGL
document. The file is named as: flwebgl-<version>.min.js
The HTML wrapper makes use of this JS file to render WebGL content.
Texture Atlas Stores all the color value ( of shapes ) including the bitmap instances on the stage.
Adding audio to your WebGL document
You can import and embed audio to the your WebGL document, control the playback using the sync settings (event,
start, and stop), and play timeline audio at runtime. WebGL currently supports only .wav and .mp3 formats.
For more information on working with audio, see Using sounds in Flash.
Last updated 6/12/2015
38
Platforms
Migrating existing content to a WebGL document
You can migrate existing content within Flash Pro to a WebGL document. To its end, Flash Pro allows you to migrate
via copying or importing content manually. Also, when working with multiple documents within Flash, it is a common
practice to copy content across documents as Layers or assets in the Library. Although, most features of Flash Pro are
supported, some content types are modified to better accommodate the WebGL format.
Flash Professional contains several powerful features that help produce visually rich content. However, considering that
some of these features are native to Flash Pro, they will not be supported in a WebGL document. Flash Pro has been
designed to modify such content to a supported format, and visually indicate when a tool or feature is not supported.
Copy content (layers or library symbols) from a traditional Flash document type (such as ActionScript 3.0, AIR for
Android, AIR for Desktop, and so on) into a WebGL document. In this case, an unsupported content-type is either
removed or converted to supported defaults.
For example, copying 3D animation will remove all 3D transformations applied to objects on stage.
Import a PSD or AI file that contain unsupported content. In this case, the content is either removed or converted to
supported defaults.
For example, import a PSD file that has Blur effects applied. Flash Pro removes the effect.
Work with multiple document types (for example, ActionScript 3.0 and WebGL) simultaneously, you switch
documents with an unsupported tool or option selected. In this case, Flash Pro CC visually indicates that the feature is
not supported.
For example, you created a dotted line in an ActionScript 3.0 document and switch to WebGL with the Line tool still
selected. Observe the pointer and the Properties Inspector, they visually indicate that dotted line is not supported
within WebGL.
Scripts You can write Javascript code in the Actions panel, which will be executed after player enters the frame. The
'this' variable in the context of frame scripts refers to the instance of the MovieClip it belongs to. In addition, frame
scripts can access Javascript functions and variables declared in the container HTML file. When you copy a frame or
layer from an ActionScript document and paste it in a WebGL document, scripts if any will be commented.
Changes applied to content after migrating
The following are the types of changes that are applied when you migrate legacy content to an WebGL document.
Content is removed Content types that are not supported in HTML5 Canvas are removed. For example:
Filters are not supported. The effect will be removed, and the shape will assume a solid fill, instead.
Last updated 6/12/2015
39
Platforms
Content is modified to a supported default value Content type or feature is supported, but a property of the feature is
not. For example:
Radial Gradient is modified to assume Solid fill using the primary color.
For a full list of features that are not supported and their fallback values during migration, see this article .
Last updated 6/12/2015
40
Platforms
Improving rendering performance with bitmap caching
Runtime bitmap caching lets you optimize rendering performance by specifying that a static movie clip (for example,
a background image) or button symbol be cached as a bitmap at runtime. By default, vector items are redrawn in every
frame. Caching a movie clip or button symbol as a bitmap prevents the browser from having to continually redraw the
item, because the image is a bitmap and its position does not change. This provides a significant improvement in
performance of rendering WebGL content.
For example, when you create an animation with a complex background, create a movie clip containing all the items
included in the background. Then select Cache as Bitmap for the background movie clip in the Property inspector.
During playback, the background is rendered as a bitmap stored at the current screen depth. Browser draws the bitmap
on the Stage quickly and only once, letting the animation play faster and more smoothly.
Bitmap caching lets you use a movie clip and freeze it in place automatically. If a region changes, vector data updates
the bitmap cache. This process minimizes the number of redraws that browser must perform, and provides smoother,
faster rendering performance.
To enable Cache as Bitmap property for a movieclip symbol, select the movieclip instance, and select Cache as Bitmap
from the Render drop-down on Properties Inspector (Window > Properties).
Considerations when using Cache as Bitmap
When using Cache as Bitmap property on WebGL content, consider the following:
• Maximum size of the movieclip symbol is limited to 2048x2048. Note that the actual bounds of the movie clip
instance that can be cached are lesser than 2048x2048, WebGL reserves some pixels.
• If there is more than one instance of the same movieclip, Flash Professional generates the cache with the size of the
first instance encountered. However, the cache is not re-generated and Cache as Bitmap property is not ignored,
even if the transform of the movie clip changes to a large extent. And hence, if the movieclip symbol is greatly scaled
during the course of animation, the animation may appear pixelated.
Last updated 6/12/2015
41
Platforms
Packaging applications for AIR for iOS
Flash Professional includes support for publishing applications for AIR for iOS. AIR for iOS applications can run on
the Apple iPhone and iPad. When you publish for iOS, Flash converts your FLA files into native iPhone applications.
For information about hardware and software requirements for desktop and mobile AIR applications, see AIR system
requirements.
For detailed instructions about packaging applications for the iPhone, see Building Adobe AIR Applications with the
Packager for iPhone.
Note: Flash Pro allows you to add path to the iOS SDK only when the AIR application includes an ANE file. Go to File >
ActionScript Settings > Library Path to include an ANE file.
Support for AIR 17.0 and Flash Player 17.0
AIR 17.0 for iOS allows you to generate 64-bit binaries along with the default 32-bit binaries of your applications to
comply with the Apple requirement for iOS applications. With the AIR 17.0 update for iOS, the Enable Faster Packaging
option under the Deployment tab of AIR for iOS Setting dialog has been enabled by default.
Deploying AIR applications on iOS devices directly
An important change to the AIR application deployment workflow allows you to deploy AIR applications directly to
iOS devices. Earlier, to deploy applications to iOS devices, invoking AIR applications from iTunes was necessary.
However, with Flash Professional, you can deploy AIR applications on iOS directly, bypassing the usage of iTunes. This
feature reduces the time required to publish an AIR application for iOS and improves productivity and performance
significantly.
Note: It is necessary that you install iTunes on the machine that has Flash Professional installed.
To enable direct deployment on an iOS device, do the following:
1 Ensure that iTunes is installed on the machine on which you have Flash Professional installed.
2 In Flash Professional, on the Properties panel, click the
button, beside the Target drop-down to bring up the AIR
for iOS Settings dialog.
Last updated 6/12/2015
42
Platforms
❖ On the Deployment tab, select Install Application On The Connected iOS Device option.
❖ Click Publish.
Testing and debugging AIR applications using the native iOS simulator
Flash Professional can be integrated with Apple Xcode to enable Native iOS Simulator to test and debug AIR
applications written for iOS. The iOS Simulator is highly useful when you do not have access to actual devices (iPhone
or iPad). With the Native iOS Simulator, you can also test and debug AIR applications across multiple devices (iPhone
and iPad). However, the iOS Simulator can be integrated with Flash Professional CS6 that runs on Macintosh systems
only.
To use the iOS Simulator, Flash Professional requires you to download and install Xcode. For more information, see
Setting up Xcode for iOS Simulator Support .
Note:
• Download and install the latest version of AIR to work with the iOS simulator.
• Since SDK version 16 onwards (CC 2014.2 update), Flash Professional CC installs and launches the iOS app on the
IOS simulator.
Setting up Xcode for iOS Simulator Support
1 Download and install Xcode from http://developer.apple.com or download from Mac App Store.
2 Launch Flash Professional.
Last updated 6/12/2015
43
Platforms
3 Create or open an existing AIR for iOS document.
4 On the Properties panel, set the Player target to the latest AIR version.
5 Click the
button, beside the Target drop-down to bring up the AIR for iOS Settings dialog.
❖ On the General tab, provide the fully qualified path to the iOS Simulator SDK manually or browse to location. For
example:
Applications/Xcode.app/Contents/Developer/Platforms/iPhoneSimulator.platform/Developer/SDKs/
iPhoneSimulator6.0.sdk
❖ On the Deployment tab, provide the Certificate and Password. Optionally, provide the Provisioning Profile for the
AIR application.
❖ Click OK to finish.
You can now use the iOS Simulator to test and debug your application. For information, see Testing AIR applications
using the Natives iOS Simulator and Debugging AIR applications using the Native iOS Simulator .
Last updated 6/12/2015
44
Platforms
Testing AIR applications using the Native iOS Simulator
Ensure that you have set up Xcode and set the path to iPhone SDK before testing your AIR application. For more
information, see Setting Up Xcode for iOS Simulator .
1 In Flash Professional, Control > Test Movie > on iOS Simulator to bring up the iOS Simulator. However, if you have
not set the iOS Simulator SDK path in AIR for iOS Settings dialog, an error is thrown to indicate the same.
2 Browse to your application on the iOS Simulator, and click to launch.
Debugging AIR applications using the Native iOS Simulator
Ensure that you have set up Xcode and set the path to iPhone SDK path before debugging your AIR application. For
more information, see Setting Up Xcode for iOS Simulator .
1 In Flash Professional, select Debug > Debug Movie > on iOS Simulator to bring up the iOS Simulator. However, if
you have not set the iOS Simulator SDK path in AIR for iOS Settings dialog, an error is thrown to indicate the same.
2 In Flash Professional, select Debug > Begin Remote Debugging Session > ActionScript 3.0.
3 Browse to your application on iOS Simulator, and click to launch.
Publishing AIR applications for devices with High Resolution Retina Display
support
Flash Professional allows you to create rich AIR applications for iOS with an extended support for High-resolution
Retina display. You can choose to select High-resolution Retina Display when publishing AIR applications.
1 In Flash Professional, create or open an existing AIR for iOS document.
2 On the Properties panel, click the
button beside the Target drop-down to bring up the AIR for iOS Settings
dialog.
❖ On the General tab, set the Resolution as High.
Last updated 6/12/2015
45
Platforms
❖ Click Publish.
Test and debug using Interpreter Mode
New in Flash Professional CC
The Interpreter Mode allows you to quickly debug or test your AIR applications written for iOS. When the Interpreter
Mode is selected, AIR applications are installed without converting to ARM code.
To enable the Interpreter Mode, do the following:
1 On the Properties panel, click the
button, beside the Target drop-down to bring up the AIR for iOS Settings
dialog.
2 On the Deployment tab, select Device Testing In Interpreter Mode or Device Debugging In Interpreter Mode for
the iOS deployment type option.
3 Click OK to finish.
Note: You can package and load multiple SWFs that contain ActionScript byte code using both the Interpreter and AOT
(Ahead of Time) modes. For more information, see this blog.
Note: The Interpreter Mode should only be used for testing or debugging purposes. The AIR installation files produced using
the Interpreter Mode cannot be uploaded to the Mac App Store.
Testing and debugging on iOS via USB
New with Flash Professional CC
You can test and debug applications on iOS devices connected via USB. This adds on to the remote testing and
debugging functionality via wi-fi available within Flash Professional CC. However, by connecting devices via USB,
testing, and debugging workflows are simplified by reducing the number of manual steps and in effect, expediting the
testing and debugging processes.
To enable testing or debugging via USB, do one of the following:
• (For debugging) Select Debug > Debug Movie > on Device Via USB.
• (For testing) Select Control >Test Movie > on Device Via USB.
Multi-device connectivity via USB
New with Flash Professional CC
Flash Professional supports testing of applications on multiple devices simultaneously. You can connect to and test
multiple devices via USB.
Last updated 6/12/2015
46
Platforms
You can take advantage of this feature to test by deploying to multiple devices of varying screen sizes, OS versions, and
hardware configurations simultaneously. This allows you to analyze performance of your application across a spectrum
of devices at once.
1 On the Properties panel, click the
button, beside the Target drop-down to bring up the AIR for iOS Settings
dialog.
2 On the Deployment tab, a list of all connected devices is displayed. Select devices on to which you wish to publish
the application.
3 Click Publish.
Adding xxhdpi icons (144x144)
New in Flash Professional CC | November 2013
You can manually add xxhdpi icons for an AIR application using the app-descriptor.xml file. Flash Pro CC allows you
to add xhdpi icons (96x96) icons using the Manage AIR SDK dialog. However, if you wish to add icons of higer
resolution, you can manually add them in the app-descriptor.xml file for your AIR application using the following tag:
<icon><image144x144>{Location of png}/[icon_name-144x144].png</image144x144></icon>
For more information about the app-descriptor.xml file, see this help article.
Troubleshooting
•
Publishing an AIR for iOS application fails if the file name specified for the FLA or the SWF contain double-byte
characters.
• When publishing an AIR for iOS application, Flash Pro hangs if the device is unplugged.
Publishing AIR for Android applications
Flash Professional CS 5.5 and later versions allow you to publish content for Adobe® AIR™ for Android.
This article describes configuring the AIR for Android publish settings in Flash Professional. For complete information
about developing Adobe AIR™ applications, see Building Adobe AIR Applications.
For information about hardware and software requirements for desktop and mobile AIR applications, see AIR system
requirements.
For complete AIR developer documentation see the Adobe AIR Reference.
Videos and tutorials
The following video tutorials describe how to create AIR™ for Android applications in Flash Pro:
• Video: AIR for Android - Part 1: Set up your development environment (GotoAndLearn.com, 18:49)
• Video: AIR for Android - Part 2: Access the camera on an Android device (GotoAndLearn.com, 13:35)
• Video: AIR for Android GPU Acceleration (GotoAndLearn.com, 15:55)
• Blog/Video: One Application, Five Screens (Christian Cantrell, Adobe blogs)
• Article: Developing a Mobile Application with Flash (John Hattan, gamedev.net)
Last updated 6/12/2015
47
Platforms
Note: (AIR 3.7 only) Packaging applications with only captive runtime (Android)With AIR 3.7, packaging of AIR
applications for Android in any target will embed the AIR runtime. This would help in improving the user-experience as
there would be no need to download the AIR runtime separately. A side-effect would however be that there would be an
increase in app size of around 9MB.Flash Professional displays warnings if an AIR for Android application was packaged
using the Shared Runtime option.
Create an Adobe AIR for Android file
You can create Adobe AIR for Android documents in Flash using the File > New command. You can also create an
ActionScript® 3.0 FLA file and convert it to an AIR for Android file through the Publish Settings dialog box.
To create an AIR for Android file, do one of the following:
• Choose AIR for Android from the Welcome screen or the New Document dialog box (File > New).
• Open an existing FLA file and convert it to an AIR for Android file. Select AIR for Android from the Target menu
in the Publish Settings dialog box (File > Publish Settings).
Preview or publish an AIR for Android application
You can preview a Flash AIR for Android SWF file as it would appear in the AIR application window. Previewing is
useful when you want to see what the visible aspects of the application look like without packaging and installing the
application.
1 Make sure you’ve set the Target setting in the Publish Settings dialog box to AIR for Android.
2 Select Control > Test Movie > Test or press Control+Enter.
If you have not set application settings through the Application & Installer Settings dialog box, Flash generates a default
application descriptor file (swfname-app.xml) for you. Flash creates the file in the same folder where the SWF file is
written. If you have set application settings using the Application & Installer Settings dialog box, the application
descriptor file reflects those settings.
To publish an AIR for Android file, do one of the following:
• Click the Publish button in the Publish Settings dialog box.
• Click the Publish button in the AIR for Android Settings dialog box.
• Choose File > Publish.
• Choose File >Publish Preview.
When you Publish an AIR file, Flash Pro creates a SWF file and XML application descriptor file. Then Flash packages
copies of both, along with any other files you have added to your application, into an AIR installer file (swfname.apk).
Creating AIR for Android applications
After you’ve finished developing your application, specify the settings for the AIR for Android application descriptor
and installer files required to deploy it. Flash Pro creates the descriptor and installer files along with the SWF file when
you publish an AIR for Android file.
You specify the settings for these files in the AIR for Android - Application & Installer Settings dialog box. Once you
have created an AIR for Android file, this dialog box can be opened from the document Property inspector. You can
also access it from the Player menu Settings button in the Flash tab of the Publish Settings dialog box.
Create the Adobe AIR application file
1 In Flash, open the FLA file or set of files that make up your Adobe AIR application.
Last updated 6/12/2015
48
Platforms
2 Save the AIR for Android FLA file before you open the AIR Application & Installer Settings dialog box.
3 Select File > AIR for Android Settings.
4 Complete the AIR for Android Application & Installer Settings dialog box, and then click Publish.
When you click the Publish button, the following files are packaged:
• The SWF file
• The application descriptor file
• The application icon files
• The files listed in the Included Files text box
Note: Publishing an AIR for Android application fails if the file name specified for the FLA or the SWF contain doublebyte characters.
The AIR for Android Application and Installer Settings dialog box is divided into four tabs: General, Deployment,
Icons, and Permissions.
General settings
The General tab of the AIR for Android Application and Installer Settings dialog box contains the following options:
Output file The name and location of the AIR file to create when using the Publish command. The output filename
extension is APK.
App Name The name used by the AIR application installer to generate the application filename and the application
folder. The name must contain only valid characters for filenames or folder names. Defaults to the name of the SWF file.
App ID Identifies your application with a unique ID. You can change the default ID if you prefer. Do not use spaces or
special characters in the ID. The only valid characters are 0-9, a-z, A-Z, and . (dot), from 1 to 212 characters in length.
Defaults to com.adobe.example.applicationName.
Version Optional. Specifies a version number for your application. Defaults to 1.0.
Version label Optional. A string to describe the version.
Aspect Ratio Allows you to select Portrait, Landscape, or Auto orientation for the application. When Auto is selected
along with Auto orientation, the application launches on the device depending on its current orientation.
Full Screen Sets the application to run in full screen mode. This setting is deselected by default.
Auto orientation Allows the application to switch from portrait to landscape mode, depending on the current
orientation of the device. This setting is deselected by default.
Render mode Allows you to specify which method the AIR runtime uses to render graphic content. The options
include:
• Auto - automatically detect and use the fastest rendering method available on the host device.
• CPU - Use the CPU.
• GPU - Use the GPU. If no GPU is available, the CPU is used.
• Direct - Render using Stage3D. This is the fastest available rendering method.
For a list of processors that do not support Direct mode, see Stage3D unsupported chipsets, drivers | Flash Player 11,
AIR 3.
Processor: Allows you to select the processor type of the devices that you are publishing the application for. The
supported processor types are ARM and Intel x86. Support for x86 processors is available since the Flash Professional
CC 2014.1 release.
Last updated 6/12/2015
49
Platforms
Included Files Specifies which additional files and folders to include in your application package. Click the Plus (+)
button to add files, and the folder button to add folders. To delete a file or folder from your list, select the file or folder
and click the Minus (-) button.
By default, the application descriptor file and the main SWF file are automatically added to the package list. The
package list shows these files even if you have not yet published the Adobe AIR FLA file. The package list displays the
files and folders in a flat structure. Files in a folder are not listed, and full paths to files are shown but are truncated if
necessary.
If you have added any AIR native extension files to the ActionScript library path, those files will appear in this list as
well.
Icon files are not included in the list. When Flash packages the files, it copies the icon files to a temporary folder that is
relative to the location of the SWF file. Flash deletes the folder after packaging is complete.
Last updated 6/12/2015
50
Platforms
Deployment settings
The Deployment tab of the AIR for Android Application and Installer Settings dialog box lets you specify the following
settings.
Certificate The digital certificate for the application. You can browse to a certificate or create a new one. For
information about creating a digital certificate, see Signing your application. Note certificates for Android applications
must have a validity period set to at least 25 years.
Password The password for the selected digital certificate.
Deployment type Specifies which type of package to create.
• The Device Release setting allows you to create packages for the marketplace or any other distribution medium such
as a website.
• The Emulator Release setting allows you to create packages for debugging in the Mobile Device Simulator.
• The Debug setting allows you to do on-device debugging, including setting breakpoints in Flash and remote
debugging the application running on the Android device. You can also choose which netwirk interface and IP
address to use for debugging sessions.
AIR runtime Specifies how the application should behave on devices that do not already have the AIR runtime installed.
• Embed AIR runtime with application adds the runtime to the application installer package so that no additional
download will be required. This increases the size of your application package significantly.
• Get AIR runtime from makes the installer to download the runtime from Google Playstore or Amazon Appstore.
After publish Allows you to specify whether to install the application on a currently connected Android device, and
whether to immediately launch the application after the installation.
Icons settings
The Icons tab of the AIR for Android Application And Installer Settings dialog box lets you specify an icon for the
Android application. The icon is shown after you install the application and run it in the AIR for Android runtime. You
can specify three different sizes for the icon (36, 48, 72, 96 pixels) to allow for the different views in which the icon
appears. The icons you choose for Android do not have to strictly adhere to these sizes.
To specify an icon, click an icon size in the Icons tab and then navigate to the file you want to use for that size. The files
must be in PNG (Portable Network Graphics) format.
If you do not supply an image for a particular icon size, Adobe AIR scales one of the supplied images to create the
missing icon image.
Permissions settings
The Permissions tab allows you to specify which services and data the application has access to on the device.
• To apply a permission, select its checkbox.
• To see a description of a permission, click the permission name. The description appears below the permission list.
• To manually manage permissions instead of using the dialog box, select “Manually manage permissions and
manifest additions in the application descriptor file”.
Last updated 6/12/2015
51
Platforms
Languages settings
The Languages pane alllows you to select the languages that you want your application to be associated with in the
application store or marketplace. By selecting a language, you enable users of the Android operating system in that
language to download your application. Note that these language settings do not do anything else to localize your
application user interface.
If no languages are selected, the application is published with all languages supported. This prevents you from needing
to select every language. The languages listed are those supported by Adobe AIR. Android may support additional
languages.
Publishing for Adobe AIR for desktop
About Adobe AIR
Adobe® AIR™ is a cross-operating system runtime that allows you to leverage your existing web development skills
(Adobe® Flash® Professional, Adobe® Flex™, Adobe® Flash Builder™ HTML, JavaScript®, Ajax) to build and deploy Rich
Internet Applications (RIAs) to the desktop. AIR enables you to work in familiar environments, to leverage the tools
and approaches you find most comfortable, and by supporting Flash, Flex, HTML, JavaScript, and Ajax, to build the
best possible experience that meets your needs.
Users interact with AIR applications in the same way that they interact with native desktop applications. The runtime
is installed once on the user's computer, and then AIR applications are installed and run just like any other desktop
application. The runtime provides a consistent cross-operating system platform and framework for deploying
applications and therefore eliminates cross-browser testing by ensuring consistent functionality and interactions across
desktops. Instead of developing for a specific operating system, you target the runtime.
AIR dramatically changes how applications can be created, deployed, and experienced. You gain more creative control
and can extend your Flash, Flex, HTML, and Ajax-based applications to the desktop, without learning traditional
desktop development technologies.
For information about hardware and software requirements for desktop and mobile AIR applications, see AIR system
requirements.
For complete information about developing Adobe AIR™ applications, see Building Adobe AIR Applications.
Create an Adobe AIR file
You can create Adobe AIR Flash documents using the Flash Welcome screen, or the File > New command, or you can
create an ActionScript® 3.0 Flash File and convert it to an Adobe AIR file through the Publish Settings dialog box.
To create an Adobe AIR file, do one of the following:
• Start Flash. The Welcome screen appears. If you have already started Flash, close any open documents to return to
the Welcome screen. In the Welcome screen, select Adobe AIR 2 (CS5) or AIR (CS5.5).
Note: If you’ve disabled the Flash Welcome screen, you can display it again by selecting Edit > Preferences and selecting
Welcome Screen from the On Launch pop-up menu in the General category.
• Choose File > New and select Adobe AIR 2 (CS5) or AIR (CS5.5) and click OK.
Last updated 6/12/2015
52
Platforms
• Open an existing Flash file and convert it to an AIR file by selecting Adobe AIR from the Player menu in the Flash
tab of the Publish Settings dialog box (File > Publish Settings).
Note: (Flash CS5 only) If you save a Flash CS5 AIR file in Flash CS4 format, set the Player version to AIR 1.5 manually in
the Publish Settings dialog box when opening the file in Flash CS4. Flash CS4 only supports publishing to AIR 1.5.
Preview or publish an Adobe AIR application
You can preview a Flash AIR SWF file as it would appear in the AIR application window. Previewing is useful when you
want to see what the visible aspects of the application look like without packaging and installing the application.
1 Make sure you’ve set the Target setting in the Flash tab of the Publish Settings dialog box to Adobe AIR.
2 Select Control > Test Movie > Test or press Control+Enter.
If you have not set application settings through the AIR - Application And Installer Settings dialog box, Flash generates
a default application descriptor file (swfname-app.xml) for you in the same folder where the SWF file is written. If you
have set application settings using the AIR Application & Installer Settings dialog box, the application descriptor file
reflects those settings.
To publish an AIR file, do one of the following:
• Click the Publish button in the Publish Settings dialog box.
• Click the Publish button in the AIR Application & Installer Settings dialog box.
• Choose File > Publish.
• Choose File >Publish Preview.
When you Publish an AIR file, Flash Pro creates a SWF file and XML application descriptor file and packages copies of
both, along with any other files you have added to your application, into an AIR installer file (swfname.air).
Note: (Windows only) Publishing of AIR application fails if the file name contains non-english characters.
Creating AIR application and installer files
After you’ve finished developing your application, specify the settings for the AIR application descriptor and installer
files required to deploy it. Flash Pro creates the descriptor and installer files along with the SWF file when you publish
an AIR file.
You specify the settings for these files in the AIR - Application & Installer Settings dialog box. Once you have created
an AIR file, this dialog box can be opened from either the document Property inspector or the Player menu Settings
button in the Flash tab of the Publish Settings dialog box.
Create the Adobe AIR application and installer files
1 In Flash, open the FLA file or set of files that make up your Adobe AIR application.
2 Save the Adobe AIR FLA file before you open the AIR Settings dialog box.
3 Select File > AIR 2 Settings.
4 Complete the AIR Settings dialog box, and then click Publish.
When you click the Publish button, the following files are packaged: the SWF file, the application descriptor file, the
application icon files, and the files listed in the Included Files text box. If you have not already created a digital
certificate, Flash displays the Digital Signature dialog box when you click the Publish button.
The AIR Application And Installer Settings dialog box is divided into 4 tabs: General, Signature, Icons, and Advanced.
For more information on these settings, see the following sections.
Last updated 6/12/2015
53
Platforms
General settings
The General tab of the AIR Application And Installer Settings dialog box contains the following options:
Output file The name and location of the .air file to create when using the Publish command.
Output as The type of package to create.
• AIR package - Creates a standard AIR installer file that assumes the AIR runtime can be separately downloaded
during installation or is already installed on the target device.
• Mac installer - Creates a complete Macintosh installer file.
• Application with runtime embedded - Creates an AIR installer file that contains the AIR runtime so no additional
download is required.
Windows Installer Select this option to compile a native, platform specific Windows installer (.exe) instead of a
platform-independent AIR installer (.air).
Name The name of the main file of the application. Defaults to the name of the FLA file.
Version Optional. Specifies a version number for your application. Defaults to 1.0.
App ID Identifies your application with a unique ID. You can change the default ID if you prefer. Do not use spaces or
special characters in the ID. The only valid characters are 0-9, a-z, A-Z, . (dot), and - (dash), from 1 to 212 characters
in length. Defaults to com.adobe.example.applicationName.
Description Optional. Lets you enter a description of the application to display in the installer window when the user
installs the application. Defaults to blank.
Copyright Optional. Lets you enter a copyright notice. Defaults to blank.
Window Style Specifies what window style (or chrome) to use for the user interface when the user runs the application
on their computer. You can specify System Chrome (the default), which refers to the standard window visual style that
the operating system uses. You can also specify Custom Chrome (opaque) or Custom Chrome (transparent). To display
your application without the system chrome, select None. System Chrome surrounds the application with the
operating-system standard window control. Custom Chrome (opaque) eliminates the standard system chrome and lets
you create a chrome of your own for the application. (You build the custom chrome directly in the FLA file.) Custom
Chrome (transparent) is like Custom Chrome (opaque), but it adds transparent capabilities to the edges of the page.
These capabilities allow for application windows that are not square or rectangular in shape.
Render mode Allows you to specify which method the AIR runtime uses to render graphic content. The options
include:
• Auto - automatically detect and use the fastest rendering method available on the host device.
• CPU - Use the CPU.
• Direct - Render using Stage3D. This is the fastest available rendering method.
For a list of processors that do not support Direct mode, see Stage3D unsupported chipsets, drivers | Flash Player 11,
AIR 3.
Profiles Which profiles to include when building the AIR file. To limit your AIR application to a specific profile,
deselect the unneeded profiles. For more information about AIR profiles, see Application profiles .
Included Files Specifies which additional files and folders to include in your application package. Click the Plus (+)
button to add files, and the folder button to add folders. To delete a file or folder from your list, select the file or folder
and click the Minus (-) button.
By default, the application descriptor file and the main SWF file are automatically added to the package list. The
package list shows these files even if you have not yet published the Adobe AIR FLA file. The package list displays the
Last updated 6/12/2015
54
Platforms
files and folders in a flat structure. Files in a folder are not listed, and full path names to files are shown but are truncated
if necessary.
If you have added any AIR native extension files to the ActionScript library path, those files will appear in this list as
well.
Icon files are not included in the list. When Flash packages the files, it copies the icon files to a temporary folder that is
relative to the location of the SWF file. Flash deletes the folder after packaging is complete.
Signature settings
The Signature tab of the AIR Application & Installer Settings dialog box allows you to specify a code signing certificate
for your application.
For more information about digital signatures, see Signing your applicationand Digitally signing an AIR file.
Icons settings
The Icons tab of the AIR Application And Installer Settings dialog box lets you specify an icon for the application. The
icon is shown after you install the application and run it in the Adobe AIR runtime. You can specify four different sizes
for the icon (128, 48, 32, and 16 pixels) to allow for the different views in which the icon appears. For example, the icon
can appear in the file browser in thumbnail, detail, and tile views. It can also appear as a desktop icon and in the title of
the AIR application window, as well as in other places.
The icon image defaults to a sample AIR application icon if no other icon files are specified (Flash CS5 only).
To specify an icon, click an icon size at the top of the Icons tab and then navigate to the file you want to use for that size.
The files must be in PNG (Portable Network Graphics) format.
If you do specify an image, it must be the exact size (either 128x128, 48x48, 32x32, or 16x16). If you do not supply an
image for a particular icon size, Adobe AIR scales one of the supplied images to create the missing icon image.
Advanced settings
The Advanced tab allows you to specify additional settings for the application descriptor file.
You can specify any associated file types that your AIR application should handle. For example, if you wanted your
application to be the principal application for handling HTML files, you would specify that in the Associated File Types
text box.
You can also specify settings for the following aspects of the application:
• The size and placement of the initial window
• The folder in which the application is installed
• The Program menu folder in which to place the application.
The dialog box has the following options:
Associated file types Lets you specify associated file types that the AIR application will handle. Click the Plus (+)
button to add a new file type to the text box. Clicking the Plus button displays the File Type Settings dialog box. Clicking
the Minus (-) button removes an item that is selected in the text box. Clicking the Pencil button displays the File Type
Settings dialog box and allows you to edit an item that you’ve selected in the text box. By default, the Minus (-) and
Pencil buttons are dimmed. Selecting an item in the text box enables the Minus (-) and Pencil buttons, allowing you to
remove or edit the item. The default value in the text box is None.
Initial window settings Lets you specify size and placement settings for the initial application window.
• Width: Specifies the initial width of the window in pixels. The value is blank by default.
Last updated 6/12/2015
55
Platforms
• Height: Specifies the initial height of the window in pixels. The value is blank by default.
• X: Specifies the initial horizontal position of the window in pixels. The value is blank by default.
• Y: Specifies the initial vertical position of the window in pixels. The value is blank by default.
• Maximum Width and Maximum Height: Specify the maximum size of the window in pixels. These values are blank
by default.
• Minimum Width and Minimum Height: Specify the minimum size of the window in pixels. These values are blank
by default.
• Maximizable: Lets you specify whether the user can maximize the window. This option is selected (or true) by
default.
• Minimizable: Lets you specify whether the user can minimize the window. This option is selected (or true) by
default.
• Resizable: Lets you specify whether the user can resize the window. If this option is not selected, Maximum Width,
Maximum Height, Minimum Width, and Minimum Height are dimmed. This option is selected (or true) by default.
• Visible: Lets you specify whether the application window is visible initially. The option is selected (or true) by
default.
Other Settings Lets you specify the following additional information regarding the installation:
• Install Folder: Specifies the folder in which the application is installed.
• Program Menu Folder (Windows only): Specifies the name of the program menu folder for the application.
• Use Custom UI for Updates: Specifies what happens when a user opens an AIR installer file for an application that’s
already installed. By default, AIR displays a dialog box that allows the user to update the installed version with the
version in the AIR file. If you don’t want the user to make that decision and you want the application to have
complete control over its updates, select this option. Selecting this option overrides the default behavior and gives
the application control over its own updates.
Languages settings
The Languages pane alllows you to select the languages that you want your application to be associated with in the
application store or marketplace. By selecting a language, you enable users of operating systems in that language to
download your application. Note that these language settings do not do anything else to localize your application user
interface.
If no languages are selected, the application is published with all languages supported. This prevents you from needing
to select every language. The languages listed are those supported by Adobe AIR. Android may support additional
languages.
File type settings
Flash displays the File Type Settings dialog box if you click the Plus (+) button or the Pencil button in the Associated
File Types section of the Advanced tab to add or edit associated file types for the AIR application.
The only two required fields in this dialog box are Name and Extension. If you click OK and either of those fields is
blank, Flash displays an error dialog box.
You can specify the following settings for an associated file type:
Name The name of the file type (for example, Hypertext Markup Language, Text File, or Example).
Last updated 6/12/2015
56
Platforms
Extension The filename extension (for example, html, txt, or xmpl), up to 39 basic alphanumeric characters, (A-Za-z09), and without a leading period.
Description Optional. A description of the file type (for example, Adobe Video File).
Content type Optional. Specifies the MIME type for the file.
File Type Icon Settings Optional. Lets you specify an icon that’s associated with the file type. You can specify four
different sizes for the icon (128x128, 48x48, 32x32, and 16x16 pixels) to allow for the different views in which the icon
appears. For example, the icon can appear in the file browser in thumbnail, detail, and tile views.
If you specify an image, it must be of the size that you specify. If you do not specify a file for a particular size, AIR uses
the image of the closest size and scales it to fit for the given occurrence.
To specify an icon, either click the folder for the icon size and select an icon file to use or enter the path and filename
for the icon file in the text box next to the prompt. The icon file must be in PNG format.
After a new file type is created, it is shown in the File Type list box in the Advanced Settings dialog box.
Failure to create application and installer files
The application and installer files fail to be created in the following instances:
• The application ID string has an incorrect length or contains invalid characters. The application ID string can be
from 1 to 212 characters and can include the following characters: 0-9, a-z, A-Z, . (dot), - (hyphen).
• Files in the Included Files list do not exist.
• The sizes of custom icon files are incorrect.
• The AIR destination folder does not have write access.
• You have not signed the application or have not specified that it is an Adobe AIRI application that will be signed
later.
Signing your application
All Adobe AIR applications must be signed to be installed on another system. Flash provides the ability, however, to
create unsigned Adobe AIR installer files so that the application can be signed later. These unsigned Adobe AIR
installer files are called an AIRI (AIR Intermediate) package. This capability provides for cases in which the certificate
is on a different machine or signing is handled separately from application development.
Sign an Adobe AIR application with a pre-purchased digital certificate from a root certificate authority
1 Choose File > AIR 2 Settings and then click on the Signature tab.
This tab has two radio buttons that allow you to either sign your Adobe AIR application with a digital certificate or
prepare an AIRI package. If you sign your AIR application, you can either use a digital certificate granted by a root
certificate authority or create a self-signed certificate. A self-signed certificate is easy to create but is not as
trustworthy as a certificate granted by a root certificate authority.
2 Select a certificate file from the pop-up menu or click the Browse button to locate a certificate file.
3 Select the certificate.
4 Enter a password.
5 Click OK.
For more information on signing your AIR application, see Digitally signing an AIR file .
Last updated 6/12/2015
57
Platforms
Create a self-signed digital certificate
1 Click the Create button. The Self-Signed Digital Certificate dialog box opens.
2 Complete the entries for Publisher Name, Organization Unit, Organization Name, Country, Password, and Confirm
Password. For Country, you can select from the menu or enter a 2-letter country code that does not appear in the
menu. For a list of valid country codes, see http://www.iso.org/iso/country_codes.
3 Specify the type of certificate.
The Type option refers to the level of security that the certificate carries. 1024-RSA uses a 1024-bit key (less secure),
and 2048-RSA uses a 2048-bit key (more secure). The default is 2048-RSA.
4 Save the information in a certificate file by completing the Save As entry or clicking the Browse button to browse to
a folder location.
5 Click OK.
6 In the Digital Signature dialog box, enter the password you assigned in the second step of this procedure and click
OK.
To have Flash remember the password you used for this session, click Remember Password For This Session.
If the Timestamp option is unselected when you click OK, a dialog box warns that the application will fail to install
when the digital certificate expires. If you click Yes in response to the warning, time stamping is disabled. If you click
No, the Timestamp option is automatically selected and time stamping is enabled.
For more information on creating a self-signed digital certificate, see Digitally signing an AIR file.
You can also create an AIR Intermediate (AIRI) application without a digital signature. A user cannot install the
application on a desktop, however, until you add a digital signature.
Prepare an AIRI package that will be signed later
❖ In the Signature tab, select Prepare An AIR Intermediate (AIRI) File That Will Be Signed Later, and click OK.
The digital signature status changes to indicate that you have chosen to prepare an AIRI package that will be signed
later, and the Set button changes to a Change button.
If you choose to sign the application later, you will need to use the command-line AIR Developer Tool included with
Flash Pro and with the AIR SDK. For more information, see Building Adobe AIR Applications.
Add or remove a version of the AIR SDK
You can add new releases and custom versions of the AIR SDK to Flash Pro. Once added, the new SDK appears in the
player target list in the Publish Settings.
To add an new verision of the SDK:
1 Download the new AIR SDK folder.
2 In Flash Pro, choose Help > Manage AIR SDK.
3 In the Manage AIR SDK dialog, click the plus "+" button and then browse to the new AIR SDK folder. Click OK.
4 Click OK in the Manage AIR SDK dialog box.
The new SDK appears in the Player Target list in Publish Settings. The lowest acceptable SDK version should be greater
than the version included with Flash Pro.
To remove a version of the SDK:
1 In Flash Pro, choose Help > Manage AIR SDK.
Last updated 6/12/2015
58
Platforms
2 In the Manage AIR SDK dialog, select the SDK you want to remove.
3 Click the minus "-" button. Click OK.
ActionScript publish settings
Modify ActionScript publish settings
When you create a new FLA document, Flash asks you which version of ActionScript you want to use. You can change
this setting if you decide later to write your scripts in a different version of ActionScript.
Note: ActionScript 3.0 is not compatible with ActionScript 2.0. The ActionScript 2.0 compiler can compile all ActionScript
1.0 code, except for the slash (/) syntax used to indicate movie clip paths (for example, parentClip/testMC:varName= "hello
world"). To avoid this problem, either rewrite your code using dot (.) notation, or select the ActionScript 1.0 compiler.
1 Select File > Publish Settings.
2 Select the ActionScript version from the Script menu.
Class files and configuration files
When you install Flash Professional, several ActionScript-related configuration folders and files are placed on your
system. If you modify these files to customize the authoring environment, back up the original files.
ActionScript classes folder Contains all of the built-in ActionScript 2.0 classes (AS files). Typical paths to this folder
are as follows:
• Windows 7 and 8: Hard Disk\Program Files\Adobe\Adobe Flash CC\Common\Configuration\ActionScript
3.0\Configuration\Classes
• Macintosh: Hard Disk/Users/user/Library/Application Support/Adobe/Flash CC/language/Configuration/Classes
The Classes folder is organized into classes for Flash Player 10 and classes for Flash Player 11. For more information
on the organization of this directory, see the Read Me file in the Classes folder.
Include class folder Contains all of the global ActionScript include files. Locations are as follows:
• Windows 7 and 8: Hard Disk\Program Files\Adobe\Adobe Flash CC\Common\Configuration\ActionScript
3.0\libs\
• Macintosh: Hard Disk/Users/user/Library/Application Support/Adobe/Flash CC/language/Configuration/Include
ActionsPanel.xml configuration file Includes the configuration file for ActionScript code hinting. Separate files
provide configuration for each version of ActionScript and Flash Lite, and for JavaScript. Locations are as follows:
• Windows 7 and 8: Hard Disk\Program Files\Adobe\Adobe Flash CC\Common\Configuration\ActionScript
3.0\libs\
• Macintosh: Hard Disk/Users/user/Library/Application Support/Adobe/Flash
CC/language/Configuration/ActionsPanel
AsColorSyntax.xml configuration file The configuration file for ActionScript code color syntax highlighting. Locations
are as follows:
• Windows 7 and 8: Hard Disk\Program Files\Adobe\Adobe Flash CC\Common\Configuration\ActionScript
3.0\libs\
Last updated 6/12/2015
59
Platforms
• Macintosh: Hard Disk/Users/user/Library/Application Support/Adobe/Flash
CC/language/Configuration/ActionsPanel
Declare an ActionScript 3.0 document class
When you use ActionScript 3.0, a SWF file may have a top-level class associated with it. This class is called the
document class. When the SWF is loaded by Flash Player, an instance of this class is created to be the SWF file's toplevel object. This object of a SWF file can be an instance of any custom class you choose.
For example, a SWF file that implements a calendar component can associate its top level with a Calendar class, with
methods and properties appropriate to a calendar component. When the SWF is loaded, Flash Player creates an
instance of this Calendar class.
1 Deselect all objects on the Stage and in the Timeline by clicking a blank area of the Stage. This displays the
Document properties in the Property inspector.
2 Enter the filename of the ActionScript file for the class in the Document Class text box in the Property inspector.
Do not include the .as filename extension.
Note: You can also enter the Document Class information in the Publish Settings dialog box.
Note: Optionally, you can also enter the name of the Class within a SWC file, linked in Library Path, that you want to set
as the Document Class.
Set the location of ActionScript files
To use an ActionScript class that you’ve defined, Flash Professional must locate the external ActionScript files that
contain the class definition. The list of folders in which Flash Professional searches for class definitions is called the
classpath for ActionScript 2.0 and the source path for ActionScript 3.0. Classpaths and source paths exist at the
application (global) and document level. For more information about classpaths, see Classes in Learning ActionScript
2.0 in Adobe Flash or “Packages ” in Learning ActionScript 3.0.
You can set the following ActionScript locations in Flash Professional:
• ActionScript 2.0
• Application level (available to all AS2 FLA files):
• Classpath (set in ActionScript preferences)
• Document level (available only to the FLA file that specifies this path):
• Classpath (set in Publish Settings)
• ActionScript 3.0
• Application level (available to all AS3 FLA files):
• Source path (set in ActionScript preferences)
• Library path (set in ActionScript preferences)
• External library path (set in ActionScript preferences)
• Document level (available only to the FLA file that specifies these paths):
• Source path (set in Publish Settings)
• Library path (set in Publish Settings)
• Document class (set in Document Property inspector)
Last updated 6/12/2015
60
Platforms
The Library path specifies the location of pre-compiled ActionScript code which resides in SWC files you have created.
The FLA file that specifies this path loads every SWC file at the top level of this path and any other code resources that
are specified within the SWC files themselves. If you use the Library path, be sure none of the compiled code in the
SWC files is duplicated in uncompiled AS files in the Source path. The redundant code will slow down compilation of
your SWF file.
You can specify more than one path for Flash Professional to look in. Resources found in any of the paths specified will
be used. When you add or modify a path, you can add absolute directory paths (for example, C:/my_classes) and
relative directory paths (for example, ../my_classes or ".").
Set the classpath for ActionScript 2.0
note: ActionScript 2.0 is deprecated with Flash Professional CC. For more information, see this article.To set the
document-level classpath:
1 Select File > Publish Settings, and click Flash.
2 Verify that ActionScript 2.0 is selected in the ActionScript Version pop-up menu, and click Settings.
3 Specify the frame where the class definition should reside in the Export Frame for Classes text field.
4 To add paths to the classpath list, do any of the following:
• To add a folder to the classpath, click the Browse to Path button
• To add a new line to the Classpath list, click the Add New Path
or absolute path, and click OK.
, browse to the folder to add, and click OK.
button. Double-click the new line, type a relative
• To edit an existing classpath folder, select the path in the Classpath list, click the Browse to Path button, browse
to the folder to add, and click OK. Alternatively, double-click the path in the Classpath list, type the desired path,
and click OK.
• To delete a folder from the classpath, select the path in the Classpath list and click the Remove Selected Path
button .
To set the application-level classpath:
1 Choose Edit Preferences (Windows) or Flash > Preferences (Macintosh) and click the ActionScript category.
2 Click the ActionScript 2.0 Settings button and add the path(s) to the Classpath list
Set the source path for ActionScript 3.0
To set the document-level source path:
1 Select File > Publish Settings, and click Flash.
2 Verify that ActionScript 3.0 is selected in the ActionScript Version pop-up menu, and click Settings. Your Flash
Player version must be set to Flash Player 9 or later to use ActionScript 3.0.
3 Specify the frame where the class definition should reside in the Export Classes in Frame text field.
4 Specify the Errors settings. You can select Strict Mode and Warnings Mode. Strict Mode reports compiler warnings
as errors, which means that compilation will not succeed if those types of errors exist. Warnings Mode reports extra
warnings that are useful for discovering incompatibilities when updating ActionScript 2.0 code to ActionScript 3.0.
5 (Optional) Select Stage to automatically declare stage instances.
6 Specify ActionScript 3.0 or ECMAScript as the dialect to use. ActionScript 3.0 is recommended.
Last updated 6/12/2015
61
Platforms
7 To add paths to the source path list, do any of the following:
• To add a folder to the source path, click the Source path tab and then click the Browse To Path button
to the folder to add, and click OK.
• To add a new line to the Source path list, click the Add New Path
relative or absolute path, and click OK.
, browse
button. Double-click the new line, type a
• To edit an existing Source path folder, select the path in the Source path list, click the Browse To Path button,
browse to the folder to add, and click OK. Alternatively, double-click the path in the Source path list, type the
desired path, and click OK.
• To delete a folder from the source path, select the path in the Source path list and click the Remove From Path
button .
To set the application-level source path:
1 Choose Edit Preferences (Windows) or Flash > Preferences (Macintosh) and click the ActionScript category.
2 Click the ActionScript 3.0 Settings button and add the path(s) to the Source path list.
Set the Library path for ActionScript 3.0 files
To set the document-level Library path, the procedure is similar to setting the Source path:
1 Choose File Publish Settings.
2 Make sure ActionScript 3.0 is specified in the Script menu and click the ActionScript Settings button.
3 In the Advanced ActionScript 3.0 Settings dialog box, click the Library path tab.
4 Add the library path to the Library path list. You can add folders or individual SWC files to the path list.
5 To set the Link Type property, double-click Link Type in the property tree of the path. The choices for Link Type are:
• Merged into code: The code resources found in the path are merged into the published SWF file.
• External: The code resources found in the path are not added to the published SWF file, but the compiler verifies
that they are in the locations you specified.
• Runtime shared library (RSL): Flash Player downloads the resources at runtime.
To set the Application-level Library path:
1 Choose Edit Preferences (Windows) or Flash > Preferences (Macintosh) and click the ActionScript category.
2 Click the ActionScript 3.0 Settings button and add the path(s) to the Library path list.
Compiling ActionScript conditionally
You can use conditional compilation in ActionScript 3.0 in the same way that it has been used in C++ and other
programming languages. For example, you can use conditional compilation to turn blocks of code throughout a project
on of off, such as code that implements a certain feature or code used for debugging.
Using config constants that you define in the publish settings, you can specify whether certain lines of ActionScript
code are compiled or not. Each constant takes the following form:
CONFIG::SAMPLE_CONSTANT
In this form, CONFIG is the config namespace and SAMPLE_CONSTANT is the constant that you will set to true or
false in the publish settings. When the value of the constant is true, the line of code that follows the constant in
ActionScript is compiled. When the value is false, the line of code that follows the constant is not compiled.
Last updated 6/12/2015
62
Platforms
For example, the following function has 2 lines of code that are compiled only if the value of the constant that precedes
them is set to true in the publish settings:
public function CondCompTest() {
CONFIG::COMPILE_FOR_AIR {
trace("This line of code will be compiled when COMPILE_FOR_AIR=true.");
}
CONFIG::COMPILE_FOR_BROWSERS {
trace("This line of code will be compiled when COMPILE_FOR BROWSERS=true.");
}
}
To define a config constant using the Publish Settings dialog box:
1 Choose File > Publish Settings.
2 Ensure that the Script menu set to ActionScript 3.0 and click the Settings button next to the menu.
3 In the Advanced ActionScript 3.0 Settings dialog box, click the Config Constants tab.
4 To add a constant, click the Add button.
5 Type the name of the constant you want to add. The default config namespace is CONFIG and the default constant
name is CONFIG_CONST.
Note: The config namespace CONFIG is declared by the Flash Professional compiler automatically. You can add your
own config namespaces by entering them with a constant name in the publish settings and adding them to your
ActionScript code using the following syntax:
config namespace MY_CONFIG;
6 Enter the value you want for the constant, either true or false. You change this value in order to turn on or off
compilation of specific lines of code.
Customizing context menus in Flash documents (CS5.5)
You can customize the standard context menu and the text-editing context menu that appears with SWF files in Flash
Player 7 and later.
• The standard context menu appears when a user right-clicks (Windows) or Control-clicks (Macintosh) on a SWF
file in Flash Player, in any area except an editable text field. You can add custom items to the menu, and hide any
built-in items in the menu except Settings and Debugger.
• The editing context menu appears when a user right-clicks (Windows) or Control-clicks (Macintosh) in an editable
text field in a SWF file in Flash Player. You can add custom items to this menu. You cannot hide any built-in items.
Note: Flash Player also displays an error context menu when a user right-clicks (Windows) or Control-clicks (Macintosh)
in Flash Player and no SWF file is loaded. You cannot customize this menu.
Customize context menus in Flash Player 7 by using the ContextMenu and ContextMenuItem objects in ActionScript
2.0. For more information on using these objects, see ContextMenu in the ActionScript 2.0 Language Reference.
Remember the following conditions when creating custom context menu items for Flash Player:
• Custom items are added to a context menu in the order in which they are created. You cannot modify this order after
the items are created.
• You can specify the visibility and enabling of custom items.
• Custom context menu items are automatically encoded using Unicode UTF-8 text encoding.
Last updated 6/12/2015
63
Platforms
Configuration folders installed with Flash (CS5.5)
Flash Professional places several configuration folders on your system when you install the application. The
configuration folders organize files associated with the application into appropriate levels of user access. You may want
to view the contents of these folders when you are working with ActionScript® or components. The configuration
folders for Flash Professional are as follows:
Application-level configuration folder
Because it is in the application level, non-administrative users do not have write access to this directory. Typical paths
to this folder are as follows:
• In Microsoft Windows XP or Microsoft Windows Vista, browse to boot drive\Program Files\Adobe\Adobe Flash
CS3\language\Configuration\.
• On the Macintosh, browse to Macintosh HD/Applications/Adobe Flash CS3/Configuration/.
First Run folder
This sibling to the application-level configuration folder facilitates sharing configuration files among users of the same
computer. Folders and files in the First Run folder are automatically copied to the user-level configuration folder. Any
new files placed in the First Run folder are copied to the user-level configuration folder when you start the application.
Typical paths to the First Run folder are as follows:
• In Windows XP or Vista, browse to boot drive\Program Files\Adobe\Adobe Flash CS3\language\First Run\.
• On the Macintosh, browse to Macintosh HD/Applications/Adobe Flash CS3/First Run/.
User-level configuration folder
Found in the user profile area, this folder is always writable by the current user. Typical paths to this folder are as
follows:
• In Windows XP or Vista, browse to boot drive\Documents and Settings\username\Local Settings\Application
Data\Adobe\Flash CS3\language\Configuration.
• On the Macintosh, browse to Macintosh HD/Users/username/Library/Application Support/Adobe/Flash
CS3/language/Configuration/.
All-user-level configuration folder
Found in the common user profile area, this folder is part of the standard Windows and Macintosh operating system
installations and is shared by all users of a particular computer. The operating system makes available to all users of the
computer any files placed in this folder. Typical paths to this folder are as follows:
• In Windows XP or Vista, browse to boot drive\Documents and Settings\All Users\Application Data\Adobe\Flash
CS3\language\Configuration\.
• On the Macintosh, browse to Macintosh HD/Users/Shared/Application Support/Adobe/Flash
CS3/language/Configuration/.
Restricted Users configuration folder
For users with restricted privileges on a workstation, typically, in a networked environment, only system administrators
have administrative access to workstations. All other users are given restricted access, which usually means that these
users can’t write to application-level files (such as the Program Files directory in Windows or the Applications folder in
Macintosh OS X).
Last updated 6/12/2015
64
Platforms
Custom Platform Support API Reference
The Custom Platform Support development kit includes a set of header files, sample plugins, and project files that you
can use for building a plugin for Flash.
Flash Professional provides a uniform way to integrate various publishers and document types in the Flash Pro
authoring environment. Publishers and document types developed by third-party developers can be plugged into
FlashPro "document creation" and "publish/test movie" workflows using the pre-defined C++ interfaces.
The APIs or the C++ header files contained in the development kit define the Document Object Model (DOM) and
Flash Component Model (FCM), which you can use to build a custom platform support plugin.
Detailed API reference documentation is available at the following location:
Custom Platform Support API Reference
More Help topics
Custom Platform Support Overview
Enabling Support for Custom Platforms
Working with Custom Platform Support Plugins
Creating accessible content
About accessible content
Accessibility overview
You can create content that is accessible to all users, including those with disabilities, using the accessibility features that
Adobe Flash Professional provides in the authoring environment user interface, taking advantage of ActionScript®
designed to implement accessibility. As you design accessible Flash Professional applications, consider how users might
interact with the content and follow recommended design and development practices.
For a tutorial about accessible content, see Create Accessible Flash Content on the Flash Tutorials page at
www.adobe.com/go/learn_fl_tutorials.
For a sample of accessible rich media content, see the Flash Samples page at www.adobe.com/go/learn_fl_samples.
Download and decompress the Samples zip file and navigate to the Accessibility\AccessibleApplications folder to access
the sample.
For the latest information on creating and viewing accessible Flash Professional content, including supported
platforms, screen reader compatibility, articles, and accessible examples, see the Flash Professional Accessibility web
page at www.adobe.com/go/learn_flash_accessibility_en/.
Last updated 6/12/2015
65
Platforms
Worldwide accessibility standards
Many countries have adopted accessibility standards based on the standards developed by the World Wide Web
Consortium (W3C). The W3C publishes the Web Content Accessibility Guidelines, a document that prioritizes actions
designers should take to make web content accessible. For information about the Web Accessibility Initiative, see the
W3C website at w3.org.
In the United States, the law that governs accessibility is commonly known as Section 508, which is an amendment to
the U.S. Rehabilitation Act.
For additional information about Section 508, see the following websites:
• The US government-sponsored website at section508.gov
• The Adobe accessibility site at www.adobe.com/accessibility/
Understanding screen reader technology
Screen readers are software applications that visually impaired users can use to navigate a website and read the web
content aloud. To enable a screen reader to read nontextual objects in your application, such as vector art and
animations, use the Accessibility panel to associate a name and description with the object. The keyboard shortcuts you
define can allow users to use the screen reader to navigate through your document with ease.
To expose graphic objects, use the Accessibility panel or ActionScript to provide a description.
You cannot control how any screen reader behaves; you can control only the content, which you can mark up in your
Flash Professional applications to expose the text and ensure that screen reader users can activate the controls. You
decide which objects in the Flash Professional application are exposed to screen readers, provide descriptions for them,
and decide the order in which they are exposed to screen readers. You cannot force screen readers to read specific text
at specific times or control the manner in which that content is read. Test your applications with a variety of screen
readers to ensure that they perform as you expect.
Sound is the most important medium for most screen reader users. Consider how any sound in your document
interacts with the text spoken aloud by screen readers. It might be difficult for screen reader users to hear what their
screen readers are saying if your Flash Professional application contains loud sounds.
Platform requirements
You can only create Flash Professional content designed for use with screen readers with Windows platforms. Viewers
of Flash Professional content must have Macromedia Flash® Player 6 from Adobe or later and Internet Explorer on
Windows 98 or later.
Flash and Microsoft Active Accessibility (Windows only)
Flash Player is optimized for Microsoft Active Accessibility (MSAA), which provides a descriptive and standardized
way for applications and screen readers to communicate. MSAA is available only for Windows operating systems. For
more information on Microsoft Accessibility Technology, visit the Microsoft Accessibility website at
www.microsoft.com/enable/default.aspx.
The Windows ActiveX (Internet Explorer plug-in) version of Flash Player 6 supports MSAA, but Windows Netscape
and Windows stand-alone players do not.
Note: MSAA is currently not supported in the opaque windowless and transparent windowless modes. (These modes are
options in the HTML Publish Settings panel, available for use with the Windows version of Internet Explorer 4.0 or later,
with the Flash ActiveX control.) To make your Flash Professional content accessible to screen readers, avoid using these
modes.
Last updated 6/12/2015
66
Platforms
Flash Player makes information about the following types of accessibility objects available to screen readers that use
MSAA.
Dynamic or static text The principal property of a text object is its name. To comply with MSAA conventions, the name
is equal to the contents of the text string. A text object can also have an associated description string. Flash Professional
uses the static or dynamic text immediately above or to the left of an input text field as a label for that field.
note: Any text that is a label is not passed to a screen reader, but is used as the name of the object that it labels. Labels are
never assigned to buttons or text fields that have author-supplied names.
Input text fields Have a value, an optional name, a description string, and a keyboard shortcut string. An input text
object’s name can come from a text object that is above or to the left of it.
Buttons Have a state (pressed or not pressed), support a programmatic default action that causes the button to depress
momentarily, and optionally have a name, a description string, and a keyboard-shortcut string. Flash Professional uses
any text entirely inside a button as a label for that button.
note: For accessibility purposes, Flash Player considers movie clips used as buttons with button event handlers such as
onPress to be buttons, not movie clips.
Components Provide special accessibility implementation.
Movie clips Exposed to screen readers as graphic objects when they do not contain any other accessible objects, or
when you use the Accessibility panel to provide a name or a description for a movie clip. When a movie clip contains
other accessible objects, the clip itself is ignored, and the objects inside it are made available to screen readers.
note: All Flash Professional Video objects are treated as simple movie clips.
Basic accessibility support in Flash Player
By default, the following objects are defined as accessible in all Flash Professional documents and are included in the
information that Flash Player provides to screen reader software. This generic support for documents that do not use
any accessibility features includes the following:
Dynamic or static text Text is transferred to the screen reader program as a name, but with no description.
Input text fields Text is transferred to the screen reader. No names are transferred, except where a labeling relationship
is found for the input text, such as a static text field positioned close to the input text field. No descriptions or keyboard
shortcut strings are transferred.
Buttons The state of the button is transferred to the screen reader. No names are transferred, except where labeling
relationships are found, and no descriptions or keyboard shortcut strings are transferred.
Documents The document state is transferred to the screen reader, but with no name or description.
Accessibility for hearing-impaired users
Include captions for audio content that is integral to comprehending the material. A video of a speech, for example,
might require captions for accessibility, but a quick sound associated with a button probably wouldn’t.
Methods to add captions to a Flash Professional document include the following:
• Add text as captions, ensuring that the captions are synchronized with the audio in the Timeline.
• Use Hi-Caption Viewer, a component available from Hi Software that works with Hi-Caption SE for use with Flash
Professional (see www.adobe.com/go/accessible_captions). Captioning Macromedia Flash Movies with Hi-Caption
SE, a white paper, explains how to use Hi-Caption SE and Flash Professional together to create a captioned
document (see www.adobe.com/go/accessibility_papers).
Last updated 6/12/2015
67
Platforms
Provide animation accessibility for the visually impaired
You can change the property of an accessible object during SWF file playback. For example, to indicate changes that
take place on a keyframe in an animation. However, different vendor’s screen readers treat new objects on frames
differently. Some screen readers might read only the new object, whereas other screen readers might re-read the entire
document.
To reduce the chance of causing a screen reader to emit extra “chatter” that can annoy users, avoid animating the text,
buttons, and input text fields in your document. Also, avoid making your content loop.
Flash Player can’t determine the actual text content of features such as Text Break Apart to animate text. Screen readers
can only provide accurate accessibility to information-carrying graphics such as icons and gestural animation, if you
provide names and descriptions for these objects in your document or for the entire Flash Professional application. You
can also add supplementary text to your document or shift important content from graphics to text.
1 Select the object for which you want to change the accessibility properties.
2 Select Window > Other Panels > Accessibility.
3 Change the properties for the object.
Alternatively, use ActionScript to update accessibility properties.
Testing accessible content
When you test your accessible Flash Professional applications, follow these recommendations:
• Download several screen readers and test your application by playing it in a browser with the screen reader enabled.
Check that the screen reader is not attempting to “talk over” places in your document where you inserted separate
audio. Several screen reader applications provide a demonstration version of the software as a free download; test as
many screen readers as you can to ensure compatibility across screen readers.
• Test interactive content and verify that users can navigate your content effectively using only the keyboard. Different
screen readers work in different ways when processing input from the keyboard; your Flash Professional content
might not receive keystrokes as you intended. Test all keyboard shortcuts.
Using Flash to enter accessibility information for screen readers
Flash for screen readers and accessibility
Screen readers read aloud a description of the content, read text, and assist users as they navigate through the user
interfaces of traditional applications such as menus, toolbars, dialog boxes, and input text fields.
By default, the following objects are defined as accessible in all Flash Professional documents and are included in the
information that Flash Player provides to screen reader software:
• Dynamic text
• Input text fields
• Buttons
• Movie clips
• Entire Flash Professional applications
Last updated 6/12/2015
68
Platforms
Flash Player automatically provides names for static and dynamic text objects, which are the contents of the text. For
each of these accessible objects, you can set descriptive properties for screen readers to read aloud. You can also
control how Flash Player decides which objects to expose to screen readers—for example, you can specify that
certain accessible objects are not exposed to screen readers at all.
The Flash Accessibility panel
The Flash Accessibility panel (Window > Other Panels > Accessibility) lets you provide accessibility information to
screen readers and set accessibility options for individual Flash Professional objects or entire Flash Professional
applications.
Note: Alternatively, use ActionScript code to enter accessibility information.
If you select an object on the Stage, you can make that object accessible and specify options and tab order for the object.
For movie clips, you can specify whether child object information is passed to the screen reader (the default when you
make an object accessible).
With no objects selected on the Stage, use the Accessibility panel to assign accessibility options for an entire Flash
Professional application. You can make the entire application accessible, make child objects accessible, have Flash
Professional label objects automatically, and give specific names and descriptions to objects.
All objects in Flash Professional documents must have instance names for you to apply accessibility options to them.
Create instance names for objects in the Property inspector. The instance name is used to refer to the object in
ActionScript.
The following options are available in the Accessibility panel:
Make Object Accessible (Default) Instructs Flash Player to pass the accessibility information for an object to a screen
reader. When the option is disabled, accessibility information for the object is not passed to screen readers. Disabling
this option as you test content for accessibility can be useful because some objects might be extraneous or decorative
and making them accessible could produce confusing results in the Screen Reader. You can then apply a name manually
to the labeled object, and hide the labeling text by deselecting Make Object Accessible. When Make Object Accessible
is disabled, all other controls on the Accessibility panel are disabled.
Make Child Objects Accessible (Movie clips only; Default) Instructs Flash Player to pass child object information to the
screen reader. Disabling this option for a movie clip causes that movie clip to appear as a simple clip in the accessible
object tree, even if the clip contains text, buttons, and other objects. All objects in the movie clip are then hidden from
the object tree. This option is useful mainly for hiding extraneous objects from screen readers.
note: If a movie clip is used as a button—it has a button event handler assigned to it, such as onPress or onRelease—the
Make Child Objects Accessible option is ignored because buttons are always treated as simple clips, and their children are
never examined, except in the case of labels.
Auto Label Instructs Flash Professional to automatically label objects on the Stage with the text associated with them.
Name Specifies the object name. Screen readers identify objects by reading these names aloud. When accessible objects
don’t have specified names, a screen reader might read a generic word, such as Button, which can be confusing.
Note: Do not confuse object names specified in the Accessibility panel with instance names specified in the Property
inspector. Giving an object a name in the Accessibility panel does not give it an instance name.
Description Lets you enter a description of the object to the screen reader. The screen reader reads this description.
Shortcut Describes keyboard shortcuts to the user. The screen reader reads the text in this text field. Entering keyboard
shortcut text here does not create a keyboard shortcut for the selected object. You must provide ActionScript keyboard
handlers to create shortcut keys.
Last updated 6/12/2015
69
Platforms
Tab Index ( only) Creates a tab order in which objects are accessed when the user presses the tab key. The tab index
feature works for keyboard navigation through a page, but not for screen reader reading order.
For more information, see the Flash Professional Accessibility web page at
www.adobe.com/go/learn_flash_accessibility_en/.
For a tutorial about accessible content, see Create Accessible Flash Content on the Flash Tutorials page at
www.adobe.com/go/learn_fl_tutorials.
For a sample of accessible rich media content, see the Flash Samples page at www.adobe.com/go/learn_fl_samples.
Download and decompress the Samples zip file and navigate to the Accessibility\AccessibleApplications folder to access
the sample.
Selecting names for buttons, text fields, and entire SWF applications
Use the Accessibility panel in the following ways to assign names to buttons and input text fields so that the screen
reader identifies them appropriately:
• Use the auto label feature to assign text adjacent or in the object as a label.
• Enter a specific label in the Accessibility panel name field.
Flash Professional automatically applies the name that you place on top of, in, or near a button or text field as a text
label. Labels for buttons must appear within the bounding shape of the button. For the button in the following
example, most screen readers would first read the word button, then read the text label Home. The user can press
Return or Enter to activate the button.
A form might include an input text field where users enter their names. A static text field, with the text Name appears
next to the input text field. When Flash Player discovers such an arrangement, it assumes that the static text object
serves as a label for the input text field.
For example, when the following part of a form is encountered, a screen reader reads “Enter your name here.”
In the Accessibility panel, turn off automatic labeling if it is not appropriate for your document. You can also turn
off automatic labeling for specific objects in your document.
Provide a name for an object
You can turn off automatic labeling for part of an application and provide names for the objects in the Accessibility
panel. If you have automatic labeling turned on, you can select specific objects and provide names for the objects in the
Name text field in the Accessibility panel so that the name is used instead of the object text label.
When a button or input text field doesn’t have a text label, or when the label is in a location that Flash Player can’t detect,
you can specify a name for the button or text field. You can also specify a name if the text label is near a button or text
field, but you don’t want that text to be used as that object’s name.
In the following example, the text that describes the button appears outside and to the right of the button. In this
location, Flash Player does not detect the text, and the screen reader does not read it.
Last updated 6/12/2015
70
Platforms
To correct this situation, open the Accessibility panel, select the button, and enter the name and description. To prevent
repetition, make the text object inaccessible.
Note: An object’s accessibility name is unrelated to the ActionScript instance name or ActionScript variable name
associated with the object. (This information generally applies to all objects.) For information on how ActionScript handles
instance names and variable names in text fields, see About text field instance and variable names in Learning ActionScript
2.0 in Adobe Flash at www.adobe.com/go/learn_cs5_learningas2_en.
Specify a name and description for a button, text field, or entire SWF application
1 Do one of the following:
• To provide a name for a button or text field, select the object on the Stage.
• To provide a name for an entire Flash Professional application, deselect all objects on the Stage.
2 Select Window > Other Panels > Accessibility.
3 Select either Make Object Accessible (for buttons or text fields) or the default, Make Movie Accessible (for entire
Flash Professional applications).
4 Enter a name and description for the button, text field, or Flash Professional application.
Define accessibility for a selected object in a SWF application
1 Select Window > Other Panels > Accessibility.
2 Do one of the following:
• Select Make Object Accessible (the default setting) to expose the object to screen readers and to enable other
options in the panel.
• Deselect Make Object Accessible to hide the object from screen readers and disable the other options in the
panel.
3 Enter a name and a description for the selected object as needed:
Dynamic text To provide a description for static text, you must convert it to dynamic text.
Input text fields or buttons Enter a keyboard shortcut.
Movie clips Select Make Child Objects Accessible to expose the objects inside the movie clip to screen readers.
note: If you can describe your application in a simple phrase that a screen reader can easily convey, turn off Make
Children Accessible, and type a suitable description.
Make an entire SWF application accessible
After a Flash Professional document is complete and ready to be published or exported, make the entire Flash
Professional application accessible.
1 Deselect all elements in the document.
2 Select Window > Other Panels > Accessibility.
3 Select Make Movie Accessible (the default setting) to expose the document to screen readers.
4 Select or deselect Make Children Accessible to expose or omit any accessible objects in the document to screen
readers.
5 If you selected Make Movie Accessible in step 2, enter a name and description for the document as needed.
Last updated 6/12/2015
71
Platforms
6 Select Auto Label (the default setting) to use text objects as automatic labels for accessible buttons or input text fields
contained in the document. Deselect this option to turn off automatic labeling and expose text objects to screen
readers as text objects.
Viewing and creating tab order and reading order
The two aspects to tab indexing order are the tab order in which a user navigates through the web content and the order
in which things are read by the screen reader, called the reading order.
Flash Player uses a tab index order from left to right and top to bottom. Customize both the tab and reading order by
using the tabIndex property in ActionScript (in ActionScript, the tabIndex property is synonymous with the reading
order).
Note: Flash Player no longer requires that you add all of the objects in a FLA file to a list of tab index values. Even if you
do not specify a tab index for all objects, a screen reader reads each object correctly.
Tab order The order in which objects receive input focus when users press the Tab key. Use ActionScript to create the
tab order, or if you have Adobe Flash Professional, use the Accessibility panel. The tab index that you assign in the
Accessibility panel does not necessarily control the reading order.
Reading order The order in which a screen reader reads information about the object. To create a reading order, use
ActionScript to assign a tab index to every instance. Create a tab-order index for every accessible object, not just the
focusable objects. For example, dynamic text must have tab indexes, even though a user cannot tab to dynamic text. If
you do not create a tab index for every accessible object in a given frame, Flash Player ignores all tab indexes for that
frame whenever a screen reader is present, and uses the default tab ordering instead.
Create a tab-order index for keyboard navigation in the Accessibility panel
You can create a custom tab-order index in the Accessibility panel for keyboard navigation for the following objects:
• Dynamic text
• Input text
• Buttons
• Movie clips, including compiled movie clips
• Components
• Screens
note: You can also use ActionScript code to create a tab-order index for keyboard navigation.
Tab focus occurs in numerical order, starting from the lowest index number. After tab focus reaches the highest tab
index, focus returns to the lowest index number.
When you move tab-indexed objects that are user-defined in your document, or to another document, Flash
Professional retains the index attributes. Check for and resolve index conflicts (for example, two different objects on
the Stage with the same tab-index number).
Note: If two or more objects have the same tab index in any given frame, Flash Professional follows the order in which
the objects were placed on the Stage.
1 Select the object in which to assign a tab order.
2 Select Window > Other Panels > Accessibility.
3 If you’re providing an index for the selected object only, in the Tab Index text field, enter a positive integer (up to
65535) that reflects the order in which the selected object should receive focus.
Last updated 6/12/2015
72
Platforms
4 To view a tab order, select View > Show Tab Order. Tab index numbers for individual objects appear in the upper-
left corner of the object.
Note: Tab indexes created with ActionScript code do not appear on the Stage when the Show Tab Order option is
enabled.
Specifying advanced accessibility options for screen readers
Turn off automatic labeling and specify an object name for screen readers
1 On the Stage, select the button or input text field for which you want to control labeling.
2 Select Window > Other Panels > Accessibility.
3 Select Make Object Accessible (the default setting).
4 Enter a name for the object. The name is read as the label for the button or text field.
5 To turn off accessibility for the automatic label (and hide it from screen readers), select the text object on the Stage.
6 If the text object is static text, convert it to dynamic text (in the Property inspector, select Text type > Dynamic Text).
7 Deselect Make Object Accessible.
Hide an object from the screen reader
You can hide a selected object from screen readers, and you can decide to hide accessible objects that are contained
inside a movie clip or Flash Professional application and expose only the movie clip or Flash Professional application
to screen readers. note: Only hide objects that are repetitive or convey no content.
When an object is hidden, the screen reader ignores the object.
1 On the Stage, select the button or input text field to hide from the screen reader.
2 Select Window > Other Panels > Accessibility.
3 In the Accessibility panel, do one of the following:
• If the object is a movie clip, button, text field, or another object, deselect Make Object Accessible.
• If the object is the child of a movie clip, deselect Make Child Objects Accessible.
Last updated 6/12/2015
73
Platforms
Create a keyboard shortcut to an object for screen readers
You can create a keyboard shortcut for an object, such as a button, so users can navigate to it without listening to the
contents of an entire page. For example, you can create a keyboard shortcut to a menu, a toolbar, the next page, or a
submit button.
To create a keyboard shortcut, write ActionScript code for an object. If you provide a keyboard shortcut for an input
text field or button, you must also use the ActionScript Key class to detect the key the user presses during Flash
Professional content playback. See Key in the ActionScript 2.0 Language Reference. See Capturing keypresses in
Learning ActionScript 2.0 in Adobe Flash at www.adobe.com/go/learn_cs5_learningas2_en.
Select the object and add the name of the keyboard shortcut to the Accessibility panel so the screen reader can read it.
Test your Flash Professional content with multiple screen readers. Keyboard shortcut functionality also depends on the
screen reader software used. The key combination Control+F, for example, is a reserved keystroke for both the browser
and the screen reader. The screen reader reserves the arrow keys. Generally, you can use the 0 to 9 keys on the keyboard
for keyboard shortcuts, however, screen readers increasingly use even these keys.
Create a keyboard shortcut
1 On the Stage, select the button or input text field to create a keyboard shortcut for.
2 Select Window > Other Panels > Accessibility.
3 In the Shortcut field, type the name of the keyboard shortcut, using the following conventions:
• Spell out key names, such as Control or Alt.
• Use capital letters for alphabetic characters.
• Use a plus sign (+) between key names, with no spaces (for example, Control+A).
Note: Flash Professional does not check that the ActionScript to code the keyboard shortcut was created.
Map a keyboard shortcut to a button instance Control+7 to myButton instance
1 Select the object on the Stage, display the Accessibility panel, and in the Shortcut field, type the key combination of
the shortcut. For example, Control+7.
2 Enter the following ActionScript 2.0 code in the Actions panel:
Note: In this example the shortcut is Control+7.
function myOnPress() {
trace( "hello" );
}
function myOnKeyDown() {
if (Key.isDown(Key.CONTROL) && Key.getCode() == 55) // 55 is key code for 7
{
Selection.setFocus(myButton);
myButton.onPress();
}
}
var myListener = new Object();
myListener.onKeyDown = myOnKeyDown;
Key.addListener(myListener);
myButton.onPress = myOnPress;
myButton._accProps.shortcut = "Ctrl+7"
Accessibility.updateProperties();
Last updated 6/12/2015
74
Platforms
Note: The example assigns the Control+7 keyboard shortcut to a button with an instance name of myButton and makes
information about the shortcut available to screen readers. In this example, when you press Control+7, the myOnPress
function displays the text “hello” in the Output panel. See addListener (IME.addListener method) in ActionScript 2.0
Language Reference at www.adobe.com/go/learn_cs5_as2lr_en.
Creating accessibility with ActionScript
About ActionScript and accessibility
You can create accessible documents with ActionScript® code. For accessibility properties that apply to the entire
document, you can create or modify a global variable called _accProps. See the _accProps property in ActionScript 2.0
Language Reference at www.adobe.com/go/learn_cs5_as2lr_en.
For properties that apply to a specific object, you can use the syntax instancename._accProps. The value of _accProps
is an object that can include any of the following properties:
Property
Type
Equivalent selection in the
Accessibility panel
Applies to
.silent
Boolean
Make Movie Accessible/Make
Object Accessible (inverse logic)
Entire documents
Buttons
Movie clips
Dynamic text
Input text
.forceSimple
.name
Boolean
string
Make Child Objects Accessible
(inverse logic)
Entire documents
Name
Entire documents
Movie clips
Buttons
Movie clips
Input text
.description
string
Description
Entire documents
Buttons
Movie clips
Dynamic text
Input text
.shortcut
string
Shortcut
Buttons
Movie clips
Input text
Note: With inverse logic, a value of true in ActionScript corresponds to a check box that is not selected in the Accessibility
panel, and a value of false in ActionScript corresponds to a selected check box in the Accessibility panel.
Modifying the _accProps variable has no effect by itself. You must also use the Accessibility.updateProperties method
to inform screen reader users of Flash Professional content changes. Calling the method causes Flash Player to
re-examine all accessibility properties, update property descriptions for the screen reader, and, if necessary, send events
to the screen reader that indicate changes have occurred.
Last updated 6/12/2015
75
Platforms
When updating accessibility properties of multiple objects at once, include only a single call to
Accessiblity.updateProperties (too frequent updates to the screen reader can cause some screen readers to become too
verbose).
See the Accessibility.updateProperties method in the ActionScript 2.0 Language Reference at
www.adobe.com/go/learn_cs5_as2lr_en.
Implementing screen reader detection with the Accessibility.isActive() method
To create Flash Professional content that behaves in a specific way if a screen reader is active, use the
Accessibility.isActive() ActionScript method, which returns a value of true if a screen reader is present, and false
otherwise. You can then design your Flash Professional content to perform so that it’s compatible with screen reader
use (for example, by hiding child elements from the screen reader). For more information, see the Accessibility.isActive
method in the ActionScript 2.0 Language Reference at www.adobe.com/go/learn_cs5_as2lr_en.
For example, you could use the Accessibility.isActive() method to decide whether to include unsolicited animation.
Unsolicited animation happens without the screen reader doing anything, which can be confusing for screen readers.
The Accessibility.isActive() method provides asynchronous communication between the Flash Professional content
and Flash Player; a slight real-time delay can occur between the time the method is called and the time when Flash
Player becomes active, returning an incorrect value of false. To ensure that the method is called correctly, do one of the
following:
• Instead of using the Accessibility.isActive() method when the Flash Professional content first plays, call the method
whenever you need to make a decision about accessibility.
• Introduce a short delay of one or two seconds at the beginning of your document to give the Flash Professional
content enough time to contact Flash Player.
For example, you can use an onFocus event to attach this method to a button. This approach generally gives the SWF
file enough time to load and you can assume a screen reader user will tab to the first button or object on the Stage.
Use ActionScript to create a tab order for accessible objects
To create the tab order with ActionScript® code, assign the tabIndex property to the following objects:
• Dynamic text
• Input text
• Buttons
• Movie clips, including compiled movie clips
• Timeline frames
• Screens
Provide a complete tab order for all accessible objects. If you create a tab order for a frame and you don’t specify a tab
order for an accessible object in the frame, Flash Player ignores all the custom tab-order assignments. Additionally, all
objects assigned to a tab order, except frames, must have an instance name specified in the Instance Name text field of
the Property inspector. Even items that are not tab stops, such as text, need to be included in the tab order if they are to
be read in that order.
Because static text cannot be assigned an instance name, it cannot be included in the list of the tabIndex property
values. As a result, a single instance of static text anywhere in the SWF file causes the reading order to revert to the
default.
To specify a tab order, assign an order number to the tabIndex property, as the following example shows:
Last updated 6/12/2015
76
Platforms
_this.myOption1.btn.tabIndex = 1
_this.myOption2.txt.tabIndex = 2
See tabIndex in Button, MovieClip, and TextField in the ActionScript 2.0 Language Reference at
www.adobe.com/go/learn_cs5_as2lr_en.
You can also use the tabChildren() or tabEnabled() methods to assign custom tab order. See MovieClip.tabChildren,
MovieClip.tabEnabled, and TextField.tabEnabled in the ActionScript 2.0 Language Reference at
www.adobe.com/go/learn_cs5_as2lr_en.
Using accessible components
A core set of UI components accelerates building accessible applications. These components automate many of the
most common accessibility practices related to labeling, keyboard access, and testing and help ensure a consistent user
experience across rich applications. Flash Professional includes the following set of accessible components:
• SimpleButton
• CheckBox
• RadioButton
• Label
• TextInput
• TextArea
• ComboBox
• ListBox
• Window
• Alert
• DataGrid
Accessible Flash Professional components must contain ActionScript that defines their accessible behavior. For
information on which accessible components work with screen readers, see the Flash Professional Accessibility web
page at www.adobe.com/go/learn_flash_accessibility_en/.
For general information about components, see “About Components” in Using ActionScript 2.0 Components at
www.adobe.com/go/learn_cs5_usingas2components_en.
For each accessible component, enable the accessible portion of the component with the enableAccessibility()
command. This command includes the accessibility object with the component as the document is compiled. Because
no simple way exists to remove an object after it is added to the component, these options are disabled by default.
Therefore, it’s important that you enable accessibility for each component. Perform this step only once for each
component; you do not need to enable accessibility for each instance of a component for a given document. See “Button
component”, “CheckBox component”, “ComboBox component”, “Label component”, “List component”, “RadioButton
component”, and “Window component” in the ActionScript 2.0 Components Language Reference at
www.adobe.com/go/learn_cs5_as2lr_en.
Best practices - Accessibility guidelines
Last updated 6/12/2015
77
Platforms
About accessibility guidelines
Screen readers are complex, and you can easily encounter unexpected results in FLA files developed for use with screen
readers, which is software that visually impaired users run to read websites aloud. Text is read aloud using specially
designed software. A screen reader can only interpret textual content. However, any descriptions that you provide for
the overall SWF file, movie clips, images, or other graphical content are also read aloud. Write descriptions for the
important images and animations so that the screen reader can also interpret these assets in your SWF file. This is the
SWF file equivalent to alt text in an HTML web page.note: Flash Professional applications must be viewed in Internet
Explorer on Windows, because Microsoft Active Accessibility (MSAA) support is limited to this browser.
Flash Player uses Microsoft Active Accessibility (MSAA) to expose Flash Professional content to screen readers. MSAA
is a Windows-based technology that provides a standardized platform for information exchange between assistive
technologies, such as screen readers, and other applications. Events (such as a change in the application) and objects
are visible to screen readers by using MSAA.
Note: Flash Player 7 (and later) does not work with all screen-reader technologies. The third-party software provider must
handle the information that MSAA provides.
Creating accessible sites
Making a website accessible involves several different criteria:
Expose the information to screen readers
Make text or images realizable Some visitors might have difficulty reading small text or seeing small graphics. Allow
users to zoom in on these elements, taking advantage of scalable vector graphics in SWF files.
Provide audio narration Consider providing an audio narration for visitors without a screen reader, or where screen
readers might not work, such as with video content.
Provide captions for audio narrations Some visitors might not be able to hear an audio narration for your site or a
video. Consider providing captions for these visitors.
Do not rely on color to communicate information Many visitors might be color blind. If you rely on color to
communicate information (such as: Click the green button to go to page 1, click the red button to go to page 2), provide
text or speech equivalents.
Historically, many online presentations (such as videos) provide alternative ways for visually impaired visitors to access
the content, for instance, a textual description of a video. However, Flash Professional provides textual information
directly to the screen reader. Although this usually means you need to make additional settings or ActionScript in a
FLA file, you do not have to create a completely separate version.
Parts of your SWF file can be exposed to screen readers. Text elements (such as text fields, static text, and dynamic text),
buttons, movie clips, components, and the entire SWF file can be interpreted by MSA-compliant screen readers.
Section 508 is United States legislation that provides guidelines for making information accessible to people with
disabilities. Section 508 specifically addresses the need for websites to be accessible in several ways. Some websites,
including all federal websites, must comply with these guidelines. If a SWF file does not communicate all of the
information to the screen reader, the SWF file is no longer Section 508-compliant. For more information, see the
Section 508 website.
Many nations have specified guidelines to follow to create accessible web sites, or follow guidelines established by other
organizations. For more information on accessibility and web standards, see the World Wide Web Consortium (W3C)
Web Accessibility Initiative website. These standards and guidelines describe what factors you must address when you
create accessible HTML websites, and some of this information applies to Flash Professional.
Last updated 6/12/2015
78
Platforms
Exposing SWF file structure and navigation
Because of the visual nature of some SWF files, the layout and navigation of the page can be complex and difficult for
screen readers to translate. An overall description of the SWF file is important to communicate information about its
structure and how to navigate through the site’s structure. You can provide this description by clicking the Stage and
entering a description into the Accessibility panel. You can also create a separate area of the site to provide this
description or overview.
Note: If you enter a description for the main SWF file, this description is read each time the SWF file refreshes. You can
avoid this redundancy by creating a separate informational page.
Inform the user about any navigational elements that change in the SWF file. Perhaps an extra button is added, or the
text on the face of a button changes, and this change is read aloud by the screen reader. Flash Player 7 and later supports
updating these properties by using ActionScript. You can update the accessibility information in your applications if
the content changes at runtime.
Controlling descriptions and repetition
Designers and developers can assign descriptions for the animations, images, and graphics in a SWF file. Provide names
for graphics so the screen reader can interpret them. If a graphic or animation does not communicate vital information
to the SWF file (perhaps it is decorative or repetitive), or you outlined the element in the overall SWF file description,
do not provide a separate description for that element. Providing unnecessary descriptions can be confusing to users
who use screen readers.
Note: If you divide text or use images for text in your SWF files, provide either a name or description for these elements.
If you have several nested movie clips that serve a single purpose or convey one idea, ensure that you do the following:
• Group these elements in your SWF file.
• Provide a description for the parent movie clip.
• Make all the child movie clips inaccessible.
This is extremely important, or the screen reader tries to describe all the irrelevant nested movie clips, which will
confuse the user, and might cause the user to leave your website. Make this decision whenever you have more than
one object, such as many movie clips, in a SWF file. If the overall message is best conveyed using a single description,
provide a description on one of the objects, and make all the other objects inaccessible to the screen reader.
Looping SWF files and applications cause screen readers to constantly refresh because the screen reader detects new
content on the page. Because the reader thinks the content is updated, it returns to the top of the web page and starts
rereading the content. Make inaccessible to screen readers any looping or refreshing objects that do not have to be
reread.
note: Do not type a description in the Description field of the Accessibility panel for instances (such as text) that the
screen reader reads aloud.
Using color
You must make decisions about using colors in an accessible file. You must not rely only on color to communicate
particular information or directives to users. A color-blind user cannot operate a page if it asks to click on the blue area
to launch a new page or the red area to hear music. Offer text equivalents on the page or in an alternate version to make
your site accessible. Also, check that significant contrast exists between foreground and background colors to enhance
readability. If you place light gray text on a white background, users cannot easily read it. Similarly, small text is difficult
for many visitors to read. Using high-contrast and large or resizable text benefits most users, even those without
impairments.
Last updated 6/12/2015
79
Platforms
Ordering, tabbing, and the keyboard
Reading order and tabbing are important considerations for making accessible Flash Professional websites. When you
design an interface, the order that it appears on the page might not match the order in which the screen reader describes
each instance. You can control and test reading order, as well as control tabbing in the SWF file.
Controlling reading order
The default reading order is not predictable and does not always match the placement of your assets or the visual layout
of the page. Keeping the layout simple can help create a logical reading order without using ActionScript. However, you
have more control over reading order if you use ActionScript and test the reading order in your SWF files.
Note: Do not miss ordering a single instance in your SWF file, or the reading order reverts to the default (and
unpredictable) reading order.
Controlling tabbing and content
Visitors who rely on screen readers to describe a site’s content typically use tabbing and keyboard controls to navigate
the operating system and web pages, because using the mouse is not useful when the screen cannot be seen. Use the
tabIndex and tabEnabled properties with the movie clip, button, text field, or component instances to offer intelligent
tabbing control in accessible SWF files. In addition to tabbing, you can use any key-press actions to navigate through
the SWF file, but you must communicate that information using the Accessibility panel. Use the Key class in
ActionScript to add key-press scripts to the SWF file. Select the object for which you want to use the key-press script,
and add the shortcut key in the Shortcut field on the Accessibility panel. Add keyboard shortcuts to essential and
frequently used buttons in your SWF file.note: In ActionScript 3.0, tabIndex and tabEnabled are properties of the
InteractiveObject class. In ActionScript 2.0, they do not require a class reference.
Note: Avoid invisible buttons in accessible SWF files, because screen readers do not recognize these buttons. (Invisible
buttons are buttons for which you define only a hit area, the clickable region, for the button.)
Many SWF files have a rapid succession of information, and screen readers frequently cannot keep up with this pace.
Provide controls for the SWF file, letting the user use buttons to navigate through the file at their own pace, and letting
them pause the process if necessary.
Handling audio, video, and animation
When you provide audio narrations or video that contains speech, provide captions for those users who cannot hear.
You can use text fields in Flash Professional, import video that contains captions, or even use an XML caption file. You
can use video cue points to specify when a text field should update text information at runtime.
For information on using Hi-Caption SE and the Hi-Caption Viewer component, see
www.adobe.com/go/flash_extensions. This third-party extension lets you create captions that you save in an XML file
and load into the SWF file at runtime, among other advanced controls. Alternatively, you can use cue points and a text
field to display caption information.
Accessibility and extending Flash
With the extensibility layer in Flash Professional, developers can create extensions that enable advanced authoring. This
lets third-party companies develop extensions that involve accessibility. You have several options for validating your
SWF files or adding captions.
For example, a validation tool can examine your SWF file for missing descriptions. It checks to see if a description is
added for a group of instances, or if text has a label for the instance, and tells you about any problems. The tool also
examines the reading order in your SWF file, and finds all instances that must be specified. You can specify reading
order by using a dialog box after the SWF file is analyzed.
Last updated 6/12/2015
80
Platforms
For information on the currently available third-party extensions, see www.adobe.com/go/flash_extensions.
Testing files and making changes
Test any SWF file that is intended for use with screen readers. Test your SWF files when each new version of Flash Player
is released, including minor revisions, and test it with the following scenarios:
• Using the Window Eyes and JAWS for Windows screen readers. These each handle SWF files differently, so you
could get different results.
• In a browser without a screen reader, and navigate through your site without using the mouse.
• Turn off your monitor and use only the screen reader to navigate your website.
• If you use audio narration, test your site without speakers.
• With several users who are representative of your target web site visitors.
Note: You do not have to test different browsers, because the technology used to expose SWF files to screen readers (MSAA)
is supported only by Internet Explorer on Windows.
When listening to your SWF file using a screen reader, check the following points:
• Is the reading order correct?
• Do you have descriptions for shortcuts in your SWF file?
• Do you have adequate and complete descriptions for the elements in the interface?
• Do you have adequate descriptions for navigating the site’s structure?
• Is the SWF file content read when it is updated or refreshed?
• If you change the context of any elements on the Stage (such as a button that changes from Play to Pause), is that
change announced by the screen reader?
No official tool is available for validating SWF files, unlike HTML validation. However, some third-party tools exist
to help you validate the file. For more information on these extensions, see www.adobe.com/go/flash_extensions.
More Help topics
Creating accessibility with ActionScript
Using Flash to enter accessibility information for screen readers
Creating accessibility with ActionScript
Accessibility for hearing-impaired users
Accessibility in the Flash workspace
The Adobe Flash Professional workspace is keyboard-accessible for users who may have difficulty using a mouse.
Note: Complete, updated Help is on the web. The application did not detect an Internet connection. For a complete version
of this topic, click the link below or search complete Flash Professional Help.
The Adobe Flash Professional workspace is keyboard-accessible for users who may have difficulty using a mouse.
See the discussion of Flash Professional workspace accessibility in Help on the web to learn about navigating the user
interface without a mouse.
Last updated 6/12/2015
81
Platforms
About accessibility support
Accessibility support in the authoring environment provides keyboard shortcuts for navigating and using interface
controls, including panels, the Property inspector, dialog boxes, the Stage, and objects on the Stage, so that you can
work with these interface elements without using the mouse.
Note: Certain keyboard controls and authoring environment accessibility features are available only in Windows.
To customize the keyboard shortcuts for accessibility in the authoring environment, use the Workspace Accessibility
Commands section of the Keyboard Shortcuts dialog box.
• To hide all panels and the Property inspector, press F4. To display all panels and the Property inspector, press F4
again.
Select controls in a panel using keyboard shortcuts
To move the focus through the panel controls when a panel or the Property inspector has the current focus, use the Tab
key. To activate a menu that has the current focus, use the Spacebar (that is, pressing Spacebar is equivalent to clicking
the menu in the panel). Flash Pro does not support moving from panel to panel with the Tab key.
When you use the keyboard shortcut for panel controls, focus is applied to a control and the control is activated using
the following criteria:
• To select a control in the panel with the Tab key, the panel with the current focus must be expanded. If the panel is
collapsed, pressing Tab has no effect.
• To display the Panel menu items when the Panel menu has the focus, press the Space bar.
• You can move the focus to a panel control only if the control is active. If a control is dimmed (inactive), you cannot
apply focus to the control.
Move the focus through the items in the Panel menu of a panel
1 To display the Panel menu items when the focus currently applied to the Panel menu, press the Spacebar.
2 To move through the items in the Panel menu, press Down Arrow.
3 To activate the currently selected Panel menu item, press Enter (Windows) or Return (Macintosh).
Move the focus through the controls in a panel
1 Press Tab when the focus is currently applied to the Panel menu. To move the focus through the controls in the
panel, press Tab repeatedly.
2 To activate the currently selected menu in a panel , press Enter or Return.
3 To edit a numerical Hot Text value, type the number and press Enter or Return.
Navigate dialog box controls using keyboard shortcuts
• To move through the controls in the dialog box, press Tab.
• To move through the controls within one section of a dialog box, press Up Arrow and Down Arrow.
• To activate the button (equivalent to clicking the button), when the focus is applied to a dialog box control button,
press Enter.
• To apply the current settings and close the dialog box (equivalent to clicking OK), when the focus is not applied to
any dialog box control button, press Enter.
• To close the dialog box without applying the changes (equivalent to clicking Cancel), press Escape.
Last updated 6/12/2015
82
Platforms
• To view the Help content for the dialog box (equivalent to clicking Help), when the focus is applied to the Help
button, press Enter or Spacebar.
Select the Stage or objects on the Stage using keyboard shortcuts
Selecting the Stage with a keyboard shortcut is equivalent to clicking on the Stage.
After the Stage is selected, use the Tab key to navigate through all objects on all layers, one at a time. You can select
instances (including graphic symbols, buttons, movie clips, bitmaps, videos, or sounds), groups, or boxes. You cannot
select shapes (such as rectangles) unless those shapes are instances of symbols. You cannot select more than one object
at a time using keyboard shortcuts.
To select objects on the Stage, use the following techniques:
• To select an object on the Stage, with the Stage selected, press Tab.
• To select the previous object when an object is currently selected, press Shift+Tab.
• To select the first object that was created on the active frame in the active layer, press Tab. When the last object on
the top layer is selected, press Tab to move to the next layer beneath it and select the first object there, and so on.
• When the last object on the last layer is selected, press Tab to move to the next frame and select the first object on
the top layer there.
• Objects on layers that are hidden or locked cannot be selected with the Tab key.
Note: If you are currently typing text in a box, you cannot select an object using the keyboard focus. You must first press
the Escape key and then select an object.
Navigate tree structures using keyboard shortcuts
To navigate tree structures, the hierarchical displays of file structures in certain Flash Professional panels, use keyboard
shortcuts.
• To expand a collapsed folder, select the folder and press Right Arrow.
• To collapse an expanded folder, select the folder and press Left Arrow.
• To move to the parent folder of an expanded folder, press Left Arrow.
• To move to the child folder of an expanded folder, press Right Arrow.
Work with library items using keyboard shortcuts
1 To copy or paste a selected library item, press Control+X (Windows) or Command+X (Macintosh) to cut the item,
or press Control+C (Windows) or Command+C (Macintosh) to copy the item.
2 To paste a cut or copied item, click the Stage or in another library to set the insertion point, and press Control+V
(Windows) or Command+V (Macintosh) to paste in the center of the Stage; or press Control+Shift+V (Windows)
or Command+Shift+V (Macintosh) to paste in place (in the same location as the original).
To cut, copy, and paste items, use the following techniques:
• Cut or copy one item or multiple items.
•
Cut or copy an item from the Library panel and paste it onto the Stage or into another library, or paste a folder
into another library.
• You cannot paste a shape from the Stage into the library.
Last updated 6/12/2015
83
Platforms
• You cannot paste a library item into a common library, because common libraries cannot be modified. However,
you can create a common library.
• When you paste a library item onto the Stage, the item is centered.
• If you paste a folder, each item in the folder is included.
• To paste a library item into a folder in the destination library, click the folder before pasting.
• You can paste a library item into a different location in the same library where it originated.
• If you attempt to paste a library item into a location containing another item by the same name, select whether
to replace the existing item.
More Help topics
Accessibility in the Flash workspace
Flash Professional Keyboard Shortcuts
(Deprecated with Flash Professional CC) Work with common libraries
Debugging ActionScript 3.0
About the ActionScript 3.0 debugger
Additional resources
The following resources provide additional detailed information about debugging ActionScript 3.0:
• Article: Understanding ActionScript 3 debugging in Flash (Adobe.com)
• Article: Introducing the ActionScript 3 debugger (Adobe.com)
• Video: Mobile device debugging via USB (Adobe.com)
Enter debugging mode
The way you begin a debugging session depends on the type of file you are working on. During a debugging session,
Flash interrupts the execution of ActionScript when it encounters a breakpoint or a runtime error.
When Flash Pro initiates a debug session, it adds special information to the SWF file that it exports for the session. This
information allows the debugger to provide the specific line numbers in the code where errors are encountered.
You can include this special debugging information in all SWF files created from a specific FLA file in the Publish
settings. This allows you to debug the SWF file even if you do not explicitly initiate a debug session. This debugging
information makes the SWF file slightly larger.
Choose a default debugging environment
• Choose Debug > Debug Movie and then choose one of the following:
• Flash Professional
• AIR Debug Launcher (Desktop)
• AIR Debug Launcher (Mobile)
Last updated 6/12/2015
84
Platforms
• on Device via USB (CS5.5 only)
All debug sessions will take place in the environment you choose. You can change the default environment at any
time.
Start debugging from a FLA file
❖ Select Debug > Debug
(Flash Professional CS6 and earlier) Select Debug > Debug Movie > Debug.
Start debugging from an ActionScript 3.0 AS file
1 With the ActionScript file open in the Script window, select the FLA file that the ActionScript file should be
compiled with from the Target menu at the top of the Script window. The FLA file must also be open in Flash to
appear in this menu.
2 Select Debug > Debug
(Flash Professional CS6 and earlier) Select Debug > Debug Movie > Debug.
Add debugging information to all SWF files created from a FLA file
1 With the FLA file open, select File > Publish Settings.
2 In the Publish Settings dialog box, click the Flash tab (CS5) or Flash category (CS5.5).
3 Select Permit Debugging.
Exit debugging mode
❖ Click the End Debug Session button in the Debug Console.
Set and remove breakpoints
Add breakpoints to ActionScript code to interrupt the execution of the code. After execution is interrupted, you can
step through and execute the code line by line, view different sections of your ActionScript, view the values of variables
and expressions, and edit variable values.
Note: Breakpoints cannot be added to ASC (ActionScript for Communication) or JSFL (Flash JavaScript) files.
Set a breakpoint
❖ In the Actions panel or Script window, click in the left margin next to the line of code where you want the breakpoint
to appear.
Remove a breakpoint
❖ In the Actions panel or Script window, click on the breakpoint to remove.
Step through lines of code
After the ActionScript execution is interrupted at a breakpoint or runtime error, you can step through the code line by
line. You may choose to step into function calls or step over them. You can also choose to continue executing the code
without stepping.
Step into code line by line
❖ Click the Step In button in the Debug Console.
Step over a function call
❖ Click the Step Over button in the Debug Console.
Last updated 6/12/2015
85
Platforms
Step out of a function call
❖ Click the Step Out button in the Debug Console.
Resume normal code execution
❖ Click the Continue button in the Debug Console.
Display and examine scripts in the call stack
When code execution stops in the debugger, you can view the call stack in the Debug Console and display the scripts
containing the functions in the call stack. The call stack shows the current list of nested function calls that are waiting
to complete execution.
You can view the individual scripts that contain each function.
❖ In the Debug Console panel, double click the name of the script in the call stack.
Display and modify variable values
View and edit the values of variables and properties in the Variables panel.
View a variable value
1 In the Variables panel, select the types of variables to display from the Panel menu.
• Show Constants displays the values constants (variables having a fixed value).
• Show Statics displays variables that belong to the class, rather than to instances of the class.
• Show Inaccessible Member Variables displays variables that are not accessible to other classes or namespaces.
This includes variables that are protected, private or internal to the namespace.
• Show Additional Hexadecimal Display adds hexadecimal values wherever decimal values are displayed. This is
mainly useful for color values. Hexadecimal values are not displayed for decimal values from 0 through 9.
• Show Qualified Names displays variables types with both the package name and the class name.
2 Expand the tree view of the object structure of the FLA until you see the variable to view.
Edit the value of a variable
1 In the Variables panel, double click on the value of the variable.
2 Enter the new value for the variable and press Enter. The new value is used during subsequent code execution.
Control compiler warnings
Control the types of compiler warnings that the ActionScript compiler generates in the Compiler Errors panel. When
the compiler reports an error, double-click the error to navigate to the line of code that caused the error.
1 Select File > Publish Settings.
2 Click Flash.
3 Click the ActionScript Settings button.
4 Select among the Errors options:
• Strict Mode reports warnings as errors, which means that compilation will not succeed if those errors exist.
• Warnings Mode reports extra warnings that are useful for discovering incompatibilities when updating
ActionScript 2.0 code to ActionScript 3.0.
Last updated 6/12/2015
86
Platforms
Navigate to errors in code
When Flash encounters an error in ActionScript code, either during compiling or execution, it reports the error in the
Compiler Errors panel. Navigate to the line of code that caused the error from the Compiler Errors panel.
❖ Double click the error in the Compiler Errors panel.
Debug a remote ActionScript 3.0 SWF file
With ActionScript 3.0, you can debug a remote SWF file by using the stand-alone, ActiveX, or plug-in version of the
Debug Flash Player, which you can find in the Flash install directory/Players/Debug/ directory. However, in the
ActionScript 3.0 Debugger, remote debugging is limited to files located on the same localhost as the Flash authoring
application, being played in the stand-alone debug player, ActiveX control, or plugin.
To permit remote debugging of the file, enable debugging in the Publish settings. You can also publish your file with a
debugging password to ensure that only trusted users can debug it.
As in JavaScript or HTML, users can view client-side variables in ActionScript. To store variables securely, send them
to a server-side application instead of storing them in your file. However, as a developer, you may have other trade
secrets, such as movie clip structures, that you do not want to reveal. You can use a debugging password to protect your
work.
Enable remote debugging of a SWF file and set a debugging password
In ActionScript 3.0 FLA files, code in frame scripts cannot be debugged. Only code in external AS files can be debugged
with the ActionScript 3.0 Debugger.
1 Open the FLA file.
2 Select File > Publish Settings.
3 In the Publish Settings dialog box, click the Flash tab (CS5) or Flash category (CS5.5), and then select Permit
Debugging.
4 Close the Publish Settings dialog box, and select one of the following commands:
• File > Export > Export Movie
• File > Publish
5 Leave the SWF file on the local machine to perform a remote debug session on the localhost, or upload it to your
web server.
The SWF file contains no breakpoint information, so if you upload the file to a remote server you will not be able to
step through code. Use the localhost to perform this task.
6 In Flash, select Debug > Begin Remote Debug Session > ActionScript 3.0.
Flash opens the ActionScript 3.0 Debugger and waits for a debug Flash Player to connect. You have 2 minutes to
start the debug Flash Player. If more than 2 minutes elapse, repeat this step.
7 Open the SWF file in the debug version of the Flash Player plugin, ActiveX control, or stand-alone player. The debug
stand-alone player is located in the Flash install directory/Players/Debug/ directory. Do not connect to a file on
another machine, as debugger will not be able to receive any breakpoint information.
The debug session begins when the debug player connects to the Flash ActionScript 3.0 Debugger panel.
Note: Remote debugging does not function if you select the Default Network Interface for AIR 3.4. Instead, select the
options to provide Network Interface name and IP Address of the system.
Last updated 6/12/2015
87
Platforms
Activate the Debugger from a remote location
1 Open the Flash authoring application if it is not already open.
2 Select Debug > Begin Remote Debug Session > ActionScript 3.0.
3 In a browser or in the debugger version of the stand-alone player, open the published SWF file from the remote
location.
If the Remote Debug dialog box does not appear, right-click (Windows) or Control-click (Macintosh) in the SWF
file to display the context menu, and select Debugger.
4 In the Remote Debug dialog box, select Localhost and select the file to open.
The display list of the SWF file appears in the Debugger. If the SWF file doesn’t play, the Debugger might be paused,
so click Continue to start it.
Writing and managing scripts
Format code
Your code can be formatted and indented automatically when typing. If you use dynamic font mapping, you ensure that
the correct fonts are used for multilingual text.
(Deprecated with Flash Professional CC) Set Auto Format options
1 Do one of the following:
•
From the panel menu
(at the upper-right corner of the Actions panel), select Preferences.
• In the Script window, select Edit > Preferences (Windows) or Flash > Preferences (Macintosh).
2 In the Preferences dialog box, select Auto Format.
3 Select any of the Auto Format options.
After you set Auto Format options, your settings are applied automatically to the code you write, but not to existing
code; you must apply your settings to existing code manually.
(Deprecated with Flash Professional CC) Format code according to Auto Format settings
• Click Auto Format
in the Actions panel or Script window toolbar.
• From the panel menu (at the upper-right corner of the Actions panel), select Auto Format.
• Press Control+Shift+F (Windows) or Command+Shift+F (Macintosh).
• In the Script window, select Tools > Auto Format.
(Deprecated with Flash Professional CC) Use dynamic font mapping
❖ To turn dynamic font mapping on or off, select or deselect Use Dynamic Font Mapping in the Preferences dialog
box.
Dynamic font mapping is turned off by default because it increases performance time when you are scripting. If you
are working with multilingual text, turn on dynamic font mapping because it helps to ensure that the correct fonts
are used.
Last updated 6/12/2015
88
Platforms
Use automatic indentation
❖ To turn automatic indentation on or off, select or deselect Automatic Indentation in the Preferences dialog box.
When automatic indentation is turned on, the text you type after an opening parenthesis “(“ or opening curly brace
“{“ is automatically indented according to the Tab Size setting in ActionScript preferences.
In your scripts, you can indent a line by selecting it and pressing Tab. To remove the indent, select the line and press
Shift+Tab.
Comment sections of code
Code comments are parts of code that the ActionScript compiler ignores. A comment lines explains what your code is
doing, or temporarily deactivates code that you don’t want to delete. Comment a line of code by beginning it with a
double slash (//). The compiler ignores all text on that line after the double slash. You can also comment larger blocks
of code by placing a slash and asterisk (/*) at the beginning of the block and an asterisk and slash (*/) at the end of the
block.
You can type these comment markers manually, or you can use buttons at the top of the Actions panel or Script window
to add them.
Comment a line of code
1 Place the insertion point at the beginning of the line or at the character where you want the comment to begin.
2 Right-click and select Comment. You can also use the keyboard shortcuts Ctrl + M (Windows) or Command + M
or go to Edit > Comment Selection.
A double slash (//) is placed at the insertion point.
Comment multiple lines of code
1 Select the lines to comment. (The first and last lines of the selection can be partial lines.)
2 Right-click and select Comment. You can also use the keyboard shortcuts Ctrl + M (Windows) or Command + M
or go to Edit > Comment Selection.
Block comment characters are placed at the beginning (/*) and end (*/) of the selection.
Note: If there are comments in between the selected lines of text, a line comment will be applied on all selected lines.
Remove a comment
1 Place the insertion point in the line that contains the comment, or select the block of code that is commented.
2 Right-click and select Uncomment. You can also use the keyboard shortcuts Ctrl + Shift + M (Windows) or
Command + Shift + M or go to Edit > Uncomment Selection.
Use syntax coloring
In ActionScript, as in any language, syntax is the way elements are put together to create meaning. If you use incorrect
ActionScript syntax, your scripts cannot work.
To highlight syntax errors, set a color-code for parts of your scripts. For example, suppose you set the syntax coloring
preference to make keywords appear in blue. When you type var, the word var appears in blue. However, if you
mistakenly type vae, the word vae remains black, which shows that you made a typing error.
Last updated 6/12/2015
89
Platforms
Do one of the following:
• Select Edit > Preferences (Windows) or Flash > Preferences (Macintosh), click Code Editor in the Category list, and
specify Syntax Coloring settings.
• With the insertion point in the Script pane, press Control-U (Windows) or Command-U (Macintosh).
Note: When you write scripts in the Actions panel, commands that are not supported by the version of the player you are
targeting appear in yellow in the Actions toolbox. For example, if the Flash Player SWF file version is set to Flash 7,
ActionScript that only Flash Player 8 supports appears in yellow in the Actions toolbox.
Using the identifier and keyword list at runtime
On launching FlashPro, the identifier and keyword lists are read from the resource file and cached. Apart from reading
the default lists from the resource, it also scans for additional keywords and identifier list in the Preference folder. It is
possible for you to add additional keywords and identifiers by adding ".txt files" in following folders:
• C:\Users\<Username>[AppData]\Roaming\Adobe\Flash Pro\13.0[ActionscriptKeywords]\
• C:\Users\<UserName>[AppData]\Roaming\Adobe\Flash Pro\13.0[ActionscriptIdentifiers]\
• C:\Users\<UserName>[AppData]\Roaming\Adobe\Flash Pro\13.0[JavascriptKeywords]\
• C:\Users\<UserName>[AppData]\Roaming\Adobe\Flash Pro\13.0[JavascriptIdentifiers]\
Use line numbers and word wrap
When you edit or modify code, line numbers make code easier to scroll and parse. Word wrap helps you avoid
horizontally scrolling long lines of code (especially when you work in the authoring environment, or at low screen
resolutions).
Enable or disable line numbers
• In the Script window, select View > Line Numbers.
• Press Control+Shift+L (Windows) or Command+Shift+L (Macintosh).
Highlight a specific line
• In the Script window, select Edit > Go To Line.
Enable or disable line word wrap
• In the Script window, select View > Word Wrap.
• Press Control+Shift+W (Windows) or Command+Shift+W (Macintosh).
Display hidden characters
Characters such as spaces, tabs, and line breaks are hidden in ActionScript code. You may need to display these
characters; for example, you must find and remove double-byte spaces that are not part of a string value, because they
cause compiler errors.
• Press Control+Shift+8 (Windows) or Command+Shift+8 (Macintosh).
The following symbols are used to display hidden characters.
Last updated 6/12/2015
90
Platforms
Hidden character
Symbol
Single-byte space
.
Double-byte space
l
Tab
>>
line break
Find text in a script
The Find tool lets you find and replace text strings in your scripts.
Note: To search through text in every script in a Flash document, use the Movie Explorer.
Find text
1 In the Actions panel or Script window, click Find
or press Control+F (Windows) or Command+F (Macintosh).
2 Enter the search string.
3 Click Find Next.
Find and replace text in a script
1 In the Actions panel or Script window, click Find
or press Control+F (Windows) or Command+F (Macintosh).
2 Enter the search string.
3 In the Replace box, enter the new string.
4 Click Find Next.
5 To replace the string, click Replace; to replace all occurrences of the string, click Replace All.
(Deprecated with Flash Professional CC) Repeat a search in the Actions panel
❖ From the panel menu
(at the upper-right corner of the Actions panel), select Find Again.
(Deprecated with Flash Professional CC) Repeat a search in the Script window
❖ Select Edit > Find Again.
(Deprecated with Flash Professional CC) Check syntax and punctuation
You can do a quick check of your ActionScript code without publishing the FLA file.
When you check syntax, the current script is checked. If the current script calls ActionScript classes, those classes are
also checked. Other scripts that might be in the FLA file are not checked.
For ActionScript 2.0 files, Check Syntax runs the code through the compiler, generating syntax and compiler errors.
For ActionScript 3.0 files, Check Syntax generates only syntax errors. To generate compiler errors, such as type
mismatches, improper return values, and variable or method name misspellings, you must use the Control > Test
command.
Last updated 6/12/2015
91
Platforms
Check syntax
To check syntax, do one of the following:
• In the Actions panel or Script window, click Check Syntax
.
• Click in the Script pane, and then press Control+T (Windows) or Command+T (Macintosh). Clicking or typing in
the Script pane gives it the focus. If an object on the Stage has the focus, the Transform panel opens instead.
Syntax errors are listed in the Compiler Errors panel.
Note: In an external ActionScript class file in the Script window, the global classpath (AS2) or source path (AS3) affects the
syntax check. Even if the global classpath or source path is set correctly, you might generate errors, because the compiler is
not aware that this class is being compiled.
Check for punctuation balance
1 Click between braces {}, brackets [], or parentheses () in your script.
2 In Windows, press Control+' (single quote); on the Macintosh, press Command+' (single quote). The text between
braces, brackets, or parentheses is highlighted, and you can check that opening punctuation has corresponding
closing punctuation.
(Deprecated with Flash Professional CC) Import and export scripts
You can import a script into the Actions panel or Script window. You can also export your scripts from the Actions
panel to external ActionScript files. (When you use the Script window, exporting is unnecessary because you can
instead save the AS file.)
If text in your scripts doesn’t look as expected when you open or import a file, change the import encoding preference.
Import an external AS file
1 In the Script pane, place the insertion point where you want to locate the first line of the external script.
2 Do one of the following:
• In the Actions panel, select Import Script from the panel menu, or press Control+Shift+I (Windows) or
Command+Shift+I (Macintosh).
• In the Script window, select File > Import Script or press Control+Shift+I (Windows) or Command+Shift+I
(Macintosh).
Export a script from the Actions panel
1 Select the script to export. Then select Export Script from the Actions Panel menu, or press Control+Shift+X
(Windows) or Command+Shift+X (Macintosh).
2 Save the ActionScript (AS) file.
Set text encoding options
1 Select Edit > Preferences (Windows) or Flash > Preferences (Macintosh), and select ActionScript in the Category
list.
2 Set any of these options:
Open/Import Select UTF-8 Encoding to open or import using Unicode encoding, or select Default Encoding to
open or import using the encoding form of the language currently used by your system.
Last updated 6/12/2015
92
Platforms
Save/Export Select UTF-8 Encoding to save or export using Unicode encoding, or select Default Encoding to save
or export using the encoding form of the language currently used by your system.
Turn the export encoding warning off or on
1 Select Edit > Preferences (Windows) or Flash > Preferences (Macintosh), and select Warnings in the Category list.
2 Select or deselect Warn On Encoding Conflicts When Exporting ActionScript Files.
(Deprecated with Flash Professional CC) Encoding for imported and exported
scripts
You can set ActionScript preferences to specify the type of encoding to use in imported or exported ActionScript files.
UTF-8 Encoding is 8-bit Unicode format, which lets you include text in multiple languages in your file; Default
Encoding is the encoding supported by the language your system is currently using, also called the traditional code page.
Note: When you use a non-English application on an English system, the Test Movie command fails if any part of the SWF
file path has characters that cannot be represented by using the Multibyte Character Sets (MBCS) encoding scheme. For
example, Japanese paths, which work on a Japanese system, won’t work on an English system. Be sure to use English-only
path names on English systems. All areas of the application that use the Test Movie player are subject to this limitation.
(Deprecated with Flash Professional CC) Pin scripts in the Actions panel
If you don’t organize the code within your FLA file into one central location, or if you’re using behaviors, you can pin
individual scripts in the Actions panel to move among them more easily. To pin a script means that you can keep the
location of the code open in the Actions panel, and easily click between open scripts. This can be especially useful when
debugging.
In the following figure, the script associated with the current location on the timeline is on Frame 1 of the layer named
Cleanup. (The tab at the far left always follows your location along the timeline.) That script is also pinned (it is shown
as the rightmost tab). Two other scripts are pinned: one on Frame 1 and the other on Frame 15 of the layer named Intro.
You can move among the pinned scripts by clicking the tabs or by using keyboard shortcuts. Moving among pinned
scripts does not change your current position on the timeline.
If the content in the Script pane doesn’t change to reflect the location you select on the timeline, the Script pane is
probably showing a pinned script. Click the tab at the lower left of the Script pane to show the script associated with
your location along the timeline.
Pin a script
1 Click the Timeline so the script appears in a tab at the lower left of the Script pane in the Actions panel.
2 Do one of the following:
• Click the Pushpin icon to the right of the tab.
• Right-click (Windows) or Control-click (Macintosh) the tab, and select Pin Script.
• From the panel menu
(at the upper-right corner of the Actions panel), select Pin Script.
Last updated 6/12/2015
93
Platforms
Unpin a script
• If a pinned script appears in a tab at the lower left of the Script pane in the Actions panel, click the Pushpin icon on
the right of the tab.
• Right-click (Windows) or Control-click (Macintosh) a tab, and select Close Script or Close All Scripts.
• From the panel menu
(at the upper-right corner of the Actions panel), select Close Script or Close All Scripts.
Keyboard shortcuts for pinned scripts
When the insertion point is in the Script pane, use the following keyboard shortcuts to work with pinned scripts.
Action
Windows shortcut key
Macintosh shortcut key
Pin script
Control+= (equal sign)
Command+=
Unpin script
Control+- (minus sign)
Command+-
Move focus to tab on the right
Control+Shift+. (period)
Command+Shift+.
Move focus to tab on the left
Control+Shift+, (comma)
Command+Shift+,
Unpin all scripts
Control+Shift+- (minus sign)
Command+Shift+-
Insert target paths
Many script actions are meant to affect movie clips, buttons, and other symbol instances. In your code, you can
reference symbol instances on a timeline by inserting a target path—the address of the instance you want to target. You
can set either an absolute or relative target path. An absolute path contains the entire address of the instance. A relative
path contains only the part of the address that is different from the address of the script itself in the FLA file, and will
no longer work if the script is moved to another location.
1 In the Actions panel, click an action in your script.
2 Click Target Path
.
3 Enter the path to the target instance, or select the target from the list.
4 Select either the Absolute or Relative path option.
Use code hints
When you work in the Actions panel or Script window, the software can detect what action you are entering and display
a code hint. There are two types of code hint: a tooltip that contains the complete syntax for that action, and a pop-up
menu that lists possible ActionScript elements, such as method or property names (sometimes referred to as a form of
code completion).
Code hints are enabled by default. By setting preferences, you can disable code hints or determine how quickly they
appear. When code hints are disabled in preferences, you can still manually display a code hint for a specific command.
Note: If you cannot display code hints for a variable or object you created in ActionScript 2.0, but code hints are enabled
in ActionScript preferences, make sure you named your variable or object with the proper suffix or that you used strict
typing for your variable or object.
Enabling code hinting
You can trigger code hints in various ways.
Strict typing for objects
Last updated 6/12/2015
94
Platforms
When you use ActionScript 2.0 and use strict typing for a variable that is based on a built-in class (such as Button, Array,
and so on), the Script pane displays code hints for the variable. For example, suppose you enter the following two lines
of code:
var foo:Array = new Array();
foo.
As soon as you enter the period (.), Flash displays a list of methods and properties available for Array objects in a popup menu, because you typed the variable as an array.
Suffixes and code hints
If you use ActionScript 1.0 or you want to display code hints for objects without strictly typing them, add a suffix to the
name of each object when you create it. For example, the suffix that triggers code hinting for the Camera class is _cam.
Suppose you type the following code: var my_array = new Array(); var my_cam = Camera.get();
If you then enter my_cam followed by a period, code hints for the Camera object appear.
For objects that appear on the Stage, use the suffix in the Instance Name box in the Property inspector. For example, to
display code hints for MovieClip objects, use the Property inspector to assign instance names with the _mc suffix to all
MovieClip objects. Then, whenever you type the instance name followed by a period, code hints appear.
var my_array = new Array();
var my_cam = Camera.get();
Although suffixes are not required for triggering code hints when you use strict typing for an object, using suffixes
consistently helps make your code understandable.
The following table lists the suffixes that trigger code hints in ActionScript 2.0:
Object type
Variable suffix
Array
_array
Button
_btn
Camera
_cam
Color
_color
ContextMenu
_cm
ContextMenuItem
_cmi
Date
_date
Error
_err
LoadVars
_lv
LocalConnection
_lc
Microphone
_mic
MovieClip
_mc
MovieClipLoader
_mcl
PrintJob
_pj
NetConnection
_nc
NetStream
_ns
SharedObject
_so
Last updated 6/12/2015
95
Platforms
Object type
Variable suffix
Sound
_sound
String
_str
TextField
_txt
TextFormat
_fmt
Video
_video
XML
_xml
XMLNode
_xmlnode
XMLSocket
_xmlsocket
Comments and code hints
You can also use ActionScript comments to specify an object’s class for code hints. In the following example, a comment
tells ActionScript that the class of the theObject instance is Object, and so on.
// Object theObject;// Array theArray;// MovieClip theMC;
If you subsequently enter theMC followed by a period, code hints that display the list of MovieClip methods and
properties appear. If you enter theArray followed by a period, code hints that display the list of Array methods and
properties appear, and so on.
Instead of this technique, however, Adobe recommends that you use strict data typing or suffixes, because these
techniques enable code hints automatically and make your code more understandable.
Specify preference settings for automatic code hints
• In the Actions panel or Script window, select Edit > Preferences (Windows) or Flash > Preferences (Macintosh), click
Code Editor in the Category list, and then enable or disable Code Hints.
(Deprecated with Flash Professional CC) Specify a delay for code hints
1 In the Actions panel or Script window, select Edit > Preferences (Windows) or Flash > Preferences (Macintosh).
2 Click ActionScript in the Category list.
3 Use the slider to select an amount of delay, in seconds.
Use tooltip-style code hints
1 Display the code hint by typing an opening parenthesis “(“ after an element that requires parentheses (for example,
after a method name, a command such as if or do..while, and so on).
2 Enter a value for the parameter.
For multiple parameters, separate the values with commas. For functions or statements, such as the for loop,
separate the parameters with semicolons.
Last updated 6/12/2015
96
Platforms
Overloaded commands (functions or methods that can be invoked with different sets of parameters) such as
gotoAndPlay() or for display an indicator that lets you select the parameter you want to set. To select the parameter,
click the small arrows or press Control+Left Arrow and Control+Right Arrow.
3 To dismiss the code hint, do one of the following:
• Type a closing parenthesis “)”.
• Click outside the statement.
• Press Escape.
Use menu-style code hints:
1 Display the code hint by typing a period after a variable or object name.
2 To navigate through the code hints, use the Up and Down Arrow keys.
3 To select an item in the menu, press Enter or Tab, or double-click the item.
4 To dismiss the code hint, do one of the following:
• Select one of the menu items.
• Click above or below the menu window.
• Type a closing parenthesis “)” if you’ve already typed an opening parenthesis “(“.
• Press Escape.
Manually display a code hint
1 Click in a code location where code hints can appear, such as in the following locations:
• After the dot (.) following a statement or command, where a property or method must be entered
• Between parentheses [()] in a method name
2 Do one of the following:
• To enable Code Hinting manually, select View > Show Code Hint.
• Press Control+Spacebar (Windows) or Command+Spacebar (Macintosh).
Last updated 6/12/2015
97
Platforms
Code hinting for custom classes
When you create custom ActionScript 3.0 classes, Flash parses the classes and determines the objects, properties, and
methods included in them. Flash can then provide code hinting when you write code that refers to the custom classes.
Custom class code completion is automatic for any class that you link to any other code with the import command.
Code hinting allows developers to work faster because they don’t have to remember all of the objects, methods, and
properties used by the class. Designers can work with classes they did not write themselves because they don’t have to
have first hand knowledge of how to work with the class.
Code hinting includes the following:
• Code hinting for nested class references
When you write nested references, the continued assistance of code hints is helpful.
• Code hinting for “this”
When you type “this” in a class file, you get code hints for that same class.
• Code hinting for “new+<space>”
When you type “new+<space>”, Flash displays a list of available classes and packages.
• Code hinting for “import”
When you type “import + <space>”, Flash displays a list of all the built-in packages and custom packages.
• Code hinting for SWC libraries
When you add a SWC library to the library path or the external library path, Flash enables code hinting for all the
classes included in the SWC file.
More Help topics
Use the Movie Explorer
Objects and classes
Compiling and exporting classes (ActionScript 2.0)
Debugging ActionScript 3.0
Debugging ActionScript 1.0 and 2.0
Data types
Data type descriptions
Enabling Support for Custom Platforms
This article guides the plug-in developers on how to create Flash Professional plug-ins to support custom platforms. To
build a custom platform support plug-in, developers must download the Custom Platform Support Development Kit
from the following location:
Download a sample plug-in from the following location and use it as a reference for building a custom support platform
support plug-in:
Last updated 6/12/2015
98
Platforms
CustomPlatformSupportDevelopmentKit.zipSampleCreateJSPlatform.zip
A plug-in consists of the following elements:
• DocType adds a new document type for the custom platform in Flash Professional and controls the authoring
features.
• Publisher allows configuration of the publish settings and publishing the document to the custom platform.
For an overview of the Custom Platform Support feature, see Custom Platform Support.
Building a Flash custom platform support plug-in
You can develop a custom platform support plug-in using one of the following methods:
• Create a plug-in using the APIs in the custom platform support development kit.
• Customize the settings of the sample plug-in included in the development kit to suit your requirements.
Custom Platform Support plug-ins are packaged as .zxp files that can be installed with Flash Professional CC. You can
host the plug-in on the Adobe Add-ons page for users to download and install using the Creative Cloud application or
distribute the plug-ins as .zxp packages to install them using Adobe Extensions Manager.
Software requirements
A developer needs the following software to build a plug-in using the custom platform support development kit.
• Microsoft Windows 7 or Apple Mac OS 10.8 and later
• Microsoft Visual Studio 2012 (for Windows) or XCode 4.5.2 (for Mac)
• Flash Professional CC 2014.1 (October)
• Eclipse IDE for C/C++ Developers
• Adobe Extension Builder 3.0
• Adobe Extension Manager 7.2.1.6
API reference documentation for plug-in developers
The custom platform support development kit contains the following elements:
• FCM (Flash Component Model): The header files contained in the development kit define a framework called FCM,
which is responsible for plug-in management.
• DocType: This contains a set of interfaces that helps you to add a new document type to the Flash start page and
allows you to enable or disable features for the custom document type.
• DOM (Document Object Model): This contains a set of interfaces that helps you to access the contents of the flash
document in the form of a DOM.
• Publisher: This contains a set of interfaces that provides hooks to the publish workflows.
For complete information about the APIs in the custom platform support and examples of how to use them to build
your plug-in, see Custom Platform Support API Reference.
Creating a custom platform support plug-in
You can create a custom platform support plug-in as follows:
1 Download the Custom Platform Support Development Kit.
Last updated 6/12/2015
99
Platforms
2 Extract the contents of the kit to your computer.
3 Open a new project in VisualStudio or Xcode and include the header files in the development kit to your software
development project. To quick-start the creation of your custom platform support plug-in, you can use the following
sample plug-in available under the SampleCreateJSPlatform directory as the base code for your plug-in project.
For example, the SampleCreateJS plug-in files are at SampleCreateJSPlatform\Plugin\SampleCreateJS\project\
4 Make necessary changes for your target platform.
5 Compile the code to generate a plug-in (.dll or .plug-in).
Packaging the custom platform support plug-in
You can generate a distributable package of the custom platform support plug-in as follows:
1 Open the sample Eclipse file or in the Eclipse New Project wizard, create a new Application Extension Project.
Provide a name for the project, then click Next.
2 On the New Adobe Application Extension Project panel, choose Adobe Flash as the target application and click
Next.
3 Change the extensions of the plug-in files that you had created from .dll to .fcm on Windows and from .plug-in to
.fcm.plug-in on Mac and add the plug-in files to the project (ExtensionContent/plugins/lib/win for Windows and
ExtensionContent/plugins/lib/mac for MAC).
4 Configure your extension by modifying the manifest.xml. To open the manifest file, right-click on the extension in
project explorer and select Adobe Extension Builder 3 > Bundle Manifest Editor and select the the manifest tab in
Bundle Manifest Editor present at EclipseProject\.staged-extension\CSXS.
5 To enable editing the manifest.xml, right-click inside the window and select Open with > XML editor. The two tags
that you must concentrate on are: ExtensionList and DispatchInfoList:
A typical ExtensionList tag looks as below:
<ExtensionList>
<Extension Id="PluginID" Version="1.0" />
<Extension Id="PublishSettingsID" Version-"1.0" />
</ExtensionList>
This tag contains the list of extensions in the final ZXP package in which each extension has a unique string as its ID.
In this case, the .dll or .plugin file created in the previous section is included in an extension. Then, the other extension
is used for configuring the Publish Settings UI of the Publisher. In the sample, ExtensionList tag the extension with the
extension ID PluginID contains the .dll/.plugin file and the extension with the ID PublishSettingsID configures the
publish pettings UI of the publisher.
❖ The DispatchInfoList tag contains details about each extension mentioned in the ExtensionList. The following is an
example of DispathInfoList:
Last updated 6/12/2015
100
Platforms
<DispatchInfoList>
<Extension Id="PluginID">
<DispatchInfo >
<Resources>
<MainPath>./plugin/fcm.xml</MainPath>
</Resources>
<Lifecycle>
<AutoVisible>true</AutoVisible>
</Lifecycle>
<UI>
<Type>ModalDialog</Type>
<Menu>CreateJS</Menu>
<Geometry>
<Size>
<Height>200</Height>
<Width>200</Width>
</Size>
</Geometry>
</UI>
</DispatchInfo>
</Extension>
<Extension Id="PublishSettingsID">
<DispatchInfo >
<Resources>
<MainPath>./index.html</MainPath>
</Resources>
<Lifecycle>
<AutoVisible>true</AutoVisible>
</Lifecycle>
<UI>
<Type>ModalDialog</Type>
<Menu>Publish Settings</Menu>
<Geometry>
<Size>
<Height>170</Height>
<Width>486</Width>
</Size>
</Geometry>
</UI>
</DispatchInfo>
</Extension>
</DispatchInfoList>
1 For the extension containing the .dll or the .plugin file, you can ignore all the tags except the MainPath tag. The
MainPath tag contains path to the file fcm.xml relative to the ExtensionContent folder. You must rename the .dll file
to .fcm and placed inside the win folder beside the fcm.xml. Similarly, if you are working on the Mac environment,
rename the .plugin file to .fcm.plugin and place it inside the mac folder beside the fcm.xml.
2 The HTML extension to configure the publish settings user interface is an HTML extension to Flash Pro. To know
more about HTML extensions to Flash Pro, see Creating HTML extensions.
3 Ensure that the lower value of the version attribute in the Host tag is 14.0, the minimum (inetrnal) version of Flash
Professional CC with Custom Platform Support.
Last updated 6/12/2015
101
Platforms
<ExecutionEnvironment>
<HostList>
<Host Name="FLPR" Version="14.0" />
</HostList>.
.
.
</ExecutionEnvironment>
1 Switch to the Script Explorer view, right-click on your project and choose Export > Adobe Extension Builder 3 >
Application Extension. The Export Wizard appears.
2 You must have a certificate to sign the extension package. Browse to an existing certificate or click Create to create
a new certificate.
3 Click Finish to compile the project. Eclipse generates a plug-in file with .zxp extension, which you can host on the
Adobe Add-ons site.
Distributing your custom platform support plug-in
You can distribute the custom platform support plug-in by hosting it on the Adobe Add-ons page and monetize it. Your
plug-in package goes through an Adobe review and approval process before it is listed on the page. You can host a plugin as follows:
1 Log in to the Adobe Add-ons page using your Adobe user ID and password.
2 On the left panel, under Become a producer, click the link Go to the producer portal.
3 Click the Sign-up button if you are not signed up as a producer.
4 For detailed instructions on how to sign up as a producer and host your plug-ins, see Getting Started with the
Producer Portal.
5 Complete the following steps in the producer portal workflow as documented in the Getting Started page:
1 Package your product in a single file.
2 Enter information about the product and upload the file.
3 Add marketing assets.
4 Preview your product.
5 Submit your product for approval.
6 After approval, your plug-in is listed under the Flash Pro product category on the Add-ons page.
• If you are a user who wants to install a plug-in, create a custom platform document, and publish it using Flash
Professional, see Working with Custom Platform Support Plug-in.
• For complete information about managing Adobe extensions, see Downloading and Installing Extensions .
Feature requests and bug reporting
Fill the following form if you want to send any questions, concerns, product bugs, or feature requests to the Flash
Professional product team:
Adobe Feature Requests and Bug Report Form
Last updated 6/12/2015
102
Platforms
Working with Custom Platform Support Plug-in
Custom Platform Support plug-ins extend the Flash Professional functionality to platforms that Flash does not support
by default. Installing a custom platform support plug-in allows you to create graphics and animation in Flash and
publish them the format that the plug-in supports. You can take advantage of the powerful graphics and animation tools
in Flash to create your work in any platform of your choice, if you have a platform support plug-in for the that platform.
To enable this capability, install the plug-in for the platform with Flash Professional using one of the following methods:
• Download the plug-in from the Adobe Add-ons page and install it using the Creative Cloud application.
• If you have the plug-in as a ZXP package, install it using the Adobe Extension Manager application.
Once installed, the plug-in adds a new document type to Flash. You can use a set of tools that the plug-in has enabled
for the platform to create your work. While publishing your work, Flash Professional uses the publish settings
configured for the custom platform.
Installing a custom platform support plug-in from the Add-ons page
You can acquire a custom platform support plug-in from the Adobe Add-ons site and install it as follows:
1 Install and launch the Adobe Creative Cloud application.
2 Log in to the Adobe add-ons page with your Adobe ID and password.
3 On the left panel, click Flash Pro. The Flash Pro add-ons available for purchase/download are listed.
4 Select the plug-in that supports your custom platform to view the details such as features supported and
compatibility.
5 On the add-on details page, purchase or download the plug-in. The plug-in is listed on the Adobe Creative Cloud
app installed on your computer and a notification appears if it is successfully installed.
6 Launch Flash Professional. The start page lists the custom platform as one of the document types.
Last updated 6/12/2015
103
Platforms
Installing the ZXP plug-in file
If you have the plug-in as a ZXP file, complete the following procedure to install the plug-in:
1 Ensure that you have installed Flash Professional CC 2014.1 or a later version.
2 Download the Adobe Extension Manager CC plug-in from the Adobe Exchange page and install it on your
computer.
3 Double-click the <plug-in>.zxp file. The Adobe Extension Manager window appears.
4 The Adobe Extension Manager displays the plug-in under Extensions if the plug-in is successfully installed.
Creating and publishing a custom platform document
Use the following procedure to create and publish a document for a custom platform:
1 Choose File > New.
2 In the New Document dialog box, select the new document type added by the custom platform plug-in and click
OK. You can see the following changes:
• The document title displays <document-name>(Custom)
• The Properties panel displays the plug-in name along with publish settings and properties.
• The tools panel displays the tools enabled by the plug-in.
3 Use the Flash authoring tools to create your animation content.
4 To view or change the publish settings for the custom platform, choose File > Publish Settings.
Last updated 6/12/2015
104
Platforms
5
Choose File > Publish to publish your document.
Note:
• If you are a developer who wants to create plug-ins to support a custom platform on Flash Professional, you can refer
to the Custom Platform Support.
• For complete information about managing Adobe extensions, see Downloading and Installing Extensions .
Best practices - Organizing ActionScript inan
application
Keeping actions together
Whenever possible, put your ActionScript® in a single location. Organizing your code in one place helps you edit
projects more efficiently, because you can avoid searching in different places when you debug or modify the
ActionScript. If you put code in a FLA file, put ActionScript on Frame 1 or Frame 2 in a layer called actions on the
topmost layer in the Timeline. Alternatively, you might put all of your code in ActionScript files. Some Flash
Professional applications do not always put all code in a single place (in particular, ActionScript 2.0-based applications
that use screens or behaviors).
You can usually put all your code in the same location (on a frame, or in ActionScript files), with the following
advantages:
• Code is easy to find in a potentially complex source file.
Last updated 6/12/2015
105
Platforms
• Code is easy to debug.
Attaching code to objects
Avoid attaching ActionScript to objects in a FLA file, even in simple SWF files. (Only ActionScript 1.0 and 2.0. can be
attached to objects; ActionScript 3.0 cannot.) Attaching code to an object means that you select a movie clip,
component, or button instance; open the Actions panel; and add ActionScript using the on() or onClipEvent() handler
functions.
Attaching ActionScript code to objects is strongly discouraged for the following reasons:
• It is difficult to locate, and the FLA files are difficult to edit.
• It is difficult to debug.
• ActionScript that is written on the timeline or in classes is more elegant and easier to build upon.
• It encourages poor coding style.
• The contrast between two styles of coding can be confusing to people learning ActionScript; it forces students and
readers to learn different coding styles, additional syntax, and a poor and limited coding style.
Avoid attaching ActionScript 2.0 to a button called myButton_btn, which looks like the following:
on (release) { //do something }
However, placing ActionScript 2.0 with the same purpose on the timeline (which is encouraged), looks like the
following code:
myButton_btn.onRelease = function() { //do something };
note: Different practices apply when using behaviors, which sometimes involves attaching code to objects.
More Help topics
Best practices - Behaviors conventions
Using the MVC design pattern
Organizing files and storing code
Comparing timeline code with object code
Enabling Support for Custom Platforms
This article guides the plug-in developers on how to create Flash Professional plug-ins to support custom platforms
using Flash Professional CC 2014.2. If you are using Flash Professional CC 2014.1 (October 2014 update), see the
Enabling Support for Custom Platforms.
To build a custom platform support plug-in, developers must download the Custom Platform Support Development
Kit from the following location:
CustomPlatformSupportDevelopmentKit.zip
Download a sample plug-in from the following location and use it as a reference for building a custom support platform
support plug-in:
SampleCreateJSPlatform.zip
Last updated 6/12/2015
106
Platforms
A plug-in consists of the following elements:
• DocType adds a new document type for the custom platform in Flash Professional and controls the authoring
features.
• Publisher allows configuration of the publish settings and publishing the document to the custom platform.
For an overview of the Custom Platform Support feature, see Custom Platform Support.
New in Flash Professional CC 2015:
• Ability to query the type of a library symbol: In case of symbols, ILibraryItem::GetProperties() will have an
additional entry with the key as kLibProp_SymbolType_DictKey. The value of key can be
kLibProp_SymbolType_Button, kLibProp_SymbolType_MovieClip, or kLibProp_SymbolType_Graphic.
• Ability to distinguish between button and MovieClip: Until the previous release, the button instances were treated
as MovieClips by both the DOM and the IFrameCommandGenerator service. Starting with Flash Pro CC 2015, an
interface has been added to support button instances. If the IMovieClip instance also implements the IButton
interface, then it is treated as a button instance. The four states of a button namely, Up, Over, Down, and Hit are
always mapped to the frames 0, 1, 2, and 3 respectively. See the file IButton.h to know more about the button
instance.
• New API to get the bounds of IClassicText objects: The AddClassicText function in ITimelineBuilder interface
now returns an object of CLASSIC_TEXT_INFO_2 (instead of the old CLASSIC_TEXT_INFO), which contains a
new field "bounds" representing the bounds of the IClassicText object.
• The sample plug-in has been modified to reuse the bitmaps used for shape fills.
• Mongoose web server has been integrated to the sample plug-in.
Note: The new IK bone tool available in Flash Professional CC 2015 release is disabled in Custom Platform document
types. Flash converts the IK content to frame-by-frame animation when you paste it into a custom platform document.
February 2015 update: Support for “masks” in IFrameCommandGenerator service--This release supports masks in
the IFrameCommandGenerator service. The new interface ITimelineBuilder2 that is inherited from the existing
ITimelineBuilder interface contains the functions that the plugin has to implement to make this feature work. See the
Custom Platform Support API documentation to know more about the new ITimelineBuilder2 interface.
Building a Flash custom platform support plug-in
You can develop a custom platform support plug-in using one of the following methods:
• Create a plug-in using the APIs in the custom platform support development kit.
• Customize the settings of the sample plug-in included in the development kit to suit your requirements.
Custom Platform Support plug-ins are packaged as .zxp files that can be installed with Flash Professional CC. You can
host the plug-in on the Adobe Add-ons page for users to download and install using the Creative Cloud application or
distribute the plug-ins as .zxp packages to install them using Adobe Extensions Manager.
Software requirements
A developer needs the following software to build a plug-in using the custom platform support development kit:
• Microsoft Windows 7 or Apple Mac OS 10.8 and later
• Microsoft Visual Studio 2012 (for Windows) or XCode 4.5.2 (for Mac)
• Flash Professional CC 2014.1 and above
Last updated 6/12/2015
107
Platforms
• Eclipse IDE for C/C++ Developers
• Adobe Extension Builder 3.0
• Adobe Extension Manager 7.2.1.6
API reference documentation for plug-in developers
The custom platform support development kit contains the following elements:
• FCM (Flash Component Model): The header files contained in the development kit define a framework called FCM,
which is responsible for plug-in management.
• DocType: This contains a set of interfaces that helps you to add a new document type to the Flash start page and
allows you to enable or disable features for the custom document type.
• DOM (Document Object Model): This contains a set of interfaces that helps you to access the contents of the flash
document in the form of a DOM.
• Publisher: This contains a set of interfaces that provides hooks to the publish workflows.
For complete information about the APIs in the custom platform support and examples of how to use them to build
your plug-in, see Custom Platform Support API Reference.
Creating a custom platform support plug-in
You can create a custom platform support plug-in as follows:
1 Download the Custom Platform Support Development Kit.
2 Extract the contents of the kit to your computer.
3 Open a new project in VisualStudio or Xcode and include the header files in the development kit to your software
development project. To quick-start the creation of your custom platform support plug-in, you can use the following
sample plug-in available under the SampleCreateJSPlatform directory as the base code for your plug-in project.
For example, the SampleCreateJS plug-in files are at SampleCreateJSPlatform\Plugin\SampleCreateJS\project\
4 Make necessary changes for your target platform.
5 Compile the code to generate a plug-in (.dll or .plug-in).
Packaging the custom platform support plug-in
You can generate a distributable package of the custom platform support plug-in as follows:
1 Open the sample Eclipse file or in the Eclipse New Project wizard, create a new Application Extension Project.
Provide a name for the project, then click Next.
2 On the New Adobe Application Extension Project panel, choose Adobe Flash as the target application and click
Next.
3 Change the extensions of the plug-in files that you had created from .dll to .fcm on Windows and from .plug-in to
.fcm.plug-in on Mac and add the plug-in files to the project (ExtensionContent/plugins/lib/win for Windows and
ExtensionContent/plugins/lib/mac for MAC).
4 Configure your extension by modifying the manifest.xml. To open the manifest file, right-click on the extension in
project explorer and select Adobe Extension Builder 3 > Bundle Manifest Editor and select the manifest tab in
Bundle Manifest Editor present at EclipseProject\.staged-extension\CSXS.
5 To enable editing the manifest.xml, right-click inside the window and select Open with > XML editor. The two tags
that you must concentrate on are: ExtensionList and DispatchInfoList:
Last updated 6/12/2015
108
Platforms
A typical ExtensionList tag looks as below:
<ExtensionList>
<Extension Id="PluginID" Version="1.0" />
<Extension Id="PublishSettingsID" Version-"1.0" />
</ExtensionList>
This tag contains the list of extensions in the final ZXP package in which each extension has a unique string as its ID.
In this case, the .dll or .plugin file created in the previous section is included in an extension. Then, the other extension
is used for configuring the Publish Settings UI of the Publisher. In the sample, ExtensionList tag the extension with the
extension ID PluginID contains the .dll/.plugin file and the extension with the ID PublishSettingsID configures the
publish pettings UI of the publisher.
❖ The DispatchInfoList tag contains details about each extension mentioned in the ExtensionList. The following is an
example of DispatchInfoList:
<DispatchInfoList>
<Extension Id="PluginID">
<DispatchInfo >
<Resources>
<MainPath>./plugin/fcm.xml</MainPath>
</Resources>
<Lifecycle>
<AutoVisible>true</AutoVisible>
</Lifecycle>
<UI>
<Type>ModalDialog</Type>
<Menu>CreateJS</Menu>
<Geometry>
<Size>
<Height>200</Height>
<Width>200</Width>
</Size>
</Geometry>
</UI>
</DispatchInfo>
</Extension>
<Extension Id="PublishSettingsID">
Last updated 6/12/2015
109
Platforms
<DispatchInfo >
<Resources>
<MainPath>./index.html</MainPath>
</Resources>
<Lifecycle>
<AutoVisible>true</AutoVisible>
</Lifecycle>
<UI>
<Type>ModalDialog</Type>
<Menu>Publish Settings</Menu>
<Geometry>
<Size>
<Height>170</Height>
<Width>486</Width>
</Size>
</Geometry>
</UI>
</DispatchInfo>
</Extension>
</DispatchInfoList>
1 For the extension containing the .dll or the .plugin file, you can ignore all the tags except the MainPath tag. The
MainPath tag contains path to the file fcm.xml relative to the ExtensionContent folder. You must rename the .dll file
to .fcm and placed inside the win folder beside the fcm.xml. Similarly, if you are working on the Mac environment,
rename the .plugin file to .fcm.plugin and place it inside the mac folder beside the fcm.xml.
2 The HTML extension to configure the publish settings user interface is an HTML extension to Flash Pro. To know
more about HTML extensions to Flash Pro, see Creating HTML extensions.
3 Ensure that the lower value of the version attribute in the Host tag is 14.1, the minimum (internal) version of Flash
Professional CC with Custom Platform Support.
<ExecutionEnvironment>
<HostList>
<Host Name="FLPR" Version="15.0" />
</HostList>.
.
.
</ExecutionEnvironment>
1 Switch to the Script Explorer view, right-click on your project and choose Export > Adobe Extension Builder 3 >
Application Extension. The Export Wizard appears.
2 You must have a certificate to sign the extension package. Browse to an existing certificate or click Create to create
a new certificate.
3 Click Finish to compile the project. Eclipse generates a plug-in file with .zxp extension, which you can host on the
Adobe Add-ons site.
Distributing your custom platform support plug-in
You can distribute the custom platform support plug-in by hosting it on the Adobe Add-ons page and monetize it. Your
plug-in package goes through an Adobe review and approval process before it is listed on the page. You can host a plugin as follows:
1 Log in to the Adobe Add-ons page using your Adobe user ID and password.
2 On the left panel, under Become a producer, click the link Go to the producer portal.
Last updated 6/12/2015
110
Platforms
3 Click the Sign-up button if you are not signed up as a producer.
4 For detailed instructions on how to sign up as a producer and host your plug-ins, see Getting Started with the
Producer Portal.
5 Complete the following steps in the producer portal workflow as documented in the Getting Started page:
1 Package your product in a single file.
2 Enter information about the product and upload the file.
3 Add marketing assets.
4 Preview your product.
5 Submit your product for approval.
6 After approval, your plug-in is listed under the Flash Pro product category on the Add-ons page.
• If you are a user who wants to install a plug-in, create a custom platform document, and publish it using Flash
Professional, see Working with Custom Platform Support Plug-in.
• For complete information about managing Adobe extensions, see Downloading and Installing Extensions .
Feature requests and bug reporting
Fill the following form if you want to send any questions, concerns, product bugs, or feature requests to the Flash
Professional product team:
Adobe Feature Requests and Bug Report Form
Export to HTML5 from Flash Professional
In this video, you'll get a sneak peak on an exciting HTML5 exporting feature that the Adobe Flash Professional team
has been working on. The Toolkit for CreateJS can help smooth the transition from ActionScript development to the
JavaScript world.
Export to HTML5 from Flash Professional
Using SWC files to build large Flash and AIR projects
with multiple SWF files for iOS
When doing game development for Android or Blackberry Tablet OS with Adobe AIR, you can load SWF files on the
fly at runtime; with AIR for iOS, there is no such option. On Android or Blackberry Tablet OS the code is interpreted
from ActionScript bytecode, whereas for iOS all code must compiled from ActionScript bytecode to native bytecode as
a single IPA file, which you can only create from a single SWF.
Using SWC files to build large Flash and AIR projects with multiple SWF files for iOS
Last updated 6/12/2015
111
Chapter 3: Workspace and workflow
Using the Stage and Tools panel
Using the Stage
The Stage is the rectangular area where you place graphic content when creating Flash Professional documents. The
Stage in the authoring environment represents the rectangular space in Flash Player or in a web browser window where
your document appears during playback. To change the view of the Stage as you work, zoom in and out. To help you
position items on the Stage, you can use the grid, guides, and rulers.
Zoom the Stage
To view the entire Stage on the screen, or to view a particular area of your drawing at high magnification, change the
magnification level. The maximum magnification depends on the resolution of your monitor and the document size.
The minimum value for zooming out on the Stage is 8%. The maximum value for zooming in on the Stage is 2000%.
• To zoom in on an element, select the Zoom tool
in the Tools panel, and click the element. To switch the Zoom
tool between zooming in or out, use the Enlarge
or Reduce
modifiers (in the options area of the Tools panel
when the Zoom tool is selected) or Alt-click (Windows) or Option-click (Macintosh).
• To zoom in so that a specific area of your drawing fills the window, drag a rectangular selection on the Stage with
the Zoom tool.
• To zoom in on or out of the entire Stage, select View > Zoom In or View > Zoom Out.
Last updated 6/12/2015
112
Workspace and workflow
• To zoom in or out by a specified percentage, select View > Magnification, and select a percentage from the submenu
or select a percentage from the Zoom control at the upper-right corner of the document window.
• To scale the Stage so that it fits completely in the application window, select View > Magnification > Fit in Window.
• To show the contents of the current frame, select View > Magnification > Show All, or select Show All from the
Zoom control at the upper-right side of the application window. If the scene is empty, the entire Stage appears.
• To show the entire Stage, select View > Magnification > Show Frame or select Show Frame from the Zoom control
at the upper-right corner of the document window.
• To show the workspace surrounding the Stage, or to view elements in a scene that are partly or completely outside
of the Stage area, select View > Pasteboard. The pasteboard appears in light gray. For example, to have a bird fly into
a frame, initially position the bird outside of the Stage in the pasteboard and animate it into the Stage area.
Move the view of the Stage
When the Stage is magnified, you may not be able to see all of it. To change the view without having to change the
magnification, use the Hand tool to move the Stage.
• In the Tools panel, select the Hand tool and drag the Stage. To temporarily switch between another tool and the
Hand tool, hold down the Spacebar and click the tool in the Tools panel.
Use rulers
When rulers show, they appear along the top and left sides of the document. You can change the unit of measure used
in the rulers from the default of pixels to another unit. When you move an element on the Stage with the rulers
displayed, lines indicating the element’s dimensions appear on the rulers.
• To show or hide rulers, select View > Rulers.
• To specify the rulers’ unit of measure for a document, select Modify > Document, and select a unit from the Ruler
Units menu.
Use guides
When rulers show (View > Rulers), you can drag horizontal and vertical guides from the rulers onto the Stage.
When you create nested timelines, draggable guides appear on the Stage only when the Timeline in which they were
created is active.
To create custom guides or irregular guides, use guide layers.
• To display or hide the drawing guides, select View > Guides > Show Guides.note: If the grid is visible and Snap to
Grid is turned on when you create guides, guides snap to the grid.
• To turn snapping to guides on or off, select View > Snapping > Snap to Guides.note: Snapping to guides takes
precedence over snapping to the grid in places where guides fall between grid lines.
• To move a guide, click anywhere on the ruler with the Selection tool and drag the guide to the desired place on the
Stage.
• To remove a guide, use the Selection tool with guides unlocked to drag the guide to the horizontal or vertical ruler.
• To lock guides, select View > Guides > Lock Guides or use the Lock Guides option in the Edit Guides (View > Guides
> Edit Guides) dialog box.
• To clear guides, select View > Guides > Clear Guides. If you are in document-editing mode, all guides in the
document are cleared. If you are in symbol-editing mode, only guides used in symbols are cleared.
Last updated 6/12/2015
113
Workspace and workflow
Set guide preferences
1 Select View > Guides > Edit Guides and do any of the following:
• To set Color, click the triangle in the color box and select a guide line color from the palette. The default guide
color is green.
• To display or hide guides, select or deselect Show Guides.
• To turn snapping to guides on or off, select or deselect Snap To Guides.
• Select or deselect Lock Guides.
• To set Snap Accuracy, select an option from the pop-up menu.
• To remove all guides, click Clear All. Clear All removes all guides from the current scene.
• To save the current settings as the default, click Save Default.
2 Click OK.
Use the grid
The grid appears in a document as a set of lines behind the artwork in all scenes.
Display or hide the drawing grid
❖ Do one of the following:
• Select View > Grid > Show Grid.
• Press Control+'' (quote) (Windows) or Command+'' (quote) (Macintosh).
Turn snapping to grid lines on or off
❖ Select View > Snapping > Snap to Grid.
Set grid preferences
1 Select View > Grid > Edit Grid and select from the options.
2 To save the current settings as the default, click Save Default.
About the main toolbar and edit bar
The menu bar at the top of the application window contains menus with commands for controlling functionality.
The edit bar, at the top of the Stage, contains controls and information for editing scenes and symbols, and for changing
the magnification level of the Stage.
Use the Tools panel
The tools in the Tools panel let you draw, paint, select, and modify artwork, as well as change the view of the Stage. The
Tools panel is divided into four sections:
• The tools area contains drawing, painting, and selection tools.
• The view area contains tools for zooming and panning in the application window.
• The colors area contains modifiers for stroke and fill colors.
• The options area contains modifiers for the currently selected tool. Modifiers affect the tool’s painting or editing
operations.
To show or hide the Tools panel, select Window > Tools.
Last updated 6/12/2015
114
Workspace and workflow
Select tools
❖ Do one of the following:
• Click the tool in the Tools panel. Depending on the tool you select, a set of modifiers might appear in the options
area at the bottom of the Tools panel.
• Press the tool’s keyboard shortcut. To view the keyboard shortcuts, select Edit > Keyboard Shortcuts (Windows)
or Flash > Keyboard Shortcuts (Macintosh). On the Macintosh, you might need to move the mouse to see the
new pointer appear.
• To select a tool located in the pop-up menu for a visible tool such as the Rectangle tool, press the icon of the
visible tool and select another tool from the pop-up menu.
Use context menus
Context menus contain commands relevant to the current selection. For example, when you select a frame in the
Timeline window, the context menu contains commands for creating, deleting, and modifying frames and keyframes.
Context menus exist for many items and controls in many locations, including on the Stage, in the Timeline, in the
Library panel, and in the Actions panel.
❖ Right-click (Windows) or Control-click (Macintosh) an item.
More Help topics
Snapping art into position
Symbols, instances, and libraryassets
Working with scenes
Creating and Editing Artwork
Flash workflow and workspace
The following additional video tutorials describe the Flash Professional work area and workflow.
• Introducing Flash Professional (4:00)
• Understanding Flash (1:17)
• Understanding Flash file types (1:55)
• Exploring the Flash interface (1:49)
• Setting up workspaces (2:14)
• Managing Design Suite Workspaces (7:44) (This demo is in Photoshop, but also applies to Flash Professional)
Note: Most things in Flash can be done either with or without ActionScript. The things that actually require ActionScript
are non-linear playback, and any situation where the author prefers to avoid using the Timeline.
General Flash workflow
To build a Flash Professional application, you typically perform the following basic steps:
Plan the application.
Last updated 6/12/2015
115
Workspace and workflow
Decide which basic tasks the application will perform.
Add media elements.
Create and import media elements, such as images, video, sound, and text.
Arrange the elements.
Arrange the media elements on the Stage and in the Timeline to define when and how they appear in your application.
Apply special effects.
Apply graphic filters (such as blurs, glows, and bevels), blends, and other special effects as you see fit.
Use ActionScript to control behavior.
Write ActionScript® code to control how the media elements behave, including how the elements respond to user
interactions.
Test and publish your application.
Test your FLA file (Control > Test Movie) to verify that your application is working as you intended and find and fix
any bugs you encounter. You should test the application throughout the creation process. You can test your file in Flash
Pro, the AIR Debug Launchers, and on-device via USB (Flash CS5.5 only).
Publish your FLA file (File > Publish) as a SWF file that can be displayed in a web page and played back with Flash®
Player.
Depending on your project and your working style, you might use these steps in a different order.
For more help getting started with the Flash Professional workflow, see the following:
• Article: Introducing Adobe Flash Professional:http://www.adobe.com/devnet/flash/training.html
• Article: Creating a simple document in Flash Professional:
http://www.adobe.com/devnet/flash/articles/flash_cs4_createfla.html
• Video: Flash Workflow Basics: http://www.adobe.com/go/lrvid4053_fl
• Flash overview: www.adobe.com/go/lrvid4053_fl
• Flash workflow: www.adobe.com/go/vid0132
• Creating your first interactive Flash file: www.adobe.com/go/vid0118
Workspace overview
You create and manipulate your documents and files using various elements, such as panels, bars, and windows. Any
arrangement of these elements is called a workspace. The workspaces of the different applications in Adobe® Creative
Suite® 5 share the same appearance so that you can move between the applications easily. You can also adapt each
application to the way you work by selecting from several preset workspaces or by creating one of your own.
Although the default workspace layout varies in different products, you manipulate the elements much the same way
in all of them.
• The Application bar across the top contains a workspace switcher, menus (Windows only), and other application
controls. On the Mac for certain products, you can show or hide it using the Window menu.
• The Tools panel contains tools for creating and editing images, artwork, page elements, and so on. Related tools are
grouped.
Last updated 6/12/2015
116
Workspace and workflow
• The Control panel displays options for the currently selected tool. In Illustrator, the Control panel displays options
for the currently selected object. (In Adobe Photoshop® this is known as the Options bar. In Adobe Flash®, Adobe
Dreamweaver®, and Adobe Fireworks® this is known as the Property Inspector and includes properties of the
currently selected element.)
• The Document window displays the file you’re working on. Document windows can be tabbed and, in certain cases,
grouped and docked.
• Panels help you monitor and modify your work. Examples include the Timeline in Flash, the Brush panel in
Illustrator, the Layers panel in Adobe Photoshop®, and the CSS Styles panel in Dreamweaver. Panels can be grouped,
stacked, or docked.
• The Application frame groups all the workspace elements in a single, integrated window that lets you treat the
application as a single unit. When you move or resize the Application frame or any of its elements, all the elements
within it respond to each other so none overlap. Panels don’t disappear when you switch applications or when you
accidentally click out of the application. If you work with two or more applications, you can position each
application side by side on the screen or on multiple monitors.
If you are using a Mac and prefer the traditional, free-form user interface, you can turn off the Application frame.
In Adobe Illustrator®, for example, select Window > Application Frame to toggle it on or off. (In Flash, the
Application frame is on permanently for Mac, and Dreamweaver for Mac does not use an Application frame.)
A Tabbed Document windows B Application bar C Workspace switcher D Panel title bar E Control panel F Tools panel G Collapse To Icons
button H Four panel groups in vertical dock
Last updated 6/12/2015
117
Workspace and workflow
Hide or show all panels
• (Illustrator, Adobe InCopy®, Adobe InDesign®, Photoshop, Fireworks)To hide or show all panels, including the Tools
panel and Control panel, press Tab.
• (Illustrator, InCopy, InDesign, Photoshop) To hide or show all panels except the Tools panel and Control panel,
press Shift+Tab.
Tip: You can temporarily display hidden panels if Auto-Show Hidden Panels is selected in Interface preferences. It’s
always on in Illustrator. Move the pointer to the edge of the application window (Windows®) or to the edge of the
monitor (Mac OS®) and hover over the strip that appears.
• (Flash, Dreamweaver, Fireworks) To hide or show all panels, press F4.
Display panel options
❖ Click the panel menu icon
in the upper-right corner of the panel.
Tip: You can open a panel menu even when the panel is minimized.
Tip: In Photoshop, you can change the font size of the text in panels and tool tips. In the Interface preferences, choose
a size from the UI Font Size menu.
(Illustrator) Adjust panel brightness
❖ In User Interface preferences, move the Brightness slider. This control affects all panels, including the Control panel.
Reconfigure the Tools panel
You can display the tools in the Tools panel in a single column, or side by side in two columns. (This feature is not
available in the Tools panel in Fireworks and Flash.)
In InDesign and InCopy, you also can switch from single-column to double-column (or single-row) display by setting
an option in Interface preferences.
❖ Click the double arrow at the top of the Tools panel.
Manage windows and panels
You can create a custom workspace by moving and manipulating Document windows and panels. You can also save
workspaces and switch among them. For Fireworks, renaming custom workspaces can lead to unexpected behavior.
Note: The following examples use Photoshop for demonstration purposes. The workspace behaves the same in all the
products.
Rearrange, dock, or float document windows
When you open more than one file, the Document windows are tabbed.
• To rearrange the order of tabbed Document windows, drag a window’s tab to a new location in the group.
• To undock (float or untab) a Document window from a group of windows, drag the window’s tab out of the group.
note: In Photoshop you can also choose Window > Arrange > Float in Window to float a single Document window, or
Window > Arrange > Float All In Windows to float all of the Document windows at once. See tech note kb405298 for
more information.
Last updated 6/12/2015
118
Workspace and workflow
note: Dreamweaver does not support docking and undocking Document windows. Use the Document window’s
Minimize button to create floating windows (Windows), or choose Window > Tile Vertically to create side-by-side
Document windows. Search “Tile Vertically” in Dreamweaver Help for more information on this topic. The workflow
is slightly different for Macintosh users.
• To dock a Document window to a separate group of Document windows, drag the window into the group.
• To create groups of stacked or tiled documents, drag the window to one of the drop zones along the top, bottom, or
sides of another window. You can also select a layout for the group by using the Layout button on the Application bar.
note: Some products do not support this functionality. However, your product may have Cascade and Tile commands
in the Window menu to help you lay out your documents.
• To switch to another document in a tabbed group when dragging a selection, drag the selection over the document’s
tab for a moment.
note: Some products do not support this functionality.
Dock and undock panels
A dock is a collection of panels or panel groups displayed together, generally in a vertical orientation. You dock and
undock panels by moving them into and out of a dock.
• To dock a panel, drag it by its tab into the dock, at the top, bottom, or in between other panels.
• To dock a panel group, drag it by its title bar (the solid empty bar above the tabs) into the dock.
• To remove a panel or panel group, drag it out of the dock by its tab or title bar. You can drag it into another dock or
make it free-floating.
Last updated 6/12/2015
119
Workspace and workflow
You can prevent panels from filling all the space in a dock. Drag the bottom edge of the dock up so it no longer meets
the edge of the workspace.
Move panels
As you move panels, you see blue highlighted drop zones, areas where you can move the panel. For example, you can
move a panel up or down in a dock by dragging it to the narrow blue drop zone above or below another panel. If you
drag to an area that is not a drop zone, the panel floats freely in the workspace.
Note: The position of the mouse (rather than the position of the panel), activates the drop zone, so if you can’t see the drop
zone, try dragging the mouse to the place where the drop zone should be.
• To move a panel, drag it by its tab.
• To move a panel group, drag the title bar.
A Title bar B Tab C Drop zone
Press Ctrl (Windows) or Command (Mac OS) while moving a panel to prevent it from docking. Press Esc while moving
the panel to cancel the operation.
Add and remove panels
If you remove all panels from a dock, the dock disappears. You can create a dock by moving panels to the right edge of
the workspace until a drop zone appears.
• To remove a panel, right-click (Windows) or Control-click (Mac) its tab and then select Close, or deselect it from
the Window menu.
• To add a panel, select it from the Window menu and dock it wherever you want.
Manipulate panel groups
• To move a panel into a group, drag the panel’s tab to the highlighted drop zone in the group.
• To rearrange panels in a group, drag a panel’s tab to a new location in the group.
• To remove a panel from a group so that it floats freely, drag the panel by its tab outside the group.
• To move a group, drag the title bar (the area above the tabs).
Last updated 6/12/2015
120
Workspace and workflow
Stack floating panels
When you drag a panel out of its dock but not into a drop zone, the panel floats freely. The floating panel allows you to
position it anywhere in the workspace. You can stack floating panels or panel groups so that they move as a unit when
you drag the topmost title bar.
• To stack floating panels, drag a panel by its tab to the drop zone at the bottom of another panel.
• To change the stacking order, drag a panel up or down by its tab.
note: Be sure to release the tab over the narrow drop zone between panels, rather than the broad drop zone in a title bar.
• To remove a panel or panel group from the stack, so that it floats by itself, drag it out by its tab or title bar.
Resize panels
• To minimize or maximize a panel, panel group, or stack of panels, double-click a tab. You can also double-click the
tab area (the empty space next to the tabs).
• To resize a panel, drag any side of the panel. Some panels, such as the Color panel in Photoshop, cannot be resized
by dragging.
Collapse and expand panel icons
You can collapse panels to icons to reduce clutter on the workspace. In some cases, panels are collapsed to icons in the
default workspace.
Last updated 6/12/2015
121
Workspace and workflow
• To collapse or expand all panel icons in a column, click the double arrow at the top of the dock.
• To expand a single panel icon, click it.
• To resize panel icons so that you see only the icons (and not the labels), adjust the width of the dock until the text
disappears. To display the icon text again, make the dock wider.
• To collapse an expanded panel back to its icon, click its tab, its icon, or the double arrow in the panel’s title bar.
Tip: In some products, if you select Auto-Collapse Icon Panels from the Interface or User Interface Options
preferences, an expanded panel icon collapses automatically when you click away from it.
• To add a floating panel or panel group to an icon dock, drag it in by its tab or title bar. (Panels are automatically
collapsed to icons when added to an icon dock.)
• To move a panel icon (or panel icon group), drag the icon. You can drag panel icons up and down in the dock, into
other docks (where they appear in the panel style of that dock), or outside the dock (where they appear as floating
icons).
Save and switch workspaces
By saving the current size and position of panels as a named workspace, you can restore that workspace even if you
move or close a panel. The names of saved workspaces appear in the workspace switcher in the Application bar.
Save a custom workspace
1 With the workspace in the configuration you want to save, do one of the following:
• (Illustrator) Choose Window > Workspace > Save Workspace.
• (Photoshop, InDesign, InCopy) Choose Window > Workspace > New Workspace.
• (Dreamweaver) Choose Window > Workspace Layout > New Workspace.
• (Flash) Choose New Workspace from the workspace switcher in the Application bar.
• (Fireworks) Choose Save Current from the workspace switcher in the Application bar.
2 Type a name for the workspace.
3 (Photoshop, InDesign) Under Capture, select one or more options:
Panel Locations Saves the current panel locations (InDesign only).
Keyboard shortcuts Saves the current set of keyboard shortcuts (Photoshop only).
Menus or Menu Customization Saves the current set of menus.
Display or switch workspaces
❖ Select a workspace from the workspace switcher in the Application bar.
In Photoshop, you can assign keyboard shortcuts to each workspace to navigate among them quickly.
Last updated 6/12/2015
122
Workspace and workflow
Delete a custom workspace
• Select Manage Workspaces from the workspace switcher in the Application bar, select the workspace, and then click
Delete. (The option is not available in Fireworks.)
• (Photoshop, InDesign, InCopy) Select Delete Workspace from the workspace switcher.
• (Illustrator) Choose Window > Workspace > Manage Workspaces, select the workspace, and then click the Delete
icon.
• (Photoshop, InDesign) Choose Window > Workspace >Delete Workspace, select the workspace, and then click
Delete.
Restore the default workspace
1 Select the Default or Essentials workspace from the workspace switcher in the application bar. For Fireworks, see
the article http://www.adobe.com/devnet/fireworks/articles/workspace_manager_panel.html.
Note: In Dreamweaver, Designer is the default workspace.
2 For Fireworks (Windows), delete these folders:Windows
Vista\\Users\<username>\AppData\Roaming\Adobe\Fireworks CS4\ Windows XP\\Documents and
Settings\<username>\Application Data\Adobe\Fireworks CS4
3 (Photoshop, InDesign, InCopy) Select Window > Workspace > Reset [Workspace Name].
(Photoshop) Restore a saved workspace arrangement
In Photoshop, workspaces automatically appear as you last arranged them, but you can restore the original, saved
arrangement of panels.
• To restore an individual workspace, choose Window > Workspace > Reset Workspace Name.
• To restore all the workspaces installed with Photoshop, click Restore Default Workspaces in the Interface
preferences.
To rearrange the order of workspaces in the application bar, drag them.
Timelines and ActionScript
With ActionScript®, you can control the Timeline at runtime. Using ActionScript allows you to create interaction and
other capabilities in your FLA files that is not possible with the Timeline alone.
Note: Complete, updated Help is on the web. The application did not detect an Internet connection. For a complete version
of this topic, click the link below or search complete Help at https://communities.adobe.com/en.html.
With ActionScript®, you can control the Timeline at runtime. Using ActionScript allows you to create interaction and
other capabilities in your FLA files that is not possible with the Timeline alone.
See the discussion of timelines and ActionScript in web Help to learn about controlling the Timeline with ActionScript.
Last updated 6/12/2015
123
Workspace and workflow
Absolute paths
An absolute path starts with the name of the level into which the document is loaded and continues through the display
list until it reaches the target instance. You can also use the alias _root to refer to the topmost Timeline of the current
level. For example, an action in the movie clip california that refers to the movie clip oregon could use the absolute path
_root.westCoast.oregon.
The first document to open in Flash Player is loaded at level 0. You must assign each additional loaded document a level
number. When you use an absolute reference in ActionScript to reference a loaded document, use the form _levelX,
where X is the level number into which the document is loaded. For example, the first document that opens in Flash
Player is called _level0; a document loaded into level 3 is called _level3.
To communicate between documents on different levels, you must use the level name in the target path. The following
example shows how the portland instance would address the atlanta instance located in a movie clip called georgia
(georgia is at the same level as oregon):
_level5.georgia.atlanta
You can use the _root alias to refer to the main Timeline of the current level. For the main Timeline, the _root alias
stands for _level0 when targeted by a movie clip also on _level0. For a document loaded into _level5, _root is equal to
_level5 when targeted by a movie clip also on level 5. For example, if the movie clips southcarolina and florida are both
loaded into the same level, an action called from the instance southcarolina could use the following absolute path to
target the instance florida:
_root.eastCoast.florida
Relative paths
A relative path depends on the relationship between the controlling Timeline and the target Timeline. Relative paths
can address targets only within their own level of Flash Player. For example, you can’t use a relative path in an action
on _level0 that targets a Timeline on _level5.
In a relative path, use the keyword this to refer to the current Timeline in the current level; use the _parent alias to
indicate the parent Timeline of the current Timeline. You can use the _parent alias repeatedly to go up one level in the
movie clip hierarchy within the same level of Flash Player. For example, _parent._parent controls a movie clip up two
levels in the hierarchy. The topmost Timeline at any level in Flash Player is the only Timeline with a _parent value that
is undefined.
An action in the Timeline of the instance charleston, located one level below southcarolina, could use the following
target path to target the instance southcarolina:
_parent
To target the instance eastCoast (one level up) from an action in charleston, you could use the following relative path:
_parent._parent
To target the instance atlanta from an action in the Timeline of charleston, you could use the following relative path:
_parent._parent.georgia.atlanta
Relative paths are useful for reusing scripts. For example, you could attach the following script to a movie clip that
magnifies its parent by 150%:
onClipEvent (load) {
_parent._xscale
= 150;
_parent._yscale = 150;
}
You can reuse this script by attaching it to any movie clip instance.
Last updated 6/12/2015
124
Workspace and workflow
Note: Flash Lite 1.0 and 1.1 support attaching scripts only to buttons. Attaching scripts to movie clips is not supported.
Whether you use an absolute or a relative path, you identify a variable in a Timeline or a property of an object with a
dot (.) followed by the name of the variable or property. For example, the following statement sets the variable name in
the instance form to the value "Gilbert":
_root.form.name = "Gilbert";
Using absolute and relative target paths
You can use ActionScript to send messages from one timeline to another. The timeline that contains the action is called
the controlling timeline, and the timeline that receives the action is called the target timeline. For example, there could
be an action on the last frame of one timeline that tells another timeline to play. To refer to a target timeline, you must
use a target path, which indicates the location of a movie clip in the display list.
The following example shows the hierarchy of a document named westCoast on level 0, which contains three movie
clips: california, oregon, and washington. Each of these movie clips in turn contains two movie clips.
_level0
westCoast
california
sanfrancisco
bakersfield
oregon
portland
ashland
washington
olympia
ellensburg
As on a web server, each timeline in Flash Professional can be addressed in two ways: with an absolute path or with a
relative path. The absolute path of an instance is always a full path from a level name, regardless of which timeline calls
the action; for example, the absolute path to the instance california is _level0.westCoast.california. A relative path is
different when called from different locations; for example, the relative path to california from sanfrancisco is _parent,
but from portland, it’s _parent._parent.california.
Specify target paths
To control a movie clip, loaded SWF file, or button, you must specify a target path. You can specify it manually, or by
using the Insert Target Path dialog box, or by creating an expression that evaluates to a target path. To specify a target
path for a movie clip or button, you must assign an instance name to the movie clip or button. A loaded document
doesn’t require an instance name, because you use its level number as an instance name (for example, _level5).
Assign an instance name to a movie clip or button
1 Select a movie clip or button on the Stage.
2 Enter an instance name in the Property inspector.
Specify a target path using the Insert Target Path dialog box
1 Select the movie clip, frame, or button instance to which you want to assign the action.
This becomes the controlling Timeline.
2 In the Actions panel (Window > Actions), go to the Actions toolbox on the left, and select an action or method that
requires a target path.
Last updated 6/12/2015
125
Workspace and workflow
3 Click the parameter box or location in the script where you want to insert the target path.
4 Click the Insert Target Path button
above the Script pane.
5 Select Absolute or Relative for the target path mode.
6 Select a movie clip in the Insert Target Path display list, and click OK.
Specify a target path manually
1 Select the movie clip, frame, or button instance to which you want to assign the action.
This becomes the controlling Timeline.
2 In the Actions panel (Window > Actions), go to the Actions toolbox on the left, and select an action or method that
requires a target path.
3 Click the parameter box or location in the script where you want to insert the target path.
4 Enter an absolute or relative target path in the Actions panel.
Use an expression as a target path
1 Select the movie clip, frame, or button instance to which you want to assign the action.
This becomes the controlling Timeline.
2 In the Actions panel (Window > Actions), go to the Actions toolbox on the left, and select an action or method that
requires a target path.
3 Do one of the following:
• Enter an expression that evaluates to a target path in a parameter box.
• Click to place the insertion point in the script. Then, in the Functions category of the Actions toolbox, doubleclick the targetPath function. The targetPath function converts a reference to a movie clip into a string.
• Click to place the insertion point in the script. Then, in the Functions category of the Actions toolbox, select the
eval function. The eval function converts a string to a movie clip reference that can be used to call methods such
as play.
The following script assigns the value 1 to the variable i. It then uses the eval function to create a reference to a
movie clip instance and assigns it to the variable x. The variable x is now a reference to a movie clip instance and
can call the MovieClip object methods.
i = 1; x = eval("mc"+i); x.play(); // this is equivalent to mc1.play();
You can also use the eval function to call methods directly, as shown in the following example:
eval("mc" + i).play();
More Help topics
Timelines and ActionScript
Best practices - Structuring FLA files
Organizing ActionScript in an application
Last updated 6/12/2015
126
Workspace and workflow
Working with multiple timelines
About multiple timelines and levels
Flash® Player has a stacking order of levels. Every Flash Professional document has a main Timeline located at level 0
in Flash Player. You can use the loadMovie command to load other Flash Professional documents (SWF files) into Flash
Player at different levels.
If you load documents into levels above level 0, the documents stack on top of one another like drawings on transparent
paper; when there is no content on the Stage, you can see through to the content on lower levels. If you load a document
into level 0, it replaces the main timeline. Each document loaded into a level of Flash Player has its own timeline.
Timelines can send messages to each other with ActionScript. For example, an action on the last frame of one movie
clip can tell another movie clip to play. To use ActionScript to control a timeline, you must use a target path to specify
the location of the timeline.
For more information, see the MovieClip.loadMovie method in the ActionScript 2.0 Language Reference.
About nested movie clips and parent-child hierarchy
When you create a movie clip instance in a Flash Professional document, the movie clip has its own timeline. Every
movie clip symbol has its own timeline. The movie clip’s timeline is nested inside the main timeline of the document.
You can also nest a movie clip instance inside another movie clip symbol.
When a movie clip is created inside a Flash Professional document, or nested inside another movie clip, it becomes a
child of that document or movie clip, which becomes the parent. Relationships between nested movie clips are
hierarchical: modifications made to the parent affect the child. The root Timeline for each level is the parent of all the
movie clips on its level, and because it is the top-most Timeline, it has no parent. In the Movie Explorer panel, you can
view the hierarchy of nested movie clips in a document by choosing Show Symbol Definitions from the panel menu.
To understand movie clip hierarchy, consider the hierarchy on a computer: the hard disk has a root directory (or folder)
and subdirectories. The root directory is analogous to the main (or root) Timeline of a Flash Professional document: it
is the parent of everything else. The subdirectories are analogous to movie clips.
You can use the movie clip hierarchy in Flash Professional to organize related objects. For example, you could create a
Flash Professional document containing a car that moves across the Stage. You can use a movie clip symbol to represent
the car and set up a motion tween to move it across the Stage.
To add wheels that rotate, you can create a movie clip for a car wheel, and create two instances of this movie clip, named
frontWheel and backWheel. Then you can place the wheels on the car movie clip’s Timeline—not on the main Timeline.
As children of car, frontWheel and backWheel are affected by any changes made to car; they move with the car as it
tweens across the Stage.
To make both wheel instances spin, you can set up a motion tween that rotates the wheel symbol. Even after you change
frontWheel and backWheel, they continue to be affected by the tween on their parent movie clip, car; the wheels spin,
but they also move with the parent movie clip car across the Stage.
More Help topics
Symbols, instances, and library assets
Last updated 6/12/2015
127
Workspace and workflow
Set preferences in Flash
You can set preferences for general application operations, editing operations, code and compiler operations, sync
settings, and drawing and text options.
Set preferences
1 Select Edit > Preferences (Windows) or Flash > Preferences (Macintosh).
2 Make a selection in the Category list and select from the respective options.
Set General preferences
On Launch Specify which document opens when you start the application.
Document- or Object-level undo Document-level undo maintains a single list of all your actions for the entire Flash
Professional document. Object-level undo maintains separate lists of your actions for each object in your document.
Object-level lets you undo an action on one object without having to also undo actions on other objects that might have
been modified more recently than the target object.
Undo levels To set the number of undo or redo levels, enter a value from 2 to 300. Undo levels require memory; the
more undo levels you use, the more system memory is consumed. The default is 100.
Auto-Recovery When enabled (the default setting), this setting saves a copy of each open file at the specified time
interval, in the same folder as the originals. If you have not saved the file yet, Flash saves the copies in its Temp folder.
The file names are the same as the originals, with “RECOVER_” added to the beginning of the file name. If Flash Pro
quits unexpectedly, a dialog box appears when you restart to allow you to open the auto-recover file. When you exit
Flash Pro normally, the auto-recover files are deleted.
Last updated 6/12/2015
128
Workspace and workflow
Starting Flash Pro CC 2015 release, Flash Professional does not create unnecessary auto-recovery files. An autorecovery file is created only if the document is modified after the last auto-recovery files were created. Auto-recovery
file is removed only after completing a successful save operation. To avoid continuous loop of auto-recovery for short
auto-recovery duration, snapshot for all files modified after last auto-recovery are created at each auto-recovery
interval. Next auto recovery timer is started only after this process is completed.
User Interface Select your preferred user interface style, between Dark or Light. To apply shading to the user interface
elements, select Enable Shading.
Workspace To have panels in icon mode auto collapse when you click outside them, select Auto-Collapse Icon Panels.
To open a separate window when you select Control > Test, select Open Flash and Script Documents in Separate
Windows. The default is to open the test movie in its own window.
Highlight Color To use the current layer’s outline color, select a color from the panel, or select Use Layer Color.
Set Sync Settings preferences
In the Sync Settings tab, you can specify the settings for synchronizing Flash with your Creatve Cloud account and
libraries.
Adobe ID This displays the Adobe ID using which you have signed in to your Creative Cloud account and the date and
time the last sync with your Creative Cloud account was done.
• To view your Creative Cloud profile and library, or to login using a different Adobe ID, click Manage Account.
• To sync your settings, click Sync Settings Now.
Sync Options This displays the sync options that you have set between Flash and your Creative Cloud account. You can
sync your application preferences; workspaces; default document settings; keyboard shortcuts; grid, guides, and
snapping settings; sprite sheet settings; variable width profiles, and custom brushes.
• Sync: Set the sync preferences by choosing among All (sync all the settings), Custom (sync the settings that you have
selected from the options displayed below), or Disabled (disable all syncing).
• To sync your settings with your Creative Cloud settings, click Sync Settings Now.
Last updated 6/12/2015
129
Workspace and workflow
To learn about synchronizing preferences to Creative Cloud, and across multiple machines, see Sync Flash Professional
Preferences with Creative Cloud
To learn more about working with Creative Cloud libraries, see Creative Cloud libraries.
Set Code Editor preferences
In the Code Editor tab, you can set how you want your code to be displayed in Flash.
Under Editing Options, you can change the defaults for the following:
• Font: Set the font and font size.
• Style: Choose between regular, italic, bold, or bold italic.
• Modify Text Coloring: Click this button to set text color for foreground, background, keywords, comments,
identifiers, and strings.
• Automatic code brace: Enabled by default. All code braces are closed by default.
• Automatic indentation: Enabled by default. Turn it off if you do not want code indentation.
• Code hints: Enabled by default. Clear the checkbox if you do not want code hints to come up as you type code.
Last updated 6/12/2015
130
Workspace and workflow
• Cache Files: Set the limit for the cache files. Default is 800.
• Tab size: The default size of the code tab is set to 4. Enter a value if you want to resize it.
Under Format Code, you can set the following preferences and check the preview pane for how the change willl be
applied to your code:
• Script Language: Select the default script language as ActionScript or JavaScript. A sample code is displayed as you
select an option.
• Brace style: Select your preferred brace style, either in the same line as control statements, in a separate line, or only
the end braces in a separate line.
• Break chained methods: Select it to display code lines as broken up logically.
• Keep array indentation: Select to keep the arrays indented logically.
• Keep space after keywords: Selected by default. Change it if you do not want a space after each keyword.
Set Script Files preferences
The Script Files tab allows you to set the import options for the script files:
Open: Select UTF-8 Encoding to open or import using Unicode encoding, or select Default Encoding to open or
import using the encoding form of the language currently used by your system.
Reload modified files: Specifies what happens when a script file is modified, moved, or deleted. Select Always, Never,
or Prompt.
• Always: No warning is displayed, and the file is automatically reloaded.
• Never: No warning is displayed, and the file remains in the current state.
• Prompt(Default): A warning is displayed, and you can choose whether to reload the file.
When you build applications with external scripts, this preference helps you avoid overwriting a script that a team
member has modified since you opened the application, or avoid publishing the application with older versions of
scripts. The warnings let you automatically close a script and reopen the newer, modified version.
Class editor: Select the editor for editing classes. The options are Flash Professional, Flash Builder, or Ask.
Set Compiler preferences
The Compiler tab in the Preferences dialog box allows you to set the following compiler preferences for the language
you have selected. You can browse to a path or an SWC file or specify a new path:
• SDK path: The path to the folder containing bin, frameworks, lib, and other folders.
• Source path: The path to the folders containing ActionScript class files.
• Library path: The path to SWC files or folders containing SWC files.
• External library path: The path to the SWC files used as runtime shared libraries.
Set Text preferences
You can specify the following preferences for text display the Text tab:
• Default Mapping Font
• Style
• Show font name language
Last updated 6/12/2015
131
Workspace and workflow
• Show font preview
• Font preview size
Set Drawing preferences
Pen tool: Lets you set options for the Pen tool. Select Show Pen Preview to display a preview line from the last clicked
point to the current location of the pointer. Select Show Solid Points to display control points as small filled squares
instead of unfilled squares. Select Show Precise Cursors to display a crosshair cursor instead of the Pen tool icon when
using the Pen tool. This option lets you see the exact target of clicks more easily.
IK Bone Tool: Autoset Transformation Point is selected by default for the Bone Tool.
Connect lines: Determines how close the end of a line being drawn must be to an existing line segment before the end
point snaps to the nearest point on the other line. This setting also controls horizontal and vertical line recognition—
that is, how nearly horizontal or vertical a line must be drawn before Flash Professional makes it exactly horizontal or
vertical. When Snap To Objects is turned on, this setting controls how close objects must be to snap to one another.
Smooth curves: Specifies the amount of smoothing applied to curved lines drawn with the Pencil tool when the
drawing mode is set to Straighten or Smooth. (Smoother curves are easier to reshape, whereas rougher curves match
the original line strokes more closely.)
note: To further smooth existing curved segments, use Modify > Shape > Smooth and Modify > Shape > Optimize.
Recognize lines: Defines how nearly straight a line segment drawn with the Pencil tool must be before Flash
Professional recognizes it as a straight line and makes it perfectly straight. If Recognize Lines is off while you draw,
straighten lines later by selecting one or more line segments and selecting Modify > Shape > Straighten.
Recognize shapes: Controls how precisely to draw circles, ovals, squares, rectangles, and 90° and 180° arcs for them to
be recognized as geometric shapes and redrawn accurately. The options are Off, Strict, Normal, and Tolerant. Strict
requires that the shape be drawn very close to straight; Tolerant specifies that the shape can be somewhat rough, and
Flash redraws the shape. If Recognize Shapes is off while you draw, straighten lines later by selecting one or more shapes
(for example, connected line segments) and selecting Modify > Shape > Straighten.
Click accuracy: Specifies how close to an item the pointer must be before Flash Professional recognizes the item.
Restore all preferences to default settings
❖ In the Preferences dialog box, click Reset to Defaults or press and hold Control+Alt+Shift (Windows) or
Command+Option+Shift (Mac OS) as you start Flash.
More Help topics
Drawing preferences
Pen tool preferences
Illustrator object import options
(Flash Professional CS6 and earlier versions only) Photoshop file importer preferences
Last updated 6/12/2015
132
Workspace and workflow
Using Flash authoring panels
Videos and tutorials
• Video: The Panels (Length = 11:15, Peachpit.com)
Flash authoring panels
Authoring panels in the Flash workspace carry the authoring and publishing controls that you can arrange according
to your preferences. You can also drag any panel out of its place, resize it, and place it anywhere on your screen for easy
access. Flash fly-out menus also give you an option to lock the panel at any particular place on your screen so that it
does not move when you drag it accidentally while working.
About the Property inspector
The Property inspector provides easy access to the most commonly used attributes of the current selection, either on
the Stage or in the Timeline. You can make changes to the object or document attributes in the Property inspector
without accessing the menus or panels that also control these attributes.
Depending on what is currently selected, the Property inspector displays information and settings for the current
document, text, symbol, shape, bitmap, video, group, frame, or tool. When two or more different types of objects are
selected, the Property inspector displays the total number of objects selected.
To display the Property inspector, Select Window > Properties, or press Control+F3 (Windows) or Command+F3
(Macintosh).
Last updated 6/12/2015
133
Workspace and workflow
About the Library panel
The Library panel (Window > Library) is where you store and organize symbols created in Flash Professional, as well
as imported files, including bitmap graphics, sound files, and video clips. The Library panel lets you organize library
items in folders, see how often an item is used in a document, and sort items by name, type, date, use count, or
ActionScript® linkage identifier. For example, when you import a animated GIF into the library, it creates a folder
named GIF under the root folder and places the file in it. You can also search the Library panel by typing in a symbol
name or linkage name in the search field and set properties on most multiple-object selections.
About the Actions panel
The Actions panel lets you create and edit ActionScript code for an object or frame. Selecting a frame, button, or movie
clip instance makes the Actions panel active. The Actions panel title changes to Button Actions, Movie Clip Actions, or
Frame Actions, depending on what is selected.
Last updated 6/12/2015
134
Workspace and workflow
To display the Actions panel, select Window > Actions or press F9.
Use the Movie Explorer
The Movie Explorer lets you view and organize the contents of a document and select elements in the document for
modification. It contains a display list of currently used elements, arranged in a navigable hierarchical tree.
Use the Movie Explorer to perform the following actions:
• Filter which categories of items in the document appear in the Movie Explorer.
• Display the selected categories as scenes, symbol definitions, or both.
• Expand and collapse the navigation tree.
• Search for an element in a document by name.
• Familiarize yourself with the structure of a Flash Professional document that another developer created.
• Find all the instances of a particular symbol or action.
• Print the navigable display list that appears in the Movie Explorer.
The Movie Explorer has a Panel menu and a context menu with options for performing operations on selected items or
modifying the Movie Explorer display. A check mark with a triangle below it in the Movie Explorer panel indicates the
Panel menu.
Note: The Movie Explorer has slightly different functionality when you are working with screens.
View the Movie Explorer
❖ Select Window > Movie Explorer.
Filter the categories of items that appear in the Movie Explorer
• To show text, symbols, ActionScript, imported files, or frames and layers, click one or more of the filtering buttons
to the right of the Show option. To customize which items to show, click the Customize button. Select options in the
Show area of the Movie Explorer Settings dialog box to view those elements.
• To show items in scenes, select Show Movie Elements from the Movie Explorer Panel menu.
• To show information about symbols, select Show Symbol Definitions from the Movie Explorer Panel menu.
note: The Movie Elements option and the Symbol Definitions option can be active at the same time.
Search for an item using the Find box
❖ In the Find box, enter the item name, font name, ActionScript string, or frame number. The Find feature searches
all items that appear in the Movie Explorer.
Select an item in the Movie Explorer
❖ Click the item in the navigation tree. Shift-click to select more than one item.
The full path for the selected item appears at the bottom of the Movie Explorer. Selecting a scene in the Movie
Explorer shows the first frame of that scene on the Stage. Selecting an element in the Movie Explorer selects that
element on the Stage if the layer containing the element is not locked.
Last updated 6/12/2015
135
Workspace and workflow
Use the Movie Explorer Panel menu or context menu commands
1 Do one of the following:
• To view the Panel menu, click the Panel menu control in the Movie Explorer panel.
• To view the context menu, right-click (Windows) or Control-click (Macintosh) an item in the Movie Explorer
navigation tree.
2 Select an option from the menu:
Go To Location Jumps to the selected layer, scene, or frame in the document.
Go To Symbol Definition Jumps to the symbol definition for a symbol that is selected in the Movie Elements area of
the Movie Explorer. The symbol definition lists all the files associated with the symbol. (The Show Symbol
Definitions option must be selected. See its definition in this list.)
Select Symbol Instances Jumps to the scene containing instances of a symbol that is selected in the Symbol
Definitions area of the Movie Explorer. (The Show Movie Elements option must be selected.)
Show In Library Highlights the selected symbol in the document’s library. (Flash Professional opens the Library
panel if it is not already visible.)
Rename Lets you enter a new name for a selected element.
Edit In Place Lets you edit a selected symbol on the Stage.
Edit In New Window Lets you edit a selected symbol in a new window.
Show Movie Elements Shows the elements in your document organized into scenes.
Show Symbol Definitions Shows all the elements associated with a symbol.
Copy All Text To Clipboard Copies selected text to the clipboard. For spell checking or other editing, paste the text
into an external text editor.
Cut, Copy, Paste, And Clear Performs these common functions on a selected element. Modifying an item in the
display list modifies the corresponding item in the document.
Expand Branch Expands the navigation tree at the selected element.
Collapse Branch Collapses the navigation tree at the selected element.
Collapse Others Collapses the branches in the navigation tree that do not contain the selected element.
Print Prints the hierarchical display list that appears in the Movie Explorer.
About Flash components and the Components panel
A component in Flash is a reusable, packaged module that adds a particular capability to a Flash document.
Components can include graphics as well as code, so they're pre-built functionality that you can easily include in your
Flash projects. For example, a component can be a radio button, a dialog box, a preload bar, or even something that has
no graphics at all, such as a timer, a server connection utility, or a custom XML parser.
If you are less experienced with writing ActionScript, you can add components to a document, set their parameters in
the Property inspector or Component inspector, and use the Behaviors panel to handle their events. For example, you
could attach a Go To Web Page behavior to a Button component that opens a URL in a web browser when the button
is clicked without writing any ActionScript code.
If you are a programmer who wants to create more robust applications, you can create components dynamically, use
ActionScript to set properties and call methods at run time, and use the event listener model to handle events.
Last updated 6/12/2015
136
Workspace and workflow
Insert a component using the Component panel
When you first add a component to a document, Flash imports it as a movie clip into the Library panel. You can also
drag a component from the Components panel directly to the Library panel and then add an instance of it to the Stage.
In any case, you must add a component to the library before you can access its class elements.
1 Select Window > Component panel.
2 Select an instance of a component in the Component panel, and drag it to the Stage or Library panel. After a
component is added to the library, you can drag multiple instances to the Stage.
3 Configure the component as needed using either the Property inspector or the Components inspector. For
information on the parameters the component uses, refer to the appropriate component documentation for the
version of ActionScript you are using in the Flash document.
Enter parameters for a component using the Component inspector
1 Select Window > Component Inspector.
2 Select an instance of a component on the Stage.
3 Click the Parameters tab and enter values for any of the listed parameters.
About the Web Services panel
You can view a list of web services, refresh web services, and add or remove web services in the Web Services panel
(Window > Other Panels > Web Services). When you add a web service to the Web Services panel, the web service is
then available to any application you create.
You can use the Web Services panel to refresh all your web services at once by clicking the Refresh Web Services button.
If you are not using the Stage but instead are writing ActionScript code for the connectivity layer of your application,
you can use the Web Services panel to manage your web services.
For detailed information about using the web services panel, see www.adobe.com/go/learn_fl_web_services.
More Help topics
Work with libraries
About ActionScript 3.0 Components
Timeline layers
Create and organize layers
Layers help you organize the artwork in your document. You can draw and edit objects on one layer without affecting
objects on another layer. In areas of the Stage with nothing on a layer, you can see through it to the layers below.
To draw, paint, or otherwise modify a layer or folder, select the layer in the Timeline to make it active. A pencil icon
next to a layer or folder name in the Timeline indicates that the layer or folder is active. Only one layer can be active at
a time (although more than one layer can be selected at a time).
Last updated 6/12/2015
137
Workspace and workflow
When you create a Flash Professional document, it contains only one layer. To organize the artwork, animation, and
other elements in your document, add more layers. You can also hide, lock, or rearrange layers. The number of layers
you can create is limited only by your computer’s memory, and layers do not increase the file size of your published
SWF file. Only the objects you place into layers add to the file size.
To organize and manage layers, create layer folders and place layers in them. You can expand or collapse layer folders
in the Timeline without affecting what you see on the Stage. Use separate layers or folders for sound files, ActionScript,
frame labels, and frame comments. This helps you find these items quickly to edit them.
To help create sophisticated effects, use special guide layers to make drawing and editing easier, and to make mask
layers.
There are five types of layers you can use in Flash:
• Normal layers contain most of the artwork in a FLA file.
• Mask layers contain objects used as masks to hide selected portions of layers below them. For more information, see
Using mask layers.
• Masked layers are layers beneath a mask layer that you associate with the mask layer. Only the portion of the masked
layer revealed by the mask is visible. For more information, see Using mask layers.
• Guide layers contain strokes that can be used to guide the arrangement of objects on other layers or the motion of
classic tween animations on other layers. For more information, see Guide layers and Create classic tween animation
along a path.
• Guided layers are layers associated with a guide layer. The objects on the guided layer can be arranged or animated
along the strokes on the guide layer. Guided layers can contain static artwork and classic tweens, but not motion
tweens.
• Motion Tween layers contain objects animated with motion tweens. For more information, see About tweened
animation.
• Armature layers contain objects with inverse kinematics bones attached. For more information, see Bone tool.
Normal, Mask, Masked, and Guide layers can contain motion tweens or inverse kinematic bones. When these items are
present in one of these layers, there are limitations to the types of content that can be added to the layer. For more
information, see Motion tweens and Bone tool.
Create a layer
When you create a layer, it appears above the selected layer. The newly added layer becomes the active layer.
❖ Do one of the following:
• Click the New Layer button
at the bottom of the Timeline.
• Select Insert > Timeline > Layer.
• Right-click (Windows) or Control-click (Macintosh) a layer name in the Timeline and select Insert Layer from
the context menu.
Create a layer folder
❖ Do one of the following:
• Select a layer or folder in the Timeline and select Insert > Timeline > Layer Folder.
• Right-click (Windows) or Control-click (Macintosh) a layer name in the Timeline and select Insert Folder from
the context menu. The new folder appears above the layer or folder you selected.
Last updated 6/12/2015
138
Workspace and workflow
• Click the New Folder icon
selected.
at the bottom of the Timeline. The new folder appears above the layer or folder you
Organize layers and layer folders
To organize your document, rearrange layers and folders in the Timeline.
Layer folders help organize your workflow by letting you place layers in a tree structure. To see the layers a folder
contains without affecting which layers are visible on the Stage, expand or collapse the folder. Folders can contain both
layers and other folders, allowing you to organize layers in much the same way you organize files on your computer.
The layer controls in the Timeline affect all layers within a folder. For example, locking a layer folder locks all layers
within that folder.
• To move a layer or layer folder into a layer folder, drag the layer or layer folder name to the destination layer folder
name.
• To change the order of layers or folders, drag one or more layers or folders in the Timeline to the desired position.
• To expand or collapse a folder, click the triangle to the left of the folder name.
• To expand or collapse all folders, Right-click (Windows) or Control-click (Macintosh) and select Expand All Folders
or Collapse All Folders.
Rename a layer or folder
By default, new layers are named by the order in which they are created: Layer 1, Layer 2, and so on. To better reflect
their contents, rename layers.
❖ Do one of the following:
• Double-click the name of the layer or folder in the Timeline and enter a new name.
• Right-click (Windows) or Control-click (Macintosh) the name of the layer or folder and select Properties from
the context menu. Enter the new name in the Name box and click OK.
• Select the layer or folder in the Timeline and select Modify > Timeline > Layer Properties. Enter the new name
in the Name box and click OK.
Select a layer or folder
❖ Do one of the following:
• Click the name of a layer or folder in the Timeline.
• Click any frame in the Timeline of the layer to select.
• Select an object on the Stage that is located in the layer to select.
• To select contiguous layers or folders, Shift-click their names in the Timeline.
• To select non-contiguous layers or folders, Control-click (Windows) or Command-click (Macintosh) their
names in the Timeline.
Copy frames from a single layer
1 Select a range of frames in a layer. To select the entire layer, click the layer name in the Timeline.
2 Select Edit > Timeline > Copy Frames.
3 Click the frame where you want to begin pasting and select Edit > Timeline > Paste Frames. To paste and replace the
exact number of copied frames on the target timeline, use the Paste and Overwrite Frames option.
Last updated 6/12/2015
139
Workspace and workflow
A Select frames and copy. B Right-click on the frame on which you want to paste and select Paste and Overwrite Frames. C The pasted frames
overwrite the exact number of frames on the timeline.
Copy frames from a layer folder
1 Collapse the folder (click the triangle to the left of the folder name in the Timeline) and click the folder name to
select the entire folder.
2 Select Edit > Timeline > Copy Frames.
3 To create a folder, select Insert > Timeline > Layer Folder.
4 Click the new folder and select Edit > Timeline > Paste Frames.
Delete a layer or folder
1 To select the layer or folder, click its name in the Timeline or any frame in the layer.
2 Do one of the following:
• Click the Delete Layer button in the Timeline.
• Drag the layer or folder to the Delete Layer button.
• Right-click (Windows) or Control-click (Macintosh) the layer or folder name and select Delete Layer from the
context menu.
note: When you delete a layer folder, all the enclosed layers and all their contents are also deleted.
Lock or unlock one or more layers or folders
• To lock a layer or folder, click in the Lock column to the right of the name. To unlock the layer or folder, click in the
Lock column again.
• To lock all layers and folders, click the padlock icon. To unlock all layers and folders, click it again.
• To lock or unlock multiple layers or folders, drag through the Lock column.
• To lock all other layers or folders, Alt-click (Windows) or Option-click (Macintosh) in the Lock column to the right
of a layer or folder name. To unlock all layers or folders, Alt-click or Option-click in the Lock column again.
Copy and paste layers (CS5.5 only)
You can copy entire layers and layer folders in the timeline and paste them into the same timeline or separate timelines.
Any type of layer can be copied.
Last updated 6/12/2015
140
Workspace and workflow
When you copy and paste layers, the layer folder structure of copied layers is preserved.
1 Select one or more layers in the Timeline by clicking the layer name. Shift-click to select contiguous layers. Control-
click (Windows) or Command-click (Macintosh) to select non-contiguous layers.
2 Choose Edit > Timeline >Copy Layers or Cut Layers. You can also right-click the layers and choose Copy Layers or
Cut Layers from the context menu.
3 In the timeline you want to paste into, select the layer immediately below where you want the pasted layers to be
inserted.
4 Choose Edit > Timeline > Paste Layers.
The layers appear in the Timeline above the layer you selected. If you have a layer folder selected, the pasted layers
appear inside the folder.
To paste a layer into a mask or guide layer you must first select a layer under that mask or guide and then paste. You
cannot paste either a mask, guide, or folder layer underneath a mask or guide layer.
You can also duplicate layers by selecting layers and choosing Edit > Timeline >Duplicate Layers. The new layers will
have the word “copy” appended to the layer name.
View layers and layer folders
Show or hide a layer or folder
A red X next to the name of a layer or folder in the Timeline indicates that a layer or folder is hidden. In the publish
settings, you can choose whether hidden layers are included when you publish a SWF file.
• To hide a layer or folder, click in the Eye column to the right of the layer or folder name in the Timeline. To show
the layer or folder, click in it again.
• To hide all the layers and folders in the Timeline, click the Eye icon. To show all layers and folders, click it again.
• To show or hide multiple layers or folders, drag through the Eye column.
• To hide all layers and folders other than the current layer or folder, Alt-click (Windows) or Option-click (Macintosh)
in the Eye column to the right of a layer or folder name. To show all layers and folders, Alt-click or Option-click it
again.
View the contents of a layer as outlines
To distinguish which layer an object belongs to, display all objects on a layer as colored outlines.
• To display all objects on that layer as outlines, click in the Outline column to the right of the layer’s name. To turn
off outline display, click in it again.
• To display objects on all layers as outlines, click the outline icon. To turn off outline display on all layers, click it
again.
• To display objects on all layers other than the current layer as outlines, Alt-click (Windows) or Option-click
(Macintosh) in the Outline column to the right of a layer’s name. To turn off the outline display for all layers,
Alt-click or Option-click in it again.
Change a layer’s outline color
1 Do one of the following:
• Double-click the layer’s icon (the icon to the left of the layer name) in the Timeline.
Last updated 6/12/2015
141
Workspace and workflow
• Right-click (Windows) or Control-click (Macintosh) the layer name and select Properties from the context
menu.
• Select the layer in the Timeline and select Modify > Timeline > Layer Properties.
2 In the Layer Properties dialog box, click the Outline Color box, select a new color, and click OK.
Note: Motion paths on the layer also use the layer outline color.
(Flash Professional CC only) Setting Properties to Multiple layers
1 In Flash Professional CC, create a FLA file or open an existing one.
2 If you have not already done so, add at least two layers.
3 Select those layers whose properties you want to modify, right-click and select Properties.
4 On the Layer Properties dialog, modify the properties that you want to.
5 Click OK
Show or hide a layer or folder
A red X next to the name of a layer or folder in the Timeline indicates that a layer or folder is hidden. In the publish
settings, you can choose whether hidden layers are included when you publish a SWF file.
• To hide a layer or folder, click in the Eye column to the right of the layer or folder name in the Timeline. To show
the layer or folder, click in it again.
• To hide all the layers and folders in the Timeline, click the Eye icon. To show all layers and folders, click it again.
• To show or hide multiple layers or folders, drag through the Eye column.
• To hide all layers and folders other than the current layer or folder, Alt-click (Windows) or Option-click (Macintosh)
in the Eye column to the right of a layer or folder name. To show all layers and folders, Alt-click or Option-click it
again.
View the contents of a layer as outlines
To distinguish which layer an object belongs to, display all objects on a layer as colored outlines.
• To display all objects on that layer as outlines, click in the Outline column to the right of the layer’s name. To turn
off outline display, click in it again.
• To display objects on all layers as outlines, click the outline icon. To turn off outline display on all layers, click it
again.
• To display objects on all layers other than the current layer as outlines, Alt-click (Windows) or Option-click
(Macintosh) in the Outline column to the right of a layer’s name. To turn off the outline display for all layers,
Alt-click or Option-click in it again.
Change a layer’s outline color
1 Do one of the following:
• Double-click the layer’s icon (the icon to the left of the layer name) in the Timeline.
• Right-click (Windows) or Control-click (Macintosh) the layer name and select Properties from the context
menu.
• Select the layer in the Timeline and select Modify > Timeline > Layer Properties.
2 In the Layer Properties dialog box, click the Outline Color box, select a new color, and click OK.
Last updated 6/12/2015
142
Workspace and workflow
Note: Motion paths on the layer also use the layer outline color.
More Help topics
Moving and copying objects
Move objects by dragging
1 Select an object or multiple objects.
2 Select the Selection tool
, position the pointer over the object, and do one of the following:
• To move the object, drag it to the new position.
• To copy the object and move the copy, Alt-drag (Windows) or Option-drag (Macintosh).
• To constrain the object’s movement to multiples of 45°, Shift-drag.
Move objects by using the arrow keys
1 Select an object or multiple objects.
2 Do one of the following:
• To move the selection 1 pixel at a time, press the arrow key for the direction in which you want the object to move.
• To move the selection 10 pixels at a time, press Shift+arrow key.
Note: When Snap To Pixels is selected, the arrow keys move objects by pixel increments on the document’s pixel grid, not
by pixels on the screen.
Move objects by using the Property inspector
1 Select an object or multiple objects.
2 If the Property inspector is not visible, select Window > Properties.
3 Enter x and y values for the location of the upper-left corner of the selection.
The units are relative to the upper-left corner of the Stage.
Note: The Property inspector uses the units specified for the Ruler Units option in the Document Properties dialog box.
Move objects by using the Info panel
1 Select an object or multiple objects.
2 If the Info Panel is not visible, select Window > Info.
3 Enter x and y values for the location of the upper-left corner of the selection.
The units are relative to the upper-left corner of the Stage.
Last updated 6/12/2015
143
Workspace and workflow
Move and copy objects by pasting
To move or copy objects between layers, scenes, or other Flash files, use the pasting technique. You can paste an object
in a position relative to its original position.
1 Select an object or multiple objects.
2 Select Edit > Cut or Edit > Copy.
3 Select another layer, scene, or file, and then select Edit > Paste In Place to paste the selection in the same position
relative to the Stage. Select Edit > Paste In Center to paste the selection in the center of the work area.
Copying objects with the clipboard
Elements copied to the clipboard are anti-aliased, so they look as good in other applications as they do in Flash. This
feature is useful for frames that include a bitmap image, gradients, transparency, or a mask layer.
Graphics pasted from other Flash documents or programs are placed in the current frame of the current layer. How a
graphic element is pasted into a Flash scene depends on the type of element it is, its source, and the preferences you
have set:
• Text from a text editor becomes a single text object.
• Vector-based graphics from any drawing program become a group that can be ungrouped and edited.
• Bitmaps become a single grouped object just like imported bitmaps. You can break apart pasted bitmaps or convert
pasted bitmaps to vector graphics.
Note: Before pasting graphics from Illustrator into Flash, convert colors to RGB in Illustrator.
Copy transformed objects
You can create a scaled, rotated, or skewed copy of an object.
1 Select an object.
2 Select Window > Transform.
3 Enter scale, rotation, or skew values.
4 Click the Duplicate Selection and Transform button
in the Transform panel.
Sync Flash Professional Preferences with Creative Cloud
Flash Professional is now fully integrated with Creative Cloud. It allows you to synchronize Preferences to Creative
Cloud, first, and across multiple machines (a maximum of two). Besides maintaining a backup on Creative Cloud, the
sync preferences feature allows you to restore and reuse preferences despite reinstalling Flash Pro.
The following set of preferences can be synced with the Creative Cloud and across multiple machines:
• Workspace: Includes syncing active workspace and user defined workspaces. When downloaded on a different
machine, panels retain their positions with appropriate adjustments made according to the screen resolution.
• Keyboard Shortcuts/custom presets: Default and customized shortcut keys.
• Document Properties: Includes document settings related to Stage.
• Application Level Preferences: Includes options set in the following tabs in Preferences panel:
• General
Last updated 6/12/2015
144
Workspace and workflow
• Code Editor
• Script files
• Text
• Drawing
• Sprite Sheet Preferences: Output options for Sprite Sheet Generator, including Image Dimension, Algorithm, Data
Format, and so on.
• Grid, Guide, and Snapping Settings: Gride, Guide, and Snapping options set using View menu in Flash
Professional CC.
You can also choose to sync preferences across two different platforms (MAC and Windows). However, due to various
differences in the operating systems, there are limitations when syncing across platforms. Certain settings cannot be
synced. For example, keyboard shortcuts that include control (MAC), are ignored when downloading Preferences on
a Windows machine.
Last updated 6/12/2015
145
Workspace and workflow
Syncing Flash Professional Preferences with Creative Cloud
1 Launch Flash Pro CC.
2 On launching Flash Professional CC for the first time, the Adobe Flash Professional dialog is displayed.
1 Begin Syncing: Click the Sync Settings Now button to begin syncing Flash Professional preferences with
Creative Cloud.
2 Modify Default Sync Settings: Click Advanced. The Sync Settings section of the Preferences Panel is displayed.
Review or modify these settings, if necessary.
3 Disable Syncing: Click the Disable Sync Settings button to disable syncing Flash Professional preferences with
Creative Cloud.
4 At any point in time, if you want to sync with the Creative Cloud, click the
button in the Title Bar of Flash Pro
CC, and click Sync Settings Now.
5 Also, to modify Sync Settings, go to Edit > Preferences > Sync Settings. You can click the Sync Settings Now button
to sync the modified settings with Creative Cloud.
Downloading Preferences from the Creative Cloud
You can sync Flash Professional Preferences across two systems. You can modify preferences on a computer, sync these
modified settings with the Creative Cloud, and download the same on a different computer.
Last updated 6/12/2015
146
Workspace and workflow
If Preferences on the second computer are default or unmodified, then you can download Preferences from Creative
Cloud. When Preferences are downloaded successfully on to a system, the Updated Settings Are Ready dialog is
displayed indicating the same.
However, a case of conflict occurs if Preferences are modified without syncing with the Creative Cloud. For more
information on how to resolve such conflicts, see Resolving Sync Conflicts .
For example, consider that you modified Keyboard Shortcuts on a computer at work and synced it with the Creative
Cloud. You can then download and apply these preferences at home on a different computer.
1 Launch Flash Pro CC.
2 In Flash Pro CC, click the
button.
3 Click the Sync Settings Now button.
4 On the Updated Settings Ready dialog, click Apply to override current preferences with the downloaded copy.
Note: If you quit Flash before applying the downloaded preferences, they are automatically applied on relaunching the
application.
Resolving Conflicts
When using multiple machines, you can modify sync settings on any of the machines. However, a case of conflict occurs
if you further modify the same settings on a different computer.
For example, consider that you have modified the Sprite Sheet settings on your machine at work (office). You further
modify these settings on a machine at home. If the machine at home was not synced with Cloud before modifying Sprite
Sheet settings, a case of conflict occurs.
To resolve such a conflict:
1 In Flash Pro CC, click the
button.
2 The following dialog box is displayed:
❖ You can choose to retain local settings or download settings from Creative Cloud by using one of the following
options:
Sync Local Sync local settings on this computer to Creative Cloud; overwrite Creative Cloud version with the local
version of settings.
Sync Cloud Sync from Creative Cloud to your local computer; ignore changes made to the local settings and replace
them with the settings downloaded from Creative Cloud.
Last updated 6/12/2015
147
Workspace and workflow
Troubleshooting
• Keyboard Shortcuts added to presets with invalid names (names not supported by the OS) are not synced with
Creative Cloud.
• Also, Keyboard Shortcuts listed under different menus are not synced across systems of different platforms. For
example, Font Mapping command is listed under different Menus in MAC and Windows versions of Flash
Professional CC. If Font Mapping is assigned a new keyboard shortcut on MAC and synced with Creative Cloud, it
cannot be downloaded and used on Windows.
• Font Settings are not synced with Creative Cloud.
• Handling Errors:
• No Internet Connection: If there is no Internet connection, Flash Pro CC throws an error, and Sync Settings
cannot be uploaded to or downloaded from Creative Cloud. Ensure that the system is connected to a non-faulty
internet connection.
• Server is Busy: If the Creative Cloud server is busy, Flash Pro CC throws an error, and Preferences cannot be
synced from the Creative Cloud.
• Low Disk Space: If there is less disk space on the local system, Flash Pro CC throws an error and fails to
download Preferences from the Creative Cloud.
Working with Adobe Color panel
Adobe® Color® is a web-based application used to experiment with, create, and share color themes that you use in a
project. Flash Professional CC is integrated with Color panel that enables you to view and use the color themes that you
have created or marked as favorite in the Adobe Color application. For more information about Adobe Color, visit this
link.
Color panel
In Flash Professional CC, the Adobe Color panel (Windows > Extensions > Adobe Color themes) displays:
• Themes you have created, and are synced with your account on the Adobe Color website (color.adobe.com).
• Public themes that you have marked as a favorite themes on the Adobe Color website.
The Adobe ID used in Flash Professional CC is automatically used to sign-in to the Adobe Color website, and the Color
panel is refreshed.
Note: If the credentials you are using with Flash Professional CC do not have an associated Color ID, then a Color ID is
automatically created using the Flash Pro CC credentials. You can then access the Adobe Color website using your Adobe
ID credentials.
Using the Color panel
Note: For the Color panel to work, Internet connectivity is required when you launch Flash Professional. Color Panel cannot
be used, if you do not have Internet connectivity.
Last updated 6/12/2015
148
Workspace and workflow
The swatches and color themes available in the Color panel are read-only. You can use a swatch or theme in your
artwork, directly from the Color panel. However, to modify a swatch or color theme, first add them to the Swatches
panel.
1 Click Window > Extensions > Adobe Color themes to open the Color panel.
All themes available in your Adobe Color account when Flash Pro was launched are displayed in the Color Panel.
2 If you have added a theme in Color after you started Flash Pro, click Refresh in the Color panel to include the latest
theme.
A Theme search by name B Favorite theme icon C Theme folder icon D Refresh E Launch Color website F Theme name
Note: The Color panel lists the themes that you have created, modified, or marked as favorite (listed under Adobe Color
website > Mycolor)
3 You can add an entire theme to your Swatches panel (Window > Swatches) by clicking the Theme Folder or Favorite
Theme icon. The theme is added to the Color folder within Swatches panel.
Last updated 6/12/2015
149
Workspace and workflow
4 If you have an extensive list of themes, search the theme using the Find box. Searches are performed on the names
of the themes.
Templates
About templates
Flash Professional templates provide you with easy-to-use starting points for common projects. The New File dialog
box provides a preview and description of each template. Templates are available in six categories:
• Advertising - these include common Stage sizes used in online ads.
• Animation - these include many common types of animations, including motion, highlighting, glow, and easing.
• Banners - includes common sizes and functionality used in website interfaces.
• Media Playback - includes photo albums and playback of several video dimensions and aspect ratios.
• Presentations - includes simple and more complex presentation styles.
• Sample Files - these provide examples of commonly used features in Flash Professional.
A note about advertising templates
Advertising templates facilitate the creation of standard rich media types and sizes defined by the Interactive
Advertising Bureau (IAB) and accepted by the online advertising industry. For more information on IAB-endorsed ad
types, see the IAB site at IAB.net.
Test your ads for stability in various browser and platform combinations. Your ad application is considered stable if it
doesn’t cause error messages, browser crashes, or system crashes.
Work with webmasters and network administrators to create detailed test plans that include the tasks you expect your
audience to do within the ad. Example test plans are available at the IAB Rich Media testing section of IAB.net. Size and
file format requirements of ads can vary by vendor and website. Check with your vendor, ISP, or the IAB to learn about
these requirements that affect the ad’s design.
Use a template
1 Select File > New.
2 In the New File dialog box, click the Templates tab.
3 Select a template from one of the categories and click OK.
4 Add content to the FLA file that opens.
5 Save and publish the file.
Additional resources
For more information on authoring Flash Professional files for mobile devices, see the Adobe® Mobile Devices site at
www.adobe.com/go/devnet_devices.
Last updated 6/12/2015
150
Workspace and workflow
Create a sprite sheet
Creating sprite sheets
A sprite sheet is a bitmap image file that contains several smaller graphics in a tiled grid arrangement. By compiling
several graphics into a single file, you enable Flash Professional and other applications to use the graphics while only
needing to load a single file. This loading efficiency can be very helpful in situations such as game development where
performance is especially important.
You can create a sprite sheet from a selection of any combination of movie clips, button symbols, graphic symbols, or
bitmaps. You can select items in the Library panel or on the Stage, but not both. Each bitmap and each frame of the
selected symbols will appear as a separate graphic in the sprite sheet. If you export from the Stage, any transforms
(scaling, skewing, etc.) you have applied to the symbol instance are preserved in the image output.
To create a sprite sheet:
1 Select one or more symbols in the Library or symbol instances on the Stage. The selection can also contain bitmaps.
2 Right-click the selection and choose Generate Sprite Sheet.
3 In the Generate Sprite Sheet dialog box, select options and then click Export.
The following export options are available:
Image Dimensions The total size in pixels of the sprite sheet. The default setting is Autosize, which sizes the sheet to fit
all the sprites you include.
Image Format The file format of the exported sprite sheet. PNG 8 bit and PNG 32-bit each support using a transparent
background (alpha channel). PNG 24 bit and JPG do not support transparent backgrounds. Generally, the visual
difference between PNG 8 bit and PNG 32 bit is small. PNG 32 bit files will be 4 times as large as 8-bit PNG bit files.
Border Padding Padding around the edges of the sprite sheet, in pixels
Shape Padding Padding between each image within the sprite sheet, in pixels.
Algorithm The technique used for packing the images into the sprite sheet. There are two options:
• Basic (default)
• MaxRects
Data Format The internal format used for the image data. Choose the format that best suits your intended workflow
for the sprite sheet after export. The default is the Starling format.
Rotate Rotates the sprites 90 degrees. This option is only available for some data formats.
Last updated 6/12/2015
151
Workspace and workflow
Trim This option saves space on the sprite sheet by trimming unused pixels from each symbol frame added to the sheet.
Stack Frames Selecting this option prevents duplicate frames within the selected symbols from being duplicated in the
resulting sprite sheet.
Find and Replace in Flash
About Find and Replace
The Find and Replace feature lets you do the following:
• Search for a text string, a font, a color, a symbol, a sound file, a video file, or an imported bitmap file.
• Replace the specified element with another element of the same type. Different options are available in the Find and
Replace dialog box depending on the type of specified element.
• Find and replace elements in the current document or the current scene.
• Search for the next occurrence or all occurrences of an element, and replace the current occurrence or all
occurrences.
Note: In a screen-based document, you can find and replace elements in the current document or the current screen, but
you can’t use scenes.
The Live Edit option lets you edit the specified element directly on the Stage. If you use Live Edit when searching for a
symbol, Flash Professional opens the symbol in edit-in-place mode.
The Find and Replace Log at the bottom of the Find and Replace dialog box shows the location, name, and type of the
elements for which you are searching.
Find and replace text
1 Select Edit > Find and Replace.
2 Select Text from the For pop-up menu.
3 In the Text box, enter the text to find.
4 In the Replace With Text box, enter the text to replace the existing text.
5 Select options for searching text:
Whole Word Searches for the specified text string as a whole word only, bounded on both sides by spaces, quotes,
or similar markers. When Whole Word is deselected, the specified text can be searched as part of a larger word. For
example, when Whole Word is deselected, a search for place will yield the words replace, placement, and so on.
Match Case Searches for text that exactly matches the case (uppercase or lowercase character formatting) of the
specified text when finding and replacing.
Regular Expressions Searches for text in regular expressions in ActionScript. An expression is any statement that
Flash Professional can evaluate that returns a value.
Text Field Contents Searches the contents of a text field.
Frames/Layers/Parameters Searches frame labels, layer names, scene names, and component parameters.
Last updated 6/12/2015
152
Workspace and workflow
Strings in ActionScript Searches strings (text between quotation marks) in ActionScript in the document or scene
(external ActionScript files are not searched).
ActionScript Searches all ActionScript, including code and strings.
6 To select the next occurrence of the specified text on the Stage and edit it in place, select Live Edit.
Note: Only the next occurrence is selected for live editing, even if you select Find All in step 7.
7 To find text, do one of the following:
• To find the next occurrence of the specified text, click Find Next.
• To find all occurrences of the specified text, click Find All.
8 To replace text, do one of the following:
• To replace the currently selected occurrence of the specified text, click Replace.
• To replace all occurrences of the specified text, click Replace All.
Find and replace fonts
1 Select Edit > Find and Replace.
2 Select Font from the For pop-up menu, then select from the following options:
• To search by font name, select Font Name and select a font from the pop-up menu or enter a font name in the
box. When Font Name is deselected, all fonts in the scene or document are searched.
• To search by font style, select Font Style and select a font style from the pop-up menu. When Font Style is
deselected, all font styles in the scene or document are searched.
• To search by font size, select Font Size and enter values for minimum and maximum font size to specify the range
of font sizes to be searched. When Font Size is deselected, all font sizes in the scene or document are searched.
• To replace the specified font with a different font name, select Font Name under Replace With and select a font
name from the pop-up menu or enter a name in the box. When Font Name is deselected under Replace with, the
current font name remains unchanged.
• To replace the specified font with a different font style, select Font Style under Replace With and select a font style
from the pop-up menu. When Font Style is deselected under Replace with, the current style of the specified font
remains unchanged.
• To replace the specified font with a different font size, select Font Size under Replace With and enter values for
minimum and maximum font size. When Font Size is deselected under Replace With, the current size of the
specified font remains unchanged.
3 To select the next occurrence of the specified font on the Stage and edit it in place, select Live Edit.
Note: Only the next occurrence is selected for live editing, even if you select Find All in step 4.
4 To find a font, do one of the following:
• To find the next occurrence of the specified font, click Find Next.
• To find all occurrences of the specified font, click Find All.
5 To replace a font, do one of the following:
• To replace the currently selected occurrence of the specified font, click Replace.
• To replace all occurrences of the specified font, click Replace All.
Last updated 6/12/2015
153
Workspace and workflow
Find and replace colors
You cannot find and replace colors in grouped objects.
Note: To find and replace colors in a GIF or JPEG file in a Flash Professional document, edit the file in an image-editing
application.
1 Select Edit > Find and Replace.
2 Select Color from the For pop-up menu.
3 To search for a color, click the Color control and do one of the following:
• Select a color swatch from the color pop-up window.
• Enter a hexadecimal color value in the Hex Edit box in the color pop-up window.
• Click the System Color Picker button and select a color from the system color picker.
• To make the eyedropper tool appear, drag from the Color control. Select any color on your screen.
4 To select a color to replace the specified color, click the Color control under Replace With and do one of the
following:
• Select a color swatch from the color pop-up window.
• Enter a hexadecimal color value in the Hex Edit box in the color pop-up window.
• Click the System Color Picker button and select a color from the system color picker.
• To make the eyedropper tool appear, drag from the Color control. Select any color on your screen.
5 To specify which occurrence of the color to find and replace, select the Fills, Strokes, or Text option or any
combination of those options.
6 To select the next occurrence of the specified color on the Stage and edit it in place, select Live Edit.
Note: Only the next occurrence is selected for live editing, even if you select Find All in the next step.
7 Find a color.
• To find the next occurrence of the specified color, click Find Next.
• To find all occurrences of the specified color, Click Find All.
8 Replace a color.
• To replace the currently selected occurrence of the specified color, click Replace.
• To replace all occurrences of the specified color, click Replace All.
Find and replace symbols
To find and replace symbols, search for a symbol by name. Replace a symbol with another symbol of any type—movie
clip, button, or graphic.
1 Select Edit > Find and Replace.
2 Select Symbol from the For pop-up menu.
3 For Name, select a name from the pop-up menu.
4 Under Replace With, for Name select a name from the pop-up menu.
5 To select the next occurrence of the specified symbol on the Stage and edit it in place, select Live Edit.
Note: Only the next occurrence is selected for editing, even if you select Find All in the next step.
Last updated 6/12/2015
154
Workspace and workflow
6 To find a symbol, do one of the following:
• To find the next occurrence of the specified symbol, click Find Next.
• To find all occurrences of the specified symbol, click Find All.
7 To replace a symbol, do one of the following:
• To replace the currently selected occurrence of the specified symbol, click Replace.
• To replace all occurrences of the specified symbol, click Replace All.
Find and replace sound, video, or bitmap files
1 Select Edit > Find and Replace.
2 Select Sound, Video, or Bitmap from the For pop-up menu.
3 For Name, enter a sound, video, or bitmap filename or select a name from the pop-up menu.
4 Under Replace With, for Name enter a sound, video, or bitmap filename or select a name from the pop-up menu.
5 To select the next occurrence of the specified sound, video, or bitmap on the Stage and edit it in place, select Live
Edit.
Note: Only the next occurrence is selected for editing, even if you select Find All in the next step.
6 Find a sound, video, or bitmap.
• To find the next occurrence of the specified sound, video, or bitmap, click Find Next.
• To find all occurrences of the specified sound, video, or bitmap, click Find All.
7 Replace a sound, video, or bitmap.
• To replace the currently selected occurrence of the specified sound, video, or bitmap, click Replace.
• To replace all occurrences of the specified sound, video, or bitmap, click Replace All.
Undo, redo, and the History panel
Undo, Redo, and Repeat commands
To undo or redo actions on individual objects, or all objects within the current document, specify either object-level or
document-level Undo and Redo commands (Edit > Undo or Edit Redo). The default behavior is document-level Undo
and Redo.
To choose Object-level or document-level undo options, do the following:
1 In Flash Professional CC, select Edit > Preferences.
2 On the General tab, select Object-level Undo from the Undo drop-down.
Last updated 6/12/2015
155
Workspace and workflow
Note that, you cannot undo some actions when using object-level Undo. Among these are entering and exiting Edit
mode; selecting, editing, and moving library items; and creating, deleting, and moving scenes.
To reapply a step to the same object or to a different object, use the Repeat command. For example, if you move a shape
named shape_A, select Edit > Repeat to move the shape again, or select another shape, shape_B, and select Edit >
Repeat to move the second shape by the same amount.
By default, Flash Professional supports 100 levels of undo for the Undo menu command. Select the number of undo
and redo levels, from 2 to 300, in Flash Preferences.
By default, when you undo a step by using Edit > Undo or the History panel, the file size of the document does not
change, even if you delete an item in the document. For example, if you import a video file into a document, and undo
the import, the file size of the document still includes the size of the video file. Any items that you delete from a
document when performing an Undo command are preserved to in order to be able to restore the items with a Redo
command.
Using the History panel
The History panel (Window > History) shows a list of the steps you’ve performed in the active document since you
created or opened that document, up to a specified maximum number of steps. (The History panel doesn’t show steps
you’ve performed in other documents.) The slider in the History panel initially points to the last step that you
performed.
• To undo or redo individual steps or multiple steps at once, use the History panel. Apply steps from the History panel
to the same object or to a different object in the document. However, you cannot rearrange the order of steps in the
History panel. The History panel is a record of steps in the order in which they are performed.
note: If you undo a step or a series of steps and then do something new in the document, you can no longer redo the
steps in the History panel; they disappear from the panel.
• By default, Flash Professional supports 100 levels of undo for the History panel. Select the number of undo and redo
levels, from 2 to 300, in Flash Preferences.
• To erase the history list for the current document, clear the History panel. After clearing the history list, you cannot
undo the steps that are cleared. Clearing the history list does not undo steps; it removes the record of those steps
from the current document’s memory.
Closing a document clears its history. To use steps from a document after that document is closed, copy the steps with
the Copy Steps command or save the steps as a command.
Undo steps with the History panel
When you undo a step, the step is dimmed in the History panel.
• To undo the last step performed, drag the History panel slider up one step in the list.
Last updated 6/12/2015
156
Workspace and workflow
• To undo multiple steps at once, drag the slider to point to any step, or click to the left of a step along the path of the
slider. The slider scrolls automatically to that step, undoing all subsequent steps as it scrolls.
note: Scrolling to a step (and selecting the subsequent steps) is different from selecting an individual step. To scroll to a step,
click to the left of the step.
Replay steps with the History panel
When you replay steps with the History panel, the steps that play are the steps that are selected (highlighted) in the
History panel, not necessarily the step currently indicated by the slider.
Apply steps in the History panel to any selected object in the document.
Replay one step
❖ In the History panel, select a step and click the Replay button.
Replay a series of adjacent steps
1 Select steps in the History panel by doing one of the following:
• Drag from one step to another. (Don’t drag the slider; drag from the text label of one step to the text label of
another step.)
• Select the first step, then Shift-click the last step; or select the last step and Shift-click the first step.
2 Click Replay. The steps replay in order, and a new step, labeled Replay Steps, appears in the History panel.
Replay nonadjacent steps
1 Select a step in the History panel, and Control-click (Windows) or Command-click (Macintosh) other steps. To
deselect a selected step, Control-click or Command-click.
2 Click Replay.
Copy and paste steps between documents
Each open document has its own history of steps. To copy steps from one document and paste them into another, use
the Copy Steps command in the History panel options menu. If you copy steps into a text editor, the steps are pasted as
JavaScript™ code.
1 In the document containing the steps to reuse, select the steps in the History panel.
2 In the History panel options menu, select Copy Steps.
3 Open the document to paste the steps into.
4 Select an object to apply the steps to.
5 Select Edit > Paste to paste the steps. The steps play back as they’re pasted into the document’s History panel. The
History panel shows them as only one step, called Paste Steps.
More Help topics
Set preferences in Flash
Automating tasks with the Commands menu
Set preferences in Flash
Automating tasks with the Commands menu
Last updated 6/12/2015
157
Workspace and workflow
Keyboard shortcuts
Copy the current shortcut set to clipboard
1 Select Edit > Keyboard Shortcuts (Windows) or Flash > Keyboard Shortcuts (Macintosh).
2 Click the Copy to Clipboard button. You can then paste the keyboard shortcut set in any text editor for reference or
printing.
Create and modify custom keyboard shortcuts
You can create and modify keyboard shortcuts in Flash Professional.
Customize keyboard shortcuts
1 Select (Windows) Edit > Keyboard Shortcuts or (Macintosh) Flash > Keyboard Shortcuts .
The Keyboard Shortcuts dialog box appears.
2 Use the following options to add, delete, or edit keyboard shortcuts:
Keyboard Layout Presets Lets you choose a preset of predetermined shortcuts from the drop-down, or any custom
set you may have defined.
Search Lets you search for any command whose shortcut you want to set or modify. Alternatively, you may drill-
down the command within the tree view of commands.
Match Case Lets you perform a case-sensitive search of the command.
Add Adds a new shortcut to the selected command. To add a new keyboard shortcut for the selected command,
click Add and enter a new key combination. Each command can one keyboard shortcut each; if a shortcut is already
assigned to a command, the Add button is disabled.
Undo Undo the last set shortcut for a command.
Copy to clipboard Copy the entire list of keyboard shortcuts to clipboard of your Operating System.
Go To Conflict Navigates to conflicting command. In case of a conflict when setting up a shortcut, a warning
message is displayed.
Save shortcuts to a preset Save the entire set of shortcuts to a preset. Preets can then be selected from the Keyboard
Layout Presets drop-down.
Delete Shortcut Deletes a selected shortcut.
Note: You cannot use single keys such as delete or page up, ones that are pre-defined for some generic tasks such as
deleting content, page scrolling, etc.
3 Click OK.
Remove a shortcut from a command
1 From the Commands pop-up menu, select a command category, select a command from the Commands list.
2 Click the X mark beside the shortcut.
Last updated 6/12/2015
158
Workspace and workflow
Add a shortcut to a command
1 From the Commands pop-up menu, select a command category and select a command.
2 Click the Add button.
3 Press a key combination.
Note: If a conflict occurs with the key combination (for example, if the key combination is already assigned to another
command), an explanatory message appears just below the Commands list. Click the Go To Conflict button to quickly
navigate to the conflicting command, and change the shortcut.
4 Click Ok.
Edit an existing shortcut
1 From the Commands pop-up menu, select a command category, select a command from the Commands list.
2 Double-click the shortcut.
3 Press a new key combination.
Note: If a conflict occurs with the key combination (for example, if the key combination is already assigned to another
command), an explanatory message appears just below the Commands list. Click the Go To Conflict button to quickly
navigate to the conflicting command, and change the shortcut.
Creating HTML extensions
Flash Professional CC can be extended using HTML extensions. Adobe Extension Builder 3 allows you to create HTML
extensions for Flash Professional CC. Earlier, you could only extend Flash Pro using SWF extensions. However, Adobe
Extension Builder 3 allows you to create HTML extensions for Creative Cloud applications. To get started, you need to
download and install Eclipse and Extension Builder 3.0. For more information, visit this link.
Creating an HTML extension
To create an HTML extension, do the following.
1 Launch Eclipse.
2 On the New Project wizard, create a new Application Extension Project. Provide a meaningful name for the project,
then click Next.
3 On the New Adobe Application Extension Project panel, choose Adobe Flash. Click Next.
4 Configure your extension using the available options:
1 Bundle ID uniquely identifies your extension.
2 Menu name is the display name for your extension. The Menu Name appears in Window > Extensionsmenu
within Flash Professional CC.
3 Window Details use these options to customize the extension window type and size. Click Next.
4 You can further customize the reference libraries for your extension in the next few screens:
1 CEP Interface Library provides functions for interacting with the host application. The option is selected by
default.
2 Frameworks are for common Javascript libraries such as jQuery.
Last updated 6/12/2015
159
Workspace and workflow
3 Services include the Adobe IPC Communication Toolkit, which enables communication between Adobe
applications, extensions, and external applications. It provides a protocol for messaging through the CEP Service
Manager, which acts as a hub for Creative Cloud communications. Click Finish to create a new Eclipse project.
Debugging your extension in Flash Professional CC
You can run your extension directly from Eclipse:
1 Right-click the project, and select Run As > Adobe Flash Extension. This launches Flash Professional CC.
2 In Flash Pro CC, select Window> Extensionsmenu item. This opens the extension panel.
Exporting your extension
To distribute your extension, you need to export it as a ZXP package. The ZXP package is then downloaded and run by
Adobe Extension Manager on Creative Cloud applications:
1 In Eclipse, switch to the Script Explorer view to right-click on your project and select Export > Adobe Extension
Builder 3 > Application Extension. This displays the Export Wizard.
2 You must have a certificate to sign the extension package. Browse to an existing certificate or click Create to create
a new one.
3 Click Finish.
4 When the export is complete, you will find the ZXP package for your extension in the project folder, ready for
distribution.
Note: To install you will need to access the <extension>\.staged-extension\CSXS\manifest.xml file and update the host
tag to set the minimum version of Flash Pro to 13.0.
Installing your extension in Flash Professional CC
You can install HTML extensions within Flash Professional CC using Adobe Extension Manager. HTML extensions can
help you extend functionalities and capabilities of Flash Pro. To install extensions, see this link .
Adding interactivity to HTML extensions
You can build an HTML extension to interact with Flash Pro by adding controls, defining behavior, and obtain
information about the host (includes Flash Pro and the operating system) environment. This can be accomplished in
two ways:
1 Using the CEP interface library: The CEP interface library provides APIs for obtaining information about the host
environment and an eval script that allows you to run JSFLs. To know more about CEP interface library, open Help
> Help Contents > Adobe Extension Builder > References within Eclipse.
2 Using JSFL: JSFL scripts can be run using the Eval script API of CEP interface Library. To know more about JSFLs,
see this link. Apart from JSFLs, the CEP infrastructure within Flash Pro also expose the following events that can
used within HTML panels only.
• com.adobe.events.flash.documentChanged is triggered due to a change in the current active document.
• com.adobe.events.flash.timelineChanged is triggered when you make a change in the timeline of the current
active document.
• com.adobe.events.flash.documentSaved is triggered when you save the current document.
• com.adobe.events.flash.documentOpened is triggered when you open a new document.
Last updated 6/12/2015
160
Workspace and workflow
• com.adobe.events.flash.documentClosed is triggered when you close the current active document.
• com.adobe.events.flash.documentNew is triggered when you create a new document.
• com.adobe.events.flash.layerChanged is triggered when you select a different layer.
• com.adobe.events.flash.frameChanged is triggered when you select a different frame.
• com.adobe.events.flash.selectionChanged is triggered when you select a different object on stage.
• com.adobe.events.flash.mouseMove is triggered when you move your Mouse over the Stage.
Example
csinterface.addEventListener("com.adobe.events.flash.selectionChanged", CallbackFunction)
In the above code snippet:
• csinterface: Object of CEP interface library.
• com.adobe.events.flash.selectionChanged: Event that triggers a change in the selection of an object. You can use
any of the above mentioned events too.
• CallbackFunction: Method that listens to triggered event.
Last updated 6/12/2015
161
Chapter 4: Animation and Interactivity
Bone tool
About inverse kinematics
Inverse kinematics (IK) is a way of animating objects using bones chained into linear or branched armatures in parentchild relationships. When one bone moves, connected bones move in relation to it.
Inverse kinematics lets you easily create natural motion. To animate using inverse kinematics, you simply specify the
start and end positions of bones on the Timeline. Flash automatically interpolates the positions of the bones in the
armature between the starting and ending frames.
You can use IK in the following ways:
• By using a shape as a container for multiple bones. For example, you can add bones to a drawing of a snake so that
it slithers realistically. You can draw these shapes in Object Drawing mode.
• By chaining symbol instances. For example, you can link movie clips showing a torso, arm, lower arm, and hand so
that they move realistically in relation to each other. Each instance has only one bone.
Bone styles
There are 4 ways that Flash can draw bones on the Stage:
• Solid. This is the default style.
• Wired. Useful when the solid style obscures too much of the artwork beneath the bone.
• Line. Useful for smaller armatures.
• None. Hides the bones to show only the artwork beneath them.
To set the Bone Style, select the IK span in the Timeline and then select the style from the Style menu in the Options
section of the Properties panel.
Note: If you save a document with the Bone Style set to None, Flash automatically changes bone style to Line the next
time you open the document.
Pose layers
When you add bones to symbol instances or shapes, Flash creates a new layer for them in the Timeline. This new layer
is called the pose layer. Flash adds the pose layer to the Timeline between existing layers to maintain the previous
stacking order of objects on the Stage.
Add bones to symbols
You can add IK bones to movie clip, graphic, and button instances. To use text, convert it to a symbol first. The symbol
instances can be on different layers before you add bones. Flash adds them to the pose layer.
Last updated 6/12/2015
162
Animation and Interactivity
Note: You can also break text apart (Modify > Break Apart) into separate shapes and use bones with the individual
shapes.
As you chain objects, consider the parent-child relationships you want to create, for example, from shoulder to elbow
to wrist.
1 Create symbol instances on the Stage. To save time later, arrange the instances so that they approximate spatial
configuration you want.
2 Select the Bone tool from the Tools panel.
3 Click the symbol instance that you want to set as the root bone of the armature. Click at the point where you want
to attach the bone to the symbol.
By default, Flash creates the bone at the location of mouse click. For a more precise way of adding a bone, turn off
Auto Set Transformation Point for IK Bone Tool (Edit > Preferences > Drawing). With Auto Set Transformation
Point turned off, the bone will snap to the symbol transformation point when you click from one symbol to the next.
4 Drag to another symbol instance and release the mouse button at the point where you want to attach it.
5 To add another bone to the armature, drag from the tail of the first bone to the next symbol instance.
It’s easier to place the tail precisely if you turn off Snap To Objects (View > Snapping > Snap To Objects).
6 To create a branched armature, click the head of an existing bone where you want the branch to begin. Then drag to
create the first bone of the new branch.
An armature can have as many branches as necessary.
Note: A branch cannot connect to another branch except at its root.
7 To reposition the elements of the completed armature, drag either the bones or the instances themselves.
• Dragging a bone moves its associated instance without allowing it to rotate relative to its bone.
• Dragging an instance allows it to move as well as rotate relative to its bone.
• Dragging an instance in the middle of a branch causes the parent bones to articulate with joint rotation. The child
bones move with no joint rotation.
After you create an armature, you can still add new instances from different layers to the armature. Drag a new bone
to the new instance and Flash moves the instance to the pose layer of the armature.
Add bones to shapes
You add bones to a single shape or to a group of shapes that are on the same layer. In either case, you must select all the
shapes before adding the first bone. After you add bones, Flash converts all the shapes and bones into an IK shape object
and moves the object to a new pose layer.
Last updated 6/12/2015
163
Animation and Interactivity
After you have added bones to a shape, the shape has the following limitations:
• You cannot merge an IK shape with other shapes outside it.
• You cannot rotate, scale, or skew the shape with the Free Transform tool.
• Editing the control points of the shape is not recommended.
1 Create a filled shape or shapes on the Stage.
The shape can contain multiple colors and strokes. Edit the shapes so they are as close to their final form as possible.
Once you add bones to a shape, the options for editing the shape become more limited.
If the shape is too complex, Flash will prompt you to convert it to a movie clip before adding bones.
2 Select the entire shape on the Stage.
If the shape contains multiple color areas or strokes, drag a selection rectangle around the shape to ensure that the
entire shape is selected.
3 Select the Bone tool in the Tools panel.
4 With the Bone tool, click inside the shape and drag to another location within the shape.
5 To add another bone, drag from the tail of the first bone to another location in within the shape.
The second bone becomes a child of the root bone. Link areas of the shape with bones in the order of the parentchild relationships you want to create. For example, link from shoulder to elbow to wrist.
6 To create a branched armature, click the head of an existing bone where you want the branch to begin. Then drag to
create the first bone of the new branch.
An armature can have as many branches as necessary.
Note: A branch cannot connect to another branch except at its root.
7 To move the armature, select the IK shape object with the Selection tool and then drag any of the bones to move
them.
Once the shape becomes an IK shape, it has the following limitations:
• You can no longer transform (scale or skew) the shape.
• You cannot add new strokes to the shape. You can still add or remove control points from the existing strokes of the
shape.
• You cannot edit the shape in place (by double-clicking it on the Stage.)
• The shape has its own registration point, transform point, and bounding box.
On-stage controls
On-stage controls allow you to easily make rotation and translation adjustments on the stage with the help of guides
that show the rotation range and precise control. The on-state controls also allow you to continue working on the stage
without having to go back to the property inspector to adjust rotation.
Last updated 6/12/2015
164
Animation and Interactivity
The bone tool on-stage controls described in the image work as follows:
1 To start working with the on-stage controls, select the bone and use the head of the bone.
2 To view the on-stage controls, roll-over the head of the bone. The head turns in to a four-way arrows or a plus
symbol (X and Y axis) inside a circle. The arrows represent the translation attributes and the circle represents
rotation attributes.
3 Click on the head of the bone and select the circle to edit rotation or select the plus symbol to edit translation
attributes.
4 To see the presence of interactive handles for rotation and translatsion at anytime, roll over the head of the bone.
5 When you click on either the rotation or translation option, the on-stage controls to set the constraints are displayed.
Using the rotation controls
To work with the rotation controls, do the following:
1 Click the bone head to see the rotation and translation tools.
2 Roll over and click the circle that represents the rotation tool. The circle turns red.
3 Click on the lock icon to enable free rotation. Lock icon turns to a dot.
4 Moving the cursor away from the center shows you one end of the rotation radius. Click on the point on which you
want the rotation to start.
5 Move the cursor within the circle again to select the other end of the rotation radius. Click where you want that point
to be.
6 Confirm the radius definition by clicking on the circle.
Note: When you edit the rotation that you have already defined, you can increase or decrease the borders by clicking
on the line and dragging.
Using the translation controls
Last updated 6/12/2015
165
Animation and Interactivity
You can use the translation controls as follows:
1 Roll over the plus sign with four-way arrows and click on it to select the translation controls.
2 Click on the lock to enable the translation controls. The lock icon turns into a dot.
3 Click on an arrow head and drag it to the point to which you want the extend the range of movement.
Edit IK armatures and objects
You can’t edit IK armatures if the pose layer includes poses after the first frame of the Timeline. Before editing, delete
any additional poses after the first frame of the armature in the Timeline.
If you are simply repositioning an armature for animation purposes, you can change positions in any frame of the pose
layer. Flash converts the frame to a pose frame.
Select bones and associated objects
• To select an individual bone, click the bone with the Selection tool. Shift-click to select multiple bones.
• To move the selection to adjacent bones, click the Parent, Child, or Next/Previous sibling buttons in the Property
inspector.
• To select all the bones in the armature, double-click a bone.
• To select an entire armature and display the properties of the armature and its pose layer, click a frame in the pose
layer containing the armature.
• To select an IK shape, click the shape.
• To select a symbol instance connected to a bone, click the instance.
Reposition bones and associated objects
• To reposition a linear armature, drag any bone in the armature. If the armature contains connected symbol
instances, you can also drag an instance. In this way you can rotate the instance relative to its bone.
• To reposition a branch of an armature, drag any bone in the branch.
• All the bones in the branch move. Bones in other branches of the armature do not move.
• To rotate a bone with its child bones without moving the parent bone, Shift-drag the bone.
• To move an IK shape to a new location on the Stage, select the shape and change its X and Y properties in the
Property inspector. You can also Alt-drag (Windows) or Option-drag (Macintosh) the shape.
Delete bones
Do one of the following:
• To delete an individual bone and all of its children, click the bone and press the Delete key.
• You can select multiple bones to delete by Shift-clicking each bone.
• To delete all bones from an IK shape or symbol armature from the Timeline, right-click the IK armature span in the
Timeline and choose Remove Armature from the context menu.
• To delete all bones from an IK shape or a symbol armature on the Stage, double click a bone in the armature to select
all bones. Then press Delete.IK shapes revert to normal shapes.
Move bones relative to the associated shape or symbol
• To move the location of either end of a bone within an IK shape, drag the end of the bone with the Subselection tool.
Last updated 6/12/2015
166
Animation and Interactivity
Note: The Subselection tool does not work if there are multiple poses in the IK span. Before editing, delete any
additional poses after the first frame of the armature in the Timeline.
• To move the location of a bone joint, head, or tail within a symbol instance, move the transformation point of the
instance. Use the Free Transform tool. The bone moves with the transformation point.
• To move an individual symbol instance without moving any other linked instances, Alt-drag (Windows) or
Command-drag (Macintosh) the instance, or drag with the Free Transform tool. The bones connected to the
instance lengthen or shorten to accommodate the new location of the instance.
Edit an IK shape
You can add, delete, and edit control points of the contours in an IK shape using the Subselection tool.
• To move the position of a bone without changing the IK shape, drag the endpoint of a bone.
• To display the control points of the IK shape boundary, click the stroke of the shape.
• To move a control point, drag the control point.
• To add a new control point, click a part of the stroke without any control points.
• To delete an existing control point, click to select it, and then press the Delete key.
Note: An IK shape cannot be transformed (scaled or skewed).
Bind bones to shape points
By default, the control points of a shape are connected to the bone that is nearest to them. You can use the Bind tool to
edit the connections between individual bones and the shape control points. In this way you can control how the stroke
distorts when each bone moves for better results. This technique is useful when the stroke of a shape does not distort
as you want when the armature moves.
You can bind multiple control points to a bone and multiple bones to a control point.
• To highlight the control points connected to a bone, click the bone with the Bind tool.
The connected points are highlighted in yellow while the selected bone is highlighted in red. Control points
connected to only one bone appear as squares. Control points connected to more than one bone appear as triangles.
• To add control points to a selected bone, Shift-click a control point that is not highlighted.
You can also Shift-drag to select multiple control points to add to the selected bone.
• To remove control points from the bone, Ctrl-click (Windows) or Option-click (Macintosh) a control point that is
highlighted in yellow.
You can also Ctrl-drag (Windows) or Option-drag (Macintosh) to remove multiple control points from the selected
bone.
• To highlight the bones connected to a control point, click the control point with the Bind tool.
The connected bones are highlighted in yellow while the selected control point is highlighted in red.
• To add other bones to the selected control point, Shift-click a bone.
• To remove a bone from a selected control point, Ctrl-click (Windows) or Option-click (Macintosh) a bone that is
highlighted in yellow.
Last updated 6/12/2015
167
Animation and Interactivity
Constrain motion of IK bones
To create more realistic motion of IK armatures, you can control the freedom of motion of specific bones. For example,
you can constrain two bones of an arm so that the elbow cannot bend in the wrong direction.
By default, each IK bone is assigned a fixed length when the bone is created. Bones can rotate around their parent joint
and along the x- and y-axis. However, they cannot move in ways that require the length of their parent bone to change
unless you enable x- or y-axis motion. By default, bone rotation is enabled and x- and y-axis motion is disabled.
You can also limit the speed of motion of a bone to create the effect of weight in a bone.
In armatures with strings of connected bones, you cannot contrain the motion of the last joint in any branch of the
armature. To give the appearance of contraint of the last joint, use bones with movie clips and connect the last bone to
a movie clip that has its alpha property set to zero. Then constrain the next-to-last bone instead of the last one.
Examples:
• For an arm, you could constrain the degrees of rotation of the elbow so that it cannot rotate beyond the normal range
of motion of a forearm.
• To enable a character to move across the Stage, turn on X or Y translation on the root bone. Turn off rotation when
using X and Y translation for more accurate movement.
You set these properties in the Property inspector when one or more bones are selected.
• To enable a selected bone to move along the x- or y- axis and change the length of its parent bone, select Enable in
the Joint: X Translation or Joint: Y Translation section of the Property inspector.
A two-headed arrow appears perpendicular to the bone on the joint to indicate that x-axis motion is enabled. A twoheaded arrow appears parallel to the bone on the joint to indicate that y-axis motion is enabled. Enabling both x and
y translation for a bone simplifyies the task of positioning the bone when rotation is disabled for the bone.
• To limit the amount of motion enabled along the x- or y-axis, select Constrain in the Joint: X Translation or Joint: Y
Translation section of the Property inspector and enter a value for the minimum and maximum distance the bone
can move.
• To disable rotation of the selected bone around the joint, deselect the Enable checkbox in the Joint: Rotation section
of the Property inspector.
This checkbox is selected by default.
• To constrain rotation of a bone, enter minimum and maximum degrees of rotation in the Joint: Rotation section of
the Property inspector.
The degrees of rotation are relative to the parent bone. An arc appears on top of the bone joint indicating the degrees
of freedom of rotation.
• To make a selected bone stationary relative to its parent bone, disable rotation and x- and y-axis translation.
The bone becomes rigid and follows the motion of its parent.
• To limit the speed of motion of a selected bone, enter a value in the Joint Speed field in the Property inspector.
Joint speed gives the bone the effect of weight. The maximum value of 100% is equivalent to unlimited speed.
Add springness to bones
Two bone properties can be used to add springiness to IK bones. The Strength and Damping properties of bones give
real physical movement to IK Bones by integrating dynamic physics into the Bones IK system. These properties allow
easier creation of physics-enhanced animation. The Strength and Damping properties give bone animation life-like
movement that is highly configurable. It is best to set these properties before adding poses to a pose layer.
Last updated 6/12/2015
168
Animation and Interactivity
Strength: The stiffness of the spring. Higher values create a stiffer spring effect.
Damping: The rate of decay of the spring effect. Higher values cause the springiness to diminish more quickly. A value
of 0 causes the springiness to remain at its full strength throughout the frames of the pose layer.
To enable springiness, select one or more bones and set the Strength and Damping values in the Spring section of the
Property inspector. The higher the Strength, the more rigid the spring becomes. Damping determines the rate of decay
of the spring effect, so the higher the value, the faster the animation ends.
To turn off the Strength and Damping properties, select the pose layer in the Timeline and deselect the Enable checkbox
in the Spring section of the Property inspector. This allows you to see on Stage the poses you have defined in the pose
layer without the effect of the Spring properties.
The following factors affect the final look of your bones animation when working with the Spring properties.
Experiment with adjusting each of these to acheive the final look you want.
• The Strength property value.
• The Damping property value.
• The number of frames between poses in the pose layer.
• The total number of frames in the pose layer.
• The number of frames between the final pose and the last frame of the pose later.
Animate an armature
You animate IK armatures differently from other objects in Flash. With armatures, you simply add frames to the pose
layer and reposition the armature on the Stage to create a keyframe. Keyframes in pose layers are called
poses
. Because IK armatures are typically used for animation purposes, each pose layer acts as a tween layer automatically.
However, IK pose layers are different from tween layers because you cannot tween properties other than bone position
in the pose layer. To tween other properties of an IK object such as location, transform, color effects, or filters, enclose
the armature and its associated objects in a movie clip or graphic symbol. You can then animate the properties of the
symbol using the Insert > Motion Tween command and the Motion Editor panel.
You can also animate IK armatures with ActionScript 3.0 at runtime. If you plan to animate an armature with
ActionScript, you cannot animate it in the Timeline. The armature can have only one pose in the pose layer. That pose
must be in the first frame in which the armature appears in the pose layer.
The following additional resources demonstrate how to animate an armature:
• Article: Character animation with the Bone Tool in Flash (Adobe.com)
• How to use the Bone tool (5:12) (YouTube.com)
• How to animate symbols with the Bone tool (3:26) (YouTube.com)
Hide editing controls during animation
Keeping all the on-stage controls always enabled can result in inadvertantly altering the positioning and the properties
of your armature. After creating bones and armature for animation, you can turn off the armature editing controls and
hints by selecting the Hide armature editing controls and hints checkbox in the property inspector.
Last updated 6/12/2015
169
Animation and Interactivity
Animate an armature in the Timeline
IK armatures exist on pose layers in the Timeline. To animate armatures in the Timeline, insert poses by right-clicking
a frame in a pose layer and selecting Insert Pose. Use the Selection tool to change the configuration of the armature.
Flash Professional automatically interpolates the positions of the bones in the frames between poses.
1 In the Timeline, if needed, add frames to the pose layer of the armature to make room for the animation you want
to create.
You add frames by right-clicking (Windows) or Option-clicking (Macintosh) a frame in the pose layer to the right
of any existing frames and choosing Insert Frame. You can add or delete frames later at any time.
2 To add a pose to a frame in the pose layer, do one of the following:
• Place the playhead in the frame where you want to add the pose and then reposition the armature on the Stage.
• Right-click (Windows) or Option-click (Macintosh) the frame in the pose layer and choose Insert Pose.
• Place the playhead in the frame where you want to add the pose and then press the F6 key.
Flash inserts a pose into the pose layer in the current frame. A diamond-shaped pose marker in the frame indicates
the new pose.
3 Add additional poses in separate frames to complete the animation to your satisfaction.
4 To change the length of the animation in the Timeline, hover the mouse cursor over the last frame of the armature
until the Resize cursor appears. Then drag the last frame of the pose layer to the right or left to add or remove frames.
Flash repositions the pose frames in proportion to the change in duration of the layer and reinterpolates the frames
in between. To resize the armature span in the Timeline without affecting the location of the pose frames, Shift-drag
the last frame of the armature span.
When you finish, scrub the playhead in the Timeline to preview the animation. You can see the armature positions
interpolated in between the pose frames.
You can reposition the armature in the pose frames or add new pose frames at any time.
Edit the location of poses in an armature
You can edit the location of poses in the following ways:
• To move a pose to a new location, Ctrl-click (Windows) or Command-click (Macintosh) a pose and then drag the
pose to a new location in the armature.
• To copy a pose to a new location, Ctrl-click (Windows) or Command-click (Macintosh) a pose and then Alt-drag
(Windows) or Option-drag (Macintosh) the pose to a new location in the armature.
• Cut, copy and paste. Ctrl-click (Windows) or Command-click (Macintosh) the pose you want to cut or copy and
choose Cut Pose or Copy Pose from the context menu.
Then Ctrl-Click (Windows) or Command-click (Macintosh) the frame in the armature span where you want to
paste and choose Paste Pose from the context menu.
Apply additional tweened effects to IK object properties
To apply tweened effects to IK object properties other than bone position, enclose the object in a movie clip or graphic
symbol.
1 Select the IK armature and all of its associated objects.
Last updated 6/12/2015
170
Animation and Interactivity
For an IK shape you can simply click the shape. For linked sets of symbol instances, you can click the pose layer in
the Timeline or drag a selection marquee around all of the linked symbols on the Stage.
2 Right-click (Windows) or Ctrl-click (Macintosh) the selection and choose Convert To Symbol from the context
menu.
3 In the Convert To Symbol dialog box, enter a name for the symbol and choose either Movie Clip or Graphic from
the Type menu. Click OK.
Flash creates a symbol with its own timeline containing the pose layer for the armature.
4 To use the new symbol on the main timeline of your FLA file, drag the symbol from the Library to the Stage.
You can now add motion tween effects to the new symbol instance on the Stage.
You can nest symbols containing IK armatures within as many layers of other nested symbols as necessary to create
your desired effect.
Prepare an armature for runtime animation with ActionScript 3.0
You can use ActionScript 3.0 to control IK armatures connected to shapes or movie clip instances. However, you can’t
control armatures connected to graphic or button symbol instances with ActionScript.
Only armatures with a single pose can be controlled with ActionScript. Armatures with more than one pose can only
be controlled in the Timeline.
1 With the Selection tool, select a frame in a pose layer containing an armature.
2 In the Property inspector, choose Runtime from the Type menu.
The hierarchy can now be manipulated with ActionScript 3.0 at runtime.
By default, the armature name in the Property inspector is the same as the pose layer name. Use this name to refer to
the armature in ActionScript. You can change the name in the Property inspector.
Add easing to IK animation
Easing is adjusting the animation speed in the frames around each pose to create more realistic motion.
1 Select either a frame between two pose frames in the pose layer or a pose frame.
• Intervening frame: Ease affects the frames between the pose frames to the left and right of the selected frame.
• Pose frame: Ease affects the frames between the selected pose and the next pose in the layer.
2 In the Property inspector, select a type of ease from the Ease menu.
• Simple eases: Four eases that slow the motion in the frames either immediately after or before the selected frame.
• Start and Stop eases: Slow the motion in the frames immediately after the prior pose frame and the frames
immediately before the next pose frame.
Note: These same ease types are available in the Motion Editor when you use motion tweens. You can view the curve
of each type of ease in the Motion Editor when you select a motion tween in the Timeline.
3 In the Property inspector, enter a value for the Strength of the ease.
The default Strength is 0, which is equivalent to no easing. The maximum value is 100, which applies the most
significant easing effect to the frames preceding the pose frame. The minimum value is -100, which applies the most
significant easing effect to the frames immediately after the preceding pose frame. When you finish, preview the
eased motion on the Stage. Scrub the playhead in the Timeline between the two pose frames where you applied the
ease.
Last updated 6/12/2015
171
Animation and Interactivity
Animation Guide
Overview
The animation guide in Adobe Flash Professional CC helps you enhance the animation you create by defining a path
for the objects you animate. This is helpful when you are working on an animation that follows a path that is not a
straight line. This process requires two layers to carry out an animation:
• A layer containing the object that you are about to animate
• A layer defining the path, which the object is supposed to follow during the animation
Animation guide works only on Classic Tweens.
For more information on Animation Guides, see Create a motion guide layer
Animation Guide based on variable stroke width
You can animate an object based on the variable thickness of the stroke of the guide path.
Apart from the keyframes for the initial and final positions of the object, you do not need any other keyframes to denote
the variation in stroke thickness.
1 To animate an object based on variable stroke width, create a path and animate the object along the path as explained
in the previous section of this document.
2 With the first keyframe of the tween selected in the timeline, select the options Scale and Scale along path check
boxes in the Property Inspector. Now the object is ready to follow the scaling based on the stroke thickness.
❖ Define the thickness of the stroke using one of the following methods:
• Choose the Width Tool (U) from the Toolbox, click anywhere on the path, and drag to vary the thickness of the path.
Last updated 6/12/2015
172
Animation and Interactivity
• Select the path using the Selection Tool (V) from the toolbox and in the Property Inspector, choose a width profile
for the stroke from the Width drop down option.
For more information on variable width stroke, see Variable Width Strokes .
Once you have a variable width stroke defined as a path, if you run the motion tween, you can see that the object not
only follows the path, but also changes its size based on the relation to the variation in the thickness of the stroke.
Here is an example that uses Animation Guide with variable width stroke:
A motion guide path can have multiple segment with each connected segment having a different variable width profile
specified as shown below. With no additional keyframes for the object, each segment's width profile is considered
during the animation.
Last updated 6/12/2015
173
Animation and Interactivity
Animation Guide based on the stroke color
Animation Guide also enables you to tween an object along the path, by changing the color of the object based on the
color of the guide path itself. To bring about this variation, you need at least two segments in the path, that is, three
minimum nodes or points as part of the path. To achieve this, while creating a Classic Motion Tween and drawing a
guide path as described in the previous section of this document, use the pen tool and draw a guide path as shown
below. This path has four nodes/points in three segments.
Apart from the keyframes for the initial and final positions of the object, there is no need to create any more keyframes
to denote the variation in stroke color.
❖ Once you create Classic Motion Tween, select the first keyframe of the tween in the Timeline. In the Property
Inspector, check the Color along the path check box. Your object is now ready to follow the color variation as per
the guide path.
Last updated 6/12/2015
174
Animation and Interactivity
❖ Now, using the Selection Tool (V) from the toolbox, click and select the second segment of the guide path and
choose a different color. Repeat the same for the third segment of the path too.
Run the animation now to see the color influence of the guide path on the object itself in the course of the tween. You
can see that the influence is not just on the color, but also on the alpha/opacity value of the stroke segment in the guide
path.
Here is an example that uses Animation Guide with color variation:
Working with classic tween animation
About classic tween animation
Note: Like most things in Flash, animation does not require any ActionScript. However, you can create animation with
ActionScript if you choose.
Classic tweens are an older way of creating animation in Flash Professional. These tweens are similar to the newer
motion tweens, but are somewhat more complicated to create and less flexible. However, classic tweens do provide
some types of control over animation that motion tweens do not. Most users will choose to work with the newer motion
tweens, but some users will still want to use classic tweens. For more information about the differences, see Differences
between motion tweens and classic tweens.
For information about migrating classic tween animations to motion tweens, see the Motion migration guide for Flash
Professional in the Adobe Flash Developer Center.
Before you begin:
Last updated 6/12/2015
175
Animation and Interactivity
Before working with classic tweens, keep in mind the following points:
• Classic tweens are the older way of creating tweened animation in Flash. The newer, easier way is to use motion
tweens. See Motion tween animation.
• In some situations, such as lip-synching, classic tweens are still the best choice. For a list of these situations, see
When to use classic tweens and this Flash Motion Tweening video tutorial.
• You cannot tween 3D properties with classic tweens.
• For a complete guide to transitioning from the classic tween workflow to the motion tween workflow, see the Motion
migration guide for Flash.
For samples of classic tween animation, see the Flash Professional Samples page at
www.adobe.com/go/learn_fl_samples. The following samples are available:
• Animated Drop Shadow: Download and decompress the Samples ZIP file and navigate to the
Graphics\AnimatedDropShadow folder to access the sample.
• Animation and Gradients: Download and decompress the Samples ZIP file and navigate to the
Graphics\AnimationAndGradients folder to access the sample.
The following tutorial demonstrates when to use classic tweens instead of motion tweens:
• Video: Flash Motion Tweening (10:13, Layers Magazine. When to use motion tweens and classic tweens.)
Create and edit keyframes for classic tween animation
Note: This topic is about creating keyframes for the older classic tweens. For help with property keyframes for the newer
motion tweens, see Create tween animation.
Changes in a classic tween animation are defined in a keyframe. In tweened animation, you define keyframes at
significant points in the animation and Flash Professional creates the contents of frames between. The interpolated
frames of a tweened animation appear as light blue or light green with an arrow drawn between keyframes. Because
Flash Professional documents save the shapes in each keyframe, create keyframes only at those points in the artwork
where something changes.
Keyframes are indicated in the Timeline: a solid circle represents a keyframe with content on it, and an empty circle
before the frame represents an empty keyframe. Subsequent frames added to the same layer have the same content as
the keyframe.
Only keyframes are editable in a classic tween. You can view tweened frames, but you can’t edit them directly. To edit
tweened frames, change one of the defining keyframes or insert a new keyframe between the beginning and ending
keyframes. Drag items from the Library panel onto the Stage to add the items to the current keyframe.
To display and edit more than one frame at a time, see Use onion skinning.
Videos and tutorials
• Video: Understanding the Timeline Icons in a Classic Tween (7:49, Peachpit.com)
• Video: Modifying Classic Tween Properties (3:03, Peachpit.com)
Create keyframes
❖ Do one of the following:
• Select a frame in the Timeline, and select Insert > Timeline > Keyframe.
• Right-click (Windows) or Control-click (Macintosh) a frame in the Timeline and select Insert Keyframe.
Last updated 6/12/2015
176
Animation and Interactivity
Insert frames in the Timeline
• To insert a new frame, select Insert > Timeline > Frame.
• To create a new keyframe, select Insert > Timeline > Keyframe, or right-click (Windows) or Control-click
(Macintosh) the frame where you want to place a keyframe, and select Insert Keyframe.
• To create a new blank keyframe, select Insert > Timeline > Blank Keyframe, or right-click (Windows) or
Control-click (Macintosh) the frame where you want to place the keyframe, and select Insert Blank Keyframe.
Delete or modify a frame or keyframe
• To delete a frame, keyframe, or frame sequence, select it and right-click (Windows) or Control-click (Macintosh)
and select Remove Frames. Surrounding frames remain unchanged.
• To move a keyframe or frame sequence and its contents, select it and drag to the desired location.
• To extend the duration of a keyframe, Alt-drag (Windows) or Option-drag (Macintosh) it to the final frame of the
new sequence.
• To copy and paste a frame or frame sequence, select it and select Edit > Timeline > Copy Frames. Select a frame or
sequence to replace, and select Edit > Timeline > Paste Frames. To paste and replace the exact number of copied
frames on the target timeline, use the Paste and Overwrite Frames option.
• To convert a keyframe to a frame, select the keyframe and select Modify > Timeline > Clear Keyframe, or right-click
(Windows) or Control-click (Macintosh) it and select Clear Keyframe. The cleared keyframe and all frames up to
the subsequent keyframe are replaced with the contents of the frame preceding the cleared keyframe.
• To copy a keyframe or frame sequence by dragging, select it and Alt-drag (Windows) or Option-drag (Macintosh)
to the new location.
• To change the length of a tweened sequence, drag the beginning or ending keyframe left or right.
• To add a library item to the current keyframe, drag the item from the Library panel onto the Stage.
• To reverse an animation sequence, select the appropriate frames in one or more layers and select Modify > Timeline
> Reverse Frames. Keyframes must be at the beginning and end of the sequence.
Add classic tween animation to an instance, a group, or text
Note: This topic is about creating older classic tweens. For help with creating the newer motion tweens, see Create tween
animation.
To tween the changes in properties of instances, groups, and type, you can use a classic tween. Flash Professional can
tween position, size, rotation, and skew of instances, groups, and type. Additionally, Flash Professional can tween the
color of instances and type, creating gradual color shifts or making an instance fade in or out.
Before tweening the color of groups or type, make them into symbols. Before animating individual characters in a block
of text separately, place each character in a separate text block.
If you apply a classic tween and then change the number of frames between the two keyframes, or move the group or
symbol in either keyframe, Flash Professional automatically tweens the frames again.
Videos and tutorials
• Video: Creating a simple classic tween (Length = 4:28, Peachpit.com)
• Video: Modifying classic tween properties (Length = 3:03, Peachpit.com)
• Video: Creating animations using tweens. Note that this video is older and refers to classic tweens as “motion
tweens”. This is because in older versions of Flash, classic tweens were the only way of creating tweened motion.
Last updated 6/12/2015
177
Animation and Interactivity
• Video: Understanding the Timeline Icons in a Classic Tween (Length = 7:49, Peachpit.com)
Create a classic tween animation
1 Click a layer name to make it the active layer, and select an empty keyframe in the layer where you want the
animation to start. This will be the first frame of the classic tween.
2 To add content to the first frame of the classic tween, do one of the following:
• Create a graphic object with the Pen, Oval, Rectangle, Pencil, or Brush tool, and then convert it to a symbol.
• Create an instance, group, or text block on the Stage.
• Drag an instance of a symbol from the Library panel.
Note: To create a tween, you must have only one item on the layer.
3 Create a second keyframe where you want the animation to end, and leave the new keyframe selected.
4 To modify the item in the ending frame, do any of the following:
• Move the item to a new position.
• Modify the item’s size, rotation, or skew.
• Modify the item’s color (instance or text block only). To tween the color of elements other than instances or text
blocks, use shape tweening.
5 To create the classic tween, do one of the following:
• Click any frame in the tween’s frame span and select Insert > Classic Tween.
• Right-click (Windows) or Control-click (Macintosh) any frame in the tween’s frame span and select Create
Classic Tween from the context menu.
If you created a graphic object in step 2, Flash Professional automatically converts the object to a symbol and names
it tween1.
6 If you modified the size of the item in step 4, select Scale in the Tweening section of the Property inspector to tween
the size of the selected item.
7 To produce a more realistic sense of motion, apply easing to the classic tween. To apply easing to a classic tween, use
the Ease field in the Tweening section of the Property inspector to specify an easing value for each classic tween you
create. Use the Custom Ease In/Ease Out dialog box to more precisely control the speed of the classic tween.
Drag the value in the Easing field or enter a value to adjust the rate of change between tweened frames:
• To begin the classic tween slowly and accelerate the tween toward the end of the animation, enter a negative value
between -1 and -100.
• To begin the classic tween rapidly and decelerate the tween toward the end of the animation, enter a positive
value between 1 and 100.
• To produce a more complex change in speed within the tween’s frame span, click the Edit button next to the Ease
field to open the Custom Ease In/Ease Out dialog box.
By default, the rate of change between tweened frames is constant. Easing creates a more natural appearance of
acceleration or deceleration by gradually adjusting the rate of change.
8 To rotate the selected item during the tween, select an option from the Rotate menu in the Property inspector:
• To prevent rotation, select None (the default setting).
• To rotate the object once in the direction requiring the least motion, select Auto.
Last updated 6/12/2015
178
Animation and Interactivity
• To rotate the object as indicated, and then enter a number to specify the number of rotations, select Clockwise
(CW) or Counterclockwise (CCW).
Note: The rotation in step 8 is in addition to any rotation you applied to the ending frame in step 4.
9 If you’re using a motion path, select Orient To Path in the Property inspector to orient the baseline of the tweened
element to the motion path.
10 To synchronize the animation of graphic symbol instances with the main Timeline, select the Sync option in the
Property inspector.
Note: Modify > Timeline > Synchronize Symbols and the Sync option both recalculate the number of frames in a tween
to match the number of frames allotted to it in the Timeline. Use the Sync option if the number of frames in the
animation sequence inside the symbol is not an even multiple of the number of frames the graphic instance occupies in
the document.
11 If you’re using a motion path, select Snap to attach the tweened element to the motion path by its registration point.
Working with Classic tweens saved as XML files
Flash Pro allows you to work with Classic Tweens as XML files. Natively, Flash Pro allows you to apply the following
commands on any Classic Tween:
• Copy Motion as XML
• Export Motion as XML
• Import Motion as XML
Copy Motion as XML
Allows you to copy Motion properties applied to any object on the Stage at a said frame.
1 Create a Classic Tween.
2 Select any keyframe on the Timeline.
3 Go to Commands > Copy Motion as XML.
The Motion properties is copied to the clipboard as XML data, you can then use any text editor to work on the XML file.
Export Motion as XML
Allows you to export Motion properties applied to any object on the stage to an XML file that can be saved.
1 Create a Classic Tween.
2 Go to Commands > Export Motion as XML.
3 Browse to a suitable location where you want to save the file.
4 Provide a name for the XML file, and click Save.
The Classic tween is exported as an XML file at the specified location.
Import Motion as XML
Allows you to import an existing XML file that has Motion properties defined.
1 Select an Object any object on the Stage.
2 Go to Commands > Import Motion as XML.
3 Browse to the location, and select the XML file. Click Ok.
Last updated 6/12/2015
179
Animation and Interactivity
4 On the Paste Motion Special dialog, select the properties that you want to apply on the selected object.
5 Click Ok.
Create a motion guide layer
To control the movement of objects in a classic tween animation, create a motion guide layer.
You cannot drag a motion tween layer or inverse kinematics pose layer onto a guide layer.
❖ Drag a normal layer onto a guide layer. This converts the guide layer to a motion guide layer and links the normal
layer to the new motion guide layer.
Note: To prevent accidentally converting a guide layer, place all guide layers at the bottom of the layer order.
Create classic tween animation along a path
Note: This topic is about working with older classic tweens. For help with using the newer motion tweens with motion
paths, see Edit the motion path of a tween animation.
Motion guide layers let you draw paths along which tweened instances, groups, or text blocks can be animated. You can
link multiple layers to a motion guide layer to have multiple objects follow the same path. A normal layer that is linked
to a motion guide layer becomes a guided layer.
Videos and tutorials
• Video: Using a motion guide with a classic tween (Length = 5:19, Peachpit.com)
• www.adobe.com/go/vid0125. Note that this video is older and refers to classic tweens as “motion tweens”. This is
because in older versions of Flash, classic tweens were the only way of creating tweened motion.
Create a motion path for classic tweened animation
1 Create a classic-tweened animation sequence.
If you select Orient To Path in the Property inspector, the baseline of the tweened element orients to the motion
path. If you select Snap, the registration point of the tweened element snaps to the motion path.
2 Right-click (Windows) or Control-click (Macintosh) the layer name of the layer containing the classic tween and
choose Add Classic Motion Guide.
Flash Professional adds a motion guide layer above the classic tween layer and indents the name of the classic tween
layer to show that it is bound to the motion guide layer.
Note: If you already have a guide layer in the Timeline, you can drag a layer containing the classic tween below the guide
layer to convert the guide layer to a motion guide and bind the classic tween to it.
3 To add a path to the motion guide layer to guide the classic tween, select the motion guide layer and use the Pen,
Pencil, Line, Circle, Rectangle, or Brush tool to draw the desired path.
Last updated 6/12/2015
180
Animation and Interactivity
You can also paste a stroke onto the motion guide layer.
4 Drag the object you are tweening to snap it to the beginning of the line in the first frame, and to the end of the line
in the last frame.
Note: For best snapping results, drag the symbol by its transformation point.
5 To hide the motion guide layer and the path so that only the object’s movement is visible while you work, click in
the Eye column on the motion guide layer.
The group or symbol follows the motion path when you play the animation.
To know more about animation guide based on variable width stroke and variable stroke color, see Animation Guide
Link layers to a motion guide layer
❖ Do one of the following:
• Drag an existing layer below the motion guide layer. The layer is indented under the motion guide layer. All
objects on this layer automatically snap to the motion path.
• Create a new layer under the motion guide layer. Objects you tween on this layer are automatically tweened along
the motion path.
• Select a layer below a motion guide layer. Select Modify > Timeline > Layer Properties, and select Guide.
Unlink layers from a motion guide layer
❖ Select the layer to unlink and do one of the following:
• Drag the layer above the motion guide layer.
• Select Modify > Timeline > Layer Properties, and select Normal as the layer type.
Paste classic tween animation properties
Note: This topic is about pasting properties of older classic tweens. For help with pasting properties of the newer motion
tweens, see Copy and paste motion tween properties.
The Paste Motion command lets you copy a classic tween, and paste only specific properties to apply to another object.
1 Select the frames in the Timeline that contain the classic tween to copy. The frames you select must be on the same
layer, however, they do not have to span a single classic tween. The selection can span a tween, empty frames, or two
or more tweens.
2 Select Edit > Timeline > Copy Motion.
3 Select the symbol instance to receive the copied classic tween.
4 Select Edit > Timeline > Paste Motion Special. Select the specific classic tween properties to paste to the symbol
instance. The classic tween properties are:
X Position How far an object moves in the x direction.
Last updated 6/12/2015
181
Animation and Interactivity
Y Position How far an object moves in the y direction.
Horizontal Scale The ratio between the current size of the object and its natural size in the horizontal direction (X).
Vertical Scale Specifies the ratio between the current size of the object and its natural size in the vertical direction
(Y).
Rotation And Skew The rotation and skew of the object. These properties must be jointly applied to an object. Skew
is a measurement of rotation in degrees, and when you rotate and skew, each property affects the other.
Color All color values such as Tint, Brightness, and Alpha are applied to the object.
Filters All filter values and changes for the selected span. If filters are applied to an object, the filter is pasted with
all values intact, and its state (enabled or disabled) applies to the new object as well.
Blend Mode Applies the blend mode of the object.
Override Target Scale Properties When unchecked, specifies that all properties be pasted relative to the target
object. When checked, this option overrides the scale properties of the target.
Override Target Rotation And Skew Properties When unchecked, specifies that all properties be pasted relative to
the target object. When checked, the pasted properties override the existing rotation and scale properties of the
object.
The necessary frames, tween, and symbol information are inserted to match the original, copied tween.
To copy a symbol’s classic tween to the Actions panel or use it in another project as ActionScript, use the Copy
Motion as ActionScript 3.0 command.
Apply custom ease in/ease out to classic tween animation
Note: This topic is about adding easing to older classic tweens. For help with adding easing to the newer motion tweens, see
Easing tween animations.
The Custom Ease In/Ease Out dialog box displays a graph representing the degree of motion over time. The horizontal
axis represents frames, and the vertical axis represents percentage of change. The first keyframe is represented as 0%,
and the last keyframe is represented as 100%.
The slope of the graph’s curve represents the rate of change of the object. When the curve is horizontal (no slope), the
velocity is zero; when the curve is vertical, an instantaneous rate of change occurs.
Last updated 6/12/2015
182
Animation and Interactivity
Additional controls for the Custom Ease In/Ease Out dialog box
Use One Setting For All Properties check box The default is selected; the displayed curve is used for all properties, and
the Properties pop-up menu is disabled. When the check box is not selected, the Properties pop-up menu is enabled,
and each property has a separate curve defining the velocity of that property.
Property pop-up menu Enabled only when the Use One Setting for All Properties check box is not selected. When
enabled, a separate curve is maintained for each of the five properties appearing in the menu. Selecting a property in
the menu displays the curve for that property. The properties are:
Position Specifies custom ease settings for the position of an animated object on the Stage.
Rotation Specifies custom ease settings for the rotation of an animated object. For example, you can fine-tune how
quickly or slowly an animated character turns around to face the user on the Stage.
Scale Specifies custom ease settings for the scale of an animated object. For example, you can more easily customize
the scale of an object so it appears to be moving away from the viewer, then coming closer, and then moving away again.
Color Specifies custom ease settings for color transitions applied to an animated object.
Filters Specifies custom ease settings for filters applied to an animated object. For example, you can control the ease
setting of a drop shadow that simulates a change in the direction of a light source.
Play and Stop buttons Let you preview an animation on the Stage using all the current velocity curves defined in the
Custom Ease In/Ease Out dialog box.
Reset button Lets you reset the velocity curve to the default, linear state.
Position of the selected control point In the lower-right corner of the dialog box, a numeric value displays the
keyframe and position of the selected control point. If no control point is selected, no value appears.
To add a control point to the line, click the diagonal line once. To achieve a precise degree of control over the motion
of an object, drag the positions of the control points.
Using frame indicators (represented by square handles), click where you want an object to slow down or speed up.
Clicking the square handle of a control point selects that control point, and displays the tangent points on either side
of it. Hollow circles represent tangent points. Drag the control point or its tangent points with the mouse or use the
keyboard’s arrow keys to position them.
Last updated 6/12/2015
183
Animation and Interactivity
Tip: By default, the control points snap to a grid. You can turn off snapping by pressing the X key while dragging the
control point.
Clicking an area of the curve away from any control points adds a new control point to the curve at that point, without
changing the shape of the curve. Clicking away from the curve and control points deselects the currently selected
control point.
Add a custom ease
1 Select a layer in the Timeline that has a classic tween applied to it.
2 Click the Edit button next to the Ease slider in the frame Property inspector.
3 (Optional) To display the curve for a single tweened property, deselect Use One Setting For All Properties, and select
a property in the menu.
4 To add a control point, Control-click (Windows) or Command-click (Macintosh) the diagonal line.
5 To increase the speed of the object, drag the control point up; to slow down the speed of the object, drag it
downwards.
6 To further adjust the ease curve, and fine tune the ease value of the tween, drag the vertex handles.
7 To view the animation on the Stage, click the play button in the lower-left corner.
8 Adjust the controls until you achieve the desired effect.
Note: If you use the Custom Ease In/Ease Out dialog box to apply a custom ease to a frame, the edit box that shows the
ease value shows '--'. If you use the Edit box or the pop-up slider to apply an ease value to a frame, the Custom Ease graph
is set to the equivalent curve, and the Use One Setting For All Properties check box is selected.
Copy and paste an ease curve
• To copy the current ease curve, press Control+C (Windows) or Command+C (Macintosh).
• To paste the copied curve into another ease curve, press Control+V (Windows) or Command+V (Macintosh).
You can copy and paste the ease curve. The copied curve remains available until you exit the Flash Professional
application.
Unsupported easing curves
Certain types of easing curves are not supported. No part of the graph can represent a nonlinear curve (such as a circle).
The Custom Ease dialog box automatically prevents moving a control point or a tangent handle to a position that would
render an invalid curve:
• All points must exist on the graph. Control points cannot be moved beyond the bounds of the graph.
• All segments of the curve must exist within the graph. The shape of the curve is flattened to prevent it from
extending beyond the bounds of the graph.
Videos and tutorials
• Video: Modifying Classic Tween Properties (3:03, Peachpit.com)
More Help topics
About Tween Animation
Create symbols
Last updated 6/12/2015
184
Animation and Interactivity
Break TLF text apart
About tweened animation
Motion tween animation
About tween animation
Before you begin
Note: Like most things in Flash, animation does not require any ActionScript. However, you can create animation with
ActionScript if you choose.
Before creating tweens, it is helpful to understand the following Flash Pro concepts:
• Drawing on the Stage
• Timeline layers and the stacking order of objects within a single layer as well as across layers
• Moving and transforming objects on the Stage and in the Property inspector
• Using the Timeline, including object lifetime and selecting objects at specific points in time. See Frames and
keyframesto learn the basics.
• Symbols and symbol properties. Tweenable symbol types include movie clips, buttons, and graphics. Text is also
tweenable.
• Nested symbols. Symbol instances can be nested inside other symbols.
• Optional: Bezier curve editing using the Select and Subselect tools. These tools can be used for editing tween motion
paths. For more information, see Editing Motion Tweens using Motion Editor.
For more information about these concepts, see the list of links at the bottom of this page.
Understanding motion tweens
A motion tween is an animation that is created by specifying different values for an object property in different frames.
Flash Pro calculates the values for that property in between those two frames. The term tween comes from the words
“in between”.
For example, you can place a symbol left of the Stage in frame 1, and move it to the right of the Stage in frame 20. When
you create a tween, Flash Pro calculates all the positions of the movie clip in between. The result is an animation of the
symbol moving from left to right, from frame 1 to frame 20. In each frame in between, Flash Pro moves the movie clip
one 20th of the distance across the Stage.
A tween span is a group of frames in the Timeline in which an object has one or more properties changed over time. A
tween span appears in the Timeline as a group of frames in a single layer with a blue background. These tween spans
can be selected as a single object and dragged from one location in the Timeline to another, including to another layer.
Only one object on the Stage can be animated in each tween span. This object is called the target object of the tween
span.
Last updated 6/12/2015
185
Animation and Interactivity
A property keyframe is a frame within a tween span where you explicitly define one or more property values for the
tween target object. These properties could include position, alpha (transparency), color tint, and so on. Each property
you define has its own property keyframes. If you set more than one property in a single frame, then the property
keyframes for each of those properties reside in that frame. You can view each property of a tween span and its property
keyframes in the Motion Editor. You can also choose which types of property keyframes to display in the Timeline from
the tween span context menu.
In the preceding example of tweening a movie clip from frame 1 to frame 20, frames 1 and 20 are property keyframes.
You can use the Property inspector, the Motion Editor, and many other tools in Flash to define values for properties
you want to animate. You specify these property values in the frames of your choosing, and Flash Pro adds the required
property keyframes to the tween span. Flash Pro interpolates the values for each of these properties in the frames in
between the property keyframes you have created.
Note: Beginning in Flash Professional CS4, the concepts of a “keyframe” and a “property keyframe” have changed. The term
“keyframe” refers to a frame in the Timeline in which a symbol instance appears on the Stage for the first time. The separate
term “property keyframe” refers to a value defined for a property of an object at a specific time or frame in a motion tween.
If a tweened object changes its location on the Stage during the tween, the tween span has a motion path associated
with it. This motion path shows the path the tweened object takes during its movement around the Stage. You can edit
the motion path on the Stage using the Selection, Subselection, Convert Anchor, Remove Anchor, and Free Transform
tools, and commands in the Modify menu. If you are not tweening position, no motion path appears on the Stage. You
can also apply an existing path as a motion path by pasting the path onto a tween span in the Timeline.
Tweened animation is an effective and efficient way to create movement and changes over time while minimizing file
size. In tweened animation, only the values for the property keyframes you specify are stored in the FLA file and
published SWF file.
Tweenable objects and properties
The types of objects that can be tweened include movie clip, graphic and button symbols, and text fields. The properties
of these objects that can be tweened include the following:
• 2D X and Y position
• 3D Z position (movie clips only)
• 2D rotation (around the z-axis)
• 3D X, Y, and Z rotation (movie clips only)
3D motion requires that the FLA file target ActionScript 3.0 and Flash Player 10 or higher in the publish settings.
Adobe AIR also supports 3D motion.
• Skew X and Y
• Scale X and Y
• Color effects
Color effects include: alpha (transparency), brightness, tint, and advanced color settings. Color effects can be
tweened only on symbols and TLF text. By tweening these properties, you can make objects appear to fade in or fade
from one color to another.
To tween a color effect on classic text, convert the text to a symbol.
• Filter properties (filters cannot be applied to graphic symbols)
Last updated 6/12/2015
186
Animation and Interactivity
Differences between motion tweens and classic tweens
Flash Pro supports two different types of tweens for creating motion. Motion tweens, introduced in Flash CS4
Professional, are powerful and simple to create. Motion tweens allow the greatest control over tweened animation.
Classic tweens, which include all tweens created in earlier versions of Flash Pro, are more complex to create. While
motion tweens offer much more control of a tween, classic tweens provide certain specific capabilities that some users
need.
The differences between motion tweens and classic tweens include the following:
• Classic tweens use keyframes. Keyframes are frames in which a new instance of an object appears. Motion tweens
can only have one object instance associated with them and use property keyframes instead of keyframes.
• A motion tween consists of one target object over the entire tween span. Classic tween allows tweening between two
keyframes, containing instances of the same or different symbols.
• Both motion tweens and classic tweens allow only specific types of objects to be tweened. When you apply a motion
tween to non-allowed object types, Flash offers to convert them to a movie clip when the tween is created. Applying
a classic tween converts them to graphic symbols.
• Motion tweens consider text a tweenable type and do not convert text objects to movie clips. Classic tweens convert
text objects to graphic symbols.
• No frame scripts are allowed on a motion tween span. Classic tweens allow frame scripts.
• Any object scripts on a tween target cannot change over the course of the motion tween span.
• Motion tween spans can be stretched and resized in the Timeline and are treated as a single object. Classic tweens
consist of groups of individually selectable frames in the Timeline.
• To select individual frames in a motion tween span, Ctrl-click (Windows) or Command-click (Macintosh) the
frames.
• With classic tweens, eases can be applied to the groups of frames between the keyframes within the tween. With
motion tweens, eases apply across the entire length of a motion tween span. Easing only specific frames of a motion
tween requires the creation of a custom ease curve.
• You can use classic tweens to animate between two different color effects, such as tint and alpha transparency.
Motion tweens can apply one color effect per tween.
• Only motion tweens can be used to animate 3D objects. You cannot animate a 3D object using a classic tween.
• Only motion tweens can be saved as Motion Presets.
• With motion tweens, you cannot swap symbols or set the frame number of a graphic symbol to display in a property
keyframe. Animations that include these techniques require classic tweens.
• There can be more than one classic or motion tween on the same layer, but there can't be both types of tween on the
same layer.
Additional resources
The following articles and resources are available about the differences between motion tweens and classic tweens:
• Creating a simple animation in Flash (Adobe.com)
• Motion migration guide for Flash Professional (Adobe.com)
• Jen DeHaan provides a useful blog post about the motion model in Flash Pro and the differences between motion
tweens and classic tweens on her Flashthusiast.com site.
Last updated 6/12/2015
187
Animation and Interactivity
Applying motion presets
Motion presets are pre-configured motion tweens that you can apply to an object on the Stage. You simply select the
object and click the Apply button in the Motion Presets panel.
Using motion presets is a quick way to learn the basics of adding animation in Flash Pro. Once you see how presets
work, making your own animations is even easier.
You can create and save your own custom presets. These can be from existing motion presets that you have modified,
or from custom tweens that you have created on your own.
The Motion Presets panel also allows you to import and export presets. You can share presets with people you are
collaborating with or take advantage of presets shared by members of the Flash Pro design community.
Using presets can save significant production time during design and development of your projects, especially if you
use similar kinds of tweens often.
Note: Motion presets can only contain motion tweens. Classic tweens cannot be saved as motion presets.
Preview a motion preset
Each motion preset included with Flash Pro has a preview that you can watch in the Motion Presets panel. The preview
gives you a sense of what the animation looks like when applied to an object in your FLA file. For custom presets that
you create or import, you can add your own preview.
1 Open the Motion Presets panel.
2 Select a motion preset from the list.
The preview plays in the Preview pane at the top of the panel.
3 To stop the preview from playing, click outside the Motion Presets panel.
Apply a motion preset
While a tweenable object (symbol instance or text field) is selected on the Stage, you can click the Apply button to apply
a preset. You can apply only one preset per object. If you apply the second preset to the same object, the second preset
replaces with the first one.
Once a preset is applied to an object on the Stage, the tween created in the Timeline no longer has any relationship to
the Motion Presets panel. Deleting or renaming a preset in the Motion Presets panel has no effect on any tweens
previously created with that preset. If you save a new preset over an existing one in the panel, it has no effect on any
tweens already created with the original preset.
Each motion preset contains a specific number of frames. When you apply a preset, the tween span created in the
Timeline contains this number of frames. If the target object already had a tween of a different length applied to it, the
tween span adjusts to match the length of the motion preset. You can adjust the length of the tween span in the Timeline
after the preset is applied.
Motion presets that contain 3D motion can only be applied to movie clip instances. The tweened 3D properties do not
apply to graphic or button symbols, or to classic text fields. You can apply 2D or 3D motion presets to any 2D or 3D
movie clip.
Note: Motion presets that animate the z-axis position of a 3D movie clip will cause the movie clip to appear to change its
x and y position as well. This is because movement along the z-axis follows the invisible perspective lines which radiate from
the 3D vanishing point (set in the 3D symbol instance Property inspector) to the edges of the Stage.
Last updated 6/12/2015
188
Animation and Interactivity
To apply the motion preset:
1 Select a tweenable object on the Stage. If you apply a motion preset to an object that is not tweenable, a dialog box
appears to allow you to convert the object to a symbol.
2 Select a preset in the Motion Presets panel.
3 Click the Apply button in the panel or choose Apply at Current Location from the panel menu.
The motion is applied so that the motion starts at the current position of the movie clip on the Stage. If the preset
has a motion path associated with it, the motion path appears on the Stage.
To apply the preset so that its motion ends at the current position of the object on the Stage, Shift-click the Apply
button or select End at Current Location from the panel menu.
You can also apply a motion preset to multiple selected frames on separate layers, as long as each selected frame contains
only a single tweenable object.
Save a tween as a custom motion preset
If you create your own tween or change a tween that you applied from the Motion Presets panel, you can save it as a
new motion preset. The new preset appears in the Custom Presets folder in the Motion Presets panel.
To save a custom tween as a preset:
1 Select one of the following items:
• The tween span in the Timeline
• The object on Stage to which the custom tween was applied
• The motion path on the Stage
2 Click the Save Selection As Preset button in Motion Presets panel or choose Save as Motion Preset from the context
menu of the selection.
The new preset appears in the Motion Presets panel. Flash Pro saves the preset as an XML file. The files are stored
in the following directories:
• Windows: <hard disk>\Documents and Settings\<user>\Local Settings\Application Data\Adobe\Flash
CC\<language>\Configuration\Motion Presets\
• Macintosh: <hard disk>/Users/<user>/Library/Application Support/Adobe/Flash
CC/<language>/Configuration/Motion Presets/
Note: You cannot undo saving, deleting, or renaming custom presets.
Import a motion preset
Motion presets are stored as XML files. Import an XML tween file to add it to the Motion Presets panel. Note that the
motion presets imported as XML files can only be added to classical tweens.
1 Choose Import from the Motion Presets panel menu.
2 In the Open dialog box, navigate to the XML file you want to import and click Open.
Flash Pro opens the XML file and adds the motion preset to the panel.
Export a motion preset
You can export motion presets as XML files that can be shared with other Flash Pro users.
1 Select the preset in the Motion Presets panel.
Last updated 6/12/2015
189
Animation and Interactivity
2 Choose Export from the panel menu.
3 In the Save As dialog box, choose a name and location for the XML file and click Save.
Delete a motion preset
You can remove presets from the Motion Presets panel. When you remove a preset, Flash Pro deletes its XML file from
disk. Consider making a backup of any presets you might want to use again later by exporting copies of them first.
1 Select the preset to delete in the Motion Presets panel.
2 Do one of the following:
• Choose Remove from the panel menu.
• Click the Remove item button in the panel.
Create a preview for a custom preset
You can create a preview for any custom motion presets that you create. Do this by storing a SWF file that demonstrates
the tweened animation in the same directory with the motion preset XML file.
1 Create the tweened animation and save it as a custom preset.
2 Create a FLA file that contains only a demonstration of the tween. Save the FLA with the exact same name as the
custom preset.
3 Create a SWF file from the FLA file with the Publish command.
4 Place the SWF file in the same directory as the saved custom motion preset XML file. These files are stored in the
following directories:
• Windows: <hard disk>\Documents and Settings\<user>\Local Settings\Application Data\Adobe\Flash
CC\<language>\Configuration\Motion Presets\
• Macintosh: <hard disk>/Users/<user>/Library/Application Support/Adobe/Flash
CC/<language>/Configuration/Motion Presets/
The preview now displays when the custom tween is selected in the Motion Presets panel.
Last updated 6/12/2015
190
Animation and Interactivity
Create tween animation
Before you begin
Before you begin animating properties, keep in mind the following:
ActionScript is not necessary. Like many things in Flash, animation does not require any ActionScript. However, you
can create animation with ActionScript if you choose.
Basics of timeline and editing properties. Before working with motion tweens, become familiar with the basic use of
the Timeline and editing properties. See Frames and keyframesto learn the basics.
You can edit individual property keyframes on Stage, in the Property inspector, or in the Motion Editor. Note that using
the Motion Editor is optional when creating many types of simple motion tweens.
Motion Editor is deprecated with Flash Professional CC.
Symbol Instances and text fields only. Flash tweens only symbol instances and text fields. All other object types are
wrapped in a symbol when you apply a tween to them. The symbol instance can contain nested symbols, which can
themselves be tweened on their own timelines.
Single object per tween. The minimal building block in a tween layer is a tween span. A tween span in a tween layer
can contain only one symbol instance or text field. The symbol instance is called the target of the tween span. However,
a single symbol can contain many objects.
Last updated 6/12/2015
191
Animation and Interactivity
Changing the target. Adding a second symbol or text field to the tween span replaces the original symbol in the tween.
You can change the target object of a tween by dragging a different symbol from the library onto the tween span in the
Timeline or by using the Modify > Symbol > Swap Symbol command. You can delete the symbol from a tween layer
without removing or breaking the tween. You can then add a different symbol instance to the tween at a later time. You
can also change the type of the target symbol or edit the symbol at any time.
Editing motion paths. When a tween contains motion, a motion path appears on the Stage. The motion path shows
the position of the tweened object in each frame. You can edit the motion path on the Stage by dragging its control
points. You cannot add a motion guide to a tween/inverse kinematics layer.
For information about tweening with Inverse Kinematics, see Animate an armature.
How tweens are added to the Timeline
When you add a tween to an object on a layer, Flash Pro does one of the following:
• It converts the layer to a tween layer.
• It creates a new layer to preserve the original stacking order of the objects on the layer.
Layers are added according to these rules:
• If there are no objects on the layer other than the selection, the layer changes to a tween layer.
• If the selection is at the bottom of the stacking order of the layer (under all other objects), Flash creates a layer above
the original layer. This new layer holds the non-selected items. The original layer becomes a tween layer.
•
If the selection is at the top of the stacking order of the layer (above all other objects), Flash creates a new layer. The
selection is moved to the new layer and that layer becomes a tween layer.
• If the selection is in the middle of the stacking order of the layer (there are objects above and below the selection),
Flash creates two layers. One layer holds the new tween and another one above it holds the non-selected items at the
top of the stacking order. The non-selected items at the bottom of the stacking order remain on the original layer,
below the newly inserted layers.
A tween layer can contain tween spans as well as static frames and ActionScript. However, frames of a tween layer that
contain a tween span cannot contain objects other than the tweened object. To add additional objects in the same
frame, place them on separate layers.
Animate position with a tween
To make an object move or slide across the Stage:
1 Select a symbol instance or a text field to tween on the Stage. The object can reside in any of the following layer types:
Normal, Guide, Mask, or Masked.
If the selection contains other objects, or it contains multiple objects from a layer, Flash offers to convert your
selection to a movie clip symbol.
To invert the selection, right-click the object and select Invert Selection.
2 Do one of the following:
• Choose Insert > Motion Tween.
• Right-click (Windows) or Ctrl-click (Macintosh) the selection or current frame and choose Create Motion
Tween from the context menu.
If the “Convert selection to symbol for tween” dialog box appears, click OK to convert the selection into a movie clip
symbol.
Last updated 6/12/2015
192
Animation and Interactivity
If the tweened object was the only item on the layer, Flash Pro converts the layer containing the object to a tween
layer. If there are other objects on the layer, Flash Pro inserts layers to preserve the stacking order. Flash places the
tweened object on its own layer.
If the original object resided in only the first frame of the Timeline, the length of the tween span is equal to one
second in duration. If the original object was present in more than one contiguous frame, the tween span contains
the number of frames occupied by the original object.
3 Drag either end of the tween span in the Timeline to shorten or extend the span to the desired number of frames.
Any existing property keyframes in the tween move proportionally with the end of the span.
To move the end of the span without moving any existing keyframes, Shift-drag the end of the tween span.
4 To add motion to the tween, place the playhead on a frame within the tween span and then drag the object to a new
position.
A motion path appears on the Stage showing the path from the position in the first frame of the tween span to the
new position. Because you explicitly defined the X and Y properties of the object, property keyframes are added for
X and Y in the frame containing the playhead. Property keyframes appear as small diamonds in the tween span.
By default, the Timeline displays the property keyframes of all property types. You can choose which types of property
keyframes to display by right-clicking (Windows) or Command-clicking (Macintosh) the tween span and choosing
View Keyframes > property type.
5 To specify another position for the object, place the playhead in another frame within the tween span and drag the
object on Stage to another position.
The motion path adjusts to include all the positions you specify.
6 To tween 3D rotation or position, use the 3D Rotation or 3D Translation tool. Be sure to place the playhead in the
frame where you want to add the 3D property keyframe first.
Note: To create multiple tweens at once, place tweenable objects on multiple layers, select them all, and choose Insert >
Motion Tween. You can also apply motion presets to multiple objects in the same way.
Tween other properties with the Property inspector
The Create Motion Tween command lets you animate most properties of a symbol instance or text field, such as
rotation, scale, transparency, or tint (symbols and TLF text only). For example, you can edit the alpha (transparency)
property of a symbol instance to make it fade onto the screen. For a list of the properties you can animate with motion
tweens, see Tweenable objects and properties.
1 Select a symbol instance or text field on the Stage.
If the selection contains other objects, or it contains multiple objects from the layer, Flash offers to convert it to a
movie clip symbol.
2 Choose Insert > Motion Tween.
If the “Convert selection to symbol for tween” dialog box appears, click OK to convert the selection into a movie clip
symbol.
When you apply a tween to an object that exists only in a single keyframe, the playhead moves to the last frame of
the new tween. Otherwise the playhead does not move.
3 Place the playhead in the frame of the tween span where you want to specify a property value.
You can place the playhead in any other frame of the tween span. The tween starts with the property values in the
first frame of the tween span, which is always a property keyframe.
Last updated 6/12/2015
193
Animation and Interactivity
4 With the object selected on the Stage, set a value for a non-position property, such as alpha (transparency), rotation,
or skew. Set the value with the Property inspector or with one of the tools in the Tools panel.
The current frame of the span becomes a property keyframe.
You can display different types of property keyframes in tween spans. Right-click (Windows) or Ctrl-click
(Macintosh) a tween span and choose View Keyframes > property type from the context menu.
5 Scrub the playhead in the Timeline to preview the tween on the Stage.
6 To add additional property keyframes, move the playhead to the desired frame in the span and set a value for the
property in the Property inspector.
Note: You can also tween properties along an entire tween with the Motion Editor. See Editing property curves with the
Motion Editor for more information.
Add an additional tween to an existing tween layer
You can add additional tweens to an existing tween layer. This allows you to use fewer layers when creating Flash
content with animation.
❖ Do one of the following:
• Add a blank keyframe to the layer (Insert > Timeline > Blank Keyframe), add items to the keyframe, and then
tween the items.
• Create a tween on a separate layer and then drag the span to the desired layer.
• Drag a static frame from another layer to the tween layer and then add a tween to an object in the static frame.
• Alt-drag (Windows) or Option-drag (Macintosh) to dulicate an existing span from the same layer or a different
layer.
• Copy and paste a tween span from the same or different layer.
Note: You can copy the target object of a motion tween to the clipboard at any frame in the tween span.
Edit the motion path of a tween animation
You can edit or change the motion path of a motion tween in the following ways:
• Change the position of the object in any frame of the tween span.
• Move the entire motion path to a different location on the Stage.
• Change the shape or size of the path with the Selection, Subselection, or Free Transform tools.
• Change the shape or size of the path with the Transform panel or Property inspector.
• Use the commands in the Modify > Transform menu.
• Apply a custom stroke as a motion path.
• Use the Motion Editor.
You can use the Always Show Motion Paths option to show all motion paths on all layers on the Stage simultaneously.
This display is helpful when designing multiple animations on different motion paths that intersect each other. When
a motion path or tween span is selected, you can choose this option from the Property inspector options menu.
Last updated 6/12/2015
194
Animation and Interactivity
Edit the shape of a motion path with the Selection and Subselection tools
With the Selection and Subselection tools, you can reshape a motion path. With the Selection tool, you can reshape a
segment by dragging. Property keyframes in the tween appear on the path as control points. With the Subselection tool,
you can expose the control points and Bezier handles on the path that correspond to each position property keyframe.
You can use these handles to reshape the path around the property keyframe points.
When you create a non-linear motion path such as a circle, you can have the tweened object rotate as it moves along
the path. To maintain a constant orientation relative to the path, select the Orient to Path option in the Property
inspector.
1 Click the Selection tool in the Tools panel.
2 Click the tween target instance so that the motion path becomes visible on the Stage.
3 With the Selection tool, drag any segment of the motion path to reshape it. Do not click to select the segment first.
4 To expose the Bezier control points of a property keyframe point on the path, click the Subselection tool and then
click the path.
The property keyframe points appear as control points (small diamonds) on the motion path.
5 To move a control point, drag it with the Subselection tool.
6 To adjust the curve of the path around a control point, drag the Bezier handles of the control point with the
Subselection tool.
If the handles are not extended, you can extend them by Alt-dragging (Windows) or Option-dragging (Macintosh)
the control point.
7 To delete an Anchor point click on it with Delete Anchor Point tool. Most anchor points generated with Selection
tool are smooth points. To convert an anchor point click onti with Convert Anchor Point tool. The anchor changes
to an angle point.
8 You can also pull out new bezier handles from a point and position them, just as you would for a regular anchor
point.
Note: You can't add anchor points to the path with Add Anchor point tool.
Adobe recommended community content:
• Video: Custom motion paths in Flash (3:51, SchoolofFlash.com. Motion tweens, editing a motion path, creating a
custom motion path and applying it to a tween.)
• Video: Flash Downunder: Motion Tweening (29:57, Adobe TV. Shows how to edit a motion path. Jump to time code
05:00 in the video.)
• Tutorial: Timeline animation in Flash (Layersmagazine.com. Creating a tween, editing the motion path.)
• Video: Altering the curve of a motion path (Length = 3:45, Peachpit.com)
Last updated 6/12/2015
195
Animation and Interactivity
Change the position of the tweened object
The simplest way to edit a motion path is to move the target instance of the tween on the Stage in any frame of the tween
span. If the current frame does not already contain a property keyframe, Flash Pro adds one to it.
1 Place the playhead in the frame where you want to move the target instance.
2 With the Selection tool, drag the target instance to a new location on the Stage.
The motion path updates to include the new location. All other property keyframes in the motion path remain in their
original locations.
Change the location of a motion path on the Stage
You can drag the entire motion path on the Stage or set its location in the Property inspector.
1 Click the Selection tool in the Tools panel.
2 Select the motion path by doing one of the following:
• Click the tween span in the Timeline and then click the motion path on the Stage.
• Click the tweened object on the Stage and then click the motion path.
• Drag a marquee around the motion path and the target instance to select them both.
• (CS5.5 only) Select multiple motion paths by Shift-clicking the motion path of each tween you want to edit. You
can also drag a marquee around all of the motion paths.
3 Move the motion path by doing one of the following:
• Drag the path to desired location on the Stage.
• Set the X and Y values for the path in the Property inspector. The X and Y values are for the upper-left corner of
the bounding box of the motion path.
• Use the Arrow keys to move the motion path.
Note: To move the tween target instance and the motion path by specifying a location for the motion path, select both and
enter the X and Y locations in the Property inspector. To move a tweened object that has no motion path, select it and enter
X and Y values in the Property inspector.
Edit a motion path with the Free Transform tool
1 Click the Free Transform tool in the Tools panel.
2 With the Free Transform tool, click the motion path. Do not click the tween target instance.
3 Scale, skew, or rotate the path with the Free Transform tool.
Note: You can also perform free transforms on the motion path by selecting it with the Subselection tool and then pressing
the Control (Windows) or Command (Macintosh) key. Pressing the key displays the same controls as the Free Transform
tool. You can then drag to perform transforms while pressing the key.
(CS5.5 only) Scale multiple tweened objects and motion paths
1 Place the playhead in the first frame of the tweens you want to edit.
2 Select the Free Transform tool from the Tools panel.
3 Select multiple tweened object and their motion paths by doing one of the following:
• Shift-click the tweened objects and their motion paths.
• Drag a marquee around the tweened objects and their motion paths.
Last updated 6/12/2015
196
Animation and Interactivity
4 Scale the selection by dragging the corners of the bounding box containing the selected objects and motion paths.
Because the playback head is in the first frame of the tweens, the scaling applies to all tweened frames. No new property
keyframes are created.
Delete a motion path from a tween
1 Select the motion path on the Stage by clicking it with the Selection tool.
2 Press the Delete key.
Copy a motion path as a stroke
1 Click the motion path on the Stage to select it.
2 Choose Edit > Copy.
You can then paste the path into another layer as a stroke or as a motion path for another motion tween.
Apply a custom stroke as a motion path
You can apply a stroke from a separate layer or a separate timeline as the motion path for a tween.
1 Select a stroke on a layer separate from the tween layer and copy it to the clipboard.
The stroke must not be closed. Only uninterrupted strokes can be used.
2 Select a tween span in Timeline.
3 With the tween span still selected, paste the stroke.
Flash Pro applies the stroke as the new motion path for the selected tween span. The target instance of the tween
now moves along the new stroke.
4 To reverse the start and end points of the tween, right-click (Windows) or Ctrl-click (Macintosh) the tween span
and select Motion Path > Reverse Path in the tween span context menu.
Use roving property keyframes
A roving property keyframe is a keyframe that is not linked to a specific frame in the Timeline. Flash adjusts the
position of roving keyframes so that the speed of motion is consistent throughout a tween.
Roving keyframes are available only for the spatial properties X, Y, and Z. They are useful when you have edited a
motion path on the Stage by dragging the tweened object to different locations in different frames. Editing motion
paths this way often creates path segments in which the motion is faster or slower than the other segments. This is
because the number of frames in the path segment is greater or smaller than other segments.
Using roving property keyframes is helpful for making the speed of an animation consistent throughout a tween. When
property keyframes are set to roving, Flash adjusts the position of the property keyframes in the tween span so that the
tweened object moves the same distance in each frame of the tween. You can then use easing to adjust the movement
so that the acceleration at the beginning and end of the tween has a realistic appearance.
When you paste a custom path onto a tween, Flash sets the property keyframes to roving by default.
To enable roving keyframes for an entire tween:
• Right-click (Windows) or Command-click (Macintosh) the tween span in the Timeline and choose Motion Path >
Switch keyframes to roving in the context menu.
Last updated 6/12/2015
197
Animation and Interactivity
To enable roving for an individual property keyframe in a tween:
• Right-click (Windows) or Command-click (Macintosh) the property keyframe in the Motion Editor panel and
choose roving in the context menu. For more information about the Motion Editor, see Editing property curves with
the Motion Editor .
When property keyframes are set to roving, they appear as round dots instead of squares in the Motion Editor.
Note: If you enable roving keyframes for a tween span and then disable them, the keyframes retain their locations in the
span that resulted from enabling roving.
Edit animation tween spans in the Timeline
When creating animation in Flash Pro, it is often appropriate to set up tween spans in the Timeline first. By establishing
the initial arrangement of objects in layers and frames, you can then finish the tweens by changing the tweened property
values in either the Property inspector or the Motion Editor.
To select tween spans and frames in the Timeline, do any of the following. Be sure that Span-based Selection is turned
on in the General Preferences (Edit > Preferences).
• To select an entire tween span, click the span.
• To select multiple tween spans, including non-contiguous spans, Shift-click each span.
• To select a single frame within a tween span, Ctrl+Alt-click (Windows) or Command+Option-click (Macintosh) the
frame inside the span.
• To select multiple contiguous frames within a span, Ctrl+Alt-drag (Windows) or Command+Option-drag
(Macintosh) inside the span.
Last updated 6/12/2015
198
Animation and Interactivity
• To select frames within multiple tween spans on different layers, Ctrl+Alt-drag (Windows) or Command+Optiondrag (Macintosh) across multiple layers.
• To select an individual property keyframe in a tween span, Ctrl+Alt-click (Windows) or Command+Option-click
(Macintosh) the property keyframe. You can then drag it to a new location.
A complete list of keyboard modifiers for working with tween spans in the Timeline is available at Flashthusiast.com.
Move, duplicate, or delete tween spans
• To move a span to a new location in the same layer, drag the span.
note: Locking a layer prevents editing on the Stage but not the Timeline. Moving a span on top of another span
consumes the overlapped frames of the second span.
• To move a tween span to a different layer, drag the span to the layer or copy and paste the span into the new layer.
You can drag a tween span onto an existing normal layer, tween layer, guide layer, mask layer, or masked layer. If the
new layer is a normal empty layer, it becomes a tween layer.
• To duplicate a span, Alt-drag (Windows) or Command-drag (Macintosh) the span to a new location in the Timeline,
or copy and paste the span.
• To delete a span, select the span and choose Remove Frames or Clear Frames from the span context menu.
Edit adjacent tween spans
• To move the breakline between two contiguous tween spans, drag the breakline.
Each tween is recalculated.
• To separate the adjacent start and end frames of two contiguous tween spans, Alt-drag (Windows) or Commanddrag (Macintosh) the start frame of the second span.
This allows you to make room for frames between the two spans.
• To split a tween span into two separate spans, Ctrl-click (Windows) or Command-click (Macintosh) a single frame
in the span and then choose Split Motion from the span context menu.
Both tween spans have same target instance.
note: You cannot split motion if more than one frame is selected. If the tween that was split had easing applied, the
two smaller tweens may not have the same motion as the original.
• To join two contiguous tween spans, select both spans and choose Join Motions from the span context menu.
Edit the length of a tween span
• To change the length of an animation, drag the right or left edge of the tween span.
Dragging the edge of one span into the frames of another span replaces the frames of the second span.
• To extend the presence of a tweened object on Stage beyond either end of its tween, Shift-drag either end frame of
its tween span. Flash Pro adds frames to the end of the span without tweening those frames.
You can also select a frame after the tween span in the same layer and press F6. Flash Pro extends the tween span
and adds a property keyframe for all properties to the selected frame. If you press F5, Flash Pro adds frames but will
not add a property keyframe to the selected frame.
note: To add static frames to the end of a span that is immediately adjacent to another span, first move the adjacent
span to make room for the new frames.
Last updated 6/12/2015
199
Animation and Interactivity
Add or remove frames within a tween span
• To remove frames from within a span, Ctrl-drag (Windows) or Command-drag (Macintosh) to select frames and
choose Remove Frames from the span context menu.
• To cut frames from within a span, Ctrl-drag (Windows) or Command-drag (Macintosh) to select the frames and
then choose Cut Frames from the span context menu.
• To paste frames into an existing tween span, Ctrl-drag (Windows) or Command-drag (Macintosh) to select the
frames to replace and choose Paste Frames from the span context menu.
Simply pasting an entire span onto another span replaces the entire second span.
Replace or remove the target instance of a tween
To replace the target instance of a tween span, do one of the following:
• Select the span and then drag the new symbol from the Library panel onto the Stage.
• Select the new symbol in the Library panel and the target instance of the tween on the Stage and choose Modify >
Symbol > Swap Symbol.
• Select the span and paste a symbol instance or text from the clipboard.
To remove the target instance of a tween span without removing the tween, select the span and press the Delete key.
View and edit property keyframes of a tween span
• To view frames containing property keyframes in a span for different properties, select the span and choose View
Keyframes from the span context menu and then choose the property type from the submenu.
• To remove a property keyframe from a span, Ctrl-click (Windows) or Command-click (Macintosh) the property
keyframe to select it and then right-click (Windows) or Ctrl-click (Macintosh) the property keyframe and choose
Clear Keyframe for the property type you want to delete the keyframe for.
• To add property keyframes for a specific property type to a span, Ctrl-click (Windows) or Command-click
(Macintosh) to select one or more frames in the span. Then right-click (Windows) or Ctrl-click (Macintosh) and
choose Insert Keyframe > property type from the span context menu. Flash Pro adds property keyframes to the
selected frames. You can also set a property of the target instance in a selected frame to add a property keyframe.
• To add a property keyframe for all property types to a span, place the playhead in the frame where you want to add
the keyframe and choose Insert > Timeline > Keyframe, or press F6.
• To reverse the direction of motion of a tween, choose Motion Path > Reverse Path from the span context menu.
• To change a tween span to static frames, select the span and choose Remove Tween from the span context menu.
• To convert a tween span to a frame-by-frame animation, select the span and choose Convert to Frame by Frame
Animation from the span context menu.
• To move a property keyframe to a different frame in the same tween span or a different tween span, Ctrl-click
(Windows) or Command-click (Macintosh) the property keyframe to select it and then drag the property keyframe
to the new location.
• To copy a property keyframe to another location in the tween span, Ctrl-click (Windows) or Command-click
(Macintosh) the property keyframe to select it and then Alt-drag (Windows) or Option-drag (Macintosh) the
property keyframe to the new location.
Last updated 6/12/2015
200
Animation and Interactivity
Add or remove 3D property keyframes in a tween
❖ Do one of the following:
• Add 3D properties using the 3D tools in the Tools panel.
• Right-click (Windows) or Ctrl-click (Macintosh) the tween span in the Timeline and choose 3D tween from the
context menu.
• If the tween span contained no 3D property keyframes, Flash Pro adds them to each existing X and Y position
and rotation property keyframe. If the tween span already contained 3D property keyframes, Flash Pro removes
them.
Move or duplicate a tween span
You can duplicate or move tween spans and parts of tween spans by dragging them in the Timeline panel.
• Drag a tween span to move it to different location in the Timeline.
• Alt-drag a tween span to duplicate it in a new location in the Timeline.
Copy and paste a motion tween
You can copy the tweened properties from one tween span to another. The tweened properties are applied to the new
target object, but the location of the target object is not changed. This allows you to apply a tween from one area of the
Stage to an object in another area without repositioning the new target object.
1 Select the tween span that contains the tweened properties you want to copy.
2 Select Edit > Timeline > Copy Motion.
3 Select the tween span to receive the copied tween.
4 Select Edit > Timeline > Paste Motion.
Flash applies the tweened properties to the target tween span and adjusts the length of the tween span to match the
copied tween span.
To copy a motion tween to the Actions panel or use it in another project as ActionScript®, use the Copy Motion as
ActionScript 3.0 command.
Copy and paste motion tween properties
You can copy the properties from a selected frame to another frame on the same tween span or a different tween span.
The property values are added only to the selected frame when the properties are pasted. The copied property values
of color effects, filters, and 3D properties are only pasted if the tweened object at that frame has the color effect, filter,
or 3D properties already applied. 2D position properties cannot be pasted onto a 3D tween.
These instructions assume that Span-Based Selection is turned on in the preferences (Edit > Preferences).
1 To select a single frame in a tween span, Ctrl+Alt-click (Windows) or Command+Option-click (Macintosh) the
frame.
2 Right-click (Windows) or Command-click (Macintosh) the selected frame and choose Copy Properties from the
context menu.
3 Select a single frame to receive the copied properties by Ctrl+Alt-clicking (Windows) or Command+Option-
clicking (Macintosh) the frame.
The destination frame must be in a tween span.
Last updated 6/12/2015
201
Animation and Interactivity
4 To paste the copied properties into the selected frame, do one of the following:
• To paste all of the copied properties, right-click (Windows) or Command-click (Macintosh) the selected frame
of the target tween span and choose Paste Properties from the context menu.
• To paste only some of the copied properties, right-click (Windows) or Command-click (Macintosh) the selected
frame of the target tween span and choose Paste PropertiesSpecial from the context menu. In the dialog box that
appears, select the properties to paste and click OK.
Flash Pro creates a property keyframe for each of the pasted properties in the selected frame and reinterpolates the
motion tween.
Convert a tween span to frame-by-frame animation
You can convert a classic or motion tween span to frame-by-frame animation. In frame-by-frame animation, each
frame contains separate keyframes (not property keyframes) which each contains separate instances of the animated
symbol. Frame-by-frame animation does not contain interpolated property values. For more information, see Frames
and keyframes.
❖ Right-click (Windows) or Ctrl-click (Macintosh) the tween span you want to convert and choose Convert to Frame
by Frame Animation from the context menu.
(Deprecated with Flash Professional CC) Copy motion as ActionScript 3.0
Copy the properties that define a motion tween in the Timeline as ActionScript 3.0 and apply that motion to another
symbol, either in the Actions panel or in the source files (such as class files) for a Flash Pro document that uses
ActionScript 3.0.
Use the fl.motion classes to customize the Flash Pro-generated ActionScript for your specific project. For more
information, see the fl.motion classes in the ActionScript 3.0 Language and Components Reference.
Copy Motion As ActionScript 3.0 can capture the following properties of a motion tween:
• Position
• Scale
• Skew
• Rotation
• Transformation Point
• Color
• Blend Mode
• Orientation To Path
• Cache As Bitmap Setting
• Easing
• Filters
• 3D rotation and position.
1 Select the tween span in the Timeline or the object on the Stage that contains the motion tween to copy.
Only one tween span or tweened object can be selected to copy as ActionScript 3.0.
Last updated 6/12/2015
202
Animation and Interactivity
2 Do one of the following:
• Select Edit > Timeline > Copy Motion As ActionScript 3.0.
• Right-click (Windows) or Control-click (Macintosh) the tween span or the tweened instance on the Stage and
choose Copy Motion As ActionScript 3.0.
Flash Pro copies to your system’s clipboard the ActionScript 3.0 code that describes the selected motion tween. The
code describes the tween as a frame-by-frame animation.
To use the copied code, paste it into the Actions panel of a Flash Pro document that contains a symbol instance that
you want to receive the copied tween. Uncomment the line that calls the addTarget() function and replace the
<instance name goes here> text in that line with the name of the symbol instance you want to animate.
To name the symbol instance you want to animate with the pasted ActionScript, select the instance on the Stage and
enter the name in the Property inspector.
You can also name a motion tween instance by selecting the tween span in the Timeline and entering a name for the
motion tween in the Property inspector. You can then reference the tween span in ActionScript 3.0 code.
For more information about animating with ActionScript 3.0, see the fl.motion classes in the ActionScript 3.0
Language and Components Reference.
Working with Motion tweens saved as XML files
Flash Pro allows you to work with Motion Tweens as XML files. Natively, Flash Pro allows you to apply the following
commands on any Motion Tween:
• Copy Motion as XML
• Export Motion as XML
• Import Motion as XML
Copy Motion as XMLAllows you to copy Motion properties applied to any object on the Stage at a said frame.
1 Create a Motion Tween.
2 Select any keyframe on the Timeline.
3 Go to Commands > Copy Motion as XML.
The Motion properties is copied to the clipboard as XML data, you can then use any text editor to work on the XML
file.Export Motion as XMLAllows you to export Motion properties applied to any object on the stage to an XML file
that can be saved.
1 Create a Motion Tween.
2 Go to Commands > Export Motion as XML.
3 Browse to a suitable location where you want to save the file.
4 Provide a name for the XML file, and click Save.
The Motion tween is exported as an XML file at the specified location.Import Motion as XMLAllows you to import
an existing XML file that has Motion properties defined.
1 Select an Object any object on the Stage.
2 Go to Commands > Import Motion as XML.
3 Browse to the location, and select the XML file. Click Ok.
4 On the Paste Motion Special dialog, select the properties that you want to apply on the selected object.
Last updated 6/12/2015
203
Animation and Interactivity
5 Click Ok.
See also
• Working with classic tween animation
• Video: Create animations with the Motion Editor
• Editing Motion Tweens using Motion Editor
• Animation basics
• Frame-by-frame animation
• How to create a character animation in Flash Professional
Editing Motion Tweens using Motion Editor
The Motion Editor in Flash Professional CC helps you create complex Motion Tweens with minimal effort. The Motion
Editor presents a compact view of all Properties applied to a selected tween span as two-dimensional graphs. You can
choose to modify each of these graphs, and hence their corresponding tweened properties individually. With precise
control and high granularity, you can greatly enrich your animations to emulate real-world behavior using the Motion
Editor.
About Motion Editor
The Motion Editor is desgined to make it easy for you to create complex tweens. Motion Editor lets you control and
manipulate properties of a tween. After creating a Motion tween, you can take advantage of the Motion Editor to
precisely refine your tween. The Motion Editor facilitates focused editing of the tween by allowing you to select and
modify one property at a time.
Why use the Motion Editor?
The Motion Editor is designed to make it easy for you to create complex tweens. Hence, the Motion Editor offers
granular control over tween and its properties. The following can only be achieved using the Motion Editor:
• Easy access and modification of all Properties applied to a tween within a single panel.
• Add different ease presets or custom ease: The Motion Editor lets you add different presets, add multiple presets,
or create a Custom ease. Adding Ease to a tweened property is an easy way to emulate real world behavior of objects.
• Resultant curve: You can apply eases to individual properties, and see the effects of eases on individual property
graphs using the Resultant curve. A resultant curve is a representation of the actual tween.
• Anchor Points and Control Points: You can isolate and make edits to key sections of a tween using Anchor Points
and Control Points.
• Refined Animations: The Motion Editor is the only way to make certain kinds of animations, such as creating a
curved path tween on an individual property by adjusting its Property curve.
Last updated 6/12/2015
204
Animation and Interactivity
Opening the Motion Editor panel
In this article, it is assumed that you have already created a Motion Tween, and are using the Motion Editor to refine
your tween. For information on creating a Motion Tween, see Motion tween animation.
To open the Motion Editor, do the following:
❖ On the Timeline, select the motion tween span you want to refine, and double-click the tween span. You could also
right-click on the tween span and select Refine Tween to bring up the Motion Editor.
Property Curves
The Motion Editor represents Properties of a tween using two-dimensional graphs called Property Curves. These
graphs are composited within a grid on the Motion Editor. Each property has its own Property Curve plotted against
time on the horizontal axis (from left to right), and the change to the value of a property on vertical axis.
You can manipulate Motion Tweens by editing Property Curves within Motion Editor. To its end, the Motion Editor
facilitates smooth editing of Property Curves, there by allowing you to gain precise control over the tween. You can
manipulate a Property Curve by adding property Keyframes or Anchor Points. This allows you to manipulate key parts
of the Property Curve, where you want the tween to display transitions for a said Property.
Take note that the Motion Editor allows you to edit only such properties that can be altered during a tween span. For
example, the Quality property of the Gradient Bevel filter can only be assigned one value during a tween span, and
hence, cannot be edited using the Motion Editor.
Last updated 6/12/2015
205
Animation and Interactivity
Anchor Points
Anchor Points provide greater control over Property Curves, by allowing you to explicity modify key parts of a curve.
You can precisely control the shape of most curves in the Motion Editor by adding property keyframes or anchor points.
The Anchor Points appear as squares on the grid. Using the Motion Editor you can control the behavior of the tween
by adding Anchor Points to a Property Curve or modifying their positions. On adding an Anchor Point, a corner is
created, where in the Curve passes through angles. However, you can smoothen any segment of a Property Curve using
Bezier controls for Control Points.
Control Points
Control Points allow you to smoothen or modify a Property Curve on either sides of an Anchor Point. Control Points
can be modified using standard Bezier Controls.
Editing Property Curves
To edit the Properties of a tween, do the following:
1 In Flash Professional CC, with a tween span selected, Right-click > select Refine Tween to bring up the Motion
Editor (or simply, double-click the selected tween span).
2 Scroll down and select the Property you want to edit. To invert selection, right-click and select Invert Selection.
Last updated 6/12/2015
206
Animation and Interactivity
3 With the Property Curve for the selected Property in view, you can choose to do the following:
1 Add Anchor Point by clicking the
button and clicking a desired frame on the Property Curve to add an
Anchor Point. Or double-click the curve to add an anchor point.
2 Select and move an existing Anchor Point (in any direction) to a desired frame on the grid. The vertical limit of
the movement is restricted to the value range of the Property.
3 Remove an Anchor Point by selecting and pressing Ctrl + Click (Cmd + Click on MAC).
Editing Property Curves using Control Points
To edit Property Curves using Control Points, do the following:
1 In Flash Professional CC, with a tween span selected, Right-click > select Refine Tween to bring up the Motion
Editor (or double-click the selected tween span).
2 Scroll down and select the Property you want to edit. To invert selection, right-click and select Invert Selection.
3 With the Property Curve for the selected Property in view, you can choose to do the following:
1 Add Anchor Point by clicking the
button and clicking a desired frame within the grid to add an Anchor
Point. Or double-click the curve to add an anchor point. OR
2 Select an existing Anchor Point on the grid.
3 With the Anchor Point selected, Alt+Drag vertically to enable Control Points. You can modify the shape of the curve
to smoothen corner segments using bezier controls.
Copying Property Curves
You can also copy Property Curves across Properties within the Motion Editor.
To copy a Property Curve, do the following:
1 In Flash Professional CC, with a tween span selected, Right-click > select Refine Tween to bring up the Motion
Editor (or double-click the selected tween span).
2 Select the Property whose curve you want to copy, and right-click > Copy OR press Ctrl + C (Cmd + C on MAC).
3 To paste the curve with absolute values, select the Property you want to paste the copied property curve on, and
right-click > Paste or press Ctrl + V (Cmd + V on MAC).
4 To paste the curve within the target curve’s range, select the Property you want to paste the copied property curve
on, and right click > Paste to fit current range.
Reversing a Property Curve
To reverse a Property Curve, do the following:
1 In the Motion Editor, select a Property.
2 Right-click > Reverse to reverse the Property Curve.
Applying preset and custom Eases
Easing allows you to control the speed of a tween to produce realistic motion with pleasing effects. Applying Eases on
motion tweens allows you to manipulate the beginning and the end parts of an animation to cause a more natural
movement of the object. For example, one of the many common uses of easing is to add realistic acceleration and
deceleration at the ends of the motion path of an object. In a nut shell, Flash Pro CC makes alters to the rate of change
of the value of Property depending on the Ease applied to it.
Last updated 6/12/2015
207
Animation and Interactivity
An ease can be simple or complex. Flash includes a wide range of preset eases that you can apply for simple or complex
effects. You can also assign Strength to an Ease to enhance the visual effect of a tween. In the Motion Editor, you can
also create your own custom ease curves.
Since ease curves in the Motion Editor can be complex, you can use them to create complex motion on the Stage
without creating complex motion paths on the Stage. You can also use ease curves to create complex tweens of any other
properties in addition to the spatial properties such as Location X and Y.
Custom Eases
Custom easing lets you create your own ease using the Custom Ease curve in the Motion Editor. You can then apply the
custom ease to any property of a selected tween.
The Custom ease graph represents the degree of motion over time. Frames are represented by the horizontal axis, and
the tween's percentage of change is represented by the vertical axis. The first value in the animation is at 0%, and the
last keyframe can be set from 0 through 100%. The rate of change of the tweened instance is shown by the slope of the
graph's curve. If you create a horizontal line (no slope) on the graph, the velocity is zero; if you create a vertical line on
the graph, there is an instantaneous rate of change.
Applying Ease curve to a Property Curve
To add Ease to a tweened Property, do the following:
1 In the Motion Editor, select the Property you want to apply Ease for, and click the Add Ease button to display the
Ease panel.
2 On the Ease panel, you can choose to:
1 Apply a Preset Ease by selecting a preset from the left pane. Specify Ease strength by entering a value in the Easing
field.
2 Create a custom ease by selecting Custom Ease on the left pane and modifying the Ease curve. For more
information, see Creating and Applying Custom Ease curves .
3 Click anywhere outside of the Ease panel to close it. Notice that the Add Ease button reads the name of the Ease you
applied to the Property.
Last updated 6/12/2015
208
Animation and Interactivity
Creating and applying custom Ease curves
To create and apply Custom Ease to a tweened Property, do the following:
1 In the Motion Editor, select the Property you want to apply Custom Ease for, and click the Add Ease button to display
the Ease panel.
2 On the Ease panel, you can modify the default Custom Ease curve by:
1 Pressing Alt + Click to add Anchor Points on the curve. Further, you can move these points to any desired point
on the grid.
2 Enabling Control Points (alt+click on an Anchor Point) on an Anchor point to smoothen curve segments on
either sides of an Anchor Point.
3 Click outside the Ease panel to close it. Notice that the Add Ease button reads Custom, indicating that you applied
a Custom Ease to the Property.
Copying Ease Curves
To copy an Ease Curve, do the following:
1 On the Ease panel, select an Ease curve you want to copy, and press Ctrl + C (Cmd + C on MAC).
2 Select the Property you want to paste the copied ease curve on, and press Ctrl + V (Cmd + V on MAC).
Applying Ease to multiple properties
You can now apply preset or custom Ease to property groups. The Motion Editor organizes properties hierarchically in
to property groups and subproperties. You can choose to apply Ease at any level, that is, to individual properties or
property groups, within this hierarchy.
Note that, after you apply Ease to a Property group, you can continue to edit the sub-properties individually. This also
means, that you can apply a different Ease (from that of the group) to a subproperty.
To apply Ease to multiple properties, do the following:
1 In the Motion Editor, select the Property Group, and click the Add Ease button to display the Ease panel.
2 On the Ease panel, select a Preset Ease or create a Custom Ease. Click anywhere outside the Ease panel to apply the
selected Ease on the Property Group.
Resultant Curve
When you apply an ease curve to a property curve, a visual overlay called the Resultant Curve appears on the grid. The
resultant curve is an accurate representation of the effect of Ease applied to a Property curve. It is indicative of the final
animation of the tweened object. The resultant curve makes it easier for you to understand the effect that you see on
the Stage when testing the animation.
Last updated 6/12/2015
209
Animation and Interactivity
Controlling the Motion Editor display
In the Motion Editor, you can control which property curves appear for editing, and the size of the display of each
property curve. Property curves that are displayed at a large size are easier to edit.
• The new Motion Editor displays only those Properties that are applied to a tween.
• You can use the fit to view toggle (
) to fit Motion Editor to the width of the timeline.
• You can adjust the size of the Motion Editor and choose to display less (
) or more frames (
) in using the
Timeline Zoom controls. You can also use the slider to set an appropriate view of the Motion Editor.
• The Motion Editor is also equipped with vertical zoom toggle. You can use the Vertical Zoom to display a suitable
range of property values within the Motion Editor. Zooming in also allows you to make focused and finer edits to a
Property Curve.
• The Properties appear expanded in the left pane of the Motion Editor, by default. However, you collapse the drilldown list by clikcing a property name.
Keyboard shortcuts
Double-click - on a property curve to add Anchor Point.Alt+Drag - an anchor point to enable Control
Points.Alt+Drag - to manipulate a selected control point (single-sided editing).Alt-click - an anchor point to disable
control points (corner point).Shift+drag - to move an anchor point in linear direction.Command/Control + Click to delete an anchor point.Up/down arrow keys - to move a selected anchor point vertically.Command/Control + C/V
- to copy/paste a selected curve.Command/Control + R - to reverse a selected curve.Command/Control + Scroll - to
zoom-in/out.
Shape tweening
Last updated 6/12/2015
210
Animation and Interactivity
About shape tweens
In shape tweening, you draw a vector shape at one specific frame in the Timeline, and change that shape or draw
another shape at another specific frame. Flash Professional then interpolates the intermediate shapes for the frames in
between, creating the animation of one shape morphing into another.
Flash Pro allows you to add shape tweens to uniform solid strokes as well as non-uniform fancy strokes. You can also
add shape tweens to strokes enhanced using the Variable Width Tool. Experiment with the shapes you want to use to
determine the results. You can use shape hints to tell Flash Professional which points on the beginning shape should
correspond to specific points on the end shape.
You can also tween the position and color of shapes within a shape tween.
To apply shape tweening to groups, instances, or bitmap images, break these elements apart. See Break apart a symbol
instance.
To apply shape tweening to text, break the text apart twice to convert the text to objects. See Break apart a symbol
instance.
Create a shape tween
The following steps show how to create a shape tween from frame 1 to frame 30 of the Timeline. However, you can
create tweens in any part of the Timeline that you choose.
1 In frame 1, draw a square with the Rectangle tool.
2 Select frame 30 of the same layer and add a blank keyframe by choosing Insert > Timeline > Blank Keyframe or
pressing F7.
3 On the Stage, draw a circle with the Oval tool in frame 30.
You should now have a keyframe in frame 1 with a square and a keyframe in frame 30 with a circle.
4 In the Timeline, select one of the frames in between the two keyframes in the layer containing the two shapes.
5 Choose Insert > Shape Tween.
Flash interpolates the shapes in all the frames between the two keyframes.
6 To preview the tween, scrub the playhead across the frames in the Timeline, or press the Enter key.
7 To tween motion in addition to shape, move the shape in frame 30 to a location on the Stage that is different from
the location of the shape in frame 1.
Preview the animation by pressing the Enter key.
8 To tween the color of the shape, make the shape in frame 1 a different color from the shape in frame 30.
9 To add easing to the tween, select one of the frames between the two keyframes and enter a value in the Ease field
in the Property inspector.
Enter a negative value to ease the beginning of the tween. Enter a positive value to ease the end of the tween.
Control shape changes with shape hints
To control more complex or improbable shape changes, you can use shape hints. Shape hints identify points that should
correspond in starting and ending shapes. For example, if you are tweening a drawing of a face as it changes expression,
you can use a shape hint to mark each eye. Then, instead of the face becoming an amorphous tangle while the shape
change takes place, each eye remains recognizable and changes separately during the shift.
Last updated 6/12/2015
211
Animation and Interactivity
Shape hints contain letters (a through z) for identifying which points correspond in the starting and ending shapes. You
can use up to 26 shape hints.
Shape hints are yellow in a starting keyframe, green in an ending keyframe, and red when not on a curve.
For best results when tweening shapes, follow these guidelines:
• In complex shape tweening, create intermediate shapes and tween them instead of just defining a starting and
ending shape.
• Make sure that shape hints are logical. For example, if you’re using three shape hints for a triangle, they must be in
the same order on the original triangle and on the triangle to be tweened. The order cannot be abc in the first
keyframe and acb in the second.
• Shape hints work best if you place them in counterclockwise order beginning at the top-left corner of the shape.
Use shape hints
1 Select the first keyframe in a shape-tweened sequence.
2 Select Modify > Shape > Add Shape Hint. The beginning shape hint appears as a red circle with the letter a
somewhere on the shape.
3 Move the shape hint to a point to mark.
4 Select the last keyframe in the tweening sequence. The ending shape hint appears somewhere on the shape as a green
circle with the letter a.
5 Move the shape hint to the point in the ending shape that should correspond to the first point you marked.
6 To view how the shape hints change the shape tweening, play the animation again. To fine-tune the tweening, move
the shape hints.
7 Repeat this process to add additional shape hints. New hints appear with the letters that follow (b, c, and so on).
View all shape hints
❖ Select View > Show Shape Hints. The layer and keyframe that contain shape hints must be active for Show Shape
Hints to be available.
Remove a shape hint
❖ Drag it off the Stage.
Remove all shape hints
❖ Select Modify > Shape > Remove All Hints.
Last updated 6/12/2015
212
Animation and Interactivity
Shape tweening strokes with Variable Width
Flash Pro CC 2014 allows you to add shape-tween to strokes with Variable Width. Earlier, Flash Pro only supported
creating shape tweens for solid uniform strokes and shapes. This limited designers from creating shape tweens for nonuniform strokes, such as strokes enhanced using the Variable Width Tool. Tweening strokes with variable width greatly
expands the design possibilities within Flash Pro CC.
Adding Shape tweens to fancy strokes is not different from tweening a shape or a solid uniform stroke. The workflow
necessitates that you define the start and final shape of the tween, and Flash Pro creates the transitionary frames of the
tween.
About Variable Width Tool
Vairable Width tool allows you to enhance uniform solid strokes to create beautiful and fancy strokes. For information
on how to enhance strokes using the Variable Width Tool, see Enhancing strokes and shapes using the Variable Width
tool .
Adding Shape tween to Variable Width strokes
1 In Flash Professional CC, draw a line using the Line Tool.
2 Use the Variable Width tool to add width at the middle of the stroke (see below figure). For information on using
Variable Width tool, see Enhancing strokes using Variable Width Tool .
3 Select another frame on the timeline, for example frame 30, and create the final shape of the stroke for your tween.
Last updated 6/12/2015
213
Animation and Interactivity
4 Right-click on any frame between 1 to 30, and select Create Shape Tween.
Adding shape tweens to variable width profiles
Flash Pro CC also allows you to add shape tweens to fancy strokes saved as Variable Width Profiles. You can apply width
profiles to the start and final shapes of a tween, and allow Flash to create a smooth Shape tween.
Width Profiles are nothing but fancy strokes created and saved using Variable Width Tool for easy reuse. For more
information about Width Profiles, see Saving Width Profiles .
To add shape tweens to variable width profiles, do the following:
1 In Flash Professional CC, draw a line on Stage using the Line Tool.
2 On the Properties Inspector, select and apply a Width Profile from the Width drop-down.
Last updated 6/12/2015
214
Animation and Interactivity
3 Select another frame on the timeline, for example frame 30, and select a desired Width Profile from the Width drop-
down on Properties Inspector.
4 Right-click on any frame between 1 to 30, and select Create Shape Tween to add shape tween to the selected Width
Profiles.
Frames and keyframes
Like films, Adobe Flash Professional documents divide lengths of time into frames. In the Timeline, you work with
these frames to organize and control the content of your document. You place frames in the Timeline in the order you
want the objects in the frames to appear in your finished content.
A keyframe is a frame where a new symbol instance appears in the Timeline. A keyframe can also be a frame that
includes ActionScript® code to control some aspect of your document. You can also add a blank keyframe to the
Timeline as a placeholder for symbols you plan to add later or to explicitly leave the frame blank.
A property keyframe is a frame in which you define a change to an object’s properties for an animation. Flash
Professional can tween, or automatically fill in, the property values between the property keyframes in order to produce
fluid animations. Because property keyframes let you produce animation without drawing each individual frame, they
make creating animation easier. A series of frames containing tweened animation is called a motion tween.
A tweened frame is any frame that is part of a motion tween.
A static frame is any frame that is not part of a motion tween.
You arrange keyframes and property keyframes in the Timeline to control the sequence of events in your document and
its animation.
Videos and tutorials
• Video: Editing frames on the Timeline (Length = 9:27, Peachpit.com)
Last updated 6/12/2015
215
Animation and Interactivity
Insert frames in the Timeline
• To insert a new frame, select Insert > Timeline > Frame (F5).
• To create a new keyframe, select Insert > Timeline > Keyframe (F6), or right-click (Windows) or Control-click
(Macintosh) the frame where you want to place a keyframe, and select Insert Keyframe from the context menu.
• To create a new blank keyframe, select Insert > Timeline > Blank Keyframe, or right-click (Windows) or
Control-click (Macintosh) the frame where you want to place the keyframe, and select Insert Blank Keyframe from
the context menu.
Select frames in the Timeline
Flash Professional offers two different methods for selecting frames in the Timeline. In frame-based selection (the
default), you select individual frames in the Timeline. In span-based selection, the entire frame sequence, from one
keyframe to the next, is selected when you click any frame in the sequence. You can specify span-based selection in
Flash Professional Preferences.
• To select one frame, click the frame. If you have Span Based Selection enabled, Control-click (Windows) or
Command-click (Macintosh) the frame.
• To select multiple contiguous frames, drag the cursor over the frames, or Shift-click additional frames.
• To select multiple non-contiguous frames, Control-click (Windows) or Command-click (Macintosh) additional
frames.
• To select all frames in the Timeline, select Edit > Timeline > Select All Frames.
• To select an entire span of static frames, double-click a frame between two keyframes. If you have Span Based
Selection enabled, click any frame in the sequence.
• To select a whole span of frames (motion tween or inverse kinematics) click on it once if you have Span-based
Selection enabled in the Preferences. If Span-based Selection is disabled, double-click on the span. To select multiple
spans, click on each of them while holding the Shift key.
Label frames in the Timeline
You can label frames in the Timeline as a way of helping organize its contents. You can also label a frame in order to be
able to refer to that frame in ActionScript by it’s label. That way, if you rearrange the Timeline and move the label to a
different frame number, the ActionScript will still refer to the frame label and will not have to be updated.
Frame labels can only be applied to keyframes. A best practice is to create a separate layer in the Timeline to contain
your frame labels.
To add a frame label:
1 Select the frame you wish to label in the Timeline.
2 With the frame selected, enter the label name in the Label section of the Property inspector. Press Enter or Return.
Videos and tutorials
• Video: Using frame labels (Length = 8:29, Peachpit.com)
Enable span-based frame selection
Span-based frame selection allows you to select a range of frames between 2 keyframes with a single click.
1 Select Edit > Preferences.
Last updated 6/12/2015
216
Animation and Interactivity
2 Select the General category.
3 In the Timeline section, select Span Based Selection.
4 Click OK.
(Flash Professional CC only) Distribute to KeyFrames
Distribute to KeyFrames option allows you to distribute multiple objects (Symbols and Bitmaps) on the Stage to
individual KeyFrames each.
1 Select multiple objects of any layer on the stage.
2 Right-click anywhere on stage, and select Distribute to KeyFrames.
Copy or paste a frame or frame sequence
❖ Do one of the following:
• Select the frame or sequence and select Edit > Timeline > Copy Frames. Select the frame or sequence that you
want to replace, and select Edit > Timeline > Paste Frames.
• Alt-drag (Windows) or Option-drag (Macintosh) a keyframe to the location where you want to copy it.
Delete a frame or frame sequence
❖ Select the frame or sequence and select Edit > Timeline > Remove Frame, or right-click (Windows) or Control-click
(Macintosh) the frame or sequence and select Remove Frame from the context menu.
Surrounding frames remain unchanged.
Move a keyframe or frame sequence
❖ Select a keyframe or frame sequence and then drag the keyframe or sequence to the desired location.
Change the length of a static frame sequence
❖ Control-drag (Windows) or Command-drag (Macintosh) the beginning or ending frame of the span to the left or
right.
To change the length of a frame-by-frame animation sequence, see Create frame-by-frame animations.
Convert a keyframe to a frame
❖ Select the keyframe and select Edit > Timeline > Clear Keyframe, or right-click (Windows) or Control-click
(Macintosh) the keyframe and select Clear Keyframe from the context menu.
The Stage contents of the cleared keyframe and all frames up to the subsequent keyframe are replaced with the Stage
contents of the frame preceding the cleared keyframe.
View a preview of frame content in the Timeline
In each keyframe of the Timeline, you can view a thumbnail preview of the items in the keyframe.
❖ Choose Preview from the Timeline panel Options menu at the upper-right corner of the Timeline panel.
Last updated 6/12/2015
217
Animation and Interactivity
More Help topics
The Timeline
Animation basics
Motion tweens
Frame-by-frame animation
Timelines and Actionscript
Using sounds in Flash
Frame-by-frame animation
Create frame-by-frame animations
Frame-by-frame animation changes the contents of the Stage in every frame and is best suited to complex animation
in which an image changes in every frame instead of simply moving across the Stage. Frame-by-frame animation
increases file size more rapidly than tweened animation. In frame-by-frame animation, Flash Professional stores the
values for each complete frame.
To create a frame-by-frame animation, define each frame as a keyframe and create a different image for each frame.
Each new keyframe initially contains the same contents as the keyframe preceding it, so you can modify the frames in
the animation incrementally.
1 Click a layer name to make it the active layer, and select a frame in the layer where the animation is to start.
2 If the frame isn’t already a keyframe, select Insert > Timeline > Keyframe.
3 Create the artwork for the first frame of the sequence. Use the drawing tools, paste graphics from the Clipboard, or
import a file.
4 To add a new keyframe whose contents are the same as those of the first keyframe, click the next frame to the right
in the same row and select Insert > Timeline > Keyframe, or right-click (Windows) or Control-click (Macintosh)
and select Insert Keyframe.
5 To develop the next increment of the animation, alter the contents of this frame on the Stage.
6 To complete your frame-by-frame animation sequence, repeat steps 4 and 5 until you’ve built the desired motion.
Last updated 6/12/2015
218
Animation and Interactivity
7 To test the animation sequence, select Control > Play or click the Play button on the Controller (Window > Toolbars
> Controller).
Creating frame-by-frame animations by converting classic or motion tweens
You can convert a classic tween or a motion tween span to frame-by-frame animation. In frame-by-frame animation,
each frame contains separate keyframes (not property keyframes) which each contains separate instances of the
animated symbol. Frame-by-frame animation does not contain interpolated property values.
❖ Right-click (Windows) or Ctrl-click (Macintosh) the tween span you want to convert and choose Convert to Frame
by Frame Animation from the context menu.
Use onion skinning
Usually, one frame of the animation sequence at a time appears on the Stage. To help position and edit a frame-by-frame
animation, view two or more frames on the Stage at once. The frame under the playhead appears in full color, while
surrounding frames are dimmed, making it appear as if each frame were drawn on a sheet of translucent onion-skin
paper and the sheets were stacked on top of each other. Dimmed frames cannot be edited.
Videos and tutorials
• Video: Aligning Objects with Onion Skinning and the Grid (Length = 8:34, Adobe Press)
Simultaneously view several frames of an animation on the Stage
❖ Click the Onion Skin button
. All frames between the Start Onion Skin and End Onion Skin markers (in the
Timeline header) are superimposed as one frame in the Document window.
Control onion skinning display
• To display onion skinned frames as outlines, click the Onion Skin Outlines button
.
• To change the position of either onion skin marker, drag its pointer to a new location. (Normally, the onion skin
markers move in conjunction with the current frame pointer.)
• To enable editing of all frames between onion skin markers, click the Edit Multiple Frames button . Usually, onion
skinning lets you edit only the current frame. However, you can display the contents of each frame between the
onion skin markers, and make each available for editing, regardless of which is the current frame.
Note: Locked layers (those with a padlock icon) aren’t displayed when onion skinning is turned on. To avoid a multitude
of confusing images, lock or hide the layers you don’t want to be onion skinned.
Change the display of onion skin markers
❖ Click the Modify Onion Markers
button and select an item:
Always Show Markers Displays the onion skin markers in the Timeline header whether or not onion skinning is on.
Anchor Onion Locks the onion skin markers to their current position in the Timeline header. Usually, the onion skin
range is relative to the current frame pointer and the onion skin markers. Anchoring the onion skin markers
prevents them from moving with the current frame pointer.
Onion 2 Displays two frames on either side of the current frame.
Onion 5 Displays five frames on either side of the current frame.
Onion All Displays all frames on either side of the current frame.
Last updated 6/12/2015
219
Animation and Interactivity
Custom Brushes
Overview
The Brush Tool (B) in Adobe Flash Professional CC allows you to custom-define a brush by setting parameters of the
brush such as shape and angle. This enables you to create natural artwork in your projects by customizing the brush
tool to suit your drawing needs. You can choose, edit and create a custom brush in Flash Professional through the
Property Inspector, when the brush tool is selected in the toolbox.
Choosing a custom brush
By default, the Brush tool provides you a number of brushes in customized shapes to suit your various drawing needs.
You can see a number of brush shapes when you choose the Brush Tool from the toolbox and look under the "Brush"
setting in Property Inspector.
You can choose a brush from the Brush drop-down menu and start drawing the artwork on the stage.
Creating a custom brush
You can create custom brushes with custom-defined size, angle and flatness as follows:
❖ Click the "Brush Tool (B)" from the toolbox and click the "+" button next to the "Brush" setting in the Property
Inspector.
❖ In the Nib Options dialog box, select a shape, specify an angle, and flatness percentage. You can see a preview of the
brush as you set the parameters.
Last updated 6/12/2015
220
Animation and Interactivity
❖ Click OK. The new custom brush is selected in the Property Inspector as the default brush for the current document.
Zooming brush size with stage zoom level and resizing
You can use the Zoom size with stage check box to scale the brush size proportionately to the changing zoom level of
the stage. This allows you to draw seamlessly adjusting to any zoom level. If you want to revert to the earlier default
behavior of brushes maintaining a constant pixel size even when you change the zoom level of the stage, you must
disable the 'Zoom size with stage' checkbox in the brush Property Inspector.
You can resize the brush to the desired size by adjusting the Size option. The preview icon next to the Size option
indicates the chaging size of the brush as you adjust the size.
A Resize the brush B Get a preview of the brush size as you resize C Zoom the brush size with the stage zoom level
Editing a custom brush
You can change the properties of the custom brush that you have created as follows:
❖ In the Properties Inspector, selecting the custom brush that you want to modify by clicking on the button with a
pencil icon next to the brush options.
Last updated 6/12/2015
221
Animation and Interactivity
❖ In the Nib Options dialog box, modify the properties such as shape, angle, and flatness and click OK.
Note: You can edit only those brushes that you have custom-created and cannot modify the properties of any of the default
brushes.
Deleting a custom brush
1 To delete a custom brush you have created, select the "Brush Tool (B)" from the toolbox and choose the custom
brush that you want to delete under Fill and Stroke in the Property Inspector.
2 Click the "-" button that is enabled. The selected custom brush is deleted from the list.
Note: You can delete only those brushes that you have created. You are not allowed to delete the default brushes.
Synchronizing custom brushes to the cloud
Custom brushes you create can be synchronized to the cloud (your Creative Cloud account) through the Flash
preferences. To do that, navigate to Edit > Preferences on Windows or Flash > Preferences on a Mac. You will find the
option to synchronize custom brushes under the "Sync Settings" section as shown below: -
Last updated 6/12/2015
222
Animation and Interactivity
Animation basics
Note: Like most things in Flash, animation does not require any ActionScript. However, you can create animation with
ActionScript if you choose.
Types of animation
provides several ways to create animation and special effects. Each method provides you with different possibilities for
creating engaging animated content.
Flash supports the following types of animation:
Motion tweens Use motion tweens to set properties for an object, such as position and alpha transparency in one frame
and again in another frame. Flash then interpolates the property values of the frames in between. Motion tweens are
useful for animation that consists of continuous motion or transformation of an object. Motion tweens appear in the
Timeline as a contiguous span of frames that can be selected as a single object by default. Motion tweens are powerful
and simple to create.
Classic tweens Classic tweens are like motion tweens, but are more complex to create. Classic tweens allow for some
specific animated effects not possible with span-based tweens.
Inverse Kinematics poses (deprecated with Flash Professional CC) Inverse kinematic poses allow you to stretch and
bend shape objects and link groups of symbol instances to make them move together in naturalistic ways. Once you
have added bones to a shape or a group of symbols, you can change the position of the bones or symbols in different
keyframes. Flash interpolates the positions in the in-between frames.
Shape tweens In shape tweening, you draw a shape at one specific frame in the Timeline, and change that shape or
draw another shape at another specific frame. Flash Pro then interpolates the intermediate shapes for the frames in
between, creating the animation of one shape morphing into another.
Last updated 6/12/2015
223
Animation and Interactivity
Frame-by-frame animation This animation technique lets you specify different art for each frame in the Timeline. Use
this technique to create an effect that is like the frames of a film being played in rapid succession. This technique is
useful for complex animation where the graphic elements of each frame must be different.
About frame rates
The frame rate, the speed the animation is played at, is measured in number of frames per second (fps). A frame rate
that’s too slow makes the animation appear to stop and start; a frame rate that’s too fast blurs the details of the
animation. A frame rate of 24 fps is the default for new Flash documents and usually gives the best results on the web.
The standard motion-picture rate is also 24 fps.
The complexity of the animation and the speed of the computer playing the animation affect the smoothness of the
playback. To determine optimum frame rates, test your animations on a variety of computers.
Because you specify only one frame rate for the entire Flash Pro document, set this rate before you begin creating
animation.
Identifying animations in the Timeline
Flash Pro distinguishes tweened animation from frame-by-frame animation in the Timeline by displaying different
indicators in each frame that contains content.
The following frame content indicators appear in the Timeline:
• A span of frames with a blue background indicates a motion tween. A black dot in the first frame of the span indicates
that the tween span has a target object assigned to it. Black diamonds indicate the last frame and any other property
keyframes. Property keyframes are frames that contain property changes explicitly defined by you. You can choose
which types of property keyframes to display by right-clicking (Windows) or Command-clicking (Macintosh) the
motion tween span and choosing View Keyframes > type from the context menu. Flash displays all types of property
keyframes by default. All other frames in the span contain interpolated values for the tweened properties of the
target object.
• A hollow dot in the first frame indicates that the target object of the motion tween has been removed. The tween
span still contains its property keyframes and can have a new target object applied to
it.
• A span of frames with a green background indicates an inverse kinematics (IK) pose layer. Pose layers contain IK
armatures and poses. Each pose appears in the Timeline as a black diamond. Flash interpolates the positions of the
armature in the frames in between poses.
• A black dot at the beginning keyframe with a black arrow and blue background indicates a classic
tween.
• A dashed line indicates that the classic tween is broken or incomplete, such as when the final keyframe is
missing.
• A black dot at the beginning keyframe with a black arrow and a light green background indicates a shape
tween.
Last updated 6/12/2015
224
Animation and Interactivity
• A black dot indicates a single keyframe. Light gray frames after a single keyframe contain the same content with no
changes. These frames have a vertical black line and a hollow rectangle at the last frame of the
span.
• A small a indicates that the frame is assigned a frame action with the Actions panel.
• A red flag indicates that the frame contains a label.
• A green double slash indicates that the frame contains a comment.
• A gold anchor indicates that the frame is a named anchor.
About layers in tweened animation
Each scene in a Flash Pro document can consist of any number of Timeline layers. Use layers and layer folders to
organize the contents of an animation sequence and separate animated objects. Organizing them in layers and folders
prevents them from erasing, connecting to, or segmenting each other when they overlap. To create animation that
includes tweened movement of more than one symbol or text field at once, place each object on a separate layer. You
can use one layer as a background layer to contain static artwork and use additional layers to contain one separate
animated object.
When you create a motion tween, Flash Pro converts the layer containing the object you selected to tween into a tween
layer. The tween layer has a tween icon next to the layer name in the Timeline.
If other objects are present on the same layer as the tweened object, Flash Pro adds new layers above or below the
original layer as needed. Any objects that existed below the tweened object on its original layer move to a new layer
below the original layer. Any objects that were above the tweened object on its original layer move to a new layer above
the original layer. Flash Pro inserts these new layers between any pre-existing layers in the Timeline. In this way Flash
Pro preserves the original stacking order of all the graphic objects on the Stage.
A tween layer can contain only tween spans (contiguous groups of frames containing a tween), static frames, blank
keyframes, or empty frames. Each tween span can contain only a single target object and an optional motion path for
the target object. Because you cannot draw in a tween layer, create additional tweens or static frames on other layers
and then drag them to the tween layer. To place frame scripts on a tween layer, create them on another layer and drag
them to the tween layer. A frame script can only reside in a frame outside the motion tween span itself. In general, it is
best to keep all frame scripts on a separate layer that contains only ActionScript.
When a document has several layers, tracking and editing the objects on one or more of them can be difficult. This task
is easier if you work with the contents of one layer at a time. To hide or lock layers you are not currently working on,
click the Eye or Lock icon next to the layer name in the Timeline. Using layer folders can help you organize layers into
manageable groups.
Last updated 6/12/2015
225
Animation and Interactivity
Distributing objects to layers for tweened animation
Flash Pro automatically moves an object to its own tween layer when you apply a motion tween to the object. However,
you can also distribute objects to their own separate layers yourself. For example, you can choose to distribute objects
yourself when you are organizing content. Manual distribution is also useful for applying animation to objects while
maintaining precise control over how they move from one layer to another.
When you use the Distribute To Layers command (Modify > Timeline > Distribute To Layers), Flash Pro distributes
each selected object to a new, separate layer. Any objects that you don’t select (including objects in other frames) are
preserved in their original layers.
You can apply the Distribute To Layers command to any element on the Stage, including graphic objects, instances,
bitmaps, video clips, and broken-apart text blocks.
About new layers created with Distribute to Layers
New layers created during the Distribute To Layers operation are named according to the name of the element that each
contains:
• A new layer containing a library asset (such as a symbol, bitmap, or video clip) receives the same name as the asset.
• A new layer containing a named instance receives the name of the instance.
• A new layer containing a character from a broken-apart text block is named with the character.
• A new layer containing a graphic object (which has no name) is named Layer1 (or Layer2, and so on), because
graphic objects do not have names.
Flash Pro inserts the new layers below any selected layers. The new layers are arranged top to bottom, in the order
that the selected elements were originally created. The layers in broken-apart text are arranged in the order of the
characters, whether left-to-right, right-to-left, or top-to-bottom. For example, suppose you break apart the text
FLASH and distribute it to layers. The new layers, named F, L, A, S, and H, are arranged top to bottom, with F at the
top. These layers appear immediately below the layer that initially contained the text.
Distribute objects to layers
1 Select the objects you want to distribute to separate layers. The objects can be in a single layer, or in several layers,
including non-contiguous layers.
2 Do one of the following:
• Select Modify > Timeline > Distribute To Layers.
• Right-click (Windows) or Control-click (Macintosh) one of the selected objects, and select Distribute To Layers.
Creating tweened animations by distributing objects to keyframes
New in Flash Professional CC
Flash Pro automatically allows you to distribute objects to separate keyframes each. You can choose to distribute objects
when you are organizing content on stage. Manually, the process is tedious and time-consuming. Distribution is highly
useful when creating tweened animation by placing objects on individual keyframes. You could assign different objects
or object states to individual keyframes each. In effect, when the playhead is scrubbed across these keyframes, the effect
of a tweened animation is apparent.
When you use the Distribute To Keyframes command, Flash Pro distributes each selected object to a new, separate
keyframe. Any objects that you don’t select (including objects in other frames) are preserved in their original layers.
Last updated 6/12/2015
226
Animation and Interactivity
You can apply the Distribute To Keyframes command to any element on the Stage, including graphic objects, instances,
bitmaps, video clips, and text blocks.
About new keyframes created with Distribute to Keyframes
• New keyframes created during the Distribute To Keyframes operation are arranged according to the sequence in
which the objects were selected.
• If any object on the layer was left unselected when performing the Distribute to Keyframes operation, the original
frames stay unaffected for such objects. The objects that are selected for distribution are assigned keyframes starting
the frame immediately next to the last frame of the original content. For example, if Object1 and Object2 are on a
layer that has 50 frames. If Object1 was chosen for distribution, it is placed on the 51st keyframe.
Distribute objects to keyframes
1 Select the objects you want to distribute to separate layers. The objects can be in a single layer, or in several layers,
including non-contiguous layers.
2 Right-click (Windows) or Control-click (Macintosh) one of the selected objects, and select Distribute To Keyframes.
Additional resources
The following articles are available about working with animation in Flash Pro:
• Creating a simple animation in Flash (Adobe.com)
• Animation Learning Guide for Flash Professional (Adobe.com)
• Motion migration guide for Flash Professional (Adobe.com)
• Creating animation in ActionScript 3.0 (Adobe.com)
• How to Lip Sync a Character in Flash (Length = 2:30, YouTube.com)
More Help topics
Motion tween animation
Working with classic tween animation
Inverse kinematics
Shape tweening
Frame-by-frame animation
Create a new document
Creating buttons
Last updated 6/12/2015
227
Animation and Interactivity
Basic steps for creating buttons
1 Decide what button type best suits your needs.
Button symbol Most people choose button symbols for their flexibility. Button symbols contain a specialized
internal timeline for button states. You can easily create visually different Up, Down, and Over states. Button
symbols also change their state automatically as they react to user actions.
Movie clip button You can use a movie clip symbol to create sophisticated button effects. Movie clip symbols can
contain almost any type of content, including animation. However, movie clip symbols do not have built-in Up,
Down, and Over states. You create those states yourself, using ActionScript. A disadvantage is that movie clip files
are larger than button files. Use these resources to learn how to create a button with a movie clip symbol:
• Tutorial: Movie Clip Buttons (ActionScript 3.0, Schoolofflash.com)
ActionScript button component Use a button component if you require only a standard button or a toggle, and you
don’t want to customize it extensively. Both ActionScript 2.0 and 3.0 button components come with built-in code
that enables state changes. So, you don’t have to define the look and behavior of button states. Simply drag the
component onto the Stage.
• ActionScript 3.0 button components allow for some customization. You can bind the button to other
components, and share and display application data. They have built-in features, such as accessibility support.
Button, RadioButton, and CheckBox components are available. For details, see Use the Button component in
Using Adobe ActionScript 3.0 Components. For examples of how to use Button components, see AS3 Button
Component Quick Start.
• ActionScript 2.0 button components are not customizable. The component enables state changes. For details,
see Button component.
2 Define your button states.
Up frame The appearance of the button when the user is not interacting with it.
Over frame The appearance of the button as the user is about to select it.
Down frame The appearance of the button as the user selects it.
Hit frame The area that is responsive to clicks by the user. Defining this Hit frame is optional. If your button is small,
or if its graphic area is not contiguous, defining this frame can be useful.
• The contents of the Hit frame are not visible on the Stage during playback.
• The graphic for the Hit frame is a solid area large enough to encompass all graphic elements of the Up, Down,
and Over frames.
• If you don’t specify a Hit frame, the image for the Up state is used.
You can make a button that responds when a different area of the stage is clicked or rolled over (also called a
disjoint rollover). Place the Hit frame graphic in a different location than the other button frame graphics.
3 Associate an action with the button.
To make something happen when the user selects a button, you add ActionScript code to the Timeline. Place the
ActionScript code in the same frames as the buttons. The Code Snippets panel has pre-written ActionScript 3.0 code
for many common button uses. See Add interactivity with code snippets .
Note: ActionScript 2.0 is not compatible with ActionScript 3.0. If your version of Flash uses ActionScript 3.0, you can’t
paste ActionScript 2.0 code into your button (and vice versa). Before you paste ActionScript from another source into
your buttons, verify that the version is compatible.
Last updated 6/12/2015
228
Animation and Interactivity
Create a button with a button symbol
To make a button interactive, you place an instance of the button symbol on the Stage and assign actions to the instance.
You assign the actions to the root timeline of the FLA file. Do not add actions to the timeline of the button symbol. To
add actions to the button timeline, use a movie clip button instead.
1 Choose Edit > Deselect All, or click an empty area of the Stage to ensure that nothing is selected on the Stage.
2 Choose Insert > New Symbol.
3 In the Create New Symbol dialog box, enter a name. For the symbol Type, select Button.
Flash Pro switches to symbol-editing mode. The Timeline changes to display four consecutive frames labeled Up,
Over, Down, and Hit. The first frame, Up, is a blank keyframe.
4 To create the Up state button image, select the Up frame in the Timeline. Then use the drawing tools, import a
graphic, or place an instance of another symbol on the Stage.
You can use graphic symbols or movie clip symbols inside a button, but you cannot use another button symbol.
5 In the Timeline, click the Over frame, and then choose Insert > Timeline > Keyframe.
Flash Pro inserts a keyframe that duplicates the contents of the preceding Up frame.
6 With the Over frame still selected, change or edit the button image on the Stage to create the appearance you want
for the Over state.
7 Repeat steps 5 and 6 for the Down frame and the optional Hit frame.
8 To assign a sound to a state of the button, select that state’s frame in the Timeline and choose Window > Properties.
Then select a sound from the Sound menu in the Property inspector. Only sounds you have already imported appear
in the Sound menu.
9 When you finish, choose Edit > Edit Document. Flash returns you to the main timeline of your FLA file. To create
an instance of the button you created on the Stage, drag the button symbol from the Library panel to the Stage.
10 To test a button’s functionality, use the Control > Test command. You can also preview the states of a button symbol
on the Stage by choosing Control > Enable Simple Buttons. This command allows you to see the up, over, and down
states of a button symbol without using Control > Test.
Enable, edit, and test button symbols
By default, Flash Pro keeps button symbols disabled as you create them. Select and then enable a button to see it respond
to mouse events. Best practice is to disable buttons as you work and enable them to quickly test their behavior.
• To select a button, use the Selection tool to drag a selection rectangle around the button.
• To enable or disable buttons on the Stage, choose Control > Enable Simple buttons. This command acts as a toggle
between the two states.
• To move a button, use the arrow keys.
• To edit a button, use the Property inspector. If it isn’t visible, choose Windows > Properties.
• To test the button in the authoring environment, choose Control > Enable Simple Buttons.
• To test the button in Flash Player, choose Control > Test Movie [or Test Scene] > Test. This method is the only way
to test movie clip buttons.
• To test the button in the Library Preview panel, select the button in the Library and click Play.
Last updated 6/12/2015
229
Animation and Interactivity
Troubleshooting buttons
Use these resources to troubleshoot common problems with buttons:
• TechNote: Button hotspots are active even though the buttons are covered with other objects (Adobe.com)
• TechNote: Adding actions to shared buttons (Adobe.com)
• Video: Troubleshooting ActionScript 2.0 button symbols (Kirupa.com)
Additional button resources
The following TechNotes contain instructions for some specific button scenarios:
• TechNote: How to create a new button (Adobe.com)
• TechNote: Creating advanced buttons (Adobe.com)
• TechNote: How can one button do different things at different times? (Adobe.com)
Working with multiple timelines
About multiple timelines and levels
Flash® Player has a stacking order of levels. Every Flash Professional document has a main Timeline located at level 0
in Flash Player. You can use the loadMovie command to load other Flash Professional documents (SWF files) into Flash
Player at different levels.
If you load documents into levels above level 0, the documents stack on top of one another like drawings on transparent
paper; when there is no content on the Stage, you can see through to the content on lower levels. If you load a document
into level 0, it replaces the main timeline. Each document loaded into a level of Flash Player has its own timeline.
Timelines can send messages to each other with ActionScript. For example, an action on the last frame of one movie
clip can tell another movie clip to play. To use ActionScript to control a timeline, you must use a target path to specify
the location of the timeline.
For more information, see the MovieClip.loadMovie method in the ActionScript 2.0 Language Reference.
About nested movie clips and parent-child hierarchy
When you create a movie clip instance in a Flash Professional document, the movie clip has its own timeline. Every
movie clip symbol has its own timeline. The movie clip’s timeline is nested inside the main timeline of the document.
You can also nest a movie clip instance inside another movie clip symbol.
When a movie clip is created inside a Flash Professional document, or nested inside another movie clip, it becomes a
child of that document or movie clip, which becomes the parent. Relationships between nested movie clips are
hierarchical: modifications made to the parent affect the child. The root Timeline for each level is the parent of all the
movie clips on its level, and because it is the top-most Timeline, it has no parent. In the Movie Explorer panel, you can
view the hierarchy of nested movie clips in a document by choosing Show Symbol Definitions from the panel menu.
To understand movie clip hierarchy, consider the hierarchy on a computer: the hard disk has a root directory (or folder)
and subdirectories. The root directory is analogous to the main (or root) Timeline of a Flash Professional document: it
is the parent of everything else. The subdirectories are analogous to movie clips.
Last updated 6/12/2015
230
Animation and Interactivity
You can use the movie clip hierarchy in Flash Professional to organize related objects. For example, you could create a
Flash Professional document containing a car that moves across the Stage. You can use a movie clip symbol to represent
the car and set up a motion tween to move it across the Stage.
To add wheels that rotate, you can create a movie clip for a car wheel, and create two instances of this movie clip, named
frontWheel and backWheel. Then you can place the wheels on the car movie clip’s Timeline—not on the main Timeline.
As children of car, frontWheel and backWheel are affected by any changes made to car; they move with the car as it
tweens across the Stage.
To make both wheel instances spin, you can set up a motion tween that rotates the wheel symbol. Even after you change
frontWheel and backWheel, they continue to be affected by the tween on their parent movie clip, car; the wheels spin,
but they also move with the parent movie clip car across the Stage.
More Help topics
Symbols, instances, and library assets
Working with scenes
To organize a document thematically, you can use scenes. For example, you might use separate scenes for an
introduction, a loading message, and credits. Though using scenes has some disadvantages, there are some situations
in which few of these disadvantages apply, such as when you create lengthy animations. When you use scenes, you avoid
having to manage a large number of FLA files because each scene is contained within a single FLA file.
Using scenes is similar to using several FLA files together to create a larger presentation. Each scene has a Timeline.
Frames in the document are numbered consecutively through the scenes. For example, if a document contains two
scenes with ten frames each, the frames in Scene 2 are numbered 11–20. The scenes in the document play back in the
order they are listed in the Scene panel. When the playhead reaches the final frame of a scene, the playhead progresses
to the next scene.
Disadvantages of scenes
When you publish a SWF file, the Timeline of each scene combines into a single Timeline in the SWF file. After the
SWF file compiles, it behaves as if you created the FLA file using one scene. Because of this behavior, scenes have some
disadvantages:
• Scenes can make documents confusing to edit, particularly in multi-author environments. Anyone using the FLA
document might have to search several scenes within a FLA file to locate code and assets. Consider loading external
SWF content or using movie clips instead.
• Scenes often result in large SWF files. Using scenes encourages you to place more content in a single FLA file, which
results in larger FLA files and SWF files.
• Scenes force users to progressively download the entire SWF file, even if they do not plan or want to watch all of it.
If you avoid scenes, users can control what content they download as they progress through your SWF file.
• Scenes combined with ActionScript might produce unexpected results. Because each scene Timeline is compressed
onto a single Timeline, you might encounter errors involving your ActionScript and scenes, which typically require
extra, complicated debugging.
Controlling scene playback
To stop or pause a document after each scene, or to let users navigate the document in a nonlinear fashion, you use
ActionScript. For more information see, .
Last updated 6/12/2015
231
Animation and Interactivity
This video tutorial demonstrates how to create and use scenes:
• Video: Understanding Flash Scenes
Display the Scene panel
❖ Select Window > Other Panels > Scene.
Add a scene
❖ Select Insert > Scene, or click the Add Scene button
in the Scene panel.
Delete a scene
❖ Click the Delete Scene button
in the Scene panel.
Change the name of a scene
❖ Double-click the scene name in the Scene panel and enter the new name.
Duplicate a scene
❖ Click the Duplicate Scene button
in the Scene panel.
Change the order of a scene in the document
❖ Drag the scene name to a different location in the Scene panel.
View a particular scene
❖ Do one of the following:
• Select View > Go To, and then select the name of the scene from the submenu.
• Click on the Edit Scene button at the upper right corner of the document window and choose the scene name
from the pop-up menu.
Best practices - Advertising with Flash
Using recommended dimensions
Use the Interactive Advertising Bureau (IAB) guidelines to set dimensions for your Flash Professional advertisements.
The following table lists the recommended Interactive Marketing Unit (IMU) ad formats measurements:
Last updated 6/12/2015
232
Animation and Interactivity
Type of advertisement
Dimensions (pixels)
Wide skyscraper
160 x 600
Skyscraper
120 x 600
Half-page ad
300 x 600
Full banner
468 x 60
Half banner
234 x 60
Micro bar
88 x 31
Button 1
120 x 90
Button 2
120 x 60
Vertical banner
120 x 240
Square button
125 x 125
Leaderboard
728 x 90
Medium rectangle
300 x 250
Square pop-up
250 x 250
Vertical rectangle
240 x 400
Large rectangle
336 x 280
Rectangle
180 x 150
When you create a FLA file from a template (Select File > New, and click the Templates tab), you see many of these sizes.
Creating SWF file advertisements
Use these guidelines when you create advertisements:
• Optimize your graphics. Make SWF file banner advertisements 15K or smaller.
• Create a GIF banner advertisement in Flash Professional that is 12K or smaller.
• Limit looping banner advertisements to three repetitions. Many websites adopt the standardized file size
recommendations as advertising specifications.
• Use the GET command to pass data between an advertisement and a server, and do not use the POST command.
For more information on GET and POST, see the getURL function in ActionScript 2.0 Language Reference.
Note: Provide control to the user. If you add sound to an advertisement, also add a mute button. If you create a transparent
Flash Professional ad that hovers over a web page, provide a button to close the advertisement for its duration.
Tracking advertisements
Several leading advertising networks now support standardized tracking methods in Flash Professional SWF files. The
following guidelines describe the supported tracking methodology:
Create a button or movie clip button Use standardized dimensions outlined by the IAB. For a list of standardized
dimensions, see the IAB website. For more information on creating a button in Flash Professional, see Creating buttons.
Last updated 6/12/2015
233
Animation and Interactivity
Add a script to the button Executes when a user clicks the banner. You might use the getURL() function to open a new
browser window. The following code snippets are two examples of ActionScript 2.0 code you might add to Frame 1 of
the Timeline:
myButton_btn.onRelease = function(){
getURL(clickTAG, "_blank");
};
You might add the following code to Frame 1 of the Timeline:
myButton_btn.onRelease = function() {
if (clickTAG.substr(0, 5) == "http:") {
getURL(clickTAG);
}
};
The getURL() function adds the variable passed in the object and embed tags, and then sends the browser that is
launched to the specified location. The server hosting the ad can track clicks on the advertisement. For more
information on using the getURL() function, see ActionScript 2.0 Language Reference.
Assign clickTAG code for tracking Tracks the advertisement and helps the network serving the ad to track where the ad
appears and when it is clicked.
The process is the standard way of creating an advertising campaign for a typical Flash Professional advertisement. If
you assign the getURL() function to the banner, you can use the following process to add tracking to the banner. The
following example lets you append a variable to a URL string to pass data, which lets you set dynamic variables for each
banner, instead of creating a separate banner for each domain. You can use a single banner for the entire campaign, and
any server that is hosting the ad can track the clicks on the banner.
In the object and embed tags in your HTML, you would add code similar to the following example (where
www.helpexamples.com is the ad network, and adobe.com is the company with an advertisement):
<EMBED src="your_ad.swf?clickTAG= http://helpexamples.com/tracking?http://www.adobe.com">
Add the following code in your HTML:
<PARAM NAME=movie VALUE="your_ad.swf?clickTAG =http:
//helpexamples.com/tracking?http://www.adobe.com">
<< this HTML stuff may need to be updated
to account for the Active content fix, which likely will cause users
to edit .js files instead of html files - JayA >>
For more information on advanced tracking techniques, see the Rich Media Advertising Center at
www.adobe.com/go/rich_media_ads.
To download the Rich Media Tracking Kit, which includes examples and documentation, see
www.adobe.com/go/richmedia_tracking.
To learn more about and download the Flash Ad Kit, which helps you deliver integrated and sophisticated
advertisements, see www.adobe.com/go/learn_fl_flash_ad_kit.
Last updated 6/12/2015
234
Animation and Interactivity
Testing your ads
Test your SWF file ad on the most common browsers, especially the browsers that your target audience uses. Some users
might not have Flash Player installed or they might have JavaScript disabled. Plan for these circumstances by having a
replacement (default) GIF image or other scenarios for these users. For more information on detecting Flash Player, see
Specify publish settings for SWF files . Give the user control of the SWF file. Let the user control any audio in the ad. If
the advertisement is a borderless SWF file that hovers over a web page, let the user close the advertisement immediately
and for the duration of the ad.
For the latest information on Flash Player version penetration for different regions, go to
www.adobe.com/go/fp_version_penetration.
More Help topics
Optimizing graphics and animation
Add interactivity with code snippets
The Code Snippets panel is designed to make it easy for non-programmers to start using simple JavaScript and
ActionScript 3.0 quickly. It lets you add code to your FLA file to enable common functionality. Using the Code Snippets
panel does not require knowledge of JavaScript or ActionScript 3.0.
With the Code Snippets panel, you can:
• Add code that affects the behavior of an object on the Stage
• Add code that controls the movement of the playhead in the Timeline
• (CS5.5 only) - Add code that allows touchscreen user-interaction
• Add new code snippets that you create to the panel
Using the code snippets included with Flash is also a good way to begin learning JavaScript or ActionScript 3.0. By
looking at the code in the snippets and following the snippet instructions, you can begin understanding code structure
and vocabulary.
Before you begin
When working with the Code Snippets panel, it is important to understand these fundamentals of Flash:
• Many of the code snippets require you to customize a few items in the code. In Flash Pro you can do this in the
Actions panel. Each snippet contains specific instructions for this task.
• All of the included code snippets are either JavaScript or ActionScript 3.0.
• Some snippets affect the behavior of an object, allowing it to be clicked or causing it to move or disappear. You apply
these snippets to the object on the Stage.
• Some snippets cause an action to occur immediately when the playhead enters the frame that contains the snippet.
You apply these snippets to a Timeline frame.
• When you apply a code snippet, the code is added to the current frame of the Actions layer in the Timeline. If you
have not created an Actions layer yourself, Flash adds one above all other layers in the Timeline.
• For ActionScript to control an object on the Stage, the object must have an instance name assigned in the Property
inspector.
• You can click the Show Description and Show Code buttons that appear when you select a snippet in the panel.
Last updated 6/12/2015
235
Animation and Interactivity
Additional videos and tutorials
• Video: Creating an application with the Code Snippets panel (12:11, Adobe TV)
• Video: Creating a zoom in and spin custom snippet (10:20, flashandmath.com)
• Tutorial: Code snippets for beginning ActionScript 3 programmers and designers - Flash Pro CS5
Add a code snippet to an object or Timeline frame
To add an action that affects an object or the playhead:
1 Select an object on the Stage or a frame in the Timeline.
If you select an object that is not a symbol instance, Flash converts the object to a movie clip symbol when you apply
the snippet.
If you select an object that does not already have an instance name, Flash adds one when you apply the snippet.
2 In the Code Snippets panel (Window > Code Snippets), double-click the snippet you want to apply.
If you selected an object on the Stage, Flash adds the snippet to the Actions panel in the frames containing the
selected object.
If you selected a Timeline frame, Flash adds the snippet to just that frame.
3 In the Actions panel, view the newly added code and replace any necessary items according to the instructions at
the top of the snippet.
(Flash CS5.5) Add a code snippet to an object or Timeline frame
To add an action that affects an object or the playhead:
1 Select the snippet you want to apply in the Code Snippets panel (Window > Code Snippets).
2 To display a description of the snippet, click the Show Description button that appears to the right of the selected
snippet.
3 To display the code within the snippet, click the Show Code button to the right of the snippet.
4 If the snippet contains the text “instance_name_here”, drag from that text to the instance on the Stage that you want
to the code to control. To drag-and-drop, the symbol instance must be a movie clip or a button.
If the instance does not yet have a name, a dialog box appears to allow you to enter a name for the instance.
You can also click the text and enter the instance name directly in the code. Use this method of you are working with
a shape or graphic symbol instance.
5 If the snippet contains other colored text, select the text and enter the correct information according to the
instructions inside the code snippet.
6 When you finish editing the code snippet, click the Insert button.
Flash adds the code to the Actions layer. If no Actions layer exists, Flash creates one.
If you selected an object on the Stage, Flash adds the snippet to the Actions panel in the frames containing the
selected object.
If you selected a Timeline frame, Flash adds the snippet to the Actions layer in just that frame.
7 (Optional) To view the inserted code, open the Actions panel (Window > Actions).
Last updated 6/12/2015
236
Animation and Interactivity
Add new snippets to the Code Snippets panel
You can add new code snippets to the Code Snippets panel in two ways:
• Enter a snippet in the Create New Code Snippet dialog box.
• Import a code snippet XML file.
To use the Create New Code Snippet dialog box:
1 In the Code Snippets panel, choose Create New Code Snippet from the panel menu.
2 In the dialog box, Enter the Title, Tool tip text, and JavaScript or ActionScript 3.0 code for your snippet.
You can add any code that is currently selected in the Actions panel by clicking the Auto-Fill button.
3 Select the Automatically replace instance_name_here check box if your code includes the string
“instance_name_here” and you want Flash to replace it with the correct instance name when the snippet is applied.
Flash adds the new snippet to the Code Snippets panel in a folder called Custom.
To import a code snippet in XML format:
1 In the Code Snippets panel, choose Import Code Snippets XML from the panel menu.
2 Select the XML file you want to import and click Open
To see the correct XML format for code snippets, choose Edit Code Snippets XML from the panel menu.
To delete a code snippet, right-click the snippet in the panel and choose Delete Code Snippet from the context menu.
Using mask layers
About mask layers
For spotlight effects and transitions, use a mask layer to create a hole through which underlying layers are visible. A
mask item can be a filled shape, a type object, an instance of a graphic symbol, or a movie clip. Group multiple layers
under a single mask layer to create sophisticated effects.
To create dynamic effects, animate a mask layer. For a filled shape used as a mask, use shape tweening; for a type object,
graphic instance, or movie clip, use motion tweening. When using a movie clip instance as a mask, animate the mask
along a motion path.
To create a mask layer, place a mask item on the layer to use as a mask. Instead of having a fill or stroke, the mask item
acts as a window that reveals the area of linked layers beneath it. The rest of the mask layer conceals everything except
what shows through the mask item. A mask layer can contain only one mask item. A mask layer cannot be inside a
button, and you cannot apply a mask to another mask.
To create a mask layer from a movie clip, use ActionScript. A mask layer created with ActionScript can be applied only
to another movie clip. See Using Movie Clips as Masks in Learning ActionScript 2.0 in Adobe Flash.
Note: The 3D tools cannot be used on objects on mask layers and layers containing 3D objects cannot be used as mask
layers. For more information about the 3D tools, see 3D graphics.
Last updated 6/12/2015
237
Animation and Interactivity
The following video tutorials demonstrate creating and animating mask layers. Some videos may show the Flash
Professional CS3 or CS4 workspace, but are still applicable to Flash Professional CS5.
• Layers TV – Episode 21: Masks in Flash (9:25)
• Creating and Animating Masks (CS3) (2:12)
Work with mask layers
You can use mask layers to reveal portions of a picture or graphic in the layer below. To create a mask, you specify that
a layer is a mask layer, and either draw or place a filled shape on that layer. You can use any filled shape, including
groups, text, and symbols, as a mask. The mask layer reveals the area of linked layers beneath the filled shape.
Create a mask layer
1 Select or create a layer containing the objects to appear inside the mask.
2 Select Insert > Timeline > Layer to create a new layer above it. A mask layer always masks the layer immediately
below it; create the mask layer in the proper place.
3 Place a filled shape, text, or an instance of a symbol on the mask layer. Flash Professional ignores bitmaps, gradients,
transparency, colors, and line styles in a mask layer. Any filled area is completely transparent in the mask; any nonfilled area is opaque.
4 Right-click (Windows) or Control-click (Macintosh) the mask layer’s name in the Timeline, and select Mask. A mask
layer icon indicates the mask layer. The layer immediately below it is linked to the mask layer, and its contents show
through the filled area on the mask. The masked layer name is indented, and its icon changes to a masked layer icon.
5 To display the mask effect in Flash Professional, lock the mask layer and the masked layer.
Mask additional layers after creating a mask layer
❖ Do one of the following:
• Drag an existing layer directly below the mask layer.
• Create a new layer anywhere below the mask layer.
• Select Modify > Timeline > Layer Properties, and select Masked.
Unlink layers from a mask layer
❖ Select the layer to unlink and do one of the following:
• Drag the layer above the mask layer.
• Select Modify > Timeline > Layer Properties, and select Normal.
Animate a filled shape, type object, or graphic symbol instance on a mask layer
1 Select the mask layer in the Timeline.
2 To unlock the mask layer, click in the Lock column.
3 Do one of the following:
• If the mask object is a filled shape, apply shape tweening to the object.
• If the mask object is a type object or graphic symbol instance, apply motion tweening to the object.
4 When the animation operation is complete, click in the Lock column for the mask layer to re-lock the layer.
Last updated 6/12/2015
238
Animation and Interactivity
Animate a movie clip on a mask layer
1 Select the mask layer in the Timeline.
2 To edit the movie clip in place and to display the movie clip’s Timeline, double-click the movie clip on the Stage.
3 Apply motion tweening to the movie clip.
4 When the animation procedure is complete, click the Back button to return to document-editing mode.
5 To lock the layer again, click in the Lock column for the mask layer.
More Help topics
Motion tweens
Five steps to learning Flash Professional
This learning guide will help you quickly get started and achieve a great understanding of building projects and
applications using Adobe Flash Professional CS6.
Five steps to learning Flash Professional
Learn Flash Professional CS6 video tutorials
Learn the basics of Flash Pro CS6 with Getting Started and New Features tutorials by product experts.
Learn Flash Professional CS6 video tutorials
Altering the Curve of a motion
In this video you will learn about altering the curve of a motion in Flash CS5.
Altering the Curve of a motion
Animation Learning Guide for Flash
Adobe Flash Professional CS5.5 offers several ways to include animation in your projects. The Animation Learning
Guide for Flash explains how to use all of these animation types in Flash Professional, including the improved way of
creating and editing motion tweens using the Timeline and Motion Editor. Explore the sections below to dive into
whatever topic interests you.
Animation Learning Guide for Flash
Last updated 6/12/2015
239
Animation and Interactivity
Graphic Effects Learning Guide for Flash
Adobe Flash Professional CS5 provides a number of features for producing impressive graphic effects, enhancing the
look and feel of your projects. The Graphic Effects Learning Guide for Flash explores these features, from basic tasks
such as using tiles and blend modes to more advanced concepts such as animating filters and applying masks using
ActionScript. Check out the sections below and dive into whatever topic interests you.
Graphic Effects Learning Guide for Flash
Spring for Bones
In this video Paul will show you how to not only use inverse kinematics in Flash, but also how to make movement feel
more lifelike by giving it some natural springiness.
Spring for Bones
Text Layout Framework
Join trainer Paul Trani as he demonstrates some of the new text layout features in Flash Professional CS5.
Text Layout Framework
Using the Deco Tool
In this video you will learn about content aware scaling in Flash CS5.
Using the Deco Tool
Avoiding common authoring mistakes in Flash
Professional
This series of articles outlines common authoring mistakes that can cause issues in your Adobe Flash Professional
projects, and offers techniques you can apply to prevent them from occurring. These guidelines also show you ways to
work more efficiently and so you'll encounter fewer performance problems and runtime errors.
Avoiding common authoring mistakes in Flash Professional
Last updated 6/12/2015
240
Chapter 5: Multimedia and Video
Working with video cue points
note: (Flash Professional CC only) Video Cue Points feature is deprecated and will be unavailable with Flash Professional
CCUse video cue points to allow events to be triggered at specific times in the video. There are two kinds of cue points
that you can work with in Flash:
• Encoded cue points. These are cue points you add when encoding video with Adobe Media Encoder. For more
information about adding cue points in Adobe Media Encoder, see Using Adobe Media Encoder. Encoded cue
points can be accessed by other applications in addition to Flash.
• ActionScript cue points. These are cue points you add to a video with the Property inspector in Flash. ActionScript
cue points are accessible only to Flash and Flash Player. For more information about ActionScript cue points, see
Understanding Cue Points in the ActionScript 3.0 Developer’s Guide.
When an FLVPlayback component instance is selected on the Stage, the video cue points list appears in the Property
inspector. You can also preview the entire video on the Stage and add ActionScript cue points using the Property
inspector while previewing the video, including videos served by Flash Media Server.
A video tutorial about working with video cue points is available at www.adobe.com/go/lrvid5302_fl_en.
To work with cue points in the Property inspector:
1
Import video as progressive download, or place the FLVPlayback component on the stage and specify the source
video. You can specify the source video in the Property inspector.
2 In the Property inspector, click Cue Points to expand the section, if it's not already open.
3 Click the Add button (+) to add an ActionScript cue point, and the Delete button (-) to delete an existing cue point.
You can specify the time by dragging the mouse right or left to increase or decrease the timecode value, or by typing
in a value.
4 To add a parameter to a cue point, select the ActionScript cue point and click the Add button (+) at the bottom of
Parameters section.
5 You can rename the ActionScript cue points and any parameters by clicking in the name field and editing the name.
You can import and export lists of cue point from within the Property inspector. Only ActionScript cue points can be
imported to avoid conflicts with cue points that have already been embedded inside the video during encoding.
The Import and Export cue point buttons at the top of Cue Points section allow you to import or export cue point lists
in XML format. When exporting, the list includes all Navigation and Event cue points which are embedded in the video,
along with all ActionScript cue points you have added. When importing, a dialog showing the number of ActionScript
cue points imported is displayed.
Last updated 6/12/2015
241
Multimedia and Video
Add video to Flash
Flash provides several methods by which you can incorporate video into your Flash document and play it back for
users.
Before you begin
Before you start working with video in Flash Professional, it is important to understand the following information:
• Flash Professional can only play specific video formats.
These include FLV, F4V, and MPEG video. For instructions on converting video in other formats, see Create video
for use in Flash .
• Use the separate Adobe Media Encoder application (included with Flash Professional) to convert other video
formats to F4V. For instructions, see Create video for use in Flash .
• There are different ways of adding video to Flash Professional, each with advantages in different situations. See
below for a list of these methods.
• Flash Professional includes a Video Import Wizard that opens when you choose File > Import > Import Video.
• Using the FLVPlayback component is the simplest way to quickly get video playing in a Flash Professional file.
For instructions, see Progressively download video using a web server.
Methods for using video in Flash
You can use video in Flash Professional in different ways:
• Progressive download from a web server
This method keeps the video file external to the Flash Professional file and the resulting SWF file. This keeps the
SWF file size small. This is the most common method of using video in Flash Professional.
• Stream video using Adobe Flash Media Server.
This method also keeps the video file external to your Flash Professional file. Adobe Flash Media Streaming Server
gives you secure protection of your video content in addition to a smooth streaming playback experience.
• Embed video data directly inside a Flash Professional file
This method results in very large Flash Professional files, and is only recommended for short video clips. For
instructions, see Embed a video file within a Flash file.
Progressively download video using a web server
Progressive downloading lets you use either the FLVPlayback component or ActionScript that you write to load and
play back external FLV or F4V files in a SWF file at runtime.
Because the video file is kept external to the other Flash Professional content, it’s relatively easy to update video content
without republishing the SWF file.
Progressive downloading provides the following advantages over embedding video in the Timeline:
• During authoring, you can publish only your SWF file to preview or test part or all of your Flash Professional
content. This results in faster preview times and quicker turnaround on iterative experimentation.
• During playback, video begins playing as soon as the first segment of video is downloaded and cached to the local
computer’s disk drive.
Last updated 6/12/2015
242
Multimedia and Video
• At runtime, video files are loaded by Flash Player from the computer’s disk drive into the SWF file, with no limitation
on video file size or duration. No audio synchronization issues or memory restrictions exist.
• The frame rate of the video file can be different from the frame rate of the SWF file, allowing for greater flexibility
in authoring Flash Professional content.
Import video for progressive download
You can import a video file that is stored locally on your computer, and then upload the video file to a server after
importing it to your FLA file. In Flash, when you import video for progressive download, you are really adding only a
reference to the video file. Flash uses the reference to find the video file on your local computer or on a web server.
You can also import a video file that is already uploaded to a standard web server, an Adobe Flash Media Server (FMS),
or Flash Video Streaming Service (FVSS).
1 Select File > Import > Import Video to import the video clip into the current Flash Professional document.
2 Select the video clip to import. You can select either a video clip located on your local computer, or enter the URL
of a video already uploaded to a web server or Flash Media Server.
• To import video located on your local computer, select Load external video with playback component.
• To import video already deployed to a web server, Flash Media Server, or Flash Video Streaming Service, select
Already deployed to a web server, Flash Video Streaming Service, or Stream From Flash Media Server, and enter
the URL of the video clip.
note: The URL for a video clip located on a web server will use the http communication protocol. The URL for a
video clip located on a Flash Media Server or Flash Streaming Service will use the RTMP communication protocol.
3 Select a skin for your video clip. You can choose to:
• Not use a skin with the FLVPlayback component by selecting None.
• Select one of the predefined FLVPlayback component skins. Flash Professional copies the skin into the same
folder as the FLA file.note: FLVPlayback component skins are slightly different depending on whether you are
creating an AS2- or AS3-based Flash document.
• Select a custom skin of your own design by entering the URL of the skin on the web server. note: If you choose to
use a custom skin invoked from a remote location, then live preview will not be available for the video on Stage.
4 The Video Import Wizard creates an FLVPlayback video component on the Stage that you can use to test video
playback locally. When you finish creating your Flash document and want to deploy the SWF file and video clip,
upload the following assets to the web server or Flash Media Server hosting your video:
• If using a local copy of the video clip, upload the video clip (which is located in the same folder as the source
video clip you selected with a .flv extension)
note: Flash Professional uses a relative path to point to the FLV or F4V file (relative to the SWF file), letting you use
the same directory structure locally that you use on the server. If the video was previously deployed to your FMS or
the FVSS hosting your video, you can skip this step.
• The video skin (if you chose to use a skin)
To use a predefined skin, Flash Professional copies the skin into the same folder as the FLA file.
• The FLVPlayback component
To edit the FLVPlayback component’s URL field to that of the web server or Flash Media Server that you are
uploading the video to, use the Component inspector (Windows > Component inspector) to edit the contentPath
parameter.
Last updated 6/12/2015
243
Multimedia and Video
Stream video using Adobe Flash Media Server
Flash Media Server streams media in real-time to Flash Player and AIR. Flash Media Server uses bandwidth detection
to deliver video or audio content based on the user’s available bandwidth.
Streaming video with Flash Media Server provides the following advantages over embedded and progressively
downloaded video:
• Video playback starts sooner than it does using other methods of incorporating video.
• Streaming uses less of the client's memory and disk space, because the clients don’t need to download the entire file.
• Network resources are used more efficiently, because only the parts of the video that are viewed are sent to the client.
• Delivery of media is more secure, because media is not saved to the client’s cache when streamed.
• Streaming video provides better tracking, reporting, and logging ability.
• Streaming lets you deliver live video and audio presentations, or capture video from a web cam or digital video
camera.
• Flash Media Server enables multiway and multiuser streaming for video chat, video messaging, and video
conferencing applications.
• By using server-side scripting to control video and audio streams, you can create server-side play lists, synchronized
streams, and more intelligent delivery options based on the client’s connection speed.
To learn more about Flash Media Server, see www.adobe.com/go/flash_media_server.
To learn more about Flash Video Streaming Service, see www.adobe.com/go/learn_fvss_en.
Embed a video file within a Flash file
When you embed a video file, all of the video file data is added to the Flash Professional file. This results in a much
larger Flash Professional file and subsequent SWF file. The video is placed in the Timeline where you can see the
individual video frames represented in the Timeline frames. Because each video frame is represented by a frame in the
Timeline, the frame rate of the video clip and the SWF file must be set to the same rate. If you use different frame rates
for the SWF file and the embedded video clip, video playback is inconsistent.
Note: To use variable frame rates, stream the video using either progressive downloading or Flash Media Server. When
you import video files using either of these methods, the FLV or F4V files are self-contained and run at a frame rate
separate from that of all other timeline frame rates included in the SWF file.
Embedded video works best for smaller video clips, with a playback time of less than 10 seconds. If you are using video
clips with longer playback times, consider using progressively downloaded video, or streaming video using Flash Media
Server.
The limitations of embedded video include:
• You might encounter problems if the resulting SWF files become excessively large. Flash Player reserves a lot of
memory when downloading and attempting to play large SWF files with embedded video, which can cause Flash
Player to fail.
• Longer video files (over 10 seconds long) often have synchronization issues between the video and audio portions
of a video clip. Over time, the audio track begins playing out of sequence with the video, causing a less than desirable
viewing experience.
Last updated 6/12/2015
244
Multimedia and Video
• To play a video embedded in a SWF file, the entire video file must be downloaded before the video starts to play. If
you embed an excessively large video file, it might take a long time for the SWF file to download in its entirety and
for playback to start.
• After a video clip is imported, it cannot be edited. Instead, you must re-edit and re-import the video file.
• When publishing your SWF file via the web, the entire video must be downloaded to the viewer’s computer before
video playback can begin.
• At runtime, the entire video must fit into the local memory of the playback computer.
• The length of an imported video file cannot exceed 16000 frames.
• The video frame rate and Flash Professional Timeline frame rate must be the same. Set the frame rate of your Flash
Professional file to match the frame rate of the embedded video.
You can preview frames of an embedded video by dragging the playhead along the Timeline (scrubbing). Note that the
video sound track does not play back during scrubbing. To preview the video with sound, use the Test Movie command.
Embedding a video within a Flash file
1 Select File > Import > Import Video to import the video clip into the current Flash Professional document.
2 Select one of the following options:
Load external video with playback component: Imports the video and creates an instance of the FLVPlayback
component to control video playback.
Embed FLV in SWF and play in timeline: Embeds the FLV into the Flash document and places it in the timeline.
Embed H.264 videos in timeline: Embeds H.264 videos into the Flash document. When you import a video using
this option, it is placed on the stage to be used as a guide for your animation at design time. Frames from the video
are rendered on the stage as you scrub through or play the timeline. The audio for the relevant frames is also played
back.
Note:
• When you try to publish your FLA file with H264 video content on a layer that is neither a guide layer nor a
hidden layer, a warning is shown if the platform you are publishing to does not support embedded H.264 videos..
3 Click Browse and select the video file from your computer and click Next.
Optional: If you have Adobe Media Encoder installed on your computer and you want to convert the video to
another format using AME, click Convert video.
4 Choose the symbol type with which to embed the video.
Embedded Video If you’re using the video clip for linear playback in the Timeline, importing the video into the
Timeline is the most appropriate method.
Movie Clip A best practice is to place video inside a movie clip instance, because you have the most control over the
content. The video’s Timeline plays independently from the main Timeline. You do not have to extend your main
Timeline by many frames to accommodate the video, which can make working with your FLA file difficult.
Graphic When you embed a video clip as a graphic symbol, you cannot interact with the video using ActionScript
(typically you use graphic symbols for static images and to create reusable pieces of animation that are tied to the
main Timeline).
5 Import the video clip directly onto the Stage (and the Timeline) or as a library item.
By default, Flash Professional places the video you import on the Stage. To import into the library only, deselect
Place Instance on Stage.
Last updated 6/12/2015
245
Multimedia and Video
If you’re creating a simple video presentation with linear narration and little to no interaction, accept the default
setting and import the video to the Stage. To create a more dynamic presentation, work with multiple video clips, or
add dynamic transitions or other elements using ActionScript, import the video into the library. After a video clip
is in the library, customize it by converting it into a MovieClip object that you can more easily control with
ActionScript.
By default, Flash Professional expands the Timeline to accommodate the playback length of the video clip you are
embedding.
If the video file contains audio that you don't want to import, deselect Include audio.
6 Click Next. Review the confirmation messages and click Finish.
The Video Import wizard embeds the video into the SWF file. The video appears either on the Stage or in the library
depending on the embedding options you chose.
7 In the Property inspector (Window > Properties), give the video clip an instance name, and make any modifications
to the video clip’s properties.
Import video files into the library
To import FLV, F4V, or H.264 videos, use the Import > Import Video or Import to Library commands.
To create your own video player, which dynamically loads FLV or F4V files from an external source, place your video
inside a movie clip symbol. When you load FLV or F4V files dynamically, adjust the dimensions of the movie clip to
match the actual dimension of the video file and scale the video by scaling the movie clip.
Note: A best practice is to place video inside a movie clip instance, which gives you the most control over the content. The
video’s Timeline plays independently from the main Timeline. You do not have to extend your main Timeline by many
frames to accommodate the video, which can make working with your FLA file difficult.
❖ To import an FLV, SWF, or H.264 video file into the library, do one of the following:
• Select File > Import > Import To Library.
• Select any existing video clip in the Library Panel, and select Properties from the Library Panel menu. Click
Import. Locate the file to import, and click Open.
Change the properties of a video clip
You can change properties for an instance of an embedded video clip on the Stage, assign the instance an instance name,
and change its width, height, and position on the Stage using the Property inspector. You can also swap an instance of
a video clip—assign a different symbol to an instance of a video clip. Assigning a different symbol to an instance
displays a different instance on the Stage but leaves all the other instance properties (such as dimensions and
registration point) intact.
In the Video Properties dialog box, you can do the following:
• View information about an imported video clip, including its name, path, creation date, pixel dimensions, length,
and file size
• Change the video clip name
• Update the video clip if you modify it in an external editor
• Import an FLV or F4V file to replace the selected clip
• Export a video clip as an FLV or F4V file
For lessons on working with video, see the Adobe Flash Support Center at www.adobe.com/go/flash_video.
Last updated 6/12/2015
246
Multimedia and Video
Change video instance properties in the Property inspector
1 Select an instance of an embedded or linked video clip on the Stage.
2 Select Window > Properties, and do any of the following:
• Enter an instance name in the Name text field on the left side of the Property inspector.
• Enter values for W and H to change the dimensions of the video instance.
• Enter values for X and Y to change the position of the upper-left corner of the instance on the Stage.
• Click Swap. Select a video clip to replace the clip currently assigned to the instance.
note: You can swap an embedded video clip only with another embedded video clip, and you can swap a linked video
clip only with another linked video clip.
View video clip properties in the Video Properties dialog box
1 Select a video clip in the Library Panel.
2 Select Properties from the Library Panel menu, or click the Properties button located at the bottom of the Library
Panel. The Video Properties dialog box is displayed.
Assign a new name to, update, or replace a video
1 Select the video clip in the Library Panel and select Properties from the Library Panel menu.
2 Do one of the following:
• To assign a new name, enter the name in the Name text field.
• To update a video, navigate to the updated video file and click Open.
• To replace a video, click Import, navigate to the FLV, F4V, or H.264 file to replace the current clip, and click Open.
Control video playback using the Timeline
To control playback of an embedded video file, control the Timeline that contains the video. For example, to pause a
video playing on the main Timeline, you would call a stop() action that targets that Timeline. Similarly, you can control
a video object in a movie clip symbol by controlling the playback of that symbol’s Timeline.
You can apply the following actions to imported video objects in movie clips: goTo, play, stop, toggleHighQuality,
stopAllSounds, getURL,FScommand, loadMovie, unloadMovie, ifFrameLoaded, and onMouseEvent. To apply actions
to a Video object, first convert the Video object to a movie clip.
To show a live video stream from a camera, use ActionScript. First, place a Video object on the Stage, select New Video
from the Library Panel menu. To attach the video stream to the Video object, use Video.attachVideo.
See also Video and attachVideo (Video.attachVideo method) in the ActionScript 2.0 Language Reference, and fl.video in
the ActionScript 3.0 Language Reference.
Update an embedded video after editing its source file
1 Select the video clip in the Library Panel.
2 Select Properties and click Update.
The embedded video clip is updated with the edited file. The compression settings you selected when you first
imported the video are reapplied to the updated clip.
Last updated 6/12/2015
247
Multimedia and Video
Tutorials and examples
The following videos and articles provide additional detailed information about working with video in Flash
Professional. Some videos show Flash Professional CS3 or CS4, but still apply to Flash Professional CS5.
• Article: Video Learning Guide for Flash (Adobe.com)
• Video: Working with video (3:23) (Adobe.com)
• Video: Importing and using video in Flash (CS3) (1:50) (Adobe.com)
• Video: Flash 411 - Video players for the Flash phobic (10:26) (Adobe.com)
• Video: Flash 411 – Video crash course (10:43) (Adobe.com)
• Video: Exporting from After Effects to Flash (6:02) (Adobe.com)
• Video: Exporting from After Effects to Flash via XFL (2:43) (Adobe.com)
• Video: Converting metadata and markers to cue points (4:07) (Adobe.com)
• Video: Flash 411 - Hookin’ up with Flash Media Server (21:29) (Adobe.com)
• Video: Advanced Video Streaming and Mgmt Techs with Flex and Flash (73:45) (Adobe.com)
• Article: Video Learning Guide for Flash (Adobe.com)
• Article: Getting started with the ActionScript 3 FLVPlayback component (Adobe.com)
• Article: Skinning the ActionScript 3 FLVPlayback component (Adobe.com)
• Article: Controlling web video with ActionScript 3 FLVPlayback programming (Adobe.com)
• Article: Web video template: Spokesperson presentation with synchronized graphics (Adobe.com)
• Article: Web video template: Showcase website for personal video (Adobe.com)
More Help topics
Specify the contentPath or source parameter
The FLVPlayback component
The FLVPlayback component
Working with video
Video formats and Flash
Test document download performance
About symbols
Playing external FLV or F4V files dynamically
Create video files for use in Flash
Adobe Flash Professional can incorporate digital video footage into web-based presentations. The FLV and F4V
(H.264) video formats offer technological and creative benefits that let you fuse video together with data, graphics,
sound, and interactive control. FLV and F4V video let you easily put video on a web page in a format that almost anyone
can view.
Last updated 6/12/2015
248
Multimedia and Video
How you choose to deploy your video determines how you create your video content, and how you integrate it with
Flash Professional. You can incorporate video into Flash Professional in the following ways:
Stream video with Adobe Flash Media Server You can host video content on Adobe® Flash® Media Server, a server
solution optimized to deliver real-time media. Flash Media Server uses the Real-Time Messaging Protocol (RTMP), a
protocol designed for real-time server applications such as streaming video and audio content. You can host your own
Flash Media Server, or use a hosted Flash® Video® Streaming Service (FVSS). Adobe has partnered with several content
delivery network (CDN) providers to offer hosted services for delivering on-demand FLV or F4V file video across highperformance, reliable networks. Built with Flash Media Server and integrated directly into the delivery, tracking, and
reporting infrastructure of the CDN network, FVSS provides the most effective way to deliver FLV or F4V files to the
largest possible audience without the hassle of setting up and maintaining your own streaming server hardware and
network.
To control video playback and provide intuitive controls for users to interact with the streaming video, use the
FLVPlayback component, Adobe® ActionScript®, or the Open Source Media Framework (OSMF). For more
information about using the OSMF, see the OSMF documentation.
Progressively download video from a web server If you don’t have access to Flash Media Server or FVSS, or your video
needs are for a low-volume website with only limited amounts of video content, you can consider progressive
downloading. Progressively downloading a video clip from a web server doesn’t provide the real-time performance that
Flash Media Server does; however, you can use relatively large video clips, and keep the size of your published SWF files
to a minimum.
To control video playback and provide intuitive controls for users to interact with the video, use the FLVPlayback
component or ActionScript.
Embed video in the Flash document You can embed a small, short-duration video file directly into the Flash
Professional document, and publish it as part of the SWF file. Embedding video content directly into the Flash
Professional SWF file significantly increases the size of published file, and is only suitable for small video files (typically
less then 10 seconds in length). In addition, the audio to video synchronization (also known as audio/video sync) can
become mis-synchronized when using longer video clips embedded in the Flash document. Another disadvantage to
embedding video within the SWF file is that you cannot update the video without republishing the SWF file.
Note: When you try to publish your FLA with H264 video content on a layer that is neither a guide layer nor a hidden
layer, a warning message appears that the platform you are publishing to does not support embedded H.264 videos.
Control video playback
You can control the playback of video in Flash Professional using the FLVPlayback component, by writing custom
ActionScript to play an external video stream, or by writing custom ActionScript to control the playback of video in the
Timeline for embedded video.
FLVPlayback component Lets you quickly add a full-featured FLV playback control to your Flash Professional
document and provides support for both progressive downloading and streaming FLV or F4V files. FLVPlayback lets
you easily create intuitive video controls for users to control video playback and apply pre-made skins, or apply your
own custom skins to the video interface. For more information see The FLVPlayback component.
Open Source Media Framework (OSMF) The OSMF enables developers to easily choose and combine pluggable
components to create high-quality, full-featured playback experiences. For more information, see the OSMF web site,
and the OSMF documentation. The Adobe DevNet article RealEyes OSMF Player Sample - Part 1: Setup and
Deployment provides a detailed example of working with the OSMF.
Control external video using ActionScript Play back external FLV or F4V files in a Flash Professional document at
runtime using the NetConnection and NetStream ActionScript objects. For more information see Controlling external
video playback with ActionScript .
Last updated 6/12/2015
249
Multimedia and Video
You can use video behaviors (pre-written ActionScript scripts) to control video playback.
Control embedded video in the Timeline To control playback of embedded video files, you must write ActionScript to
control the Timeline containing the video. For more information see Control video playback using the Timeline.
The Video Import Wizard
The Video Import Wizard simplifies the importing of video into a Flash Professional document by guiding you through
the process of selecting an existing video file, and importing the file for use in one of three different video playback
scenarios. The Video Import Wizard provides a basic level of configuration for the import and playback method you
choose, which you can later modify for your specific requirements.
The Video Import dialog box provides these video import options:
Load external video with playback component Imports the video and creates an instance of the FLVPlayback
component to control video playback. When you are ready to publish the Flash document as a SWF and upload it to
your web server, you must also upload the video file to either a web server or Flash Media Server, and configure the
FLVPlayback component with the location of the uploaded video file.
Embed FLV in SWF and play in timeline Embeds the FLV into the Flash document. When you import video this way,
the video is placed in the Timeline where you can see the individual video frames represented in the Timeline frames.
An embedded FLV video file becomes part of the Flash Professional document.
note: Embedding video content directly into the Flash Professional SWF file significantly increases the size of published
file, and is only suitable for small video files. In addition, the audio to video synchronization (also known as audio/video
sync) can become mis-synchronized when using longer video clips embedded in the Flash document.
Embed H.264 video in timeline Embeds H.264 videos into the Flash document. When you import a video using this
option, it can be placed on the stage to be used as a guide for your animation at design time. Frames from the video will
rendered on the stage as you scrub through or play the timeline. The audio for the relevant frames will also be played
back.
Note:
•
When you try to publish your FLA with H264 video content on a layer that is neither a guide layer nor a hidden
layer, a warning message appears that the platform you are publishing to does not support embedded H.264 videos.
Video formats and Flash
To import video into Flash you must use video encoded in the FLV or H.264 format. The Video Import Wizard (File >
Import > Import Video) checks video files that you select for import, and alerts you if the video might not be in a format
that Flash can play. In the event that the video is not in either the FLV or F4V format, you can use Adobe® Media®
Encoder to encode the video in the appropriate format.
Adobe Media Encoder
Adobe® Media® Encoder is a stand-alone encoding application employed by programs such as Adobe® Premiere® Pro,
Adobe® Soundbooth®, and Flash Professional for output to certain media formats. Depending on the program, the
Adobe Media Encoder provides a specialized Export Settings dialog box that accommodates the numerous settings
associated with certain export formats, such as Adobe Flash Video and H.264. For each format, the Export Settings
dialog box includes a number of presets that are tailored for particular delivery media. You can also save custom presets,
which you can share with others or reload as needed.
For information on encoding video in the H.264 or F4V format using Adobe Media Encoder, see Using Adobe Media
Encoder.
Last updated 6/12/2015
250
Multimedia and Video
The H.264, On2 VP6, and Sorenson Spark video codecs
When encoding video using Adobe Media Encoder, you can choose from three different video codecs with which to
encode your video content for use with Flash:
H.264 Support for the H.264 video codec was incorporated into Flash Player beginning with version 9.0.r115. The F4V
video format which uses this codec provides a significantly better quality-to-bitrate ratio than previous Flash video
codecs, however, it is more computationally demanding than the Sorenson Spark and On2 VP6 video codecs released
with Flash Player 7 and 8.
note: If you need to use video with alpha channel support for compositing, you must use the On2 VP6 video codec; F4V
does not support alpha video channels.
On2 VP6 The On2 VP6 codec is the preferred video codec to use when creating FLV files you intend to use with Flash
Player 8 and higher. The On2 VP6 codec provides:
• Higher quality video when compared to the Sorenson Spark codec encoded at the same data rate
• Support for the use of an 8-bit alpha channel to composite video
To support better quality video at the same data rate, the On2 VP6 codec is noticeably slower to encode and requires
more processor power on the client computer to decode and play back. For this reason, carefully consider the lowest
common denominator of computer you intend your viewing audience to use when accessing your FLV video
content.
Sorenson Spark Introduced in Flash Player 6, the Sorenson Spark video codec should be used if you intend to publish
Flash documents requiring backwards compatibility to Flash Player 6 and 7. If you anticipate a large user base that uses
older computers, you should consider FLV files encoded with the Sorenson Spark codec, as it is much less
computationally demanding to play back than either the On2 VP6 or H.264 codecs.
If your Flash Professional content dynamically loads Flash Professional video (using either progressive download or
Flash Media Server), you can use On2 VP6 video without having to republish a SWF file originally created for use with
Flash Player 6 or 7, as long as users use Flash Player 8 or later to view your content. By streaming or downloading On2
VP6 video into Flash SWF versions 6 or 7, and playing the content using Flash Player 8 or later, you avoid having to
recreate your SWF files for use with Flash Player 8 and later versions.
Note: Only Flash Player 8 and 9 support both publish and playback of On2 VP6 video.
Codec
SWF version (publish version)
Flash Player version (required for
playback)
Sorenson Spark
6
6, 7, 8
7
7, 8, 9, 10
On2 VP6
6, 7, 8
8, 9, 10
H.264
9.2 or later
9.2 or later
Tips for creating Adobe FLV and F4V video
Follow these guidelines to deliver the best possible FLV or F4V video:
Work with video in the native format of your project until your final output
If you convert a precompressed digital video format into another format such as FLV or F4V, the previous encoder can
introduce video noise. The first compressor already applied its encoding algorithm to the video, reducing its quality,
frame size, and rate. That compression may have also introduced digital artifacts or noise. This additional noise affects
the final encoding process, and a higher data rate may be required to encode a good-quality file.
Last updated 6/12/2015
251
Multimedia and Video
Strive for simplicity
Avoid elaborate transitions—they don’t compress well and can make your final compressed video look “chunky” during
the change. Hard cuts (as opposed to dissolves) are usually best. Eye-catching video sequences—for instance showing
an object zooming from behind the first track, doing a “page peel,” or wrapping around a ball and then flying off the
screen—don’t compress well and should be used sparingly.
Know your audience data rate
When you deliver video over the Internet, produce files at lower data rates. Users with fast Internet connections can
view the files with little or no delay for loading, but dial-up users must wait for files to download. Make the clips short
to keep the download times within acceptable limits for dial-up users.
Select the proper frame rate
Frame rate indicates frames per second (fps). If you have a higher data rate clip, a lower frame rate can improve playback
through limited bandwidth. For example, if you are compressing a clip with little motion, cutting the frame rate in half
probably saves you only 20% of the data rate. However, if you are compressing high-motion video, reducing the frame
rate has a much greater effect on the data rate.
Because video looks much better at native frame rates, leave the frame rate high if your delivery channels and playback
platforms allow. For web delivery, get this detail from your hosting service. For mobile devices, use the device-specific
encoding presets, and the device emulator available through Adobe Media Encoder in Adobe Premiere Pro. If you need
to reduce the frame rate, the best results come from dividing the frame rate by whole numbers.
Select a frame size that fits your data rate and frame aspect ratio
At a given data rate (connection speed), increasing the frame size decreases video quality. When you select the frame
size for your encoding settings, consider frame rate, source material, and personal preferences. To prevent pillarboxing,
it’s important to choose a frame size of the same aspect ratio as that of your source footage. For example, you get
pillarboxing if you encode NTSC footage to a PAL frame size.
Adobe Media Encoder makes several Adobe FLV or F4V video presets available. These include preset frame sizes and
frame rates for the different television standards at different data rates. Use the following list of common frame sizes (in
pixels) as a guide, or experiment with the various Adobe Media Encoder presets to find the best setting for your project.
Dial-up Modem NTSC 4 x 3 162 x 120
Dial-up Modem PAL 4 x 3 160 x 120
T1/DSL/cable NTSC 4 x 3 648 x 480
T1/DSL/cable PAL 4 x 3 768 x 576
Stream for best performance
To eliminate download time, provide deep interactivity and navigation capabilities, or monitor quality of service,
stream Adobe FLV or F4V video files with the Flash Media Server or use the hosted service from one of Adobe’s Flash
Video Streaming Service partners available through the Adobe website. For more details on the difference between
Progressive Download and Streaming with Flash Media Server, see “Delivering Flash Video: Understanding the
Difference Between Progressive Download and Streaming Video” on the Flash Developer Center website.
Know progressive download times
Know how long it will take to download enough of your video so that it can play to the end without pausing to finish
downloading. While the first part of your video clip downloads, you may want to display other content that disguises
the download. For short clips, use the following formula: Pause = download time – play time + 10% of play time. For
example, if your clip is 30 seconds long and it takes one minute to download, give your clip a 33-second buffer (60
seconds – 30 seconds + 3 seconds = 33 seconds).
Last updated 6/12/2015
252
Multimedia and Video
Remove noise and interlacing
For the best encoding, you might need to remove noise and interlacing.
The higher the quality of the original, the better the final result. Although frame rates and sizes of Internet video are
usually smaller than those of television, computer monitors have much better color fidelity, saturation, sharpness, and
resolution than conventional televisions. Even with a small window, image quality can be more important for digital
video than for standard analog television. Artifacts and noise that are barely noticeable on TV can be obvious on a
computer screen.
Adobe Flash is intended for progressive display on computer screens and other devices, rather than on interlaced
displays such as TVs. Interlaced footage viewed on a progressive display can exhibit alternating vertical lines in highmotion areas. Thus, Adobe Media Encoder removes interlacing from all video footage that it processes.
Follow the same guidelines for audio
The same considerations apply to audio production as to video production. To achieve good audio compression, begin
with clean audio. If you are encoding material from a CD, try to record the file using direct digital transfer instead of
through the analog input of your sound card. The sound card introduces an unnecessary digital-to-analog and analogto-digital conversion that can create noise in your source audio. Direct digital transfer tools are available for Windows
and Macintosh platforms. To record from an analog source, use the highest-quality sound card available.
Note: If your source audio file is monaural (mono), it is recommended that you encode in mono for use with Flash. If you
are encoding with Adobe Media Encoder, and using an encoding preset, be sure to check if the preset encodes in stereo or
mono, and select mono if necessary.
Tutorials and examples
The following video tutorials and articles provide detailed explanations of creating and preparing video for use in Flash
Professional. Some items show Flash Professional CS3 or CS4, but still apply to Flash Professional CS5.
• Video: Creating FLV and F4V files (4:23) (Adobe.com)
• Video: Flash 411 - Video encoding basics (15:16) (Adobe.com)
• Video: Batch encoding with Adobe Media Encoder (5:45) (Adobe.com)
• Article: Using Adobe Media Encoder (Adobe.com)
• Article: H.264 for the rest of us (Adobe.com)
More Help topics
Add video to Flash
The FLVPlayback component
Controlling external video playback with ActionScript
Using sounds in Flash
Last updated 6/12/2015
253
Multimedia and Video
About sounds and Flash
Adobe Flash Professional offers several ways to use sound. Make sounds that play continuously, independent of the
Timeline, or use the Timeline to synchronize animation to a sound track. Add sounds to buttons to make them more
interactive, and make sounds fade in and out for a more polished sound track.
There are two types of sounds in Flash Professional: event sounds and stream sounds. An event sound must download
completely before it begins playing, and it continues playing until explicitly stopped. Stream sounds begin playing as
soon as enough data for the first few frames has been downloaded; stream sounds are synchronized to the Timeline for
playing on a website.
If you’re creating Flash Professional content for mobile devices, Flash Professional also lets you include device sounds
in your published SWF file. Device sounds are encoded in the device’s natively supported audio format, such as MIDI,
MFi, or SMAF.
You can use shared libraries to link a sound to multiple documents. You can also use the ActionScript® 2.0
onSoundComplete event or ActionScript® 3.0 soundComplete event to trigger an event based on the completion of a
sound.
You can load sounds and control sound playback using prewritten behaviors or media components; the latter also
provide a controller for stop, pause, rewind, and so on. You can also use ActionScript 2.0 or 3.0 to load sounds
dynamically.
For more information, see attachSound (Sound.attachSound method) and loadSound (Sound.loadSound method)in
ActionScript 2.0 Language Reference or Sound class in ActionScript 3.0 Language and Components Reference.
Note: (Flash Professional CC only) ActionScript 2.0 and ActionScript 1.0 are not supported with Flash Pro CC.
Note: (Flash Professional CC only) To work with sounds in Flash Pro CC, pre-installing QuickTime or iTunes is not needed.
The following videos and articles provide detailed instruction on using sound in Flash Professional.
• Video: Working with sound (2:57)
• Video: Working with Soundbooth and Flash (4:02)
• Video: Layers TV – Episode 74: 3D tools and sound (23:09)
• Article: Synchronizing text with audio
• Video series: Working with audio
• Video: Audio in Flash: Part 1 (Sound on the Timeline) LayersMagazine.com
• Video: Audio in Flash: Part 2 (Sound and ActionScript) LayersMagazine.com
Importing sounds
You place sound files into Flash Professional by importing them into the library or directly importing them to stage.
The File > Import > Import to Library menu option places the audio only in the library, and not on the timeline.
When you import an audio file using File > Import > Import to Stage menu option or by dragging and dropping the
audio file directly to the timeline, the audio will be placed on active frame of the active layer. If you drag and drop
multiple audio files, only one audio file will be imported because one frame can contain only one audio.
To import audio, use one of the following methods:
• To import an audio file to library, select File > Import > Import To Library and select the audio file that you want to
import.
Last updated 6/12/2015
254
Multimedia and Video
• To import an audio file to stage, select File > Import > Import To Stage and select the audio file that you want to
import.
• Drag-and-drop the audio file directly to the stage.
Note: You can also drag a sound from a common library into the library for the current document.
Flash Professional stores sounds in the library along with bitmaps and symbols. You need only one copy of a sound file
to use that sound multiple ways in your document.
If you want to share sounds among Flash Professional documents, you can include the sounds in shared libraries.
Flash Professional includes a Sounds library containing many useful sounds that can be used for effects. To open the
Sounds library, choose Window > Common Libraries > Sounds. To import a sound from the Sounds library to your
FLA file, drag the sound from the Sounds library to the Library panel of your FLA file. You can also drag sounds from
the Sounds library to other shared libraries.
Sounds can use large amounts of disk space and RAM. However, mp3 sound data is compressed and smaller than WAV
or AIFF sound data. Generally, when using WAV or AIFF files, it’s best to use 16-22 kHz mono sounds (stereo uses twice
as much data as mono), but Flash Professional can import either 8- or 16-bit sounds at sample rates of 11, 22, or 44 kHz.
Sounds recorded in formats that are not multiples of 11 kHz (such as 8, 32, or 96 kHz) are resampled when imported
into Flash Professional. Flash Professional can convert sounds to lower sample rates on export.
If you want to add effects to sounds in Flash Professional, it’s best to import 16-bit sounds. If you have limited RAM,
keep your sound clips short or work with 8-bit sounds instead of 16-bit sounds.note: (Flash Professional CC only) To
import or play sounds in Flash Pro, pre-installing QuickTime or iTunes is not needed.
Supported sound file formats
You can import the following sound file formats into Flash Professional:
• Adobe Sound (.asnd). This is the native sound format of Adobe® Soundbooth™.
• Wave (.wav)
• AIFF (.aif, .aifc)
• mp3
You can import these additional sound file formats:
• Sound Designer® II (.sd2)
• Sun AU (.au, .snd)
• FLAC (.flac)
• Ogg Vorbis (.ogg, .oga)
• The ASND format is a non-destructive audio file format, native to Adobe Soundbooth. ASND files can contain
audio data with effects that can be modified later, Soundbooth multitrack sessions, and snapshots that allow you to
revert to a previous state of the ASND file.
• WebGL and HTML5 Canvas doctypes support only MP3 and WAV formats.
Add a sound directly from your computer to the Timeline
You can import audio directly from your computer over to the Timeline by using any of the following methods:
• Select File > Import > Import to Stage and select the audio file that you want to import.
• Drag and drop the audio file to the stage/timeline.
Last updated 6/12/2015
255
Multimedia and Video
Note that only add one audio file at a time. Dragging and dropping multipe audio files will import only one audio file
to the timeline.
Add a sound from the library to the Timeline
You can add a sound to a document using the library, or you can load a sound into a SWF file during runtime, using
the loadSound method of the Sound object. For more information, see loadSound (Sound.loadSound method) in the
ActionScript 2.0 Language Reference or Sound Class in the ActionScript 3.0 Reference.
1 Import the sound into the library if it has not already been imported.
2 Select Insert > Timeline > Layer.
3 With the new sound layer selected, drag the sound from the Library panel onto the Stage. The sound is added to the
current layer.
You can place multiple sounds on one layer or on layers containing other objects. However, it is recommended that
each sound be placed on a separate layer. Each layer acts as a separate sound channel. The sounds on all layers are
combined when you play the SWF file.
4 In the Timeline, select the first frame that contains the sound file.
5 Select Window > Properties, and click the arrow in the lower-right corner to expand the Property inspector.
6 In the Property inspector, select the sound file from the Sound pop-up menu.
7 Select an effect option from the Effects pop-up menu:
None Applies no effects to the sound file. Select this option to remove previously applied effects.
Left Channel/Right Channel Plays sound in the left or right channel only.
Fade Left To Right/Fade Right To Left Shifts the sound from one channel to the other.
Fade In Gradually increases the volume of a sound over its duration.
Fade Out Gradually decreases the volume of a sound over its duration.
Custom Lets you create custom in and out points of sound using the Edit Envelope.
Note: Effects are not supported on WebGL and HTML5 Canvas documents.
8 Select a synchronization option from the Sync pop-up menu:
Event Synchronizes the sound to the occurrence of an event. An event sound plays when its starting keyframe first
appears and the plays in its entirety, independently of the playhead in the Timeline, even if the SWF file stops
playing. Event sounds are mixed when you play your published SWF file.
If an event sound is playing and the sound is instantiated again (for example, by the user clicking a button again, or
the playhead passing the starting keyframe of the sound), the first instance of the sound continues to play and
another instance of the same sound begins to play simultaneously. Keep this in mind when using longer sounds, as
they can potentially overlap, causing unintended audio effects.
Start The same as Event, except that if the sound is already playing, no new instance of the sound plays.
Stop Silences the specified sound.
Stream Synchronizes the sound for playing on a website. Flash Professional forces animation to keep pace with
stream sounds. If Flash Professional can’t draw animation frames quickly enough, it skips frames. Unlike event
sounds, stream sounds stop if the SWF file stops playing. Also, a stream sound can never play longer than the length
of the frames it occupies. Stream sounds are mixed when you publish your SWF file.
An example of a stream sound is the voice of a character in an animation that plays in multiple frames.
Last updated 6/12/2015
256
Multimedia and Video
Note: If you use an mp3 sound as a stream sound, you must recompress the sound for export. You can export the
sound as an mp3 file, with the same compression settings that it had on import.
These choices are explained and demonstrated in this video tutorial by Andy Anderson at InfiniteSkills.com.
Flash remembers the audio sync options in property inspector. If a sound is selected from the “Sound” section of
the Properties Inspector, then on trying to set another sound on a new keyframe from the Properties Inspector,
Flash remembers the sync options “Stream” or “Event” of the previous sound.
Note: Stream setting is not supported in WebGL and HTML5 Canvas documents.
9 Enter a value for Repeat to specify the number of times the sound should loop, or select Loop to repeat the sound
continuously.
For continuous play, enter a number large enough to play the sound for an extended duration. For example, to loop
a 15-second sound for 15 minutes, enter 60. Looping stream sounds is not recommended. If a stream sound is set
to loop, frames are added to the file and the file size is increased by the number of times the sound is looped.
10 To test the sound, drag the playhead over the frames containing the sound or use commands in the Controller or
the Control menu.
Remove a sound from the Timeline
1 In the Timeline layer containing the sound, select a frame that also contains the sound.
2 In the Property inspector, go to the Sound section and select None from the Name menu.
Flash deletes the sound from the Timeline layer.
Add a sound to a button
You can associate sounds with the different states of a button symbol. Because the sounds are stored with the symbol,
they work for all instances of the symbol.
1 Select the button in the Library panel.
2 Select Edit from the Panel menu in the upper-right corner of the panel.
3 In the button’s Timeline, add a layer for sound (Insert > Timeline > Layer).
4 In the sound layer, create a regular or blank keyframe to correspond with the button state to which you want to add
a sound (Insert > Timeline > Keyframe or Insert > Timeline > Blank Keyframe).
For example, to add a sound that plays when you click the button, create a keyframe in the frame labeled Down.
5 Click the keyframe you created.
6 Select Window > Properties.
7 In the Property inspector, select a sound file from the Sound pop-up menu.
8 Select Event from the Sync pop-up menu.
To associate a different sound with each of the button’s keyframes, create a blank keyframe and add another sound
file for each keyframe. You can also use the same sound file and apply a different sound effect for each button
keyframe.
Last updated 6/12/2015
257
Multimedia and Video
Synchronize a sound with animation
To synchronize a sound with animation, you start and stop the sound at keyframes.
1 Add a sound to the Timeline in its own layer (see above for instructions).
2 To synchronize this sound with an event in the scene, create a beginning keyframe for the sound that corresponds
to the keyframe of the event in the scene that you want to trigger the sound. You can select any of the
synchronization options described above (see Add a sound to the Timeline).
3 Create a keyframe in the sound layer’s Timeline at the frame where you want the sound to end. A representation of
the sound file appears in the Timeline.
4 Select Window > Properties, and click the arrow in the lower-right corner to expand the Property inspector.
5 In the Property inspector, select the same sound from the Sound pop-up menu.
6 Still in the Property inspector, select Stop from the Sync pop-up menu.
When you play the SWF file, the sound stops playing when it reaches the ending keyframe.
7 To play back the sound, drag the playhead in the Timeline.
Edit a sound in Flash
In Flash Professional, you can define the starting point of a sound or control the volume of the sound as it plays. You
can also change the point at which a sound starts and stops playing. This is useful for making sound files smaller by
removing unused sections.
1 Add a sound to a frame, or select a frame that already contains a sound.
2 Select Window > Properties.
3 Click the Edit button on the right side of the Property inspector.
4 Do any of the following:
• To change the start and end points of a sound, drag the Time In and Time Out controls in the Edit Envelope.
• To change the sound envelope, drag the envelope handles to change levels at different points in the sound.
Envelope lines show the volume of the sound as it plays. To create additional envelope handles (up to eight total),
click the envelope lines. To remove an envelope handle, drag it out of the window.
• To display more or less of the sound in the window, click the Zoom In or Out buttons.
• To switch the time units between seconds and frames, click the Seconds and Frames buttons.
5 To hear the edited sound, click the Play button.
Split a sound on timeline
You can split the stream audio embedded on the timeline using the Split Audio context menu. Split Audio enables you
to pause the audio when it is necessary and then resume the audio playback from the point it was stopped at a later
frame on the timeline.
To split an audio clip on your timeline:
1 Select File > Import > Import to library.
2 Select the audio clip and import it to library.
3 Create a new layer on your timeline and add the clip to the layer.
4 Under Properties > Sound, select the Sync type as Streaming.
Last updated 6/12/2015
258
Multimedia and Video
5 Right-click on the frame at which you want to split the audio and click Split Audio.
Edit a sound in Soundbooth
If you have Adobe Soundbooth installed, you can use Soundbooth to edit sounds you have imported into your FLA file.
After making changes in Soundbooth, when you save the file and overwrite the original, the changes are automatically
reflected in the FLA file.
If you change the filename or format of the sound after editing it, you will need to re-import it into Flash Professional.
For a video tutorial about using Flash together with Soundbooth, see Working with Soundbooth and Flash at
www.adobe.com/go/lrvid4100_xp.
Note: Soundbooth is available only on Windows computers and Intel®-based Macintoshes.
To edit an imported sound in Soundbooth:
1 Right-click (Windows) or Ctrl-click (Macintosh) the sound in the Library panel.
2 Choose Edit in Soundbooth from the context menu. The file opens in Soundbooth.
3 Edit the file in Soundbooth.
4 When you are finished, save the file. To save the changes in a non-destructive format, choose the ASND format.
If you save the file in a different format from the original, you will need to re-import the sound file into Flash
Professional.
Last updated 6/12/2015
259
Multimedia and Video
5 Return to Flash Professional to see the edited version of the sound file in the Library panel.
Note: You cannot edit sounds from the Sounds library (Window > Common Libraries > Sounds) with the Edit in
Soundbooth command. To edit these sounds in Soundbooth, open Soundbooth and select the sound from the Resource
Central panel. Edit the sound and then import it into Flash Professional.
Using sounds in Flash Lite
Adobe® Flash® Lite supports two types of sound: standard Flash Professional sounds, like those used in Flash
Professional desktop applications, and device sounds. Flash Lite 1.0 supports device sounds only; Flash Lite 1.1 and 2.x
support both standard sounds and device sounds.
Device sounds are stored in the published SWF file in their native audio format (such as MIDI or MFi); during
playback, Flash Lite passes the sound data to the device, which decodes and plays the sound. Because you can’t import
most device audio formats into Flash Professional, you instead import a proxy sound in a supported format (such as
mp3 or AIFF) that is replaced with an external device sound that you specify.
You can use device sounds only as event sounds—you can’t synchronize device sounds with the Timeline as you can
with standard sounds.
Flash Lite 1.0 and Flash Lite 1.1 do not support the following features available in the desktop version of Flash® Player:
• The ActionScript Sound object
• Loading of external mp3 files
• The Speech Audio Compression option
For more information, see “Working with Sound, Video, and Images” in Developing Flash Lite 2.x Applications or
“Working with Sound” in Developing Flash Lite 1.x Applications.
More Help topics
Sharing library assets at runtime
Sound in Actionscript
(Deprecated with Flash Professional CC) Work with common libraries
Exporting sounds
Transforming and combining graphic objects
Transforming objects
You can transform graphic objects, as well as groups, text blocks, and instances, by using the Free Transform tool or the
options in the Modify > Transform menu. Depending on the type of element you select, you can transform, rotate, skew,
scale, or distort the element. You can change or add to a selection during a transformation operation.
When you transform an object, group, text box, or instance, the Property inspector for that item displays any changes
made to the item’s dimensions or position.
Last updated 6/12/2015
260
Multimedia and Video
A bounding box appears during transform operations that involve dragging. The bounding box is rectangular (unless
it was modified with the Distort command or the Envelope modifier), with its edges initially aligned parallel to the
edges of the Stage. Transformation handles are located on each corner and in the middle of each side. As you drag, the
bounding box previews the transformations.
Move, realign, change, and track the transformation point
During a transformation, a transformation point appears at the center of a selected element. The transformation point
is initially aligned with the object’s center point. You can move the transformation point, return it to its default location,
and move the default point of origin.
For scaling, skewing, or rotating graphic objects, groups, and text blocks, the point opposite the point you drag is the
point of origin by default. For instances, the transformation point is the point of origin by default. You can move the
default point of origin for a transformation.
1 Select the Free Transform tool
, or select one of the Modify > Transform commands.
Once you have begun a transformation, you can track the location of the transformation point in the Info panel and
in the Property inspector.
2 Do one of the following:
• To move the transformation point, drag it from within the selected graphic object.
• To realign the transformation point with the element’s center point, double-click the transformation point.
• To switch the point of origin for a scale or skew transformation, hold down the Alt key (Windows) or Option key
(Macintosh) while dragging your chosen object control point during the transformation.
• In the Info panel, you can toggle to display Registration and Transformation points. The button appears as to
indicate that the registration point coordinates are being displayed. On clicking the same button, it changes to
, indicating that the Transformation coorindates are being displayed.
Use the Free Transform tool
You can perform individual transformations or combine several transformations, such as moving, rotating, scaling,
skewing, and distortion.note: The Free Transform tool cannot transform symbols, bitmaps, video objects, sounds,
gradients, or text. If a multiple selection contains any of these items, only the shape objects are distorted. To transform a
text block, first convert the characters to shape objects.
1 Select a graphic object, group, instance, or text block on the Stage.
2 Click the Free Transform tool
.
Moving the pointer over and around the selection changes the pointer to indicate which transformation function is
available.
Last updated 6/12/2015
261
Multimedia and Video
3 To transform the selection, drag the handles:
• To move the selection, position the pointer over the object within the bounding box, and drag the object to a new
position. Do not drag the transformation point.
• To set the center of rotation or scaling, drag the transformation point to a new location.
• To rotate the selection, position the pointer just outside a corner handle and drag. The selection rotates around
the transformation point. Shift-drag to rotate in 45° increments.
• To rotate around the opposite corner, Alt-drag (Windows) or Option-drag (Macintosh).
• To scale the selection, drag a corner handle diagonally to scale in two dimensions. Shift-drag to resize
proportionally.
• To scale in the respective direction only, drag a corner handle or a side handle horizontally or vertically.
• To skew the selection, position the pointer on the outline between the transformation handles and drag.
• To distort shapes, press Control (Windows) or Command (Macintosh) and drag a corner handle or a side handle.
• To taper the object—to move the selected corner and the adjoining corner equal distances from their origins,
Shift-Control-click to drag (Windows) or Shift-Command-click to drag (Macintosh) a corner handle.
4 To end the transformation, click outside the selected item.
Distort objects
When you apply a Distort transformation to a selected object, dragging a corner handle or an edge handle on the
bounding box moves the corner or edge and realigns the adjoining edges. Shift-drag a corner point to constrain the
distortion to a taper—that is, move that corner and the adjoining corner an equal distance and in the opposite direction
from each other. The adjoining corner is the corner on the same axis as the direction you drag. Control-click
(Windows) or Command-click (Macintosh) to drag a middle point on an edge to move the entire edge freely.
You can distort graphic objects by using the Distort command. You can also distort objects when performing a free
transform on them.
note: The Distort command cannot modify symbols, shape primitives, bitmaps, video objects, sounds, gradients, object
groups, or text. If a multiple selection contains any of these items, only the shape objects are distorted. To modify text, first
convert the characters to shape objects.
1 Select a graphic object or objects on the Stage.
2 Select Modify > Transform > Distort.
3 Place the pointer on one of the transformation handles and drag.
4 To end the transformation, click outside the selected object or objects.
Modify shapes with the Envelope modifier
The Envelope modifier lets you warp and distort objects. An envelope is a bounding box that contains one or more
objects. Changes made to an envelope’s shape affect the shape of the objects in the envelope. You edit the shape of an
envelope by adjusting its points and tangent handles.
Note: The Envelope modifier cannot modify symbols, bitmaps, video objects, sounds, gradients, object groups, or text. If a
multiple selection contains any of these items, only the shape objects are distorted. To modify text, first convert the
characters to shape objects.
1 Select a shape on the Stage.
2 Select Modify > Transform > Envelope.
Last updated 6/12/2015
262
Multimedia and Video
3 Drag the points and tangent handles to modify the envelope.
Scale objects
Scaling an object enlarges or reduces the object horizontally, vertically, or both.
1 Select a graphic object or objects on the Stage.
2 Select Modify > Transform > Scale.
3 Do one of the following:
• To scale the object both horizontally and vertically, drag one of the corner handles. Proportions are maintained
as you scale. Shift-drag to scale nonuniformly.
• To scale the object either horizontally or vertically, drag a center handle.
4 To end the transformation, click outside the selected object or objects.
Note: When you increase the size of a number of items, items near the edges of the bounding box might be moved off
the Stage. If this occurs, select View > Pasteboard to see the elements that are beyond the edges of the Stage.
Rotate and skew objects
Rotating an object turns it around its transformation point. The transformation point is aligned with the registration
point, which defaults to the center of the object, but you can move the point by dragging it.
You can rotate an object by the following methods:
• Dragging with the Free Transform tool
(you can skew and scale the object in the same operation).
• By specifying an angle in the Transform panel (you can scale the object in the same operation).
Rotate and skew objects by dragging
1 Select the object or objects on the Stage.
2 Select Modify > Transform > Rotate And Skew.
3 Do one of the following:
• Drag a corner handle to rotate the object.
• Drag a center handle to skew the object.
4 To end the transformation, click outside the selected object or objects.
Last updated 6/12/2015
263
Multimedia and Video
Rotate objects by 90°
1 Select the object or objects.
2 Select Modify > Transform > Rotate 90° CW to rotate clockwise, or Rotate 90° CCW to rotate counterclockwise.
Skew objects
Skewing an object transforms it by slanting it along one or both axes. You can skew an object by dragging or by entering
a value in the Transform panel.
1 Select the object or objects.
2 Select Window > Transform.
3 Click Skew.
4 Enter angles for the horizontal and vertical values.
Flip objects
You can flip objects across their vertical or horizontal axis without moving their relative position on the Stage.
1 Select the object.
2 Select Modify > Transform > Flip Vertical or Flip Horizontal.
Restore transformed objects
When you use the Free Transform tool or the Transform panel to scale, rotate, and skew instances, groups, and text,
Flash saves the original size and rotation values with the object. This lets you remove the transformations you applied
and restore the original values.
You can undo only the most recent transformation when you select Edit > Undo. You can remove all transformations
by clicking the Remove Transform button in the panel before you deselect the object. After you deselect the object the
original values are lost and the transformation cannot be removed.
Restore a transformed object to its original state
1 Ensure the transformed object is still selected.
2 Do one of the following:
• Click the Remove Transform button
in the Transform panel
• Select Modify > Transform > Remove Transform
Combining objects
To create new shapes by combining or altering existing objects, use the Combine Objects commands in the Modify
menu (Modify > Combine Objects). In some cases, the stacking order of selected objects determines how the operation
works.
Each command applies to specific types of graphic objects, which are noted below. A merge shape is a shape drawn with
a tool set to Merge Drawing mode. A drawing Object is a shape drawn with a tool set to Object Drawing mode.
The Combine Objects commands are:
Union Joins two or more merge shapes or drawing objects. The result is a single Object Drawing mode shape consisting
of all the portions visible on the shapes before they were unified. The unseen, overlapping portions of the shapes are
deleted. note: Unlike when you use the Group command (Modify > Group), you cannot break apart shapes joined by using
the Union command.
Last updated 6/12/2015
264
Multimedia and Video
Intersect Creates an object from the intersection of two or more drawing objects. The resulting Object Drawing shape
consists of the overlapping portions of the combined shapes. Any part of the shape that doesn’t overlap is deleted. The
resulting shape uses the fill and stroke of the top-most shape in the stack.
Punch Removes portions of a selected drawing object as defined by the overlapping portions of another selected
drawing object positioned in front of it. Any part of a drawing object that is overlapped by the top-most object is
deleted, and the top-most object is deleted entirely. The resulting objects remain separate and are not combined into a
single object (unlike the Union or Intersect commands, which join the objects together).
Crop Uses the outline of one drawing object to crop another drawing object. The front or top-most object defines the
shape of the cropped area. Any part of an underlying drawing object that overlaps with the top-most object remains,
while all other portions of the underlying objects are deleted, and the top-most object is deleted entirely. The resulting
objects remain separate, and are not combined into a single object (unlike the Union or Intersect commands, which
join the objects).
More Help topics
About 9-slice scaling and movie clip symbols
Edit movie clip symbols with 9-slice scaling
Working with the library
Work with libraries
The library in a Flash Professional document stores media assets that you create in the Flash Professional authoring
environment or import to use in the document. You can create vector artwork or text directly in Flash Professional;
import vector artwork, bitmaps, video, and sound; and create symbols. A symbol is a graphic, a button, a movie clip, or
text that you create once and can reuse multiple times. You can also use ActionScript to add media content to a
document dynamically.
The library also contains any components that you have added to your document. Components can be either compiled
clips or MovieClip based components.
You can open the library of any Flash Professional document while you are working in Flash Professional, to make the
library items from that file available for the current document. You can search the symbols in the library by their names
or their ActionScript linkage names.
You can create permanent libraries in your Flash Professional application that are available whenever you start Flash
Professional. Flash Professional also includes several sample libraries containing buttons, graphics, movie clips, and
sounds.
You can export library assets as a SWF file to a URL to create a runtime-shared library. This lets you link to the library
assets from Flash Professional documents that import symbols using runtime sharing.
The Library panel (Window > Library) displays a scroll list with the names of all items in the library, which lets you
view and organize these elements as you work. An icon next to an item’s name in the Library panel indicates the item’s
file type.
note: (Flash Professional CC and later versions only) Dragging objects from Stage to the Library panel to convert to
a Symbol is deprecated, and will not be functional with Flash Professional CC.
Last updated 6/12/2015
265
Multimedia and Video
note: (Flash Professional CC and later versions only) Dragging objects on to the Stage across two undocked documents
is deprecated, and will not be functional with Flash Professional CC.
Open a library in another Flash file
1 From the current document, select File > Import > Open External Library.
2 Navigate to the Flash Professional file whose library you want to open and click Open.
The selected file’s library opens in the current document, with the filename at the top of the Library panel. To use
items from the selected file’s library in the current document, drag the items to the current document’s Library panel
or to the Stage.
Resize the Library panel
❖ Do one of the following:
• Drag the lower-right corner of the panel.
• Click the Wide State button to enlarge the Library panel so it shows all the columns.
• Click the Narrow State button to reduce the width of the Library panel.
Change the width of columns
❖ Position the pointer between column headers and drag to resize.
Work with folders in the Library panel
You can organize items in the Library panel using folders. When you create a new symbol, it is stored in the selected
folder. If no folder is selected, the symbol is stored at the root of the library.
Flash also imports animated GIF files in an organized way by placing them in a separate folder under the library root
folder and naming all the associated bitmaps based on their sequence.
Create a new folder
❖ Click the New Folder button
at the bottom of the Library panel.
Open or close a folder
❖ Double-click the folder, or Select the folder and select Expand Folder or Collapse Folder from the Panel menu for
the Library panel.
Open or close all folders
❖ Select Expand All Folders or Collapse All Folders from the Panel menu for the Library panel.
Move an item between folders
❖ Drag the item from one folder to another.
If an item with the same name exists in the new location, Flash Professional prompts you to replace it with the item
you are moving.
Sort items in the Library panel
Columns in the Library panel list the name of an item, its type, the number of times it’s used in the file, its linkage status
and identifier (if the item is associated with a shared library or is exported for ActionScript), and the date on which it
was last modified.
Last updated 6/12/2015
266
Multimedia and Video
You can sort items in the Library panel alphanumerically by any column. Items are sorted within folders.
Flash libary organizes the imported animated GIF files in a separate folder under the library root folder and names all
the associated bitmaps based on their sequence.
❖ Click the column header to sort by that column. Click the triangle button to the right of the column headers to
reverse the sort order.
(Deprecated with Flash Professional CC) Work with common libraries
You can use the sample common libraries included with Flash Professional to add buttons or sounds to your
documents. You can also create custom common libraries, which you can then use with any documents that you create.
Use an item from a common library in a document
1 Select Window > Common Libraries, and select a library from the submenu.
2 Drag an item from the common library into the library for the current document.
Create a common library for your SWF application
1 Create a Flash Professional file with a library containing the symbols that you want to include in the common library.
2 Place the Flash Professional file in the user-level Libraries folder on your hard disk.
• On Windows® XP, the path is C:\Documents and Settings\username\Local Settings\Application
Data\Adobe\Flash CS5\language\Configuration\Libraries\.
• On Windows® Vista®, the path is C:\Users\username\Local Settings\Application Data\Adobe\Flash
CS5\language\Configuration\Libraries\.
• On Mac OS, the path is Hard Disk/Users/username/Library/Application Support/Adobe/Flash
CS5/language/Configuration/Libraries/.
Conflicts between library assets
If you import or copy a library asset into a document that already contains a different asset of the same name, choose
whether to replace the existing item with the new item. This option is available with all the methods for importing or
copying library assets.
The Resolve Library Items dialog box appears when you attempt to place items that conflict with existing items in a
document. A conflict exists when you copy an item from a source document that already exists in the destination
document and the items have different modification dates. Avoid naming conflicts by organizing your assets inside
folders in your document’s library. The dialog box also appears when you paste a symbol or component into your
document’s Stage and you already have a copy of the symbol or component that has a different modification date from
the one you’re pasting.
If you choose not to replace the existing items, Flash Professional attempts to use the existing item instead of the
conflicting item that you are pasting. For example, if you copy a symbol named Symbol 1 and paste the copy into the
Stage of a document that already contains a symbol named Symbol 1, Flash Professional creates an instance of the
existing Symbol 1.
If you choose to replace the existing items, Flash Professional replaces the existing items (and all their instances) with
the new items of the same name. If you cancel the Import or Copy operation, the operation is canceled for all items (not
just those items that conflict in the destination document).
Only identical library item types may be replaced with each other. That is, you cannot replace a sound named Test with
a bitmap named Test. In such cases, the new items are added to the library with the word Copy appended to the name.
Last updated 6/12/2015
267
Multimedia and Video
Note: Replacing library items using this method is not reversible. Save a backup of your FLA file before you perform
complex paste operations that are resolved by replacing conflicting library items.
If the Resolve Library Conflict dialog box appears when you are importing or copying library assets into a document,
resolve the naming conflict.
Resolve naming conflicts between library assets
❖ Do one of the following in the Resolve Library Conflict dialog box:
• To preserve the existing assets in the destination document, click Don’t Replace Existing Items.
• To replace the existing assets and their instances with the new items of the same name, click Replace Existing
Items.
Work with library items
When you select an item in the Library panel, a thumbnail preview of the item appears at the top of the Library panel.
If the selected item is animated or is a sound file, you can use the Play button in the library preview window or the
Controller to preview the item.
Search library items by linkage name
You can search the library search panel for symbols by their names or their ActionScript linkage names.
• To search for a library item, type in the first few letters of the symbol name or the ActionScript linkage name of the
library item. As you type, the list of matching symbols appears in the library panel.
Use a library item in the current document
❖ Drag the item from the Library panel onto the Stage.
The item is added to the current layer.
Convert an object on the Stage to a symbol in the library
❖ Select the object on stage, right click, and select Convert to Symbol.
Use a library item from the current document in another document
❖ Drag the item from the Library panel or Stage into the Library panel or Stage of another document.
Copy library items from a different document
1 Select the document that contains the library items.
2 Select the library items in the Library panel.
3 Select Edit > Copy.
4 Select the document that you want to copy the library items to.
5 Select that document’s Library panel.
6 Select Edit > Paste.
Edit a library item
1 Select the item in the Library panel.
Last updated 6/12/2015
268
Multimedia and Video
2 Select one of the following from the Panel menu for the Library panel:
• To edit an item in Flash Professional, select Edit.
• To edit an item in another application, select Edit With and then select an external application.
Note: When starting a supported external editor, Flash Professional opens the original imported document.
Rename a library item
Changing the library item name of an imported file does not change the filename.
1 Do one of the following:
• Double-click the item’s name.
• Select the item and select Rename from the Panel menu for the Library panel.
• Right-click (Windows) or Control-click (Macintosh) the item and select Rename from the context menu.
2 Enter the new name in the box.
Delete a library item
When you delete an item from the library, all instances or occurrences of that item in the document are also deleted.
❖ Select the item and click the Trash Can icon at the bottom of the Library panel.
Find unused library items
To organize your document, you can find unused library items and delete them.
Note: It is not necessary to delete unused library items to reduce a Flash Professional document’s file size, because unused
library items are not included in the SWF file. However, items linked for export are included in the SWF file.
❖ Do one of the following:
• Select Unused Items from the Panel menu for the Library panel.
• Sort library items by the Use Count column, which indicates whether an item is in use.
Update imported files in the library
If you use an external editor to modify files that you have imported into Flash Professional, such as bitmaps or sound
files, you can update the files in Flash Professional without reimporting them. You can also update symbols that you
have imported from external Flash Professional documents. Updating an imported file replaces its contents with the
contents of the external file.
Note: You can locate the imported animated GIF files organized in a separate folder under the library root folder with
all the associated bitmaps named based on their sequence.
1 Select the imported file in the Library panel.
2 Select Update from the Panel menu for the Library panel.
Copy library assets between documents
You can copy library assets from a source document into a destination document in a variety of ways. You can also share
symbols between documents as shared library assets during authoring or at runtime.
Last updated 6/12/2015
269
Multimedia and Video
If you attempt to copy assets that have the same name as existing assets in the destination document, the Resolve
Library Conflicts dialog box lets you choose whether to overwrite the existing assets or to preserve the existing assets
and add the new assets with modified names. Organize library assets in folders to minimize name conflicts when
copying assets between documents.
Copy a library asset by copying and pasting
1 Select the asset on the Stage in the source document.
2 Select Edit > Copy.
3 Make the destination document the active document.
4 To paste the asset in the center of the visible pasteboard, place the pointer on the Stage and select Edit > Paste In
Center. To place the asset in the same location as in the source document, select Edit > Paste In Place.
Copy a library asset by dragging
❖ With the destination document open, select the asset in the Library panel in the source document and drag the asset
into the Library panel in the destination document.
Copy a library asset by opening the source document library in the destination document
1 With the destination document active, select File > Import > Open External Library.
2 Select the source document, and click Open.
3 Drag an asset from the source document library onto the Stage or into the library of the destination document.
More Help topics
Working with Text Layout Framework (TLF) text
Using imported artwork
Sound
Video
Symbols, instances, and libraryassets
Configuration folders installed with Flash
Sharing library assets at runtime
Creating buttons
Sharing library assets at runtime
Draw lines and shapes
Draw straight lines with the Line Segment tool
To draw one straight line segment at a time, use the Line tool.
1 Select the Line tool
.
2 Select Window > Properties and select stroke attributes.
Last updated 6/12/2015
270
Multimedia and Video
Note: You cannot set fill attributes for the Line tool.
3 Click the Object Drawing button
in the Options section of the Tools panel to select either Merge or Object
Drawing mode. When the Object Drawing button is depressed, the Line tool is in Object Drawing mode.
4 Position the pointer where the line is to begin, and drag to where the line is to end. To constrain the angle of the line
to multiples of 45°, Shift-drag.
Draw rectangles and ovals
The Oval and Rectangle tools let you create these basic geometric shapes, and apply strokes, fills, and specify rounded
corners. In addition to the Merge and Object drawing modes, the Oval and Rectangle tools also provide the Primitive
Object drawing mode.
When you create rectangles or ovals using the Rectangle Primitive or Oval Primitive tools, Flash draws the shapes as
separate objects. These shapes unlike the shapes you create using Object Drawing mode. The primitive shape tools let
you specify the corner radius of rectangles using controls in the Property inspector. And also the start and end angle,
and the inner radius of ovals. After you create a primitive shape, alter the radius and dimensions by selecting the shape
on the Stage and adjusting the controls in the Property inspector.
note: When either of the Primitive Object drawing tools is selected, the Property inspector retains the values of the last
primitive object that you edited. For example, if you modify a rectangle and then draw a second rectangle.
Note:To draw from the center of the Stage, hold the Alt key when drawing a shape.
Draw rectangle primitives
1 To select the Rectangle Primitive tool, click and hold the mouse button on the Rectangle tool
Rectangle Primitive tool
, and select the
from the pop-up menu.
2 To create a rectangle primitive, drag with the Rectangle Primitive tool on the Stage.
Note: To change the corner radius while dragging with the Rectangle primitive tool, press the Up Arrow key or Down
Arrow key. When the corners achieve the desired roundness, release the key.
3 With the rectangle primitive selected, you can use the controls in the Property inspector to further modify the shape
or specify fill and stroke colors.
Last updated 6/12/2015
271
Multimedia and Video
Theses Property inspector controls are specific to the Rectangle Primitive tool:
Rectangle Corner Radius Controls Let you specify the corner radiuses for the rectangle. You can enter a numeric
value for the inner radius in each text box. Entering a negative value creates an inverse radius. You can also deselect
the constrain corner radius icon, and adjust each corner radius individually.
Reset Resets all of the Rectangle Primitive tool controls, and restores the rectangle primitive shape drawn on the
Stage to its initial size and shape.
4 To specify a different corner radius for each corner, deselect the Lock icon in the Rectangle Options area of the
Property inspector. When locked, the radius controls are restrained so that each corner uses the same radius.
5 To reset the corner radii, click the Reset button in the Property inspector.
Draw oval primitives
1 Click and hold the mouse button on the Rectangle tool
, and select the Oval Primitive tool
.
2 To create an oval primitive, drag the Primitive Oval tool on the Stage. To constrain the shape to a circle, Shift-drag.
3 With the oval primitive selected on the Stage, you can use the controls found in the Property inspector to further
modify the shape or specify fill and stroke colors.
Last updated 6/12/2015
272
Multimedia and Video
These Property inspector controls are specific to the Oval Primitive tool:
Start Angle/End Angle The angle of the start point and end point of the oval. Using these controls, you can easily
modify the shape of ovals and circles into pie slices, half circles, and other creative shapes.
Inner Radius An inner radius (or oval) within the oval. You can either enter a numeric value for the inner radius in
the box or click the slider and interactively adjust the size of the inner radius. You can enter values from 0 to 99
representing the percentage of fill that is removed.
Close Path Determines whether the path (or paths, if you are specifying an inner radius) of the oval is closed. If you
specify an open path, no fill is applied to the resulting shape, only the stroke is drawn. Close Path is selected by
default.
Reset Resets all of the Oval Primitive tool controls and restores the oval primitive shape drawn on the Stage to its
initial size and shape.
Draw ovals and rectangles
The Oval and Rectangle tools create these basic geometric shapes.
1 To select the Rectangle tool
or Oval tool
, click and hold the mouse button on the Rectangle tool and drag.
2 To create a rectangle or oval, drag the Rectangle or Oval tool on the Stage.
3 For the Rectangle tool, specify rounded corners by clicking the Round Rectangle modifier and entering a corner
radius value. A value of zero (0) creates square corners.
4 Drag on the Stage. If you are using the Rectangle tool, press the Up Arrow and Down Arrow keys while dragging to
adjust the radius of rounded corners.
For the Oval and Rectangle tools, Shift-drag to constrain the shapes to circles and squares.
Last updated 6/12/2015
273
Multimedia and Video
5 To specify a specific size of oval or rectangle, select the Oval or Rectangle tool and press the Alt key (Windows) or
Option key (Macintosh). Then click the Stage to display the Oval And Rectangle Settings dialog box.
• For ovals, specify the width and height in pixels and whether to draw the oval from the center.
• For rectangles, specify the width and height in pixels, the radius of the rounded corners, and whether to draw the
rectangle from the center.
See also: Live Preview of Colors .
Draw polygons and stars
1 Select the PolyStar tool
by clicking and holding the mouse button on the Rectangle tool and selecting from the
pop-up menu that appears.
2 Select Window > Properties and select fill and stroke attributes.
3 Click Options and do the following:
• For Style, select Polygon or Star.
• For Number Of Sides, enter a number from 3 through 32.
• For Star Point Size, enter a number from 0 through 1 to specify the depth of the star points. A number closer to
0 creates deeper points (like needles). If you are drawing a polygon, leave this setting unchanged. (It does not
affect the polygon shape.)
4 Click OK.
5 Drag on the Stage.
See also: Live Preview of Colors .
Draw with the Pencil tool
To draw lines and shapes, use the Pencil tool, in much the same way that you use a real pencil to draw. To apply
smoothing or straightening to the lines and shapes as you draw, select a drawing mode for the Pencil tool.
1 Select the Pencil tool
.
2 Select Window > Properties and select a stroke color, line weight, and style.
3 Select a drawing mode under Options in the Tools panel:
• To draw straight lines and convert approximations of triangles, ovals, circles, rectangles, and squares into these
common geometric shapes, select Straighten .
• To draw smooth curved lines, select Smooth
.
• To draw freehand lines with no modification applied, select Ink
.
4 To draw with the Pencil tool, Shift-drag to constrain lines to vertical or horizontal directions, click the Stage, and
drag.
Last updated 6/12/2015
274
Multimedia and Video
Paint with the Brush tool
The Brush tool
draws brush-like strokes. It creates special effects, including calligraphic effects. Select a brush size
and shape using the Brush tool modifiers.
Brush size for new strokes remains constant even when you change the magnification level for the Stage. So, the same
brush size appears larger when the Stage magnification is lower. For example, suppose you set the Stage magnification
to 100% and paint with the Brush tool using the smallest brush size. Then, you change the magnification to 50% and
paint again using the smallest brush size. The new stroke that you paint appears 50% thicker than the earlier stroke.
(Changing the magnification of the Stage does not change the size of existing brush strokes.)
Use an imported bitmap as a fill when painting with the Brush tool. See Break apart groups and objects.
If you have a Wacom pressure-sensitive tablet connected to your computer, vary the width and angle of the brush stroke.
This can be achieved by using the Brush tool Pressure and Tilt modifiers, and varying pressure on the stylus.
The Pressure modifier varies the width of brush strokes when you vary the pressure on the stylus. The Tilt modifier
varies the angle of brush strokes when you vary the angle of the stylus on the tablet. The Tilt modifier measures the
angle between the top (eraser) end of the stylus and the top (north) edge of the tablet. For example, if you hold the pen
vertically against the tablet, the Tilt is 90. The Pressure and Tilt modifiers are both fully supported for the eraser
function of the stylus.
Note: On a tablet, the Tilt and Pressure options for Brush Tool function only when you use the Pen mode. The mouse
mode does not enable these options.
1 Select the Brush tool
.
2 Select Window > Properties and select a fill color.
3 Click the Brush Mode modifier and select a painting mode:
Paint Normal Paints over lines and fills on the same layer.
Paint Fills Paints fills and empty areas, leaving lines unaffected.
Paint Behind Paints in blank areas of the Stage on the same layer, leaving lines and fills unaffected.
Paint Selection Applies a new fill to the selection when you select a fill in the Fill Color control or the Fill box of the
Property inspector, the same as selecting a filled area and applying a new fill.
Paint Inside Paints the fill in which you start a brush stroke and never paints lines. If you start painting in an empty
area, the fill doesn’t affect any existing filled areas.
4 Select a brush size and brush shape from the Brush tool modifiers.
5 To zoom the brush proportionately to the zoom level of the stage as you increase or decrease it while you draw, select
the Zoom size with stage check box. This allows you to draw seamlessly adjusting to any zoom level and preview
your work as you draw.
Last updated 6/12/2015
275
Multimedia and Video
6 If a Wacom pressure-sensitive tablet is attached to your computer, select the Pressure modifier, the Tilt modifier, or
both, to modify brush strokes.
• Select the Pressure modifier to vary the width of your brush strokes by varying the pressure on your stylus.
• To vary the angle of your brush strokes by varying the angle of the stylus on the Wacom pressure-sensitive tablet,
select the Tilt modifier.
7 Drag on the Stage. To constrain brush strokes to horizontal and vertical directions, Shift-drag.
Create custom brushes
The Brush Tool allows you to custom-define a brush by setting parameters of the brush such as shape and angle. This
enables you to create natural artwork in your projects by customizing the brush tool to suit your drawing needs. You
can choose, edit and create a custom brush in Flash Professional through the Property Inspector, when the brush tool
is selected in the toolbox. To learn how to create, edit, and delete custom brushes, see Custom Brushes.
Enhancing strokes and shapes using the Variable Width tool
The Width tool allows you to embellish a stroke by adding widths of varying thickness. Variable width can then be saved
as Width Profiles that can be applied to other strokes. You can select the Width tool from the Tools panel or using the
Keyboard Shortcut (U).
When you mouseover a stroke with the Width tool selected, points (Width Point) appears on the stroke with handles
(Width Handle). You can adjust the stroke width, move the width point, copy the width point, and delete the width
point. The Width information is displayed in the Info Panel when you modify Width of a stroke.
You can also select multiple Width Points, and perform any of actions (move, copy, or delete) mentioned earlier.
For multiple strokes, the Width Tool adjusts only the active stroke. If you want to adjust a stroke, mouse-over the stroke
using the Width Tool.
Note: Variable Width Strokes are converted to Uniform strokes, if a file containing variable width stroke is opened using
an older version of Flash Professional.
Adding variable width to a stroke using Width tool
To add width to a stroke, do the following:
❖ Draw a stroke or shape using any of the tools. For example, Line tool.
1 Select the Width Tool
from the tools panel.
Last updated 6/12/2015
276
Multimedia and Video
2 With the Width Tool selected, mouseover the stroke. This displays potential Width Points and Width Handles. The
tool also changes its appearance to
the stroke.
, indicating that the Width Tool is active and variable width can be applied to
❖ With the point selected using the Width Tool, drag the Width Handle outwards.
Note: The size of the Width is constrained to 100 pixels on either side of the Width point.
❖ You can see that variable width is added to stroke. Select the Width Tool and mouseover the stroke, this displays the
new Width Point and Width Handle.
Last updated 6/12/2015
277
Multimedia and Video
Moving or copying variable width applied to a stroke
You can move or copy Width Points created for a stroke, which in effect, moves or copies variable width applied to
stroke. To move a width point, do the following:
1 Select the Width tool
from the tools panel.
2 Mouseover the stroke to display existing width points, and select the Width Point you want to move.
3 Drag the Width Point along the stroke.
Note: Movement of the Width Point is constrained by the next successive Width Point on either sides.
❖ Width point is moved to its new location, and thereby also modifying the stroke accordingly.
To copy a Width Point, do the following:
1 Select the Width tool
from the tools panel.
2 Mouseover the stroke to display existing Width Points, and select the point you want to copy.
3 Hold Alt (Option for Mac) and drag the width point along the stroke to copy the selected Width point.
Note: Movement of the point is constrained by the next successive Width Point on either sides.
Last updated 6/12/2015
278
Multimedia and Video
❖ Width point is copied. This also modifies the stroke accordingly.
Modifying variable width of a stroke
Modifying the variable width of a stroke at any Width point, expands or contracts the stroke equi-proportionally on
either sides of the Width Point. However, if you want to modify the width on any one side of the point, do the following:
1 Select the Width tool
from the tools panel.
2 Mouseover the stroke to display existing Width Points, and choose the Width Point from either ends of the Width
Handle that you want to modify.
3 Hold Alt (Option for Mac) and drag the Width Handle outwards to modify the selected Width Point.
Last updated 6/12/2015
279
Multimedia and Video
❖ The Width point is moved, and the stroke is modified accordingly.
Deleting variable width of a stroke
To delete a Width point, do the following:
1 Mouse over and select the Width point you want to delete.
2 Press Backspace or Delete to delete the Width point.
Width tool controls
The following table lists the keyboard modifiers to use while working with the Width tool:
Last updated 6/12/2015
280
Multimedia and Video
Width control tasks
Keyboard modifiers
Create non-uniform widths
Alt+drag (Windows) or Opt+drag (Mac OS)
Create a copy of the width point
Alt+drag the width point (Windows) or Opt+drag the width point
(Mac OS)
Copy and move all the points along the path
Alt+Shift+drag (Windows) or Opt+Shift+drag (Mac OS)
Select multiple width points and drag them
Shift+click+drag
Delete selected width points
Delete
Saving width profiles
After defining the stroke width, you can save the variable width profile from the Properties Inspector.
1 Select the stroke to which you added variable width.
2 Click the + button to the right of Width drop-down on Properties Inspector.
3 On the Variable Width Profile dialog, enter a Profile Name.
4 Click Ok.
Width profiles can then be applied to selected paths by choosing them from the Width Profile drop-down list in the
Properties Panel. When a stroke with no variable width is selected, the list displays the Uniform option. To restore the
default width profile set, click the Reset Profiles button.
Save width profile is enabled only when variable width apart from default width profiles is selected on the stage. You
can create your own stroke profiles using width tool and save them. Similarly, delete width profile icon is enabled when
custom width profile is selected in the drop down. In case you want to delete any custom profile, you can use this option.
Note: Restoring the default width profile set in the PI, removes any custom saved profiles. You also sync the customs saved
profiles to the cloud.
Last updated 6/12/2015
281
Multimedia and Video
(Flash Professional CC only) Live Color Preview
Live Color Preview feature displays the stroke and fill colors simultaneous when drawing a shape on the stage. It allows
you to preview the near-final appearance of a shape when drawing. This feature is enabled for all drawing tools available
within Flash Pro.
The Live Color Preview feature is also enabled for Color Swatches within Flash Professional. This allows you to preview
changes of stroke or fill colors for a selected shape on the Stage. By hovering the pointer over a desired color, you can
see the color change.
Live Color Preview is enabled for color swatches in the following panels:
• Tools panel
• Properties Inspector (PI)
• Stage PI
• Text PI
• Grid
• Guides
More Help topics
Adjust Stroke and Fill color
Drawing modes and graphic objects
Check spelling
Note: Feature deprecated in Flash Professional CC release.
You can check spelling in text throughout your Flash Professional document. You can also customize the spell checker.
Use the spell checker
1 Select Text > Check Spelling to view the Check Spelling dialog box.
The box in the upper-left corner identifies words not found in the selected dictionaries, and also identifies the type
of element that contains the text (such as a text field or frame label).
2 Do one of the following:
• Click Add To Personal to add the word to your personal dictionary.
• Click Ignore to leave the word unchanged. Click Ignore All to leave all occurrences of the word in the document
unchanged.
• Enter a word in the Change To box or select a word from the Suggestions scroll list. Then click Change to change
the word or click Change All to change all occurrences of the word in the document.
• Click Delete to delete the word from the document.
3 To end the spelling check, do one of the following:
• Click Close to end spelling before Flash Professional reaches the end of the document.
Last updated 6/12/2015
282
Multimedia and Video
• Continue checking spelling until you see a notification that Flash Professional has reached the end of the
document, then click No to end spelling checking. (Click Yes to continue the spelling check at the beginning of
the document.)
Customize the spelling checker
1 Do one of the following:
• Select Text > Spelling Setup. (Use this option if you have not used the Check Spelling feature before.)
• In the Check Spelling dialog box (Text > Check Spelling), click Setup.
2 Set any of the following options:
Document Options Use these options to specify which elements are to be checked.
Dictionaries Lists the built-in dictionaries. You must select at least one dictionary to enable spelling checking.
Personal Dictionary Enter a path or click the folder icon and browse to a document to use as a personal dictionary.
(You can modify this dictionary.)
Edit Personal Dictionary Adds words and phrases to your personal dictionary. In the Personal Dictionary dialog
box, enter each new item on a separate line in the text field.
Checking Options Use these options to control how Flash Professional handles specific types of words and
characters when checking spelling.
Working with Photoshop PSD files in Flash
Working with Photoshop and Flash
You can use Adobe® Photoshop® and Adobe® Flash® together to create visually compelling web-based applications,
animations, or interactive messaging elements. Photoshop lets you create still images and artwork, providing a high
degree of creative control. Flash lets you bring those still images together and incorporate them into interactive Internet
content.
The Photoshop drawing and selection tools provide you with a greater degree of creative control than the tools found
in Flash. If you have to create complex visual images, or retouch photographs for use in interactive presentations, use
Photoshop to create your artwork, and then import the finished images into Flash.
Importing still images into Flash
Flash can import still images in many formats, but you usually use the native Photoshop PSD format when importing
still images from Photoshop into Flash.
When importing a PSD file, Flash can preserve many of the attributes that were applied in Photoshop, and provides
options for maintaining the visual fidelity of the image and further modifying the image. When you import a PSD file
into Flash, you can choose whether to represent each Photoshop layer as Flash layers or individual keyframes.
(Flash Professional CS6 and earlier versions only) Exchanging QuickTime movies
You can exchange QuickTime video files between Photoshop and Flash. For example, you can render a QuickTime
movie directly from Photoshop, and then import it into Flash, converting it into an FLV (Flash Video) file, which can
be played in Flash® Player.
Last updated 6/12/2015
283
Multimedia and Video
When you use Photoshop to modify video footage, you can paint nondestructively on its frames. When you save a
Photoshop file with a video layer, you are saving the edits that you made to the video layer, not edits to the footage itself.
Note: When you import a QuickTime video file from Photoshop to Flash, use the Import Video dialog box (File > Import
Video). Using the Photoshop PSD import feature to import video only imports the first frame of a video file.
You can also export Flash documents as QuickTime video, and import them into Photoshop where you can paint nondestructively on the video frames. For example, you can create an animated sequence in Flash, export the Flash
document as a QuickTime video, and then import the video into Photoshop.
Color
Flash works internally with colors in the RGB (red, green, blue) or HSB (hue, saturation, brightness) color space.
Although Flash can convert CMYK images to RGB, you should create Photoshop artwork in RGB. Before you import
CMYK artwork from Photoshop into Flash, convert the image to RGB in Photoshop.
About importing Photoshop PSD files
Flash Professional lets you import Photoshop PSD files and preserves most of your artwork's data. The PSD Importer
also lets you control how your Photoshop artwork is imported into Flash Professional, letting you specify how to import
specific objects in a PSD file, as well as specifying that the PSD file be converted to a Flash Professional movie clip.
The Flash Professional PSD Importer provides the following key features:
• PSD files imported into Flash Professional maintain their color fidelity from Photoshop.
• Preserves editability of blend modes that both Flash Professional and Photoshop have in common.
• Smart Objects in the PSD file are rasterized, and imported into Flash Professional as bitmaps which preserves object
transparency.
• Converts the PSD file layers to individual Flash Professional layers or keyframes or imports the PSD file as a single
bitmap image, in which case Flash Professional flattens (rasterizes) the file.
• Drag-and-drop from Photoshop to Flash Professional invokes the PSD file importer, letting you choose how to
import your Photoshop artwork.
Videos and tutorials
The following videos and tutorials demonstrate working with Photoshop and Flash Professional. Some videos show the
Flash Professional CS3 or CS4 workspace, but are still applicable to Flash Professional CS5.
• Video: Import Photoshop files to Flash (CS3) (7:01)
• Video: Designing websites with Photoshop and Flash (CS3) (6:01)
• Blog: Want to create Photoshop apps with AIR, Flash, and AS3? (Daniel Koestler, Adobe)
Compatibility between Flash and Photoshop
Certain visual attributes can either not be accurately imported, or, after they are imported, lose their ability to be further
edited in the Flash Professional authoring environment. The PSD Importer provides you with several options to import
and place artwork to best maintain its visual appearance and editability. However, certain visual attributes cannot be
preserved. Use the following guidelines to improve the appearance of PSD files imported into Flash Professional:
• Flash Professional supports only the RGB color space, and not the CMYK color space, which is common in printing.
Flash Professional can convert CMYK images to RGB; however, colors are better preserved if you convert CMYK
colors to RGB in Photoshop.
• Flash Professional can import the following Photoshop blend modes, and maintain their editability: Normal,
Darken, Multiply, Lighten, Screen, Hard Light, Difference, and Overlay.
Last updated 6/12/2015
284
Multimedia and Video
If you use a blend mode that Flash Professional does not support, you can rasterize the layer to maintain its visual
appearance, or remove the blend mode from the layer.
• Flash Professional cannot import Photoshop Smart Objects as editable objects. To preserve the visual attributes of
Smart Objects, they are rasterized and imported into Flash Professional as bitmaps.
• Flash Professional can only import the first frame of Photoshop Video layers.
• Image and Fill layers are always rasterized when imported into Flash Professional.
• PNG objects in Photoshop are converted to JPG files when imported into Flash Professional. Transparency in the
original PNG is preserved in the resulting JPG file.
• Photoshop does a better job of scaling bitmap images than Flash Professional. If you know that you plan to scale a
bitmap that is coming from Photoshop into Flash Professional, scale the bitmap in Photoshop before importing it
into Flash Professional.
• When importing objects containing transparent areas as flattened bitmaps, any objects on the layers behind the
transparent portion of the object will be visible through the transparent area—assuming the objects behind the
object containing transparency are also being imported. To prevent this, import only the transparent object as a
flattened bitmap.
To import multiple layers and maintain transparency without having any visible remnants of the layers behind the
transparency, import the PSD file using the Bitmap Image With Editable Layer Styles option. This will encapsulate
the imported objects as a movie clip, and use the movie clip's transparency. This is particularly useful if you need to
animate the different layers in Flash Professional.
Import Photoshop PSD files
Photoshop format (PSD) is the default Photoshop file format. Flash Professional can directly import PSD files and
preserve many Photoshop features, retaining the image quality and editability of the PSD file in Flash Professional. You
can also flatten PSD files when importing them, creating a single bitmap image file that retains the image’s visual effects
but removes the hierarchical layer information native to the PSD file format.
For a video tutorial about designing websites with Photoshop and Flash Professional, see www.adobe.com/go/vid0201.
Last updated 6/12/2015
285
Multimedia and Video
A Layers in the PSD file being imported B Import options available for the selected layer or object
1 Select File > Import To Stage or Import To Library.
2 Navigate to the Adobe Photoshop PSD file to import, select it, and click OK.
3 (Optional) In the PSD Import dialog box, select layers, groups, and individual objects and choose how to import
each item.
Last updated 6/12/2015
286
Multimedia and Video
4 For Convert Layers To, select one of the following:
Flash Layers All selected layers in the Select Photoshop layers list are placed on their own layer. Each layer is labeled
with the name of the layer in the Photoshop file. The layers in Photoshop are objects on the individual layers. The
objects also have the name of the layer in Photoshop when put into the Library panel.
Keyframes All selected layers in the Select Photoshop layers list are placed in individual keyframes on a new layer.
The new layer is named for the Photoshop file (for example, myfile.psd). The layers in Photoshop become objects
on the individual keyframes. The objects also have the name of the layer in Photoshop when put into the Library
panel.
5 For the remaining options, select from the following:
Place Layers At Original Position The contents of the PSD file retain the exact position that they had in Photoshop.
For example, if an object was positioned at X = 100 Y = 50 in Photoshop, it assumes the same coordinates on the
Flash Professional Stage.
If this option is not selected, the imported Photoshop layers are centered on the Stage. The items in the PSD file
remain relative to each other when imported; however, all objects are centered as one block in the current view. This
feature can be useful if you are zoomed in to an area of the Stage and are importing a specific object for that area of
the Stage. If you imported the object using the original coordinates, you might not see it imported, because it might
be placed outside of the current stage view.
note: When you import the PSD file to the Flash Professional library, this option is not available.
Set Stage Size To Same Size As Photoshop Canvas The Flash Professional Stage size resizes to the same size as the
Photoshop document size (or active crop area) used to create the PSD file. This option is not selected by default.
note: When you import the PSD file to the Flash Professional library, this option is not available.
6 Click OK.
Importing PSD files to the Flash library
Importing a PSD file into the library is similar to importing to the Stage. When you import a PSD file into the library,
the root folder uses the name of the PSD file. After the PSD file is imported into the library, you can change the name
of the root folder, or move the layers out of the folder.note: The library orders the contents of the imported PSD file
alphabetically. The hierarchical grouping and folder structure remains the same, but the library reorders them
alphabetically.
A movie clip is created that contains all of the content of the PSD file imported to its timeline, as if the content were
imported to the Stage. Almost all movie clips have a bitmap or other asset associated with them. To minimize confusion
and naming conflicts, these assets are stored in an Assets folder in the same folder as the movie clip.note: When you
import to the library, the PSD file's contents are imported to the movie clip's timeline, not the main Flash timeline.
Photoshop Import options
When you import a Photoshop PSD file that contains multiple layers, you can set the following options:
Layer Comp If the Photoshop file contains layer comps, you can specify which version of the image to import. A layer
comp is a snapshot of a state of the Photoshop Layers palette. Layer comps record three types of layer options, all of
which are imported into Flash Professional:
• Layer visibility: whether a layer is displayed or hidden.
• Layer position in the document.
• Layer appearance: whether a layer style is applied to the layer and the layer’s blending mode.
Last updated 6/12/2015
287
Multimedia and Video
If no layer comps are present, this pop-up menu is hidden. Flash Professional supports all aspects of the layer comp’s
fidelity, including visibility, position, and layer style.
Importing text objects
Text objects are text layers in Photoshop. Choose how to import text into Flash Professional.
Editable Text Creates an editable text object from the text on the selected Photoshop layer. The appearance of the text
might be compromised to maintain the editability of the text. If you import the text as a movie clip, the movie clip
contains an editable text object.note: When importing editable text into the library, it must be inside a movie clip. Only
movie clips, bitmaps, and graphic symbols can be stored in the library. When Editable Text is selected as an option for a
text layer being imported into the library, it is automatically imported as a graphic symbol.
Vector Outlines Converts text to vector paths to preserve the visual appearance of the text. The text itself is no longer
editable, but opacity and compatible blend mode maintain their editability. If this option is selected, the object must be
converted to a movie clip.note: (Windows 8 only) If a PSD file containing text is imported with the Vector Outline option
selected, you cannot edit the anchor points for the vector object. This is observed with PSD files that were created using fonts
unavailable in Windows 8.
Flattened Bitmap Image Rasterizes the text into a bitmap to preserve the exact appearance of the text layer in
Photoshop. Rasterized text is no longer editable.note: When importing text on a path you must import it as a flattened
bitmap image to preserve the visual fidelity of the object.
Importing shape objects
A Shape Layer object is an object that was originally a shape layer in Photoshop or an image layer with a vector clipping
mask on it.
Editable Paths And Layer Styles Creates an editable vector shape with a bitmap clipped inside the vector. Supported
blend modes, filters, and opacity are maintained. Unsupported blend modes that cannot be reproduced in Flash
Professional are removed. The object must be converted to a movie clip.
Flattened Bitmap Image Rasterizes the shape into a bitmap to preserve the exact appearance of the shape layer in
Photoshop. A rasterized image is no longer editable.
Importing image or fill layers
If the image or fill layer is associated with a vector mask, it is treated as a shape layer object.
Bitmap Image With Editable Layer Styles Creates a movie clip with a bitmap inside. Supported blend modes, filters,
and opacity are maintained. Unsupported blend modes that cannot be reproduced in Flash Professional are removed.
The object must be converted to a movie clip.
Flattened Bitmap Image Rasterizes the image into a bitmap to preserve the exact appearance of the image or fill layer
in Photoshop.
(Flash Professional CS6 and earlier versions only) Importing merged bitmap objects and
objects in a merged bitmap
A merged bitmap is an object that contains more than one Photoshop layer that is flattened (or merged) into a single
bitmap when imported into Flash Professional. Objects in a merged bitmap represent layers in Photoshop. To create a
merged bitmap, select two or more layers, and select the Merge Layers button.
Last updated 6/12/2015
288
Multimedia and Video
(Flash Professional CS6 and earlier versions only) Importing multiple objects of different
types
If you import multiple objects of different types, Flash Professional only lets you import the selected objects with the
import options they share in common, such as Create Movie Clip and Registration.
Importing multiple objects of the same type
If you import multiple objects of the same type, the import options displayed are the same as if a single object of that
type was selected. If the objects do not share the same attributes, the import options displayed are in an indeterminate
state, and your results may not be as expected.
(Flash Professional CS6 and earlier versions only) Importing a Group folder
When you import a group folder, you can import it as a movie clip, or place each layer in the group on its own layer or
keyframe on the timeline.
If you select Import As Movie Clip, each layer in the group folder is placed on a layer in a movie clip, which is then
placed on its own layer or keyframe on the timeline. The movie clip uses the same name as that group folder had in
Photoshop, and if you import the movie clip to a Flash Professional layer, the layer uses the same name.
If you do not place the group in a movie clip, each layer is converted to the type that is currently set for it, and each layer
in the group is imported to its own Flash Professional layer. The Flash Professional layers are named for the individual
layers in the PSD file.
(Flash Professional CS6 and earlier versions only) Importing and merging layers
The PSD Importer lets you merge two or more layers into a merged bitmap that is imported as a single bitmap file rather
than individual objects.
The layers you select to create a merged bitmap must be a continuous range of two or more layers at the same level. For
example, you cannot select one layer inside a group and a layer outside that group, and merge them. Instead, you must
select the entire group and the separate layer.
Setting publish options
The publish settings in the PSD Importer let you specify the degree of compression and document quality to apply to
the image when publishing the Flash Professional document as a SWF file. These settings take effect only when you
publish the document as a SWF file and have no effect on the image when you import it to the Flash Professional Stage
or library.
Compression Lets you choose either lossy or lossless compression formats:
Lossy Lossy (JPEG) compresses the image in JPEG format. To use the default compression quality specified for the
imported image, select Use Publish Setting. To specify a new quality compression setting, select the Custom option and
enter a value between 1 and 100 in the Quality text field. (A higher setting preserves greater image integrity but yields
a larger file size.)
Lossless Lossless (PNG/GIF) compresses the image with lossless compression, in which no data is discarded from the
image.
note: Use lossy compression for images with complex color or tonal variations, such as photographs or images with gradient
fills. Use lossless compression for images with simple shapes and relatively few colors.
Calculate Bitmap Size Determines the number of bitmaps that are created for a given layer based on your import
selections and the compressed size in kilobytes of the resulting bitmaps on the layer. For example, if you select a layer
with a drop shadow and a blur and maintain layer styles, the Calculate Bitmap Size information states that three bitmaps
Last updated 6/12/2015
289
Multimedia and Video
will result from the import—one for each filter effect and another for the image itself. To calculate the size of all the
bitmaps to be imported, select all of the layers and click Calculate Bitmap Size.
(Flash Professional CS6 and earlier versions only) Photoshop file importer
preferences
The Flash Preferences dialog box lets you set import preferences for Photoshop PSD files. The preferences you specify
for importing PSD files affect the options the PSD Import dialog box is initially populated with for the Photoshop layer
types.
Note: To override the preferences specified for different layer types on an object by object basis, use the PSD Import dialog
box. Select the layer to change import options for, and specify the necessary options.
Import Image Layers Preferences
These options specify how the import options for image layers will initially be set. You can import image layers as any
of the following:
Bitmap Images With Editable Layer Styles Creates a movie clip with a bitmap nested inside. Specifying this option
maintains supported blend modes and opacity, but other visual attributes that cannot be reproduced in Flash will be
removed. If this option is selected, the object must be converted into a movie clip.
Flattened Bitmap Images Rasterizes any text into a flattened bitmap image to maintain the exact appearance the text
layer had in Photoshop.
Create Movie Clips Specifies that the image layers be converted to movie clips when imported into Flash. This option
can be changed in the PSD Import dialog box on a layer by layer basis if you do not want all of the image layers to be
converted to movie clips.
Text layer import preferences
These options specify how the import options for text layers will initially be set.
Editable Text Creates an editable text object from the text on the Photoshop text layer. The appearance of the text will
be sacrificed to maintain the editability of the text. If this option is selected, the object must be converted into a movie
clip.
Vector Outlines Vectorizes the text into paths. The appearance of the text may be altered, but visual attributes will be
maintained. If this option is selected, the object must be converted into a movie clip.
Flattened Bitmap Images Rasterize the text to maintain the exact appearance the text layer had in Photoshop.
Create Movie Clips Automatically converts the text layer to a movie clip when imported into Flash. This option can be
changed in the PSD Import dialog box on an object by object basis if you do not want all of the text layers to be
converted to movie clips. This option is required when either Editable Text or Vector Outlines is selected.
Shape layer import preferences
These options specify how the import options for shape layers will initially be set.
Editable Paths And Layer Styles This option will create an editable vector shape with a bitmap clipped inside the vector
shape. Supported blend modes and opacity will also be maintained with this option, but other visual attributes that
cannot be reproduced in Flash will be sacrificed. If this option is selected, then the object must be converted into a
movie clip.
Flattened Bitmap Images This option will rasterize the shape and maintain the exact appearance the shape layer had
in Photoshop.
Last updated 6/12/2015
290
Multimedia and Video
Create Movie Clips This option will set the shape layers to be converted to a movie clip when imported into Flash. This
option can be changed on an object by object basis if you do not want some shape layers to be converted to movie clips.
This option is disabled if the Maintain Editable Paths and Layers Styles checkbox is checked.
Layer group import preferences
This option specifies how the options for layer groups will initially be set.
Create Movie Clips Specifies that all groups be converted to a movie clip when imported into Flash. This can be
changed on an object by object basis if you do not want some layer groups to be movie clips.
Merged bitmap import preferences
This option specifies how the import options for merged bitmaps will initially be set.
Create Movie Clips This option will set the merged bitmaps to be converted to a movie clip when imported into Flash.
This option can be changed on an object by object basis if you do not want some merged bitmaps to be converted to
movie clips. This option is disabled if the Maintain Editable Paths And Layers Styles checkbox is checked.
Movie clip registration import preferences
Specifies a global registration point for movies that are created. This setting applies to the registration point for all
object types. This option can be changed on an object by object basis in the PSD Import dialog box; this is the initial
setting for all object types. For more information on movie clip registration, see Edit symbols.
Publish settings for imported images
The publish settings preferences for a FLA file let you specify the degree of compression and document quality to apply
to images when publishing the Flash Professional document as a SWF file. These settings take effect only when you
publish the document as a SWF file, and have no effect on the image when you import it to the Flash Professional stage
or library.
Compression Lets you choose either lossy or lossless compression formats:
Lossy Lossy (JPEG) compresses the image in JPEG format. To use the default compression quality specified for the
imported image, select Use Publish Setting. To specify a new quality compression setting, select the Custom option and
enter a value between 1 and 100 in the Quality text field. (A higher setting preserves greater image integrity but yields
a larger file size.)
Lossless Lossless (PNG/GIF) compresses the image with lossless compression, in which no data is discarded from the
image.
note: Use lossy compression for images with complex color or tonal variations, such as photographs or images with gradient
fills. Use lossless compression for images with simple shapes and relatively few colors.
Quality Lets you set a quality level for the comression.
Use Publish Setting Applies the current JPEG Quality setting from the Publish Settings.
Custom Lets you specify a separate specific quality setting.
More Help topics
Export QuickTime
Set preferences in Flash
Last updated 6/12/2015
291
Multimedia and Video
3D graphics
About 3D graphics in Flash
Flash Professional allows you to create 3D effects by moving and rotating movie clips in 3D space on the Stage. Flash
Professional represents 3D space by including a z axis in the properties of each movie clip instance. You add 3D
perspective effects to movie clip instances by moving them along their x axis or rotating them around their x or y axis
using the 3D Translation and 3D Rotation tools. In 3D terminology, moving an object in 3D space is called a translation
and rotating an object in 3D space is called a transformation. Once you have applied either of these effects to a movie
clip, Flash Professional considers it a 3D movie clip and a colored axes indicator appears overlaid onto the movie clip
whenever it is selected.
To make an object appear nearer or further away from the viewer, move it along its z axis with the 3D Translation tool
or the Property inspector. To give the impression of an object that is at an angle to the viewer, rotate the movie clip
around its z axis with the 3D Rotation tool. By using these tools in combination, you can create realistic perspective
effects.
Both the 3D Translation and the 3D Rotation tools allow you to manipulate objects in global or local 3D space. Global
3D space is the Stage space. Global transforms and translations are relative to the Stage. Local 3D space is the movie
clip space. Local transforms and translations are relative to the movie clip space. For example, if you have a movie clip
containing several nested movie clips, local 3D transforms of the nested movie clips are relative to the drawing area
inside the container movie clip. The default mode of the 3D Translation and Rotation tools is global. To use them in
local mode, click the Global toggle button in the Options section of the Tools panel.
By using the 3D properties of movie clip instances in your FLA file, you can create a variety of graphic effects without
duplicating movie clips in the library. However, when you edit a movie clip from the library, 3D transforms and
translations that have been applied are not visible. When editing the contents of a movie clip, only 3D transforms of
nested movie clips are visible.
Last updated 6/12/2015
292
Multimedia and Video
Note: Once a 3D transform is added to a movie clip instance, its parent movie clip symbol cannot be edited in Edit in Place
mode.
If you have 3D objects on the Stage, you can add certain 3D effects to all of those objects as a group by adjusting the
Perspective Angle and Vanishing Point properties of your FLA file. The Perspective Angle property has the effect of
zooming the view of the Stage. The Vanishing Point property has the effect of panning the 3D objects on the Stage.
These settings only affect the appearance of movie clips that have a 3D transform or translation applied to them.
In the Flash Professional authoring tool, you can control only one viewpoint, or camera. The camera view of your FLA
file is the same as the Stage view. Each FLA file has only one perspective Angle and Vanishing Point setting.
To use the 3D capabilities of Flash Professional, the publish settings of your FLA file must be set to Flash Player 10 and
ActionScript 3.0. Only movie clip instances can be rotated or translated along the z axis. Some 3D capabilities are
available through ActionScript that are not available directly in the Flash Professional user interface, such as multiple
Vanishing Points and separate cameras for each movie clip. Using ActionScript 3.0, you can apply 3D properties to
objects such as text, FLV Playback components, and buttons, in addition to movie clips.
Note: The 3D tools cannot be used on objects on mask layers and layers containing 3D objects cannot be used as mask
layers. For more information about mask layers, see Using mask layers.
Additional resources
The following resources provide additional detailed information about working with 3D graphics in Flash Professional:
Video tutorials:
• Working with 3D art (5:02) (Adobe.com)
• Flash Downunder – 3D rotation and 3D translation (25:50) (Adobe.com)
• Layers TV – Episode 74: 3D tools and sound (23:09) (Adobe.com)
Articles:
• Mariko Ogawa has written a detailed article titled Exploring the new 3D features in Flash Professional in the Adobe
Flash Developer Center. The article describes using the 3D tools, animating 3D properties, and working with 3D in
ActionScript 3.0.
Last updated 6/12/2015
293
Multimedia and Video
Move objects in 3D space
You move movie clip instances in 3D space with the 3D Translation tool
. When you select a movie clip with the
tool, its three axes, X, Y, and Z, appear on the Stage on top of the object. The x axis is red, the y axis is green, and the z
axis is blue.
The default mode of the 3D Translation tool is global. Moving an object in global 3D space is the same as moving it
relative to the Stage. Moving an object in local 3D space is the same as moving it relative to its parent movie clip if it has
one. To toggle the 3D Translation tool between global and local modes, click the Global toggle button in the Options
section of the Tools panel while the 3D Translation tool is selected. You can temporarily toggle the mode from global
to local by pressing the D key while dragging with the 3D Translation tool.
The 3D Translation and Rotation tools occupy the same space in the Tools panel. Click and hold the active 3D tool icon
in the Tools panel to select the currently inactive 3D tool.
By default, selected objects that have 3D translation applied appear with a 3D axis overlay on the Stage. You can turn
off this overlay in the General section of Flash Preferences.
Note: Changing the z axis position of a 3D movie clip will cause the movie clip to appear to change its x and y position as
well. This is because movement along the z axis follows the invisible perspective lines which radiate from the 3D vanishing
point (set in the 3D symbol instance Property inspector) to the edges of the Stage.
Move a single object in 3D space
1 Select the 3D Translation tool
in the Tools panel (or press the G key to select it).
2 Set the tool to Local or Global mode.
Be sure that the tool is in the mode you want mode by checking the Global toggle button in the Options section of
the Tools panel. Click the button or press the D key to toggle the mode.
3 Select a movie clip with the 3D Translation tool
.
4 To move the object by dragging with the tool, move the pointer over the x-, y-, or z-axis controls. The pointer
changes when over any of the controls.
The x- and y-axis controls are the arrow tips on each axis. Drag one of these controls in the direction of its arrow to
move the object along the selected axis. The z-axis control is the black dot at the center of the movie clip. Drag the
z-axis control up or down to move the object on the z axis.
5 To move the object using the Property inspector, enter a value for X, Y, or Z in the 3D Position and View section of
the Property inspector.
Last updated 6/12/2015
294
Multimedia and Video
When you move an object on the z axis, its apparent size changes. The apparent size appears in the Property
inspector as the Width and Height values in the 3D Position and View section of the Property inspector. These values
are read-only.
Move a multiple-object selection in 3D space
When you select multiple movie clips, you can move one of the selected objects with the 3D Translation tool
the others move in the same way.
and
• To move each object in the group in the same way in global 3D space, set the 3D Translation tool to global mode
and then drag one of the objects with the axis controls. Shift-double-click one of the selected objects to move the
axis controls to that object.
• To move each object in the group in the same way in local 3D space, set the 3D Translation tool to local mode and
then drag one of the objects with the axis controls. Shift-double-click one of the selected objects to move the axis
controls to that object.
You can also move the axis controls to the center of the multiple selection by double-clicking the z-axis control. Shiftdouble-click one of the selected objects to move the axis controls to that object.
Rotate objects in 3D space
You rotate movie clip instances in 3D space with the 3D Rotation tool
. A 3D rotation control appears on top of
selected objects on the Stage. The X control is red, the Y control is green, and the Z control is blue. Use the orange free
rotate control to rotate around the X and Y axes at the same time.
The default mode of the 3D Rotation tool is global. Rotating an object in global 3D space is the same as moving it
relative to the Stage. Rotating an object in local 3D space is the same as moving it relative to its parent movie clip if it
has one. To toggle the 3D Rotation tool between global and local modes, click the Global toggle button in the Options
section of the Tools panel while the 3D Rotation tool is selected. You can temporarily toggle the mode from global to
local by pressing the D key while dragging with the 3D Rotation tool.
The 3D Rotation and Translation tools occupy the same space in the Tools panel. Click and hold the active 3D tool icon
in the Tools panel to select the currently inactive 3D tool.
By default, selected objects that have 3D rotation applied appear with a 3D axis overlay on the Stage. You can turn off
this overlay in the General section of Flash Preferences.
Last updated 6/12/2015
295
Multimedia and Video
Rotate a single object in 3D space
1 Select the 3D Rotation tool
in the Tools panel (or press the W key).
Verify that the tool is in the mode that you want by checking the Global toggle button in the Options section of the
Tools panel. Click the button or press the D key to toggle the mode between global and local.
2 Select a movie clip on the Stage.
The 3D Rotation controls appear overlaid on selected object. If the controls appear in a different location, doubleclick the control center point to move it to the selected object.
3 Place the pointer over one of the four rotation axis controls.
The pointer changes when over one of the four controls.
4 Drag one of the axis controls to rotate around that axis, or the free rotate control (outer orange circle) to rotate x and
y simultaneously.
Drag the X axis control left or right to rotate around the x axis. Drag the y-axis control up or down to rotate around
the y axis. Drag the z-axis control in a circular motion to rotate around the z axis.
5 To relocate the rotation control center point relative to the movie clip, drag the center point. To constrain the
movement of the center point to 45° increments, press the Shift key while dragging.
Moving the rotation control center point lets you control the effect of the rotation on the object and its appearance.
Double-click the center point to move it back to the center of the selected movie clip.
The location of the rotation control center point for the selected object appears in the Transform panel as the 3D
Center Point property. You can modify the location of the center point in the Transform panel.
Rotate a multiple-object selection in 3D space
1 Select the 3D Rotation tool
in the Tools panel (or press the W key).
Verify that the tool is in the mode that you want by checking the Global toggle button in the Options section of the
Tools panel. Click the button or press the D key to toggle the mode between global and local.
2 Select multiple movie clips on the Stage.
The 3D Rotation controls appear overlaid on the most recently selected object.
3 Place the pointer over one of the four rotation axis controls.
The pointer changes when over one of the four controls.
Last updated 6/12/2015
296
Multimedia and Video
4 Drag one of the axis controls to rotate around that axis, or the free rotate control (outer orange circle) to rotate X
and Y simultaneously.
Drag the x-axis control left or right to rotate around the x axis. Drag the y-axis control up or down to rotate around
the y axis. Drag the z-axis control in a circular motion to rotate around the z axis.
All of the selected movie clips rotate around the 3D center point which appears at the center of the rotation controls.
5 To relocate the 3D rotation control center point, do one of the following:
• To move the center point to an arbitrary location, drag the center point.
• To move the center point to the center of one of the selected movie clips, Shift-double-click the movie clip.
• To move the center point to the center of the group of selected movie clips, double-click the center point.
Changing the location of the 3D rotation center point lets you control the effect of the rotation on the objects.
The location of the rotation control center point for the selected object appears in the Transform panel as the 3D
Center Point. You can modify the location of the center point in the Transform panel.
Rotate a selection with the Transform panel
1 Open the Transform panel (Window > Transform).
2 Select one or more movie clips on the Stage.
3 In the Transform panel, enter the desired values in the 3D Rotation X, Y, and Z fields to rotate the selection. These
fields contain hot text, so you can drag the values to change them.
Note: The 3D rotation takes place in global or local 3D space, depending on the current mode of the 3D Rotation tool
in the Tools panel.
4 To move the 3D rotation point, enter the desired values in the 3D Center Point X, Y, and Z fields.
Adjusting the Perspective Angle
The Perspective Angle property of a FLA file controls the apparent angle of view of 3D movie clips on the Stage.
Increasing or decreasing the Perspective Angle affects the apparent size of 3D movie clips and their location relative to
the edges of the Stage. By increasing the Perspective Angle, you make 3D objects appear closer to the viewer. By
decreasing the Perspective Angle property, you make 3D objects appear further away. The effect is like zooming in or
out with a camera lens which changes the angle of view through the lens.
Last updated 6/12/2015
297
Multimedia and Video
The Perspective Angle property affects all movie clips with 3D translation or rotation applied to them. The Perspective
Angle does not affect other movie clips. The default Perspective Angle is 55° of view, like a normal camera lens. The
range of values is from 1° to 180°.
To view or set the Perspective Angle in the Property inspector, a 3D movie clip must be selected on Stage. Changes to
the Perspective Angle are visible on the Stage immediately.
The Perspective Angle changes automatically when you change the Stage size so that the appearance of 3D objects does
not change. You can turn off this behavior in the Document Properties dialog box.
To set the Perspective Angle:
1 On the Stage, select a movie clip instance that has 3D rotation or translation applied to it.
2 In the Property inspector, enter a new value in the Perspective Angle field, or drag the hot text to change the value.
Last updated 6/12/2015
298
Multimedia and Video
Adjust the Vanishing Point
The Vanishing Point property of a FLA file controls the orientation of the z axis of 3D movie clips on the Stage. The z
axes of all 3D movie clips in a FLA file recede toward the Vanishing Point. By relocating the Vanishing Point, you change
the direction that an object moves when translated along its z axis. By adjusting the position of the Vanishing Point, you
can precisely control the appearance of 3D objects and animation on the Stage.
For example, if you locate the Vanishing Point at the upper-left corner of the Stage (0, 0), then increasing the value of
the Z property of a movie clip moves the movie clip away from the viewer and toward the upper-left corner of the Stage.
Because the Vanishing Point affects all 3D movie clips, changing it also changes the position of all movie clips that have
a z-axis translation applied.
The Vanishing Point is a document property that affects all movie clips that have z-axis translation or rotation applied
to them. The Vanishing Point does not affect other movie clips. The default location of the Vanishing Point is the center
of the Stage.
To view or set the Vanishing Point in the Property inspector, a 3D movie clip must be selected on Stage. Changes to the
Vanishing Point are visible on the Stage immediately.
To set the Vanishing Point:
1 On the Stage, select a movie clip that has 3D rotation or translation applied to it.
2 In the Property inspector, enter a new value in the Vanishing Point field, or drag the hot text to change the value.
Guides indicating the location of the Vanishing Point appear on the Stage while dragging the hot text.
3 To move the Vanishing Point back to the center of the Stage, click the Reset button in the Property inspector.
Note: If you resize the Stage, the Vanishing Point does not update automatically. To maintain the 3D look created by a
specific placement of the Vanishing Point, you will need to reposition the Vanishing Point relative to the new Stage size.
More Help topics
Working in three dimensions (3D)
Apply patterns with the Spray Brushtool
The Spray Brush acts like a particle sprayer, letting you “brush” a pattern of shapes onto the Stage at one time. By default,
the Spray Brush emits a spray of dot particles using the currently selected fill color. However, you can use the Spray
Brush tool to apply a movie clip or graphic symbol as a pattern.
1 Select the Spray Brush tool.
2 In the Spray Brush tool Property inspector, select a fill color for the default spray of dots. Or, click Edit to select a
custom symbol from the library.
You can use any movie clip or graphic symbol in the library as a “particle.” These symbol-based particles give you a
great deal of creative control over artwork you create in Flash.
3 Click or drag on the Stage where you want the pattern to appear.
Last updated 6/12/2015
299
Multimedia and Video
Spray Brush tool options
The Spray Brush tool options appear in the Property inspector when you select the Spray Brush from the Tools panel.
Edit Opens the Select Symbol dialog box, from which you select a movie clip or graphic symbol to use as a spray brush
particle. When a symbol in the library is selected, its name appears next to the edit button.
Color selector Select a fill color for the default particle spray. The color selector is disabled when you use a symbol in
the library as a spray particle.
Scale This property only appears when not using a symbol from the Library as the particle. Scale the symbol used as a
spray particle. For example, a value of 10% makes the symbol 10% smaller. A value of 200% makes the symbol 200%
larger.
Scale width This property only appears when using a symbol as the particle. Scale the width of a symbol used as a spray
particle. For example, a value of 10% makes the symbol 10% narrower. A value of 200% makes the symbol 200% wider.
Scale height This property only appears when using a symbol as the particle. Scales the height of a symbol used as a
spray particle. For example, a value of 10% makes the symbol 10% shorter. A value of 200% makes the symbol 200%
taller.
Random scaling Specifies that each symbol-based spray particle is placed on Stage at a random scale, altering the size
of each particle. This option is disabled when using the default spray of dots.
Rotate symbol This property only appears when using a symbol as the particle. Rotates the symbol-based spray particle
around a center point.
Random rotation This property only appears when using a symbol as the particle. Specifies that each symbol-based
spray particle is placed on Stage at a random degree of rotation. This option is disabled when you use the default spray
of dots.
Width The width of the spray particle when not using a symbol from the Library.
Height The height of the spray particle when not using a symbol from the Library.
Brush Angle The amount of clock-wise rotation to apply to the spray particle when not using a symbol from the
Library.
More Help topics
Create symbols
Working with the library
Arranging objects
Stack objects
In a layer, Flash stacks objects in the order in which they are created, placing the most recently created object at the top
of the stack. The stacking order of objects determines how they appear when they overlap. You can change the stacking
order of objects at any time.
Drawn lines and shapes always appear below groups and symbols on the stack. To move them up the stack, you must
group them or make them into symbols.
Last updated 6/12/2015
300
Multimedia and Video
Layers also affect the stacking order. Everything on Layer 2 appears in front of everything on Layer 1, and so on. To
change the order of layers, drag the layer name in the Timeline to a new position.
1 Select the object.
2 Do one of the following:
• Select Modify > Arrange > Bring To Front Or Send To Back to move the object or group to the top or bottom of
the stacking order.
• Select Modify > Arrange > Bring Forward Or Send Backward to move the object or group forward or backward
one position in the stacking order.
If more than one group is selected, the groups move in front of or behind all unselected groups, while maintaining their
order relative to each other.
Align objects
The Align panel lets you align selected objects along the horizontal or vertical axis. You can align objects vertically
along the right edge, center, or left edge of the selected objects, or horizontally along the top edge, center, or bottom
edge of the selected objects.
For a tutorial about the layout tools in Flash, see Use Layout Tools on the Flash Tutorials page at
www.adobe.com/go/learn_fl_tutorials.
1 Select the objects to align.
2 Select Window > Align.
3 To apply alignment modifications relative to Stage dimensions, in the Align panel, select To Stage.
4 To modify the selected object(s), select the alignment buttons.
Group objects
To manipulate elements as a single object, group them. For example, after creating a drawing, you might group the
elements of the drawing so that you can easily select and move the drawing as a whole.
When you select a group, the Property inspector displays the x and y coordinates of the group and its pixel dimensions.
You can edit groups without ungrouping them. You can also select an individual object in a group for editing without
ungrouping the objects.
❖ Select the objects to group. You can select shapes, other groups, symbols, text, and so on.
• To group objects, select Modify > Group, or press Control+G (Windows) or Command+G (Macintosh).
• To ungroup objects, select Modify > Ungroup, or press Control+Shift+G (Windows) or Command+Shift+G
(Macintosh).
Edit a group or an object within a group
1 Select the group, and then select Edit > Edit Selected, or double-click the group with the Selection tool.
Everything on the page that is not part of the group is dimmed, indicating that elements outside the group are
inaccessible.
2 Edit any element within the group.
3 Select Edit > Edit All, or double-click a blank spot on the Stage with the Selection tool.
Last updated 6/12/2015
301
Multimedia and Video
Flash restores the group to its status as a single entity, and you can work with other elements on the Stage.
Break apart groups and objects
To separate groups, instances, and bitmaps into ungrouped, editable elements, you break them apart, which
significantly reduces the file size of imported graphics.
Although you can select Edit > Undo immediately after breaking apart a group or object, breaking apart is not entirely
reversible. It affects objects as follows:
• Severs a symbol instance’s link to its master symbol
• Discards all but the current frame in an animated symbol
• Converts a bitmap to a fill
• Places each character into a separate text block when applied to text blocks
• Converts characters to outlines when applied to a single text character.
Do not confuse the Break Apart command with the Ungroup command. The Ungroup command separates grouped
objects, returning grouped elements to the state they were in before grouping. It does not break apart bitmaps,
instances, or type, or convert type to outlines.
1 Select the group, bitmap, or symbol to break apart.
2 Select Modify > Break Apart.
Note: Breaking apart animated symbols, or groups in an interpolated animation is not recommended and might have
unpredictable results. Breaking apart complex symbols and large blocks of text can take a long time. You might need to
increase the application’s memory allocation to properly break apart complex objects.
More Help topics
Create and organize layers
Break TLF text apart
Automating tasks with the Commands menu
Create and manage commands
To repeat the same task, create a command in the Commands menu from steps in the History panel and reuse the
command. Steps replay exactly as they were originally performed. You can’t modify the steps as you replay them.
To use steps the next time you start Flash Professional, create and save a command. Saved commands are retained
permanently, unless you delete them. Steps that you copy using the History panel Copy Steps command are discarded
when you copy something else.
Create a command from selected steps in the History panel. Rename or delete commands in the Manage Saved
Commands dialog box.
Create a command
1 Select a step or set of steps in the History panel.
Last updated 6/12/2015
302
Multimedia and Video
2 Select Save As Command from the History panel options menu.
3 Enter a name for the command and click OK. The command appears in the Commands menu.
Note: The command is saved as a JavaScript file (with the extension .jsfl) in your Commands folder. This folder is in
the following locations: Windows XP: boot drive\Documents and Settings\<user>\Local Settings\Application
Data\Adobe\Flash CS5\<language>\Configuration\Commands; Mac OS® X: Macintosh
HD/Users/<username>/Library/Application Support/Adobe/Flash CS5/<language>/Configuration/Commands.
Edit the names of commands in the Commands menu
1 Select Commands > Manage Saved Commands.
2 Select a command to rename.
3 Click the Rename button.
4 Enter the new name and click OK.
Delete a name from the Commands menu
1 Select Commands > Manage Saved Commands, and select a command.
2 Click Delete, click Yes in the warning dialog box, and click OK.
Run commands
• To use a saved command, select the command from the Commands menu.
• To run a JavaScript or Flash JavaScript command, select Commands > Run Command, navigate to the script to run,
and click Open.
Get more commands
Use the Get More Commands option in the Commands menu to link to the Flash Exchange website at
www.adobe.com/go/flash_exchange and download commands that other Flash Professional users have posted. For
more information on the commands posted there, see the Flash Exchange website.
1 Make sure you are connected to the Internet.
2 Select Commands > Get More Commands.
Steps that can’t be used in commands
Some tasks can’t be saved as commands or repeated using the Edit > Repeat menu item. These commands can be
undone and redone, but they cannot be repeated.
Examples of actions that can’t be saved as commands or repeated include selecting a frame or modifying a document
size. If you attempt to save an unrepeatable action as a command, the command is not saved.
More Help topics
Copy and paste steps between documents
Last updated 6/12/2015
303
Multimedia and Video
Drawing in Flash
About drawing
The drawing tools in Adobe Flash Professional let you create and modify lines and shapes for the artwork in your
documents. The lines and shapes you create in Flash Professional are all lightweight vector graphics, which help keep
your FLA file size small.
Before you draw and paint in Flash Professional, it is important to understand how Flash Professional creates artwork,
and how drawing, painting, and modifying shapes can affect other shapes on the same layer.
The following video tutorials demonstrate how to use the drawing tools in Flash Professional. Some videos may show
the Flash Professional CS3 or CS4 workspace, but are still applicable to Flash Professional CS5.
• Using the drawing tools (1:55)
• Using the drawing tools (CS3) (5:03)
• Object and merge drawing (2:09)
Vector and bitmap graphics
Computers display graphics in either vector or bitmap format. Understanding the difference between the two formats
helps you work more efficiently. Using Flash Professional, you can create and animate compact vector graphics. Flash
Professional also imports and manipulates vector and bitmap graphics that were created in other applications.
Vector graphics
Vector graphics describe images by using lines and curves, called vectors, that also include color and position
properties. For example, the image of a leaf is described by points through which lines pass, creating the leaf ’s outline.
The color of the leaf is determined by the color of the outline and the color of the area enclosed by the outline.
When you edit a vector graphic, you modify the properties of the lines and curves that describe its shape. Move, resize,
reshape, and change the color of a vector graphic without changing the quality of its appearance. Vector graphics are
resolution independent; that is, they can be displayed on output devices of varying resolutions without losing any
quality.
Bitmap graphics
Bitmap graphics describe images using colored dots, called pixels, arranged in a grid. For example, the image of a leaf
is described by the specific location and color value of each pixel in the grid, creating an image in much the same
manner as a mosaic.
Last updated 6/12/2015
304
Multimedia and Video
When you edit a bitmap graphic, you modify pixels rather than lines and curves. Bitmap graphics are resolution
dependent, because the data describing the image is fixed to a grid of a particular size. Editing a bitmap graphic can
change the quality of its appearance. In particular, resizing a bitmap graphic can make the edges of the image ragged as
pixels are redistributed within the grid. Displaying a bitmap graphic on an output device that has a lower resolution
than the image itself also degrades its quality.
Paths
Whenever you draw a line or shape in Flash, you create a line called a path. A path is made up of one or more straight
or curved segments. The beginning and end of each segment is denoted by anchor points, which work like pins holding
a wire in place. A path can be closed (for example, a circle), or open, with distinct endpoints (for example, a wavy line).
You change the shape of a path by dragging its anchor points, the direction points at the end of direction lines that appear
at anchor points, or the path segment itself.
A Selected (solid) endpoint B Selected anchor point C Unselected anchor point D Curved path segment E Direction point F Direction line.
Paths can have two kinds of anchor points: corner points and smooth points. At a corner point, a path abruptly changes
direction. At a smooth point, path segments are connected as a continuous curve. You can draw a path using any
combination of corner and smooth points. If you draw the wrong type of point, you can always change it.
A Four corner points B Four smooth points C Combination of corner and smooth points.
A corner point can connect any two straight or curved segments, while a smooth point always connects two curved
segments.
Last updated 6/12/2015
305
Multimedia and Video
Note: Don’t confuse corner and smooth points with straight and curved segments.
A path outline is called a stroke. A color or gradient applied to an open or closed path interior area is called a fill. A
stroke can have weight (thickness), color, and a dash pattern. After you create a path or shape, you can change the
characteristics of its stroke and fill.
Direction lines and direction points
When you select an anchor point that connects curved segments (or select the segment itself), the anchor points of the
connecting segments display direction handles, which consist of direction lines that end in direction points. The angle
and length of the direction lines determine the shape and size of the curved segments. Moving the direction points
reshapes the curves. Direction lines don’t appear in the final output.
A smooth point always has two direction lines, which move together as a single, straight unit. When you move a
direction line on a smooth point, the curved segments on both sides of the point are adjusted simultaneously,
maintaining a continuous curve at that anchor point.
In comparison, a corner point can have two, one, or no direction lines, depending on whether it joins two, one, or no
curved segments, respectively. Corner point direction lines maintain the corner by using different angles. When you
move a direction line on a corner point, only the curve on the same side of the point as that direction line is adjusted.
Direction lines are always tangent to (perpendicular to the radius of) the curve at the anchor points. The angle of each
direction line determines the slope of the curve, and the length of each direction line determines the height, or depth,
of the curve.
Last updated 6/12/2015
306
Multimedia and Video
Drawing modes and graphic objects
In Flash Professional, you can create several different kinds of graphic objects by using different drawing modes and
drawing tools. Each kind has its own advantages and disadvantages. By understanding the capabilities of the different
graphic object types, you can make good decisions about which types of objects to use in your work.
Note: In Flash Professional, graphic objects are items on the Stage. Flash lets you move, copy, delete, transform, stack, align,
and group graphic objects. “Graphic objects” in Flash are different from “ActionScript objects,” which are part of the
ActionScript® programming language. Do not confuse the two uses of the term “objects.” For more information on objects
in the programming language, see About Data Types in Learning ActionScript 2.0 in Adobe Flash, or Data types in the
ActionScript 3.0 Developer’s Guide.
The following video tutorials demonstrate the drawing modes in Flash Professional. Some videos show the Flash
Professional CS3 or CS4 workspace, but are still applicable to Flash Professional CS5.
• Object and merge drawing (2:09)
• Using the drawing tools (CS3) (5:03)
Merge Drawing mode
The default drawing mode automatically merges shapes that you draw when you overlap them. When you draw shapes
that overlap each other in the same layer, the top-most shape cuts away the part of the shape underneath it that it
overlaps. In this way, drawing shapes is a destructive drawing mode. For example, if you draw a circle and overlay a
smaller circle on top of it, and then select the smaller circle and move it, the portion of the second circle that overlaid
the first circle is removed.
When a shape has both a stroke and a fill, they are considered separate graphic elements that can be selected and moved
independently.
Last updated 6/12/2015
307
Multimedia and Video
Enter Merge Drawing mode
1 Select the Merge Drawing option in the Tools panel.
2 Select a drawing tool from the Tools panel and draw on the Stage
Note: By default, Flash Professional uses the Merge Drawing mode.
Object Drawing mode
Creates shapes referred to as drawing objects. Drawing objects are separate graphic objects that do not automatically
merge together when overlaid. This lets you overlap shapes without altering their appearance if you move them apart,
or rearrange their appearance. Flash Professional creates each shape as a separate object that you can individually
manipulate.
When a drawing tool is in Object Drawing mode, the shapes you create with it are self-contained. The stroke and fill of
a shape are not separate elements, and shapes that overlap do not alter one another. When you select a shape created
using Object Drawing mode, Flash Professional surrounds the shape with a rectangular bounding box to identify it.
Note: Set preferences for contact sensitivity when selecting shapes created using the Object Drawing mode.
Last updated 6/12/2015
308
Multimedia and Video
Enter Object Drawing mode
To draw shapes using Object Drawing mode, you must explicitly enable it.
1 Select a drawing tool that supports Object Drawing mode (the Pencil, Line, Pen, Brush, Oval, Rectangle, and
Polygon tools).
2 Select the Object Drawing button
from the Options category of the Tools panel, or press the J key to toggle
between the Merge and Object Drawing modes. The Object Drawing button toggles between the Merge and Object
Drawing modes. You can set preferences for contact sensitivity when you select shapes created with Object Drawing
mode.
3 Draw on the Stage.
Convert a Merge Drawing mode created shape to an Object Drawing mode shape
1 Select the shape on the Stage.
2 To convert the shape into an Object Drawing mode shape, select Modify > Combine Objects > Union. After
conversion, the shape is treated like a vector-based drawing object that does not alter its appearance by interacting
with other shapes.
Note: To join two or more shapes into a single, object-based shape, use the Union command.
Primitive objects
Primitive objects are shapes that let you adjust their characteristics in the Property inspector. You can precisely control
the size, corner radius, and other properties of the shape at any time after you have created it without having to draw it
from scratch.
Two types of primitives are available, rectangles and ovals.
1 Select the Rectangle Primitive Tool
or Oval Primitive Tool
from the Tools panel.
2 Draw on the Stage.
Overlapping shapes
When you draw a line across another line or painted shape in Merge Drawing mode, the overlapping lines are divided
into segments at the intersection points. To select, move, and reshape each segment individually, use the Selection tool.
When you paint on top of shapes and lines, the portion underneath is replaced by whatever is on top. Paint of the same
color merges together. Paint of different colors remains distinct. To create masks, cutouts, and other negative images,
use these features. For example, the following cutout is made by moving the ungrouped kite image onto the green shape,
deselecting the kite, and then moving the filled portions of the kite away from the green shape.
Last updated 6/12/2015
309
Multimedia and Video
To avoid inadvertently altering shapes and lines by overlapping them, group the shapes or use layers to separate them.
More Help topics
Group objects
Create and organize layers
Drawing with the Pen tool
To draw precise paths as straight lines or smooth, flowing curves, use the Pen tool. When you draw with the Pen tool,
click to create points on straight line segments and drag to create points on curved line segments. Adjust straight and
curved line segments by adjusting points on the line.
The following video tutorial demonstrates how to use Pen tool in Flash Professional:
• Adobe Flash CS4 basics : 0102 Pen Tool (10:55) (YouTube.com)
Pen tool drawing states
The Pen tool provides feedback about its current drawing state by displaying different pointers. The various drawing
states are indicated by the following pointers:
Initial Anchor Point pointer
The first pointer you see when you select the Pen tool. Indicates that the next mouse click on the Stage will create an
initial anchor point, which is the beginning of a new path (all new paths begin with an initial anchor point). Any
existing drawing paths are terminated.
Sequential Anchor Point pointer
Indicates that the next mouse click will create an anchor point with a line connecting it to the previous anchor point.
This pointer is displayed during the creation of all user-defined anchor points except the initial anchor point of a path.
Add Anchor Point pointer
Indicates that the next mouse click will add an anchor point to an existing path. To add an anchor point, the path must
be selected, and the Pen tool must not be over an existing anchor point. The existing path is redrawn based on the
additional anchor point. Only one anchor point can be added at a time.
Delete Anchor Point pointer
Last updated 6/12/2015
310
Multimedia and Video
Indicates that the next mouse click on an existing path will remove an anchor point. To remove an anchor point, the
path must be selected with the Selection tool, and the pointer must be over an existing anchor point. The existing path
is redrawn based on the removal of the anchor point. Only one anchor point can be removed at a time.
Continue Path pointer
Extends a new path from an existing anchor point. For this pointer to be activated, the mouse must be over an existing
anchor point on a path. This pointer is only available when you are not currently drawing a path. The anchor point does
not have to be one of the terminal anchor points of a path; any anchor point can be the location of a continued path.
Close Path pointer
Closes the path you’re drawing on the starting point of the path. You can only close a path that you are currently
drawing, and the existing anchor point must be the starting anchor point of the same path. The resulting path does not
have any specified fill color settings applied to the enclosed shape; apply fill color separately.
Join Paths pointer
Similar to the Close Path Tool except that the mouse must not be over the initial anchor point of the same path. The
pointer must be over either of the terminal points of a unique path. The segment may or may not be selected.note:
Joining paths may or may not result in a closed shape.
Retract Bezier Handle pointer
Appears when the mouse is over an anchor point whose Bezier handles are displayed. Clicking the mouse retracts the
Bezier handles and causes the curved path across the anchor point to revert to straight segments.
Convert Anchor Point pointer
Converts a corner point without direction lines to a corner point with independent direction lines. To enable the
Convert Anchor Point pointer, use the Shift + C modifier keys to toggle the Pen tool.
For a video tutorial about the Pen tool, see www.adobe.com/go/vid0120.
Draw straight lines with the Pen tool
The simplest path you can draw with the Pen tool is a straight line, made by clicking the Pen tool to create two anchor
points. Continue to click to create a path made of straight line segments connected by corner points.
1 Select the Pen tool
.
2 Position the Pen tool where the straight segment is to begin, and click to define the first anchor point. If direction
lines appear, you accidentally dragged the Pen tool; choose Edit > Undo and click again.
Note: The first segment you draw is not visible until you click a second anchor point (unless you’ve specified Show Pen
Preview in the Drawing category of the Preferences dialog box).
3 Click again where you want the segment to end (Shift-click to constrain the angle of the segment to a multiple of
45°).
4 Continue clicking to set anchor points for additional straight segments.
Last updated 6/12/2015
311
Multimedia and Video
5 To complete the path as an open or closed shape, do one of the following:
• To complete an open path, double-click the last point, click the Pen tool in the Tools panel, or Control-click
(Windows) or Command-click (Macintosh) anywhere away from the path.
• To close the path, position the Pen tool over the first (hollow) anchor point. A small circle appears next to the
Pen tool pointer when it is positioned correctly. Click or drag to close the path.
• To complete the shape as is, select Edit > Deselect All, or select a different tool in the Tools panel.
Draw curves with the Pen tool
To create a curve, add an anchor point where a curve changes direction and drag the direction lines that shape the
curve. The length and slope of the direction lines determine the shape of the curve.
Curves are easier to edit and your system can display and print them faster if you draw them using as few anchor points
as possible. Using too many points can also introduce unwanted bumps in a curve. Instead, draw widely spaced anchor
points, and practice shaping curves by adjusting the length and angles of the direction lines.
1 Select the Pen tool
.
2 Position the Pen tool where the curve is to begin, and hold down the mouse button.
The first anchor point appears, and the Pen tool pointer changes to an arrowhead. (In Photoshop, the pointer
changes only after you’ve started dragging.)
3 Drag to set the slope of the curve segment you’re creating, and then release the mouse button.
In general, extend the direction line about one third of the distance to the next anchor point you plan to draw. (You
can adjust one or both sides of the direction line later.)
Hold down the Shift key to constrain the tool to multiples of 45°.
A Positioning Pen tool B Starting to drag (mouse button pressed) C Dragging to extend direction lines.
4 Position the Pen tool where the curve segment is to end, and do one of the following:
• To create a C-shaped curve, drag in a direction opposite to the previous direction line and release the mouse
button.
Last updated 6/12/2015
312
Multimedia and Video
• To create an S-shaped curve, drag in the same direction as the previous direction line and release the mouse
button.
5 To create a series of smooth curves, continue dragging the Pen tool from different locations. Place anchor points at
the beginning and end of each curve, not at the tip of the curve.
To break out the direction lines of an anchor point, Alt-drag (Windows) or Option-drag (Macintosh) direction lines.
6To complete the path, do one of the following:
• To close the path, position the Pen tool over the first (hollow) anchor point. A small circle appears next to the
Pen tool pointer when it is positioned correctly. Click or drag to close the path.
• To leave the path open, Ctrl-click (Windows) or Command-click (Macintosh) anywhere away from all objects,
select a different tool, or choose Edit > Deselect All.
Add or delete anchor points
Adding anchor points can give you more control over a path or it can extend an open path. However, it’s a good idea
not to add more points than necessary. A path with fewer points is easier to edit, display, and print. To reduce the
complexity of a path, delete unnecessary points.
The toolbox contains three tools for adding or deleting points: the Pen tool
the Delete Anchor Point tool
.
, the Add Anchor Point tool
, and
By default, the Pen tool changes to the Add Anchor Point tool as you position it over a selected path, or to the Delete
Anchor Point tool as you position it over an anchor point.
Note: Don’t use the Delete, Backspace, and Clear keys or the Edit > Cut or Edit > Clear commands to delete anchor points;
these keys and commands delete the point and the line segments that connect to that point.
1 Select the path to modify.
2 Click and hold the mouse button on the Pen tool
the Delete Anchor Point tool
, then select the Pen tool
.
Last updated 6/12/2015
, Add Anchor Point tool
, or
313
Multimedia and Video
3 To add an anchor point, position the pointer over a path segment, and click. To delete an anchor point, position the
pointer over an anchor point, and click.
Adjust anchor points on paths
When you draw a curve with the Pen tool, you create smooth points—anchor points on a continuous, curved path.
When you draw a straight line segment or a straight line connected to a curved segment, you create corner points—
anchor points on a straight path or at the juncture of a straight and a curved path.
By default, selected smooth points appear as hollow circles, and selected corner points appear as hollow squares.
Move or add anchor points
• To move an anchor point, drag the point with the Subselection tool
.
• To nudge an anchor point or points, select the point or points with the Subselection tool and use the arrow keys to
move the point or points. Shift-click to select multiple points.
• To add an anchor point, click a line segment with the Pen tool. A plus (+) sign appears next to the Pen tool if an
anchor point can be added to the selected line segment. If the line segment is not yet selected, click it with the Pen
tool to select it, and then add an anchor point.
Delete anchor points
Deleting unneeded anchor points on a curved path optimizes the curve and reduces the resulting SWF file size.
• To delete a corner point, click the point once with the Pen tool. A minus (-) sign appears next to the Pen tool if an
anchor point can be deleted from the selected line segment. If the line segment is not yet selected, click it with the
Pen tool to select it, and then delete the anchor point.
• To delete a smooth point, click the point once with the Pen tool. A minus (-) sign appears next to the Pen tool if an
anchor point can be deleted from the selected line segment. If the line segment is not yet selected, click it with the
Pen tool to select it, and then delete the corner point. (Click once to convert the point to a corner point, and once
more to delete the point.)
Convert segments between straight and curved
To convert segments in a line from straight segments to curve segments, convert corner points to smooth points. You
can also do the reverse.
• To convert a corner point to a smooth point, use the Subselection tool to select the point, then Alt-drag (Windows)
or Option-drag (Macintosh) the point to place the tangent handles.
• To convert a smooth point to a corner point, click the point with the Pen tool. The carat ^ marker next to the pointer
indicates when it is over the smooth point.
Last updated 6/12/2015
314
Multimedia and Video
Adjust segments
To change the angle or length of the segment or adjust curved segments to change the slope or direction of the curve,
adjust straight segments.
When you move a tangent handle on a smooth point, the curves on both sides of the point adjust. When you move a
tangent handle on a corner point, only the curve on the same side of the point as the tangent handle adjusts.
• To adjust a straight segment, select the Subselection tool , and select a straight segment. Use the Subselection tool
to drag an anchor point on the segment to a new position.
• To adjust a curve segment, select the Subselection tool and drag the segment.
note: When you click the path, Flash Professional shows the anchor points. Adjusting a segment with the Subselection
tool can add points to the path.
• To adjust points or tangent handles on a curve, select the Subselection tool, and select an anchor point on a curved
segment.
• To adjust the shape of the curve on either side of the anchor point, drag the anchor point, or drag the tangent handle.
To constrain the curve to multiples of 45º, Shift-drag. To drag tangent handles individually, Alt-drag (Windows) or
Option-drag (Macintosh).
Pen tool preferences
Specify preferences for the appearance of the Pen tool pointer, for previewing line segments as you draw, and for the
appearance of selected anchor points. Selected line segments and anchor points use the outline color of the layer on
which the lines and points appear.
1 Select the Pen tool
, then select Edit > Preferences (Windows) or Flash > Preferences (Macintosh).
2 In the Category list, select Drawing.
3 Set the following options for the Pen tool:
Show Pen Preview Previews line segments as you draw. A preview of the line segment appears as you move the
pointer around the Stage, before you click to create the end point of the segment. If this option is not selected, a line
segment does not appear until you create the end point.
Show Solid Points Displays selected anchor points as hollow and deselected anchor points as solid. If this option is
not chosen, selected anchor points are solid, and deselected anchor points are hollow.
Show Precise Cursors Specifies that the Pen tool pointer appears as a cross-hair pointer rather than the default Pen
tool icon, for more precise placement of lines. To display the default Pen tool icon with the Pen tool, deselect the
option.
note: To switch between the cross-hair pointer and the default Pen tool icon, press Caps Lock.
4 Click OK.
Last updated 6/12/2015
315
Multimedia and Video
More Help topics
Reshape lines and shapes
Adjust Stroke and Fill color
Embed fonts for consistent text appearance
When your published SWF files play on computers across the Internet, there is no guarantee that the fonts you used are
available on those machines. To ensure that your text maintains the appearance you intended, you can embed entire
fonts or specific subsets of characters from a font. By embedding the characters in your published SWF file, you make
the font available to the SWF file regardless of the computer that plays the file. Once a font is embedded, you can use it
anywhere in your published SWF file.
Beginning with Flash Professional CS5, Flash automatically embeds all characters used by any text objects that contain
text. Creating an embedded font symbol yourself allows your text objects to use additional characters, such as when
accepting user input at runtime or when editing text with ActionScript. Embedded fonts are not necessary for text
objects that have the Anti-alias property set to Use Device Fonts. You specify which fonts you want embedded in your
FLA file, and Flash embeds the fonts when you publish a SWF file.
There are 4 common situations in which to ensure correct text appearance by embedding fonts in a SWF file:
• When creating text objects in your FLA file that are part of a design that requires consistent text appearance.
• When you are using an anti-alias option other than Use Device Fonts, you must embed the fonts or text may
disapppear or appear incorrectly.
• When generating text dynamically with ActionScript in your FLA file.
• When creating dynamic text with ActionScript, you must specify in ActionScript which font to use.
• When your SWF file contains text objects and may be loaded by another SWF file that does not have the required
fonts embedded.
The Font Embedding dialog box allows you to:
• Manage all embedded fonts in one place.
• Create font symbols for each embedded font.
• Select custom ranges of embedded characters for a font as well as pre-defined ranges.
• Work with both Text Layout Framework (TLF) text and Classic text in the same file and use embedded fonts with
each. Note that TLF text is unavailable with Flash Professional CC. For more information, see Opening Flash CS6
file with Flash Professional CC.
• Continue to work with Flash Professional CS4 and earlier FLA files that contain fonts embedded with the older
method that associated the embedded characters with a specific text object. When you open an older FLA file, Flash
Professional CS5 and later allow you to edit these older embedded fonts with the Font Embedding dialog box.
To embed characters from a font in a SWF file:
1 With your FLA file open in Flash, open the Font Embedding dialog box by doing one of the following:
• Choose Text > Font Embedding.
• From the Library panel options menu, choose Add Font.
• Right-click in empty space in the Library panel tree view, and choose New Font.
• In the Text Property inspector, click on the Embed button.
Last updated 6/12/2015
316
Multimedia and Video
2 If your font is not already selected in the Font Embedding dialog box, click the Add (+) button to add a new
embedded font to your FLA file.
When you open the Font Embedding dialog box from the Library or the Text Property inspector, a font item appears
automatically in the dialog box.
3 In the Options tab, select the Family and Style of the font you want to embed.
If you opened the Font Embedding dialog box from the Text Property inspector or from the Library panel, the font
used by the current selection appears automatically in the dialog box.
4 In the Character Ranges section, select the character ranges you want to embed. The more characters you embed,
the larger your published SWF file will be.
5 If you want to embed any additional specific characters, enter them in the “Also include these characters” field.
6 To enable the embedded font symbol to be accessed with ActionScript code, select Export for ActionScript in the
ActionScript tab.
7 If you selected Export for ActionScript, select an outline format also. For TLF text containers, select TLF (DF4) as
the Outline Format. For Classic text containers, select Classic (DF3).
You must create separate embedded font symbols for use in TLF and Classic text containers. The TLF (DF4) outline
format is not available for PostScript Type 1 fonts. TLF (DF4) requires Flash Player version 10 or later.
8 If you want to use the font symbol as a shared asset, select options in the Sharing section of the ActionScript tab. For
more information about using shared assets, see Sharing library assets across files.
To edit the parameters of an embedded font symbol:
1 Do one of the following:
• Right-click the font symbol in the Library and choose Properties.
• Select a text container on the Stage and click the Embed button in the Character section of the Property inspector.
• Select the font symbol in the Library and choose Edit Properties from the panel options menu.
• Double-click the icon of the font symbol in the Library.
• Choose Text > Font Embedding, and then select the font symbol you want to edit in the tree view on the left of
the dialog.
2 Make changes in the Font Embedding dialog box and click OK.
The tree view in the Font Embedding dialog box displays all font symbols in the current FLA file, organized by font
family. You can edit any or all of the fonts while the dialog is open, and the changes will be committed when you press
the OK button.
Note: If you save a Flash Professional CS5 FLA file to CS4 format, font symbols are converted to CS4 Font Symbols which
will embed the entire range of characters in a font, not a selected sub-range. All TLF text blocks are converted to Classic
text fields. Font symbols are saved in DefineFont3 format to ensure compatibility with Classic text. Each CS4 font symbol
will contain an entire copy of the embedded font information for each font it uses. Saving in CS4 format also causes the
embedding information to move into any text objects that referenced font symbols, as this is how embedded font
information was stored in Flash Pro CS4 and earlier versions.
Additional resources
• Article: Formatting text for localized Flash projects: Font embedding for multiple languages (Adobe.com)
Last updated 6/12/2015
317
Multimedia and Video
Drawing preferences
Set drawing settings to specify snapping, smoothing, and straightening behaviors. Change the tolerance setting for each
option, and turn each option off or on. Tolerance settings are relative, depending on the resolution of your computer
screen and the current magnification of the scene. By default, each option is on and set to Normal tolerance.
Drawing settings
1 Select Edit > Preferences (Windows) or Flash > Preferences (Macintosh) and select Drawing.
2 Under the Drawing category, select from the following options:
Pen tool Lets you set options for the Pen tool. Select Show Pen Preview to display a preview line from the last clicked
point to the current location of the pointer. Select Show Solid Points to display control points as small filled squares
instead of unfilled squares. Select Show Precise Cursors to display a crosshair cursor instead of the Pen tool icon
when using the Pen tool. This option lets you see the exact target of clicks more easily.
Connect Lines Determines how close the end of a line being drawn must be to an existing line segment before the
end point snaps to the nearest point on the other line. This setting also controls horizontal and vertical line
recognition—that is, how nearly horizontal or vertical a line must be drawn before Flash Professional makes it
exactly horizontal or vertical. When Snap To Objects is turned on, this setting controls how close objects must be to
snap to one another.
Smooth Curves Specifies the amount of smoothing applied to curved lines drawn with the Pencil tool when the
drawing mode is set to Straighten or Smooth. (Smoother curves are easier to reshape, whereas rougher curves match
the original line strokes more closely.)
note: To further smooth existing curved segments, use Modify > Shape > Smooth and Modify > Shape > Optimize.
Recognize Lines Defines how nearly straight a line segment drawn with the Pencil tool must be before Flash
Professional recognizes it as a straight line and makes it perfectly straight. If Recognize Lines is off while you draw,
straighten lines later by selecting one or more line segments and selecting Modify > Shape > Straighten.
Recognize Shapes Controls how precisely to draw circles, ovals, squares, rectangles, and 90° and 180° arcs for them
to be recognized as geometric shapes and redrawn accurately. The options are Off, Strict, Normal, and Tolerant.
Strict requires that the shape be drawn very close to straight; Tolerant specifies that the shape can be somewhat
rough, and Flash redraws the shape. If Recognize Shapes is off while you draw, straighten lines later by selecting one
or more shapes (for example, connected line segments) and selecting Modify > Shape > Straighten.
Click Accuracy Specifies how close to an item the pointer must be before Flash Professional recognizes the item.
Selection, Subselection, and Lasso tool contact options
Specify the Selection, Subselection, and Lasso tool contact-sensitivity options when you create shapes using Object
Drawing mode. By default, objects are only selected when the tool’s marquee rectangle completely surrounds the object.
Deselecting this option selects entire objects when they are only partially enclosed by the selection marquee of the
Selection, Subselection, or Lasso tools.
1 Select Edit > Preferences (Windows) or Flash > Preferences (Macintosh).
2 In the General category, do one of the following:
• To select only objects and points that are completely enclosed by the selection marquee, deselect ContactSensitive Selection and Lasso tools. Points that lie within the selection area are still selected.
• To select objects or groups that are only partially enclosed by the selection marquee, select Contact-Sensitive
Selection and Lasso tools.
Last updated 6/12/2015
318
Multimedia and Video
note: The Subselection tools use the same contact-sensitive setting.
Scaling and caching symbols
Scaling content on the Stage
You can scale items on the stage in these ways:
• Scale individual symbol instances with the Free Transform tool, Properties panel, or Transform panel.
• Scale individual symbol instances with 9-slice scaling and the tools and panels listed above.
• Scaling the entire contents of the Stage when resizing the stage (CS5.5 only).
Scale an individual symbol instance
1 Select the symbol instance on the Stage.
2 Do one of the following:
• Select the Free Transform tool in the Tools panel and then drag the corners or edges of the instance to resize it.
• Open the Properties panel (Window > Properties) and edit the Height and Width properties of the instance.
• Open the Transform panel (Window > Transform) and edit the Scale Width and Scale Height properties of the
instance.
Scale all content when resizing the Stage (CS5.5 only)
1 Choose Modify > Document.
2 In the Document Settings dialog box, enter new values for the Height and Width dimensions of the document. This
is the Stage size.
3 Select the Scale Content with Stage option. Click OK.
Scaling is applied to all content in all frames.
Tutorials and videos
• Video: Flash Professional CS5.5 - Scaling Assets (4:20, Adobe TV)
• ActionScript 3.0 Example: Scaling and resizing assets for use on multiple screens (Paul Trani,
cookbooks.adobe.com)
About 9-slice scaling and movie clip symbols
9-slice scaling allows you to specify how scaling is applied to specific areas of a movie clip. With 9-slice scaling, you can
ensure that the movie clip looks correct when scaled. With normal scaling, Flash Professional scales all parts of a movie
clip equally, and in both the horizontal and vertical dimensions. For many movie clips, this equal scaling can make the
clip’s graphics look strange, especially at the corners and edges of rectangular movie clips. This is often true of movie
clips used as user interface elements, such as buttons.
The movie clip is visually divided into nine sections with a grid-like overlay, and each of the nine areas is scaled
independently. To maintain the visual integrity of the movie clip, corners are not scaled, while the remaining areas of
the image are scaled (as opposed to being stretched) larger or smaller, as needed.
Last updated 6/12/2015
319
Multimedia and Video
When a movie clip symbol has 9-slice scaling applied, it appears in the Library panel preview with the guides displayed.
If Enable Live Preview is turned on (Control > Enable Live Preview) when you scale instances of the movie clip on the
Stage, you see the 9-slice scaling applied on the Stage.note: The Live Preview setting cannot be used with an ActionScript
3.0 document.
Note: 9-slice scaling cannot be applied to Graphic or Button symbols. Bitmaps inside 9-slice enabled movie clips are scaled
normally, without 9-slice distortion, while the other movie clip contents are scaled according to the 9-slice guides.
Note: 9-slice scaling is sometimes also referred to as “scale 9.”
A 9-slice-enabled movie clip can contain nested objects within it, but only certain types of objects inside the movie clip
properly scale in the 9-slice manner. To make a movie clip with internal objects that also adhere to 9-slice scaling when
the movie clip is scaled, those nested objects must be shapes, drawing objects, groups, or graphic symbols.
For video tutorials about 9-slice scaling, see:
• www.adobe.com/go/vid0204
• www.adobe.com/go/vid0205
Edit movie clip symbols with 9-slice scaling
By default, slice guides are placed at 25% (or one-fourth) of the symbol’s width and height from the edge of the symbol.
In symbol-editing mode, the slice guides appear as dotted lines superimposed on the symbol. The slice guides don’t
snap when you drag them on the pasteboard. The guides do not appear when the symbol is on the Stage.
You cannot edit 9-slice-enabled symbols in place on the Stage. You must edit them in symbol-editing mode. note:
Instances made from a 9-slice-enabled movie clip symbol can be transformed, but should not be edited. Editing these
instances can have unpredictable results.
For video tutorials about 9-slice scaling, see:
• www.adobe.com/go/vid0204
• www.adobe.com/go/vid0205
Enable 9-slice scaling for an existing movie clip symbol
1 With the source document open, select Window > Library.
2 Select a movie clip, button, or graphic symbol in the Library panel.
3 Select Properties from the Library Panel menu.
Last updated 6/12/2015
320
Multimedia and Video
4 Select Enable Guides for 9-slice Scaling.
Edit a 9-slice-enabled movie clip symbol
1 Enter symbol-editing mode by doing one of the following:
• Select an instance of the symbol on the Stage and right-click (Windows) or Control-click (Macintosh), and select
Edit.
• Select the symbol in the Library panel and right-click (Windows) or Control-click (Macintosh), and select Edit.
• Double-click the symbol in the Library panel.
2 To move the horizontal or vertical guides, drag and release a guide. The new position of the guide is updated in the
Library preview for the symbol.
Improving rendering performance with bitmap caching
Runtime bitmap caching lets you optimize playback performance by specifying that a static movie clip (for example, a
background image) or button symbol be cached as a bitmap at runtime. By default, Flash Player redraws each vector
item on the Stage in every frame. Caching a movie clip or button symbol as a bitmap prevents Flash Player from having
to continually redraw the item, because the image is a bitmap and its position on the Stage does not change. This
provides a significant improvement in playback performance.
For example, when you create an animation with a complex background, create a movie clip containing all the items
included in the background. Then select Cache as Bitmap for the background movie clip in the Property inspector.
During playback, the background is rendered as a bitmap stored at the current screen depth. Flash Player draws the
bitmap on the Stage quickly and only once, letting the animation play faster and more smoothly.
Without bitmap caching, the animation might play back too slowly.
Bitmap caching lets you use a movie clip and freeze it in place automatically. If a region changes, vector data updates
the bitmap cache. This process minimizes the number of redraws that Flash Player must perform, and provides
smoother, faster playback performance.
Only use runtime bitmap caching on static, complex movie clips in which the position, but not the content, of the movie
clip changes on each frame in an animation. The playback or runtime performance improvement from using runtime
bitmap caching is only noticeable on complex-content movie clips. Runtime bitmap caching with simple movie clips
does not enhance performance.
For more information, see When to enable caching in Learning ActionScript 2.0 in Adobe Flash.
Guy Watson has written a detailed article about using bitmap caching in the Flash Professional Developer Center titled
Using Bitmap Caching in Flash.
The Optimizing animations and FLA files (7:24) (CS3) video tutorial also provides tips on using runtime bitmap
caching.
Note: You can only use the Use Runtime Bitmap Caching option for movie clip and button symbols.
Under the following circumstances, a movie clip does not use a bitmap (even if Use Runtime Bitmap Caching is
selected) but instead renders the movie clip or button symbol by using vector data:
• The bitmap is too large (greater than 2880 pixels in either direction).
• Flash Player fails to allocate memory for the bitmap (producing an out-of-memory error).
Last updated 6/12/2015
321
Multimedia and Video
Specify bitmap caching for a symbol instance
1 Select the movie clip or button symbol on the Stage.
2 In the Property inspector, select the Cache as Bitmap option (CS5) or choose Cache as Bitmap from the Render
menu (CS5.5).
Specify a backround color for a cached symbol instance (CS5.5 only)
When Bitmap Caching is turned on for a symbol instance, you can choose an opaque background color for the instance.
By default the background is transparent.
1 Select the instance on the Stage.
2 In the Display section of the Properties panel, select opaque from the Bitmap Background menu.
3 Select a background color from the color picker.
Videos and tutorials
• Video: Flash Professional CS5.5 - Export as bitmap and cache as bitmap (2:06, Adobe TV)
Graphic filters
About filters
Filter overview
Filters (graphic effects) let you add enriching visual effects to text, buttons, and movie clips. A feature unique to Flash
Pro is that you can animate the filters you apply using motion tweens.
Flash Pro blend modes let you create composite images. Compositing is the process of varying the transparency or color
interaction of two or more overlapping objects. Blending modes also add a dimension of control to the opacity of
objects and images. You can use Flash Pro blending modes to create highlights or shadows that let details from an
underlying image show through, or to colorize a desaturated image.
About animated filters
You can animate filters in the Timeline. Objects on separate keyframes joined by a tween have the parameters for
corresponding filters tweened on intermediate frames. If a filter does not have a matching filter (a filter of the same
type) at the opposite end of the tween, a matching filter is added automatically to ensure that the effect occurs at the
end of the animation sequence.
To prevent motion tweens from functioning incorrectly if a filter is missing at one end of the tween, or if filters are
applied in a different order at each end, Flash Pro does the following:
• If you apply a motion tween to a movie clip with filters applied to it, when you insert a keyframe at the opposite end
of the tween, the movie clip automatically has the same filters, with the same stacking order, on the last frame of the
tween as it did at the beginning of the tween.
Last updated 6/12/2015
322
Multimedia and Video
• If you place movie clips on two different frames with different filters applied to each, and you apply a motion tween
between the frames, Flash Pro first processes the movie clip with the most filters. Flash Pro then compares the filters
applied to the first movie clip against the filters that the second movie clip uses. If no matching filters are found in
the second movie clip, Flash Pro generates a dummy filter with no parameters and the color of the existing filters.
• If a motion tween exists between two keyframes and you add a filter to the object in one keyframe, Flash Pro
automatically adds a dummy filter to the movie clip when it reaches the keyframe at the other end of the tween.
• If a motion tween exists between two keyframes and you remove a filter from an object in one keyframe, Flash Pro
automatically removes the matching filter from the movie clip when it reaches the keyframe at the other end of the
tween.
• If you set filter parameters inconsistently between the beginning and end of a motion tween, Flash Pro applies the
filter settings of the starting frame to the interpolated frames. Inconsistent settings occur when the following
parameters are set differently between the beginning and end of the tween: knockout, inner shadow, inner glow, and
type of gradient glow and gradient bevel.
For example, if you create a motion tween using the drop shadow filter, and apply a drop shadow with a knockout
on the first frame of the tween, and an inner shadow on the last frame of the tween, Flash Pro corrects the
inconsistent use of the filter in the motion tween. In this case, Flash Pro applies the filter settings used on the first
frame of the tween—a drop shadow with a knockout.
About filters and Flash Player performance
The type, number, and quality of the filters you apply to objects can affect the performance of SWF files as you play
them. The more filters you apply to an object, the greater the number of calculations Adobe® Flash® Player must process
to correctly display the visual effects you’ve created. Adobe® recommends that you apply a limited number of filters to
a given object.
Each filter includes controls that let you adjust the strength and quality of the applied filter. Using lower settings
improves performance on slower computers. If you are creating content for playback on a wide range of computers, or
are unsure of the computing power available to your audience, set the quality level to Low to maximize playback
performance.
About Pixel Bender filters
Adobe Pixel Bender™ is a programming language developed by Adobe that allows users to create custom filters, effects,
and blend modes for use in Flash and After Effects. Pixel Bender is hardware independent and designed to run
efficiently on a variety of GPU and CPU architectures automatically.
Pixel Bender developers create filters by writing Pixel Bender code and saving the code in a text file with the file
extension pbj. Once written, a Pixel Bender filter can be used by any Flash document. Use ActionScript® 3.0 to load the
filter and use its controls.
For more information about working with Pixel Bender in ActionScript, see ActionScript 3.0 Developer's Guide.
Lee Brimelow has posted several helpful Pixel Bender examples on his blog at http://theflashblog.com/?cat=44.
The following video tutorials demonstrate the use of Pixel Bender filters in Flash Pro:
Working with filters
Enhanced in Flash Professional CC
Each time you add a new filter to an object, it is added to the list of applied filters for that object in the Property
inspector. You can apply multiple filters to an object, as well as remove filters that were previously applied. You can apply
filters only to text, button, movie clip, components, and compiled clips objects.
Last updated 6/12/2015
323
Multimedia and Video
You can create a filter settings library that lets you easily apply the same filter or sets of filters to an object. Flash Pro
stores the filter presets you create in the Filters section of the Property inspector in the Filters > Presets menu.
With Flash Professional CS6 and earlier versions, applying filters was restricted to movie clip and button symbols only.
With Flash Professional CC, you can now additionally apply Filters to Compiled Clips and Movie Clip components.
This allows you to add various effects to components directly, at the click of a button (or two), making your applications
look that much better. With Flash Pro CS6, to add filters or other effects to components, one had to “wrap” it inside a
movie clip symbol. That is:
1 Create or add a component on stage.
2 Right click on the component, and select Convert to Symbol.
With Flash Professional CS6 (and earlier versions), you could add filters or various other kinds of effects after wrapping
the component inside a symbol. However, this was only a workaround, and not a suggested best practice. With Flash
Professional CC, you could add various filters to components by directly using the Filters, Color Effects, and Display
Settings options available on the Properties Panel. To understand this key enhancement better, consider the following
example: Adding Bevel filter to a Button component
1 Create or add a Button on stage from the Components Panel, and select the Button subsequently.
2 On the Properties Panel, click the
button drop-down list in the Filters section and select Bevel filter. Properties
and Values for the Bevel filter are displayed.
3 Modify or set appropriate values for any desired Property. For example, Blur X, Blur Y, Strength, Shadow, etc. You
will notice the effects reflecting on the selected button simultaneously.
Apply or remove a filter
1 Select a text, button, or movie clip object to apply a filter to or remove a filter from.
Last updated 6/12/2015
324
Multimedia and Video
2 In the Filters section of the Property panel, do one of the following:
• To add a filter, click the
look.
button, and select a filter. Experiment with the settings until you get the desired
• To remove a filter, select the filter to remove in the list of applied filters, and click the Remove Filter button
You can delete or rename any presets.
.
Copy and paste a filter
1 Select the object to copy a filter from, and select the Filters panel.
2 Select the filter to copy, and click
the button. In the drop-down click Copy Selected Filter. To copy all filters,
choose Copy All Filters.
3 Select the object to apply the filter to, and click the button. In the drop-down, click Paste Filters.
Apply a preset filter to an object
1 Select the object to apply a filter preset to, and select the Filter tab.
2 Click the
button to open the drop-down.
3 Select the filter preset to apply from the list of available presets at the bottom of the drop-down list.
Note: When you apply a filter preset to an object, Flash Pro replaces any filters currently applied to the selected objects with
the filters used in the preset.
Enable or disable a filter applied to an object
❖ By default all Filters stay enabled. Click the
icon next to the filter name to disable the Filter in the Filter list. Click
the X button next to the filter name to enable a Filter.
Note: To toggle the enable state of the other filters in the list, Alt-click (Windows) or Option-click (Macintosh) the enable
icon in the Filter list. If you Alt-click the icon, the selected filter is enabled, and all others filters in the list are disabled.
Enable or disable all filters applied to an object
❖ Click the
button, and select Enable All or Disable All from the drop-down.
Note: To enable or disable all of the filters in the list, Control-click the enable or disable icon in the Filter list.
Create preset filter libraries
Save filter settings as preset libraries that you can easily apply to movie clip and text objects. Share your filter presets
with other users by providing them with the filter configuration file. The filter configuration file is an XML file that is
saved in the Flash Pro Configuration folder in the following location:
• Windows 7 and 8: C:\Users\username\AppData\Local\Adobe\Flash CC\language\Configuration
• (Flash Professional CS6 or earlier versions only) Windows XP: C:\Documents and Settings\username\Local
Settings\Application Data\Adobe\Flash CS6\language\Configuration\Filters\filtername.xml
• (Flash Professional CS6 or earlier versions only) Windows Vista: C:\Users\username\Local Settings\Application
Data\Adobe\Flash CS6\language\Configuration\Filters\filtername.xml
• Macintosh: Macintosh HD/Users/username/Library/Application Support/Adobe/Flash
CC/language/Configuration/Filters/filtername.xml
Last updated 6/12/2015
325
Multimedia and Video
Create a library of filters with preset settings
1 Apply the filter or filters to any selected object.
2 Click the
button to add a new filter.
3 Select the filter and click the
button, and choose Save As Preset.
4 Enter a name for the filter settings in the Save Preset As dialog box, and click OK.
Rename a filter preset
1 Click the
button, and add a new filter.
2 Select the filter and click the
button. Click Edit Presets.
3 Double-click the preset name to modify.
4 Enter a new preset name, and click OK.
Delete a filter preset
1 Click the
button, and add a new filter.
2 Select the filter and click the
button.
3 Click Edit Presets.
4 On the Edit Presets dialog, select the preset to remove, and click Delete.
Applying filters
Apply a drop shadow
The Drop Shadow filter simulates the look of an object casting a shadow onto a surface.
For a sample of a drop shadow with a classic tween, see the Flash Samples page at www.adobe.com/go/learn_fl_samples.
Download and decompress the Samples zip file and navigate to the Graphics\AnimatedDropShadow directory.
1 Select the object to apply a drop shadow to.
2 In the Filters section of the Property inspector, click the
button, and select Drop Shadow.
Last updated 6/12/2015
326
Multimedia and Video
3 Edit the filter settings:
• To set the width and height of the drop shadow, set the Blur X and Y values.
• To set the darkness of the shadow, set the Strength value. The higher the numerical value, the darker the shadow.
• Select the quality level for the drop shadow. High is approximate to that of a Gaussian blur. Low maximizes
playback performance.
• To set the angle of the shadow, enter a value.
• To set the distance of the shadow from the object, set the Distance value.
• Select Knockout to knock out (or visually hide) the source object and display only the drop shadow on the
knockout image.
• To apply the shadow within the boundaries of the object, select Inner shadow.
• To hide the object and display only its shadow, select Hide Object. Hide Object lets you more easily create a
realistic shadow.
• To open the Color Picker and set the shadow color, click the Color control.
Create a skewed drop shadow
1 Select the object with the shadow you want to skew.
2 Duplicate (select Edit > Duplicate) the source object.
3 Select the duplicated object, and skew it using the Free Transform tool (Modify > Transform > Rotate And Skew).
4 Apply the Drop Shadow filter to the duplicated movie clip or text object. (It will already be applied if the object you
duplicated already had a drop shadow.)
5 In the Filters panel, select Hide Object to hide the duplicated object while leaving its shadow visible.
6 Select Modify > Arrange > Send Backward to place the duplicated object and its shadow behind the original object
that you duplicated.
7 Adjust both the Drop Shadow filter settings and the angle of the skewed drop shadow until you achieve the desired
look.
Apply a blur
The Blur filter softens the edges and details of objects. Applying a blur to an object can make it appear as if it is behind
other objects, or make an object appear to be in motion.
1 Select an object to apply a blur to, and select Filters.
2 Click the
button, and select Blur.
3 Edit the filter settings on the Filter tab:
• To set the width and height of the blur, set the Blur X and Y values.
• Select the quality level for the blur. High is approximate to that of a Gaussian blur. Low maximizes playback
performance.
Last updated 6/12/2015
327
Multimedia and Video
Apply a glow
The Glow filter lets you apply a color around the edges of an object.
1 Select an object to apply a glow to, and select Filters.
2 Click the
button, and select Glow.
3 Edit the filter settings in the Filter tab:
• To set the width and height of the glow, set the Blur X and Y values.
• To open the Color Picker and set the glow color, click the Color control.
• To set the sharpness of the glow, set the Strength value.
• To knock out (or visually hide) the source object and display only the glow on the knockout image, select
Knockout.
• To apply the glow within the boundaries of the object, select Inner Glow.
• Select the quality level for the glow. High is approximate to that of a Gaussian blur. Low maximizes playback
performance.
Apply a bevel
Applying a bevel applies a highlight to the object that makes it appear to be curved up above the background surface.
1 Select an object to apply a bevel to, and select Filters.
2 Click the
button, and select Bevel.
3 Edit the filter settings in the Filter tab:
• To set the type of bevel, select a bevel from the Type menu.
• To set the width and height of the bevel, set the Blur X and Y values.
• Select a shadow and highlight color for the bevel from the pop-up color palette.
• To set the opacity of the bevel without affecting its width, set the Strength value.
• To change the angle of the shadow that the beveled edge casts, set the Angle value.
• To define the width of the bevel, enter a value for Distance.
• To knock out (or visually hide) the source object and display only the bevel on the knockout image, select
Knockout.
Apply a gradient glow
Applying a gradient glow produces a glow look with a gradient color across the surface of the glow. The gradient glow
requires one color at the beginning of the gradient with an Alpha value of 0. You cannot move the position of this color,
but you can change the color.
Last updated 6/12/2015
328
Multimedia and Video
1 Select an object to apply a gradient glow to.
2 In the Filters section of the Property inspector, click the
button, and select Gradient Glow.
3 Edit the filter settings on the Filter tab:
• Select the type of glow to apply to the object from the Type pop-up menu.
• To set the width and height of the glow, set the Blur X and Y values.
• To set the opacity of the glow without affecting its width, set the Strength value.
• To change the angle of the shadow that the glow casts, set the Angle value.
• To set the distance of the shadow from the object, set the Distance value.
• To knock out (or visually hide) the source object and display only the gradient glow on the knockout image, select
Knockout.
• Specify a gradient color for the glow. A gradient contains two or more colors that fade or blend into one another.
The color you select for the beginning of the gradient is referred to as the alpha color.
• To change a color in the gradient, select one of the color pointers below the gradient definition bar and click the
color space that appears directly below the gradient bar to display the Color Picker. Sliding these pointers adjusts
the level and position of that color in the gradient.
• To add a pointer to the gradient, click on or below the gradient definition bar. To create a gradient with up to 15
color transitions, add up to 15 color pointers. To reposition a pointer on the gradient, drag the pointer along the
gradient definition bar. To remove a pointer, drag it down and off the gradient definition bar.
• Select the quality level for the gradient glow. High is approximate to that of a Gaussian blur. Low maximizes
playback performance.
Apply a gradient bevel
Applying a gradient bevel produces a raised look that makes an object appear to be raised above the background, with
a gradient color across the surface of the bevel. The gradient bevel requires one color in the middle of the gradient with
an alpha value of 0.
1 Select an object to apply a gradient bevel to.
2 In the Filters section of the Property inspector, click the
button, and select Gradient Bevel.
3 Edit the filter settings on the Filter tab:
• Select the type of bevel to apply to the object from the Type pop-up menu.
• To set the width and height of the bevel, set the Blur X and Y values.
• To affect the smoothness of the bevel without affecting its width, enter a value for Strength.
• To set the angle of the light source, enter a value for Angle.
• To knock out (or visually hide) the source object and display only the gradient bevel on the knockout image,
select Knockout.
• Specify a gradient color for the bevel. A gradient contains two or more colors that fade or blend into one another.
The middle pointer controls the alpha color of the gradient. You can change the color of the alpha pointer, but
you cannot reposition this color in the gradient.
Last updated 6/12/2015
329
Multimedia and Video
To change a color in the gradient, select one of the color pointers below the gradient definition bar, and click the
color space that appears directly below the gradient bar to display the Color Picker. To adjust the level and
position of that color in the gradient, slide these pointers.
To add a pointer to the gradient, click on or below the gradient definition bar. To create a gradient with up to 15
color transitions, add up to 15 color pointers. To reposition a pointer on the gradient, drag the pointer along the
gradient definition bar. To remove a pointer, drag it down and off the gradient definition bar.
Apply the Adjust Color filter
The Adjust Color filter allows you to finely control the color attributes of the selected object, including contrast,
brightness, saturation, and hue.
1 Select an object to adjust the color for.
2 In the Filters section of the Property inspector, click the
button, and select Adjust Color.
3 Enter values for the color attributes. The attributes and their corresponding values are as follows:
Contrast Adjusts the highlights, shadows, and midtones of an image.
Brightness Adjusts the brightness of an image.
Saturation Adjusts the intensity of a color.
Hue Adjusts the shade of a color.
4 To reset all of the color adjustments to 0 and return the object to its original state, click Reset Filter.
More Help topics
Working with Pixel Bender shaders
Change the color and transparency of an instance
Exporting SVG files
What is SVG?
Scalable Vector Graphics (SVG) is an XML markup language for describing two-dimensional images. SVG files provide
resolution independent, HiDPI graphics on the web, in print, and on mobile devices in a compact format. You can style
an SVG with CSS, and the support of scripting and animation makes SVG an integral part of the web platform.
Some common image formats of the web, such as GIF, JPEG, and PNG, are bulky and are usually of low resolution. The
SVG format offers a lot more value by allowing you to describe images in terms of vector shapes, text, and filter-effects.
SVG files are compact and provide high-quality graphics on the web and on handheld devices that have resource
constraints, as well. You can magnify the view of an SVG image on-screen without compromising on sharpness, detail,
or clarity. In addition, SVG provides superior support for text and colors, which ensures that you will see images as they
appear on Stage. The SVG format is entirely XML-based and offers many advantages to developers and other users
alike.
Last updated 6/12/2015
330
Multimedia and Video
The export SVG workflow in Flash Professional CC
Flash Professional CC allows you to export to SVG format, version 1.1. You can create visually rich artwork using
powerful design tools available within Flash Professional, and then, export to SVG.
In Flash Professional CC, you can export selected frames and keyframes of an animation. And, because the exported
artwork is Vector, the resolution of the image is high even on scaling to different sizes.
The SVG export feature replaces the erstwhile FXG export (dropped from Flash Professional CC (June, 2013)). You
will find that performance of SVG export feature and the quality of the output is far superior. Also, in comparison to
FXG, loss of content is minimal in SVG.
Artwork with Filter effects
With SVG, filter effects may not appear exactly the same as in Flash Pro, since there is no one-to-one mapping between
filters available in Flash and SVG. However, Flash Pro leverages combinations of different primitive filters available
within SVG to simulate a similar effect.
Handling multiple symbols
The SVG export handles multiple symbols seamlessly, without any loss of content. The output closely resembles the
artwork on Stage within Flash Pro.
Exporting artwork in SVG format
1 In Flash Professional CC, scrub or move the playhead to the appropriate frame.
2 Select File > Export > Export Image. or select File > Publish Settings (select the SVG Image option in the Other
Formats section.)
3 Enter or browse to the location where you want to save the SVG file. Ensure that you select SVG as the Save As type.
4 Click Ok.
5 On the Export SVG dialog, choose to Embed or Link to your SVG file.
• Include Hidden Layers Exports all hidden layers in the Flash document. Deselecting Export Hidden Layers
prevents all layers (including layers nested inside movie clips) marked as hidden from being exported in the
resulting SVG. This lets you easily test different versions of Flash documents by making layers invisible.
• Embed: Embeds a bitmap in the SVG file. Use this option to if you want to directly embed bitmaps within the
SVG file.
• Link: Provides a link to the path of bitmap files. Use this option when you do not want to embed, but provide
link to the bitmaps from the SVG file. If you select Copy Images to Folder option, the bitmaps will be saved
inside the images folder created at the location where the SVG file is exported. When Copy Images to Folder
option is not selected, the bitmaps will be referenced in the SVG file from their original source location. In case
the bitmap source location is unavailable then they will be embedded inside the svg file.
• Copy Images to /Images folder: Allows you to copy the bitmap to the /Images. The /Images folder, if it does not
already exist, is created in the export location of the SVG.
Last updated 6/12/2015
331
Multimedia and Video
❖ Click Ok.
Note: Some Flash Professional features are not supported by SVG format. Content created using these features are either
removed or defaulted to a supported feature when exporting. For more information, see this article .
Alternatively, you could also use the Publish Settings dialog to export SVG files from within Flash Professional CC (File
> Publish Settings). Select the SVG option from the Other formats section to export SVG files.
Note: It is recommended that you view SVG on modern browsers with latest updates only. This is because, some graphic
filters and color effects may not render correctly on older versions of browsers such as Internet Explorer 9.
Interchanging SVG files with Adobe Illustrator
Flash Professional CC enables interchanging of content with Adobe Illustrator. This workflow is a replacement for the
FXG Export feature that was dropped with Flash Professional CC (13.0). You can export SVG files from within Flash
Professional, and import them within Adobe Illustrator. For more information about using SVG files within Adobe
Illustrator, see this Help Topic.
Use this workflow if you want to make granular edits to your artwork and add enriching detail. You may also use
Illustrator to add effects, such as drop shadow, to the artwork.
To edit SVG files within Adobe Illustrator and use the edited content within Flash Pro, do the following:
1 In Flash Professional CC, export to SVG.
2 Edit your artwork by opening the SVG file using Adobe Illustrator.
3 Save the SVG file as an .ai file, and import within Flash Pro. For more information about using Illustrator files within
Flash Pro, see this article.
Last updated 6/12/2015
332
Multimedia and Video
Sharing library assets across files
Sharing library assets at runtime
About runtime shared library assets
Shared library assets let you use assets from one FLA file in another FLA file. This can be useful in these situations:
• When more than one FLA file needs to use the same artwork or other assets.
• When a designer and a developer want to be able to edit artwork and ActionScript code in separate FLA files for a
joint project.
Sharing library assets works like this:
• For runtime shared assets, assets from a source document are linked as external files in a destination document.
Runtime assets are loaded into the destination document during document playback—that is, at runtime. The
source document containing the shared asset does not need to be available on your local network when you author
the destination document. The source document must be posted to a URL for the shared asset to be available to the
destination document at runtime.
Working with runtime shared assets
Using runtime shared library assets involves two procedures. First, the author of the source document defines a shared
asset in the source document and enters an identifier string for the asset and a URL (HTTP or HTTPS only) where the
source document will be posted.
Second, the author of the destination document defines a shared asset in the destination document and enters an
identifier string and URL identical to those used for the shared asset in the source document. Alternatively, the
destination document author can drag the shared assets from the posted source document into the destination
document library. The ActionScript version set in the Publish settings must match that of the source document.
In either scenario, the source document must be posted to the specified URL for the shared assets to be available for
the destination document.
Define runtime shared assets in a source document
To define sharing properties for an asset in a source document and make the asset accessible for linking to destination
documents, use the Symbol Properties dialog box or the Linkage Properties dialog box.
1 With the source document open, select Window > Library:
2 Do one of the following:
• Select a movie clip, button, or graphic symbol in the Library panel, and select Properties from the Library Panel
menu. Click Advanced.
• Select a font symbol, sound, or bitmap, and select Linkage from the Library Panel menu.
3 For Linkage, select Export For Runtime Sharing to make the asset available for linking to the destination document.
4 Enter an identifier for the symbol. Do not include spaces. This is the name Flash Professional uses to identify the
asset when linking to the destination document.
Last updated 6/12/2015
333
Multimedia and Video
Note: Flash Professional also uses the linkage identifier to identify a movie clip or button that is used as an object in
ActionScript. See Working with movie clips in Learning ActionScript 2.0 in Adobe Flash or Working with movie clips
in the ActionScript 3.0 Developer’s Guide.
5 Enter the URL where the SWF file containing the shared asset will be posted, and click OK.
When you publish the SWF file, you must post the SWF file to the URL you specified so that the shared assets are
available to destination documents.
Link to runtime shared assets from a destination document
You can link to a shared asset by entering its URL or by dragging the asset into the destination document.
Link a shared asset to a destination document by entering the identifier and URL
1 In the destination document, select Window > Library.
2 Do one of the following:
• Select a movie clip, button, graphic symbol, bitmap, or sound in the Library panel, and select Properties from the
Library Panel menu. Click Advanced.
• Select a font symbol, and select Linkage from the Library Panel menu.
3 For Linkage, select Import For Runtime Sharing to link to the asset in the source document.
4 Enter an identifier for the symbol, bitmap, or sound that is identical to the identifier used for the symbol in the
source document. Do not include spaces.
5 Enter the URL where the SWF source file containing the shared asset is posted, and click OK.
Link a shared asset to a destination document by dragging
1 In the destination document, do one of the following:
• Select File > Open.
• Select File > Import > Open External Library.
2 Select the source document and click Open.
3 Drag the shared asset from the source document Library panel into the Library panel or onto the Stage in the
destination document.
Turn off sharing for a symbol in a destination document
1 In the destination document, select the linked symbol in the Library panel and do one of the following:
• If the asset is a movie clip, button, or graphic symbol, select Properties from the Library Panel menu.
• If the asset is a font symbol, select Linkage from the Library Panel menu.
2 Deselect Import For Runtime Sharing, and click OK.
Sharing library assets at author-time
Sharing assets at author-time has these advantages:
• Allows you to avoid the need for redundant copies of assets used in more than one FLA file. For example, if you are
developing a FLA for web browsers, another for iOS and another for Android, you can share assets among the 3 files.
• When you edit a shared asset in one FLA file, the changes are reflected in other FLA files that use the asset when
they are opened or brought into focus.
Last updated 6/12/2015
334
Multimedia and Video
There are 2 ways of sharing library assets during authoring:
• Using symbols from external FLA files by linking to them from symbols in another FLA file.
• (CS5.5 only) Sharing symbols among FLA files that are part of the same Flash project in the Project panel. For
information about using the Project panel, see Working with Flash projects .
Sharing by linking to symbols in separate FLA files works like this:
• For shared assets during authoring, update or replace any symbol in a FLA file you are authoring with any symbol
in any other FLA file available on your local network.
• Update the symbol in the destination document as you author the document.
• The symbol in the destination document retains its original name and properties, but its contents are updated or
replaced with those of the symbol you select.
Sharing symbols using the Project panel works like this (CS5.5 only):
• You create a project in the Project panel and create a FLA file in the project.
• In that FLA file, you specify which symbols you want to share with other files by checking the sharing checkbox for
each item in the Library panel.
• Create a second FLA file in the project.
• Copy and paste layers, frames, or items on the Stage from the first FLA file to the second.
• Flash moves the shared library items in the pasted elements to a separate file called AuthortimeSharedAssets.FLA
within the project folder.
The following assets types are sharable within a project:
Asset type
Sharable on its own?
Sharable if inside a movie clip?
Movie clip symbol
Yes
Yes
Graphic symbol
Yes
Yes
Button symbol
Yes
Yes
Font symbol
No
Yes
FLV video
No
Yes
Embeded video
No
Yes
Sound (any format)
No
Yes
Bitmap (any format)
No
Yes
Compiled clip (SWC)
No
Yes
Component (symbol-based)
Yes
Yes
Update or replace shared symbols
You can update or replace a movie clip, button, or graphic symbol in a document with any other symbol in a FLA file
accessible on your local network. The original name and properties of the symbol in the destination document are
preserved, but the contents of the symbol are replaced with the contents of the symbol you select. Any assets that the
selected symbol uses are also copied into the destination document.
1 With the document open, select a movie clip, button, or graphic symbol in the Library panel and select Properties
from the panel Options menu.
Last updated 6/12/2015
335
Multimedia and Video
2 If the Linkage and Source areas of the Symbol Properties dialog box are not showing, click Advanced.
3 To select a new FLA file, click Browse.
4 Navigate to a FLA file that contains the symbol to use to update or replace the selected symbol in the Library panel,
and click Open.
5 Navigate to a symbol, and click OK.
6 Do one of the following:
• CS5: In the Symbol Properties dialog box, under Source, select Always Update Before Publishing and click OK.
• CS5.5: In the Symbol Properties dialog box, under Authortime Sharing, select Update Automatically and click
OK
Define assets for sharing in a project (CS5.5 only)
Sharing assets among FLA files in a project allows you to edit the asset in one file and see the changes reflected in the
other FLA files that use the asset.
1 Create a Flash project. See Create projects .
2 In a FLA file in the project, for each library asset you want to share with other FLA files in the project, do one of the
following:
• Open the Library panel and select the Link checkbox next to the asset name.
• With the asset selected in the Library panel, choose Properties from the panel Options menu and then click the
Share with Project button.
3 In the Timeline or on the Stage, copy layers, frames, or Stage items containing shared assets.
4 In a separate FLA file in the same project, paste the layers, frames, or stage items into a separate FLA filer in the same
project.
Videos and tutorials
• Video: Flash Professional CS5.5 - Sharing assets across projects (3:51, Paul Trani, Adobe TV)
• Tutorial: Creating mobile projects with shared assets and the Project panel (Yuki Shimizu, Adobe.com)
Reshape lines and shapes
Display and adjust points with the Subselection tool
1 Select the Subselection tool
.
2 Click the line or shape outline.
Reshape a line or shape
To reshape a line or shape outline, drag any point on a line using the Selection tool. The pointer changes to indicate
what type of reshaping it can perform on the line or fill.
Last updated 6/12/2015
336
Multimedia and Video
Flash Professional adjusts the curve of the line segment to accommodate the new position of the moved point. If the
repositioned point is an end point the line will lengthen or shorten. If the repositioned point is a corner, the line
segments forming the corner remain straight as they become longer or shorter.
Some brush stroke areas are easier to reshape if you view them as outlines.
If you are having trouble reshaping a complex line, smooth it to remove some of its details, making reshaping easier.
Increasing the magnification can also make reshaping easier and more accurate.
1 Select the Selection tool
.
2 Do one of the following:
• To reshape the segment, drag from any point.
• To drag a line to create a new corner point, control-click (Windows) or Option-click (Macintosh).
Straighten and smooth lines
Straightening makes small straightening adjustments to lines and curves you already drew. It has no effect on segments
that are already straight.
Note: To adjust the degree of automatic smoothing and straightening, specify preferences for drawing settings.
To make Flash Professional recognize shapes, use the straightening technique. If you draw any oval, rectangular, or
triangular shapes with the Recognize Shapes option turned off, use the Straightening option to make the shapes
geometrically perfect. Shapes that are touching, and thus connected to other elements, are not recognized.
Smoothing softens curves and reduces bumps or other variations in a curve’s overall direction. It also reduces the
number of segments in a curve. Smoothing is relative, however, and has no effect on straight segments. It is particularly
useful when you are having trouble reshaping a number of very short curved line segments. Selecting all the segments
and smoothing them reduces the number of segments, producing a gentler curve that is easier to reshape.
Repeated application of smoothing or straightening makes each segment smoother or straighter, depending on how
curved or straight each segment was originally.
• To smooth the curve of each selected stroke, select the Selection tool and click the Smooth modifier
in the
Options section of the Tools panel. Each click of the Smooth modifier button makes the selected stroke progressively
smoother.
• To enter specific parameters for a smoothing operation, choose Modify > Shape > Smooth. In the Smooth dialog
box, enter values for the Smooth Angles Above, Smooth Angles Below, and Smoothing Strength parameters.
Last updated 6/12/2015
337
Multimedia and Video
• To make small straightening adjustments on each selected fill outline or curved line, select the Selection tool
click the Straighten modifier in the Options section of the Tools panel.
and
• To enter specific parameters for a straightening operation, choose Modify > Shape > Straighten. In the Straighten
dialog box, enter a value for the Straighten Strength parameter.
• To use shape recognition, select the Selection tool
> Straighten.
and click the Straighten modifier
, or select Modify > Shape
Optimize curves
Optimizing smooths curves by refining curved lines and filling outlines, reducing the number of curves used to define
these elements. Optimizing curves also reduces the size of the Flash Professional document (FLA file) and the exported
Flash Professional application (SWF file). Apply optimization to the same elements multiple times.
1 Select the drawn elements to optimize and select Modify > Shape > Optimize.
2 To specify the degree of smoothing, drag the Optimization Strength slider. The results depend on the curves
selected. Generally, optimizing produces fewer curves, with less resemblance to the original outline.
3 To display a message indicating the number of segments in the selection before and after the optimization, select the
Show Totals Message option. Flash Professional displays the message after the operation completes.
4 Click OK.
Modify shapes
1 To convert lines to fills, select a line or multiple lines and select Modify > Shape > Convert Lines To Fills. Selected
lines are converted to filled shapes, which allows you to fill lines with gradients or to erase a portion of a line.
Converting lines to fills can make file sizes larger, but it can also speed up drawing for some animations.
2 To expand the shape of a filled object, select a filled shape, and select Modify > Shape > Expand Fill. Enter a value
in pixels for Distance and select Expand or Inset For Direction. Expand enlarges the shape, and Inset reduces it.
This feature works best on a single, small, filled color shape with no stroke, that does not contain many small details.
3 To soften the edges of an object, select a filled shape, and select Modify > Shape > Soften Fill Edges. Set the following
options:
Distance The width, in pixels, of the soft edge.
Number Of Steps Controls how many curves are used for the soft edge effect. The more steps you use, the smoother
the effect. Increasing steps also creates larger files and slows drawing.
Expand Or Inset Controls whether the shape is enlarged or reduced to soften the edges.
This feature works best on a single filled shape that has no stroke, and can increase the file size of a Flash Professional
document and the resulting SWF file.
Delete everything on the Stage
❖ Double-click the Eraser tool
in the toolbar. This erases all types of content on the Stage and pasteboard.
Remove stroke segments or filled areas
1 Select the Eraser tool, and then click the Faucet modifier
.
2 Click the stroke segment or filled area to delete.
Last updated 6/12/2015
338
Multimedia and Video
Erase by dragging
1 Select the Eraser tool.
2 Click the Eraser Mode modifier and select an erasing mode:
Erase Normal Erases strokes and fills on the same layer.
Erase Fills Erases only fills; strokes are not affected.
Erase Lines Erases only strokes; fills are not affected.
Erase Selected Fills Erases only the currently selected fills and does not affect strokes, selected or not. (Select the
fills to erase before using the Eraser tool in this mode.)
Erase Inside Erases only the fill on which you begin the Eraser stroke. If you begin erasing from an empty point,
nothing is erased. Strokes are unaffected by the eraser in this mode.
3 Click the Eraser Shape modifier and select an eraser shape and size. Make sure that the Faucet modifier is not
selected.
4 Drag on the Stage.
More Help topics
Adjust anchor points on paths
Drawing preferences
Strokes, fills, and gradients
Create or edit a gradient fill
A gradient is a multicolor fill in which one color gradually changes into another color. Flash Pro lets you apply up to 15
color transitions to a gradient. Creating a gradient is a good way to create a smooth color gradation across one or more
objects. You can save a gradient as a swatch to make it easy to apply the gradient to multiple objects. Flash Pro can create
two types of gradients:
Linear gradients change color along a single axis (horizontal or vertical).
Radial gradients change color in an outward direction starting from a central focal point. You can adjust the direction
of a gradient, its colors, the location of the focal point, and many other properties of the gradient.
provides additional control over linear and radial gradients for use with Flash Player. These controls, called overflow
modes, let you specify how colors are applied beyond the gradient.
For a sample of gradients, see the Flash Samples page at www.adobe.com/go/learn_fl_samples. Download and
decompress the Samples zip file and navigate to the Graphics\AnimationAndGradients folder to access the sample.
1 To apply a gradient fill to existing artwork, select an object or objects on the Stage.
2 If the Color panel is not visible, select Window > Color.
3 To select a color display mode, select RGB (the default setting) or HSB from the panel menu.
4 Select a gradient type from the Type menu:
Linear Creates a gradient that shades from the starting point to the end point in a straight line.
Last updated 6/12/2015
339
Multimedia and Video
Radial Produces a gradient that blends outward in a circular path from a central focal point.
note: When you select a linear or radial gradient, the Color panel also includes two other options if you are publishing
for Flash Player 8 or later. First, the Overflow menu is enabled below the Type menu. Use the Overflow menu to control
the colors applied past the limits of the gradient. Second, the gradient definition bar appears, with pointers below the
bar indicating the colors in the gradient.
5 (Optional) From the Overflow menu, select an overflow mode to apply to the gradient: Extend (the default mode),
Reflect, or Repeat.
6 (Optional) To create an SVG-compliant (Scalable Vector Graphics) linear or radial gradient, select the Linear RGB
check box. This will allow the gradient to look smooth when scaled to different sizes after it is first applied.
7 To change a color in the gradient, select one of the color pointers below the gradient definition bar (the triangle at
the top of the selected color pointer will turn black). Then click in the color space pane that appears above the
gradient bar. Drag the Brightness slider to adjust the lightness of the color.
8 To add a pointer to the gradient, click on or below the gradient definition bar. Select a color for the new pointer, as
described in the previous step.
You can add up to 15 color pointers, letting you create a gradient with up to 15 color transitions.
9 To reposition a pointer on the gradient, drag the pointer along the gradient definition bar. Drag a pointer down and
off of the gradient definition bar to remove it.
10 To save the gradient, click the triangle in the upper-right corner of the Color panel, and select Add Swatch from the
menu.
The gradient is added to the Swatches panel for the current document.
11 To transform the gradient, such as to make a vertical gradient instead of a horizontal one, use the Gradient
Transform tool. See Transform gradient and bitmap fillsfor more information.
Adjust Stroke and Fill color
You can specify the stroke and fill color of graphic objects and shapes using either the Stroke Color and Fill Color
controls in the Tools panel, or the Stroke Color and Fill Color controls in the Property inspector.
The Stroke Color and Fill Color section of the Tools panel contains controls for activating the Stroke Color and Fill
Color boxes, which in turn determine whether the strokes or fills of selected objects are affected by color choices. Also,
the Colors section has controls for quickly resetting colors to the default, setting the stroke and fill color settings to
None, and swapping fill and stroke colors.
In addition to letting you select a stroke and fill color for a graphic object or shape, the Property inspector provides
controls for specifying the stroke width and style.
To use these controls to change the painting attributes of existing objects, first select the objects on the Stage.
Also see: Live Preview of Colors .
Adjust stroke and fill color using the Tools panel
The Tools panel Stroke Color and Fill Color controls set the painting attributes of new objects you create with the
drawing and painting tools. To use these controls to change the painting attributes of existing objects, first select the
objects on the Stage.
• Click the Stroke or Fill Color control, and select a color swatch.
• Click the System Color Picker button in the pop-up window, and select a color. You could also hover the pointer
over different colors to preview the effect of the color on the shape.
Last updated 6/12/2015
340
Multimedia and Video
• Type a color’s hexadecimal value in the box.
• To return to the default color settings (white fill and black stroke), click the Black And White button in the Tools
panel.
• To remove any stroke or fill, click the No Color button.
Note: The No Color button appears only when you are creating an oval or rectangle. You can create an object without
a stroke or fill, but you cannot use the No Color button with an existing object. Instead, select the existing stroke or
fill and delete it.
• To Swap colors between the fill and the stroke, click the Swap Colors button in the Tools panel.
Flash Professional CC allows you to preview Stroke or Fill colors live when changing them from the Color Swatch. For
more information, see Live Preview of Colors .
Apply a solid color fill using the Property inspector
1 Select a closed object or objects on the Stage.
2 Select Window > Properties.
3 To select a color, click the Fill Color control and do one of the following:
• Select a color swatch from the palette.
• Type a color’s hexadecimal value in the box.
Select a stroke color, style, and weight using the Property inspector
To change the stroke color, style, and weight for a selected object, use the Stroke Color control in the Property inspector.
For stroke style, choose from styles that are preloaded with Flash Pro, or create a custom style. To select a solid color
fill, use the Fill Color control in the Property inspector.
1 Select an object or objects on the Stage (for symbols, first double-click to enter symbol-editing mode).
2 Select Window > Properties.
3 To select a stroke style, click the Style menu and select an option. To create a custom style, click Custom in the
Property inspector, select options in the Stroke Style dialog box, and click OK.
Note: Selecting a stroke style other than Solid can increase file size.
4 To select a stroke weight, set the Stroke slider or enter a value in the text box.
5 To enable stroke hinting, select the Stroke Hinting check box. Stroke hinting adjusts line and curve anchors on full
pixels, preventing blurry vertical or horizontal lines.
6 To set the style for a path end, select a Cap option:
None Is flush with the path’s end.
Round Adds a round cap that extends beyond the path end by half the stroke width.
Square Adds a square cap that extends beyond the path by half the stroke width.
7 (Optional) If you are drawing lines using the Pencil or Brush tools with the drawing mode set to Smooth, use the
Smoothing slider to specify the degree to which Flash Pro smooths the lines you draw.
By default, the Smoothing value is set to 50, but you can specify a value from 0 to 100. The greater the smoothing
value, the smoother the resulting line.
Note: When the drawing mode is set to Straighten or Ink, the Smoothing slider is disabled.
Last updated 6/12/2015
341
Multimedia and Video
8 To define how two path segments meet, select a Join option. To change the corners in an open or closed path, select
a path and select another join option.
9 To avoid beveling a Miter join, enter a Miter limit.
Line lengths exceeding this value are squared instead of pointed. For example, a Miter limit of 2 for a 3-point stroke
means that when the length of the point is twice the stroke weight, Flash Pro removes the limit point.
Adjust the strokes of multiple lines or shapes
To change the stroke color, width, and style of one or more lines or shape outlines, use the Ink Bottle tool. You can apply
only solid colors, not gradients or bitmaps, to lines or shape outlines.
Using the Ink Bottle tool, rather than selecting individual lines, makes it easier to change the stroke attributes of
multiple objects at one time.
1 Select the Ink Bottle tool from the Tools panel.
2 Select a stroke color.
3 Select a stroke style and stroke width from the Property inspector.
4 To apply the stroke modifications, click an object on the Stage.
Copy strokes and fills
Use the Eyedropper tool to copy fill and stroke attributes from one object and immediately apply them to another
object. The Eyedropper tool also lets you sample the image in a bitmap to use as a fill.
1 To apply the attributes of a stroke or filled area to another stroke or filled area, select the Eyedropper tool and click
the stroke or filled area whose attributes you want to apply.
When you click a stroke, the tool automatically changes to the Ink Bottle tool. When you click a filled area, the tool
automatically changes to the Paint Bucket tool with the Lock Fill modifier turned on.
2 Click another stroke or filled area to apply the new attributes.
Modifying painted areas
The Paint Bucket tool fills enclosed areas with color. This tool lets you do the following:
• Fill empty areas, and change the color of already painted areas.
• Paint with solid colors, gradients, and bitmap fills.
• Use the Paint Bucket tool to fill areas that are not entirely enclosed.
Last updated 6/12/2015
342
Multimedia and Video
• Have Flash Pro close gaps in shape outlines as you use the Paint Bucket tool.
1 Select the Paint Bucket tool from the Tools panel.
2 Select a fill color and style.
3 Click the Gap Size modifier that appears at the bottom of the Tools panel and select a gap size option:
• Don’t Close Gaps to close gaps manually before filling the shape. Closing gaps manually can be faster for complex
drawings.
• A Close option to have Flash Pro fill a shape that has gaps.
Note: If gaps are too large, you might have to close them manually.
4 Click the shape or enclosed area to fill.
Transform gradient and bitmap fills
You can transform a gradient or bitmap fill by adjusting the size, direction, or center of the fill.
1 Select the Gradient Transform tool
from the Tools panel. If you do not see the Gradient Transform tool in the
Tools panel, click and hold on the Free Transform tool and then select the Gradient Transform tool from the menu
that appears.
2 Click an area filled with a gradient or bitmap fill. A bounding box with editing handles appears. When the pointer
is over any one of these handles, it changes to indicate the function of the handle.
Center point The rollover icon for the center point handle is a four-way arrow.
Focal point The focal point handle appears only when you select a radial gradient. The rollover icon for the focal
point handle is an inverted triangle.
Size The rollover icon for the size handle (middle handle icon on the edge of the bounding box) is a circle with an
arrow inside of it.
Rotation Adjusts the rotation of the gradient. The rollover icon for the rotation handle (the bottom handle icon on
the edge of the bounding box) is four arrows in the shape of a circle.
Width Adjusts the width of the gradient. The rollover icon for the width handle (the square handle) is a double-
ended arrow.
Press Shift to constrain the direction of a linear gradient fill to multiples of 45°.
A Center point B Width C Rotation D Size E Focal point.
3 Reshape the gradient or fill in any of the following ways:
• To reposition the center point of the gradient or bitmap fill, drag the center point.
Last updated 6/12/2015
343
Multimedia and Video
• To change the width of the gradient or bitmap fill, drag the square handle on the side of the bounding box. (This
option resizes only the fill, not the object containing the fill.)
• To change the height of the gradient or bitmap fill, drag the square handle at the bottom of the bounding box.
• To rotate the gradient or bitmap fill, drag the circular rotation handle at the corner. You can also drag the lowest
handle on the bounding circle of a circular gradient or fill.
• To scale a linear gradient or a fill, drag the square handle at the center of the bounding box.
Last updated 6/12/2015
344
Multimedia and Video
• To change the focal point of a circular gradient, drag the middle circular handle on the bounding circle.
• To skew or slant a fill within a shape, drag one of the circular handles on the top or right side of the bounding box.
• To tile a bitmap inside a shape, scale the fill.
Note: To see all the handles when working with large fills or fills close to the edge of the Stage, select View > Pasteboard.
Lock a gradient or bitmap to fill the Stage
You can lock a gradient or bitmap fill to make it appear that the fill extends over the entire Stage and that the objects
painted with the fill are masks revealing the underlying gradient or bitmap.
When you select the Lock Fill modifier with the Brush or Paint Bucket tool and paint with the tool, the bitmap or
gradient fill extends across the objects you paint on the Stage.
Last updated 6/12/2015
345
Multimedia and Video
Use a locked gradient fill
1 Select the Brush or Paint Bucket tool and select a gradient or bitmap as a fill.
2 Select Linear or Radial from the Type menu in the Color panel.
3 Click the Lock Fill modifier
.
4 First paint the areas where you want to place the center of the fill, and then move to other areas.
Use a locked bitmap fill
1 Select the bitmap to use.
2 Select Bitmap from the Type menu in the Color panel.
3 Select the Brush or Paint Bucket tool.
4 Click the Lock Fill modifier
.
5 First paint the areas where you want to place the center of the fill, and then move to other areas.
More Help topics
Break apart groups and objects
Working with Fireworks files inFlash
About imported Fireworks PNG files
You can import Adobe® Fireworks PNG files into Flash Professional as flattened images or as editable objects. When
you import a PNG file as a flattened image, the entire file (including any vector artwork) is rasterized, or converted to
a bitmap image. When you import a PNG file as editable objects, vector artwork in the file is preserved in vector format.
Choose to preserve placed bitmaps, text, filters (called effects in Fireworks), and guides in the PNG file when you
import it as editable objects.
About imported filters and blends from Fireworks PNG files
When you import Fireworks® PNG files, you can retain many of the filters and blending modes applied to objects in
Fireworks and continue to modify those filters and blends using Flash Professional.
Flash Professional only supports modifiable filters and blends for objects imported as text and movie clips. If an effect
or blend mode is not supported, Flash Professional rasterizes or ignores it when it is imported. To import a Fireworks
PNG file that contains filters or blends that Flash Professional does not support, rasterize the file during the import
process. After this operation, you cannot edit the file.
Fireworks effects supported in Flash
Last updated 6/12/2015
346
Multimedia and Video
Flash Professional imports the following Fireworks effects as modifiable filters:
Fireworks effect
Flash Professional filter
Drop shadow
Drop shadow
Solid shadow
Drop shadow
Inner shadow
Drop shadow (with Inner shadow automatically selected)
Blur
Blur (where blurX = blurY=1)
Blur more
Blur (where blurX = blurY=1)
Gaussian blur
Blur
Adjust color brightness
Adjust color
Adjust color contrast
Adjust color
Fireworks blend modes supported in Flash
Flash Professional imports the following Fireworks blend modes as modifiable blends:
Fireworks blending mode
Flash Professional blending mode
Normal
Normal
Darken
Darken
Multiply
Multiply
Lighten
Lighten
Screen
Screen
Overlay
Overlay
Hard light
Hard light
Additive
Add
Difference
Difference
Invert
Invert
Alpha
Alpha
Erase
Erase
Flash Professional ignores all other blending modes imported from Fireworks. The blending modes that Flash
Professional does not support are Average, Negation, Exclusion, Soft Light, Subtractive, Fuzzy Light, Color Dodge, and
Color Burn.
Importing text from Fireworks into Flash
When you import text from Fireworks into Flash Professional 8 or later, the text is imported with the default anti-alias
setting of the current document.
If you import the PNG file as a flattened image, you can start Fireworks from Flash Professional and edit the original
PNG file (with vector data).
When you import multiple PNG files in a batch, you select import settings one time. Flash Professional uses the same
settings for all files in the batch.
Last updated 6/12/2015
347
Multimedia and Video
Note: To edit bitmap images in Flash Professional, convert the bitmap images to vector artwork or break apart the bitmap
images.
1 Select File > Import > Import To Stage or Import To Library.
2 Select PNG Image from the Files Of Type (Windows) or Show (Macintosh) pop-up menu.
3 Navigate to a Fireworks PNG image and select it.
4 Click Open.
5 Select one of the following for Location:
Import All Page(s) into New Scene(s) Imports all pages in the PNG file as scenes within a movie clip, with all of their
frames and layers intact inside the movie clip symbol. A new layer is created that uses the name of the Fireworks
PNG file name. The first frame (page) of the PNG document is placed on a keyframe that starts at the last keyframe;
all other frames (pages) follow.
Import One Page into Current Layer Imports the selected page (identified in the Page Name pop-up menu) of the
PNG file into the current Flash Professional document in a single new layer as a movie clip. The contents of the
selected page are imported as a movie clip, with all of their original layer and frame structure intact. If the page
movie clip has frames inside it, each frame is a movie clip in itself.
Page Name Specifies the Fireworks page you want to import into the current scene.
6 Select one of the following for File Structure:
Import As Movie Clip And Retain Layers Imports the PNG file as a movie clip, with all of its frames and layers intact
inside the movie clip symbol.
Import Page(s) as New Layer(s) Imports the PNG file into the current Flash Professional document in a single new
layer at the top of the stacking order. The Fireworks layers are flattened into the single layer. The Fireworks frames
are contained in the new layer.
7 For Objects, select one of the following:
Rasterize If Necessary To Maintain Appearance Preserves Fireworks fills, strokes, and effects in Flash Professional.
Keep All Paths Editable Keeps all objects as editable vector paths. Some Fireworks fills, strokes, and effects are lost
on import.
8 For Text, select one of the following:
Rasterize If Necessary To Maintain Appearance Preserves Fireworks fills, strokes, and effects in text imported into
Flash Professional.
Keep All Paths Editable Keeps all text editable. Some Fireworks fills, strokes, and effects are lost on import.
9 To flatten the PNG file into a single bitmap image, select Import As A Single Flattened Bitmap. When this option is
selected, all other options are dimmed.
10 Click OK.
More Help topics
Last updated 6/12/2015
348
Multimedia and Video
Using Flash Professional with Adobe Scout
Flash Professional CC can now leverage the advanced telemetry features provided by Adobe Scout. This feature allows
you to retrieve and use the intuitively collated profiling data provided by Scout.
Scout is an analysis and profiling tool for Flash runtime that allows you to analyze performance of applications designed
for mobile, desktop, or web. Scout is designed to provide accurate data aggregated from several system resources. The
data provided is intuitive enough to easily measure, profile, and analyze performance of applications.
Scout provides basic telemetry data for any SWFs running on a computer. To enable and view advanced data, Flash
Professional provides additional options on the Publish Settings dialog.
To integrate Flash Professional CC with Scout, download and install Scout on the same computer that has Flash
Professional CC installed. You could also install Adobe Scout on a different system, and use the Remote Logging
functionality, to retrieve telemetry data for SWFs running remotely.
Note: Ensure that the Wi-Fi connection between the system and the device running the application is non-faulty and
stable.
To download and install Adobe Scout, click here.
Enabling Detailed Telemetry data
To view and analyze your performance of applications with detailed telemetry data, do the following:
1 In Flash Professional CC, select File > Publish Settings to bring up the Publish Settings dialog.
2 On the Publish Settings dialog, drill-down the Advanced options to select the Enable Detailed Telemetry option.
3 You can choose to provide a password to secure access to the detailed telemetry data for your application. If you
choose to enable password protection, you can access detailed telemetry data for your application, only after
providing the password in Scout.
4 Click OK.
Enabling Detailed Telemetry Data for Adobe AIR publishing for iOS devices
To enable Detailed Telemetry Data for Adobe AIR applications written for iOS devices, do the following.
1 Ensure that you have the Enable Detailed Telemetry option selected on the Publish Settings dialog. For more
information, see Enabling Detailed Telemetry data.
2 On the Properties panel, click the
button, beside the Target drop-down to bring up the AIR for iOS Settings
dialog.
3 On the AIR for iOS Settings dialog, switch to the Deployment tab and select the Enable Sampler option in the
Telemetry Options section.
4 Click OK.
Enabling Detailed Telemetry Data for Adobe AIR publishing for Android
devices
To enable Detailed Telemetry Data for Adobe AIR applications written for Android devices, do the following.
1 Ensure that you have the Enable Detailed Telemetry option selected on the Publish Settings dialog. For more
information, see Enabling Detailed Telemetry data.
Last updated 6/12/2015
349
Multimedia and Video
2 On the Properties panel, click the
button, beside the Target drop-down to bring up the AIR for Android Settings
dialog.
3 On the AIR for iOS Settings dialog, switch to the Deployment tab and select the Enable Sampler option in the
Telemetry Options section.
4 On the Permissions tab, select the Internet option.
5 Click OK.
Working with Text Layout Framework (TLF) text
note: (Flash Professional CC only) The Text Layout Framework is deprecated and the functionality will be unavailable with
Flash Professional CC. If a FLA file containing TLF Text, previously saved with an older version of Flash Professional, is
opened with Flash Pro CC, then TLF is converted to Classic Text. For more information, see this article .Beginning in Flash
Professional CS5, you can add text to a FLA file using a new text engine called the Text Layout Framework (TLF). TLF
supports a wider array of rich text layout features and fine control of text attributes. TLF text allows greater control of
text than the previous text engine, now called Classic text.
TLF text provides the following enhancements over Classic text:
• Print-quality typography.
• Additional character styles, including leading, ligatures, highlight color, underline, strikethrough, case, digit case,
and more.
• Additional paragraph styles, including multi-column support with gutter width, last line justification options,
margins, indents, paragraph spacing, and container padding values.
• Control of additional Asian text attributes, including Tate Chu Yoko, Mojikumi, Kinsoku Shori Type, and Leading
model.
• You can apply attributes such as 3D Rotation, Color Effects, and Blend Modes to TLF text without placing it in a
movie clip symbol.
• Text can flow across multiple text containers. These containers are called threaded or linked text containers.
• The ability to create right-to-left text for Arabic and Hebrew scripts.
• Support for bi-directional text, where right-to-left text can contain elements of left-to-right text. This is important
for embedding English words or Arabic numerals within Arabic/Hebrew text, for example.
About TLF text
Before you begin
When creating text, it is important to understand the following fundamentals of working with text in Flash:
• TLF text is the default text type in Flash Professional CS5. In Flash Pro CS5.5, the default is .
• There are 2 types of TLF text containers, point text and area text. A point text container’s size depends solely on the
text it contains. An area text container’s size is independent of the amount of text it contains. Point text is the default.
To change a point text container to area text, resize it with the selection tool or double-click the small circle at the
bottom-right corner of the container bounding box.
Last updated 6/12/2015
350
Multimedia and Video
• TLF text requires that ActionScript 3.0 and Flash Player 10 or higher are specified in the publish settings of your
FLA file. For more information see Publish settings .
• When using TLF text, the Property inspector has three display modes, depending on the current type of text
selection:
• Text tool mode; when the Text tool has been selected in the Tools panel and no text is selected in the Flash
document.
• Text object mode; when an entire text block is selected on the Stage.
• Text edit mode; when a text block is being edited.
• You can create three types of text block with TLF text, depending on how you want the text to behave at runtime:
• Read Only: when published as SWF file, the text cannot be selected or edited.
• Selectable: when published as SWF file, the text is selectable and can be copied to the clipboard, but is not
editable. This setting is the default for TLF text.
• Editable: when published as SWF file, text is selectable and can be edited.
• Unlike Classic text, TLF text does not support PostScript Type 1 fonts. TLF supports only OpenType and TrueType
fonts. When working with TLF text, PostScript fonts are not available in the Text > Font menu. Note that if you apply
a PostScript Type 1 font to a TLF text object using one of the other font menus, Flash substitutes the _sans device
font instead. When working with Classic text, all installed PostScript fonts are available in the Font menus.
• TLF text requires a specific ActionScript library to be available to Flash Player at runtime. If this library is not already
present on the playback computer, Flash Player automatically downloads it. For more information about the library,
see Publishing SWF files with TLF text.
• TLF text cannot be used as a layer mask at author-time. To create a mask with text, create the mask with ActionScript
3.0 or use Classic text for the mask. See Masking display objects in the ActionScript 3.0 Developer’s Guide.
• Anti-aliasing settings for TLF text are not reflected on the Stage until the Flash file is exported as a SWF file. To see
the effect of anti-aliasing settings, use the Control > Test command or the File > Publish command.
• To use Cascading Style Sheets (CSS), use ActionScript to apply a stylesheet. For more information, see Applying
cascading style sheets in the ActionScript 3.0 Developer’s Guide.
• TLF has extensive ActionScript APIs for creating and manipulating text flows at runtime. These APIs enable
additional features like text decoration, in-line images, the ability to read HTML and TLFMarkup languages, and
others useful for creating dynamic content.
Tutorials and videos
• Video: TLF in Flash Professional CS5.5 (4:33, Adobe TV)
• Video: CSS stylsheets with TLF text (8:12, Adobe TV)
Converting between Classic and TLF text
When you convert a text object from one text engine to the other, Flash preserves most of the formatting. However,
because the text engines are different in their capabilities, some formatting may be slightly different, including letter
spacing and line spacing. Inspect the text carefully and reapply any settings that have been changed or lost.
If you need to convert text from Classic to TLF, try to do so only once rather than converting back and forth more than
once. The same is true for converting TLF text to Classic text.
When converting between TLF and Classic text, Flash converts text types as follows:
• TLF Read Only> Classic Static
Last updated 6/12/2015
351
Multimedia and Video
• TLF Selectable > Classic Static
• TLF Editable > Classic Input
Publishing SWF files with TLF text
To function properly, all TLF text objects rely on a specific TLF ActionScript library, also called a Runtime Shared
Library or RSL. Because the library is separate from your published SWF file, the SWF file size is minimized. During
authoring, Flash Professional provides the library. At runtime, after you have uploaded your published SWF file to a
web server, the library is provided in the following ways:
1 The local computer. Flash Player looks for a copy of the library on the local machine it is playing on. If the SWF file
is not the first to use TLF text on that computer, the computer already has a local copy of the library in its Flash
Player cache. Once TLF text has been in use on the Internet for some time, most end-user computers will have a
local copy of the library file. However, it is possible for Flash Player end-users to disable this feature on their
computer.
2 On Adobe.com. If no local copy is available, Flash Player will query Adobe’s servers for a copy of the library. The
library only has to download one time per computer. After that, all subsequent SWF files that play on the same
computer will use the previously downloaded copy of the library.
3 On your web server. If Adobe’s servers are not available for some reason, Flash Player looks for the library in the web
server directory where the SWF file resides. To provide this extra level of back-up, manually upload the library file
to the web server along with your SWF file. You can also specify an alternate path for the library on your server to
allow multiple SWF files in different locations to point to a single instance of the library. More information about
the assets file is provided below.
When you publish a SWF file that uses TLF text, Flash Professional creates an additional file named
textLayout_X.X.X.XXX.swz (where the X’s are replaced by the version number) next to your SWF file. You can
optionally choose to upload this file to your web server along with your SWF file. This allows for the rare case where
Adobe’s servers are not available for some reason.
You can also avoid the need for Flash Player to do a separate download of the TLF assets by compiling the assets within
your SWF file. You can do this in the ActionScript settings of your FLA file. However, remember that these assets add
significantly to the size of your published SWF file and should only be included when download performance is not a
conern. This feature can also be useful when Adobe servers are not available, such as when deploying SWF files on
closed or private networks which may restirct access to outside URLs.
To compile the TLF ActionScript assets in published SWF files:
1 Choose File > Publish Settings.
2 Click the Flash Tab.
3 Click the Settings button next to the Script menu.
4 Click the Library Path tab.
5 Select Merged Into Code from the Default Linkage menu.
The following are recommendations for handling the TLF library for different deployment scenarios
• Web-based SWF file: use the default behavior of allowing Flash Player to download the RSL if necessary.
• AIR-based SWF file: Compile the RSL into the SWF file. This way text functionality of the AIR application will not
be compromised while offline.
• iPhone-based SWF: It is not recommended that you use TLF on the iPhone for performance reasons. If you do,
compile the TLF code into the SWF because the iPhone cannot load RSLs.
Last updated 6/12/2015
352
Multimedia and Video
Note: For more information about how the Flash Player cache works, see Improving Flex application performance using
the Flash Player cache.The article focuses on Flash Builder, but all of the information about the Flash Player cache applies
to Flash Professional as well.
When the TLF ActionScript assets are not embedded or available on the local playback computer, there can be a slight
delay in SWF playback while Flash Player downloads the assets. You can choose the type of preloader SWF that Flash
Player displays while the assets are downloaded. You choose the preloader by setting the Preloader Method in the
ActionScript 3.0 settings.
To set the Preloader Method:
1 Choose File > Publish Settings.
2 In the Flash tab, click the ActionScript 3.0 Settings button.
3 In the Advanced ActionScript 3.0 Settings dialog box, select a method from the Preloader Method menu. The
available methods are:
• Preloader SWF: this is the default. Flash embeds a small preloader SWF file inside your published SWF file. This
preloader displays a progress bar while the assets load.
• Custom Preloader Loop: use this setting is you want to use a preloader SWF of your own.
The Preloader Method setting is only available if the Default Linkage is set to Runtime Shared Library (RSL).
Tutorials and Videos
• Tutorial: Using a Custom Preloader Loop With TLF Text - Jeff Kamerer, Adobe
• TechNote: Loading child SWFs with TLF content generates reference errors
• Cookbook: How Do I Correct This Runtime Library Error?
Reducing SWF file size with TLF text (CS5.5 only)
Most TLF text requires that a specific ActionScript library be compiled into your SWF file. This library adds about 20k
to the file size.
If you need to keep the file size as small as possible, you can prevent the ActionScript library from being included by
limiting your use of TLF text in the following ways:
• Use only Selectable or Read Only TLF text types.
• Do not give any TLF text instances an instance name in the Properties panel. This means that the text cannot be
manipluated with ActionScript.
Even with these limitations, you can still take advantage of the text layout capabilities of TLF text.
Working with character styles
Character styles are attributes that apply to a single character or a set of characters, rather than to whole paragraphs or
text containers. To set character styles, you work with the Character and Advanced Character sections of the Text
Property inspector.
The Character section of the Property inspector includes the following text properties:
Family The name of the font. (Note TLF text only supports OpenType and TrueType fonts.)
Style Regular, Bold, or Italic. Faux italic and faux bold styles are not available to TLF text objects. Some fonts may also
include additional styles, such as Black, BoldItalic, etc.
Size The size of the characters in pixels.
Last updated 6/12/2015
353
Multimedia and Video
Leading The vertical space between lines of text. By default, Leading is expressed as a percentage but can also be
expressed in points.
Color The color of the text.
Tracking The amount of space between the selected characters.
Highlight The highlight color.
Kerning Kerning: Adds or subtracts space between specific pairs of characters. TLF text automatically kerns characters
using the kerning information built in to most fonts.
When Asian text options are disabled, the Auto-kerning check box appears. When Auto-kerning is on, kerning
information in the font is used. When Auto-kerning is off, kerning information in the font is ignored and no kerning
is applied.
When Asian text options are enabled, Kerning can have these values:
• Auto: Uses the kerning information built in to the font for Latin characters. For Asian characters, applies kerning
only to those characters that have kerning information built in to them. Asian characters which do not have kerning
information are Kanji, Hiragana, and Katakana.
• On: Always turns on kerning.
• Off: Always turns off kerning.
Anti-alias There are three anti-aliasing modes to choose from
• Use Device Fonts: Specifies that the SWF file use the fonts installed on the local computer to display the fonts.
Typically, device fonts are legible at most font sizes. This option doesn’t increase the size of the SWF file. However,
it forces you to rely on the fonts installed on the user’s computer for font display. When using device fonts, choose
only commonly installed font families.
• Readability: Allows for improved legibility of fonts, particularly at small sizes. To use this option for a given text
block, embed the font used by the text object. For instructions, see Embed fonts for consistent text. (Do not use this
option if you intend to animate text; instead, use the Animation mode.)
• Animation: Creates a smoother animation by ignoring alignment and kerning information. To use this option for a
given text block, embed the font used by the text block. For instructions, see Embed fonts for consistent text. For
legibility, use 10-point or larger type when specifying this option.
Rotation Allows you to rotate individual characters. Specifying rotation for fonts that do not contain vertical layout
information can give undesirable results.
Rotation can have the following values:
• 0° - Forces all characters to have no rotation.
• 270° - The primary use for 270-° rotation is Roman text with Vertical orientation. If used on other types of text, such
as Vietnamese and Thai, this setting can give undesirable results
• Auto - Specifies a 90 degree counter-clockwise rotation for full width and wide characters only, as determined by
the Unicode properties of the character. This value is typically used with Asian text to rotate only those characters
that require rotation. This rotation is applied only in vertical text to return full width and wide characters to a
vertical orientation without affecting other characters.
Underline Places a horizontal line beneath the characters.
Strikethrough Places a horizontal line through the center of the characters.
Superscript Moves the characters slightly above the normal line of type and reduces the character size. Superscript can
also be applied using the Baseline Shift menu in the Advanced Character section of the TLF Text Property inspector.
Last updated 6/12/2015
354
Multimedia and Video
Subscript Moves the characters slightly below the normal line of type and reduces the character size. Subscript can also
be applied using the Baseline Shift menu in the Advanced Character section of the TLF Text Property inspector.
The Advanced Character section contains the following properties:
Link Use this field to create a text hyperlink. Enter the URL to load when the characters are clicked in the published
SWF file at runtime.
Target Used with the link property to specify the window the URL loads into. Target can have these values:
• _self - specifies the current frame in the current window.
• _blank - specifies a new window.
• _parent - specifies the parent of the current frame.
• _top - specifies the top-level frame in the current window.
• Custom - You can enter any custom string value you want into the Target field. You would do this in cases where
you know the custom name of a browser window or frame that will already be open when your SWf file is playing.
Case Allows you to specify how capital and lower-case characters are used. Case can have these values:
• Default: Uses each character’s default typographic case.
• Uppercase: Specifies that all characters use uppercase glyphs.
• Lowercase: Specifies that all characters use lowercase glyphs.
• Caps to Small Caps: Specifies that all capitalized characters use small uppercase glyphs. This option requires that the
selected font contains small caps glyphs. Adobe Pro fonts typically have these glyphs defined.
• Lowercase to Small Caps: Specifies that all lowercase characters use small uppercase glyphs. This option requires
that the selected font contains small caps glyphs. Adobe Pro fonts typically have these glyphs defined.
Hebrew and Perso-Arabic scripts such as Arabic do not distinguish between upper and lower case and are not affected
by this setting.
Digit Case Lets you specify which numeral style to apply when working with OpenType fonts that offer both lining and
old style numerical figures. Digit Case can have these values:
• Default: Specifies default digit case. The results are font-dependent; characters use the settings specified by the font
designer without any features applied.
• Lining: Lining (or “aligning”) figures are all-cap height and typically monospaced in text faces so that they line up
vertically on charts.
• Old Style: old style figures have what is considered to be a traditional, classic look. They are only available for certain
typefaces, sometimes as the regular numerals in a font, but more often within a supplementary or expert font. The
figures are proportionately spaced, eliminating the white spaces that result from monospaced lining figures,
especially around the numeral one. Old style figures are most often used within text. Unlike lining figures, they
blend in without disturbing the visual line of the body copy. They also work well in headlines since they're not as
intrusive as lining figures. Many typographic designers prefer them for most uses except charts and tables.
Digit Width Lets you specify whether to use proportional or tabular numerals when working with OpenType fonts that
offer both lining and old style numerical figures. Digit Width can have these values:
• Default: Specifies default digit width. Results are font-dependent; characters use the settings specified by the font
designer without any features applied.
Last updated 6/12/2015
355
Multimedia and Video
• Proportional: Specifies proportional figures. Display typefaces usually contain proportional figures. The total
character widths of these figures are based on the width of the numeral itself plus a small amount of white space
around it. For example, an 8 takes up more width than a 1. Proportional figures can be either lining or old style.
Proportional figures don't align vertically and are unsuitable for use in tables, charts, or other vertical columns.
• Tabular: Specifies tabular figures. Tabular numerals are numeric characters that each have the same total character
width. The character width is the width of the numeral itself plus the white space on both sides. Tabular spacing
(also called monospacing) allows numerals to align vertically in tables, financial statements, and other columns of
figures. Tabular figures are usually lining figures, meaning that they sit on the baseline and have the same height as
the capital letters.
Dominant Baseline Available only when Asian options are turned on in the panel options menu of the Text Property
inspector. Specifies the dominant (or primary) baseline for text that you explicitly select (as opposed to Leading Basis,
which determines the baseline alignment of an entire paragraph). Dominant Baseline can have these values:
• Auto: Resolved based on the selected Locale. This setting is the default.
• Roman: For text, the font and point size of the text determine this value. For graphic elements, the bottom of the
image is used.
• Ascent: Specifies an ascent baseline. For text, the font and point size of the text determine this value. For graphic
elements, the top of the image is used.
• Descent: Specifies a descent baseline. For text, the font and point size of the text determine this value. For graphic
elements, the bottom of the image is used.
• Ideographic Top: Aligns the small characters in a line to the specified position of the large character's em-box.
• Ideographic Center: Aligns the small characters in a line to the specified position of the large character's em-box.
• Ideographic Bottom: Aligns the small characters in a line to the specified position of the large character's em-box.
Alignment Baseline Available only when Asian options are turned on in the panel options menu of the Text Property
inspector. Lets you specify a different baseline for text or a graphic image within a paragraph. For example, if you insert
an icon into a line of text, you can specify an alignment using the top or bottom of the image relative to the text baseline.
• Use Dominant: Specifies that the Alignment Baseline use the Dominant Baseline setting.
• Roman: For text, the font and point size of the text determine this value. For graphic elements, the bottom of the
image is used.
• Ascent: Specifies an ascent baseline. For text, the font and point size of the text determine this value. For graphic
elements, the top of the image is used.
• Descent: Specifies a descent baseline. For text, the font and point size of the text determine this value. For graphic
elements, the bottom of the image is used.
• Ideographic Top: Aligns the small characters in a line to the specified position of the large character's embox.
• Ideographic Center: Aligns the small characters in a line to the specified position of the large character's embox.
• Ideographic Bottom: Aligns the small characters in a line to the specified position of the large character's embox.
This setting is the default.
Ligatures Ligatures are typographic replacement characters for certain letter pairs, such as "fi" and "fl" that are available
in some fonts. Ligatures usually replace consecutive characters sharing common components. They are part of a more
general class of glyphs called contextual forms. With contextual forms, the specific shape of a letter depends on context,
such as surrounding letters or proximity to the end of a line. Note the Ligatures setting has no effect on scripts where
ligatures or connections between letters are the norm and are not font-dependent. These scripts include Perso-Arabic,
Devanagari, and some others.
Last updated 6/12/2015
356
Multimedia and Video
The Ligatures property can have these values:
• Minimum: Minimum ligatures.
• Common: Common or “standard” ligatures. This setting is the default.
• Uncommon: Uncommon or “discretionary” ligatures.
• Exotic: Exotic or “historical” ligatures. Included in only a few font families.
Break Used to prevent selected words from breaking at the end of lines, such as proper names or words that could be
misread when hyphenated. The Break setting is also used to keep multiple characters or groups of words together, such
as clusters of initials, or a first and last name. Break can have these values:
• Auto: Line break opportunities are based on the Unicode character properties in the font. This setting is the default.
• All: Treats all characters in the selection as mandatory line break opportunities.
• Any: Treats any character in the selection as a line break opportunity.
• No Break: Treats no characters in the selection as line break opportunities.
Baseline Shift This control sets the Baseline Shift in percent or pixels. Positive values move the character's baseline
below the baseline of the rest of the line; negative values move it above the baseline. The Superscript or Subscript
attribute can also be applied from this menu. The default is 0. The range is +/- 720 points or percent.
Locale As a character property, the selected locale affects the shaping of glyphs via OpenType features in a font. For
example, languages like Turkish do not have ligatures such as fi and ff. Another example is the capital version of 'i' in
Turkish, which is an uppercase i with a dot and not 'I'.
A separate flow-level Locale property is available in the Container and Flow section of the TLF Text Property inspector.
All characters inherit the Container and Flow Locale property unless it is set differently at the character level.
Last updated 6/12/2015
357
Multimedia and Video
Working with paragraph styles
To set paragraph styles, you work with the Paragraph and Advanced Paragraph sections of the Text Property inspector.
The Paragraph section includes the following text properties:
Align This property can be used with horizontal or vertical text. Align to Start aligns the text along the starting edge of
the container (the left side for left-to-right text). Align to End aligns the text along the ending edge of the container (the
right side for left-to-right text).
When the Paragraph Direction of the current selection is right to left, the appearance of the alignment icons reverses
to indicate the correct direction.
Margins: Start and End These settings specify the width of the left and right margins in pixels. The default is 0.
Indent Specifies the indentation of the first word of the selected paragraph, in pixels.
Spacing: Before and After Specifies pixel values for space before and after a paragraph.
note: Note: Unlike traditional page layout applications, the vertical space specified between paragraphs collapses when
values overlap. For example, you have two paragraphs, Para1 followed by Para2. Para1 has 12 pixels of space after it (Space
After), and Para2 has 24 pixels of space before it (Space Before). TLF produces 24 points between the paragraphs, not 36.
If a paragraph begins at the top of a column, no extra space is added before the paragraph. In this case, you can use the first
baseline offset options of the paragraph.
Text Justify Text Justify: Indicates how justification is applied to text. Text Justify can have these values:
• Letter Spacing: Distributes justification between letters.
• Word Spacing: Distributes justification between words. This setting is the default.
Direction Specifies paragraph direction. Direction settings are only available if Right-to-Left options are turned on in
Preferences. This setting applies only to the currently selected paragraph within the text container. A separate Direction
property can be set for the container in the Container and Flow section of the TLF Text Property inspector. Direction
can have these values:
• Left to Right: Left to Right text direction. Used for most languages. This setting is the default.
• Right to Left: Right-to-Left text direction. Used for Middle Eastern languages like Arabic and Hebrew, and languages
based on Arabic script such as Farsi or Urdu.
The Advanced Paragraph options are only available when Asian Options are turned on in Preferences or via the
Options menu of the TLF Text Property inspector.
The Advanced Paragraph section includes the following properties:
Mojikumi Sometimes called the justification rule, this property determines how paragraph justification is applied. The
justifiers that are applied based on this setting affect the spacing of punctuation and the leading. In the Roman version,
the comma and Japanese periods take a full character's width but only half in East Asian. Additionally, the spacing
between sequential punctuation marks becomes tighter, obeying traditional East Asian typographic conventions.
Another item to note in the example below is the leading, applied to the second line of the paragraphs. In the East Asian
version, the last two lines push left. In the Roman version, the second and following lines push left.
Mojikumi can have these values:
• Auto: Justification is applied based on the Locale selected in Character and Flow section of the Text Property
inspector. This setting is the default.
• Space: Use Roman justification rules.
• East Asian: Use East Asian justification rules.
Last updated 6/12/2015
358
Multimedia and Video
Kinsoku Shori Type Sometimes called the justification style. this property specifies options for handling Japanese
kinsoku characters, which cannot appear at either the beginning or end of a line. Kinsoku Shori Type can have these
values:
• Auto: Resolved based on the Locale selected in the container and Flow section of the Text Property inspector. This
setting is the default.
• Prioritize Least Adjustment: Bases justification on either expanding or compressing the line, whichever gives a result
closest to the desired width.
• Push In Kinsoku: Bases justification on compressing kinsoku at the end of the line. Kinsoku expands if no kinsoku
occurs or if that end-of-line space is insufficient.
• Push Out Only: Bases justification on expanding the line.
Leading Model Leading Model is a paragraph format composed of allowed combinations of leading basis and leading
direction.
Leading Basis determines the baselines of two consecutive lines that are intended to be at the distance specified by line
height from each other. For example, for two consecutive lines in a paragraph with Roman leading basis, the line height
is the distance between their respective Roman baselines.
Leading Direction determines the direction in which line height is measured. If leading direction is Up, line height is
the distance of a line's baseline from the previous line's baseline. If leading direction is Down, line height is the distance
of a line's baseline from the next line's baseline.
Leading Model can have these values:
• Roman; Up: Leading basis is Roman and leading direction is Up. In this case, the line height is the distance of a line's
Roman baseline from the previous line's Roman baseline.
• Ideographic Top; Up: Leading basis is Ideographic Top and leading direction is Up. In this case, the line height is the
distance of a line's Ideographic Top baseline from the previous line's Ideographic Top baseline.
• Ideographic Center; Up: Leading basis is Ideographic Center and leading direction is Up. In this case, the line height
is the distance of a line's Ideographic Center baseline from the previous line's Ideographic Center baseline.
Last updated 6/12/2015
359
Multimedia and Video
• Ideographic Top; Down: Leading basis is Ideographic Top and leading direction is Down. In this case, the line height
is the distance of a line's Ideographic Top baseline from the next line's Ideographic Top baseline.
• Ideographic Center; Down: Leading basis is Ideographic Center and leading direction is Down. In this case, the line
height is the distance of a line's Ideographic Center baseline from the next line's Ideographic Center baseline.
• Auto: The Leading Model is resolved based on the Locale selected in the Container and Flow section of the Text
Property inspector. (Ideographic Top; Down for Japanese and Chinese and Roman; Up for all others. This setting is
the default value.
Container and flow properties
Working with Container and Flow properties
The container and Flow section of the TLF Text Property inspector controls options that affect the entire text container.
These proeprties include:
Behavior This option controls how the container expands as the amount of text increases. Behavior has these options:
• Single Line
• Multiline: This option is only available when the selected text is area text. It is not available if the selected text is point
text.
• Multiline No Wrap
• Password: Makes characters appear as dots instead of letters for password security. This option is only available in
the menu when the text type is Editable (for either point or area text). It is not available for the Read Only or
Selectable text types.
Max Chars The maximun number of characters to allow in the text container. Enabled only for text containers whose
type is set to Editable. The maximum value is 65535.
Alignment Specifies the alignment of text within the container. Settings include:
• Top: Vertically aligns text down from the top of the container.
• Center: Centers lines of text in the container
• Bottom: Vertically align lines of text up from the bottom of the container.
• Justify: Evenly distributes lines of text vertically between the top and bottom of the container.
note: The Alignment options change appropriately when the text direction is set to Vertical.
Column Count Specifies the number of columns of text within the container. This property is only enabled for area text
containers. The default value is 1. The maximum value is 50.
Column Gutters Specifies the spacing (or gutter) between each column in the selected container. The default value is
20. The maximum value is 1000. The unit of measurment is set according to the Ruler Units set in Document Settings.
Padding Specifies the width of the margins between the text and the selected container. Padding can be set for all 4
margins.
Border Color The color of the stroke around the outside of the container. The default is no border.
Border width The width of the stroke around the outside of the container. Enabled only when a border color is chosen.
The maximum value is 200.
Background Color The color of the background behind the text. The default is no color.
Last updated 6/12/2015
360
Multimedia and Video
First Line Offset specifies the alignment of the first line of text with the top of the text container. For example, you can
make text fall a specific distance below the top of the container. First line offset is often referred to as first baseline offset
when working with Roman characters. In this case, the baseline is an imaginary line on which the majority of the
characters in a typeface rest. When working with TLF, baseline can refer to any of the following, depending on the
language being used: Roman, Ascent, Descent, Ideographic Top, Ideographic Center, and Ideographic Bottom.
First Line Offset can have these values:
• pt: Specify the distance in points between the baseline of the first line of text and the top inset of the frame. This
setting enables a field for specifying the point distance.
• Auto: Aligns the top of the line, based on the tallest glyph, with the top of the container.
• Ascent: The distance between the top inset of the text container and the baseline of the first line of text is the height
of the tallest glyph in the font (typically the "d" character in Roman fonts).
• Line Height: The distance between the top inset of the text container and the baseline of the first line of text is the
Line Height (leading) of the line.
Direction Used to specify either a left-to-right or right-to-left text direction for the selected container. Left-to-right is
used for most languages. Right-to-left is used for Middle Eastern languages such as Arabic and Hebrew, and languages
based on Arabic script such as Farsi or Urdu.
When applied at the paragraph level, direction controls the left-to-right or right-to-left text direction and the indents
and punctuation used by the paragraph. When applied at the container level, direction controls the column direction.
Paragraphs in the container inherit the direction attribute from the container.
Locale Sets the Locale property at the flow level. See Working with character styles.
Flowing text across multiple containers
Threading, or linking, between text containers is only available for TLF (Text Layout Framework) text and does not
apply to Classic text blocks. Text containers can be threaded from frame to frame, and inside symbols, as long as the
threaded containers are all within the same timeline.
To link 2 or more text containers:
1 Use the Selection tool or Text tool to select a text container.
2 Click the In port or the Out port of the selected text container. (The In-port and Out-port positions on the text
container are based on the container's flow direction and vertical or horizontal setting. For example, if the text flow
is Left-to-Right and horizontal , the In port is on the upper left and the Out port is on the lower right. If the text flow
is Right-to-Left, the In port is on the upper-right and the Out port is on the lower left.)
The pointer changes to the loaded text icon.
3 Then do one of the following:
• To link to an existing text container, position the pointer over the target text container. Click the text container
to link the two containers.
• To link to a new text container, click or drag on an empty part of the Stage. Clicking creates an object of the same
size and shape as the original; dragging lets you create a rectangular text container of any size. You can also add
a new container between 2 linked containers.
The containers are now linked and text can flow between them.
To unlink two text containers, do one of the following:
• Place the container in edit mode and then double-click the In-port or Out-port that you want to unlink. The text
reflows in the first of the two containers.
Last updated 6/12/2015
361
Multimedia and Video
• Delete one of the linked text containers.
note: After creating a linkage, the second text container acquires the flow direction and locale of the first container. After
unlinking, these settings persist in the second container instead of reverting to their pre-linkage settings. In Flash Pro
CS5.5, scrolling performance is faster than CS5, except for linked text containers.
Making text scrollable
You can make a TLF text container scrollable by adding a UIScrollBar component to the text container. The text
container must have the following settings:
• The Text Type must be set to Editable or Selectable.
• The Container and Flow Behavior must be set to Multiline or Multiline No Wrap.
Make a TLF text container scrollable:
• Drag an instance of the UIScrollBar component from the Components Panel onto the text container, closest to the
side of the container where you want to attach it.
The UIScrollBar component snaps to the side of the text container.
Make a text container scroll horizontally:
1 Select the UIScrollBar component instance on the Stage.
2 Set the Direction of the UIScrollBar component to Horizontal in the Component Parameters section of the Property
Inspector.
3 Drag the UIScollBar component instance to the top or bottom of the text container.
The UIScrollBar component snaps to the top or bottom of the text container.
Using tab rulers (CS5.5 only)
You use the tab ruler to add tab stops to TLF text containers. The tab ruler appears when a TLF text container is in edit
mode. The tab ruler displays tab stops defined for the currently selected paragraphs. It also shows markers for
paragraph margins and first-line indent.
Hide or show tab ruler Choose Text > TLF Tab Ruler.
Set type of tab Double-click a marker or Shift-click several markers and select a type from the menu.
Start, Center, or End tab Aligns the start, end, or center of the text to the tab stop.
Decimal tab Aligns a character in the text to the tab stop. This character is usually a decimal point, shown by default
in the menu. To align to a dash or other character, enter it in the menu.
Add tab Click in the tab ruler. The tab marker appears at that location in the tab ruler.
Move tab Drag the tab marker to a new location. (To move it precisely, double-click its tab marker and enter a pixel
location for the marker.)
Delete tab Drag its marker downward off the tab ruler until it disappears. (If the text is vertically aligned, drag the
marker to the left, toward the text, until it disappears.)
Change unit of measure Choose Modify > Document. Then select a unit from the Ruler Units menu in the dialog box.
Last updated 6/12/2015
362
Multimedia and Video
Asian and right-to-left text
Creating Asian text
To work with properties that apply to Asian text, enable the Asian Text options by doing one of the following:
• Choose Show Asian Options from the panel options menu in the Property inspector while TLF text is selected on
the Stage.
• Select Show Asian Text Options in the Text section of Preferences (Edit > Preferences).
The Asian text properties include:
• Tate Chu Yoko: used in combination with Asian text where Roman characters must be rotated to a horizontal
orientation to display properly in a vertical layout.
• Dominant Baseline
• Alignment Baseline
• Mojikumi
• Kinsoku Shori Type
• Leading Model
Working with Illustrator AI files in Flash
About Adobe Illustrator AI files
Flash Pro lets you import Adobe® Illustrator® AI files and preserves the majority of the editability and visual fidelity of
your artwork. The AI Importer also provides you with a great degree of control in determining how your Illustrator
artwork is imported into Flash Pro, letting you specify how to import specific objects into an AI file.
The Flash Pro AI Importer provides the following key features:
• Preserves editability of the most commonly used Illustrator effects as Flash Pro filters.
• Preserves editability of blend modes that Flash Pro and Illustrator have in common.
• Preserves the fidelity and editability of gradient fills.
• Maintains the appearance of RGB (red, green, blue) colors.
• Imports Illustrator Symbols as Flash Pro Symbols.
Last updated 6/12/2015
363
Multimedia and Video
• Preserves the number and position of Bezier control points.
• Preserves the fidelity of clip masks.
• Preserves the fidelity of pattern strokes and fills.
• Preserves object transparency.
• Converts the AI file layers to individual Flash Pro layers, keyframes, or a single Flash Pro layer. You can also import
the AI file as a single bitmap image, in which case Flash Pro flattens (rasterizes) the file.
• Provides an improved copy-and-paste workflow between Illustrator and Flash Pro. A copy-and-paste dialog box
provides settings to apply to AI files being pasted onto the Flash Pro stage.
Compatibility between Flash and Illustrator
Certain visual attributes can either not be accurately imported, or, after they are imported, lose their ability to be further
edited in the Flash Pro authoring environment. The AI Importer provides you with several options to import and place
artwork to best maintain its visual appearance and editability. However, certain visual attributes cannot be preserved.
Use the following guidelines to improve the appearance of AI files imported into Flash Pro:
• Flash Pro supports only the RGB color space, and not the CMYK color space, which is common in printing. Flash
Pro can convert CMYK images to RGB, however, colors are better preserved if you convert the colors to RGB in
Illustrator.
• To preserve the drop shadow, inner glow, outer glow, and Gaussian blur AI effects as editable Flash Pro filters, Flash
Pro imports the objects to which they are applied as a Flash Pro movie clip. If you attempt to import an object with
these attributes as something other than a movie clip, Flash Pro displays an incompatibility alert, and recommends
importing the object as a movie clip.
Working with Illustrator and Flash
You can move Illustrator artwork into the Flash editing environment or directly into Flash Player. You can copy and
paste artwork, save files in SWF format, or export artwork directly to Flash. In addition, Illustrator provides support
for Flash dynamic text and movie clip symbols. For a video on using Flash and Illustrator together, see
www.adobe.com/go/lrvid4099_xp.
Pasting Illustrator artwork
You can create graphically rich artwork in Illustrator and copy and paste it into Flash simply, quickly, and seamlessly.
When you paste Illustrator artwork into Flash, the following attributes are preserved:
• Paths and shapes
• Scalability
• Stroke weights
• Gradient definitions
• Text (including OpenType fonts)
• Linked images
• Symbols
• Blending modes
In addition, Illustrator and Flash support pasted artwork in the following ways:
• When you select entire top-level layers in Illustrator artwork and paste them into Flash, the layers are preserved
along with their properties (visibility and locking).
Last updated 6/12/2015
364
Multimedia and Video
• Non-RGB Illustrator colors (CMYK, grayscale, and custom) convert to RGB in Flash. RGB colors paste as expected.
• When you import or paste Illustrator artwork, you can use various options to preserve effects (such as drop shadow
on text) as Flash filters.
• Flash preserves Illustrator masks.
Exporting SWF files from Illustrator
From Illustrator, you can export SWF files that match the quality and compression of SWF files exported from Flash.
When you export, you can choose from a variety of presets to ensure optimal output, and you can specify how to handle
multiple artboards, symbols, layers, text, and masks. For example, you can specify whether Illustrator symbols are
exported as movie clips or graphics, or you can choose to create SWF symbols from Illustrator layers.
Importing Illustrator files into Flash
When you want to create complete layouts in Illustrator and then import them into Flash in one step, you can save your
artwork in the native Illustrator format (AI) and import it, with high fidelity, into Flash using the File > Import To Stage
or File > Import To Library commands in Flash.
If your Illustrator file contains multiple artboards, you select the artboard you want to import from the Import dialog
box in Flash, and specify settings for in that artboard for all layers. All objects on the selected artboard can be imported
as a single or multiple flash layers or keyframes in Flash Pro.
When you import Illustrator artwork as an AI, EPS, or PDF file, Flash preserves the same attributes as for pasted
Illustrator artwork. In addition, when an imported Illustrator file contains layers, you can import them in any of the
following ways:
• Convert Illustrator layers to Flash layers
• Convert Illustrator layers to Flash frames
• Convert all Illustrator layers to a single Flash layer
Symbol workflow
Symbol workflow in Illustrator is similar to symbol workflow in Flash.
Text Conversion If the AI file contains Text, you can convert the text to:
• Editable Text
• Vector Outline
• Flattened bitmap image
Layer Conversion Flash Pro CC allows you to convert layers in the imported AI file to:
• Single flattened bitmap file
• Editable paths and effects
(Flash Professional CS6 and earlier versions only) Symbol properties and links Using the Symbols panel or the Control
panel, you can easily assign names to symbol instances, break links between instances and symbols, swap a symbol
instance with another symbol, or create a copy of the symbol. In Flash, the editing features in the Library panel work
in a similar way.
(Flash Professional CS6 and earlier versions only) Static, dynamic, and input text objects
When you bring static text from Illustrator into Flash, Flash converts the text to outlines. In addition, you can set up
your text in Illustrator as dynamic text. Dynamic text enables you to edit text content programmatically in Flash, and
easily manage projects that require localization in multiple languages.
Last updated 6/12/2015
365
Multimedia and Video
In Illustrator, you can specify individual text objects as static, dynamic, or input text. Dynamic text objects in Illustrator
and Flash have similar properties. For example, both use kerning that affects all characters in a text block rather than
individual characters, both anti-alias text the same way, and both can be linked to an external XML file containing text.
About importing AI files to the Flash library
Importing an AI file into the library is similar to importing to the Stage, the difference being that the entire AI file is
encapsulated as a Flash Pro symbol. The content is imported into the library and organized by the layering and
grouping structure of the AI file.
When you import an AI file into the library, the root folder uses the name of the AI file. After the AI file is imported
into the library, you can change the name of the root folder, or move the layers out of the folder.note: The Library panel
orders the contents of the imported AI file alphabetically. The hierarchical grouping and folder structure remains the same,
but the library reorders them alphabetically.
When converting AI layers to keyframes, the AI file is imported as a movie clip; converting the AI layers to Flash layers,
or as a single Flash layer, imports the AI file as a graphic symbol. The resulting movie clip or graphic symbol contains
all of the content of the AI file imported to its timeline, as if the content were imported to the Stage. Almost all movie
clips have a bitmap or other asset associated with them. To minimize confusion and naming conflicts, these assets are
stored in an Assets folder in the same folder as the movie clip.note: When you import to the library, the AI file's contents
are imported to the movie clip's timeline, not the main Flash Pro timeline.
(Flash Professional CS6 and earlier versions only) AI File Importer preferences
The Flash Preferences dialog box lets you set import preferences for AI files and the AI File Import dialog box. The
preferences you specifiy for importing AI files affect the options the AI Import dialog box is initially populated with for
the Illustrator object types.
Last updated 6/12/2015
366
Multimedia and Video
Note: To override the preferences specified for different layer types on an object by object basis, use the AI Import dialog
box. Select the layer, object, or group to change its import options, and specify the necessary options.
General Preferences that affect how the AI Importer will respond when importing AI files:
Show Import Dialog Box Specifies that the AI File Import Dialog dialog box appears.
Exclude Objects Outside Crop Area Excludes objects on the Illustrator canvas which fall outside the artboard or crop
area.
Import Hidden Layers Specifies that hidden layers be imported by default.
Import Text As Lets you specify the following import preferences for text objects:
Editable Text Specifies that imported Illustrator text is editable Flash Pro text. The appearance of the text may be
compromised to maintain the editability of the text.
Vector Outlines Converts text to vector paths. Use this option to preserve the visual appearance of the text. Some visual
effects might be sacrificed—such as unsupported blend modes and filters—but visual attributes such as text on a path
are maintained if the text is imported as a movie clip. The text itself is no longer editable, but opacity and compatible
blend modes maintain their editability.
note: To preserve the drop shadow, inner glow, outer glow, and Gaussian blur that AI effects applied to text as editable Flash
Pro filters, select Create Movie Clip Import to import the text as a movie clip.
Bitmaps Rasterizes the text into a bitmap to preserve the exact appearance of the text as it was in Illustrator. If filters
or other effects are applied that are not compatible with Flash Pro, importing the text as a bitmap preserves the visual
appearance. Rasterized text is no longer editable.
Create Movie Clips Specifies that text objects be imported inside a movie clip. To maintain supported blend modes, AI
effects, and transparency of less than 100% between Illustrator and Flash Pro, specify that the text object be imported
as a movie clip.
Import Paths As Lets you specify the following path import preferences:
Editable Paths Creates an editable vector path. Supported blend modes, effects, and object transparency are preserved,
but attributes not supported in Flash Pro are discarded.
Bitmaps Rasterizes the path into a bitmap to preserve the exact appearance of the path in Illustrator. A rasterized image
is no longer editable.
Create Movie Clips Specifies that path objects be imported inside a movie clip.
Images Lets you specify the import preference for images:
Flatten Bitmaps To Maintain Appearance Rasterizes the image into a bitmap to preserve the appearance of blending
modes and effects that are not supported in Flash Pro. A rasterized image is no longer editable.
Create Movie Clips Specifies that images be imported inside a movie clip.
Groups Lets you specify the import preferences for groups:
Import As Bitmaps Rasterizes the group into a bitmap to preserve the appearance of the objects as they appeared in
Illustrator. After a group is converted to a bitmap, the objects in it cannot be selected or renamed.
Create Movie Clips Specifies that all objects in the group be encapsulated into a single movie clip.
Layers Lets you specify the import preferences for layers:
Import As Bitmaps Rasterizes the layer into a bitmap to preserve the appearance of the objects as they appeared in
Illustrator.
Create Movie Clips Specifies that the layer is encapsulated into a movie clip.
Last updated 6/12/2015
367
Multimedia and Video
Movie Clip Registration Specifies a global registration point for movies that are created. This setting applies to the
registration point for all object types. This option can be changed on an object by object basis in the AI File Import
dialog box; this is the initial setting for all object types. For more information on movie clip registration, see Edit
symbols.
Import Adobe Illustrator files
When you want to create complete layouts in Illustrator and then import them into Flash in one step, you can save your
artwork in the native Illustrator format (AI) and import it, with high fidelity, into Flash using the File > Import
To Stage or File > Import To Library commands in Flash.
If your Illustrator file contains multiple artboards, you select the artboard you want to import from the Import dialog
box in Flash, and specify settings for in that artboard for all layers. All objects on the selected artboard can be imported
as a single or multiple flash layers or keyframes in Flash Pro.
When you import Illustrator artwork as an AI, EPS, or PDF file, Flash preserves the same attributes as for pasted
Illustrator artwork. In addition, when an imported Illustrator file contains layers, you can import them in any of the
following ways:
• Convert Illustrator layers to Flash layers
• Convert Illustrator layers to Flash frames
• Convert all Illustrator layers to a single Flash layer
Symbol workflow
Symbol workflow in Illustrator is similar to symbol workflow in Flash.
Text Conversion
If the AI file contains Text, you can convert the text to:
• Editable Text
• Vector Outline
• Flattened bitmap image
Layer Conversion
Flash Pro CC allows you to convert layers in the imported AI file to:
• Single flattened bitmap file
• Editable paths and effects
(Flash Professional CS6 and earlier versions only) Symbol properties and links
Using the Symbols panel or the Control panel, you can easily assign names to symbol instances, break links between
instances and symbols, swap a symbol instance with another symbol, or create a copy of the symbol. In Flash, the
editing features in the Library panel work in a similar way.
(Flash Professional CS6 and earlier versions only) Static, dynamic, and input text objects
When you bring static text from Illustrator into Flash, Flash converts the text to outlines. In addition, you can set up
your text in Illustrator as dynamic text. Dynamic text enables you to edit text content programmatically in Flash, and
easily manage projects that require localization in multiple languages.
In Illustrator, you can specify individual text objects as static, dynamic, or input text. Dynamic text objects in Illustrator
and Flash have similar properties. For example, both use kerning that affects all characters in a text block rather than
individual characters, both anti-alias text the same way, and both can be linked to an external XML file containing text.
Last updated 6/12/2015
368
Multimedia and Video
1 Select File > Import To Stage or Import To Library.
2 Navigate to the AI file to import, select it, and click OK. The Import Illustrator Document To Stage or The Import
Illustrator Document To Library dialog box appears.
This dialog box provides options to import the Illustrator file. Depending on the types of objects in the Illustrator
file you’re importing, the options available to you vary.
3 (Optional) To generate a list of items in the AI file that are incompatible with Flash Pro, click Incompatibility Report.
The Incompatibility Report button appears only if incompatibilities exist with Flash Pro in the AI file.
The incompatibilty report analyzes possible incompatibilities between Illustrator and Flash Pro. The Import
Options area (next to the Alert button) of the AI Import dialog box displays recommendations to obtain the
maximum compatibility for any incompatible item.
The incompatibilty report includes an Apply Recommended Import Settings checkbox. If checked, Flash Pro
automatically applies the recommended import options to any incompatible objects within the AI file. The
exceptions to this are when the AI document is larger in size than that supported by Flash Pro, and when the AI
document uses the CMYK color mode. To correct either of these incompatibilities, reopen the document in
Illustrator CS3, and adjust the size of the document, or change the color mode to RGB.
4 For Convert Layers To, select one of the following:
Flash Layers Converts each layer in the imported document to a layer in the Flash document.
Keyframes Converts each layer in the imported document to a keyframe in the Flash document.
Single Flash Layer Converts all layers in the imported document to a single flattened layer in the Flash Pro
document.
Last updated 6/12/2015
369
Multimedia and Video
5 Select appropriate Text and Layer conversion options.
6 Click OK.
Illustrator object import options
Layers manage all the items that make up Illustrator artwork. By default, all items are organized in a single, parent layer.
You can import all items in a given parent layer as a single, flattened bitmap, or, individually select each object and
specify import options specific to the type of object it is (text, path, group, and so on). The AI Importer provides options
to select layers in the artwork you are importing and specify individual import options based on preserving the visual
appearance of an object, or its editability in Flash Pro.
Correcting incompatible graphic effects
1 To generate an incompatibilty report, click Incompatibility Report. The incompatibility report lists items in the AI
file that are incompatible with Flash Pro.
2 Select Change Import Settings To Resolve Object Incompatibilities. Many incompatibilities between Illustrator and
Flash Pro can be automatically corrected using the incompatibility report and the import recommendations
suggested in the Import options area of the AI Import dialog box.
Select individual objects
1 Select the object to specify import options for. Illustrator objects that you can select include layers, groups,
individual paths, text, and images.
2 Review the import options available for the type of object you’ve selected in the object options section of the dialog
box. Note whether any incompatibilities are listed and what the recommended correction is to import the object.
3 Select the desired import options, and select another object to specify import options for, or click OK.
(Flash Professional CS6 and earlier versions only) Selecting layers
The Layers panel lists the objects in a document. By default, every Illustrator document contains at least one layer, and
each object in a given file is listed under that layer.
When an item in the Layers panel contains other items, a triangle appears to the left of the item’s name. To show or hide
the content, click the triangle. If no triangle appears, the layer contains no additional items.note: You can expand or
collapse all groups and layers using the AI Importer context menu. Right-click to display the context menu and select
Expand All or Collapse All.
Selection column Controls whether items are selected for import or not. If an item is checked, you can select that layer
and specify import options; if Edit is not checked, the layer is dimmed and you cannot specify any import setting for
the item in that layer.
Object Type column An icon indicates what the Flash Pro object type located on that layer will be when imported and,
if visible, that the item is selected. The object types are:
• Text
• Path
• Group
• Movie clip
• Graphic symbol
• Image
Last updated 6/12/2015
370
Multimedia and Video
Text import options
Flash Pro lets you import text as editable text, vector outlines, or a flattened bitmap. To maintain supported blend
modes, AI effects, and transparency of less than 100% between Illustrator and Flash Pro, import text as a movie clip.
Importing text as a movie clip preserves the editability of compatible visual effects.
Editable Text By default, Illustrator text imports as editable Flash Pro text. The appearance of the text can be
compromised to maintain the editability of the text.
Vector Outlines Converts text to vector paths. Use this option to preserve the visual appearance of the text. Some visual
effects might be sacrificed—such as unsupported blend modes and filters—but visual attributes such as text on a path
are maintained if the text is imported as a movie clip. The text itself is no longer editable, but opacity and compatible
blend modes maintain their editability.note: To preserve the drop shadow, inner glow, outer glow, and Gaussian blur that
AI effects applied to text as editable Flash Pro filters, select Create Movie Clip Import to import the text as a movie clip.
Bitmap Rasterizes the text into a bitmap to preserve the exact appearance of the text as it was in Illustrator. If filters or
other effects are applied that are not compatible with Flash Pro, importing the text as a bitmap preserves the visual
appearance. Rasterized text is no longer editable.
Path import options
A path is the line that results from drawing in Illustrator. A path is either open, like an arc, or closed, like a circle. For
an open path, the starting and ending anchor points for the path are called endpoints. Editable paths can be imported
into Flash Pro, however, if certain blend modes, filters, or other effects are applied to the path, those effects might not
be compatible with Flash Pro.
Bitmap Rasterizes the path into a bitmap to preserve the exact appearance of the path in Illustrator. A rasterized image
is no longer editable.
Editable Path Creates an editable vector path. Supported blend modes, effects, and object transparency are preserved,
but attributes not supported in Flash Pro are discarded.
Image import options
Bitmap images are the most common electronic medium for continuous-tone images, such as photographs or digital
paintings. Illustrator creates bitmap effects by using filters, effects, and graphic styles. While many of these effects are
compatible with Flash Pro, some might need to be flattened—or rasterized—to preserve their visual appearance. note:
If a raster file in Illustrator is linked, only JPEG, GIF, and PNG are imported with their native format preserved. All other
file types are converted to the PNG format in Flash Pro. Additionally, the conversion (to PNG) depends on the version of
QuickTime® installed on your computer.
Flatten Bitmap To Maintain Appearance Rasterizes the image into a bitmap to preserve the appearance of blending
modes and effects that are not supported in Flash Pro. A rasterized image is no longer editable.
Create Movie Clip Imports Illustrator images as movie clips.
(Flash Professional CS6 and earlier versions only) Group import options
Groups are collections of graphic objects that are treated as a single unit. Grouping lets you move or transform a
number of objects without affecting their attributes or relative positions. For example, you might group the objects in
a logo design so that you can move and scale the logo as one unit. Groups can also be nested. That is, they can be
grouped in other objects or groups to form larger groups.
Last updated 6/12/2015
371
Multimedia and Video
Groups appear as <Group> items in the Import panel. When an item such as a group contains other items, a triangle
appears to the left of the item’s name. Click the triangle to show or hide the contents of the group. If no triangle appears,
the item contains no additional items.
Import As Bitmap Rasterizes the group into a bitmap to preserve the appearance of the objects as they appeared in
Illustrator. After a group is converted to a bitmap, the objects in it cannot be selected or renamed.
Create Movie Clip Encapsulates all objects in the group into a single movie clip.
Copy and pasting between Illustrator and Flash
If you copy and paste (or drag-and-drop) artwork between Illustrator and Flash Pro, the Paste dialog box appears,
which provides import settings for the AI file being copied (or pasted).
Paste As Bitmap Flattens the file being copied into a single bitmap object.
Paste Using AI File Importer Preferences Imports the file using the AI file import setting specified in Flash Pro
Preferences (Edit > Preferences).
Apply Recommended Import Settings To Resolve Incompatibilities Enabled by default when Paste Using AI File
Importer Preferences is selected. Automatically fixes any incompatibilities detected in the AI file.
Maintain Layers Enabled by default when Paste Using AI File Importer Preferences is selected. Specifies that layers in
the AI file be converted to Flash Pro layers (the same as if you selected Convert To Flash Layers from the AI Import
dialog box). If deselected, all layers are flattened into a single layer.
More Help topics
Working with InDesign files inFlash
You can import InDesign artwork using the XFL file format exported from InDesign CS4, or the FLA file format
exported from InDesign CS5. For more information about the XFL file format, see .
The following video tutorials demonstrate using the XFL and FLA formats to move content from InDesign to Flash
Professional:
• How to import content from Adobe InDesign CS5 into Adobe Flash Professional CS5 (4:49, WonderHowTo.com,
exporting FLA format from InDesign for import to Flash Professional.)
• Understanding Flash Integration (5:10, Adobe TV, InDesign import.)
• Using InDesign Export to Flash (6:22, Adobe TV, Using XFL.)
• Design and develop workflows (4:49, Adobe TV, InDesign to Flash via XFL.)
• Flash Downunder - InDesign to Flash (28:38, Adobe TV, Comprehensive overview in CS4.)
• Design workflows with Creative Suite 4 (3:34, Adobe TV, InDesign, Illustrator, Flash)
Working with symbol instances
Last updated 6/12/2015
372
Multimedia and Video
Create instances
After you create a symbol, you can create instances of that symbol throughout your document, including inside other
symbols. When you modify the symbol, Flash Professional updates all instances of the symbol.
You can give names to instances from the Property inspector. Use the instance name to refer to an instance in
ActionScript. To control instances with ActionScript®, give each instance within a single timeline a unique name. For
more information, see Handling events in Learning ActionScript 2.0 in Adobe Flash or Handling events in the
ActionScript 3.0 Developer’s Guide.
To specify color effects, assign actions, set the graphic display mode, or change the behavior of new instances, use the
Property inspector. The behavior of the instance is the same as the symbol behavior, unless you specify otherwise. Any
changes you make affect only the instance and not the symbol.
Create an instance of a symbol
1 Select a layer in the Timeline. Flash Professional can place instances only in keyframes, always on the current layer.
If you don’t select a keyframe, Flash Professional adds the instance to the first keyframe to the left of the current
frame.
Note: A keyframe is a frame in which you define a change in the animation. For more information, see Insert frames in
the Timeline.
2 Select Window > Library.
3 Drag the symbol from the library to the Stage.
4 If you created an instance of a graphic symbol, to add the number of frames that will contain the graphic symbol,
select Insert > Timeline > Frame.
Apply a custom name to an instance
1 Select the instance on the Stage.
2 Select Window > Properties, and enter a name in the Instance Name box.
Editing instance properties
Each symbol instance has its own properties that are separate from the symbol. You can change the tint, transparency,
and brightness of an instance; redefine how the instance behaves (for example, change a graphic to a movie clip); and
specify how an animation plays inside a graphic instance. You can also skew, rotate, or scale an instance without
affecting the symbol.
In addition, you can name a movie clip or button instance so that you can use ActionScript to change its properties. For
more information, see Classes in Learning ActionScript 2.0 in Adobe Flash or Objects and classes in Learning
ActionScript 3.0. To edit instance properties, you use the Property inspector (Windows > Properties).
The properties of an instance are saved with it. If you edit a symbol or relink an instance to a different symbol, any
instance properties you’ve changed still apply to the instance.
Set the visibilty of an instance (CS5.5 only)
You can make a symbol instance on the Stage invisible by turning off the Visible property. Using the Visible property
provides faster rendering performance than setting the symbol’s Alpha property to 0.
The Visible property requires a Player setting of Flash Player 10.2 or later and is only compatible with movie clip,
button, and component instances.
1 Select the instance on the Stage.
Last updated 6/12/2015
373
Multimedia and Video
2 In the Display section of the Properties panel, deselect the Visible property.
Change the color and transparency of an instance
Each instance of a symbol can have its own color effect. To set color and transparency options for instances, use the
Property inspector. Settings in the Property inspector also affect bitmaps placed in symbols.
When you change the color and transparency for an instance in a specific frame, Flash Professional makes the change
as soon as it displays that frame. To make gradual color changes, apply a motion tween. When tweening color, you enter
different effect settings in starting and ending keyframes of an instance, and then tween the settings to make the
instance’s colors shift over time.
Note: If you apply a color effect to a movie clip symbol that has multiple frames, Flash Professional applies the effect to every
frame in the movie clip symbol.
1 Select the instance on the Stage, and select Window > Properties.
2 In the Property inspector, select one of the following options from the Style menu in the Color Effect section:
Brightness Adjusts the relative lightness or darkness of the image, measured on a scale from black (–100%) to white
(100%). To adjust brightness, click the triangle and drag the slider or enter a value in the box.
Tint Colors the instance with the same hue. To set the tint percentage from transparent (0%) to completely saturated
(100%), use the Tint slider in the Property inspector. To adjust tint, click the triangle and drag the slider or enter a
value in the box. To select a color, enter red, green, and blue values in the respective boxes, or click the Color control
and select a color from the Color Picker.
Alpha Adjusts the transparency of the instance, from transparent (0%) to completely saturated (100%). To adjust
the alpha value, click the triangle and drag the slider or enter a value in the box.
Advanced Separately adjusts the red, green, blue, and transparency values of an instance. This is most useful to
create and animate subtle color effects on objects such as bitmaps. The controls on the left let you reduce the color
or transparency values by a specified percentage. The controls on the right let you reduce or increase the color or
transparency values by a constant value.
Last updated 6/12/2015
374
Multimedia and Video
The current red, green, blue, and alpha values are multiplied by the percentage values, and then added to the
constant values in the right column, producing the new color values. For example, if the current red value is 100,
setting the left slider to 50% and the right slider to 100% produces a new red value of 150 ([100 x .5] + 100 = 150).
note: The Advanced settings in the Effect panel implement the function (a * y+ b)= x where a is the percentage specified
in the left set of boxes, y is the color of the original bitmap, b is the value specified in the right set of boxes, and x is the
resulting effect (between 0 and 255 for RGB, and 0 and 100 for alpha transparency).
You can also change the color of an instance using the ActionScript ColorTransform object. For detailed
information on the Color object, see ColorTransform in ActionScript 2.0 Language Reference or ActionScript 3.0
Language and Components Reference.
Swap one instance for another
To display a different instance on the Stage and preserve all the original instance properties, such as color effects or
button actions, assign a different symbol to an instance.
For example, suppose you’re creating a cartoon with a rat symbol for your character, but decide to change the character
to a cat. You could replace the rat symbol with the cat symbol and have the updated character appear in roughly the
same location in all your frames.
Assign a different symbol to an instance
1 Select the instance on the Stage, and select Window > Properties.
2 Click the Swap button in the Property inspector.
3 Select a symbol to replace the symbol currently assigned to the instance. To duplicate a selected symbol, click
Duplicate Symbol and click OK.
Duplicating lets you base a new symbol on an existing one in the library and minimizes copying if you’re making
several symbols that differ slightly.
Replace all instances of a symbol
❖ Drag a symbol with the same name as the symbol you are replacing from one Library panel into the Library panel
of the FLA file you are editing and click Replace. If you have folders in the library, the new symbol must be dragged
into the same folder as the symbol you are replacing.
Change an instance’s type
To redefine an instance’s behavior in a Flash Professional application, change its type. For example, if a graphic instance
contains animation that you want to play independently of the main Timeline, redefine the graphic instance as a movie
clip instance.
1 Select the instance on the Stage, and select Window > Properties.
2 Select Graphic, Button, or Movie Clip from the menu in the Property inspector.
Set looping for a graphic instance
To determine how animation sequences inside a graphic instance play in your Flash Professional application, set
options in the Property inspector.
Last updated 6/12/2015
375
Multimedia and Video
An animated graphic symbol is tied to the Timeline of the document in which the symbol is placed. In contrast, a movie
clip symbol has its own independent Timeline. Animated graphic symbols, because they use the same Timeline as the
main document, display their animation in document-editing mode. Movie clip symbols appear as static objects on the
Stage and do not appear as animations in the Flash Professional editing environment.
1 Select a graphic instance on the Stage, and select Window > Properties.
2 Select an animation option from the Options menu in the Looping section of the Property inspector:
Loop Loops all the animation sequences contained in the current instance for as many frames as the instance
occupies.
Play Once Plays the animation sequence beginning from the frame you specify to the end of the animation and then
stops.
Single Frame Displays one frame of the animation sequence. Specify which frame to display.
3 To specify the first frame of the graphic symbol to display when looping, enter a frame number in the First text box.
The Single Frame option also uses the frame number you specify here.
Break apart a symbol instance
To break the link between an instance and a symbol and make the instance into a collection of ungrouped shapes and
lines, you break apart the instance. This feature is useful for changing the instance substantially without affecting any
other instance. For example, you must break apart an instance before applying a shape tween to it.
Changes to the source symbol for an instance do not affect an instance after it has been broken apart.
1 Select the instance on the Stage.
2 Select Modify > Break Apart. This action breaks the instance into its component graphic elements.
3 To modify these elements, use the painting and drawing tools.
Get information about instances on the Stage
The Property inspector and Info panel display the following information about instances selected on the Stage:
• In the Property inspector, view the instance’s behavior and settings—for all instance types, color effect settings,
location, and size; for graphics, the loop mode and first frame that contains the graphic; for buttons, the instance
name (if assigned) and tracking option; for movie clips, the instance name (if assigned). For location, the Property
inspector displays the x and y coordinates of the symbol’s registration point.
• In the Info panel, view the instance’s size and location; the location of its registration point; its red (R), green (G),
blue (B), and alpha (A) values (if the instance has a solid fill); and the location of the pointer. The Position and Size
section on the Properties Inspector displays the x and y coordinates of either the symbol’s registration point or
tranformation point. You can toggle to view coordinates of either the registration point or transformation point.
• In the Movie Explorer, view the contents of the current document, including instances and symbols.
View any actions assigned to a button or movie clip in the Actions panel.
Get information about an instance
1 Select the instance on the Stage.
2 Display the Property inspector (Window > Properties) or panel to use:
• To display the Info panel, select Window > Info.
• To display the Movie Explorer, select Window > Movie Explorer.
Last updated 6/12/2015
376
Multimedia and Video
• To display the Actions panel, select Window > Actions.
View the symbol definition for the selected symbol in the Movie Explorer
1 Click the Show Buttons, Movie Clips, and Graphics button at the top of the Movie Explorer.
2 Right-click (Windows) or Control-click (Macintosh), and select Show Symbol Instances and Go To Symbol
Definition; or select these options from the menu in the upper-right corner of the Movie Explorer.
Jump to the scene containing instances of a selected symbol
1 Display the symbol definitions.
2 Right-click (Windows) or Control-click (Macintosh), and select Show Movie Elements and Go To Symbol
Definition; or select these options from the menu in the upper-right corner of the Movie Explorer.
More Help topics
Add classic tween animation to an instance, a group, or text
Creating buttons
Working with symbols
About symbols
A symbol is a graphic, button, or movie clip that you create once in the Flash Professional authoring environment or by
using the SimpleButton (AS 3.0) and MovieClip classes. You can then reuse the symbol throughout your document or
in other documents.
A symbol can include artwork that you import from another application. Any symbol that you create automatically
becomes part of the library for the current document.
An instance is a copy of a symbol located on the Stage or nested inside another symbol. An instance can be different
from its parent symbol in color, size, and function. Editing the symbol updates all of its instances, but applying effects
to an instance of a symbol updates only that instance.
Using symbols in your documents dramatically reduces file size; saving several instances of a symbol requires less
storage space than saving multiple copies of the contents of the symbol. For example, you can reduce the file size of your
documents by converting static graphics, such as background images, into symbols and then reusing them. Using
symbols can also speed SWF file playback, because a symbol needs to be downloaded to Flash® Player only once.
Share symbols among documents as shared library assets during authoring or at runtime. For runtime shared assets,
you can link assets in a source document to any number of destination documents, without importing the assets into
the destination document. For assets shared during authoring, you can update or replace a symbol with any other
symbol available on your local network.
If you import library assets with the same name as assets already in the library, you can resolve naming conflicts without
accidentally overwriting existing assets.
Additional introductory instruction about symbols is available from these resources:
• Adobe TV: Understanding symbols (2:28)
Last updated 6/12/2015
377
Multimedia and Video
• Adobe Video Workshop: Creating and using symbols and instances (CS3) (7:12) (This video focuses on Flash
Professional CS3, but the information is still relevant.)
• Flash Professional Design Center article: Using Flash for the first time – Part 1: Building a banner
Types of symbols
Each symbol has a unique Timeline and Stage, complete with layers. You can add frames, keyframes, and layers to a
symbol Timeline, just as you can to the main Timeline. When you create a symbol you choose the symbol type.
• Use graphic symbols
for static images and to create reusable pieces of animation that are tied to the main
Timeline. Graphic symbols operate in sync with the main Timeline. Interactive controls and sounds won’t work in a
graphic symbol’s animation sequence. Graphic symbols add less to the FLA file size than buttons or movie clips
because they have no timeline.
• Use button symbols
to create interactive buttons that respond to mouse clicks, rollovers, or other actions. You
define the graphics associated with various button states, and then assign actions to a button instance. For more
information, see Handling events in Learning ActionScript 2.0 in Adobe Flash or Handling events in the
ActionScript 3.0 Developer’s Guide.
• Use movie clip symbols
to create reusable pieces of animation. Movie clips have their own multiframe Timeline
that is independent from the main Timeline—think of them as nested inside a main Timeline that can contain
interactive controls, sounds, and even other movie clip instances. You can also place movie clip instances inside the
Timeline of a button symbol to create animated buttons. In addition, movie clips are scriptable with ActionScript®.
• Use font symbols to export a font and use it in other Flash Professional documents.
Flash Professional provides built-in components, movie clips with defined parameters, that you can use to add user
interface elements, such as buttons, checkboxes, or scroll bars, to your documents. For more information, see About
Components in Using ActionScript 2.0 Components, or About ActionScript 3.0 Components in Using ActionScript
3.0 Components.
note: To preview animation in component instances and scaling of 9-slice-scaled movie clips in the Flash Professional
authoring environment, select Control > Enable Live Preview.
Create symbols
You can create a symbol from selected objects on the Stage, create an empty symbol and make or import the content in
symbol-editing mode, and create font symbols in Flash Professional. Symbols can contain all the functionality that
Flash Professional can create, including animation.
Using symbols that contain animation lets you create Flash Professional applications with a lot of movement while
minimizing file size. Consider creating animation in a symbol that has a repetitive or cyclic action—the up-and-down
motion of a bird’s wings, for example.
To add symbols to your document, use shared library assets during authoring or at runtime.
Convert selected elements to a symbol
1 Select an element or several elements on the Stage. Do one of the following:
• Select Modify > Convert To Symbol.
• Drag the selection to the Library panel.
• Right-click (Windows) or Control-click (Macintosh) and select Convert To Symbol from the context menu.
2 In the Convert To Symbol dialog box, type the name of the symbol and select the behavior.
3 Click in the registration grid to position the registration point for the symbol.
Last updated 6/12/2015
378
Multimedia and Video
4 Click OK.
Flash Professional adds the symbol to the library. The selection on the Stage becomes an instance of the symbol.
Once you have created a symbol, you can edit it in symbol edit mode by choosing Edit > Edit Symbols, or you can
edit it in the context of the Stage by choosing Edit > Edit In Place. You can also change the registration point of a
symbol.
Create an empty symbol
1 Do one of the following:
• Select Insert > New Symbol.
• Click the New Symbol button at the lower left of the Library panel.
• Select New Symbol from the Library Panel menu in the upper-right corner of the Library panel.
2 In the Create New Symbol dialog box, type the name of the symbol and select the behavior.
3 Click OK.
Flash Professional adds the symbol to the library and switches to symbol-editing mode. In symbol-editing mode,
the name of the symbol appears above the upper-left corner of the Stage, and a cross hair indicates the symbol’s
registration point.
4 To create the symbol content, use the Timeline, draw with the drawing tools, import media, or create instances of
other symbols.
5 To return to document-editing mode, do one of the following:
• Click the Back button.
• Select Edit > Edit Document.
• Click the scene name in the Edit bar.
When you create a symbol, the registration point is placed at the center of the window in symbol-editing mode.
You can place the symbol contents in the window in relation to the registration point. To change the registration
point, when you edit a symbol, move the symbol contents in relation to the registration point.
6 In the ActionScript Linkage section, you can choose to export for ActionScript by selecting the Export for
ActionScript checkbox. The Class and Base Class are automatically displayed (you can choose to rename the class
names). Flash Pro searches for class definitions in an external AS file or a linked SWC file. If the class definitions are
not found in these locations, Flash Pro automatically generates class files. For more information, see this article.
(Flash Professional CC only) Swapping multiple symbols
The Swap Symbol option allows you to swap symbols with a selected symbol or bitmaps.
1 In Flash Pro CC, select multiple symbols on the stage.
2 On the Properties panel, click SWAP.
3 On the Swap Symbol dialog, select the symbol you want to replace all selected symbols/bitmaps with.
4 Click OK.
Last updated 6/12/2015
379
Multimedia and Video
Convert animation on the Stage into a movie clip symbol
To reuse an animated sequence on the Stage, or to manipulate it as an instance, select it and save it as a movie clip
symbol.
1 On the main Timeline, select every frame in every layer of the animation on the Stage that you want to use. For
information on selecting frames, see Insert frames in the Timeline.
2 Do one of the following to copy the frames:
• Right-click (Windows) or Control-click (Macintosh) any selected frame, and select Copy Frames from the
context menu. To delete the sequence after converting it to a movie clip, select Cut.
• Select Edit > Timeline > Copy Frames. To delete the sequence after converting it to a movie clip, select Cut
Frames.
3 Deselect your selection and make sure nothing on the Stage is selected. Select Insert > New Symbol.
4 Name the symbol. For Type, select Movie Clip, then click OK.
5 On the Timeline, click Frame 1 on Layer 1, and select Edit > Timeline > Paste Frames.
This action pastes the frames (and any layers and layer names) you copied from the main Timeline to the Timeline
of this movie clip symbol. Any animation, buttons, or interactivity from the frames you copied now becomes an
independent animation (a movie clip symbol) that you can reuse.
6 To return to document-editing mode, do one of the following:
• Click the Back button.
• Select Edit > Edit Document.
• Click the scene name in the Edit bar above the Stage.
Duplicate symbols
Duplicating a symbol lets you use an existing symbol as a starting point for creating a symbol.
To create versions of the symbol with different appearances, also use instances.
Duplicate a symbol using the Library panel
❖ Select a symbol in the Library panel and do one of the following:
• Right-click (Windows) or Control-click (Macintosh), and select Duplicate from the context menu.
• Select Duplicate from the Library Panel menu.
Duplicate a symbol by selecting an instance
1 Select an instance of the symbol on the Stage.
2 Select Modify > Symbol > Duplicate Symbol.
The symbol is duplicated, and the instance is replaced with an instance of the duplicate symbol.
Last updated 6/12/2015
380
Multimedia and Video
Edit symbols
When you edit a symbol, Flash Professional updates all the instances of that symbol in your document. Edit the symbol
in the following ways:
• In context with the other objects on the Stage by using the Edit In Place command. Other objects are dimmed to
distinguish them from the symbol you are editing. The name of the symbol you are editing appears in an Edit bar at
the top of the Stage, to the right of the current scene name.
• In a separate window, using the Edit In New Window command. Editing a symbol in a separate window lets you see
the symbol and the main Timeline at the same time. The name of the symbol you are editing appears in the Edit bar
at the top of the Stage.
You edit the symbol by changing the window from the Stage view to a view of only the symbol, using symbol-editing
mode. The name of the symbol you are editing appears in the Edit bar at the top of the Stage, to the right of the
current scene name.
When you edit a symbol, Flash Professional updates all instances of the symbol throughout the document to reflect
your edits. While editing a symbol, use any of the drawing tools, import media, or create instances of other symbols.
• Change the registration point of a symbol (the point identified by the coordinates 0, 0) by using any symbol-editing
method.
Edit a symbol in place
1 Do one of the following:
• Double-click an instance of the symbol on the Stage.
• Select an instance of the symbol on the Stage and right-click (Windows) or Control-click (Macintosh), and select
Edit in Place.
• Select an instance of the symbol on the Stage, and select Edit > Edit In Place.
2 Edit the symbol.
3 To exit edit-in-place mode and return to document-editing mode, do one of the following:
• Click the Back button.
• Select the current scene name from the Scene menu in the Edit bar.
• Select Edit > Edit Document.
• Double-click outside the symbol content.
Edit a symbol in a new window
1 Select an instance of the symbol on the Stage and right-click (Windows) or Control-click (Macintosh), and select
Edit In New Window.
2 Edit the symbol.
3 Click the Close box in the upper-right corner (Windows) or upper-left corner (Macintosh) to close the new window,
and click in the main document window to return to editing the main document.
Edit a symbol in symbol-editing mode
1 Do one of the following to select the symbol:
• Double-click the symbol’s icon in the Library panel.
Last updated 6/12/2015
381
Multimedia and Video
• Select an instance of the symbol on the Stage, and right-click (Windows) or Control-click (Macintosh), and select
Edit from the context menu.
• Select an instance of the symbol on the Stage and select Edit > Edit Symbols.
• Select the symbol in the Library panel and select Edit from the Library Panel menu, or right-click (Windows) or
Control-click (Macintosh) the symbol in the Library panel and select Edit.
2 Edit the symbol.
3 To exit symbol-editing mode and return to editing the document, do one of the following:
• Click the Back button at the left of the Edit bar at the top of the Stage.
• Select Edit > Edit Document.
• Click the scene name in the Edit bar at the top of the Stage.
• Double-click outside the symbol content.
More Help topics
Creating buttons
Sharing library assets at runtime
Work with libraries
Embed fonts for consistent text appearance
Editing instance properties
Sharing library assets at runtime
Embed fonts for consistent text appearance
Working with Adobe Premiere Proand After Effects
Working with Adobe Premiere Pro and Adobe Flash
Adobe Premiere Pro is a professional tool for editing video. If you use Adobe Flash Professional to design interactive
content for websites or mobile devices, you can use Adobe Premiere Pro to edit the movies for those projects. Adobe
Premiere Pro gives you professional tools for frame-accurate video editing, including tools for optimizing video files
for playback on computer screens and mobile devices.
Adobe Flash Professional is a tool for incorporating video footage into presentations for the web and mobile devices.
Adobe Flash offers technological and creative benefits that let you fuse video with data, graphics, sound, and interactive
control. The FLV and F4V formats let you put video on a web page in a format that almost anyone can view.
You can export FLV and F4V files from Adobe Premiere Pro. You can embed those files into interactive websites or
applications for mobile devices with Adobe Flash. Adobe Flash can import sequence markers you add in an Adobe
Premiere Pro sequence as cue points. You can use these cue points to trigger events in SWF files on playback.
If you export video files in other standard formats, Adobe Flash can encode your videos within rich media applications.
Adobe Flash uses the latest compression technologies to deliver the greatest quality possible at small file sizes.
Last updated 6/12/2015
382
Multimedia and Video
Moving assets between Adobe Premiere Pro and Adobe Flash
In Adobe Premiere Pro, you can add Flash cue point markers to a timeline. Flash cue point markers serve as cue points
in a rich media application. There are two types of cue point markers: event and navigational cue point markers. You
can use navigational cue point markers to navigate to different sections of FLV and F4V files, and to trigger the display
of onscreen texts. You can use event cue point markers for triggering action scripts at specified times in FLV and F4V
files.
You can export a movie from Adobe Premiere Pro directly into the FLV and F4V formats. You can choose from
severalExport Settings presets. These presets balance file size against audio and video quality to achieve the bit rate
needed for any target audience or device. If you export the movie with an alpha channel, you can use the movie easily
used as a layer in a rich media project.
You can import the FLV or F4V file into Adobe Flash. Flash reads sequence markers as navigational or event cue points.
In Flash, you can also customize the interface that surrounds your video.
Alternatively, you can use Flash to create animations for use in movies. You can create an animation in Flash. You can
export the animation as an FLV or F4V file. Then, you can import the FLV or F4V file into Adobe Premiere Pro for
editing. In Adobe Premiere Pro, for example, you could add titles or mix the animation with other video sources.
Working with Flash and After Effects
If you use Adobe® Flash® to create video or animation, you can use After Effects to edit and refine the video. For
example, from Flash you can export animations and applications as QuickTime movies or Flash Video (FLV) files. You
can then use After Effects to edit and refine the video.
If you use After Effects to edit and composite video, you can then use Flash to publish that video. You can also export
an After Effects composition as XFL content for further editing in Flash.
Flash and After Effects use separate terms for some concepts that they share in common, including the following:
• A composition in After Effects is like a movie clip in Flash Professional.
• The composition frame in the Composition panel is like the Stage in Flash Professional.
• The Project panel in After Effects is like the Library panel in Flash Professional.
• Project files in After Effects are like FLA files in Flash Professional.
• You render and export a movie from After Effects; you publish a SWF file from Flash Professional.
Additional resources
The following video tutorials provide additional detailed information about using Flash together with After Effects:
• “Importing and exporting XFL files between Flash and After Effects” at www.adobe.com/go/lrvid4098_xp.
• “Exporting an After Effects composition to Flash Professional using SWF, F4V/FLV, and XFL” at
www.adobe.com/go/lrvid4105_xp.
• “Converting metadata and markers to cue points for use in Flash” at www.adobe.com/go/lrvid4111_xp.
• Michael Coleman, product manager for After Effects, provides a video of a presentation from Adobe MAX on
Adobe TV in which he demonstrates the use of mocha for After Effects and Flash together to dynamically replace a
video at run time in Flash Player: http://www.adobe.com/go/learn_aefl_vid15383v1008_en
• Tom Green provides a brief video tutorial on the Layers Magazine website that shows how to use the XFL format to
export an After Effects composition for use in Flash Professional: http://www.layersmagazine.com/exporting-xflfomrat-from-after-effects-to-flash.html
Last updated 6/12/2015
383
Multimedia and Video
The following articles provide additional information about using Flash and After Effects together:
• Richard Harrington and Marcus Geduld provide an excerpt, "Flash Essentials for After EffectsUsers", of their book
After Effects for Flash | Flash for After Effects on the Peachpit website. In this chapter, Richard and Marcus explain
Flash in terms that an After Effects user can understand. http://www.peachpit.com/articles/article.aspx?p=1350895
• Richard Harrington and Marcus Geduld also provide "After Effects Essentials for Flash Users", another excerpt from
their book After Effects for Flash | Flash for After Effects. In this chapter, Richard and Marcus explain After Effects in
terms that a Flash user can understand. http://www.peachpit.com/articles/article.aspx?p=1350894
• Tom Green provides a detailed article titled IntegratingFlash Professional CS4 with After Effects CS4 in the Flash
Developer Center: http://www.adobe.com/go/learn_aefl_integrating_fl_ae_en
• Robert Powers provides a video tutorial on the Slippery Rock NYC website that shows the basics of usingAfter
Effects from the perspective of someone who is familiar withFlash Professional.
Exporting QuickTime video from Flash
If you create animations or applications with Flash, you can export them as QuickTime movies using the File > Export
> Export Movie command in Flash. For a Flash animation, you can optimize the video output for animation. For a Flash
application, Flash renders video of the application as it runs, allowing the user to manipulate it. This lets you capture
the branches or states of your application that you want to include in the video file.
Rendering and exporting FLV and F4V files from After Effects
When you render finished video from After Effects, select FLV or F4V as the output format to render and export video
that can play in Flash Player. You can then import the FLV or F4V file into Flash and publish it in a SWF file, which can
be played by Flash Player.
Importing and publishing video in Flash
When you import an FLV or F4V file into Flash, you can use various techniques, such as scripting or Flash components,
to control the visual interface that surrounds your video. For example, you might include playback controls or other
graphics. You can also add graphic layers on top of the FLV or F4V file for composite results.
Composite graphics, animation, and video
Flash and After Effects each include many capabilities that allow you to perform complex compositing of video and
graphics. Which application you choose to use will depend on your personal preferences and the type of final output
you want to create.
Flash is the more web-oriented of the two applications, with its small final file size. Flash also allows for run-time
control of animation. After Effects is oriented toward video and film production, provides a wide range of visual effects,
and is generally used to create video files as final output.
Both applications can be used to create original graphics and animation. Both use a timeline and offer scripting
capabilities for controlling animation programmatically. After Effects includes a larger set of effects, while the Flash
ActionScript® language is the more robust of the two scripting environments.
Both applications allow you to place graphics on separate layers for compositing. These layers can be turned on and off
as needed. Both also allow you to apply effects to the contents of individual layers.
In Flash, composites do not affect the video content directly; they affect only the appearance of the video during
playback in Flash Player. In contrast, when you composite with imported video in After Effects, the video file you
export actually incorporates the composited graphics and effects.
Because all drawing and painting in After Effects is done on layers separate from any imported video, it is always nondestructive. Flash has both destructive and nondestructive drawing modes.
Last updated 6/12/2015
384
Multimedia and Video
Exporting After Effects content for use in Flash
You can export After Effects content for use in Flash. You can export a SWF file that can be played immediately in Flash
Player or used as part of another rich media project. When you export content from After Effects in SWF format, some
of the content may be flattened and rasterized in the SWF file.
To edit your After Effects content further in Flash, export a composition as an XFL file. An XFL file is a type of Flash
file that stores the same information as a FLA file, but in XML format. When you export a composition from After
Effects as XFL for use in Flash, some of the layers and keyframes that you created in After Effects are preserved in the
Flash version. When you import the XFL file in Flash, it unpacks the XFL file and adds the assets from the file to your
FLA file according to the instructions in the XFL file.
The following video tutorials provide detailed information about exporting XFL files from After Effects:
• Importing and exporting XFL files between Flash and After Effects (Adobe.com)
• Exporting XFL Format from After Effects to Flash (Tom Green, Layers Magazine)
Importing Flash SWF files into After Effects
Flash has a unique set of vector art tools that make it useful for a variety of drawing tasks not possible in After Effects
or Adobe® Illustrator®. You can import SWF files into After Effects to composite them with other video or render them
as video with additional creative effects. Interactive content and scripted animation are not retained. Animation
defined by keyframes is retained.
Each SWF file imported into After Effects is flattened into a single continuously rasterized layer, with its alpha channel
preserved. Continuous rasterization means that graphics stay sharp as they are scaled up. This import method allows
you to use the root layer or object of your SWF files as a smoothly rendered element in After Effects, allowing the best
capabilities of each tool to work together.
More Help topics
Rendering and exporting for Flash Professional and Flash Player
Last updated 6/12/2015
385
Chapter 6: Exporting and Publishing
About exporting from Flash
Export SWF files
The Flash Export commands do not store export settings separately with each file, as does the Publish command. (To
create all the files you need to put Flash Professional content on the web, use the Publish command.)
Export Movie exports a Flash Professional document to a still-image format, creates a numbered image file for every
frame in the document, and exports the sound in a document to a WAV file (Windows only).
1 Open the Flash Professional document to export, or select the frame or image to export in the current document.
2 Select File > Export > Export Movie, or File > Export > Export Image.
3 Enter a name for the output file.
4 Select the file format and click Save. If the format you selected requires more information, an Export dialog box
appears.
5 Set the export options for the format you selected. See About export file formats.
6 Click OK, and then click Save.
About export file formats
Remember the following:
• If the format you selected requires more information, an Export dialog box appears.
• When you save a Flash Professional image as a bitmap GIF, JPEG, PICT (Macintosh), or BMP (Windows) file, the
image loses its vector information and is saved with pixel information only. You can edit images exported as bitmaps
in image editors such as Adobe® Photoshop®, but you can no longer edit them in vector-based drawing programs.
• When you export a Flash Professional file in the SWF format, text is encoded as Unicode, providing support for
international character sets, including double-byte fonts. Flash Professional Player 6 and later versions support
Unicode encoding.
Flash Professional content is exported as sequences and images are exported as individual files. PNG is the only crossplatform bitmap format that supports transparency (as an alpha channel). Some non-bitmap export formats do not
support alpha (transparency) effects or mask layers.
The following table lists the formats that you can export Flash Professional content and images to:
Last updated 6/12/2015
386
Exporting and Publishing
File type
Extension
Windows
Macintosh
Animated GIF, GIF Sequence, and
GIF Image
.gif
•
•
Bitmap (BMP) Sequence and
Bitmap Image
.bmp
•
Flash document (SWF)
.swf
•
•
JPEG Sequence and JPEG Image
.jpg
•
•
PICT Sequence and PICT Image
(Macintosh)
.pct
PNG Sequence and PNG Image
.png
•
•
Export QuickTime
.mov
•
•
WAV audio (Windows)
.wav
•
Windows AVI (Windows)
.avi
•
•
Update SWF files for Dreamweaver
To add the content to your page, export SWF files directly to an Adobe® Dreamweaver® site. Dreamweaver generates all
the needed HTML code. You can start Flash Professional from Dreamweaver to update the content. In Dreamweaver,
you can update the Flash Professional document (FLA file) and re-export the updated content automatically.
For more information on working with Dreamweaver, see Using Dreamweaver in Dreamweaver Help.
1 In Dreamweaver, open the HTML page that contains the Flash Professional content.
2 Do one of the following:
• Select the Flash Professional content within the HTML page, and click Edit.
• In Design view, press Control (Windows) or Command (Macintosh), and double-click the Flash Professional
content.
• In Design view, right-click (Windows) or Control-click (Macintosh) the Flash Professional content, and select
Edit with Flash.
• In Design view, in the Site panel, right-click (Windows) or Control-click (Macintosh) the Flash Professional
content, and select Open with Flash.
3 If the FLA file for the exported file does not open, the Open File dialog box appears. Navigate to the FLA file, and
click Open.
4 If the user used the Change Link Sitewide feature in Dreamweaver, a warning appears. To apply link changes to the
SWF file, click OK. To prevent the warning message from appearing when you update the SWF file, click Don’t Warn
Me Again.
5 Update the FLA file as needed in Flash Professional.
6 To save the FLA file and reexport it to Dreamweaver, do one of the following:
• To update the file and close Flash Professional, click the Done button above the upper-left corner of the Stage.
• To update the file and keep Flash Professional open, select File > Update for Dreamweaver.
Last updated 6/12/2015
387
Exporting and Publishing
More Help topics
Publishing Flash documents
Publishing Flash documents
Publishing overview
You can play content in the following ways:
• In Internet browsers that are equipped with Flash Player
• As a stand-alone application called a projector
• With the Flash ActiveX control in Microsoft Office and other ActiveX hosts
• With Flash Xtra in Director® and Authorware® from Adobe®
By default, the Publish command creates a Flash Pro SWF file and an HTML document that inserts your Flash Pro
content in a browser window. The Publish command also creates and copies detection files for Macromedia Flash 4
from Adobe and later. If you change publish settings, Flash Pro saves the changes with the document. After you create
a publish profile, export it to use in other documents or for others working on the same project to use.
When you use the Publish, Test Movie, or Debug Movie commands, Flash creates a SWF file from your FLA file. You
can view the sizes of all the SWF files created from the current FLA file in the Document Property inspector.
Flash® Player 6 and later support Unicode text encoding. With Unicode support, users can view multilanguage text,
regardless of the language that the operating system running the player uses.
You can publish the FLA file in alternative file formats—GIF, JPEG, and PNG —with the HTML needed to display them
in the browser window. Alternative formats allow a browser to show your SWF file animation and interactivity for users
who don’t have the targeted Adobe Flash Player installed. When you publish a Flash Pro document (FLA file) in
alternative file formats, the settings for each file format are stored with the FLA file.
You can export the FLA file in several formats, similar to publishing FLA files in alternative file formats, except that the
settings for each file format are not stored with the FLA file.
Alternatively, create a custom HTML document with any HTML editor and include the tags required to display a SWF
file.
To test how the SWF file works before you publish your SWF file, use Test Movie (Control > Test Movie > Test) and
Test Scene (Control > Test Scene).
Note: In Flash Professional CS5, when you set the Flash Player target to Flash Player 10 in the Publish Settings, the target
is actually Flash Player 10.1.
HTML documents
You need an HTML document to play a SWF file in a web browser and specify browser settings. To display a SWF file
in a web browser, an HTML document must use the object and embed tags with the proper parameters.
Last updated 6/12/2015
388
Exporting and Publishing
Note: You can generate an HTML document using the correct object and embed tags using the Publish Settings dialog box,
and selecting the HTML option. For more information, see Specify publish settings for HTML documents .
Flash Pro can create the HTML document automatically when you publish a SWF file.
Detecting whether Flash Player is present
In order for your published Flash Pro content to be seen by Web users, Flash Player must be installed in their Web
browser.
The following resources and articles provide up-to-date information about how to add code to your web pages to
determine if Flash Player is installed and provide alternative content in the page if it is not.
• Flash Player Help
• Flash Player Detection Kit
• Adobe Flash Player version checking protocol
• Future-Proofing Flash Player Detection Scripts
Publishing for mobile devices
Adobe® AIR® for Android® and iOS® lets Flash Pro users create engaging content for mobile devices using the
ActionScript® scripting language, drawing tools, and templates. For detailed information on authoring for mobile
devices, see the AIR Developer Reference and the Content Development Kits in the Mobile and Devices Development
Center.
Note: Depending on the mobile device for which you are developing, certain restrictions can apply as to which ActionScript
commands and sound formats are supported. For more details, see Mobile Articles on the Mobile and Devices Development
Center.
Testing mobile content with the Mobile Content Simulator
Flash Pro also includes a Mobile Content Simulator, a way to test content created with Adobe AIR in an emulated
Android or iOS environment. With the Mobile Content Simulator, you can use the Control > Test Movie command to
test your Flash file in the AIR Debug Launcher for Mobile, which in turn launches the simulator.
Once the simulator window is opened, you can send input to the Flash file as if it were running on a mobile device. The
inputs available include:
• Accelerometer, X, Y, and Z axes
• Orientation threshold angle
• Touch and gestures, including pressure sensitivity
• Geolocation, direction, and velocity
• Hardware keys (found on Android devices)
Publishing secure Flash documents
Flash Player 8 and later contain the following features that help you ensure the security of your Flash Pro documents:
Buffer overrun protection
Last updated 6/12/2015
389
Exporting and Publishing
Enabled automatically, this feature prevents the intentional misuse of external files in a Flash Pro document to
overwrite a user’s memory or insert destructive code such as a virus. This prevents a document from reading or writing
data outside the document’s designated memory space on a user’s system.
Exact domain matching for sharing data between Flash documents
Flash Player 7 and later enforce a stricter security model than earlier versions. The security model changed in two
primary ways between Flash Player 6 and Flash Player 7:
Exact domain matching Flash Player 6 lets SWF files from similar domains (for example, www.adobe.com and
store.adobe.com) communicate freely with each other and with other documents. In Flash Player 7, the domain of the
data to be accessed must match the data provider’s domain exactly for the domains to communicate.
HTTPS/HTTP restriction A SWF file that loads by using nonsecure (non-HTTPS) protocols cannot access content
loaded by using a secure (HTTPS) protocol, even when both protocols are in exactly the same domain.
For more information about ensuring that content performs as expected with the new security model, see
Understanding security in Learning ActionScript 2.0 in Adobe Flash.
Local and network playback security
Flash Player 8 and later include a security model that lets you determine the local and network playback security for
SWF files that you publish. By default, SWF files are granted read access to local files and networks. However, a SWF
file with local access cannot communicate with the network, and the SWF file cannot send files or information to any
networks.
Allow SWF files to access network resources, letting the SWF file send and receive data. If you grant the SWF file access
to network resources, local access is disabled, protecting information on the local computer from potentially being
uploaded to the network.
To select the local or network playback security model for your published SWF files, use the Publish Settings dialog box.
Flash Player
Flash Player plays Flash Pro content in the same way as it appears in a web browser or an ActiveX host application. Flash
Pro Player is installed with the Flash Pro application. When you double-click Flash Pro content, the operating system
starts Flash Player, which then plays the SWF file. Use the player to make Flash Pro content viewable for users who
aren’t using a web browser or an ActiveX host application.
To control Flash Pro content in Flash Player, use menu commands and the fscommand() function. For more
information, see Sending messages to and from Flash Player in Learning ActionScript 2.0 in Adobe Flash.
Use the Flash Player context menu to print Flash Pro content frames.
❖ Do one of the following:
• To open a new or existing file, select File > New, or Open.
• To change your view of the application, select View > Magnification and make a selection.
• To control Flash Pro content playback, select Control > Play, Rewind, or Loop Playback.
Update or Reinstall Flash Player
If you are having trouble with your Flash Player installation, you can update or reinstall it. You can go to the Flash Player
download page directly from Flash Pro by choosing Help > Get Latest Flash Player.
Last updated 6/12/2015
390
Exporting and Publishing
If you prefer to uninstall Flash Player first, follow these steps:
1 Close your browser.
2 Remove any currently installed version of the player.
For instructions, see TechNote 14157 on the Adobe® Flash® Support Center at www.adobe.com/go/tn_14157.
3 To begin the installation, visit http://www.adobe.com/go/getflashplayer.
Follow the on-screen instructions to install the player.
You can also run one of the following installers in your Players folder. However, the installer on the Adobe website
is usually more up to date than those in the Players folder.
• For the ActiveX control for Windows® (Internet Explorer or AOL), run the Install Flash Player 9 AX.exe file.
• For the plug-in for Windows (Firefox, Mozilla, Netscape, Safari, or Opera), run the Install Flash Player 9.exe file.
• For the plug-in for Macintosh® (AOL, Firefox, Internet Explorer for Macintosh, Netscape, Opera, or Safari), run
Install Flash Player 10 (Mac OS 9.x) or Install Flash Player 10 OS X (Mac OS X.x).
Note: To verify the installation visit http://www.adobe.com/shockwave/welcome/ from within your web browser.
Configure a server for Flash Player
For users to view your Flash Pro content on the web, the web server must be properly configured to recognize SWF files.
Configuring a server establishes the appropriate Multipart Internet Mail Extension (MIME) types so that the server can
identify files with the .swf extension as Flash Pro files.
A browser that receives the correct MIME type can load the appropriate plug-in, control, or helper application to
process and properly display the incoming data. If the MIME type is missing or not properly delivered by the server,
the browser might display an error message or a blank window with a puzzle-piece icon.
• If your site is established through an Internet service provider (ISP), ask the ISP to add this MIME type to the server:
application/x-shockwave-flash with the .swf extension.
• If you are administering your own server, see your web server documentation for instructions on adding or
configuring MIME types.
• Corporate and enterprise system administrators can configure Flash Pro to restrict Flash Player access to resources
in the local file system. Create a security configuration file that limits Flash Player functionality on the local system.
The security configuration file is a text file placed in the same folder as the Flash Player installer. The Flash Player
installer reads the configuration file during installation and follows its security directives. Flash Player uses the System
object to expose the configuration file to ActionScript.
With the configuration file, disable Flash Player access to the camera or microphone, limit the amount of local storage
Flash Player can use, control the auto-update feature, and block Flash Player from reading anything from the user’s local
hard disk.
For more information about security, see System in ActionScript 2.0 Language Reference.
Adding MIME Types
When a web server accesses files, the server must properly identify the files as Flash Pro content to display them. If the
MIME type is missing or not properly delivered by the server, the browser can show error messages or a blank window
with a puzzle-piece icon.
Last updated 6/12/2015
391
Exporting and Publishing
If your server is not properly configured, you (or your server’s administrator) must add the SWF file MIME types to
the server’s configuration files and associate the following MIME types with the SWF file extensions:
• MIME type application/x-shockwave-flash has the .swf file extension.
• MIME type application/futuresplash has the .spl file extension.
If you are administering a server, consult your server software documentation for instructions on adding or configuring
MIME types. If you are not administering a server, contact your Internet service provider, web master, or server
administrator to add the MIME type information.
If your site is on a Mac OS server, you must also set the following parameters: Action: Binary; Type: SWFL; and Creator:
SWF2.
Search engine optimization for Flash content
In mid-2008, Adobe announced a significant advance in Flash Player technology that allows the text content inside
SWF files to be indexed by search engines such as Google and Yahoo!. There are a variety of strategies you can employ
to optimize the visibility of your SWF content to search engines. These practices as a whole are referred to as search
engine optimization (SEO).
Adobe has added a SEO Technology Center to the Developer Connection section of Adobe.com. The SEO Technology
Center contains the following articles that detail some of the techniques you can use to increase the visibility of your
SWF files to internet searches:
• Search optimization techniques for RIAs
• Search optimization checklist for RIAs
About Omniture and Flash
Flash content can be integrated with Omniture SiteCatalyst and Omniture Test&Target. SiteCatalyst helps marketers
quickly identify the most profitable paths through their website, determine where visitors are navigating away from
their site, and identify critical success metrics for online marketing campaigns. Test&Target gives marketers the
capability to continually make their online content more relevant to their customers. Test&Target provides an interface
for designing and executing tests, creating audience segments and targeting content.
Omniture customers can use SiteCatalyst and Test&Target with Flash by downloading and installing the Omniture
Extension pack.
• To download the Omniture extensions and access instructions for using them, choose Help > Omniture.
More Help topics
Using publish profiles
Publish settings
Creating multilanguage text
Specify publish settings for SWF files
Exporting Sounds
Last updated 6/12/2015
392
Exporting and Publishing
About compressing sounds for export
You can select compression options for individual event sounds and export the sounds with those settings. You can also
select compression options for individual stream sounds. However, all stream sounds in a document are exported as a
single stream file, using the highest setting of all those applied to individual stream sounds. This includes stream sounds
in video objects.
If you select global compression settings for event sounds or stream sounds in the Publish Settings dialog box, these
settings are applied to individual event sounds or all stream sounds if you do not select compression settings for the
sounds in the Sound Properties dialog box.
You can also override export settings specified in the Sound Properties dialog box by selecting Override Sound Settings
in the Publish Settings dialog box. This option is useful if you want to create a larger high-fidelity audio file for local
use and a smaller low-fidelity version for the web.
The sampling rate and degree of compression make a significant difference in the quality and size of sounds in exported
SWF files. The more you compress a sound and the lower the sampling rate, the smaller the size and the lower the
quality. You should experiment to find the optimal balance between sound quality and file size.
When working with imported mp3 files, you can export the files in mp3 format using the same settings that the files
had when imported.
Note: In Windows, you can also export all the sounds from a document as a WAV file using File > Export > Export Movie.
Compress a sound for export
1 Do one of the following:
• Double-click the sound’s icon in the Library panel.
• Right-click (Windows) or Control-click (Macintosh) a sound file in the Library panel and select Properties from
the context menu.
• Select a sound in the Library panel and select Properties from the Panel menu in the upper-right corner of the
panel.
• Select a sound in the Library panel and click the Properties button at the bottom of the Library panel.
2 If the sound file has been edited externally, click Update.
3 For Compression, select Default, ADPCM, mp3, Raw, or Speech.
The Default compression option uses the global compression settings in the Publish Settings dialog box when you
export your SWF file. If you select Default, no additional export settings are available.
4 Set export settings.
5 Click Test to play the sound once. Click Stop if you want to stop testing the sound before it finishes playing.
6 Adjust export settings if necessary until the desired sound quality is achieved, and then click OK.
ADPCM and Raw compression options
ADPCM compression sets compression for 8- or 16-bit sound data. Use the ADPCM setting when you export short
event sounds such as button clicks.
Raw compression exports sounds with no sound compression.
Preprocessing Converts mixed stereo sounds to monaural (mono) when you select Convert Stereo To Mono (mono
sounds are unaffected by this option).
Last updated 6/12/2015
393
Exporting and Publishing
Sample Rate Controls sound fidelity and file size. Lower rates decrease file size but can also degrade sound quality. Rate
options are as follows:
note: Flash Professional cannot increase the kHz rate of an imported sound above the rate at which it was imported.
5 kHz Barely acceptable for speech.
11 kHz The lowest recommended quality for a short segment of music and one-quarter the standard CD rate.
22 kHz A popular choice for web playback and half the standard CD rate.
44 kHz The standard CD audio rate.
ADPCM Bits (ADPCM only) Specifies the bit depth of the sound compression. Higher bit depths produce higher
quality sound.
mp3 compression options
MP3 Compression Lets you export sounds with mp3 compression. Use mp3 when you are exporting longer stream
sounds such as music sound tracks.
If you are exporting a file that was imported in mp3 format, you can export the file using the same settings the file had
when it was imported.
Use Imported mp3 Quality Default setting. Deselect to select other mp3 compression settings. Select to export an
imported mp3 file with the same settings the file had when it was imported.
Bit Rate Determines the bits per second in the exported sound file. Flash Professional supports 8 through 160 Kbps
CBR (constant bit rate). When you export music, set the bit rate to 16 Kbps or higher for best results.
Preprocessing Converts mixed stereo sounds to monaural (mono sounds are unaffected by this option).
note: The Preprocessing option is available only if you select a bit rate of 20 Kbps or higher.
Quality Determines the compression speed and sound quality:
Fast Yields faster compression but lower sound quality.
Medium Yields somewhat slower compression but higher sound quality.
Best Yields the slowest compression and the highest sound quality.
Speech compression option
Speech compression exports sounds using a compression that is adapted to speech.note: Flash Lite 1.0 and Flash Lite
1.1 do not support the Speech compression option. For content targeting those player versions, use mp3, ADPCM, or Raw
compression.
Sample rate Controls sound fidelity and file size. A lower rate decreases file size but can also degrade sound quality.
Select from the following options:
5 kHz Acceptable for speech.
11 kHz Recommended for speech.
22 kHz Acceptable for most types of music on the web.
44 kHz The standard CD audio rate. However, because compression is applied, the sound is not CD quality in the SWF
file.
Last updated 6/12/2015
394
Exporting and Publishing
Guidelines for exporting sound in Flash documents
Besides sampling rate and compression, there are several ways to use sound efficiently in a document and keep file size
small:
• Set the in and out points to prevent silent areas from being stored in the Flash Professional file and to reduce the size
of the sound data in the file.
• Get more out of the same sounds by applying different effects for sounds (such as volume envelopes, looping, and
in/out points) at different keyframes. You can get a number of sound effects by using only one sound file.
• Loop short sounds for background music.
• Do not set streaming sound to loop.
• When exporting audio in embedded video clips, remember that the audio is exported using the global streaming
settings selected in the Publish Settings dialog box.
• Use stream synchronization to keep the animation synchronized to your sound track when you preview your
animation in the editor. If your computer is not fast enough to draw the animation frames so that they keep up with
your sound track, Flash Professional skips frames.
• When exporting QuickTime movies, use as many sounds and channels as you want without worrying about file size.
The sounds are combined into a single sound track when you export as a QuickTime file. The number of sounds
you use has no effect on the final file size.
More Help topics
Publishing overview
Specify publish settings for SWF files
About exporting from Flash
Export QuickTime video files
Using Flash Professional, you can create QuickTime® movies (MOV files) that can be played back by users who have
the QuickTime plug-in installed on their computers. This is often done when people use Flash Professional to create
title sequences or animation for use as video content. The published QuickTime file can be distributed as a DVD, or
incorporated into other applications such as Adobe® Director® or Adobe® Premiere® Pro.
If you are creating a QuickTime video using Flash Professional, set your publish setting to Flash Professional 3, 4, or 5.
Note: The QuickTime Player does not support Flash Player files later than version 5.
Tutorials and videos
• Video: Length = 17:24. Flash QuickTime Exporting. Learn how to export ActionScript-based animations to Flash
and then composite in After Effects.
More Help topics
About QuickTime
Export QuickTime
Last updated 6/12/2015
395
Exporting and Publishing
Best practices - Tips for creating content for mobile
devices
Creating Flash content for use on mobile devices
To create Flash content for mobile devices, follow some basic principles. For example, Flash developers often avoid
extremely complex artwork and excessive tweening or transparency.
Flash Lite developers face additional challenges because performance on mobile devices varies greatly. If content must
be published to many different devices, developers sometimes have to author for the lowest common denominator.
Optimizing mobile content requires making trade-offs. For example, one technique may make the content look better,
while another results in better performance. As you evaluate these trade-offs, you will be going back and forth
repeatedly between testing in the emulator and testing on the target device. You must see your content on the actual
device to evaluate the trueness of colors, text readability, physical interactions, UI responsiveness, and other aspects of
the real mobile experience.
For more tips and techniques for creating content for mobile phones and devices, see
www.adobe.com/go/learn_cs_mobilewiki_en.
Flash Lite guidelines for animation in mobile devices
When creating animated content for a mobile devices, keep device CPU limitations in mind. Following these guidelines
can help preventFlash Lite content from running slowly:
• When creating a new Flash Lite file, check that the document is set up correctly. Although Flash files scale smoothly,
performance can suffer if the file is not running at its native Stage size and has to scale in the player. Try to set the
document Stage size to match the resolution of the target device. Also set the Flash Player to the correct version of
Flash Lite.
• Flash Lite can render vector graphics at low, medium, and high quality. The higher the rendering quality, the more
smoothly and accurately Flash Lite renders vector graphics and the greater the demand on the device’s CPU. To
provide complex animation, experiment with changing the player’s quality setting and then thoroughly test the SWF
file. To control the rendering quality of a SWF file, use the _quality property or the SetQuality command. Valid
values for the _quality property are LOW, MEDIUM, and HIGH.
• Limit the number of simultaneous tweens. Reduce the number of tweens, or sequence the animation so that one
begins when another ends.
• Use transparency (alpha) effects on symbols sparingly because they are CPU intensive. In particular, avoid tweening
symbols with alpha levels that are not fully opaque (less than 100%).
• Avoid CPU-intensive visual effects, such as large masks, extensive motion, alpha blending, extensive gradients, and
complex vectors.
• Experiment with combinations of tweens, keyframe animations, and ActionScript-driven movement to produce the
most efficient results.
• Rendering vector ovals and circles is much more memory intensive than rendering quadrangles. Using round and
oval strokes also greatly increases CPU use.
• Test animations frequently on actual target devices.
Last updated 6/12/2015
396
Exporting and Publishing
• When Flash draws an animated region, it defines a rectangular bounding box around the area. Optimize the
drawing by making that rectangle as small as possible. Avoid overlapping tweens, because Flash interprets the
merged area as a single rectangle, resulting in a larger total region. Use Flash's Show Redraw Region feature to
optimize the animation.
• Avoid using _alpha = 0 and _visible = false to hide on-screen movie clips. If you simply turn a movie clip’s visibility
off or change its alpha to zero, it is still included in line-rendering calculations, which can affect performance.
• Similarly, do not try to hide a movie clip by obscuring it behind another piece of artwork. It will still be included in
the player’s calculations. Instead, move movie clips completely off the Stage or remove them by calling
removeMovieClip.
For more tips and techniques for creating content for mobile phones and devices, see
www.adobe.com/go/learn_cs_mobilewiki_en.
Flash Lite bitmap and vector graphics in mobile devices
Flash Lite can render both vector and bitmap graphics. Each type of graphic has its advantages and disadvantages. The
decision to use vector rather than bitmap graphics is not always clear and often depends on several factors.
Vector graphics are compactly represented in SWF files as mathematical equations and rendered at run time by the
Flash Lite player. In contrast, bitmap graphics are represented as arrays of picture elements (pixels), which require more
bytes of data. Therefore, using vector graphics in a file can help reduce file size and memory usage.
Vector graphics also maintain their smooth shapes when scaled in size. Bitmap images can appear boxy, or pixelated,
when scaled.
Compared to bitmaps, vector graphics require more processing power to render, especially vector graphics that have
many complex shapes and fills. Consequently, heavy use of vector shapes can sometimes reduce overall file
performance. Because bitmap graphics do not require as much processing time to render as vector graphics, they are
better choice for some files, for example, a complex road map meant to be animated and scrolled on a mobile phone.
Keep these considerations in mind:
• Avoid using outlines on vector shapes. Outlines have an inner and outer edge (fills have only one) and are twice the
work to render.
• Corners are simpler to render than curves. When possible, use flat edges, especially with very small vector shapes.
• Optimization is especially helpful with small vector shapes such as icons. Complex icons may lose their details upon
rendering, and the work of rendering the details is wasted.
• As a general rule, use bitmaps for small, complex images (such as icons) and vector graphics for larger and simpler
ones.
• Import bitmap graphics at the correct size; don’t import large graphics and scale them down in Flash, because this
wastes file size and run-time memory.
• The Flash Lite player does not support bitmap smoothing. If a bitmap is scaled or rotated, it will have a chunky
appearance. If it is necessary to scale or rotate a graphic, consider using a vector graphic instead.
• Text is essentially just a very complex vector shape. Of course, text is often critical, so it can rarely be avoided entirely.
When text is needed, avoid animating it or placing it over an animation. Consider using text as a bitmap. For
multiline dynamic and input text, the line break of the text string is not cached. Flash breaks lines at run time and
recalculates the breaks every time the text field needs to be redrawn. Static text fields are not problematic, because
the line breaking is precalculated at compile time. For dynamic content, using dynamic text fields is unavoidable,
but when possible, consider using static text fields instead.
Last updated 6/12/2015
397
Exporting and Publishing
• Minimize the use of transparency in PNG files; Flash must calculate redraws even for the transparent portions of
the bitmap. For example, with a transparent PNG file that represents a foreground element, don't export the
transparent PNG at the full size of the screen. Instead, export it at the actual size of the foreground element.
• Try to group bitmap layers together and vector layers together. Flash needs to implement different renderers for
bitmap and vector content, and switching between renderers takes time.
For more tips and techniques for creating content for mobile phones and devices, see
www.adobe.com/go/learn_cs_mobilewiki_en.
Set compression of Flash Lite bitmaps for mobile devices
When using bitmaps, you can set image-compression options (on a per-image basis or globally for all bitmap images)
that reduce SWF file size.
Set compression options for an individual bitmap file
1 Start Flash and create a document.
2 Select a bitmap in the Library window.
3 Right-click (Windows) or Control-click (Macintosh) the bitmap icon in the Library window, and select Properties
from the context menu to open the Bitmap Properties dialog box.
4 In the Compression pop-up menu, select one of the following options:
• Select the Photo (JPEG) option for images with complex color or tonal variations, such as photographs or images
with gradient fills. This option produces a JPEG file. Select the Use Imported JPEG Data check box to use the
default compression quality specified for the imported image. To specify a new quality compression setting,
deselect Use Imported JPEG Data and enter a value between 1 and 100 in the Quality text box. A higher setting
produces an image of higher image, but also a larger file, so adjust the value accordingly.
• Select the Lossless (PNG/GIF) option for images with simple shapes and a few colors. This option compresses
the image using lossless compression, which discards no data.
5 Click Test to determine the results of the file compression.
Compare the original file size to the compressed file size to decide whether the selected compression setting is
acceptable.
Set compression for all bitmap images
1 Select File > Publish Settings, and then click the Flash tab to display compression options.
2 Adjust the JPEG quality slider, or enter a value. A higher JPEG quality value produces an image of higher image
quality but a larger SWF file. A lower image quality produces a smaller SWF file. Try different settings to determine
the best trade-off between size and quality.
Optimizing Flash Lite frames for mobile devices
• Most devices that support Flash Liteplay back content at about 15 to 20 frames per second (fps). The frame rate can
be as low as 6 fps. During development, set the document frame rate to approximate the playback speed of the target
device. This shows how the content will run on a device with limited performance. Before publishing a final SWF
file, set the document frame rate to at least 20 fps or higher to avoid limiting performance in case the device supports
a higher frame rate.
Last updated 6/12/2015
398
Exporting and Publishing
• When using gotoAndPlay, remember that every frame between the current frame and the requested frame needs to
be initialized before Flash plays the requested frame. If many of these frames contain different content, it could be
more efficient to use different movie clips rather than using the Timeline.
• Although preloading all content by putting it at the beginning of the file makes sense on the desktop, preloading on
a mobile device can delay file startup. Space content throughout the file so that movie clips are initialized as they are
used.
For more tips and techniques for creating content for mobile phones and devices, see
www.adobe.com/go/learn_cs_mobilewiki_en.
Optimizing ActionScript for Flash Lite content on mobile devices
Because of the processing speed and memory limitations on most mobile devices, follow these guidelines when
developing ActionScript for Flash Lite content used on mobile devices:
• Keep the file and its code as simple as possible. Remove unused movie clips, delete unnecessary frame and code
loops, and avoid too many frames or extraneous frames.
• Using FOR loops can be expensive because of the overhead incurred while the condition is checked with each
iteration. When the costs of the iteration and the loop overhead are comparable, execute multiple operations
individually instead of using a loop. The code may be longer, but performance will improve.
• Stop frame-based looping as soon as it is no longer needed.
• When possible, avoid string and array processing because it can be CPU-intensive.
• Always try to access properties directly rather than using ActionScript getter and setter methods, which have more
overhead than other method calls.
• Manage events wisely. Keep event listener arrays compact by using conditions to check whether a listener exists (is
not null) before calling it. Clear any active intervals by calling clearInterval, and remove any active listeners by
calling removeListener before removing content using unloadapplication or removeapplicationClip. Flash does not
re-collect SWF data memory (for example, from intervals and listeners) if any ActionScript functions are still
referring to the SWF data when a movie clip is unloaded.
• When variables are no longer needed, delete them or set them to null, which marks them for garbage collection.
Deleting variables helps optimize memory use during run time, because unneeded assets are removed from the SWF
file. It is better to delete variables than to set them to null.
• Explicitly remove listeners from objects by calling removeListener before garbage collection.
• If a function is being called dynamically and passing a fixed set of parameters, use call instead of apply.
• Make namespaces (such as paths) more compact to reduce startup time. Every level in the package is compiled to
an IF statement and causes a new Object call, so having fewer levels in the path saves time. For example, a path with
the levels com.xxx.yyy.aaa.bbb.ccc.funtionName causes an object to be instantiated for com.xxx.yyy.aaa.bbb.ccc.
Some Flash developers use preprocessor software to reduce the path to a unique identifier, such as
58923409876.functionName, before compiling the SWF code.
• If a file consists of multiple SWF files that use the same ActionScript classes, exclude those classes from select SWF
files during compilation. This can help reduce file download time and run-time memory requirements.
• Avoid using Object.watch and Object.unwatch, because every change to an object property requires the player to
determine whether a change notification must be sent.
• If ActionScript code that executes on a keyframe in the timeline requires more than 1 second to complete, consider
splitting up that code to execute over multiple keyframes.
Last updated 6/12/2015
399
Exporting and Publishing
• Remove trace statements from the code when publishing the SWF file. To do this, select the Omit Trace Actions
check box on the Flash tab in the Publish Settings dialog box.
• Inheritance increases the number of method calls and uses more memory: a class that includes all the functionality
it needs is more efficient at run time than a class that inherits some of its functionality from a superclass. Therefore,
you may need to make a design trade-off between extensibility of classes and efficiency of code.
• When one SWF file loads another SWF file that contains a custom ActionScript class (for example,
foo.bar.CustomClass) and then unloads the SWF file, the class definition remains in memory. To save memory,
explicitly delete any custom classes in unloaded SWF files. Use the delete statement and specify the fully qualified
class name, such as: delete foo.bar.CustomClass.
• Limit the use of global variables, because they are not marked for garbage collection if the movie clip that defined
them is removed.
• Avoid using the standard user interface components (available in the Components panel in Flash). These
components are designed to run on desktop computers and are not optimized to run on mobile devices.
• Whenever possible, avoid deeply nested functions.
• Avoid referencing nonexistent variables, objects, or functions. Compared to the desktop version of Flash Player,
Flash Lite 2 looks up references to nonexistent variables slowly, which can significantly affect performance.
• Avoid defining functions using anonymous syntax. For example, myObj.eventName = function{ ...}. Explicitly
defined functions are more efficient, such as function myFunc { ...}; my Obj.eventName = myFunc;.
• Minimize the use of Math functions and floating-point numbers. Calculating these values slows performance. If you
must use the Math routines, consider precalculating the values and storing them in an array of variables. Retrieving
the values from a data table is much faster than having Flash calculate them at run time.
For more tips and techniques for creating content for mobile phones and devices, see
www.adobe.com/go/learn_cs_mobilewiki_en.
Managing Flash Lite file memory for mobile devices
Flash Lite regularly clears from memory any objects and variables that a file no longer references. This is known as
garbage collection. Flash Lite runs its garbage-collection process once every 60 seconds, or whenever usage of file
memory increases suddenly by 20% or more.
Although you cannot control how and when Flash Lite performs garbage collection, you can still free unneeded
memory deliberately. For timeline or global variables, use the delete statement to free the memory that ActionScript
objects use. For local variables—for example, a variable defined within a function definition—you can’t use the delete
statement to free an object’s memory, but you can set to null the variable that references the object. This frees the
memory that the object uses, provided there are no other references to that object.
The following two code examples show how to free memory that objects use by deleting the variable that references
those objects. The examples are identical, except that the first example creates a timeline variable and the second creates
a global variable.
Last updated 6/12/2015
400
Exporting and Publishing
// First case: variable attached to a movie or
// movie clip timeline
//
// Create the Date object.
var mcDateObject = new Date();
// Returns the current date as a string.
trace(mcDateObject);
// Delete the object.
delete mcDateObject;
// Returns undefined.
trace(mcDateObject);
//
// Second case: global variable attached to a movie or
// movie clip timeline
//
// Create the Date object.
_global.gDateObject = new Date();
// Returns the current date as a string.
trace(_global.gDateObject);
// Delete the object.
delete _global.gDateObject;
// Returns undefined.
trace(_global.gDateObject);
As mentioned previously, you can’t use the delete statement to free memory that a local function variable uses. Instead,
set the variable reference to null, which has the same effect as using delete.
function func()
{
// Create the Date object.
var funcDateObject = new Date();
// Returns the current date as a string.
trace(funcDateObject);
// Delete has no effect.
delete funcDateObject;
// Still returns the current date.
trace(funcDateObject);
// Set the object reference to null.
funcDateObject = null;
// Returns null.
trace(funcDateObject);
}
// Call func() function.
func();
For more tips and techniques for creating content for mobile phones and devices, see
www.adobe.com/go/learn_cs_mobilewiki_en.
Loading data for mobile devices in Flash Lite
When developing files for mobile devices, minimize the amount of data you attempt to load at one time. If you are
loading external data into a Flash Lite file (for example, using XML.load), the device’s operating system may generate
a “memory failure” error if insufficient memory is allocated for the incoming data. This situation can occur even if the
total amount of remaining memory is sufficient.
Last updated 6/12/2015
401
Exporting and Publishing
For example, suppose a file attempts to load an XML file that’s 100 KB, but the device’s operating system has allocated
only 30 KB to handle that incoming data stream. In this case, Flash Litedisplays an error message to the user, indicating
that not enough memory is available.
To load large amounts of data, group the data in smaller pieces—for example, in several XML files—and make several
data-loading calls for each piece. The size of each piece of data, and therefore the number of data-loading calls you need
to make, varies by device and file. To determine an appropriate balance between the number of data requests and the
likelihood of a memory failure, test files on a variety of target devices.
For optimum performance, avoid loading and parsing XML files if possible. Instead, store data in simple name/value
pairs and load the data from a text file using loadVars or from precompiled SWF files.
For more tips and techniques for creating content for mobile phones and devices, see
www.adobe.com/go/learn_cs_mobilewiki_en.
Exclude classes from compilation for Flash Lite
To reduce the size of a SWF file, consider excluding classes from compilation but retaining the ability to access and use
them for type checking. For example, try this if you are developing a file that uses multiple SWF files or shared libraries,
especially those that access many of the same classes. Excluding classes helps avoid duplicating classes in those files.
1 Create a new XML file.
2 Name the XML file FLA_filename_exclude.xml, where FLA_filename is the name of the FLA file without the .fla
extension. For example, if the FLA file is sellStocks.fla, the XML filename must be sellStocks_exclude.xml.
3 Save the file in the same directory as the FLA file.
4 Place the following tags in the XML file:
<excludeAssets>
<asset name=”className1” />
<asset name=”className2” />
</excludeAssets>
The values specified for the name attributes in the <asset> tags are the names of classes that should be excluded from
the SWF file. Add as many as required for the file. For example, the following XML file excludes the
mx.core.UIObject and mx.screens.Slide classes from the SWF file:
<excludeAssets>
<asset name=”mx.core.UIObject” />
<asset name=”mx.screens.Slide” />
</excludeAssets>
For more tips and techniques for creating content for mobile phones and devices, see
www.adobe.com/go/learn_cs_mobilewiki_en.
Best practices - Structuring FLA files
Last updated 6/12/2015
402
Exporting and Publishing
Organizing timelines and the library
Frames and layers on a timeline show you where assets are placed and determine how your document works. How a
timeline and the library are set up and used affect the entire FLA file and its overall usability. The following guidelines
help you author content efficiently, and let other authors who use your FLA documents have a greater understanding
of how the document is structured.
• Give each layer an intuitive layer name, and place related assets together in the same location. Avoid using the
default layer names (such as Layer 1, Layer 2).
Clearly describe the purpose or content of each layer or folder when you name them.
If applicable, place your layers that include ActionScript and a layer for frame labels at the top of the layer stack in
the timeline. For example, name the layer that contains your ActionScript actions.
• Use layer folders to group and organize similar layers, to facilitate locating the layers that include code and labels.
• Lock layers that you are not using or do not want to modify. Lock your ActionScript layer immediately so that
symbol instances or media assets are not placed on that layer.
• Never put any instances or assets on a layer that includes ActionScript. Because this can potentially cause conflicts
between assets on the Stage and ActionScript that references them, keep all of your code on its own actions layer,
and lock it after you create it.
• Use frame labels in a FLA file instead of using frame numbers in your ActionScript code if you reference frames in
your code. If those frames change later when you edit the timeline, and you use frame labels and move them on the
timeline, you do not have to change any references in your code.
• Use library folders.
Use folders in the library to organize similar elements (such as symbols and media assets) in a FLA file. If you name
library folders consistently each time you create a file, it is easier to remember where you put assets. Commonly used
folder names are Buttons, MovieClips, Graphics, Assets, Components, and, sometimes, Classes.
Using scenes
Using scenes is similar to using several SWF files to create a larger presentation. Each scene has a timeline. When the
playhead reaches the final frame of a scene, the playhead progresses to the next scene. When you publish a SWF file,
the timeline of each scene combines into a single timeline in the SWF file. After the SWF file compiles, it behaves as if
you created the FLA file using one scene. Because of this behavior, avoid using scenes for the following reasons:
• Scenes can make documents confusing to edit, particularly in multiauthor environments. Anyone using the FLA
document might have to search several scenes within a FLA file to locate code and assets. Consider loading content
or using movie clips instead.
• Scenes often result in large SWF files.
• Scenes force users to progressively download the entire SWF file, instead of loading the assets they actually want to
see or use. If you avoid scenes, the user can control what content they download as they progress through your SWF
file. The user has more control over how much content they download, which is better for bandwidth management.
One drawback is the requirement for managing a greater number of FLA documents.
• Scenes combined with ActionScript might produce unexpected results. Because each scene timeline is compressed
onto a single timeline, you might encounter errors involving your ActionScript and scenes, which typically requires
extra, complicated debugging.
If you create lengthy animations, you might find it advantageous to use scenes. If disadvantages apply to your
document, consider using multiple FLA files, or movie clips to build an animation instead of using scenes.
Last updated 6/12/2015
403
Exporting and Publishing
Saving files and version control
When you save your FLA files, use a consistent naming scheme for your documents. This is particularly important if
you save multiple versions of a single project.note: The Project Panel is deprecated with Flash Professional CC.
Some problems might occur if you only work with one FLA file and do not save versions when you create the file. Files
might become larger because of the history that’s saved in the FLA file, or become corrupt (as with any software you
use) while you are working on the file.
If you save multiple versions while developing, you have an earlier version available if you need to revert.
Use intuitive names for your files that are easy to read, not cryptic, and work well online:
• Do not use spaces, capitalization, or special characters.
• Only use letters, numbers, dashes, and underscores.
• If you save multiple versions of the same file, devise a consistent numbering system such as menu01.swf,
menu02.swf and so on.
• Consider using all lowercase characters in your naming schemes, because some server software is case sensitive.
• Consider a naming system that uses a noun-verb or adjective-noun combination for naming files, for instance,
classplanning.swf and myproject.swf.
Use the following methods to save new versions of a FLA file when you build an extensive project:
• Select File > Save As, and save a new version of your document.
• Use version control software or the Project panel to control your Flash Professional documents.note: The Project
Panel is deprecated with Flash Professional CC.
If you are not using version control software to create backups of your FLA file, use Save As and type a new file name
for your document after every milestone in your project.
Many software packages allow users to use version control with their files, which enables teams to work efficiently
and reduce errors (such as overwriting files or working on old versions of a document). As with other documents,
you can use these programs to organize the Flash Professional documents outside Flash Professional.
Best practices - Behaviors conventions
About behaviors conventions
Behaviors are prewritten ActionScript 2.0 code that you can add to parts of a FLA file. Many developers enter
ActionScript code either into one or several frames on the main Timeline or in external ActionScript files. However,
when you use behaviors, sometimes code is placed directly on symbol instances (such as buttons, movie clips, or
components) instead of being placed on the timeline.
Behaviors are not supported by ActionScript 3.0.
Last updated 6/12/2015
404
Exporting and Publishing
Comparing timeline code with object code
To avoid problems that decentralized ActionScript 2.0 code creates, carefully plan a document that uses behaviors.
Many developers do not place ActionScript on symbol instances, and instead place their code on the Timeline (timeline
code) or in classes. Because behaviors add code to many locations in a FLA file, your ActionScript is not centralized
and can be difficult to locate. When code is not centralized, it is difficult to understand interactions between the
snippets of code, and it is impossible to write elegant code. Decentralized code can potentially lead to problems
debugging code or editing files.
If you use behaviors, try the following features to facilitate working with behaviors and decentralized ActionScript:
Script Navigator Makes your timeline code or code on individual objects easy to find and edit in the Actions panel.
Find And Replace Lets you search for strings and replace them in a FLA file.
Script Pinning Lets you pin multiple scripts from various objects and work with them simultaneously in the Actions
panel. This method works best with the Script navigator.
Movie Explorer Lets you view and organize the contents of a FLA file, and select elements (including scripts) for further
modification.
When to use behaviors
The main difference between a FLA file with behaviors and a FLA file without behaviors is the workflow you must use
for editing the project. If you use behaviors, you must select each instance on the Stage, or select the Stage, and open
the Actions or Behaviors panel to make modifications. If you write your own ActionScript and put all your code on the
main Timeline, you only have to make your changes on the Timeline.
If you have a FLA file with symbols, you can select one of the instances on the Stage, and use the Add menu on the
Behaviors panel to add a behavior to that instance. The behavior you select automatically adds code that attaches to the
instance, using “object code” such as the on() handler. You can also select a frame on a timeline, and add different
behaviors to a frame using the Behaviors panel.
Decide how to structure your FLA file. Examine how and where to use behaviors and ActionScript in your FLA file.
Consider the following questions:
• What code do the behaviors contain?
• Do you have to modify the behavior code? If so, by how much? To modify the behavior code to any extent, do not
use behaviors. You usually cannot edit behaviors by using the Behaviors panel if you make modifications to the
ActionScript. To significantly edit the behaviors in the Actions panel, it is usually easier to write all of the
ActionScript yourself in a centralized location.
• What other ActionScript do you need, and does other ActionScript have to interact with the behavior code?
Debugging and modifications are easier to make from a central location. For example, if code on a timeline interacts
with behaviors placed on objects, avoid behaviors.
• How many behaviors do you have to use, and where do you plan to put them in the FLA file? If your behaviors are
all placed on a timeline, they might work well in your document. Or, your workflow might not be affected if you use
only a small number of behaviors. However, if you use many behaviors on a lot of object instances, writing your own
code on the Timeline or in external ActionScript files might be more efficient.
Remember, ActionScript 3.0 does not support behaviors.
Last updated 6/12/2015
405
Exporting and Publishing
Using behaviors consistently
Use behaviors consistently throughout a document when they are your main or only source of ActionScript. Use
behaviors when you have little or no additional code in the FLA file, or have a consistent system in place for managing
the behaviors that you use.
If you add ActionScript to a FLA file, put code in the same locations where behaviors are added, and document how
and where you add code.
For example, if you place code on instances on the Stage (object code), on the main Timeline (frame scripts), and also
in external AS files, examine your file structure. Your project will be difficult to manage if you have code in all of these
places. However, if you logically use behaviors and structure your code to work in a particular way surrounding those
behaviors (place everything on object instances), at least your workflow is consistent. The document will be easier to
modify later.
Sharing files that use behaviors
If you plan to share your FLA file with other users and you use ActionScript placed on or inside objects (such as movie
clips), it can be difficult for those users to find your code’s location, even when they use the Movie Explorer to search
through the document.
Document the use of behaviors if you are working with a complex document. Depending on the size of the application,
create a flow chart, list, or use good documentation comments in a central location on the main Timeline.
If you are creating a FLA file with code placed in many locations throughout the document and plan to share the file,
leave a comment on Frame 1 on the main Timeline to tell users where to find the code and how the file is structured.
The following example shows a comment (on Frame 1) that tells users the location of the ActionScript:
/*
ActionScript placed on component instances and inside movie clips using behaviors.
Use the Movie Explorer to locate ActionScript
*/
Note: This technique is not necessary if your code is easy to find, the document is not shared, or all of your code is placed
on frames of the main Timeline.
Best practices - SWF application authoring guidelines
About SWF application guidelines
The best way to create Flash Professional applications depends on the application you create and the technology that
you are using to build the application.
Last updated 6/12/2015
406
Exporting and Publishing
An online application lets a user influence a website by interacting with it. For example, the application might collect
information from the user (such as a username and password for a registration), information might be added to the site
(such as in a forum), or the user might interact in real time with other site visitors (such as a chat room or interactive
white board). Results from the server often appear in the SWF file, depending on the interaction. These examples are
applications that involve the user and different kinds of server interaction. A website that does not use visitor
information or data is not an application (for example, a portfolio, cartoon animation, or static informational site).
Flash Professional applications involve an interactive process between the user, a web application, and a server. The
basic process is as follows:
1 A user enters information into a SWF file.
2 The information is converted into data.
3 The data is formatted and sent to a web server.
4 The data is collected by the web server and sent to an application server (for example, ColdFusion, PHP, or ASP).
5 The data is processed and sent back to the web server.
6 The web server sends the results to the SWF file.
7 The SWF file receives the formatted data.
8 Your ActionScript processes the data so the application can use it.
When you build an application, you must select a protocol for transferring data. The protocol alerts the application
when data is sent or received, in what format the data is transferred, and how it handles a server’s response. After data
is received in the SWF file, it must be manipulated and formatted. If you use a protocol, you do not have to worry about
data being in an unexpected format. When you transfer data using name-value pairs, you can check how the data is
formatted. Check that the data is formatted correctly, so you do not receive XML formatted data and so the SWF file
knows what data to expect and work with.
Collecting and formatting data
Applications depend on user interaction with the SWF file. Frequently, it depends on the user entering data into forms.
Flash Professional provides many ways you can enter and format data in Flash Professional applications. This flexibility
exists because of the capabilities you have with animation and creative control over the interface, and error checking
and validation you can perform using ActionScript.
Benefits from using Flash Professional to build forms to collect data include the following:
• Increased design control.
• Decreased or no need for page refreshing.
• Reuse of common assets.
Tip: To save information that you collect from the user, save it in a shared object on the user’s computer. Shared
objects let you store data on a user’s computer, which is similar to using a cookie. For more information on Shared
objects, see the sharedObject class in ActionScript 2.0 Language Reference or ActionScript 3.0 Language and
Components Reference.
Sending and processing data
You must typically process information before you send it to the server, so it’s formatted in a way that the server
understands. When the server receives the data, it can be manipulated in any number of ways and sent back to the SWF
file in a format that it can accept, which can range from name-value pairs to complex objects.
Last updated 6/12/2015
407
Exporting and Publishing
Note: Your application server must have the MIME type of its output set to application/x-www-urlform-encoded. If that
MIME type is missing, the result is usually unusable when it reaches Flash Professional.
The following table shows you several options for sending data to a server and receiving data using Flash Professional:
Send data
Description
LoadVars.send and LoadVars.sendAndLoad
Sends name-value pairs to a server-side script for processing.
LoadVars.send sends variables to a remote script and ignores any
response. LoadVar.sendAndLoad sends name-value pairs to a server
and loads or parses the response into a target LoadVars object.
XML.send and XML.sendAndLoad
Similar to LoadVars, but XML.send and XML.sendAndLoad send XML
packets instead of name-value pairs.
getURL
Using the getURL() function or MovieClip.getURL method, you can
send variables from Flash Professional to a frame or pop-up window.
Flash Remoting
Lets you easily exchange complex information between Flash
Professional and ColdFusion, ASP.NET, Java, and more. You can also use
Flash Remoting to consume web services.
Web services
Adobe Flash Professional includes the WebServiceConnector
component that lets you connect to remote web services, send and
receive data, and bind results to components. This lets Flash
Professional developers quickly create Rich Internet Applications
without having to write a single line of ActionScript.
You can consume remote web services by using WebServiceClasses,
which can require writing complex ActionScript.
Adding data loading and validation
Validate any information you retrieve before you send that data to a server. This reduces strain on the remote server,
because it does not handle as many requests when users do not fill in required fields. Never rely solely on client-side
validation in any application; server-side validation must also occur.
Even if you build a simple registration or login form, check that the user has entered their name and password. Perform
this validation before sending the request to the remote server-side script and waiting for a result. Do not rely only on
server-side validation. If a user enters only a username, the server-side script must receive the request, validate the data
being sent, and return an error message to the Flash Professional application, stating that it requires both the username
and password. Likewise, if validation is performed only on the client side (within the SWF file), a user might hack the
SWF file, bypass the validation, and send data to your server in an attempt to post the bad data.
Client-side validation can be as simple as making sure that a form field is at least one character long, or that the user
entered a numeric value and not a string. To validate an e-mail address, for example, check that the text field in Flash
Professional isn’t empty and contains at least the at sign (@) and dot (.) characters. For the server-side validation, add
more complex validation and check that the e-mail address belongs to a valid domain.
You must write ActionScript to handle the data that loads into the SWF file from the server. After you finish loading
data into a SWF file, the data can be accessed from that location. Use ActionScript to check whether the data is fully
loaded. You can use callback functions or listeners to send a signal that the data is loaded into the document.
When you load data, it can be formatted in several ways:
• You might load XML, in which case you use the XML class methods and properties to parse the data and use it. If
you use name-value pairs, the pairs turn into variables and you can manipulate them as variables.
• You might receive data from a web service or from Flash Remoting.
Last updated 6/12/2015
408
Exporting and Publishing
In both cases, you could receive complex data structures, such as arrays, objects, or record sets, which you must parse
and bind appropriately.
Using error handling and debugging
Your application needs to be robust enough to anticipate certain errors and handle them accordingly.
One of the best ways to perform error handling in ActionScript 2.0 is to use the try-catch-finally blocks that let you
throw and catch custom errors. By creating custom error classes, you can reuse code throughout your application
without having to rewrite error handling code. For more information on throwing custom errors, see the Error class in
ActionScript 2.0 Language Reference. For more information on try-catch-finally blocks, see try..catch..finally in
ActionScript 2.0 Language Reference.
In ActionScript 3.0, use the flash.errors class to catch errors.
For more information, see “Handling synchronous errors in an application” in Programming ActionScript 3.0.
Organizing files and storing code
Consider the following guidelines before you start organizing files and storing code:
• Do you divide the SWF file into multiple SWF files, and, if so, how should they interact?
• What assets can you share across SWF files?
• What files do you dynamically load?
• How and where do you store ActionScript?
When you develop an application, store your server-side code and files in a logical directory structure, similar to
those in an ActionScript package. Arrange your code this way to keep it well organized and reduce the risk of the
code being overwritten.
For larger applications, encapsulate client-server communication and services in classes. When you use classes, you
benefit in the following ways:
• You can reuse the code in more than one SWF file.
• You can edit code in a central place, and update all SWF files by republishing them.
• You can create a single API that can manipulate different UI elements or other assets that perform similar functions.
Using the MVC design pattern
The MVC design pattern is used to separate the information, output, and data processing in the application. The
application is divided into three elements: model, view, and controller; each element handles a different part of the
process.
The model Incorporates the data and rules of the application. Much of the application’s processing occurs in this part
of the design pattern. The model also contains any components (such as CFCs, EJBs, and web services), and the
database. Data returned is not formatted for the interface (or front end) of the application in this part of the process.
The returned data can be used for different interfaces (or views).
The view Handles the front end of the application (the interface with which the user interacts), and renders the model’s
contents. The interface specifies how the model’s data is presented and outputs the view for the user to use, and lets the
user access or manipulate the application’s data. If the model changes, the view updates to reflect those changes by either
pushing or pulling data (sending or requesting data). If you create a hybrid web application (for example, one that
Last updated 6/12/2015
409
Exporting and Publishing
includes Flash Professional interacting with other applications on the page), consider the multiple interfaces as part of
the view in the design pattern. The MVC design pattern supports handling a variety of views.
The controller Handles the requirements of the model and view to process and display data, and typically contains a
lot of code. It calls any part of the model, depending on user requests from the interface (or view), and contains code
that’s specific to the application. Because this code is specific to the application, it is usually not reusable. However, the
other components in the design pattern are reusable. The controller does not process or output any data, but it takes
the request from the user and decides what part of the model or view components it needs to call, and determines where
to send the data and what formatting is applied to the returned data. The controller ensures that views have access to
parts of the model data that they must display. The controller typically transmits and responds to changes that involve
the model and view.
Each part of the model is built as a self-contained component in the overall process. If you change one part of the model
(for example, you might rework the interface), the other parts of the process do not usually need modification, which
reduces problems. If your design pattern is created correctly, you can change the view without reworking the model or
controller. If your application does not use MVC, making changes anywhere can cause a rippling effect across all your
code, which requires many more changes than if you were using a specific design pattern.
An important reason to use the MVC pattern is to separate data and logic from the user interface. By separating these
parts of the process, you can have several different graphical interfaces that use the same model and unformatted data.
This means that you can use your application with different Flash Professional interfaces, such as an interface for the
web, one for Pocket PC, a version for cell phones, and perhaps an HTML version that doesn’t use Flash Professional at
all. Separating data from the rest of the application can greatly reduce the time it takes to develop, test, and even update
more than one client interface. Similarly, adding new front ends for the same application is easier if you have an existing
model to use.
Only use MVC if you build a large or complex application, such as an e-commerce website or an e-learning application.
Using the architecture requires planning and understanding how Flash Professional and this design pattern work.
Carefully consider how the different pieces interact with each other; this typically involves testing and debugging.
When you use MVC, testing and debugging are more involved and difficult than in typical Flash Professional
applications. If you build an application in which you need the additional complexity, consider using MVC to organize
your work.
Creating secure applications
Dishonest users might try to hack your application, whether you build a small portal site where users can log in and
read articles or a large e-commerce store. For this reason, consider the following steps to secure your application.
• Post data to HTTPS for data that needs to be secured. Encrypt values in Flash Professional before sending them to
a remote server to be processed.
Note: Never store any information or code in a SWF file that you don't want users to see. It is easy to disassemble SWF
files and view their contents using third-party software.
• Add a cross-domain policy, which prevents unauthorized domains from accessing your assets.
Best practices - Optimizing FLAfiles for SWF output
Last updated 6/12/2015
410
Exporting and Publishing
Optimize Flash documents
As your document file size increases, so does its download time and playback speed. You can take several steps to
prepare your document for optimal playback. As part of the publishing process, Flash Professional automatically
performs some optimization on documents. Before exporting a document, you can optimize it further by using various
strategies to reduce the file size. You can also compress a SWF file as you publish it. As you make changes, test your
document by running it on a variety of computers, operating systems, and Internet connections.
The following video tutorial describes several methods for optimizing FLA files. The video shows Flash Professional
CS3, but is still applicable to Flash Professional CS5.
• Optimizing animations and FLA files (7:24)
Optimize documents
• Use symbols, animated or otherwise, for every element that appears more than once.
• Use tweened animations whenever possible when creating animation sequences. Tweened animations use less file
space than a series of keyframes.
• Use movie clips instead of graphic symbols for animation sequences.
• Limit the area of change in each keyframe; make the action take place in as small an area as possible.
• Avoid animating bitmap elements; use bitmap images as background or static elements.
• Use mp3, the smallest sound format, whenever possible.
Optimize elements and lines
• Group elements.
• Use layers to separate elements that change during the animation from elements that do not.
• Use Modify > Shape > Optimize to minimize the number of separate lines that are used to describe shapes.
• Limit the number of special line types, such as dashed, dotted, ragged, and so on. Solid lines require less memory.
Lines created with the Pencil tool require less memory than brush strokes.
Optimize text and fonts
• Limit the number of fonts and font styles. Use embedded fonts sparingly because they increase file size.
• For Embed Fonts options, select only the characters needed instead of including the entire font.
Optimize colors
• Use the Color menu in the Symbol Property inspector to create many instances of a single symbol in different colors.
• Use the Color panel (Window > Color) to match the color palette of the document to a browser-specific palette.
• Use gradients sparingly. Filling an area with gradient color requires about 50 bytes more than filling it with solid
color.
• Use alpha transparency sparingly because it can slow playback.
Speed up document display
To speed up the document display, use commands in the View menu to turn off rendering-quality features that require
extra computing and slow down document display.
Last updated 6/12/2015
411
Exporting and Publishing
None of these commands have any effect on how Flash Professional exports a document. To specify the display quality
of Flash Professional documents in a web browser, use the object and embed parameters. The Publish command can
do this for you automatically.
❖ Select View > Preview Mode, and select from the following options:
Outlines Displays only the outlines of the shapes in your scene and causes all lines to appear as thin lines. This
makes it easier to reshape your graphic elements and to display complex scenes quickly.
Fast Turns off anti-aliasing and displays all the colors and line styles of your drawing.
Antialias Turns on anti-aliasing for lines, shapes, and bitmaps and displays shapes and lines so that their edges
appear smoother on the screen. Draws more slowly than the Fast option. Anti-aliasing works best on video cards
that provide thousands (16-bit) or millions (24-bit) of colors. In 16- or 256-color mode, black lines are smoothed,
but colors might look better in Fast mode.
Antialias Text Smooths the edges of any text. Works best with large font sizes and can be slow with large amounts
of text. This is the most common mode in which to work.
Full Renders all content on the Stage fully. Might slow down display.
Optimizing graphics and animation
Before you create optimized and streamlined animations or graphics, outline and plan your project. Make a target for
the file size and length of the animation, and test throughout the development process.
Follow these guidelines to optimize graphics and animation:
• Avoid using gradients, because they require many colors and calculations to be processed, which is more difficult
for a computer processor to render.
• For the same reason, keep the amount of alpha or transparency you use in a SWF file to a minimum.
Animating objects that include transparency is processor-intensive and should be kept to a minimum. Animating
transparent graphics over bitmaps is a particularly processor-intensive kind of animation, and must be kept to a
minimum or avoided completely.
note: The best bitmap format to import into Flash Professional is PNG, which is the native file format of Macromedia
Fireworks from Adobe. PNG files have RGB and alpha information for each pixel. If you import a Fireworks PNG file
into Flash Professional, you retain some ability to edit the graphic objects in the FLA file.
• Optimize bitmaps without overcompressing them. A 72-dpi resolution is optimal for the web. Compressing a
bitmap image reduces file size, but compressing it too much compromises the quality of the graphic. Check that the
settings for JPEG quality in the Publish Settings dialog box do not overcompress the image. Representing an image
as a vector graphic is preferable in most cases. Using vector images reduces file size, because the images are made
from calculations instead of many pixels. Limit the number of colors in your image while still retaining quality.
note: Avoid scaling bitmaps larger than their original dimensions, because it reduces the quality of the image and is
processor intensive.
• Set the _visible property to false instead of changing the _alpha level to 0 or 1 in a SWF file. Calculating the _alpha
level for an instance on the Stage is processor intensive. If you disable the instance’s visibility, it saves CPU cycles and
memory, which can give your SWF files smoother animations. Instead of unloading and possibly reloading assets,
set the _visible property to false, which is less processor-intensive.
Last updated 6/12/2015
412
Exporting and Publishing
• Reduce the number of lines and points you use in a SWF file. Use the Optimize Curves dialog box (Modify > Shape
> Optimize) to reduce the number of vectors in a drawing. Select the Use Multiple Passes option for more
optimization. Optimizing a graphic reduces file size, but compressing it too much compromises its quality. However,
optimizing curves reduces your file size and improves SWF file performance. Third-party options are available for
specialized optimization of curves and points that yield different results.
To get the best results, try different ways of producing animated content, and test each of the options.
A higher frame rate (measured in frames per second, or fps) produces smooth animation in a SWF file but it can be
processor-intensive, particularly on older computers. Test your animations at different frame rates to find the lowest
frame rate possible.
For a sample of scripted animation, see the Flash Samples web page at www.adobe.com/go/learn_fl_samples.
Download and decompress the Samples zip file and navigate to the ActionScript2.0/Animation folder to access the
sample.
Animation frame rate and performance
When you add animation to an application, consider the frame rate that you set your FLA file to. Frame rate can affect
the performance of your SWF file and the computer that plays it. Setting a frame rate too high can lead to processor
problems, especially when you use many assets or use ActionScript to create animation.
However, you also need to consider the frame rate setting, because it affects how smoothly your animation plays. For
example, an animation set to 12 frames per second (fps) in the Property inspector plays 12 frames each second. If the
document's frame rate is set to 24 fps, the animation appears to animate more smoothly than if it ran at 12 fps. However,
your animation at 24 fps also plays faster than it does at 12 fps, so the total duration (in seconds) is shorter. Therefore,
to make a 5-second animation using a higher frame rate, you must add additional frames to fill those five seconds than
at a lower frame rate (and thus, raises the total file size of your animation). A 5-second animation at 24 fps typically has
a higher file size than a 5-second animation at 12 fps.
Note: When you use an onEnterFrame event handler to create scripted animations, the animation runs at the document's
frame rate, similar to if you created a motion tween on a timeline. An alternative to the onEnterFrame event handler is
setInterval (see ActionScript 2.0 Language Reference). Instead of depending on frame rate, you call functions at a specified
interval. Like onEnterFrame, the more frequently you use setInterval to call a function, the more resource intensive the
animation is on your processor.
Use the lowest possible frame rate that makes your animation appear to play smoothly at runtime, which helps reduce
the strain on the end-user's processor. High frame rates (more than 30 to 40 fps) put a lot of stress on processors, and
do not change the appearance of the animation much or at all at runtime.
Select a frame rate for your animation as early as possible in the development process. When you test the SWF file,
check the duration, and the SWF file size, of your animation. The frame rate greatly affects the speed of the animation.
Filters and SWF file performance
If you use too many filters in an application, you can use large amounts of memory and cause Flash Player performance
to suffer. Because a movie clip with filters attached has two bitmaps that are both 32-bit, these bitmaps can cause your
application to use a significant amount of memory if you use many bitmaps. The computer's operating system might
generate an out-of-memory error. On a modern computer, out-of-memory errors should be rare, unless you are using
filter effects extensively in an application (for example, you have thousands of bitmaps on the Stage).
However, if you do encounter an out-of-memory error, the following occurs:
• The filters array is ignored.
Last updated 6/12/2015
413
Exporting and Publishing
• The movie clip is drawn using the regular vector renderer.
• No bitmaps are cached for the movie clip.
After an out-of-memory error occurs, a movie clip never attempts to use a filters array or a bitmap cache. Another
factor that affects player performance is the value that you use for the quality parameter for each filter that you apply.
Higher values require more CPU and memory for the effect to render, whereas setting the quality parameter to a
lower value requires fewer computer resources. Avoid using an excessive number of filters, and use a lower quality
setting when possible.
Note: If a 100 pixel by 100 pixel object is zoomed in once, it uses four times the memory since the content's dimensions
are now 200 pixels by 200 pixels. If you zoom another two times, the shape is drawn as an 800 pixel by 800 pixel object
which uses 64 times the memory as the original 100 pixel by 100 pixel object. Whenever you use filters in a SWF file,
disable the zoom menu options from the SWF file's context menu.
You can encounter errors if you use invalid parameter types. Some filter parameters also have a particular valid
range. If you set a value that's outside of the valid range, the value changes to a valid value that's within the range.
For example, quality should be a value from 1 to 3 for a standard operation, and can only be set to 0 to 15. Anything
higher than 15 is set to 15.
Some constructors have restrictions on the length of arrays required as input parameters. If a convolution filter or
color matrix filter is created with an invalid array (not the right size), the constructor fails and the filter is not created
successfully. If the filter object is then used as an entry on a movie clip's filters array, it is ignored.
Tip: When using a blur filter, using values for blurX and blurY that are powers of 2 (such as 2, 4, 8, 16, and 32) can
be computed faster and give a 20% to 30% performance improvement.
Bitmap caching and SWF file performance
Bitmap caching helps you enhance the performance of nonchanging movie clips in your applications. When you set the
MovieClip.cacheAsBitmap or Button.cacheAsBitmap property to true, Flash Player caches an internal bitmap
representation of the movie clip or button instance. This can improve performance for movie clips that contain complex
vector content. All of the vector data for a movie clip that has a cached bitmap is drawn to the bitmap, instead of to the
main Stage.
Note: The bitmap is copied to the main Stage as unstretched, unrotated pixels snapped to the nearest pixel boundaries.
Pixels are mapped one-to-one with the parent object. If the bounds of the bitmap change, the bitmap is re-created instead
of being stretched.
For detailed information on caching button or movie clip instances see the following topics:
• About caching and scrolling movie clips with ActionScript in Learning ActionScript 2.0 in Adobe Flash
• Caching a movie clip in Learning ActionScript 2.0 in Adobe Flash
Use the cacheAsBitmap property with movie clips with mostly static content and that do not scale and rotate
frequently. With such movie clips, using the cacheAsBitmap property can lead to performance improvements when
the movie clip is translated (when its x and y position is changed).
Enabling caching for a movie clip creates a surface, which has several advantages, such as helping complex vector
animations to render fast. In some situations, enabling caching does not improve performance, or even decrease it.
Overall performance of cached data depends on how complex the vector data of your instances are, how much of
the data you change, and whether or not you set the opaqueBackground property. If you are changing small regions,
the difference between using a surface and using vector data might be negligible. Test both scenarios with your work
before you deploy the application.
When to use bitmap caching
Last updated 6/12/2015
414
Exporting and Publishing
The following are typical scenarios in which you might see significant benefits when you enable bitmap caching by
optimizing vector graphics.
Complex background image An application that contains a detailed and complex background image of vector data. To
improve performance, select the content, store it in a movie clip, and set the opaqueBackground property to true. The
background is rendered as a bitmap and can be redrawn quickly, so that your animation plays faster.
Scrolling text field An application that displays a large amount of text in a scrolling text field. Place the text field in a
movie clip that you set as scrollable with scrolling bounds (the scrollRect property), enabling fast pixel scrolling for the
specified instance. When a user scrolls the movie clip instance, the scrolled pixels shift up and generate the newly
exposed region instead of regenerating the entire text field.
Windowing system An application with a complex system of overlapping windows. Each window can be open or
closed (for example, web browser windows). If you mark each window as a surface (set the cacheAsBitmap property to
true), each window is isolated and cached. Users can drag the windows so that they overlap each other, and each
window doesn't need to regenerate the vector content.
When to avoid using bitmap caching
Misusing bitmap caching can negatively affect your SWF file. When you develop a FLA file that uses surfaces,
remember the following guidelines:
• Do not overuse surfaces (movie clips with caching enabled). Each surface uses more memory than a regular movie
clip; only enable surfaces to improve rendering performance.
• A cached bitmap can use significantly more memory than a regular movie clip instance. For example, if the movie
clip on the Stage is 250 pixels by 250 pixels, when cached it might use 250 KB instead of 1 KB when it's a regular
(uncached) movie clip instance.
• Avoid zooming in on cached surfaces. If you overuse bitmap caching, a large amount of memory is consumed (see
previous bullet), especially if you zoom in on the content.
• Use surfaces for movie clip instances that are largely static (nonanimating). You can drag or move the instance, but
the contents of the instance should not animate or change a lot. For example, if you rotate or transform an instance,
the instance changes between the surface and vector data, which is difficult to process and negatively affects your
SWF file.
• If you mix surfaces with vector data, it increases the amount of processing that Flash Player (and sometimes the
computer) needs to do. Group surfaces together; for example, when you create windowing applications.
Working with components in Flash Player
The component framework lets you add functionality to components, but it can potentially add considerable file size
to an application. Components inherit from each other. One component adds size to your Flash Professional document,
but subsequent components that use the same framework do not necessarily add more size. As you add components to
the Stage, the file size increases, but at some point, it levels off because components share classes and do not load new
copies of those classes.
If you use multiple components that do not share the same framework, they might add substantial file size to the SWF
file. For example, the XMLConnector component adds 17K to the SWF file, and TextInput components add 24K to
your document. If you add the ComboBox component, it adds 28K, because it is not part of the framework of either
previous component. Because the XMLConnector component uses data binding, the classes add 6K to the SWF file. A
document that uses all these components has 77K before you add anything else to the file. Carefully consider your SWF
file size when you add a new component to the document.
Last updated 6/12/2015
415
Exporting and Publishing
Components must exist in the parent SWF file’s library. For example, an application must have a copy of the
components it uses in its library, even if those components are required only by child SWF files that are loaded at
runtime. This is necessary to ensure that the components function properly, and slightly increases the download time
of the parent SWF file. However, the parent library isn’t inherited or shared in the SWF files that you load into the
parent. Each child SWF file must download to the application with its own copy of the same components.
When you are planning to publish a SWF file with backward compatibility, you must have a good understanding of
which components have that capability. The following table provides information about component availability in
different versions of Flash Player:
Components
Flash Player 6 (6.0.65.0)
and earlier
Flash Player 6 (6.0.65.0)
Flash Player 7 and 8
Flash Player 9
ActionScript 3.0
Not supported
Not supported
Not supported
Supported
ActionScript 2.0
Supported
Supported
Supported
Supported
V2 UI component set
Not supported
Supported
Supported
Supported
Media components
Not supported
Not supported
Supported
Supported
Data components
Not supported
Not supported
Supported
Supported
Deselect the Optimize for Flash Player 6r65 option in Publish Settings for the V2 UI components to work.
Optimizing component styles and performance
When using ActionScript 2.0, one of the most processor-intensive calls in a component framework is the setStyle call.
The setStyle call executes efficiently, but the call is intensive because of the way it is implemented. The setStyle call is
not always necessary in all applications, but if you use it, consider its performance effect.
To enhance performance, you can change styles before they are loaded, calculated, and applied to the objects in your
SWF file. If you can change styles before the styles are loaded and calculated, you do not have to call setStyle.
To improve performance when using styles, set properties on each object as objects are instantiated. When you
dynamically attach instances to the Stage, set properties in initObj in the call that you make