Download 10ft.x 10ft.
Transcript
PRODUCT INFORMATION:
Read this information before proceeding. It is the user’s responsibility to take the following precautions
at all times.
• Always stake or weigh down your canopy. Do not use in any potentially windy or rainy weather.
Wind and rain can damage your product and may also result in injury to you or others.
Therefore, do not rely on product for protection in heavy or prolonged rain storms.
• The canopy is designed as a temporary sun shelter. Do not leave up for extended periods.
• Use caution when handling the frame. Avoid pinching hands or fingers as frame opens or closes.
• Do not use canopy in a lightning storm.
• Do not leave your canopy unattended.
• Do not build fires under canopy.
USER MANUAL
PRODUCT CARE/MAINTENANCE:
For long lasting durability and the best possible protection for your canopy, follow these care and
maintenance instructions:
• Use a mild soap (not detergent) and plenty of water for canopy cleaning.
• Let the canopy and frame dry completely before closing or storing to avoid mildew.
• The frame will operate and look better if occasionally wiped with silicone spray, especially before
and after use in damp conditions. Remove excess silicone residue before attaching top.
• Slightly tighten bolts if frame becomes loose.
CR AF TSMAN LI M ITED WAR R ANT Y
FOR TWO YEARS from the date of sale this product is warranted against defects in material
or workmanship.
WITH PROOF OF SALE return a defective product to the retailer from which it was purchased
for free replacement.
This warranty covers ONLY defects in material or workmanship, and does not apply to
accidental damage or damage from wind, rain or other forces of nature, nor to product that
has been altered or modified in any manner.
This warranty gives you specific legal rights, and you may also have other rights which vary
from state to state.
Sears Brands Management Corporation, Hoffman Estates, IL 60179
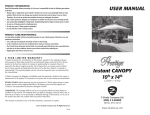
Commercial Canopy
10 ft. x 10 ft.
CUSTOMER ASSISTANCE
(855) 497-4233
(3.05m x 3.05m)
1114
PA C K AG E I N C L U D ES
• Canopy Frame
• Polyester Top
3
• 4-Piece Stake Kit
• Roll Away Bag
Engage Pull Pin slider at each corner by
pushing up on slider with one hand while
holding down on top of leg with other hand.
Engage Pull Pin into hole.
Repeat on opposite legs.
Pull Pin
I N I T I AL S ET U P
Please read each step before you attempt to set up. Save these instructions for future reference.
4
With partner, lift outer legs up and slide out the
inner legs until the Pull Pin locks into outer legs.
Repeat on opposite legs.
Pull
Pin
Locking
Strips
1
With partner, grasp two
outer frame legs, slightly lift
off the ground, and step
backwards - stopping at full
arms’ length.
2
Unfold the canopy top and
place it over the open frame.
3
Secure the canopy top to
the frame by attaching the
locking strips on the canopy
top with the locking strips
on the frame. Pull the
corners down fully.
TA K E D OWN
With partner on opposite side of canopy, place
your frame in the center of area to be shaded.
Grasp outer legs, lift off the ground, and step
backwards - stopping at full arms’ length.
1
Grasp the top and bottom of the truss on
opposite sides. Slightly lift canopy up and push
hands together while stepping backwards until
canopy is fully opened. Be careful not to pinch
fingers or push too hard so as to avoid damage
to truss.
4
With partner on opposite
side, grasp top and bottom
area of trusses. Lift the
canopy up slightly and
shake it while stepping
towards your partner until
the unit is 3/4 closed.
With each partner grasping
two outer legs, push frame
together to fully close it.
Be careful not to pinch
fingers!
Store canopy in roll away bag.
With partner, slightly lift up
adjacent outer legs, release Pull
Pin to unlock and telescope inner
legs into outer legs.
Repeat on opposite legs.
2
Pull
Pin
2
Grasp top and bottom area of
trusses. Lift the canopy up
slightly and shake while
stepping towards your partner
until 3/4 closed. With each
partner grasping two outer legs,
push frame together to fully
close it. Be careful not to pinch
fingers!
Pull
Pin
S ET U P
1
3
Release Pull Pin at each corner
by first lifting fabric away from
slider. With one hand push up
on truss near the Pull Pin, pull
pin out to release.
NOTE: It is much easier to
release Pull Pin when the
canopy weight has been
removed from the Pull Pin.
WARNING: Keep all flame and heat sources away from all product fabrics. These fabrics meet
the flammability requirements of CPAI-84. The fabric may burn if left in continuous contact
with any flame source. The application of any foreign substance to the fabric may render the
flame-resistant properties ineffective.


