1
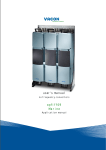
vacon se2
user's manual
vacon
2
Need Help?
This manual answers most installation and startup questions
that may arise. However, if you have any problems,
please let your first call be to us.
Vacon, Inc.
Chambersburg, PA 17202
Normal business hours:
(North America)
8:00 AM to 5:00 PM, Eastern time
+1 877-Vacon06
(+1 877-822-6606)
After-hours support is also available
For a quick-start summary of SE2 features, see
“Appendix A: Quick Start Guide for the SE2 Drive” on page 42
and Vacon, Inc. are trademarks of Vacon Plc, a
member of Vacon Group
Table of contents
3
SE2 User’s Manual: Table of Contents
1
Introduction . . . . . . . . . . . . . . . . . . . . . . . . . . . . . . . . . . . . . . . . . . . . . . . . . . . . . . 5
1.1 Product overview . . . . . . . . . . . . . . . . . . . . . . . . . . . . . . . . . . . . . . . . . . . . 5
1.2 Important safety information . . . . . . . . . . . . . . . . . . . . . . . . . . . . . . . . . . 5
1.3 Electromagnetic compatibility (EMC) . . . . . . . . . . . . . . . . . . . . . . . . . . . . 7
1.4 Summary of certifications . . . . . . . . . . . . . . . . . . . . . . . . . . . . . . . . . . . . . 7
1.5 User's manual publication history . . . . . . . . . . . . . . . . . . . . . . . . . . . . . . 7
2
About the SE2 drive . . . . . . . . . . . . . . . . . . . . . . . . . . . . . . . . . . . . . . . . . . . . . . . 8
2.1 Identifying the drive by model number . . . . . . . . . . . . . . . . . . . . . . . . . . . 8
2.2 Drive model numbers . . . . . . . . . . . . . . . . . . . . . . . . . . . . . . . . . . . . . . . . 9
3
Receiving and installation . . . . . . . . . . . . . . . . . . . . . . . . . . . . . . . . . . . . . . . . . 10
3.1 Preliminary inspection . . . . . . . . . . . . . . . . . . . . . . . . . . . . . . . . . . . . . . 10
3.2 Installation precautions . . . . . . . . . . . . . . . . . . . . . . . . . . . . . . . . . . . . . . 10
3.3 Mechanical dimensions . . . . . . . . . . . . . . . . . . . . . . . . . . . . . . . . . . . . . . 11
4
Power wiring . . . . . . . . . . . . . . . . . . . . . . . . . . . . . . . . . . . . . . . . . . . . . . . . . . . . 13
4.1 General wiring information . . . . . . . . . . . . . . . . . . . . . . . . . . . . . . . . . . . 13
4.2 Drive and motor connections . . . . . . . . . . . . . . . . . . . . . . . . . . . . . . . . . 17
4.3 Motor terminal box connections . . . . . . . . . . . . . . . . . . . . . . . . . . . . . . 17
5
Control wiring . . . . . . . . . . . . . . . . . . . . . . . . . . . . . . . . . . . . . . . . . . . . . . . . . . . 18
5.1 Control terminal connections . . . . . . . . . . . . . . . . . . . . . . . . . . . . . . . . . 18
5.2 RJ45 data connection . . . . . . . . . . . . . . . . . . . . . . . . . . . . . . . . . . . . . . . . 18
6
Operation . . . . . . . . . . . . . . . . . . . . . . . . . . . . . . . . . . . . . . . . . . . . . . . . . . . . . . . 19
6.1 Using the keypad . . . . . . . . . . . . . . . . . . . . . . . . . . . . . . . . . . . . . . . . . . . 19
6.2 Changing parameters . . . . . . . . . . . . . . . . . . . . . . . . . . . . . . . . . . . . . . . 19
6.3 Resetting factory default settings . . . . . . . . . . . . . . . . . . . . . . . . . . . . . 20
6.4 Terminal control . . . . . . . . . . . . . . . . . . . . . . . . . . . . . . . . . . . . . . . . . . . 20
6.5 Keypad control . . . . . . . . . . . . . . . . . . . . . . . . . . . . . . . . . . . . . . . . . . . . . 21
7
Parameters . . . . . . . . . . . . . . . . . . . . . . . . . . . . . . . . . . . . . . . . . . . . . . . . . . . . . 22
7.1 Level 1 parameters . . . . . . . . . . . . . . . . . . . . . . . . . . . . . . . . . . . . . . . . . 22
7.2 Level 2 parameters . . . . . . . . . . . . . . . . . . . . . . . . . . . . . . . . . . . . . . . . . 24
7.3 Adjusting Voltage / frequency (V/f) characteristics . . . . . . . . . . . . . . . . 28
7.4 P-00 read only drive status parameters (Group Zero) . . . . . . . . . . . . . 28
8
Analog and digital input configurations . . . . . . . . . . . . . . . . . . . . . . . . . . . . . . 30
8.1 Terminal mode (P-201=0) . . . . . . . . . . . . . . . . . . . . . . . . . . . . . . . . . . . . 30
8.2 Typical applications for terminal mode . . . . . . . . . . . . . . . . . . . . . . . . . 31
8.3
Keypad mode (P-201 = 1 or 2) . . . . . . . . . . . . . . . . . . . . . . . . . . . . . . . . . 34
8.4 Modbus control mode (P-201 = 3 or 4) . . . . . . . . . . . . . . . . . . . . . . . . . . 35
8.5 User PI control mode (P-201 = 5 or 6) . . . . . . . . . . . . . . . . . . . . . . . . . . 35
Email: [email protected] • Fax 717-264-3115
4
9
Table of contents
Troubleshooting and fault messages . . . . . . . . . . . . . . . . . . . . . . . . . . . . . . . . 38
10 Technical data . . . . . . . . . . . . . . . . . . . . . . . . . . . . . . . . . . . . . . . . . . . . . . . . . . .
10.1 Environmental information . . . . . . . . . . . . . . . . . . . . . . . . . . . . . . . . . . .
10.2 Ratings . . . . . . . . . . . . . . . . . . . . . . . . . . . . . . . . . . . . . . . . . . . . . . . . . . .
10.3 Maximum supply ratings for UL compliance . . . . . . . . . . . . . . . . . . . .
40
40
40
41
Start-up guide . . . . . . . . . . . . . . . . . . . . . . . . . . . . . . . . . . . . . . . . . . . . . . . . . . . . . . . 42
24-hour support 1-877-822-6606
Introduction
vacon
1.
Introduction
1.1
Product overview
5
Although the Vacon SE2 variable speed AC drive is small in size, it is big on
performance. It is an economical yet powerful solution for many industrial
applications. It features remote communications capability (using Modbus®
protocol), a keypad for easy configuration, and standard NEMA 12 / IP54 enclosures
that eliminate the need for mounting in a separate enclosure.
A separate model with a line disconnect speed potentiometer and direction selector
switch is also available. Contact your local Vacon distributor for more information.
This product family includes a wide variety of models to suit almost any input voltage
requirement. An ‘x’ in the following table indicates what models are currently
available. Refer to “Identifying the drive by model number” on page 8 for help in
interpreting model numbers.
Input Voltage
1.2
115 Vac
1 Phase
230 Vac
1 Phase
230 Vac
3 Phase
460 Vac
3 Phase
x
x
x
x
x
x
Power (kW)
Power (hp)
0.37
0.5
x
x
0.75
1
x
x
1.5
2
x
2.2
3
4.0
5
5.5
7.5
x
7.5
10
x
x
x
x
Important safety information
The SE2 variable speed drive is intended for professional incorporation into
complete equipment or systems. If it is installed incorrectly, it may cause a safety
hazard. The SE2 uses high voltages and currents, carries a high level of stored
electrical energy, and controls mechanical devices that can cause injury. Pay close
attention to system design and electrical installation to avoid hazards in either
normal operation or in the event of equipment malfunction.
System design, installation, commissioning, and maintenance must be carried out
only by personnel who have the necessary training and experience to do it correctly.
Please ensure that the safety information and instructions presented here are read
and followed, including information regarding transport, storage, installation, and
use of the SE2. Please also be aware of the specified environmental limitations of the
product. (See “Technical data” on page 40.)
Email: [email protected] • Fax 717-264-3115
1
6
vacon
Introduction
Throughout this manual, important safety information is included, with warning and
caution notes. Please read the following information carefully, and all warning and
caution information in the manual.
Indicates a potentially hazardous
situation which, if not avoided, could
result in injury or death.
Indicates a potentially hazardous
situation which, if not avoided, could
result in damage to property.
Safety of machinery, and safety-critical applications
The level of integrity offered by the SE2 control functions, for example, Stop/Start,
Forward/Reverse, and Maximum Speed, is not sufficient for use in safety-critical
applications without independent channels of protection. All applications where
malfunction could cause injury or loss of life must be subject to a risk assessment
and further protection provided where needed. Within the European Union, all
machinery in which this product is used must comply with Directive 89/392/EEC,
Safety of Machinery. In particular, the electrical equipment should comply with
EN60204-1.
• SE2 units should be installed only by qualified electrical personnel and in accordance with
local and national regulations and codes of practice.
• Electric shock hazard! Disconnect and ISOLATE the SE2 before attempting any work on it.
High voltages are present at the terminals and within the drive for up to 10 minutes after
the electrical supply has been disconnected.
• Where supply to the drive is through a plug and socket connector, do not disconnect until
10 minutes have elapsed after turning off the power supply.
• Ensure correct earthing (grounding) connections. The earth (ground) cable must be
sufficient to carry the maximum supply fault current which normally is limited by the fuses
or MCB.
• The STOP function does not remove potentially lethal high voltages. Be sure to ISOLATE
the drive and wait 10 minutes before starting any work on it.
• If it is desired to operate the drive at any frequency/speed above the rated speed (P-503/
P-511) of the motor, consult the manufacturers of the motor and the driven machine about
suitability for over-speed operation.
• The fan (if fitted) inside the SE2 starts automatically when the heat sink temperature
reaches approximately 45 degrees C.
•
•
•
•
•
•
•
•
•
•
•
•
Carefully inspect the SE2 unit before installation to ensure it is undamaged.
Indoor use only!
Flammable material should not be placed close to the drive.
The entry of conductive or flammable materials or foreign objects should be prevented.
Relative humidity must be less than 95% (non-condensing).
Ensure that the supply voltage, frequency, and number of phases (1 or 3 phase) correspond
to the rating of the SE2 as delivered.
An isolator should be installed between the power supply and the drive.
Never connect the mains power supply to the output terminals U, V, or W.
Protect the drive by using slow-blowing HRC fuses or MCB located in the mains supply of
the drive.
Do not install any type of automatic switchgear between the drive and the motor.
Wherever control cabling is close to power cabling, maintain a minimum separation of 4
inches and arrange crossings at 90 degrees.
Ensure that all terminals are tightened to the appropriate torque setting.
24-hour support 1-877-822-6606
1
Introduction
vacon
7
1.3 Electromagnetic compatibility (EMC)
The SE2 is designed to high standards of EMC and is optionally fitted with an internal
EMC filter. This EMC filter is designed to reduce the conducted emissions back into
the supply via the power cables for compliance with European standards.
It is the responsibility of the installer to ensure that the equipment or system into
which the product is installed complies with the EMC legislation of the country of
use. Within the European Union, equipment into which this product is incorporated
must comply with 89/336/EEC, EMC.
For use on domestic supplies, shielded motor cable must be used with the shield
terminated to earth ground on both the motor and drive sides. The installation must
be carried out by qualified installation engineers, observing good wiring practice
such as power and signal cable segregation and correct shielding techniques to
minimize emissions. When installed in this way, an SE2 unit with a built-in filter has
emission levels lower than those defined in EN61800-3, category C2 for first
environments for shielded cable lengths of up to 5 meters.
For cable lengths longer than 5 meters, the emission levels may exceed those
defined by EN61800-3, category C2. In this case, further mitigation methods, such as
fitting an external filter) must be employed if the emission limits are to maintained.
When used on industrial supplies, or second environments, the installation must be
carried out by qualified installation engineers, observing good wiring practice such
as power and signal cable segregation and correct shielding techniques to minimize
emissions. The emissions limits defined by EN61800-3, category C3 (second
environments) are maintained for shielded cable lengths of up to 25 meters. The
cable shield should be connected to earth ground on both the drive and motor sides.
1.4 Summary of certifications
The SE2 drive meets the following standards:
Standard
1.5
Description
EN61800-5-1
Safety requirements: electrical, thermal, and energy
EN61800-3
Adjustable speed electrical power drives systems, Part 3
EN55011
Limits and methods of measurement of radio interference characteristics of
Industrial Equipment (EMC)
cUL
America (UL 508C) and Canada C22.2 No. 14
User's manual publication history
Date
Doc. No.
Nature of Change
15.9.2008
DPD00086
Original release
22.9.2008
DPD00086(A) Rev. A: minor corrections to graphics and data; fault codes added
1.10.2008
DPD00086(B) Rev. B: minor corrections to graphic; ratings data corrected
8.12.2008
DPD00086(C) Rev. C: replaced Figure 7-1
Email: [email protected] • Fax 717-264-3115
1
8
vacon
About the se2 drive
2. About the se2 drive
This chapter contains information about the SE2 drive, including how to identify the
drive by its model number, with a list of all SE2 drive models and ratings.
2.1 Identifying the drive by model number
The model number of the SE2 AC drive appears on the shipping carton label and on
the technical data label (drive nameplate) on the unit. The model number includes
the drive and any options. The information provided by the model number is shown
below:
SE2 C 2 S 010 D 0 1 S
Series name
Torque type
C = Constant
V = Variable
Voltage rating
1 = 115 Vac
2 = 230 Vac
4 = 460 Vac
Input phase
S = Single-phase
0-9 = Three-Phase HP rating
Switch option
(S indicates switched)
DB option
0 or no designator: DB installed
1 = No DB transistor
2 = DB transistor installed
Filter option
0 or no designator: No filter
1 = Internal EMC filter
Enclosure type
D = NEMA 12/IP54
HP rating
Figure 2-1: Drive model number format
Technical specifications for each of the the SE2 models are given in “Technical data”
on page 40.
See “Drive model numbers” on page 9 for a list of all the SE2 drive model numbers.
24-hour support 1-877-822-6606
2
About the se2 drive
vacon
9
2.2 Drive model numbers
The following chart lists each of the drive models, with horsepower, kW, output
current (in amps), and frame size.
110-115V +/- 10% - 1 Phase Input - 3 Phase 230V Output (Voltage Doubler)
HP Model Number
kW
HP
Output Current (A)
SE2C1S005D01
.37
0.5
2.3
1
SE2C1S010D01
.75
1.0
4.3
1
1.1
1.5
5.8
2
Frame Size
SE2C1S015D02
Frame Size
200-240V +/- 10% - 1 Phase Input
HP Model Number
kW
HP
Output Current (A)
SE2C2S005D01
0.37
0.5
2.3
1
SE2C2S010D01
0.75
1
4.3
1
SE2C2S020D01
1.5
2
7
1
SE2C2S020D02
1.5
2
7
2
2.2
3
10.5
2
Frame Size
SE2C2S030D02
200-240V +/- 10% - 3 Phase Input
HP Model Number
kW
HP
Output Current (A)
SE2C20005D01
.37
0.5
2.3
1
SE2C20010D01
0.75
1
4.3
1
SE2C20020D01
1.5
2
7
1
SE2C20020D02
1.5
2
7
2
SE2C20030D02
2.2
3
10.5
3
SE2C20050D02
4.0
5
18
3
Frame Size
380-480V +/- 10% - 3 Phase Input
HP Model Number
kW
HP
Output Current (A)
SE2C40010D01
0.75
1
2.2
1
SE2C40020D01
1.5
2
4.1
1
SE2C40020D02
1.5
2
4.1
2
SE2C40030D02
2.2
3
5.8
2
SE2C40050D02
4
5
9.5
2
SE2C40075D02
5.5
7.5
14
3
SE2C40100D02
7.5
10
18
3
Email: [email protected] • Fax 717-264-3115
2
10
vacon
Receiving and installation
3. Receiving and installation
3.1 Preliminary inspection
Before storing or installing the SE2 AC drive, thoroughly inspect the device for
possible shipping damage. Upon receipt:
1.
Remove the drive from its package and inspect exterior for shipping damage. If
damage is apparent, notify the shipping agent and your sales representative.
2.
Remove the cover and inspect the drive for any apparent damage or foreign
objects. Ensure that all mounting hardware and terminal connection hardware
is properly seated, securely fastened, and undamaged.
3.
Read the technical data label affixed to the drive and ensure that the correct
horsepower and input voltage for the application has been purchased.
If you will be storing the drive after receipt, place it in its original packaging and
store it in a clean, dry place free from direct sunlight or corrosive fumes, where
the ambient temperature is not less than –40 °C (–40 °F) or greater than +60 °C
(+149 °F).
4.
EQUIPMENT DAMAGE HAZARD
Do not operate or install any drive that appears damaged.
Failure to follow this instruction can result in injury or equipment
damage.
CAUTION
5.
If the SE2 unit has been stored without power applied for 30-36 months, special
start-up procedures should be used to reform the high voltage filter capacitors
before using the unit. Failure to exercise these procedures may result in extensive damage to the drive. Contact Technical Support for detailed instructions.
3.2 Installation precautions
Improper installation of the SE2 AC drive will greatly reduce its life. Be sure to
observe the following precautions when selecting a mounting location. Failure to
observe these precautions may void the warranty!
•
Install the SE2 unit on a flat, vertical, flame-resistant, vibration-free mounting
within a suitable enclosure, according to EN60529, if specific ingress protection
ratings are required.
•
The SE2 must be installed in a pollution degree 1 or 2 environment.
•
Do not install the drive in a place subjected to high temperature, high humidity,
excessive vibration, corrosive gases or liquids, or airborne dust or metallic
24-hour support 1-877-822-6606
3
Receiving and installation
vacon
11
particles. See “Technical data” on page 40, for temperature, humidity, and
maximum vibration limits for the SE2 drive.
•
Do not mount the drive near heat-radiating elements or in direct sunlight.
•
Mount the drive vertically and do not restrict the air flow to the heat sink fins.
•
The drive generates heat. Allow sufficient space around the unit for heat
dissipation.
3.3 Mechanical dimensions
The following table lists dimensions for the SE2 frame size 1, 2, and 3 models.
See the figures on the following pages for locations of dimensions. Dimensions are
in inches and millimeters, with millimeters in parentheses.
Table 3-1: Dimensions of SE2 frame sizes 1-3
Dimensions
in inches (mm)
Frame
1
2
3
Voltage (V)
110-115
200-240
110-115
200-240 380-480
200-240
KW
0.37-1.0
0.37-1.0
1.1
1.5-2.2
1.5-4.0
4
380-480
5.5-7.5
HP
0.5-1.0
0.5-1.0
1.5
2-3
2-5
5
7.5-10.0
A
7.87 (200)
12.20 (310)
12.20 (310)
B
6.54 (166)
10.87 (276)
10.87 (276)
D
5.55 (141)
9.88 (251)
9.88 (251)
E
1.30 (33)
1.30 (33)
1.30 (33)
F
6.38 (162)
6.93 (176)
9.57 (243)
G
5.51 (140)
6.46 (164)
8.29 (210.5)
H
5.04 (128)
6.02 (153)
7.78 (197.5)
I
0.17 (4.2)
0.17 (4.2)
0.17 (4.2)
J
0.33 (8.4)
0.33 (8.4)
0.33 (8.4)
Control Terminal Torque settings of 0.5 Nm
Power Terminal Torque settings of 1 Nm
Note that the size 2 and 3 drives have 4 symmetrical mounting points.
Email: [email protected] • Fax 717-264-3115
3
12
vacon
Receiving and installation
Figure 3-1: Vacon SE2 dimensions
24-hour support 1-877-822-6606
3
Power wiring
vacon
13
4. Power wiring
This chapter provides information about connecting power wiring to the SE2 drive.
HAZARDOUS VOLTAGE
• Read and understand this manual in its entirety before installing or
operating the SE2 drive. Installation, adjustment, repair, and
maintenance of these drives must be performed by qualified
personnel.
• Disconnect all power before servicing the drive. WAIT 5 MINUTES
until the DC bus capacitors discharge.
DANGER
• DO NOT short across DC bus capacitors or touch unshielded
components or terminal strip screw connections with voltage
present.
• Install all covers before applying power or starting and stopping the
drive.
• The user is responsible for conforming to all applicable code
requirements with respect to grounding all equipment.
• Use the dedicated ground terminal to ground the drive unit. Do not
use mounting screws, bolts, or the chassis.
• Many parts in this drive, including printed circuit boards, operate at
line voltage. DO NOT TOUCH. Use only electrically-insulated tools.
Before servicing the drive:
• Disconnect all power.
• Place a “DO NOT TURN ON” label on the drive disconnect.
• Lock the disconnect in the open position.
Failure to observe these precautions will cause shock or burn,
resulting in severe personal injury or death.
4.1 General wiring information
Be sure that the installation wiring conforms with local standards. Where local
codes exceed these requirements, they must be followed.
4.1.1 Wiring Practices
When making power and control connections, observe these precautions:
•
Never connect input AC power to the output terminals T1/U, T2/V, or T3/W.
Damage to the drive will result.
•
Power wiring to the motor must have the maximum possible separation from
all other power wiring. Do not run in the same conduit; this separation reduces
the possibility of coupling electrical noise between circuits.
•
Cross conduits at right angles whenever power and control wiring intersect.
Email: [email protected] • Fax 717-264-3115
4
14
•
vacon
Power wiring
Good wiring practice also requires separation of control circuit wiring from all
power wiring. Since power delivered from the drive contains high frequencies
which may cause interference with other equipment, do not run control wires in
the same conduit or raceway with power or motor wiring.
4.1.2 Considerations for Power Wiring
Power wiring refers to the line and load connections made to terminals L1/R, L2/S,
L3/T, and T1/U, T2/V, T3/W respectively. Select power wiring as follows:
•
Use only VDE, UL or CUL recognized wire.
•
Wire voltage rating must be a minimum of 300 V for 230 Vac systems and 600 V
(Class 1 wire) for 400 Vac systems.
•
Wire gauge must be selected based on 125% of the continuous input current
rating of the drive. Wire gauge must be selected from wire tables for 75 °C
insulation rating, and must be of copper construction. See “Ratings” on
page 40 for the continuous output ratings for the drive.
See the following table for a summary of power terminal wiring specifications.
Table 4-1: Power terminal wiring specifications for the SE2 drive
Drive
Size
Specifications
1
1.8 Nm (16 in-lbs) nominal torque or
2.0 Nm (18 in-lbs) maximum torque
1.5–10 mm2 (7–15 awg wire)
2
3.4 Nm (30 in-lbs) nominal torque
10–16 mm2 (5–7 awg wire)
3
4.0 Nm (35 in-lbs) nominal torque
25 mm2 (3 awg wire)
NOTE: Wire type not specified by the manufacturer. Some types of wire may not fit within the
constraints of the conduit entry and bend radius inside the drive.
4.1.3 Grounding Guidelines
The ground terminal for each SE2 unit should be individually connected directly to
the site ground bus bar (through the filter, if installed). SE2 ground connections
should not loop from one drive to another, or to/from any other equipment. Ground
loop impedance must conform to local industrial safety regulations. To meet UL
regulations, UL approved ring crimp terminals should be used for all ground wiring
connections.
If a system ground fault monitor is to be used, only Type B devices should be used
to avoid nuisance tripping.
The safety ground
is required by code for the drive. One of these points must be
connected to adjacent building steel (girder, joist), a floor ground rod, or bus bar.
24-hour support 1-877-822-6606
4
Power wiring
vacon
15
Grounding points must comply with national and local industrial safety regulations
and/or electrical codes.
The drive safety ground must be connected to the system ground. Ground impedance
must conform to the requirements of national and local industrial safety regulations
and/or electrical codes. The integrity of all ground connections should be checked
periodically.
For shield termination, the safety ground terminal provides a grounding point for
the motor cable shield. The motor cable shield connected to this terminal (drive end)
should also be connected to the motor frame (motor end). Use a shield terminator or
EMI clamp to connect the shield to the safety ground terminal. Note: When shielded
cable is used for control and signal wiring, the shield should be grounded at the
source end only, not at the drive end.
The motor ground must be connected to one of the ground terminals on the drive.
4.1.4 Wiring Precautions
Connect the drive according to the connection diagram shown in Figure 4-1 on
page 16, ensuring that motor terminal box connections match the output
specifications of the drive.
For recommended cabling and wire sizing, see “Technical data” on page 40.
Email: [email protected] • Fax 717-264-3115
4
16
vacon
Power wiring
Figure 4-1: Connection diagram for SE2 power wiring
24-hour support 1-877-822-6606
4
Power wiring
vacon
17
4.2 Drive and motor connections
For one-phase supply, power should be connected to L1/L and L2/N.
For three-phase supplies, power should be connected to L1, L2, and L3. Phase
sequence is not important.
The motor should be connected to U, V, and W.
For drives with a dynamic brake transistor, an optional external braking resistor will
need to be connected to +DC and BR when required. The brake resistor circuit should
be protected by a suitable thermal protection circuit.
Figure 4-2: SE2 Size 1 connections
Figure 4-3: SE2 Size 2 and 3 connections
4.3 Motor terminal box connections
Most general-purpose motors are wound for operation on dual voltage supplies. This
is indicated on the nameplate of the motor.
Ensure that the motor is connected for the proper voltage configuration that
matches the SE2 drive’s output rating.
Email: [email protected] • Fax 717-264-3115
4
18
vacon
Control wiring
5. Control wiring
This chapter provides information about connecting control wiring to the SE2 drive.
5.1 Control terminal connections
Control
Terminal
Signal
1
+24V user output
2
Digital input 1
3
Digital input 2
4
Digital input 3 /
Analog input 4
5
+10V user output
+10V, 10 mA, 1k Ohms minimum
6
Analog input 1 /
Digital input 4
Analog: 0-10V, 0-20 mA, or 4-20mA
Digital: 8-30V
7
0V
User ground-connected terminal 9
8
Analog output /
Digital output
9
0V
10
Relay common
11
Relay NO contact
Description
+24V, 100 mA
Positive logic
“Logic 1” input voltage range: 8V ... 30V DC
“Logic 0” input voltage range: 0V ... 4V DC
Digital: 8-30V
Analog: 0-10V, 0-20 mA, or 4-20 mA
Analog: 0-10V, 20 mA maximum
Digital: 0-24V
User ground-connected terminal 7
Contact 250Vac, 6A / 30Vdc, 5A
5.2 RJ45 data connection
1
2
3
4
5
6
7
8
No connection
No connection
0V
No connection
No connection
+24V
RS485 - /MODBUS
RS485 + /MODBUS
For Modbus, the data
format is fixed as:
For MODBUS RTU register map
information, please refer to
“Parameters” on page 22.
When using MODBUS control,
the analog and digital input can
be configured as in MODBUS
control mode (P201=3 or 4).
1 start bit, 8 data bits,
1 stop bit, no parity
Baud rate and address
are set in P-900-902.
24-hour support 1-877-822-6606
5
Operation
vacon
19
6. Operation
This chapter describes the keypad and displays, and how to change parameters. It
also describes how to control the SE2 using the keypad or using terminal control
mode.
6.1 Using the keypad
Use the keypad and display to configure and monitor the SE2 operation.
PROG
RUN
When in keypad mode, this
key is used for starting a
stopped drive or to reverse
the direction of rotation if bidirectional keypad mode is
enabled.
PROGRAM
This key is used for displaying
real-time information, for
accessing and entering
parameter edit mode, and for
storing parameter changes.
INC
This key is used to increase
speed in real-time mode, or
to increase parameter values
in parameter edit mode.
DEC
This key is used to decrease
speed in real-time mode, or
to decrease parameter
values in parameter edit
mode.
RESET/STOP
Use this key to reset a tripped
drive. When in Keypad mode,
use it to STOP a running
drive.
SHIFT
When in programming mode,
and viewing a parameter, use
this key to access the
parameter so the data can be
changed with the UP or
DOWN arrows.
ENTER
This key enters the data into
memory.
6.2 Changing parameters
To change a parameter value in Level 1, press and release the PROG key while the
drive displays STOP. The display changes to P-010, indicating parameter 010.
To access all parameters (Level 2), hold down the SHIFT key and press the PROG
key.
Email: [email protected] • Fax 717-264-3115
6
20
vacon
Operation
To change Level 1 or Level 2 parameters, use the UP or DOWN arrows to select the
desired parameter to view or change. To display the value of the parameter, press
and release the SHIFT key. To change the value, use the UP or DOWN keys. Store the
change by pressing and releasing the ENTER key.
To return to real-time mode, press and release the PROG key. The display shows
STOP if the drive is stopped, or displays the real-time information (for example,
speed) if the drive is running.
6.3 Resetting factory default settings
To reset factory default parameter settings, press the UP, DOWN, and STOP keys for
more than two seconds. The display shows P-dEF. Press the STOP key to
acknowledge and reset the drive.
6.4 Terminal control
When delivered, the SE2 is in the factory default state, meaning that it is set to
operate in terminal control mode and all parameters (P-xxx) have the default values
as indicated in “Parameters” on page 22. To use terminal control:
1. Connect the motor to the drive, checking the motor connection matches that of the
voltage rating.
2. Enter the motor data from the nameplate. P-509 = motor rated voltage, P-510 = motor
rated current, P-503 = motor rated frequency.
3. Connect a control switch between the control terminals 1 and 2, ensuring that the
contact is open (drive disabled)
4. Connect a potentiometer (1kΩ to 10kΩ maximum) between terminals 5 and 7, and the
wiper to terminal 6.
5. With the potentiometer set to zero, switch on the supply to the drive. The display
shows StoP.
6. Close the control switch, terminals 1-2. The drive is now enabled and the output
frequency and speed are controlled by potentiometer. The display shows zero speed
in Hz (H 0.0) with the potentiometer turned to minimum.
7. Turn the potentiometer to maximum. The motor will accelerate to 60 Hz (the default
value of P-302) under the control of the accelerating ramp time P-402. The display
shows 60 Hz (H 60.0) at max speed.
8. To display motor current (A), briefly press the PROG key.
9. Press PROG again to return to the speed display.
10. To stop the motor, either turn the potentiometer back to zero, or disable the drive by
opening the control switch (terminals 1-2). If the enable/disable swtich is opened, the
drive decelerates to stop, at which time the display shows StoP . If the potentiometer
is turned to zero with the enable / disable closed, the display shows 0.0 Hz (H 0.0). If
left in this state for 20 seconds, the drive goes into standby mode, and the display
shows Standby, waiting for a speed reference signal.
24-hour support 1-877-822-6606
6
Operation
vacon
21
6.5 Keypad control
To control the SE2 from the keypad in a forward direction only, set P-201 = 1, and
follow these steps:
1. Connect the motor as for terminal control (described in “Terminal control” on
page 20).
2. Enable the drive by installing a hard-wired jumper between control terminals 1 and 2.
The display shows StoP.
3. Press the RUN key. The display shows H 0.0.
4. Press the UP key to increase speed.
5. The drive runs in a forward direction, increasing speed until you release the UP key.
The rate of acceleration is controlled by the setting of P-402.
Be sure to check this before starting.
6. Press the DOWN key to decrease speed. The drive decreases speed until you release
the DOWN key. The rate of deceleration is controlled by the setting in P-403.
7. Press the STOP key. The drive decelerates to rest at the rate set in P-403.
8. The display shows StoP, at which point the drive is disabled.
To preset a target speed before enabling the drive:
1. Press the RUN key while the drive is stopped. The display shows the target speed.
2. Use the UP and DOWN keys to adjust the speed as needed, then press the STOP key
to return the display to StoP.
3. Press the RUN key to start the drive accelerating to the target speed.
To allow the SE2 to be controlled from the keypad in a forward or reverse direction,
set P-201 = 2, and follow these steps:
Note: Operation is the same as when P-201 = 1, for start, stop, and changing speed.
1. Press the RUN key. The display changes to H 0.0.
2. Press the UP key to increase speed.
3. The drive runs in a forward direction, increasing speed until you release the UP key.
The rate of acceleration is controlled by the setting of P-402.
The maximum speed is the speed set in P-302. Be sure to
check this before starting.
4. To reverse the direction of rotation of the motor, press the RUN key again.
Email: [email protected] • Fax 717-264-3115
6
22
vacon
Parameters
7. Parameters
This chapter describes the Level 1 and Level 2 parameters for the SE2 drive, their
defaults, and options for user control.
Note that all parameters can be addressed by adding 40000 to the parameter
number. For example, parameter 201 (Input Mode) can be addressed by Modbus
address 40201.
7.1 Level 1 parameters
The following chart lists all the Level 1 parameters and their options.
Par.*.
Description
P-010 Trip log
Range
Last four trips stored
Default
Explanation
Previous 4 trips stored in order
of occurrence, with the most
recent first. UV trip is stored
Read only
only once. More fault event
logging functions are accessible
through parameter group zero.
P-010 displays the most recent four trips, together with the run-time stamp. For
example: U-Volts, 576h, 42 28 means undervoltage after 576 hrs., 42 m, 28 s.
The most recent trip is always displayed first. The time stamp is displayed by
pressing the DOWN key repeatedly. Pressing the DOWN key again displays the next
most recent fault message, and so forth.
Standby mode is enabled automatically when the drive is at zero speed for >20s.
Primary control mode for SE2.
0: Terminal control
1: Uni-directional keypad
control. Keypad START button
does not reverse direction.
0: Terminal control
1: Keypad control - FWD
2: Keypad control-FWD
and REV
3: Modbus network
Terminal / Keypad / control with internal
Modbus / PI Drive accel/decel ramps
P-201
Control Mode
4: Modbus network
Selection
control with accel/decel
ramp adjustment
5: User PI control
6: User PI control with
analog input 1
summation
2: Bi-directional keypad control
Keypad START button toggles
between FWD and REV.
0
3: Control via Modbus RTU
(RS485) comms interface using
the internal accel/decel ramps
4: Control via Modbus RTU
(RS485) comms interface with
accel/decel ramps updated via
Modbus
5: User PI control with external
feedback signal
6: User PI control wtth external
feedback signal & summation
with analog input
* Note that all parameters can be addressed by adding 40000 to the parameter number. For
example, parameter 201 (Input Mode) can be addressed by Modbus address 40201.
24-hour support 1-877-822-6606
7
Parameters
Par.*.
vacon
Description
Range
Default
Mains loss
Stop mode select
1: Coast to stop
Explanation
If the supply is lost and P-203= 0,
the drive tries to keep running by
reducing the speed of the load
using the load as a generator.
0: Ramp stop (brown-out
ride-through)
P-203
23
0
2: Ramp to stop (fast
stop)
If P-203=2, the drive ramps to
stop using the P-405 decel ramp
when mains supply is lost. This
also activates constant power
braking mode for normal
braking.
P-301 Minimum speed
0
0 Hz
Minimum speed limit, Hz or
rpm. See P-511.
P-302 Maximum speed
up to 500 Hz
60 Hz
Maximum speed limit, Hz or
rpm. See P-511.
P-303 Preset speed 1
0..500 Hz
0 Hz
Sets jog / preset speed 1
Acceleration ramp
P-402
0 to 600s
time
Deceleration ramp
P-403
0 to 600s
time
P-405
2nd decel ramp
time (Fast Stop)
P-502 Voltage boost
0...25.0s
0.0 to 25.0% of max.
output voltage
5s
Acceleration ramp time from 0
to base speed (P-503) in seconds
5s
Deceleration ramp time from
base speed (P-503) to standstill,
in seconds. When set to zero,
fastest possible ramp time
without trip is activated.
0
2nd deceleration ramp time
from base speed (P-503) to
standstill, in seconds. If set to
zero, the drive coasts to stop.
Select with fast stop function via
digital input setting, or on mains
loss as set by P-203.
Applies an adjustable boost to
SE2 voltage output at low speed
Motor
to assist with starting “sticky”
power
loads. For continuous
dependent
applications at low speed using
a forced ventilation motor.
* Note that all parameters can be addressed by adding 40000 to the parameter number. For
example, parameter 201 (Input Mode) can be addressed by Modbus address 40201.
Email: [email protected] • Fax 717-264-3115
7
24
vacon
Par.*.
P-700
P-705
Parameters
Description
Range
Analog output
function select
Digital output mode:
0: Drive enabled
1: Drive healthy
2: Motor at target speed
3: Drive tripped
4: Motor speed >= limit
5: Motor current >= limit
6: Motor speed < limit
7: Motor current < limit
Analog output mode:
8: Motor speed
9: Motor current
User relay output
select
0: Drive enabled
1: Drive healthy
2: Motor at target speed
3: Drive tripped
4: Motor speed >= limit
5: Motor current >= limit
6: Motor speed < limit
7: Motor current < limit
Default
Explanation
8
Digital output mode:
Options 0 to 7 select a digital
voltage output signal
Disabled: 0V
Enabled: +24V (25mA limit)
Options 4 to 7: digital output is
enabled using level set in P-721
Analog output mode:
Option 8: Motor speed signal
range 0..10V = 0..500 Hz (P-302)
Option 9: Motor current signal
range 0...10V = 0...200% of P-510
Defines the function of the user
relay, when the operating
conditions are met.
1
Disabled: Contacts open
Enabled: Contacts closed
Options 4-7: relay output is
enabled using level set in P-739.
* Note that all parameters can be addressed by adding 40000 to the parameter number. For
example, parameter 201 (Input Mode) can be addressed by Modbus address 40201.
7.2 Level 2 parameters
The following chart lists all the Level 2 parameters and their options.
Par.*
Description
Range
P-205
Analog input
format
0..10V, b..10V, 0..20mA,
t 4..20mA, r 4..20mA
t 20..4mA r 20..4mA
P-206
Analog input
offset
-500.0 ... 500.0%
P-207
Analog input
span
0 ... 500.0%
Default
Explanation
0..10V
Configures the voltage or current
format of the analog input signal.
b 0..10V can be used for bipolar
input signals. A 50% offset can be
applied to P-206 and 200% scaling
in P-207 gives +/- P-302.
“t” indicates the drive will trip if
signal is removed when drive is
enabled.
“r” indicates the drive will ramp to
Preset Speed 1 if signal is removed
when drive is enabled.
0%
Introduces an offset to the analog
input level with a resolution 0.1%
100%
Analog input scaling, resolution
0.1%
* Note that all parameters can be addressed by adding 40000 to the parameter number. For
example, parameter 201 (Input Mode) can be addressed by Modbus address 40201.
24-hour support 1-877-822-6606
7
Parameters
Par.*
P-211
vacon
Description
Range
0..10V, 0..20mA,
2nd analog input
t 4..20mA, r 4..20mA
format
t 20..4.mA r 20...4mA
Default
Explanation
0...10
Selects the format of the 2nd
analog input.
“t” indicates the drive will trip if
signal is removed when drive is
enabled.
“r” indicates the drive will ramp to
Preset Speed 1 if signal is removed
when drive is enabled.
P-304 Preset speed 2
0..500 Hz
0 Hz
Sets jog / preset speed 2
P-305 Preset speed 3
0..500 Hz
0 Hz
Sets jog / preset speed 3
P-306 Preset speed 4
0..500 Hz
0 Hz
Sets jog / preset speed 4
P-407
DC injection on
stop
0 to 25.0s
Brake chopper
P-410
enable (not S1)
0: Disabled
1: Enabled with s/w
protection
2: Enabled without s/w
protection
Energy
P-501
optimiser
0: Disabled
1: Enabled
P-503
P-504
Motor rated
frequency
Skip frequency
hysteresis band
P-505 Skip frequency
Motor rated
P-509
voltage
25
When > 0, DC injection braking
activated when speed reaches zero
0
with stop signal applied. Only
(disabled)
applied on disable (Stop), not on
enable. Uses the level set in P-502.
0
Software protection for standard
brake resistors (200W).
0
When enabled, automatically
reduces applied motor voltage on
light load. Minimum value is 50%
of nominal.
60 Hz
Rated (nameplate) frequency of
the motor
0..500 Hz
0 Hz
Set P-503 before adjusting.
Speed reference held at upper or
lower skip frequency limit unitl
input signal reaches the opposite
skip frequency limit. Speed ramps
through the skip frequency band at
a rate set by P-402 and P-403.
0..500 Hz
0 Hz
Set P-503 before adjusting.
Skip frequency center point.
0, 20V to 250V
230V
0, 20V to 500V
460V
Rated (nameplate) voltage of the
motor (Volts). Value limited to 250V
for low-voltage drives. Setting to
zero disables voltage
compensation.
Drive
rating
Rated (nameplate) current of the
motor. Sets overload protection.
0
When non-zero, all speed-related
parameters are displayed in rpm.
25 Hz to 500 Hz
P-510
Motor rated
current
25%-100% of drive rated
current
P-511
Motor rated
speed
0 to 30,000 rpm
* Note that all parameters can be addressed by adding 40000 to the parameter number. For
example, parameter 201 (Input Mode) can be addressed by Modbus address 40201.
Email: [email protected] • Fax 717-264-3115
7
26
vacon
Par.*
P-512
Parameters
Description
Range
V/f characteristic
0 ... P-503
frequency adjust
V/f characteristic
P-513 adjustment
0 ... P509
voltage
Default
Explanation
0.0 Hz
Sets the frequency at which the
adjustment voltage set in P-513 is
applied. (See page 28.)
0
Adjusts the applied motor voltage
to this value at the frequency set in
P-512. (See page 28.)
Edge-r: If the drive is powered up
with digital input 1 closed
(enabled), the drive will not run.
The switch must be opened and
closed after power-up or after
clearing a trip for the drive to run.
P-608
Terminal mode
restart function
EdgE-r, Auto-0 .. Auto-5
Auto-0
Auto-1...5: The drive will make 1..5
attempts to automatically restart
after a trip (25s between
attempts). If fault has cleared, the
drive restarts. To reset the
counter, drive must be powereddown. Reset the counter on the
keypad or by re-enabling the drive.
P-721
Digital input
function select
0-12
P-739
User relay
output limit
0.0 to 100%
0
100%
0: Minimum speed
1: Previous speed
Keypad mode
P-802
restart function
2: Minimum speed
(Auto-run)
3: Previous speed
(Auto-run)
Effective
P-803 switching
frequency
Auto-0: Drive will run when digital
input 1 is closed (if not tripped).
4 .. 32kHz
1
Defines the function of the digital
inputs depending on the control
mode setting in P-201. See
“Analog and digital input
configurations” on page 30, for
more information.
Sets the limit for P-705.
If set to 0 or 2, the drive will always
start from minimum speed.
If set to 1 or 3, the drive ramps up
to the operating speed prior to the
last STOP command.
If set to 2 or 3, the status of digital
input 1 controls the drive to start
or stop. The start and stop keys on
the drive will not function in this
case.
Sets maximum effective switching
frequency of the drive. If “rEd”
appears, switching frequency is
8 / 16 kHz
reduced to the level in P00-14 due
to excessive drive heatsink temp.
Defaults are model-dependent.
* Note that all parameters can be addressed by adding 40000 to the parameter number. For
example, parameter 201 (Input Mode) can be addressed by Modbus address 40201.
24-hour support 1-877-822-6606
7
Parameters
Par.*
vacon
Description
Range
Default
Explanation
27
P-809
Display speed
scaling factor
0.000 to 6.000
0
Custom scaling factor applied to
drive speed. If P-511=0, speed in
Hz is scaled by this factor. If P511>0, speed in rpm is scaled.
Displayed as a real-time variable
on the drive display, shown by “c”.
P-811
Access code
definition
0 - 9,999
0
Allows only selected parameter
access.
When enabled, the drive starts
from the detected motor rotor
speed. Short start delay possible if
rotor stationary. Recommended
for high-inertia load applications.
P-816
Spin Start (S2
and S3 only)
DC injection on
start (S1)
0: Disabled
1: Enabled
0
P-850
User PI
operating mode
0: Direct
1: Inverse
0
If an increasing feedback signal
should increase the speed of the
motor, set to “Inverse” mode.
P-851
User PI
feedback select
0: 2nd analog input (T4)
1: 1st analog input (T6)
2: Motor load current
0
This parameter selects the
feedback signal source.
P-852
User PI proport.
0.0 ... 30.0
gain
1.0
Higher value used for high inertia.
Too high a value gives instability.
P-853
User PI integral
time constant
0.0s ... 30.0s
1.0s
High value gives slower, more
damped response.
P-866
User PI digital
reference
0 ... 100%
0.0%
Sets the preset reference used
when P-869=0.
P-869
User PI
0: Digital
reference select 1: Analog
P-900
OP-buS
Modbus enable / (fixed at 115.2 kbps)
baudrate select 9.6k to 115.2 kbps
(Modbus)
Serial
P-902 communications Adr: 0 disable, 1 .. 63
address
P-903
Trip enable /
delay
0
For Size 1 drives, setting this
parameter to 1 enables DC
injection braking on enable. Set
the duration and levels with P-407
and P-502, respectively.
Sets the source for the PI control
reference signal. When set to 1,
analog input 1 is used.
OP-buS disables Modbus.
OP-buS
1
Setting a baud rate enables
Modbus at that baudrate.
Adr: Unique drive address for
communication network.
Time before a trip during a comms
loss can be set in ms.
“0” = disables the comms trip.
0 (no trip,
t 3000 “t”= drive will trip if time is
t 30, 100, 1000, 3000 (ms)
(3 sec trip) exceeded.
r 30, 100, 1000, 3000 (ms)
“r” = drive ramps to stop if the time
is exceeded.
* Note that all parameters can be addressed by adding 40000 to the parameter number. For
example, parameter 201 (Input Mode) can be addressed by Modbus address 40201.
Email: [email protected] • Fax 717-264-3115
7
28
vacon
Parameters
7.3 Adjusting Voltage / frequency (V/f) characteristics
Voltage
P509
Default
Linear V/F
P509/2
Adjusted
P513
P502
P301
P503/2
P505
P503
P302
Frequency
Figure 7-1. Voltage / frequency relationship
The V/f characteristic is defined by
several parameters, as shown in
Figure 7-1. Reducing the voltage
at a particular frequency reduces
the current in the motor and
therefore reduces the torque and
power. The V/f curve can be
further modified by using P-513
and P-512, where P-513
determines the percentage
increase or decrease of the
voltage applied to the motor at the
frequency specified in P-512. This
can be useful if motor instability is
experienced at certain
frequencies. In this case,
increase or decrease the voltage
(P-513) at the speed of the
instability (P-512).
For applications requiring energy savings, typically HVAC and pumping applications,
the energy optimiser P-501) parameter can be enabled. This automatically reduces
the applied motor voltage on light loads.
7.4 P-00 read only drive status parameters (Group Zero)
If you scroll to P-00, pressing SHIFT then displays “P-00 A”, where A represents the
secondary number within P-00 (from 1-20). You can then scroll to the required P-00
parameter.
To display the value of that particular group zero parameter, press SHIFT again.
For parameters having multiple values (for example, software ID), pressing the UP
or DOWN keys displays the different values within that parameter.
To return to the next level up, press ENTER. Pressing PROG (without pressing the
UP or DOWN keys) changes the display to the next level up (main parameter level,
that is, P-000). If the UP or DOWN keys are pressed while on the lower level (for
example, P00-05), to change the P-00 index, press PROG to display that parameter
value.
24-hour support 1-877-822-6606
7
Parameters
vacon
29
The following parameters are used for determining and monitoring status of a drive.
Par.
Description
Display range
Explanation
1st analog input
P00-01
value
0 ... 100%
100% = max. input voltage
P00-02
2nd analog input
value
0 ... 100%
100% = max. input voltage
P00-03
Speed reference
input
-P1-302 ... P1-302
Displayed in Hz if P-511 = 0; otherwise,
displayed in rpm. The ‘302’ refers to the
frequency programmed in P-302.
P00-04 Digital input status Binary value
Drive digital input status
P00-05 Reserved
0
Reserved
P00-06 Reserved
0
Reserved
Applied motor
P00-07
voltage
0 ... 600V AC
Value of RMS voltage applied to motor
P00-08 DC bus voltage
0 ... 1000V DC
Internal DC bus voltage
Internal heatsink
P00-09
temperature
-20 ... 100 degrees C
Temperature of heatsink in degrees C
P00-10 Hours run meter
0 to 99,999 hours
Unaffected by resetting factory parameters
Run time since last
P00-11
0 to 99,999 hours
trip (1)
Run-time clock stopped by drive disable (or
trip); reset on next enable only if a trip
occurred. Reset also on next enable after a
drive power-down.
P00-12
Run time since last
0 to 99,999 hours
trip (2)
Run-time clock stopped by drive disable (or
trip); reset on next enable only if trip occurred
(undervoltage not considered a trip). Not reset
by power down / power up cycling unless a trip
occurred prior to power down.
P00-13
Run time since last
0 to 99,999 hours
disable
Run-time clock stopped on drive disable; value
reset on next enable.
Drive effective
P00-14 switching
frequency
4..32 kHz
Actual drive effective output switching
frequency. This value may be lower than the
selected frequency in P-803 if the drive is too
hot. The drive automatically reduces the
switching frequency to prevent an overtemperature trip and maintain operation.
P00-15 DC bus voltage log 0 ... 1000V
8 most recent values prior to trip
Thermistor
P00-16
temperature log
-20 ... 120 degrees C
8 most recent values prior to trip
P00-17 Motor current
0 to 2x rated current
8 most recent values prior to trip
P00-18
Software ID, IO, and examples: “1.00”,
motor control
“47AE”
Version number and checksum. “1” on left
hand side indicates I/O processor; “2”
indicates motor control.
P00-19
Drive serial
number
000000 ... 999999
00-000 ... 99-999
Unique drive serial number.
Example: 540102 / 32 / 005
Drive rating
Drive rating, drive type. Ex: 0.37, 1 230, 3P-out
P00-20 Drive identifier
Email: [email protected] • Fax 717-264-3115
7
30
vacon
Analog and digital input configurations
8. Analog and digital input configurations
This chapter provides information about wiring and connections for terminal mode,
keypad mode, with examples of typical applications for which you might use the
terminal mode with the SE2 drive.
8.1 Terminal mode (P-201=0)
(Page 1 of 2)
Par. Digital input 1
721.
(T1)
Digital input 2
(T2)
Digital input 3
(T4)
0
Open: Stop
(disable)
Closed: Run
(enable)
Open: Forward run
Closed: Reverse run
1
Open: Stop
(disable)
Closed: Run
(enable)
Open: Analog spd ref
Closed: Preset spd 1/2
2
Open: Stop
(disable)
Closed: Run
(enable)
Open: Stop
(disable)
3*
Closed: Run
(enable)
Analog input
(T6)
Open: Analog speed ref Analog input 1
Closed: Preset speed 1 reference
Open: Preset spd 1
Closed: Preset spd 2
Dig. input 2
Dig. input 3
Preset spd
Open
Open
1
Closed
Open
2
Open
Closed
3
Closed
Closed
4
Open: analog spd ref
Closed: Preset spd 1
External trip input:
Open: Trip
Closed: Run
Analog input 1
reference
Open: Preset
speeds 1-4
Closed: Max.
speed (P-302)
4 preset speeds
selectable.
Analog input
used as digital
input Closed
status: 8V < Vin <
30V
Analog input 1
reference
Connect
external
thermistor type
PT100 or similar
to digital input 3
4
Open: Stop
(disable)
Closed: Run
(enable)
Open: analog input 1 Analog input 2
Closed: analog input 2 reference
Analog input 1
reference
Switches
between analog
inputs 1 and 2
5
Open: Fwd
Stop
Closed: Fwd
Run
Open: Reverse stop
Closed: Reverse run
Open: Analog spd ref
Closed: Preset spd 1
Analog input 1
reference
Closing both
digital inputs 1
and 2 causes a
fast stop (P-405)
Open: Forward
Closed: Reverse
External trip input:
Open: Trip
Closed: Run
Analog input 1
reference
Connect
external
thermistor type
PT100 or similar
to digital input 3
Open: Stop (disable)
Closed: Reverse run
(enable)
External trip input:
Open: Trip
Closed: Run
Analog input 1
reference
Closing both
digital inputs 1
and 2 causes a
fast stop (P-405)
Open: Stop
(disable)
6*
Closed: Run
(enable)
7
Open: Stop
(disable)
Closed: Fwd
Run (enable)
Digital input 3 Analog input 1
8
Open: Stop
(disable)
Closed: Run
(enable)
Open: Forward
Closed: Reverse
Preset
spd
Open
Open
Closed
Open
1
2
Open
Closed
3
Closed
Closed
4
24-hour support 1-877-822-6606
8
Comments
Analog and digital input configurations
vacon
31
(Page 2 of 2)
Par. Digital input 1
721.
(T1)
9
Open: Stop
(disable)
Closed: Fwd
Run (enable)
Digital input 2
(T2)
Digital input 3
(T4)
Analog input
(T6)
Digital input 3
Analog input 1
Preset
speed
Open
Open
1
Closed
Open
2
Open
Closed
3
Closed
Closed
4
Open: Stop (disable)
Closed: Reverse run
(enable)
10
Normally
open (NO)
Momentary
close to run
Normally closed (NC)
Momentary open to
stop
Open: Analog spd ref
Closed: Preset spd 1
11
Normally
open (NO)
Momentary
close to run
Normally closed (NC)
Momentary open to
stop
Normally open (NO)
Analog input 1
Momentary close to rev reference
12
Open: Stop
(disable)
Closed: Run
(enable)
Open: Fast stop
(disable)
Closed: Run (enable)
Open: Analog spd ref
Closed: Preset spd 1
Comments
Closing both
digital inputs 1
and 2 causes a
fast stop (P-405)
Analog input 1
reference
Closing both
digital inputs 1
and 2 causes a
fast stop (P-405)
Analog input 1
reference
* NOTE: Negative preset speeds are inverted if Run Reverse is selected.
8.2 Typical applications for terminal mode
The diagrams on the following pages illustrate applications where parameter 201
(control mode selection) is set to 0 (terminal control mode), and the settings for
parameter 721 (digital input function select) control the function of the digital inputs:
8.2.1 Analog speed input with 1 preset speed and Fwd / Rev switch:
O: Forward
C: Reverse
O: Analog Speed Ref
C: Preset Speed 1
Parameter 721 is set to 0.
Email: [email protected] • Fax 717-264-3115
8
32
vacon
Analog and digital input configurations
8.2.2 Analog speed input with 2 preset speeds:
Parameter 721 is set to 1.
8.2.3 Four preset speeds and Fwd / Rev switch:
Parameter 721 is set to 2.
O: Preset Speeds 1-4
C: Max Speed (P-302)
24-hour support 1-877-822-6606
8
Analog and digital input configurations
vacon
33
8.2.4 Analog speed input with 1 preset speed and motor thermistor trip:
Parameter 721 is set to 3.
8.2.5 Local or remote analog speeds (2 analog inputs):
Parameter 721 is set to 4.
8.2.6 Push button Fwd / Rev / Stop with fast stop using 2nd deceleration ramp:
Parameter 721 is set to 11.
Email: [email protected] • Fax 717-264-3115
8
34
vacon
Analog and digital input configurations
8.3 Keypad mode (P-201 = 1 or 2)
Par.
721.
Digital input 1
(T1)
Open: Stop
0, 1, 5, (disable)
8.. 12 Closed: Run
(enable)
Digital input 2
(T2)
Digital input 3
(T4)
Analog input
(T6)
Comments
Closed: remote Closed: remote DOWN Open: Forward
UP push-button push-button
+24V: Reverse
2
Open: Stop
(disable)
Closed: Run
(enable)
Closed: remote Closed: remote DOWN Open: Keypad spd ref
UP push-button push-button
+24V: Preset spd 1
3*
Open: Stop
(disable)
Closed: Run
(enable)
External trip input:
Closed: remote
Open: Trip
UP push-button
Closed: Run
4
Open: Stop
(disable)
Closed: Run
(enable)
Closed: remote Open: Keypad spd ref
Analog input 1
UP push-button Closed: Analog input 1
6*
Open: Stop
(disable)
Closed: Run
(enable)
External trip input:
Open: Fwd run
Open: Trip
Closed: Rev run
Closed: Run
Connect external
Open: Keypad spd ref thermistor type
+24V: Preset spd 1
PT100 or similar
to digital input 3
7
Open: Fwd
Stop
Closed: Fwd
Run
External trip input:
Open: Rev stop
Open: Trip
Closed: Rev run
Closed: Run
Closing both
Open: Keypad spd ref digital inputs 1
+24V: Preset spd 1
and 2 causes a
fast stop (P-405)
Closed: remote
DOWN push-button
Connect external
thermistor type
PT100 or similar
to digital input 3
* NOTE: By default, if the enable signal is present, the drive will not be enabled until the START
button is pressed. To automatically enable the drive with the enable signal is present, set
P-802 = 2 or 3. This then disables the use of the START or STOP buttons.
The following example shows a remote push-button speed control with Forward /
Reverse. Parameter 721 is set to 0; Parameter 201 is set to 1 or 2.
24-hour support 1-877-822-6606
8
Analog and digital input configurations
vacon
35
8.4 Modbus control mode (P-201 = 3 or 4)
Par.
721.
Digital input 1
(T1)
Open: Stop
0, 2,
(disable)
4, 5,
Closed: Run
8...12
(enable)
3*
Open: Stop
(disable)
Closed: Run
(enable)
6*
Open: Stop
(disable)
Closed: Run
(enable)
7
Open: Stop
(disable)
Closed: Run
(enable)
Digital input 2
(T2)
Digital input 3
(T4)
No effect
Open: Master speed ref
Closed: Preset speed 1
Open: Master speed ref
Closed: Analog input
Analog input
(T6)
Comments
No effect
No effect
Run and stop
commands given
via the RS485 link
and digital input 1
must be closed for
the drive to run.
External trip
input:
Open: Trip
Closed: Run
No effect
Connect external
thermistor type
PT100 or similar to
digital input 3
External trip
input:
Open: Trip
Closed: Run
Analog input
reference
External trip
input:
Closed: Keypad speed ref Open: Trip
Closed: Run
Open: Master speed ref
No effect
Master speed ref:
Start and Stop
controlled via
RS485. Keypad
speed ref: Drive
auto-runs if digital
input 1 is closed,
depending on the
P-802 setting.
Note that all parameters can be addressed by adding 40000 to the parameter
number. For example, parameter 201 (Input Mode) can be addressed by Modbus
address 40201.
8.5 User PI control mode (P-201 = 5 or 6)
Par.
721.
Digital input 1
(T1)
Open: Stop
0, 2, 4,
(disable)
5, 8..
Closed: Run
12
(enable)
1
Open: Stop
(disable)
Closed: Run
(enable)
Open: Stop
3, 6, 7 (disable)
*
Closed: Run
(enable)
Digital input 2
(T2)
Digital input 3
(T4)
Open: PI control
PI feedback analog
Closed: Preset
input
speed 1
Open: PI control
Closed: Analog
input 1
PI feedback analog
input
Open: PI control External trip input:
Closed: Preset Open: Trip
Closed: Run
speed 1
Analog input
(T6)
Comments
No effect
Analog input 1
PI feedback analog
input
Connect external
thermistor type
PT100 or similar
to digital input 3
* NOTES: By default, the PI reference is set for a digital reference level set in P-866.
When using an analog reference, set P-869 = 1 (analog), and connect reference signal to
analog input 1 (T6).
The default settings for proportional gain (P-852), integral gain (P-853), and feedback
mode (P-850) are suitable for most HVAC and pumping applications.
The analog reference used for PI control can also be used as the local speed reference
when P-721 = 1.
Email: [email protected] • Fax 717-264-3115
8
36
vacon
Analog and digital input configurations
The following diagrams illustrate various applications where parameter 201 (control
mode selection) is set to 5 (user PI control mode), and the settings for parameter 721
(digital input function select) are set for 0, 1, and 3, respectively:
8.5.1 Remote closed loop PI feedback control with local preset speed 1:
Parameter 201 is set to 5; Parameter
721 is set to 0.
8.5.2 Remote closed loop PI feedback control with local analog speed input:
Parameter 201 is set to 5; Parameter
721 is set to 1.
24-hour support 1-877-822-6606
8
Analog and digital input configurations
vacon
37
8.5.3 Remote closed loop PI feedback control w/ local preset speed 1, motor
thermistor trip:
Parameter 201 is set to 5; Parameter
721 is set to 3.
Email: [email protected] • Fax 717-264-3115
8
38
vacon
Troubleshooting and fault messages
9. Troubleshooting and fault messages
This chapter provides the fault messages and codes for the SE2 drive, along with
suggestions for corrective action.
If you need to contact technical support, the 24-hour support telephone number in
the United States is +1 877-822-6606.
Fault messages
(Page 1 of 2)
Fault Code
Description
Corrective Action
P-dEF
Factory default parameters have been
loaded
0-1
Motor at constant speed; investigate overload or
malfunction.
Motor starting: load stalled or jammed. Check
for star-delta motor wiring error.
Overcurrent on drive output. Excess
load on the motor. Over-temperature on Motor accelerating/decelerating: the accel/
the drive heatsink.
decel time too short, requiring too much power.
If P-402 or P-403 cannot be increased, a bigger
drive is required.
Cable fault between drive and motor.
I.t-trP
Check to see when the decimal points are
Drive has tripped on overload after
flashing (drive in overload) and either decrease
delivering >100% of value in P-510 for a
acceleration rate or load. Check cable length to
period of time.
be sure it is within specifications range.
OI-b
Brake channel over current
Over current in the brake resistor circuit. Check
the cabling to the brake resistor. Check brake
resistor value. Ensure that minimum resistance
values from the rating tables are observed.
Brake resistor overload
Brake resistor overload. Increase deceleration
time, reduce load inertia, or add further brake
resistors in parallel. Ensure that minimum
resistance values from the rating tables are
observed.
OL-br
Press STOP key; drive is ready to configure for a
particular application.
Check wiring to motor, look for ph-ph or phground short circuit.
PS-Trp
Internal power stage fault
Check drive ambient temperature; is additional
space or cooling needed?
Check that drive is not forced into overload.
O.Uo1t
Over voltage on DC bus
Supply problem, or increase decel ramp time
with P-403.
U.Uo1t
Under voltage on DC bus
This occurs routinely when power is switched off.
If it occurs during run operation, check the
power supply voltage.
O-t
Heatsink over temperature
Check drive ambient temperature. Additional
space or cooling may be required.
U-t
Under temperature
Trip occurs when ambient temperature is less
than 0 degrees C.
th-Flt
Faulty thermistor on heatsink
Refer to an authorized Vacon distributor.
24-hour support 1-877-822-6606
9
Troubleshooting and fault messages
vacon
39
(Page 2 of 2)
Fault Code
Description
Corrective Action
E-triP
External trip (on digital input 2 or 3
E-trip requested on digital input 2 or 3. Normally
closed contact has opened for some reason.
If motor thermistor is connected, check to see if
the motor is too hot.
SC-trP
Comms loss trip
Check communication link between drive and
external devices. Make sure each drive in the
network has a unique address.
P-LOSS
Input phase loss trip
Drive intended for use with a 3-phase supply has
lost one input phase.
SPIN-F
Spin start failed
Spin start function failed to detect the motor
speed.
data-F
Internal memory fault
Parameters not saved; defaults reloaded.
Try again. If problem recurs, contact an
authorized Vacon distributor.
4-20 F
Analog input current out of range
Check input current in range defined by P-205.
SC-Flt
Internal drive fault
Contact an authorized Vacon distributor.
FauLty
Internal drive fault
Contact an authorized Vacon distributor.
Email: [email protected] • Fax 717-264-3115
9
40
vacon
Technical data
10. Technical data
This chapter provides ratings and environmental information for the SE2 drives.
Dimensional data and diagrams for the SE2 models are in “Receiving and
installation” on page 10.
10.1 Environmental information
Operational ambient temperature range
0 - 50 degrees C
Storage ambient temperature range
-40 - 60 degrees C
Maximum altitude
2000 m.
Derate above 1000 m: 1% / 100 m
Maximum humidity
95%, non-condensing
10.2 Ratings
110-115V +/- 10% - 1 Phase Input - 3 Phase 230V Output (Voltage Doubler)
Nominal
output
current
kW
HP
Frame
size
(Amps)
150%
output
current
60 s
(Amps)
0.37
0.5
1
6.7
10
2.3
3.45
25
-
0.75
1
1
12.5
16
4.3
6.45
25
-
1.1
1.5
2
16.8
20
5.8
8.7
100
47
Nominal
input
current
(Amps)
Fuse or MCB
(Type B)
(Amps)
Max. motor
cable
length
(m)
Min. brake
res. value
(Ohms)
200-240V +/- 10% - 1 Phase Input - 3 Phase Output
Nominal
output
current
kW
HP
Frame
size
(Amps)
150%
output
curr.
60 s
(Amps)
0.37
0.5
1
6.7
6
2.3
3.45
25
0.75
1
1
12.5
10
4.3
6.45
25
-
1.5
2
1
19.3
20
7
10.5
25
-
Nominal
input
current
(Amps)
Fuse or MCB
(Type B)
(Amps)
Max. motor
cable length
(m)
Min. brake
res. value
(Ohms)
-
1.5
2
2
19.3
20
7
10.5
100
47
2.2
3
2
28.8
32
10.5
15.75
100
47
(continued on next page)
24-hour support 1-877-822-6606
10
Technical data
vacon
41
200-240V +/- 10% - 3 Phase Input - 3 Phase Output
kW
HP
Frame
size
Nominal
input
current
(Amps)
Fuse or MCB
(Type B)
(Amps)
Nominal
output
current
(Amps)
150%
output
curr.
60 s
(Amps)
Max. motor
cable length
(m)
Min. brake
res. value
(Ohms)
1.5
2
2
9.2
16
7
10.5
100
47
2.2
3
2
13.7
20
10.5
15.75
100
47
4.0
5
3
20.7
32
18
27
100
47
150%
output
current
60 s
(Amps)
Max. motor
cable length
(m)
Min. brake
res. value
(Ohms)
380-480V +/- 10% - 3 Phase Input - 3 Phase Output
kW
HP
Frame
size
Nominal
input
current
(Amps)
Fuse or MCB
(Type B)
(Amps)
Nominal
output
current
(Amps)
0.75
1
1
2.9
5
2.2
3.3
25
-
1.5
2
1
5.4
10
4.1
6.15
25
100
1.5
2
2
5.4
10
4.1
6.15
50
2.2
3
2
7.6
10
5.8
8.7
50
100
4
5
2
12.4
16
9.5
14.25
50
100
5.5
7.5
3
17.6
20
14
21
100
22
7.5
10
3
22.1
25
18
27
100
22
10.3 Maximum supply ratings for UL compliance
Drive rating
Maximum supply voltage
Maximum supply
short-circuit current
115V ratings:
0.37kW (0.5 HP) to 1.1kW (1.5 HP)
120V rms (AC)
5kA rms (AC)
230V ratings:
0.37kW (0.5 HP) to 3.7kW (5 HP)
240V rms (AC)
5kA rms (AC)
400/460V ratings:
0.75kW (1 HP) to 7.5 kW (10 HP)
500V rms (AC)
5kA rms (AC)
All the drives in the above chart are suitable for use on a circuit capable of delivering
not more than these specified maximum short-circuit Amperes symmetrical with
the specified maximum supply voltage.
Email: [email protected] • Fax 717-264-3115
10
42
vacon
Appendix A: Quick Start Guide for the SE2 Drive
Keypad and display information can
be found in “Operation” on page 19
For fuse
information, see
page 40
For cable information, refer to drive rating
data in “Ratings” on page 40
Supply voltage:
- 115, 230, 460V
- 1 or 3 phase
- see drive rating information in “Ratings” on
page 40
Motor nameplate:
Enter motor rated voltage (V) in P-509.
Enter motor rated current (A) in P-510.
Enter motor rated frequency (Hz) in P-503.
Motor connection: Ensure that the motor is
connected for the proper voltage
configuration that matches the SE2 drive’s
output rating.
24-hour support 1-877-822-6606
A