1
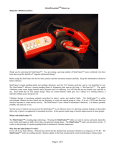
Users Manual-Using Your StimTrainer 3 main goals: To get the most out of your StimTrainer 1. 2. 3. Increase flexibility Improve Stability Add Strength Always consult your physician before starting any exercise program. These statements have not been evaluated by the food and drug administration. This product is not intended to diagnose, treat or cure any disease. Warm up/Cool down/Stretching Using the StimTrainer you will notice your warm up time is accomplished much faster. A successful exercise program consists of a warm-up, exercise, and a cool-down. Warming up is a vital part of any activity. Your circulation and pulse rate increase brings more oxygen to your muscles. A sufficient StimTrainer™ warm-up is 3 minutes of walking or jogging in place. After warm-up, stop and gently stretch the major muscle groups starting with those areas that feel the tightest. Using the StimTrainer™ after a workout helps to reduce the discomfort of a post-workout. Completely stretch all muscle groups for the best results. StimTrainer University Training Program helps you gain: Flexibility Provides hints to help you achieve your goals Benefits of exercising: Better sleep Increased metabolic rate Less fat Improved posture Reduced aches and pains Stronger bones Better self-esteem Set goals that you can easily accomplish and then increase them with time. Go slow. Don’t try to make up for months or years of reduced exercise. Gradually build your effort one step at a time. Allow yourself to ramp-up over the next 30 days. Eat healthy, drink a lot of water, get plenty of sleep and be positive! There are many opportunities during your normal day when your current low-health habits could be changed for healthier ones. Instead of taking the elevator, take the stairs. Instead of sitting during lunch, take a brisk walk, eat an apple, think and be healthier. Even if you only do this once a week it all helps. Training with us at StimTrainer University Established in 2006, StimTrainer University brings together some of the World’s leading fitness professionals and doctors to provide you with insight about the latest research in the health and fitness industry. StimTrainer University has developed a unique fitness programs built around using the StimTrainer and its trademark Kinetic Chain Flexibility & Strength Program™. Incorporating all the essential principles of exercise, the Kinetic Chain Flexibility & Strength Program™ utilizes three distinct training levels based on varying exercise goals. These tests help determine individual mechanical movement. The goal is to determine where the individual should begin their personalize exercise program. Without normal movement, personal injury is a high risk. As a guide, StimTrainer University recommends that beginners work out using the flexibility protocols for the first two weeks of training. After that, you should be able to proceed with additional strength programs to suit your goals. Breathing is also a key component in gaining flexibility. Focused deep breathing brings more oxygen to the muscle and promotes normal function. Using the StimTrainer, take a deep breath and exhale as you slowly perform the tests and stretches recommended below. Cervical Range of Motion Test Restriction in neck bending causes the head to in front of the shoulders. This is not good! For every inch the head carriage is beyond the shoulders, the compressive forces on the lower neck increase exponentially by the additional weight of the entire head (13-18 lbs). These compressive changes cause tension in the upper back and often lead to headaches. Over time, these forces will alter neck and arm movements and lead to degenerative diseases of the neck and shoulder Fig C1 Fig C2 Figure C1 illustrates a neutral position. Begin standing or seated (fig C1) and carefully bend your head backwards (fig 2). Always use caution when extending the neck to avoid becoming unstable and potentially falling. Fig C3 Fig C4 Turn your head left (fig C3 - without moving shoulders). Turn your head right (fig C4 - without moving shoulders) Bend your left ear toward the left shoulder (fig C5 - without moving shoulders). Now to the right (fig C6) Fig C5 Fig C6 If you are unable to perform this stretch then perform the Neck Stretches below. Neck Stretches Comfortably position the StimTrainer on the neck as shown (fig C7). Fig C7 Set the unit on Mode 1, High Intensity. Press the Activate Button. Begin standing or seated. Always use caution when extending the neck to avoid becoming unstable and potentially falling. Carefully bend your head backwards (fig 2). Place you’re the palm of either hand on the back of your head and apply firm resistance for 3 seconds. Relax your neck muscles, but do not return your head to neutral, instead try to get additional backward bending of the head and neck muscles. While still bending your head back, again give firm resistance for 3 seconds with your hand. After 6 times of bending your head back return to neutral. Repeat the 3 times. This same resistance training of 3 seconds will occur with all Neck Stretches. Turn your head right (fig C4 - without moving shoulders) and give resistance with your right hand on the right side of your face. Again resist 6 times and pushing your head around to the right to gain a much rotation recovery as you can. Return to neutral and repeat 3 times. Perform the same for the left side (fig C3), using the left hand for resistance. Repeat 3 times. Now bend your left ear toward the left shoulder (fig C5 - without moving shoulders). Provide resistance with the heel of your left hand. Give resistance for 3 seconds, 6 times and then return to neutral. Repeat for the right side (fig C6) using the right hand for resistance. Repeat 3 times. Shoulder Range of Motion – Scratch Test Fig OS1 Fig OS2 Fig OS3 Fig OS4 STEP 1 OVER THE SHOULDER (Fig. OS1 & OS2) • • • • Reach over the top of your right shoulder and try to touch the top of the left shoulder blade (fig OS1 & OS2). Return to neutral position Repeat Scratch Test with the left arm. Breath as you are doing these motions. STEP 2 UNDER AND BEHIND THE SHOULDER (Fig OS3 & OS4) • • The left arm reaches behind the back, palm out, and up to the bottom of the right shoulder blade (fig OS3). Repeat this motion using your right arm, reaching to touch the back left shoulder blade (fig OS4). If you are unable to perform this test, refer to the corrective stretches below: Corrective Shoulder Stretches (Fig OS5-OS13) The StimTrainer™ is comfortably placed on your neck and set to Mode 1, Intensity High. Press Activate button. Fig OS5 Fig OS6 Fig OS7 Pull your shoulders up towards your ears (fig OS5) and hold for 5 seconds. Remember to breathe during the stretch. Do this 6 times. Pull your shoulders forward towards the front of your body (fig OS6) and hold for 5 seconds. Do this 6 times. Pull your shoulders back (fig OS7) as in standing at attention. Hold for 5 seconds. Repeat this 5 times. Re-check for improved shoulder motion with the Scratch Test. Repeat stretches again to improve should flexibility. Wrist Flexibility Test (Carpal Tunnel Test) Pull your fingers backward (fig WF1 & WF2) toward your body. The hand should be at 90◦. Turn your hand over and pull your fingers downward (fig WF3). Your hand should be at 90◦. Turn your palm downward and pull your hand down (fig WF4). Your hand should be at 90◦. If you are unable to perform this without pain or in you are unable to perform due to stiffness, see the Wrist Stretches below: Fig WF1 Fig WF3 Fig WF2 Fig WF4 Wrist Stretches (Fig WF1-WF4) The StimTrainer™ is comfortably placed on your neck and set to Mode 1, Intensity High. Press Activate button. Lace your fingers together and gently pull your hand up and towards the body until you feel a stretch under the wrist and forearm (fig WF1 & WF2). Hold for 5 seconds. Remember, breathing helps you relax muscles while stretching. Repeat this 6 times with each wrist. Turn the arm over and grasp your fingers from underneath. Pull your hand back towards your body with palm facing out until you feel a gentle stretch (fig WF3). Hold for 5 seconds. Repeat this 6 times with other wrist. Turn arm over and wrap fingers together and gently pull hand backwards until you feel a stretch on the top of your arm (fig WF4). Hold for 5 seconds. Repeat this 6 times with other wrist. MID & LOWER BACK ROTATION “BROOMSTICK” Fig BR1 Fig BR2 Rotation in the upper body is very important for normal breathing. To aid in discovering your flexibility, use a common household item, such as a broomstick, rod or light-weight mop handle. Stand or Sit with a broomstick handle placed across the front of your shoulders with your arms crossed over and the hands resting on the pole (fig BR1 & BR2). Keep you head aligned with your torso – do not turn your head during this test. Keep your elbows high at all times. Exhale. Draw your belly button inwards and twist your upper body around to the left side (fig BR1) as far as you can without pain. When you have twisted as far as you can, visualize a “spot” on the wall where you are looking. Remember keep your head in line with your torso. Return to starting position. Turn to the right side (fig BR2). If you are unable to perform this due to stiffness, see the Broomstick Stretches below: Broomstick Stretches (Fig BR1 & BR2) The StimTrainer™ is comfortably placed on your neck and set to Mode 1, Intensity High. Press Activate button. Stand or Sit with a broomstick handle placed across the front of your shoulders with your arms crossed over and the hands resting on the pole (fig BR1 & BR2). Keep you head aligned with your torso – do not turn your head during this stretch. Keep your elbows high at all times. Use a mirror to see your posture. Exhale. Draw your belly button inwards and twist your upper body around to the left side (fig BR1) as far as you can, look for your “spot” and hold for 5 seconds. Relax. Breath. Return to neutral. Repeat 6 times. Perform on the right side (fig BR2). Repeat 6 times Power on your StimTrainer™ and repeat the test rotations Note: NEVER place yourself in a position of pain. Try not to turn the lower body at all during the movement. Upper Back Test (Cat Arch Test) - Basic The Cat Arch Test is designed to check the length of the long muscles of the entire back and spine. Fig UB1 Fig UB2 Begin kneeling down (fig UB1). With your elbows locked, raise up your upper back in an arch shape (fig UB2). You should be able to easily touch your chin to your chest. If you cannot, perform the Cat Arch Stretch below: Set the unit on Mode 1, low Intensity. Press the Activate Button. Take a deep breath in and as you release the air round up your spine (fig UB2). The chin moves closer to the chest and your buttocks tilts towards your belly button. Hold for 5 seconds. If this feels stiff or restricted, repeat with the StimTrainer™ in mode #1, High Intensity. Repeat 5 times. Always allow your breathing to enhance your stretching. Allow yourself to return to the starting position without dropping the belly button to the floor. Repeat 6 times. Waiters Bow Test – Basic Checks your low back and hip flexibility. • • • • Stand upright and hold your hands out like a waiter holding two trays with glasses full of water Fig WB1 Lock your knees and draw your belly button “in” towards your low back, creating a “low back arch” Keeping your back straight and trying to keep a “low back arch” lean forward from your hips until you begin to bend at the low or upper back and you feel your “low back arch” flattening out. Fig WB2 & WB3 The goal is to bend 90 degrees at the waist while keeping your back straight, your “low back arch” in place and have no discomfort or resistance in the back part of your legs. Forward Bend – “Waiters Bow Test” Fig. WB1 Fig WB2 Fig WB3 If you are not able to bend forward without discomfort, perform the following stretch program: Waiters Bow Stretch You will be performing the same actions as the Waiters Bow Test, only this time you will use the StimTrainer™ while you are performing the action as a Waiters Bow Stretch. Set the unit on Mode 1, High Intensity. Press the Activate Button. • • • • Again, stand upright and hold your hands out like a waiter holding two trays with glasses full of water Fig WB1 Lock your knees & draw your belly button “in” towards your low back, creating a “low back arch” Now, keeping your low back arched, your eyes always looking straight ahead and bend forward at your hips until you begin to bend at the lower back (keep your upper back flat) until you feel your “low back arch” start to flatten out. (Fig WB2 & WB3) and hold for 5 seconds. Exhale and again bend forward as much as you can, keeping your low back arch and flat upper back and eyes looking ahead. You will feel an increase in stretching motion in your legs. Bend forward again, trying to gain a little motion than the previous time. This is called ratcheting, trying to gain more range of motion from stretching. Ratcheting is slow movement, increasing the stretch along a muscle, up & down 3 inches of movement in both directions. Gradually lowering your body. You will repeat this for a total of 6 times. Bending Backwards Extension Test - Basic Caution: If you feel dizzy performing this test, stop immediately. Go slowly and have someone assist you. If dizzy sensation continues, check with your health care professional. Bending backwards – Stand and bend from the low back making an arch with the low back. Keep the head over the shoulders and hips. You should be able to bend backwards about 30 degrees. If you feel stiff refer to the Low Back Stretch program area. If you feel neck discomfort, refer to the neck stretches in the Cervical Stretch program area. Fig BB1 The goal is to be able to bend back comfortably, with your head in a neutral position, until your shoulders are behind your buttocks (fig BB1).If you are stiff, unable to get into this position or feel discomfort, then perform the Backwards Bending Stretch. Backwards Bending Stretch Set the unit on Mode 1, High Intensity. Press the Activate Button. Bending backwards – Stand and bend from the low back making an arch with the lower back. Keep the head over the shoulders and hips. Stabilize with your hands on the lower part of your buttocks (fig BB1). Exhale and stretch back and hold for 5 seconds. Straighten up slightly, inhale, exhale and bend backwards again. Repeat this 6 times. Side Bending Test - Basic FigSB1 Fig SB2 Goal: Bend 45 degrees (touch your left and right outside knees) to the side without discomfort and without twisting your body or leaning forward (fig SB1 & SB2). If you cannot perform correctly, then refer to the Side Bending Stretch program below. Side Bending Stretch Set the unit on Mode 1, High Intensity. Press the Activate Button. Bend your body to the side and stretch your hand down to the knee without turning, twisting or leaning your body. Exhale, stretch and hold for 5 seconds. Straighten up slightly, inhale, exhale and bend to the side again. Follow “ratchet protocol” and repeat to other side. Ratchet protocol is slow movements, gradually increasing the stretch along a muscle, up and down about 3 inches of movement in both directions. Gradually ratcheting your body lower and lower each up and down movement. Repeat this 6 times for each side. Buttock Muscle Test - Basic Fig BM1 Fig BM2 Lying on your back take a deep breath and draw the belly button in (fig BM1). Keep your heels flat on the floor, squeeze the gluteus muscles and lift your pelvis in the air (fig BM2). Try to keep the muscles on the back of the leg relaxed. Keep your belly flat for the entire time. If you feel stiff, weak or shaky, perform Buttock Muscle Stretch below. Buttock Muscle Stretch Set the unit on Mode 1, low Intensity. Press the Activate Button. Keep your heels flat on the floor, squeeze the gluteus muscles and lift your pelvis in the air. Try to keep the muscles on the back of the leg relaxed. Keep your belly flat for the entire time. Make sure you are lifting your body without turning or twisting. Inhale and hold for 5 seconds. If still tight, repeat with High Intensity. Exhale and relax back down on the floor. Repeat this 6 times. Low Back and Hips Stretch- Basic (determined by Waiters Bow Test) Fig LB1 Fig LB2 StimTrainer has developed the Assisted Stretch™ to loosen up this important area Set the unit on Mode 1, High Intensity. Press the Activate Button. Lying on your back with both legs bent and your feet flat on the floor. Place a rope or resisted band under one foot. Straighten the leg while gently pulling it straight and back towards you. You should feel a stretching sensation in the back of your leg. Return to starting position. Now power on the StimTrainer™ to basic mode. Repeat above. Hold this position for 5 seconds, relax for 1 second. Repeat 6 times. CAUTION: If this or any other stretch or exercise causes pain, tingling, numbness or other abnormality, immediately discontinue. Do not try too hard. This is a gentle stretch, not any jerking or pulling. Progress will occur naturally with this method. Lower Leg & Calf Muscle Test - Basic Set the unit on Mode 1, High Intensity. Press the Activate Button. STEP 1: Standing with left foot against wall. The right foot is flat on the ground. STEP 2: Bend knee towards wall. You should feel the stretch in the lower calf near the heel. If you don’t then reposition foot with more bend before you brace against the wall. STEP 3: After bending the left knee, raise the heel of your right foot while keeping the left leg straight and stiff. You will be pressing your hips towards the wall. You should feel the stretch in the upper calf. Hold for this position for 5 seconds, return to the starting position, and perform the same movement to the opposite side. If you do not feel a stretch sensation, you have not positioned the foot against the wall with enough tension. Everyone feels this when done correctly. You will always feel stretch doing this stretch. Repeat this sequence 5 times. - Basic Perform 2-3 times per day. – Intermediate TEST AB STRENGTH Sit up and hold this position for 30 seconds. If you cannot hold position then use the following protocols to increase strength. fig AB1 Fig AB2 Basic: With the StimTrainer™ in mode #1, keeping the belly button in and the tongue to the roof of mouth, cross your arms over your chest to create more demand on the abdominals (fig AB1). Goal: hold for 30 seconds. Then rest 5 seconds and repeat 10 times. Advanced: Keeping the hands to the ears is performed after the arms have been placed across the chest. Make sure elbows stay out on each side (fig AB2). Curl up and hold for 30 seconds. Then rest 5 seconds and repeat 10 times. HIP “DOUBLE SPLITS” STRETCH • • • Set the unit on Mode 1, High Intensity. Press the Activate Button. Start by sitting on the ground and placing one leg at a 90 degree bend in front of you Place other leg behind at 90 degrees. *Make sure to have the upper part of the forward leg coming straight off of the hip and the lower part at a correct 90 degrees Fig SS1 • • • Fig SS2 Sit up straight and keep a relaxed low back curve. Draw the belly button inward and lean forward from the hip. You should feel the stretch in your hips and buttock. If you feel it in your low back go to the Low Back Stretch area of exercises. Power on the StimTrainer™ and perform same test. Hold for 5 seconds and repeat 5 times. Reverse legs and repeat for other leg positions. LOW BACK RANGE OF MOTION TWIST TEST fig R1 fig R2 fig R3 fig R4 Lying with your back flat on the floor bend your knees to 90 degrees (fig R1). Lift the feet off the floor and keep your knees pointed towards the ceiling. Keeping your upper back and shoulders flat on the floor begin rolling your hips and knees toward the floor (fig R2). Your knees should be able to touch the floor (fig R3, R4). Stop when you feel the opposite shoulder starting to leave the ground, or you experience any pain. Hold for 5 seconds. Repeat this test with the StimTrainer™ powered on, rolling to each side. Do this 5 times to each side. If you are unable to perform this stretch then perform the Low Back Twist Stretch below Low Back Twist Stretch Set the unit on Mode 1, High Intensity. Press the Activate Button. Lying with your back flat on the floor bend your knees to 90 degrees. Lift the feet off the floor and keep your knees pointed towards the ceiling. Keeping your upper back and shoulders flat on the floor begin rolling your hips and knees toward the floor. Your knees should be able to touch the floor. Roll to each side. Stop when you feel the opposite shoulder starting to leave the ground, or you experience any pain. Hold for 5 seconds. . Repeat 6 times with each leg.