1
user manual
manual de usuario
DRC99392
EN
ES
Read these instructions before using your new product for the first time.
Es importante leer este manual antes de usar por vez primera su equipo.
RCA DRC99392_Eng & Spa IB_MTK A5_17-3-2011.indd 1
3/28/2011 10:31:02 AM
Safety Instructions
Safety Instructions
On Condensation
•
When left in a heated room where it is warm and damp, water droplets or condensation may form inside the unit. When there is condensation inside the unit, the unit may not function normally. Let
the unit stand for 1 to 2 hours before turning the power on, or gradually heat the room and allow the unit to dry before use.
Ventilation Warning
•
* SEE BOTTOM OF UNIT FOR GRAPHIC SYMBOLS *
The lightning flash with an arrowhead symbol, within the
equilateral triangle, is intended to alert the user to the presence of uninsulated "dangerous voltage" within the product's
enclosure that may be of sufficient magnitude to cause an
electric shock.
The exclamation point within the equilateral triangle is intended to alert the user to the presence of important operating and maintenance (servicing) instructions in this owner's
manual.
WARNING: Should any trouble occur, disconnect the AC power adapter
and refer servicing to a qualified technician.
WARNING: TO PREVENT FIRE OR SHOCK HAZARD, DO NOT REMOVE
COVER (OR BACK). NO USER-SERVICEABLE PARTS INSIDE. REFER
SERVICING TO QUALIFIED SERVICE PERSONNEL.
WARNING: TO REDUCE THE RISK OF ELECTRIC SHOCK, DO NOT EXPOSE
THIS APPLIANCE TO RAIN OR MOISTURE. DO NOT PLACE OBJECTS
FILLED WITH LIQUIDS ON OR NEAR THIS UNIT.
CAUTION: Use of controls or adjustments or performance
of procedures other than those specified may result in
hazardous radiation exposure.
CAUTION: DANGER OF EXPLOSION IF BATTERY IS INCORRECTLY
REPLACED. REPLACE ONLY WITH THE SAME OR EQUIVALENT TYPE.
THIS CLASS B DIGITAL APPARATUS
COMPLIES WITH CANADIAN ICES-003.
This product contains a
low power laser device.
On Placement
•
•
•
•
•
•
•
•
Do not use the unit in places that are extremely hot, cold, dusty or
humid.
Place the unit on a flat and even surface.
Do not restrict the air flow of the unit by placing it in a place with
poor air flow, by covering it with a cloth, or by placing it on carpeting.
To avoid magnetizing, do not place the unit near speakers or magnets.
Do not use this unit in direct sunlight or leave the unit in a closed
automobile (or similar environments) where it would be exposed to
high temperatures above 104°F (40°C).
No naked flame sources such as lighted candles should be placed on
the AC power adapter or the main unit.
The AC/DC adaptor and apparatus should not be exposed to splashing or dripping liquids, and no objects filled with liquids, such as
vases, should be placed on the AC/DC adaptor and apparatus.
The apparatus should not be exposed to dripping or splashing and
that no objects filled with liquids, such as vases, should be placed
on apparatus.
On Safety
•
•
When connecting or disconnecting the AC power adapter, grip the
plug and not the cord itself. Pulling the cord may damage it and create a hazard.
When you are not going to use the unit for a long period of time,
disconnect the AC power adapter.
•
Do not block the ventilation openings or holes. If the ventilation
openings or holes are blocked by a newspaper or cloth, etc., the heat
may not be able to get out.
Do not operate the unit in a confined space, such as a bookcase or
built-in cabinet. Allow about 4 inches (10cm) of free space all around
the unit for adequate ventilation.
Rating Plate Location
•
The rating plate is located on the bottom of unit.
FCC Statements
NOTE: This equipment has been tested and found to comply with the
limits for a Class B digital device, pursuant to Part 15 of the FCC Rules.
These limits are designed to provide reasonable protection against
harmful interference in a residential installation. This equipment generates, uses and can radiate radio frequency energy and, if not installed
and used in accordance with the instructions, may cause harmful interference to radio communications. However, there is no guarantee that
interference will not occur in a particular installation. If this equipment
does cause harmful interference to radio or television reception, which
can be determined by turning the equipment off and on, the user is
encouraged to try to correct the interference by one or more of the following measures:
– Reorient or relocate the receiving antenna.
– Increase the separation between the equipment and receiver.
– Connect the equipment into an outlet on a circuit different from that
to which the receiver is connected.
– Consult the dealer or an experienced radio/TV technician for help.
Warning: Changes or modifications to this unit not expressly approved
by the party responsible for compliance could void the user’s authority
to operate the equipment.
Notes on Copyright
It is forbidden by law to copy, broadcast, show, broadcast on cable, play
in public, or rent copyrighted material without permission.
Apparatus Claims of U.S. Patent Nos. 6,836,549; 6,381,747; 7,050,698;
6,516,132 and 5,583,936 licensed for limited viewing uses only.
This product incorporates copyright protection technology that is protected by U.S. patents and other intellectual property rights. Use of this
copyright protection technology must be authorized by Macrovision,
and is intended for home and other limited viewing uses only unless otherwise authorized by Macrovision. Reverse engineering or disassembly
is prohibited.
Important Safety
Instructions
1.
2.
3.
4.
5.
6.
7.
Read these instructions.
Keep these instructions.
Heed all warnings.
Follow all instructions.
Do not use this apparatus near water.
Clean only with a dry cloth.
Do not block the ventilation openings. Install in accordance with
the manufacturer's instructions.
2
RCA DRC99392_Eng & Spa IB_MTK A5_17-3-2011.indd 2
3/28/2011 10:31:02 AM
Important Safety
Instructions
8. Do not install near any heat sources such as radiators, heat registers,
stoves, or other apparatus (including amplifiers) that produce heat.
9. Do not defeat the safety purpose of a polarized or grounding type plug. A polarized plug has two blades with one wider than the
other. A grounding type plug has two blades and a third grounding
prong. The wide blade or the third prong are provided for your
safety. If the provided plug does not fit into your outlet, consult an
electrician for replacement of the obsolete outlet.
10. Protect the power cord from being walked on or pinched
particularly at plugs, convenience receptacles, and the point where
they exit from the apparatus.
Disc Formats
•
Audio CDs are
divided into “tracks”.
A “track” is usually
one song on an
Audio CD.
Title1
Chapter1
Title2
Chapter2
Chapter3
Chapter1
Chapter2
EN
Note: Numbers identify
Track1
Track2
Track3
Track4
Track5
each title, chapter, and
track on a disc. Most discs have these numbers recorded on them, but
some do not.
Note on Unauthorized Discs
You may not be able to play some DVDs on this unit, particularly if they
were purchased from outside your geographic area or made for business purposes.
11. Only use attachments/accessories specified by the manufacturer.
12. Use only with a cart, stand, tripod, bracket,
or table specified by the manufacturer,
or sold with the apparatus. When a cart is
used, use caution when moving the cart/
apparatus combination to avoid injury from Portable Cart Warning
tip-over.
13. Unplug this apparatus during lightning storms or when unused for long
periods of time.
14. Refer all servicing to qualified service personnel. Servicing is required
when the apparatus has been damaged in any way, such as the AC
power cord or plug is damaged, liquid has spilled or objects have fallen
into the apparatus, the apparatus has been exposed to rain or moisture,
does not operate normally, or has been dropped.
Accessories
Please check and identify the supplied accessories.
.
.
.
.
Remote Control (with battery).........................................................x 1
AC Power Adapter.................................................................................x 1
Car Power Adapter................................................................................x 1
Carrying Bag...........................................................................................x 1
Remote Control
Disc Formats
Using the Remote Control
•
The unit can play back
DVDs
[8cm/12cm disc]
Audio CDs
[8cm/12cm disc]
Compatible
•
Region Management Information
Point the remote control at the REMOTE SENSOR located on the
unit.
When using this unit in very bright light, the infrared REMOTE SENSOR may not work properly.
To Change Remote Battery
Region Management Information: This unit is designed and manufactured to respond to the Region Management Information that is encoded on DVDs. If the region number printed on the DVD does not correspond to the region number of this unit, it cannot play that disc.
1. Open the battery door.
The region number of this unit is 1.
Remove the
PLASTIC sheet
before using the
Remote Control.
Disc Function or Operation That is Not Available
When the symbol appears on the screen, it indicates the function or
operation attempted is not available at that time. This occurs because the
DVD manufacturer determines the specific functions of DVDs. Certain
functions may not be available on some DVDs. Be sure to read the documentation provided with the DVD.
Icons Used on DVDs
Sample lcons
Note:
When playing back a
CD-G (Graphics) or CD
EXTRA disc, the audio
portion will be played,
but the graphic images will not be shown.
1
Language selections for audio
Language selections for subtitles
Screen aspect ratio
Multiple camera angles
Region code indicator
Titles, Chapters and Tracks
•
DVDs are divided into “titles” and “chapters”. If the disc has more
than one movie on it, each movie would be a separate “title”.
“Chapters” are sections of titles.
2. Insert one CR2025 (3V) size battery.
Battery Replacement
When the battery becomes weak, the operating distance of the remote control will be greatly reduced and you will need to replace the
battery.
Note: If the remote control is not going to be used for a long time,
remove the battery.
WARNING: Do not dispose of the battery in a fire or it may leak and/
or explode.
WARNING: Batteries should not be exposed to excessive heat such as
sunshine, fire or the like.
CAUTION:
•
•
Danger of explosion if battery is incorrectly replaced. Replace only
with the same or equivalent type.
[The remote control supplied with] This product contains a button
cell battery that may be ingested by children. Do not leave button
cell batteries within reach of children.
3
RCA DRC99392_Eng & Spa IB_MTK A5_17-3-2011.indd 3
3/28/2011 10:31:02 AM
Control Reference Guide
Control Reference Guide
Remote Control
Unit
VIDEO
MODE
1
2
3
4
MENU
PREV
SEARCH
GOTO
NEXT
STOP
PAUSE
ANGLE
DISPLAY
9
10
11
PLAY
5
6
MEMORY
7
4
ENTER
M
AUDIO
2
3
5
6
SUBTITLE/
RETURN
7
8
9
12
13
14
15
0
SETUP
8
A-B
DISC
REPEAT
1. VIDEO MODE button
Adjust Brightness, Screen Size and Contrast of the LCD screen.
2.
PREV button
Move back through titles, chapters or tracks on a disc.
3.
/
SEARCH buttons
SEARCH:
Fast reverse playback.
SEARCH:
Fast forward playback.
4. GOTO button
Skip directly to a location on a CD/DVD.
5. Cursor ( , , , ) buttons
Move between selections on a menu screen and adjust certain
settings.
ENTER button
Confirm selections on a menu screen.
6. MEMORY button
Set titles/chapters in a favorite order.
7. Number (0 - 9) buttons
Use when creating programs or locating a title/chapter/track or
specific time.
8. REPEAT A-B button
Perform point-to-point repeat playback on a DVD or CD.
REPEAT DISC button
Repeat a DVD chapter or title.
Repeat a CD track or the whole disc.
SETUP button
In Stop Mode, press to display the unit’s SETUP menu.
9. MENU button
Enter and exit the main DVD Menu.
10. NEXT button
Skip to next title, chapter or track on a disc.
11. STOP button
Stop playing a disc.
PLAY button
Start or resume playback of a disc.
PAUSE button
Press once to pause playback. Press subsequently to advance frame
by frame on a DVD.
12. DISPLAY button
Show status information on the screen.
13. ANGLE button
Switch between multiple camera angles if applicable to the DVD.
14. AUDIO button
Select one of the audio sound tracks on a DVD (if more than one is
available) or select the audio output mode on a CD.
15. SUBTITLE button
Select one of the subtitle languages programmed on a DVD
(if available).
RETURN button
Return to normal operation after using the SETUP menu of a DVD.
1.
2.
3.
4.
5.
LCD screen
DC IN 9V - 12V jack
AUDIO / VIDEO OUT jack
CHARGE / STANDBY / ON switch
VOLUME control
Adjusts the volume.
6. Headphone jack
7. STOP button
Press to stop playing a disc.
MENU button
Accesses DVD Disc Menu if DVD disc is currently playing.
Accesses Setup menu if disc is not playing.
button
Press to start or resume playback of a disc.
Pressing during playback of a disc will cause playback to be paused.
PREV button
Press to go back to the previous title / chapter / track.
In DVD Menu or Setup Menu, press to scroll left.
SEARCH button
Press to perform fast forward playback during CD playback.
In DVD Menu, Setup Menu or JPG Menu, press to scroll up.
NEXT button
Press to advance titles / chapters / tracks.
In DVD Menu or Setup Menu, press to scroll right.
SEARCH button
Press to perform fast reverse playback during CD playback.
In DVD Menu, Setup Menu or JPG Menu, press to scroll down.
8. Disc Door
Push to close the disc door.
9. OPEN knob
Press the open knob to open the disc door.
10. Remote sensor
Senses the remote control's signals.
11. ON indicator
12. CHARGING indicator
Charge the rechargeable battery before using it for the first time.
Complete charging typically takes approximately 4-5 hours. The
charging light will go out when the battery becomes fully charged.
4
RCA DRC99392_Eng & Spa IB_MTK A5_17-3-2011.indd 4
3/28/2011 10:31:03 AM
Power Supply
Power Supply
A. Using the AC Power Adapter
To recharge the built-in battery
The supplied AC power adapter operates on AC 100-120V.
AC power
1 Tooutlet
AC power adapter
1
To wall outlet
2 To DC IN 9V - 12V Jack
Caution:
• The AC power adapter included with this unit is for its use only. Do
not use it with other equipment.
• When the unit is not going to be used for long time, disconnect the
AC power adapter from the wall outlet.
• When the AC power adapter is plugged in, the apparatus is not
completely disconnected from the main power supply, even when
the power is turned off.
Warning:
The AC/DC adaptor is used as disconnect device. The AC/DC adaptor of
apparatus should not be obstructed OR should be easily accessed during intended used. To be completely disconnect the power input, the
AC/DC adaptor of apparatus shall be disconnected from the mains.
B. Using the Car Power Adapter
The 12V car power adapter allows the unit to be used with vehicles that
have a 12V, negative ground electrical system.
Warning:
Disconnect the car power adapter when not in use. Not for use in 24V
vehicles.
1
To cigarette
lighter socket
Car power adapter
2 To DC IN 9V - 12V Jack
Caution:
•
•
•
•
•
•
Use the provided 12V car power adapter only. Use with other car
power adapters could damage the unit.
The 12V car power adapter included with this unit is for its use only.
Do not use it with other equipment.
In the interest of traffic safety, do not operate this unit or view
videos while driving a vehicle.
Make sure the unit is securely fastened to prevent it from falling or
flying through the air in the event of an accident.
When the inside of the cigarette lighter socket is dirty with ashes or
dust, the plug section may become hot due to poor contact. Be sure
to clean the cigarette lighter socket before use.
After use, disconnect the 12V car power adapter from both the unit
and cigarette lighter socket.
EN
AC power
adapter
IN 9V
2 To- 12VDCJack
4 Charging
light ON
the switch
3 Slide
to CHARGE
5 Recharging
is completed
when charging
light goes out
Warning:
• The built-in battery can only be recharged when the unit is in
CHARGE mode while using the AC power adapter.
• The built-in battery cannot be recharged when the unit is in ON
mode.
• Do NOT recharge the built-in battery in a vehicle using the car
power adapter.
• Batteries should not be exposed to excessive heat such as sunshine,
fire or the like.
Note:
• When the built-in battery power is low, "Battery Low" will display on
the screen and the unit will stop playing.
• Recharge the built-in battery when you are ready to use it again.
• While using the built-in battery, the environmental temperature
should be 41°F (5°C) to 95°F (35°C).
• To get the longest service life of the built-in battery, charge at
indoor-temperature.
• The built-in battery in this device may present a risk of fire or
chemical burn if mistreated. Do not disassemble, heat above 212oF
(100oC), or incinerate.
• The unit should not be exposed to excessive heat such as sunshine,
fire or the like.
• When discarding the unit, environmental problems must be
considered and local rules or laws governing the disposal of such
products must be strictly followed.
Turning on the Unit
1. Slide the CHARGE / STANDBY / ON switch on the
left side of the unit to the ON position.
2. The start-up picture will appear on the screen.
3. After use, slide the CHARGE / STANDBY / ON
switch to the STANDBY (power off ) position.
Connections
A. Connecting a TV
If your TV has audio/video inputs, you can connect the unit to your TV
using standard Audio/Video cables.
C. Using the Built-in Battery
White Red Yellow
To AUDIO /
VIDEO OUT
jacks
Audio / Video cable
(not included)
White Red Yellow
The unit has a built-in, non-replaceable, rechargeable battery. Charge
the built-in battery before using it for the first time. Complete charging
typically takes approximately 4-5 hours. The charging light will go out
when the built-in battery becomes fully charged.
TV
5
RCA DRC99392_Eng & Spa IB_MTK A5_17-3-2011.indd 5
3/28/2011 10:31:03 AM
Playing a Disc (Basic Playback)
Connections
Watching a DVD on your TV
1. Turn on the unit.
2. Turn on the TV and follow the instructions included with it to watch
video from external sources.
B. Using Headphones/Earphones
•
•
Turn down the volume before connecting, and then adjust the
level.
When headphones/earphones are connected, no sound will be
emitted from the unit’s speaker.
Caution:
Avoid listening to sound
at levels which may be
harmful to your ears.
2. Press the
PLAY button on the remote control or press the
button twice on the unit when you reach the desired point to
resume normal playback.
Notes:
• The DVD player mutes sound and subtitles during reverse and
forward scan of DVDs.
• The fast playback speed may differ depending on the disc.
Skip (Forward / Reverse)
•
•
•
Press the
NEXT button to advance titles, chapters/tracks.
Press the
PREV button to go back to current or previous titles,
chapters/tracks.
For an Audio CD, use the number buttons on the remote control to
go directly to the desired track number.
Audio Selection
Headphones/Earphones
(3.5mm diameter plug) (not included)
Playing a Disc (Basic Playback)
This owner’s manual explains the basic instructions for operating
this unit. Some DVDs are produced in a manner that allows specific
or limited operation during playback. Therefore, this unit may not
respond to all operating commands. THIS IS NOT A DEFECT. Please
refer to the instructions accompanying the specific DVD in question
for more information about the options available on that DVD.
“ ” may appear on the screen during operation. A “ ” means the
desired operation is not permitted by the unit or disc.
Playing a Disc
1. Slide the CHARGE / STANDBY / ON switch on the left side of the
unit to the ON position.
See Customizing the function settings before proceeding to step 2.
2. Press the OPEN knob to open the disc door.
3. Hold the disc by its sides and carefully place it onto the spindle with
the label side facing up, pushing gently until you hear a “click”.
4. Close the disc door. It takes a short while for your unit to load the
disc. After loading, the unit will automatically bring you to the main
menu of the DVD or start playing the DVD.
5. If the unit does not automatically start playing the DVD, press the
PLAY button on the remote control or button on the unit.
Pausing Playback (Still Mode)
Press the PAUSE button. To resume normal playback, press the
PLAY button on the remote control or button on the unit.
For a DVD, each time you press the PAUSE button on the remote
control, the picture advances one frame.
Stopping Playback
Press the STOP button at the location where you want to interrupt
playback. To resume playback at the position where the disc was
stopped, press the PLAY button on the remote control or button
on the unit.
If you press the STOP button twice, the unit’s memory will be cleared
and pressing the PLAY button on the remote control or button on
the unit will reset the DVD to the beginning.
Fast Forward / Fast Reverse
1. Press the SEARCH
or
SEARCH button when a disc is playing.
Each time you press the SEARCH
or
SEARCH button, the
playback speed changes in the following sequence:
On some DVDs, the sound is recorded in two or more formats. Follow
the directions below to select the preferred language and sound
system.
1. While a disc is playing, press the AUDIO button to show the current
audio format number.
Audio 1/3:Dolby D 2ch English
2. Press the AUDIO button repeatedly to select the desired audio
format.
Notes:
• If only one audio format is recorded on the DVD, the number does
not change.
• Some DVDs allow you to change audio selections using the disc
menu only. If this is the case, press the MENU button and choose
the appropriate language on the disc menu.
• You can select different audio channels (Stereo, Mono Left, Mono
Right or Mix-Mono) on an Audio CD by pressing the AUDIO button
repeatedly.
Subtitle Selection
1. While a DVD is playing, press the SUBTITLE button to display the
current language setting, as shown in the example.
Subtitle 02/03:Spanish
2. Press the SUBTITLE button repeatedly to select the desired subtitle
language. You can turn subtitles off by pressing the SUBTITLE
button repeatedly until the “ Subtitle Off ” is displayed.
Notes:
• Some DVDs are set to display subtitles automatically, and you
cannot turn them off even if you set the subtitle function to off.
• During some scenes, the subtitles may not appear immediately
after you select your desired scene.
• The number of subtitle languages recorded differs depending on
the disc. If only one language is recorded, the language does not
change.
• This function can only be used for discs on which subtitles have
been recorded in multiple languages.
• Some DVDs allow you to change subtitles using the disc menu
only. If this is the case, press the MENU button and choose the
appropriate subtitle on the disc menu.
Angle Selection
Some DVDs contain scenes that have been shot from a number of
different angles. For these discs, the same scene can be viewed from
each of these different angles.
1. While you are playing a DVD with different angles recorded, press
the ANGLE button to view the number of current angles available.
2. Press the ANGLE button repeatedly to change the scene to the next
recorded angle.
• After approx. two seconds, playback will continue from the new
angle selected.
6
RCA DRC99392_Eng & Spa IB_MTK A5_17-3-2011.indd 6
3/28/2011 10:31:04 AM
Repeat Playback
Playing a Disc (Basic Playback)
• If no button is pressed
1
1/3
within 10 seconds,
Sequence of angle shots (Example)
playback continues
1 /3
2 /3
without changing the
current angle.
Note: This function can
only be used for discs on
which scenes shot from
multiple angles have been recorded.
2. Press the REPEAT A-B button again at the end of the section
(“
AB ” is displayed).
3. The unit will immediately begin replaying your selection.
3 /3
Display Function
While the disc is playing, press the DISPLAY button repeatedly to
display information on operation status.
To Resume Normal Playback
4. While the disc is playing, press the REPEAT A-B button until the
EN
“
AB OFF ” indicator displays on the screen (the repeat indicator
disappears from the screen for a CD). The system will return to
normal playback.
Notes:
• Some discs may not permit A-B repeat operation.
• You cannot set the A-B repeat function for a segment that includes
multiple camera angles.
• You can specify a segment only within the current title or track.
• There may be a slight difference between point A and the location
where playback actually resumes depending on the disc.
Locating a Desired Section
Adjust the LCD Screen
Locating a Specific Chapter / Title
You can adjust Brightness, Screen Size and Contrast of the LCD screen.
1. Press the VIDEO MODE button.
2. Press the / button to select Brightness, Screen Size or Contrast.
3. Press the / button to change the setting.
4. Press the VIDEO MODE button to exit the menu.
If you know the chapter/title number for the chapter/title that you want
to play, you can locate it by directly selecting that number.
1. Press the GOTO button.
1. While the DVD is playing, press the REPEAT DISC button until the
Chapter ” indicator displays on the screen. The current chapter is
“
played repeatedly.
Title 01/03 Chapter 03/12 / Title 01/03 Chapter 00/00
2. Press the / button to highlight chapter/title number, then press
the corresponding number buttons (2 digits) for the chapter/title
you want (for example: 02, 08, 10 or 15). If you press only 1 numeric
button, press the ENTER button to confirm.
3. Playback starts from the selected chapter/title.
Notes:
• If the chapter/title number entered is not permitted by the DVD,
" Input invalid " will display. Repeat steps 1 and 2 to re-enter the
correct number.
• Some discs may not respond to this process.
• This method of locating a chapter/title is available only on a DVD
that contains chapter/title numbers.
Repeating a Title
Locating a Specific Time
Repeat Playback
You can play a specific DVD title or chapter repeatedly (title repeat,
chapter repeat, A-B repeat).
Repeating a Chapter
2. While the DVD is playing, press the REPEAT DISC button until the
Title ” indicator displays on the screen. The current title is played
“
repeatedly.
To Resume Normal Playback
3. While the DVD is playing, press the REPEAT DISC button until
the “ Repeat Off ” indicator displays on the screen.
You can play a single CD track or the whole disc repeatedly.
Repeating a Single Track
1. While the CD is playing, press the REPEAT DISC button until the
Track ” indicator displays on the screen. The current track is
“
played repeatedly.
Repeating the Whole Disc
2. While the CD is playing, press the REPEAT DISC button until
All ” indicator displays on the screen. The whole disc is
the “
played repeatedly.
To Resume Normal Playback
3. While the CD is playing, press the REPEAT DISC button until
the “ Repeat Off ” indicator displays on the screen.
Repeating a Specific Section
You can play a specific section repeatedly.
1. While the disc is playing, press the REPEAT A-B button at the
A ” is displayed) you want to play
beginning of the section (“
repeatedly.
You can move to a specific location by entering its corresponding time
(hours, minutes, seconds).
1. Press the GOTO button two times. Title 01/03 Time : :
2. Press the corresponding number buttons (5 digits: X:XX:XX, for
example: 0 30 05, 1 08 23, 1 22 56) for the setting point you want.
3. Playback starts from the selected section.
Notes:
• If the time entered is not permitted by the DVD, " Input invalid " will
display. You should re-enter the correct time.
• Some discs may not respond to this process.
• Some scenes may not be located as precisely as you specified.
• This method for accessing specific locations is available only within
the current title of the DVD.
Programmable Memory
You can combine your favorite titles/chapters/tracks and play them in
the order you determine.
1. Press the MEMORY button while a disc is playing. The following
display appears.
Clear: Delete all input programs.
Exit: Exit memory menu and return to normal playback.
Start: Start memory playback.
Next / Prev: Move to the next / previous setup page.
7
RCA DRC99392_Eng & Spa IB_MTK A5_17-3-2011.indd 7
3/28/2011 10:31:04 AM
Viewing JPEG Files
Programmable Memory
Notes:
•
•
•
2. Input the title (2 digits) and chapter (2 digits) by pressing the
number buttons (for example: 01 02, 02 05, 02 11). It will move to
the next item automatically.
• You can use the Cursor buttons ( , , , ) to move the highlighted
bar to any item, and re-enter the title and chapter. Press the
NEXT /
PREV to move to the next / previous setup page.
• You can use the Cursor buttons ( , , , ) to move the highlighted
bar to “Clear”, “Exit”, “Start” or “Next / Prev”, and press the ENTER
button to confirm.
3. Press the PLAY button on the remote control or
unit to start memory playback.
(“ Program ” appears on the screen).
button on the
4. To resume normal playback from memory playback
1). Press the MEMORY button to display the memory menu.
2). Use the Cursor buttons ( , , , ) to move the highlighted
bar to “Stop”. Press the ENTER button to confirm “Stop”.
3). Use the Cursor buttons ( , , , ) to highlight “Clear”, and
then press the ENTER button to confirm.
4). Use the Cursor buttons ( , , , ) to highlight “Exit”, and then
press the ENTER button to confirm. It will return to normal
playback (“ Program ” disappears from the screen).
Notes:
• If the title or chapter number entered is not permitted by the DVD,
it will disappear. You should re-enter correct number.
• You should input items one by one following the 1, 2, 3 ... sequence.
• If the DVD contains only one title, you can only arrange order for
chapters.
• Some discs may not permit memory playback operation.
• If you select repeat during memory playback, the DVD player
repeats the current memory playback.
• If you press the MEMORY button while the display appears on the
TV screen, the display disappears.
• The programmed selections will be cleared when you press the
STOP button two times, open the disc tray or turn off the DVD
player.
Viewing JPEG Files
This unit can play JPEG files recorded on a CD-R or CD-ROM disc (CD-RW
is not recommended).
Viewing JPEG Files
1. Press the OPEN knob to open
the disc door.
2. Hold a JPEG file disc by its edges
and gently push it onto the
spindle with the label side facing
up until you hear a “click”.
3. Close the disc door. The JPEG
files on the disc will be displayed
one by one automatically. If the disc does not play automatically,
press the PLAY button on the remote control or button on the
unit.
4. Press the MENU or STOP button to display a folder list. Press the
/ button to highlight a JPEG file to play. Press the PLAY button
on the remote control or button on the unit to start playback.
•
•
You can press the PAUSE button on the remote control or button
on the unit to freeze the picture. Press the
PLAY button on the
remote control or button on the unit to resume picture slide show.
You can press the STOP button to quit playback.
You can press the
PREV or
NEXT button to change the
picture.
You can press the ANGLE button to rotate direction of the picture
by 90°.
Some discs may not permit this operation.
Customizing the Function Settings
Language Setup
Language
Video
System
1. Press the SETUP button on the
- - Language Menu - Eng
Player Menu
remote control or MENU button
Eng
Audio
Off
Subtitle
on the unit in stop mode (when
Eng
Disc Menu
disc is not playing).
2. Press the button to select
Language Menu.
Go To Language Menu
3. Press the / button to select
the option (Player Menu, Audio, Subtitle or Disc Menu), then press
the button.
4. Press the / button to select your preferred language, then press
the ENTER button to confirm.
5. Repeat steps 3 and 4 to adjust other options. Press the button to
return to the previous menu.
6. Press the SETUP or RETURN button to exit the menu.
Notes:
• Some DVDs may not play in the audio language you selected. A
prior language may be programmed on the disc.
• Some DVDs may be set to display subtitles in a language other
than the one you selected. A prior subtitle language may be
programmed on the disc.
• Some DVDs allow you to change subtitle selections using the disc
menu only. If this is the case, press the MENU button and choose
the appropriate subtitle language from the selection on the disc
menu.
• Some DVDs may not include your pre-selected language. In this
case, the DVD player automatically displays disc menus consistent
with the disc’s initial language setting.
Video Setup
Video
System
Language
1. Press the SETUP button on the
- - Video Menu - remote control or MENU button
Brightness
00
Contrast
00
on the unit in stop mode (when
disc is not playing).
2. Press the / button to select
Video Menu.
Go To Video Menu
3. Press the / button to select
the option (Brightness or Contrast), then press the button.
4. Press the / button to adjust the setting, then press the ENTER
button to confirm.
5. Repeat steps 3 and 4 to adjust other options. Press the button to
return to the previous menu.
6. Press the SETUP or RETURN button to exit the menu.
System Setup
1. Press the SETUP button on the remote control or MENU button on
the unit in stop mode (when disc is not playing).
2. Press the / button to select System Menu.
3. Press the / button to select the option (TV Display or Default),
then press the button.
8
RCA DRC99392_Eng & Spa IB_MTK A5_17-3-2011.indd 8
3/28/2011 10:31:05 AM
Maintenance
Customizing the Function Settings
Video
Language
4. Press the / button to adjust
- - System Menu - the settings, then press the
TV Display
Wide
Default
No
ENTER button to confirm.
5. Repeat steps 3 and 4 to adjust
other options. Press the
button to return to the previous
Go To System Menu
menu.
6. Press the SETUP or RETURN button to exit the menu.
System
TV Display
Pan Scan
• When wide-screen video is played, this Cut off when a wide-screen
video image is played.
mode clips the right and left sides of
the image so that it can be viewed on
a conventional screen.
• Some wide-screen DVDs that do not
permit Pan Scan mode playback are
automatically played in letterbox
mode (black bands that appear at the
top and bottom of the screen).
Pan Scan
Letter Box
• When wide-screen video is played in
this mode on a conventional screen,
black bands appear at the top and
bottom of the screen.
Wide Screen
• This is the correct mode for playing
wide-screen videos on the unit screen
Letter Box
or other external wide-screens.
Notes:
• The displayable picture size is preset
on the DVD. Therefore the playback
picture of some DVDs may not
conform to the picture size selected.
• When you play DVDs recorded in the
Wide Screen
4:3 aspect ratio, the playback picture
will always appear in the 4:3 aspect ratio regardless of the TV display
setting.
• Select Wide Screen to conform the LCD screen on the unit. Always
be sure that your TV display conforms to the actual TV in use if you
connect the unit to a TV.
Default
It takes 3-5 seconds to reset the DVD settings to the factory default.
Sound System
Dolby Digital
Dolby Digital is a technology developed by Dolby Laboratories.
Soundtracks encoded in Dolby Digital can reproduce from one to 5.1
discrete channels of excellent quality audio.
The unit automatically recognizes the Dolby Digital bitstream and
provides a downmix suitable for two-channel listening. An additional
Dolby Digital decoder is required for reproduction of the discrete multichannel soundtracks available on many DVDs.
Manufactured under license from Dolby Laboratories.
Dolby and the double-D symbol are trademarks of
Dolby Laboratories.
Cleaning the Disc
A defective or soiled disc inserted into the unit can cause sound to drop
out during playback.
Handle the disc by holding its inner and outer edges.
• Do NOT touch the surface of the unlabeled side of the disc.
EN
• Do NOT stick paper or tape on the surface.
• Do NOT expose the disc to direct sunlight or excessive heat.
• Clean the disc before playback. Wipe the disc
from the center outward with a cleaning cloth.
• NEVER use solvents such as benzine or alcohol
to clean the disc.
• Do NOT use irregular shaped discs (example: heart shaped,
octagonal, etc.). They may cause malfunctions.
Cleaning the Unit
•
•
•
Be sure to turn the unit off and disconnect the AC power adapter
before cleaning the unit.
Wipe the unit with a dry soft cloth. If the surfaces are extremely
dirty, wipe clean with a cloth that has been dipped in a weak soapand-water solution and wrung out thoroughly, then wipe with a dry
cloth.
Never use alcohol, benzine, thinner, cleaning fluid or other
chemicals. Do NOT use compressed air to remove dust.
Important Note
•
Before transporting the unit, remove the disc from the disc
compartment.
Carrying Bag Installation
CAUTIONS:
1. Do not use this DVD player case as a swing, car seat, or for any other
purpose except to hold a DVD player and accessories.
2. The DVD player case is intended for viewing only from the rear
seats. Do not install or use this product in the front seat of a vehicle.
3. To reduce the chance of injury in case of a collision or sudden stop:
• Always keep DVD player strapped securely inside case while vehicle
is moving.
• Always keep DVD player case securely attached inside vehicle while
the vehicle is moving.
4. Always position the plastic hooks and strap adjustment slider so that
they do not touch the back of the head of the person in the front seat.
To Attach the DVD Player Case to a Headrest (Images 1 & 2)
1. Insert the DVD player into the case as
Image 1
shown right (1, 2, 3).
2. Unzip the main compartment that holds
2
3
the player; locate the D rings at the top of
the case (A).
1
3. Locate 2 straps with hooks on each end.
4. Hook one end of the each strap to the D
rings at the top of the case.
Image 2
5. Criss-cross the straps around the front of
the headrest (B) and hook the straps to a
second set of rings on the lower part of
the case (C).
6. Tighten up the straps until the unit is
secured. Connect the 12V car adapter as
shown on the right (D).
Note: Before closing the bag,
release the left and right elastic
bands from the screen panel.
CAUTION:
1. High temperature damages
CDs/DVDs.
2. Do not store in closed cars.
3. Protect from direct sunlight.
9
RCA DRC99392_Eng & Spa IB_MTK A5_17-3-2011.indd 9
3/28/2011 10:31:05 AM
Troubleshooting Guide
No power.
•
•
Ensure the AC power adapter is connected.
The unit is not turned on.
The remote control does not function.
•
•
•
•
Make sure the infrared remote sensor is not blocked.
Make sure the plastic sheet has been removed from the remote
control.
Point the remote directly at the infrared remote sensor on the unit.
Replace the battery in the remote control with a new one.
No sound or only a very low-level sound is heard.
•
•
•
•
•
•
The volume control is located on the side of the unit – please try
adjusting this.
The system is in pause mode. Press the PLAY button to return to
normal play mode.
The unit is in fast-forward or fast-reverse mode. Press the
PLAY
button to return to normal play mode.
Make sure the AUDIO/VIDEO output connections are correct.
The DTS DVD cannot be decoded to have speaker output.
The unit is too hot; shut off the unit for 30 minutes to cool it down.
No picture.
•
The region number of the disc doesn't match the region number of
this unit.
The picture is not clear.
•
•
•
Clean the disc.
The disc is scratched.
Adjust the LCD's brightness and contrast using the VIDEO MODE
button on the remote control.
Severe hum or noise is heard.
•
•
The plugs and jacks are dirty. Wipe them with a cloth slightly
moistened with alcohol.
Clean the disc.
The disc does not play.
•
•
•
•
•
There is no disc inside (“No Disc” appears on the screen).
Insert the disc correctly with the playback side facing down.
Clean the disc.
A non-NTSC disc has been inserted. The unit and disc region
number are incompatible.
Condensation may have formed inside the unit due to a sudden change
in temperature. Wait about an hour for it to clear and try again.
Need More Help?
Please visit online help at
http://www.RCAav.com
Limited Warranty
AVC MULTIMEDIA (“AVC”) makes the following limited warranty. This
limited warranty extends to the original consumer purchaser and is
limited to non-commercial use of the product.
One Year Parts & Labor Warranty
AVC products purchased in the United States are warranted to be free
from defects in materials or workmanship for a period of one year from
the date of their original retail purchase. If the unit fails to conform to
this warranty, we will service the product using new or refurbished
parts and products, at AVC’s sole discretion.
During a period of one year from the effective warranty date, AVC will
provide, when needed, service labor to repair a manufacturing defect at
its designated Service Center. To obtain warranty service in the United
States, you must first call our Customer Support Center at 1-800-5065746 or 1-877-252-6873, during the hours listed in the box below.
Limited Warranty
The determination of service will be made by AVC Customer Support.
PLEASE DO NOT RETURN YOUR UNIT TO AVC WITHOUT PRIOR
AUTHORIZATION. New or remanufactured replacements for defective
parts or products will be used for repairs by AVC at its designated
Service Center for one year from the effective warranty date. Such
replacement parts or products are warranted for an additional one year
from the date of repair or replacement. The Customer will be required
to ship the unit to the Service Center indicated at the time Customer
Support is contacted to make the necessary repairs. The customer is
responsible for all transportation charges to the service facility.
Packaging and Shipping Instruction
When you send the product to the AVC service facility you must use the
original carton box and packing material or an equivalent as designated
by AVC.
Your Responsibility
(1)You must retain the original sale receipt to provide proof of
purchase.
(2) These warranties are effective only if the product is purchased and
operated in the U.S.A. or Canada.
(3) Warranties extend only to defects in material or workmanship,
and do not extend to any product or parts which have been lost
or discarded, or damage to product or parts caused by misuse,
accident, improper operation or maintenance, or use in violation
of instructions provided with the product, or to product which
has been altered or modified without authorization of AVC, or
to products or parts thereof which have had the serial number
removed or changed.
Out of Warranty
In the event your product requires repair after the limited warranty
period has expired, please contact our Customer Support Center at
1-800-506-5746, 1-877-252-6873 or www.RCAav.com
Hours: Monday–Thursday: 9am–7pm, Friday: 9am–5pm, Saturday: 9am–NOON Eastern time.
Important: You are responsible for any transportation, shipping or insurance relative to the return of product to our Product Returns Center.
All warranties implied by state law, including the implied warranties
of merchantability and fitness for a particular purpose, are expressly
limited to the duration of the limited warranties set forth above. With
the exception of any warranties implied by state law as hereby limited,
the foregoing warranty is exclusive and in lieu of all other warranties,
guarantees, agreements and similar obligations of manufacturer or
seller with respect to the repair or replacement of any parts. In no event
shall AVC be liable for consequential or incidental damages.
No person, agent, distributor, dealer or company is authorized to
change, modify or extend the terms of these warranties in any manner
whatsoever. The time within action must be commenced to enforce
any obligation of AVC arising under the warranty or under any statute,
or law of the United States or any state thereof, is hereby limited to
one year from the date of purchase. This limitation does not apply to
implied warranties arising under state law.
This warranty gives you specific legal rights and you may also have
other rights, which may vary, from state to state. Some states do
not allow limitation on how long an implied warranty lasts, when an
action may be brought, or the exclusion or limitation of incidental or
consequential damages, so the above provisions may not apply to you.
For more information on other products and services, please visit our
web site at www.RCAav.com
Important: Also keep your “Bill of Sale” as proof of purchase.
Model no.......................................... Product name..................................................
Type of set....................................... Serial no..............................................................
Invoice no........................................ Date purchased...............................................
Dealer name....................................................................................................................
FOR SERVICE AND REPAIR, PLEASE VISIT www.RCAav.com
Specifications and external appearance are subject to change without notice.
© 2011 AVC MULTIMEDIA
AVC Multimedia,
Markham, Ontario L3R 1E3
http://www.RCAav.com
Printed in China
10
RCA DRC99392_Eng & Spa IB_MTK A5_17-3-2011.indd 10
3/28/2011 10:31:06 AM
Precauciones de seguridad
Precauciones de seguridad
•
No se debe exponer este aparato a salpicaduras ni a líquidos que
goteen, ni tampoco se debe poner ningún objeto lleno de líquido,
como son los floreros, sobre el aparato.
Acerca de la seguridad
•
•
* VER PARTE TRASERA DE LA UNIDAD PARA SÍMBOLOS GRÁFICOS *
El símbolo de un rayo dentro de un triángulo equilátero está
pensado para alertar al usuario de la presencia de “voltaje
peligroso” no aislado dentro de la carcasa del producto, el
cual puede ser de una magnitud suficiente para provocar
una descarga eléctrica.
El signo de admiración dentro de un triángulo equilátero
está pensado para alertar al usuario de la presencia de
instrucciones importantes de manejo y mantenimiento
(reparación) en este manual de usuario.
AVISO: Si ocurre algún problema, desconecte el adaptador de CA y
llame a un técnico calificado para el mantenimiento.
PRECAUCIÓN: PARA PREVENIR RIESGO DE INCENDIO O DESCARGA
ELÉCTRICA, NO RETIRE LA CUBIERTA NI LA PARTE POSTERIOR DEL
EQUIPO. NO HAY PIEZAS DE REPUESTO PARA EL USUARIO DENTRO DEL
APARATO. PARA CUALQUIER TIPO DE CONSULTA, ACUDA A PERSONAL
DE SERVICIO CALIFICADO.
ADVERTENCIA: PARA REDUCIR EL RIESGO DE SUFRIR UNA DESCARGA
ELÉCTRICA, NO EXPONGA ESTE APARATO A LA LLUVIA NI A LA HUMEDAD. NO PONGA OBJETOS QUE CONTENGAN LÍQUIDOS SOBRE ESTA
UNIDAD NI CERCA DE ELLA.
CUIDADO: AL USAR LOS CONTROLES, HACER AJUSTES O LLEVAR A
CABO PROCEDIMIENTOS DISTINTOS A LOS QUE SE ESPECIFICAN EN EL
MANUAL, PUEDE QUEDAR EXPUESTO A RADIACION PELIGROSA.
PRECAUCIÓN: PELIGRO DE EXPLOSIÓN AL CAMBIAR LAS BATERÍAS DE
MANERA INCORRECTA. AL CAMBIAR LAS PILAS, CÁMBIELAS POR EL
MISMO TIPO DE BATERÍAS O POR UN TIPO DE BATERÍA SIMILAR.
Cumple con la especificación Canadiense
ICES-003 clase B.
PRECAUCIÓN
RADIACIÓN LÁSER INVISIBLE EN CASO DE
APERTURA Y DESBLOQUEO DE CIERRE.
EVITE CUALQUIER EXPOSICIÓN AL RAYO.
Este producto contiene un dispositivo láser de baja potencia.
En cuanto a la ubicación
•
•
•
•
•
•
•
•
No haga uso de la unidad en lugares con mucho calor, frío, polvo o
humedad.
Coloque la unidad en una superficie plana y pareja.
No ponga este aparato en lugares con poca ventilación. No lo cubra
con un paño ni lo coloque sobre la alfombra, impidiendo de esta
forma el flujo de aire a través de la unidad.
No restrinja el flujo de aire de la unidad poniéndola en un lugar con
poca ventilación, cubriéndola con un paño, o poniéndola sobre una
alfombra.
Para evitar la atracción magnética, no ponga la unidad cerca de un
parlante ni de un imán.
No utilice esta unidad bajo la luz directa del sol ni deje la unidad
en un automóvil cerrado (o en un ambiente similar) donde pudiera
quedar expuesta a altas temperaturas de más de 104°F (40°C).
No ponga objetos que tengan llamas al descubierto, tales como
velas, sobre esta unidad.
Ni el adaptador de CA/CC ni el aparato deben estar expuestos a
salpicaduras de agua ni a líquidos que goteen, ni tampoco se debe
poner ningún objeto lleno de líquido, como son los floreros, sobre el
adaptador de CA/CC ni sobre el aparato.
Al conectar o desconectar el adaptador de CA, agarrar el enchufe y
no el cable mismo. Tirar del cable puede dañarlo y crear riesgo.
Cuando la unidad no se va a usar por un período largo de tiempo,
desconecte el adaptador de CA de la toma de CA.
ES
En cuanto a la condensación
•
Si deja la unidad en un lugar caluroso y húmedo, es posible que
en el interior del reproductor la unidad se formen pequeñas gotas
o que se forme condensación. Si existe condensación. Si existe
condensación en el interior del aparato, es posible que la unidad no
funcione de manera normal. Deje que la unidad esté en reposo por
1 ó 2 horas antes de encenderla, o bien, gradualmente, entibie la
habitación y seque la unidad antes de usarla.
Advertencia sobre la ventilación
•
•
No obstruya las ranuras ni los oroficios de ventilación. (es posible
que al obstruirlos con un periódico o un paño, etc. el calor no pueda
salir de la unidad.)
No haga funcionar esta unidad en un espacio cerrado, tal como
un estante para libros o un mueble incorporado. Deje cerca de 4
pulgadas (10 cm) de espacio libre alrededor de la unidad para que
se pueda ventilar de manera apropiada.
Localización de la placa de características nominales
•
La localización de la placa de características nominales es en la
parte trasera de la unidad.
Renseignements FCC
NOTA: Este aparato ha sido puesto a prueba y se ha verificado que
cumple con las restricciones de los equipos digitales clase B, en
conformidad con el Capítulo 15 del Reglamento de la FCC. Dichas
restricciones están diseñadas para proporcionar la debida protección
contra interferencia dañina en las instalaciones residenciales. Este
equipo genera, usa y puede irradiar energía de frecuencias radiales
y, de no instalarse y usarse según las instrucciones, puede causar
interferencia dañina para las comunicaciones de radio. No obstante,
no hay garantía de que en una instalación específica no se produzca
interferencia. Si este equipo causara interferencia en la recepción de
la radio o la televisión (lo quer se puede determinar encendiendo y
apagando el equipo), le sugerimos al usuario que intente corregir dicha
interferencia, adoptando una o más de las siguientes medidas:
- Reoriente o ubique en otro lugar la antena de recepción.
- Aumente la distancia que separa al equipo del receptor.
- Conecte el equipo a un enchufe de pared que se encuentre en un
circuito diferente a donde tenga conectado el receptor.
- Pida ayuda al vendedor o a un técnico de radios y televisores con
experiencia.
Advertencia: los cambios o modificaciones que se hagan a esta unidad,
que no estén expresamente aprobados por la parte responsable de
hacer cumplir las reglas de funcionamiento de este aparato, pueden
anular la autoridad del usuario para operar este equipo.
Notas sobre los derechos de reproducción
Está prohibida por ley la copia, difusión, exhibición, distribución
por cable, emisión pública o alquiler de material con Copyright sin
autorización previa.
Las disposiciones sobre aparatos de las patentes norteamericanas
n° “6.836.549, 6.381.747, 7.050.698, 6.516.132 y 5.583.936” están
autorizadas exclusivamente para usos de visualización limitados.
"Este producto cuenta con tecnología para proteger los derechos
de reproducción, la cual está protegida por los derechos de ciertas
patentes americanas y por otros derechos de propiedad intelectual.
Macrovision debe autorizar el uso de esta tecnología para proteger
los derechos de reproducción, la cual está destinada únicamente al
uso en el hogar y a otro tipo de reproducción limitada, a menos que
Macrovision lo autorice de otra manera. Queda prohibido desarmar o
llevar a cabo procedimientos de ingeniería inversa en este aparato".
2
RCA DRC99392_Eng & Spa IB_MTK A5_17-3-2011.indd 2
3/28/2011 10:31:06 AM
Instrucciones de
seguridad importantes
1.
2.
3.
4.
5.
6.
7.
Lea estas instrucciones.
Conserve estas instrucciones.
Preste atención a todas las advertencias.
Siga todas las instrucciones.
No use este aparato cerca del agua.
Limpie solo con un paño seco.
No bloquee ninguna de las aberturas de ventilación. Instale de
acuerdo a las instrucciones del fabricante.
8. No instale cerca ninguna fuentes de calor tales como radiadores,
re gi s t ro s d e c a l o r, e s t u f a s u o t ro s a p a rato s ( i n c l u ye n d o
amplificadores) que producen calor.
9. No anule el propósito de seguridad del enchufe de tipo polarizado
o del enchufe con toma a tierra. Un enchufe polarizado tiene dos
cuchillas y una tercera clavija de conexión a tierra. La cuchilla más
ancha o la tercera clavija se proveen para su seguridad. Cuando el
enchufe provisto no encaje en su toma de corriente, consulte a un
electricista para reemplazar la toma de corriente obsoleta.
10. Proteja el cable de alimentación de ser pisado o per forado
específicamente en el área del enchufe, la toma de corriente y el
punto en donde salen del aparato.
11. Sólo use los anexos/accesorios especificados por el fabricante.
12. Use sólo con el carro, soporte, trípode, o mesa
especificados por el fabricante, o vendidos
con el aparato. Cuando use el carro, mueva
la combinación de carro/aparato de manera
Advertencia sobre el
cautelosa para evitar daños a causa de que carro para transporte
se vuelque.
13. Desconecte este aparato durante tormentas eléctricas o cuando no
se vaya a usar durante períodos prolongados.
14. Derive todas las reparaciones del equipo a personal de reparaciones
calificado. Se precisará reparar el aparato cuando éste se haya
dañado de cualquier forma, como cuando el enchufe o el cable de
alimentación de CA se haya dañado, cuando se haya derramado
un líquido o haya caído un objeto dentro del aparato, cuando el
aparato haya quedado expuesto a la lluvia o a la humedad, cuando
no funcione normalmente o se haya caído.
Formatos de los discos
El equipo puede reproducir:
DVDs [discos
de 8cm/12cm]
Formatos de los discos
de audio se
reproducirá, pero
las imágenes gráficas no podrán
verse.
Selección de idiomas para audio
Selección de idiomas para los subtítulos
Proporción del tamaño de la pantalla
Ángulos de cámara múltiples
1
Indicador del código de región
Títulos, capítulos y pistas
•
•
Los DVD están divididos en
Título1
Título2
títulos y capítulos. Si el disco
contiene más de una película,
Capítulo3 Capítulo1 Capítulo2
Capítulo1 Capítulo2
cada película sería un título
distinto. Los capítulos son
Pista 1
Pista 2
Pista 3
Pista 4
Pista 5
secciones de los títulos.
Los CD de audio se dividen en pistas; una pista es normalmente una
canción o un tema en un CD de audio.
Nota: Existen números que identifican cada título, capítulo y pista de
un disco. La mayoría de discos tienen estos números grabados en ellos,
pero algunos no los tienen.
Notas sobre discos no autorizados
No podrá reproducir algunos discos DVD en esta Unidad si éstos fueron adquiridos fuera de su zona geográfica o si se fabricaron para fines comerciales.
Accesorios
Por favor revise e identifique los accesorios suministrados.
. Control remoto con pila........................................................................x 1
. Adaptador de CA......................................................................................x 1
. Adaptador para vehículo......................................................................x 1
. Estuche para transporte........................................................................x 1
Control remoto
Utlilizar el mando a distancia
•
•
Dirija el control remoto hacia el SENSOR REMOTO ubicado en la unidad.
Al estar ante la presencia de una luz muy brillante, es posible que el
SENSOR DEL CONTROL REMOTO infrarrojo no funcione correctamente.
Para cambiar las pilas del control remoto
1. Abra la tapa del compartimento para la pila.
CDs de audio
[discos de 8cm/12cm] Compatible
Información de gestión de región
Información de gestión de región: Esta Unidad está diseñada y fabricada para responder a la Información de Gestión de Región que está
codificada en los discos DVD. Si el número de Región impreso en el
disco DVD no se corresponde con el número de Región de la Unidad,
ésta no podrá reproducir ese tipo de discos.
El número de región de esta unidad es 1.
Función de disco u operación no disponible
Cuando aparece el símbolo en la pantalla del TV, ello indica que la función y operación que se está intentando no está disponible en ese momento. Esto ocurre porque el fabricante del disco DVD determina las funciones
específicas. Ciertas funciones pueden no estar disponibles en algunos discos. Asegúrese de leer la documentación proporcionada con el disco.
Iconos utilizados en los DVD
Iconos de muestra
Nota:
Cuando se reproduce un disco CD-G (Gráficos) o CD EXTRA, la porción
Antes de USAR el 2. Introduzca una pila tamaño CR2025 (3V).
control remoto,
retire la lámina de
PLÁSTICO.
Cambio de la pila
Al agotarse la pila, la distancia de funcionamiento del control remoto
disminuirá considerablemente y deberá cambiar la pila.
Nota: Cuando no vaya a usar el control remoto por un periodo
prolongado, retire la pila.
ADVERTENCIA: No arroje las pilas al fuego, ya que pueden explotar o se
puede derramar el líquido que hay en su interior.
ADVERTENCIA: las baterías no deben ser expuestas a mucho calor,
como son la luz del sol, el fuego o fuentes similares de calor.
CUIDADO:
• Peligro de explosión al cambiar la batería por una batería incorrecta.
Cambie la batería por un tipo de batería similar o equivalente.
• El control remoto que se incluye con este producto contiene una
batería de botón que podría ingerirla un niño. No deje baterías de
botón al alcance de los niños.
3
RCA DRC99392_Eng & Spa IB_MTK A5_17-3-2011.indd 3
3/28/2011 10:31:07 AM
Guía de referencia para los controles
Control remoto
Guía de referencia para los controles
Unidad
VIDEO
MODE
1
2
3
4
MENU
PREV
SEARCH
GOTO
NEXT
STOP
PAUSE
ANGLE
DISPLAY
9
10
11
PLAY
5
6
MEMORY
2
3
7
4
5
6
7
8
ENTER
M
AUDIO
SUBTITLE/
RETURN
9
12
13
14
15
ES
0
SETUP
8
A-B
DISC
REPEAT
1. Botón VIDEO MODE
Modifica el Brillo, la Tamño de la pantalla o el Contraste de la
pantalla LCD.
2. Botón
PREV
Retrocede a través de los títulos, capítulos o pistas de un disco.
3. Botones
/
SEARCH
SEARCH: para reproducción a alta velocidad en sentido de
retroceso.
SEARCH: para reproducción a alta velocidad en sentido de avance.
4. Botón GOTO
Salta directamente a una parte específica del disco de CD/DVD.
5. Botones del cursor ( , , , )
Uselos para moverse entre una y otra selección en la pantalla del
menú y para ajustar ciertas programaciones.
Botón ENTER
Confirma las selecciones en la pantalla del menú.
6. Botón MEMORY
Fije títulos/capítulos en su orden favorito.
7. Botones numéricos (0-9)
Uselos para crear programas. También úselo para seleccionar
directamente la títulos, capítulos o pistas de un disco.
8. Botón REPEAT A-B
Lleva a cabo la reproducción repetida entre dos puntos de un disco
de DVD o de audio.
Botón REPEAT DISC
Repite el capítulo o título de un disco de DVD. Repite una pista del
disco compacto.
Botón SETUP
Al detener un disco, este botón hace aparecer el menú de
programación.
9. Botón MENU
Sirve para ingresar y para salir del menú principal del DVD.
10. Botón
NEXT
Salta al título, capítulo o pista siguiente de un disco.
11. Botón STOP
Detiene la reproducción del disco.
Botón PLAY
Da inicio o reanuda la reproducción del disco.
Botón PAUSE
Presione una vez para hacer una pausa en la reproducción del disco.
Presiónelo varias veces para avanzar un cuadro a la vez.
12. Botón DISPLAY
Despliega en pantala información sobre el estado del equipo.
13. Botón ANGLE
Alterna entre los múltiples ángulos de cámara, siempre y cuando el
disco de DVD que esté reproduciendo haya sido programado con
ángulos de cámara múltiples.
14. Botón AUDIO
Selecciona una de las pistas de sonido de audio de un disco de
DVD (en caso que haya más de una pista disponible) o selecciona la
modalidad de salida de audio de un disco compacto.
15. Botón SUBTITLE
Selecciona uno de los idiomas de subtítulos programado en el disco
de DVD (en caso que ésta característica se encuentre disponible).
Botón RETURN
Regresa al funcionamiento normal, luego de usar el menú de
programación de un disco de DVD.
1.
2.
3.
4.
5.
Pantalla de LCD
Enchufe DC IN 9V - 12V
Enchufes AUDIO / VIDEO OUT
CHARGE / STANDBY / ON [carga/apagado/encendido]
Control VOLUME
Ajusta el volumen.
6. Enchufe para los audífonos
7. Botón STOP
Oprima para detener la reproducción de un disco.
Botón MENU
Accede al menú del disco de DVD, si el disco de DVD está en
reproducción.
Accede el menú de configuración, si el disco de DVD no está en
reproducción.
Botón
Oprima para comenzar o para reanudar la reproducción de un disco. Al
presionar durante la reproducción de un disco, se hará una pausa.
Botón
PREV
Oprima para ir al título, capítulo o pista anterior. Al estar en la
modalidad del menú de DVD o menú de configuración, oprima para
avanzar el texto hacia la izquierda.
Botón
SEARCH
Oprima para llevar a cabo la reproducción rápida en sentido de
avance durante la reproducción de un CD.
En el menú de DVD, configuración o de archivos JPG, oprima para
avanzar el texto hacia arriba.
Botón
NEXT
Avanza a través de los títulos, capítulos o pistas de un disco.
En el menú de DVD o de configuración, oprima para avanzar el
texto hacia la derecha.
Botón
SEARCH
Oprima para llevar a cabo la reproducción rápida en sentido de
retroceso durante la reproducción de un CD.
8. Compartimiento para discos
Cierre la bandeja presionando la tapa del compartimiento para discos.
9. Botón de apertura
Oprima para abrir la tapa del compartimiento para discos.
10. Sensor control remoto
Recibe las señales del control remoto.
11. Indicador ON
12. Indicador CHARGING
Cargue la batería recargable antes de usarla por primera vez. El
tiempo de carga completa normalmente tarda aproximadamente
4-5 horas. La luz de carga se apagará cuando la batería se haya
terminado de cargar.
4
RCA DRC99392_Eng & Spa IB_MTK A5_17-3-2011.indd 4
3/28/2011 10:31:07 AM
Fuente de energía
Fuente de energía
A. Uso del adaptador de CA
Para recargar la batería integrada
Este adaptador de CA opera en CA 100-120V.
1
Adaptador de CA
Al enchufe
de la pared
de
1 AlCAenchufe
de la pared
Adapador
de CA
2 Al enchufe DC IN 9V
2 AlDCenchufe
IN 9V
Precauciones:
•
•
•
El adaptador de CA incluido es sólo para uso con esta unidad. No
usarlos con otro equipo.
Cuando la unidad no se vaya a usar por un periodo prolongado,
desconecte el adaptador de corriente de CA del enchufe de la pared.
Cuando el adaptador de CA está enchufado, el aparato no está
completamente desconectado del principal, incluso cuando la
energía está apagada.
Advertencia:
El adaptador de CA/CC se utiliza como un dispositivo de desconexión.
El adaptador de CA/CC del aparato no se debe obstruir Y debe
hacer fácil acceso a él cuando se planee usarlo. Para desconectarse
completamente de la entrada de corriente, el adaptador de CA/CC del
aparato debe estar desconectado de la red eléctrica.
B. Uso del adaptador para vehículo
El adaptador para vehículo que viene incluido con este aparato está
diseñado para usarse en vehículos con un sistema eléctrico a tierra
negativo de 12V.
Advertencias: Desconecte el adaptador para vehículos cuando no vaya
a utilizarlo. No lo use en vehículos equipados con un sistema de 24V.
1
Al encendedor
del vehículo
L’adapteur d’auto
2 Al enchufe DC IN 9V
el interruptor
3 Deslice
a la posición CHARGE
indica
4 Laqueluzlaque
pila se
esta cargando se
encendera
pila se termina
5 La
de recargar cuando
la luz se apaga
Advertencias:
• La batería integrada sólo podrá recargarse cuando la unidad se
encuentre en el modo CHARGE mientras se usa el adaptador de CA.
• La batería integrada no podrá recargarse cuando la unidad se
encuentre en el modo encendido (ON).
• NO recargue la batería en el vehículo usando el adaptador de
corriente para el automóvil.
• Baterías no se deben exponer a fuentes de calor excesivo, como la
luz del sol, fuego u otros.
Notas:
• Cuando la batería integrada tenga poca carga, “Battery Low” aparecerá
en la pantalla y se interrumpirá la reproducción en la unidad.
• Recargue la batería integrada cuando esté listo para usarla nuevamente.
• Cuando use la batería integrada, la temperatura del ambiente
deberá ser de 41°F (5°C) a 95°F (35°C).
• Para obtener la máxima vida útil de la batería integrada, cárguela a
la temperatura del interior.
• La batería integrada incluida en este dispositivo podría presentar riesgo
de incendio o quemadura química si se trata de manera inadecuada.
No desarme, exponga a calor por encima de los 212°F (100°C), o incinere.
• La unidad no deberá exponerse al calor excesivo tal como el de la
luz solar, incendio o similares.
• Cuando deseche la unidad, deberán considerarse los problemas
ambientales y las reglas y leyes locales que rijan la eliminación de
tales productos deberán seguirse de manera estricta.
Encendido de la unidad
Precauciones:
• Utilice únicamente el adaptador para vehículos de 12V que se
suministra. El uso de otro adaptador para vehículos podría dañar el
aparato.
• El adaptador para vehículos de 12V se suministra para su uso
exclusivo con este aparato. No lo utilice con ningún otro equipo.
• Por razones de seguridad, no manipule este aparato ni visualice
ningún DVD mientras conduce un vehículo.
• Compruebe que el aparato está bien sujeto para evitar que se caiga
en caso de accidente.
• Cuando el interior de la toma del encendedor esté lleno de ceniza
o polvo, la sección de la toma puede calentarse a causa del mal
contacto. Limpie la toma del encendedor antes de utilizarla.
• Después de su utilización, desconecte el adaptador para vehículos
tanto del aparato como del encendedor del coche.
1. Deslizar el interruptor CHARGE / STANDBY
/ ON en el lado izquierdo de la unidad a la
posición ON (encendido).
2. El logotipo del DVD (imagen de comienzo)
aparecerá en la pantalla de la unidad.
3. Después de usar este aparato, deslice el interruptor CHARGE /
STANDBY / ON a la posición de suspensión STANDBY (apagado).
Conexiones
A. Enchufar la unidad a un TV
Si su televisor dispone de entradas de Audio/Vídeo, usted podrá conectar la unidad a su TV utilizando el cable Audio/Vídeo.
C. Cómo usar la batería integrada
Blanco Rojo Amarillo
Al enchufe AUDIO
Cable audio/vídeo
/ VIDEO OUT
(no includío)
Blanco Rojo Amarillo
La unidad tiene una batería integrada, no reemplazable, recargable.
Cargue la batería integrada antes de usarla por primera vez. El tiempo
de carga completa normalmente tarda aproximadamente 4-5 horas.
La luz de carga se apagará cuando la batería integrada esté completamente cargada.
TV
5
RCA DRC99392_Eng & Spa IB_MTK A5_17-3-2011.indd 5
3/28/2011 10:31:07 AM
Conexiones
Para ver un DVD en su televisor
1. Encienda la unidad.
2. Para ver imágenes de video provenientes de fuentes externas,
encienda el televisor y siga las instrucciones que se incluyen con
dicho aparato.
Reproducción de un disco (reproducción básica)
Avance / Retroceso rápido
1. Presione el botón
SEARCH o
SEARCH mientras el DVD está
en reproducción. Cada vez que presiona el botón
SEARCH o
SEARCH, la velocidad de lectura rápida cambia, siguiendo la
secuencia siguiente:
B. Uso de los audífonos/auriculares
•
•
Baje el volumen antes de conectarlos, y luego ajuste el nivel de volumen.
Al estar conectados los audífonos/auriculares, no habrá salida de
sonido a través de los parlantes de la unidad.
Audífonos / Auriculares
(enchufe de 3,5mm de diámetro - no suministrados)
Cuidado:
Evite escuchar el sonido a un nivel que pueda dañar sus oídos.
Reproducción de un disco (reproducción básica)
Este manual del propietario explica las instrucciones básicas de este
equipo reproductor de DVDs. Algunos discos de DVD son fabricados
con el fin de permitir operaciones específicas o limitadas durante
la reproducción de dicho disco. Por esta razón, es posible que el
equipo para DVD no responda a todos los comandos de operación,
lo cual no significa que el equipo esté defectuoso. Revise las notas
acerca de las instrucciones de los discos. Mientras el equipo esté en
funcionamiento, es posible que en la pantalla del televisor aparezca
“
”. “
”significa que el equipo reproductor de DVD, o bien, el
disco no permiten llevar a cabo la operación que usted desea.
Reproducción de un disco
1. Deslizar el interruptor CHARGE / STANDBY / ON en el lado
izquierdo de la unidad a la posición ON (encendido).
Lea la sección ADAPTANDO LA PROGRAMACIÓN DE LAS FUNCIONES
antes de proceder con el paso 2.
2. Oprima el botón OPEN para abrir la tapa del compartimiento para
discos.
3. Sostenga el disco por sus lados y colóquelo con cuidado dentro del
eje con el lado de la etiqueta hacia arriba, empujando suavemente
hasta que escuche un “clic”.
4. Cerrar la puerta del disco. El equipo tarda un momento en cargar el
disco. Una vez cargado el disco, el equipo iniciará automáticamente
su reproducción.
5. Si no se empieza a reproducir automáticamente el disco, oprima el
botón PLAY del control remoto o el botón de la unidad.
Para hacer una pausa en la reproducción (modalidad sin
movimiento)
Presione el botón PAUSE. Para reanudar la reproducción normal,
oprima el botón PLAY del control remoto o el botón de la unidad.
En el caso de un DVD, cada vez que oprime el botón PAUSE del control
remoto, la imagen avanza un cuadro.
Para detener la reproducción
Presione el botón STOP a la altura del disco donde usted desee
interrumpir la reproducción. Para reanudar la reproducción en el mismo
punto donde haya detenido el disco, oprima el botón
PLAY del
control remoto o el botón de la unidad.
Si oprime dos veces el botón STOP, la memoria de la unidad se
borrará y al oprimir el botón PLAY del control remoto o el botón
de la unidad reconfigurará el DVD según su configuración inicial.
ES
2. Oprima el botón
PLAY del control remoto o apriete dos veces
el botón
de la unidad al llegar al punto deseado desde donde
desee reanudar la reproducción normal.
Notas:
• El reproductor de DVD desactiva el sonido y los subtítulos durante
la lectura de avance y retroceso de los discos de DVD.
• La velocidad rápida de reproducción puede variar dependiendo del
disco.
Saltear (hacia delante / hacia atrás)
•
•
•
Presione el botón
NEXT para avanzar a títulos, capítulos/pistas
siguientes.
Presione el botón
PREV para retroceder a títulos, capítulos/
pistas anteriores.
En el caso de los discos compactos de audio, use los botones
numéricos del control remoto para ir directamente al número de pista
deseado.
Selección de audio
En el caso de algunos discos, el sonido es grabado en dos o más formatos. Siga las instrucciones que se indican a continuación para seleccionar el tipo de reproducción.
1. Mientras el disco esté en reproducción, presione el botón AUDIO
para ver en pantalla el número de formatos de audio actual.
Audio 1/3:Dolby D 2ch English
2. Presione varias veces el botón AUDIO para seleccionar el formato
de audio deseado.
Notas:
• Si hay registrado sólo un formato de audio, el número no cambiará.
• Algunos discos de DVD le permiten cambiar la selección de audio
sólo por medio del menú del disco. Si éste es el caso, presione el
botón MENU y elija el idioma apropiado en el menú del disco.
• En un disco compacto de audio, usted puede seleccionar diferentes
canales de audio (Stereo [Estéreo], Mono Left [Mono Izq.], Mono
Right [Mono Der.] o Mix-Mono [Mono Mezc.]) presionando el botón
AUDIO reiteradamente.
Selección de subtítulo
1. Mientras el DVD está en reproducción, presione el botón SUBTITLE
para desplegar la programación actual de idioma, tal como se
muestra en el ejemplo.
Subtitle 02/03:Spanish
2. Presione reiteradamente el botón SUBTITLE para seleccionar el
idioma de subtítulo deseado. Usted puede desactivar los subtítulos
presionando una y otra vez el botón SUBTITULE hasta que el
indicador “ Subtitle Off ” aparezca en la pantalla.
Notas:
• Algunos discos de DVD están programados para desplegar
automáticamente los subtítulos, y usted no podrá desactivar esta
función aún cuando lo intente.
• Durante algunas escenas, es posible que los subtítulos no
aparezcan inmediatamente después de que haya seleccionado su
escena deseada.
• El número de idiomas de subtítulo grabados varía según el disco. Si
sólo hay un idioma grabado, el idioma no cambia.
• Esta función sólo puede usarse en discos en los cuales se han
grabado subtítulos en múltiples idiomas.
6
RCA DRC99392_Eng & Spa IB_MTK A5_17-3-2011.indd 6
3/28/2011 10:31:08 AM
Reproducción de un disco (reproducción básica)
•
Algunos discos de DVD sólo le permiten cambiar los subtítulos
utilizando el menú del disco. De ser así, presione el botón MENU y
elija el subtítulo apropiado en el menú del disco.
Selección de ángulo
Algunos discos de DVD contienen escenas que se han filmado desde
una variedad de ángulos diferentes. En el caso de dichos discos, usted
puede ver la misma escena desde cada uno de estos ángulos.
1. Mientras está
1/3
1
reproduciendo un DVD
Secuencia de tomas de ángulo (Ejemplo)
con diferentes ángulos
grabados, presione el
botón ANGLE para ver
el número de ángulos
disponibles.
2. Presione el botón ANGLE repetidas veces para cambiar la escena al
siguiente ángulo grabado.
• Alrededor de dos segundos después, la reproducción continuará
en el nuevo ángulo seleccionado.
• Si no presiona ningún botón dentro de 10 segundos, la
reproducción continúa sin cambiar el ángulo actual.
1 /3
2 /3
3 /3
Nota:
Esta función sólo puede usarse en caso que el disco tenga escenas que
se hayan grabado desde diferentes ángulos.
Función DISPLAY
Mientras está operando el disco, presione el botón DISPLAY
repetidamente para mostrar informacion sobre el estado de operacion.
Modifique la pantalla LCD
Al estar bajo la modalidad de reproducción, ajuste el brillo, la Tamño de
la pantalla o la contraste de la pantalla de LCD.
1. Presione el botón VIDEO MODE.
2. Presione el botón / para seleccionar brillo, tamño de la pantalla
o contraste.
3. Luego presione el botón / para cambiar la programación.
4. Presione el botón VIDEO MODE para salir del menú.
Repetir playback
Repetir playback
Repetición de una sola pista
1. Mientras el disco está en reproducción, presione el botón REPEAT
DISC hasta que el indicador “ Track ” aparezca en la pantalla. La
pista actual se reproducirá reiteradamente.
Repetición de todo el disco compacto
2. Mientras el disco está en reproducción, presione el botón REPEAT
DISC hasta que el indicador “ All ” aparezca en la pantalla. Todo el
disco se reproducirá reiteradamente.
Para reanudar la reproducción normal
3. Mientras el disco está en reproducción, presione el botón REPEAT
DISC hasta que el indicador “ Repeat Off ” repeat desaparezca de la
pantalla.
Repetición de una sección específica
Usted puede reproducir una sección específica una y otra vez.
1. Mientras el disco está en reproducción, presione el botón REPEAT
A-B al comienzo de la sección cuya reproducción desea repetir. El
indicador “ A ” aparece en la pantalla.
2. Presione nuevamente el botón REPEAT A-B al final de la sección. El
indicador “ AB ” aparece en la pantalla.
3. La unidad comenzará de inmediato la reproducción repetida de su
selección.
Para reanudar la reproducción normal
4. Mientras el disco está en reproducción, presione el botón REPEAT
A-B hasta que el indicador “ AB OFF ” aparezca en la pantalla (el
indicador repeat desaparecerá de la pantalla en el caso de un CD).
Notas:
• Algunos discos pueden no permitir repetir operacion A-B.
• No podra fijar la funcion repetir A-B para un segmento que incluye
multiples angulos de camara.
• Puede especificar un segmento solamente dentro del titulo o pista
actual.
• Puede haber una leve diferencia entre punto A y el lugar donde
realmente continua playback dependiendo del disco.
Ubicar la seccion deseada
Ubicar un capitulo/titulo especifico
Si conoce el numero de capitulo/titulo para el capitulo que desea
escuchar, puede ubicarlo seleccionando directamente ese numero.
1. Presione el botón GOTO.
Title 01/03 Chapter 03/12
Title 01/03 Chapter 00/00
2. Mientras el disco está en reproducción, presione el botón REPEAT
DISC hasta que el indicador “ Title ” aparezca en la pantalla. El
título actual se reproducirá reiteradamente.
2. Presione el botón / para remarcar el numero capitulo/titulo.
Presione las teclas de numeros correspondientes (2 digitos) para
el capitulo/titulo que desea. (Por ejemplo: 02, 08, 10 o 15.) (Si Ud
presiona solamente 1 tecla numerica, presione el botón ENTER
para confirmar.)
3. Playback se inicia desde el capitulo/titulo seleccionado.
Notas:
• Si el numero de capitulo/titulo ingresado no esta permitido por
el DVD, aparecerera ” Input invalid ”. Repita los pasos 1 y 2 para
reintroducir el número correcto.
• Algunos discos pueden no responder a este proceso.
• Este metodo de ubicar un capitulo/titulo esta disponible solamente
en un DVD que contiene numeros de capitulo/titulo.
Para reanudar la reproducción normal
Ubicar un horario especifico
Usted puede reproducir reiteradamente un título o un capítulo
específico de un DVD. (Repetición de título, repetición de capítulo,
repetición A-B)
Repetición de un capítulo
1. Mientras el disco está en reproducción, presione el botón REPEAT
DISC hasta que el indicador “ Chapter ” aparezca en la pantalla. El
capítulo actual se reproducirá reiteradamente.
Repetición de un título
3. Mientras el disco está en reproducción, presione el botón REPEAT
DISC hasta que el indicador “ Repeat Off ” aparezca en la pantalla.
Usted puede reproducir reiteradamente una sola pista de un CD o el
disco completo.
Puede mover a un lugar especifico ingresando el horario correspondiente
(horas, minutos, segundos).
1. Presione el botón GOTO dos veces.
Title 01/03 Time : :
7
RCA DRC99392_Eng & Spa IB_MTK A5_17-3-2011.indd 7
3/28/2011 10:31:08 AM
Ubicar la seccion deseada
2. Presione las teclas numericas correspondientes (5 digitos: X:XX:XX,
por ejemplo: 0 30 05, 1 08 23, 1 22 56.) para el punto de fijacion que
desea.
3. Playback se inicia desde la seccion seleccionada.
Notas:
• Si el horario ingresado no esta permitido por el DVD, aparecera
“ Input invalid ”. Debera re-ingresar el horaro correcto.
• Algunos discos pueden no responder a este proceso.
• Algunas escenas pueden no ubicarse con la precision especificada.
• Este metodo para acceder a lugares especificos esta disponible
solamente dentro del actual titulo del DVD.
Memoria programable DVD
Ud puede combinar sus titulos/capitulos favoritos y escucharlos en el
orden que Ud determine.
1. Presione el botón MEMORY mientras opera el DVD, aparece el
siguiente pantalla.
Clear: Borrar todos los programas de entrada.
Exit: Salir del menu memoria y retornar a playback (operado)
normal.
Start: Iniciar playback memoria.
Next / Prev: Mover a la siguiente / anterior pagina prefijada.
2. Ingrese el titulo (2 digitos) y capitulo (2 digitos) presionando las
teclas numericas. (Por ejemplo: 01 02, 02 05, 02 11.) Se movera
automaticamente al item siguiente.
• Puede usar las teclas Cursor ( , , , ) para mover la barra
remarcada hacia cualquier item, y re ingresaer el titulo y capitulo.
(Presione el botón
NEXT /
PREV para mover a la siguiente
(anterior pagina prefijada.)
• Puede usar las teclas Cursor ( , , , ) para mover la barra
remarcada hacia “Clear”, “Exit”, “Start” o “Next / Prev”, y presione el
botón ENTER para confirmar.
3. Oprima el botón
PLAY del control remoto o el botón
de la
unidad para dar inicio a la reproducción de la memoria. (“ Program ”
aparece en la pantalla.)
4. Para continuar playback normal desde playback memoria
1). Presione el botón MEMORY para mostrar el menu memoria.
2). Use las teclas Cursor ( , , , ) para mover la barra remarcada
hacia “Stop”. Presione el botón ENTER para confirmar “Stop”.
3). Utilice los botones del cursor ( , , , ) para destacar “Clear”,
y después presione el botón de la ENTER para confirmar.
4). Utilice los botones del cursor ( , , , ) para destacar la “Exit”,
y después presione el botón ENTER para confirmar. Volverá
al aparato de lectura normal (el “ Program ” desaparece de la
pantalla).
Notas:
• Si el numero de titulo o capitulo ingresado no esta permitido por el
DVD, desaparecera. Ud debera re-ingresar el numero correcto.
• Debera ingresar los items uno por uno siguiendo la secuencia 1, 2, 3... .
• Si el DVD contiene solamente un titulo, solo podra organizar el orden de capitulos.
• Algunos discos pueden no permitir operacion playback memoria.
• Si Ud selecciona repetir durante playback memoria, el DVD repetira
el actual playback memoria.
• Si Ud presiona el botón MEMORY mientras aparece el display en la
pantalla de TV, el display desaparece.
• Las selecciones programadas se borraran cuando Ud presiona el
botón STOP dos veces, abre la bandeja del disco o apaga el DVD.
Para ver archivos de JPEG
Esta unidad puede reproducir archivos de JPEG grabados en un disco
de CD-R o CD-ROM (no se recomienda usar discos de CD-RW).
Para mirar los archivos de JPEG
1. Oprima el botón OPEN
para abrir la tapa del
compartimiento para discos.
2. Tome el disco con el archivo
de JPEG por el borde y empuje
ES
con cuidado sobre el eje,
dejando la parte escrita hacia
arriba, hasta que oiga un “clic”.
3. Cerrar la puerta del disco. Los archivos JPEG en el disco se
mostrarán de uno en uno automáticamente. Si el disco no juega
automáticamente, oprima el botón PLAY del control remoto o el
botón de la unidad.
4. Presione el botón MENU o STOP para desplegar una lista de
las carpetas. Presione el botón / para seleccionar el archivo
deseado. Oprima el botón PLAY del control remoto o el botón
de la unidad para dar inicio a la reproducción.
Notas:
• Usted puede apretar el botón PAUSE del control remoto o el
botón de la unidad para congelar la imagen. Oprima el botón
PLAY del control remoto o el botón de la unidad para reanudar
la exposición de dispositivas.
• Usted puede presionar el botón STOP para detener la
reproducción.
• Usted puede presionar el botón
PREV o
NEXT para cambiar
de imagen.
• Usted puede presionar el botón ANGLE para rotar la dirección de la
imagen.
• Es posible que algunos discos no permitan esta operación.
Adaptando la programación de las funciones
Configuración idioma
Video
System
Language
1. Oprima el botón SETUP del
- - Language Menu - control remoto o el botón
Eng
Player Menu
Eng
Audio
MENU de la unidad al estar
Off
Subtitle
Eng
Disc Menu
bajo la modalidad de detención
(Cuando el disco no está en
reproducción.)
Go To Language Menu
2. Oprima el botón para
seleccionar la Menú del Idioma (Language Menu).
3. Oprima el botón / para seleccionar la opción (Player Menu
[Menú del Reproductor], Audio [Sonido], Subtitle [Subtítulos] o Disc
Menu [Menú del Disco]), oprima el botón .
4. Oprima el botón / para seleccionar el idioma de su preferencia,
después oprima el botón ENTER para confirmar.
5. Repita los pasos 3 y 4 para modificar otras opciones. Oprima el
botón para regresar a la menú anterior.
6. Oprima el botón SETUP o RETURN para salir del menú.
Notas:
• Algunos discos de video de DVD no se pueden reproducir en
un idioma diferente al que usted ha seleccionado. Es posible
programar en el disco un idioma anterior.
• Es posible que algunos discos de video de DVD estén programados
para desplegar subtítulos en un idioma diferente al que usted
ha seleccionado. Es posible programar en el disco un idioma de
subtítulo anterior.
• Algunos discos de video de DVD sólo le permiten cambiar la
selección de subtítulo utilizando el menú del disco. De ser así,
presione el botón MENU y escoja el idioma de subtítulo apropiado
a partir de la selección del menú del disco.
8
RCA DRC99392_Eng & Spa IB_MTK A5_17-3-2011.indd 8
3/28/2011 10:31:08 AM
Adaptando la programación de las funciones
•
Es posible que algunos discos de video de DVD no incluyan
un idioma preseleccionado. De ser así, el reproductor de DVD
despliega automáticamente los menúes siguiendo la programación
de idioma inicial del disco.
Configuración de video
Video
System
Language
1. Oprima el botón SETUP del
- - Video Menu - control remoto o el botón
Brightness
00
Contrast
00
MENU de la unidad al estar
bajo la modalidad de detención
(Cuando el disco no está en
reproducción.)
Go To Video Menu
2. Oprima el botón / para
seleccionar la Menú de Video (Video Menu).
3. Oprima el botón / para seleccionar la opción (Brightness [Brillo]
o Contrast [Contraste]), y luego oprima el botón .
4. Oprima el botón / para modificar la configuración, oprima el
botón ENTER para confirmar.
5. Repita los pasos 3 y 4 para modificar otras opciones. Oprima el
botón para regresar a la menú anterior.
6. Oprima el botón SETUP o RETURN para salir del menú.
Configuración de equipo
Video
System
Language
1. Oprima el botón SETUP del
- - System Menu - control remoto o el botón
TV Display
Wide
MENU de la unidad al estar
Default
No
bajo la modalidad de detención
(Cuando el disco no está en
reproducción.)
Go To System Menu
2. Oprima el botón / para
seleccionar la menú de Equipo (System Menu).
3. Oprima el botón / para seleccionar la opción (TV Display
[Pantalla de Televisión] o Default [De fábrica]), oprima el botón .
4. Oprima el botón / para modificar la configuración, después
oprima el botón ENTER para confirmar.
5. Repita los pasos 3 y 4 para modificar otras opciones. Oprima el
botón para regresar a la menú anterior.
6. Oprima el botón SETUP o RETURN para salir del menú.
Pantalla de Televisión
Pan Scan
• Al reproducir un video en la modalidad de
pantalla ancha, esta modalidad recorta los
lados izquierdo y derecho de la imagen de
manera que se pueda ver en una pantalla
convencional.
• Algunos DVDs para pantalla ancha que
no permiten la reproducción bajo la
modalidad Pan Scan se reproducen
automáticamente bajo la modalidad de
buzón (letterbox), la cual muestra una
banda negra en la parte superior e inferior
de la pantalla.
Buzón (Letter Box)
Al reproducir un material de video para
pantalla ancha bajo esta modalidad en una
pantalla convencional, aparecen bandas
negras en la parte de arriba y de abajo de la
pantalla.
Pantalla ancha (Wide Screen)
Esta es la modalidad adecuada para reproducer
videos para pantalla ancha en una pantalla
ancha.
Se corta al reproducir
una imagen de video
para pantalla ancha
Pan Scan
Buzón
Pantalla ancha
Adaptando la programación de las funciones
Notas:
• El tamaño de la imagen que aparece en pantalla está programado
en el disco de video de DVD. Por consiguiente, es posible que la
imagen de reproducción de algunos discos de video de DVD no
concuerde con el tamaño de la imagen que haya selecionado.
• Cuando usted reproduce discos de video de DVD que estén
grabados sólo en un tamaño de imagen de 4:3, la imagen de
reproducción siempre aparecerá en un tamaño de imagen de 4:3,
sin importar la programación del Pantalla de Televisión.
• Seleccione Pantalla ancha (Wide Screen) para ajustar la imagen
a la pantalla de LCD de la unidad. Cuando conecte la unidad a
un televisor, asegúrese siempre de ajustar el radio de aspecto al
televisor que esté usando.
De fábrica – El equipo tardará 3 a 5 segundos en reiniciar el reproductor
de DVD bajo la modalidad de programación del fabricante.
Sistema de sonido
Dolby Digital
Dolby Digital es una tecnología desarrollada por Dolby Laboratories.
Los temas codificados con Dolby Digital pueden reproducir entre 1 a
5,1 canales discretos de excelente calidad de audio.
La unidad reconoce automáticamente la corriente de bits de Dolby
Digital y brinda una mezcla apropiada para escuchar en dos canales. Se
requiere un decodificador adicional de Dolby Digital para reproducir
temas disponibles en varios DVD en canales múltiples.
Fabricado bajo la licencia de Dolby Laboratories.
“Dolby” y el símbolo de la doble D son marcas
registradas de Dolby Laboratories.
Instalación del estuche de transporte
CUIDADO:
1. No use este estuche para el reproductor de DVD como columpio,
asiento para el automóvil, ni para ningún otro propósito, excepto
para sostener el reproductor de DVD y sus accesorios.
2. El estuche del reproductor de DVD está destinado para mirarse
exclusivamente desde los asientos traseros del automóvil. No
instale ni use este producto en el asiento delantero de un vehículo.
3. Para disminuir la posibilidad de sufrir lesiones en caso de una
colisión o al detenerse bruscamente:
• Mantenga siempre el reproductor de DVD bien atado dentro del
estuche mientras el vehículo esté en movimiento.
• Mantenga siempre el estuche del reproductor de DVD bien
sujetado dentro del vehículo mientras el automóvil esté en
movimiento.
4. Siempre coloque los ganchos de plástico y el deslizador para ajustar
la correa de manera que no rocen la parte de atrás de la cabeza de
la persona sentada en el asiento delantero.
Para amarrar el estuche del reproductor de DVD a un reposacabezas
(Imágenes 1 y 2):
1. Inser te la unidad en el maletín, como
Imagen 1
muestra el dibujo (1, 2, 3).
2
2. Abra el cierre del compartimiento
3
principal donde está el reproductor;
1
encuentre los anillos en forma de D en la
parte superior del estuche (A).
3. Encuentre 2 correas con ganchos a cada
lado.
4. Enganche un extremo de cada correa a los anillos en forma de D
ubicados en la parte superior del estuche.
9
RCA DRC99392_Eng & Spa IB_MTK A5_17-3-2011.indd 9
3/28/2011 10:31:09 AM
Instalación del estuche de transporte
5. Entrecruce las correas alrededor de la
Imagen 2
parte frontal del reposacabezas (B) y
enganche las correas a un segundo juego
de anillos, ubicado en la parte inferior del
estuche (C).
6. Apriete las correas hasta que la unidad
quede bien sujeta. Conecte el adaptador
para el automóvil de 12V, según se muestra a la derecha (D).
Nota: antes de cerrar el
bolso, suelte las bandas
elásticas a la izquierda y
la derecha del panel de la
pantalla.
CUIDADO:
1. Las temperaturas altas dañan los
discos compactos y los discos de
DVD.
2. No guardar en vehículos cerrados.
3. Proteja de la luz directa del sol.
Mantenimiento
Limpieza del disco
Si pone en el equipo un disco defectuoso o sucio, esto puede provocar
irregularidadesen el sonido durante la reproducción.
Al tomar el disco, hágalo sosteniendo so borde interior y exterior.
• NO toque la superficie del lado del disco que no tiene escritura.
• NO pegue papeles ni cinta adhesiva en la superficie del disco.
• NO exponga el disco directamente a los rayos del sol o al calor
excesivo.
• Cada vez que vaya a reproducir un disco,
límpielo antes desde el centro hacia los bordes
con un paño para limpieza.
• No utilice NUNCA disolventes tales como la bencina o el alcohol
para limpiar el disco.
• No utilice discos de formas irregulares (como por ejemplo: en
forma de corazón, octagonales, etc.), ya que pueden impedir que el
equipo funcione adecuadamente.
Limpieza del equipo
•
•
•
Asegúrese de apagar el equipo y desconectar el cable de
alimentación de CA antes de llevar a cabo la limpieza del equipo.
Limpie el equipo con un paño seco y suave. Si la superficie del disco
estuviera extremadamente sucia, sumerja un paño en una solución
de agua con jabón y luego estrújelo bien y limpie el disco con este
paño húmedo. Luego seque el disco con un paño seco.
Nunca utilice alcohol, bencina, diluyente, líquidos de limpieza
ni otros químicos para limpiar el disco, ni tampoco use aire
comprimido para quitarle el polvo.
Nota importante
•
Cada vez que vaya a mover el equipo, retire antes los discos que
haya en la bandeja para CDs.
Guía para resolver problemas
No hay corriente.
• Revise que el adaptador de CA esté conectado.
• La unidad no está encendida.
El control remoto no funciona.
• Retire cualquier obstáculo que esté bloqueando el sensor remoto
infrarrojo.
• Asegúrese de haber retirado la lámina de plástico del control remoto.
• Apunte con el control remoto directamente al sensor remoto de la ES
unidad.
• Cambie la pila del control remoto por una pila nueva.
No hay sonido o está muy bajo.
• El control de volumen es situado en el lado de la unidad - trata por
favor el ajuste esto.
• El sistema es en podo pausa. Presione el botón PLAY para retornar
al modo de reproducción normal.
• La unidad está en el modo adelantado rápido o retroceso rápido.
Presione el botón
PLAY para volver al modo normal de
reproducción.
• Asegúrese que las conexiones de salida de AUDIO/VÍDEO son
correctas.
• Este unidad no puede decodificar el disco DVD DTS.
• La unidad está muy caliente. Apáguela durante unos 30 minutos para
que se enfríe.
No hay imagen.
• El número de región del disco no es el mismo que el número de
región del equipo.
La imagen no es clara.
• Limpie el disco.
• El disco está rayado.
• Por favor ajuste el brillo y el contraste de la pantalla de LCD,
utilizando el botón VIDEO MODE del control remoto.
Se oye un silbido o ruido muy fuerte.
• Los enchufes macho y hembra están sucios. Límpielos con un paño
levemente humedecido con alcohol.
• Limpie el disco.
El disco no suena.
• No hay disco dentro del equipo. (El indicado “No Disc [No Disco]”
aparece en la pantalla.)
• Inserte el disco correctamente con el lado se reproducción hacia
adelante.
• Limpie el disco.
• El número de región de la unidad y del disco son incompatibles.
• Puede haber condensación al interior del equipo, producto de un
cambio brusco de temperatura. Espere alrededor de una hora que
está desaparezca e intente hacer funcionar el equipo nuevament.
¿Necesita más ayuda?
Por favor, o visite nuestra página de ayuda en internet
http://www.RCAav.com
10
RCA DRC99392_Eng & Spa IB_MTK A5_17-3-2011.indd 10
3/28/2011 10:31:09 AM
Garantía limitada
AVC MULTIMEDIA (“AVC”) ofrece la siguiente garantía limitada, la cual se extiende al comprador-consumidor original y está limitada al uso no
comercial del producto.
Garantía de repuestos y reparaciones por Uno Año
Los productos AVC que se hayan comprado en los Estados Unidos o Canadá tienen una garantía de uno año a partir de la fecha original de
compra en caso de presentar defectos en los materiales o en su fabricación. Si la unidad no se encuentra en conformidad a esta garantía, nosotros
repararemos el producto usando piezas y productos nuevos y reparados, según lo estime AVC únicamente.
Durante un período de uno año a partir de la fecha efectiva de la garantía, AVC proporcionará, cuando sea necesario, mano de obra de reparación
para reparar defectos de fabricación en su centro de reparaciones designado. Para obtener los servicios de la garantía en los Estados Unidos o
Canadá, usted deberá llamar primero a nuestro Centro de Servicio para el Cliente al 1-800-506-5746 o1-877-252-6873 durante las horas que
se indican en el recuadro más abajo. La decisión de si bien usted está facultado para recibir estos servicios la tomará la oficina de Respaldo al
Cliente de AVC. POR FAVOR NO DEVUELVA ESTA UNIDAD A AVC SIN CONTAR CON AUTORIZACIÓN PREVIA. En los centros designados para
reparaciones y por un período de uno año a contar de la fecha de efectividad de la garantía, AVC utilizará piezas o productos de recambio nuevos
o refabricados al efectuar reparaciones de productos o piezas defectuosas. Dichos productos o piezas de recambio cuentan con una garantía
adicional de uno año a contar de la fecha del cambio o de la reparación. Para poder hacer las reparaciones que sean necesarias, el cliente deberá
enviar la unidad al centro de reparaciones que se le indique al contactarse con la oficina de respaldo al cliente. El cliente es responsable por todos
los gastos de envío al centro de reparaciones.
Instrucciones para envolver la unidad y para su envío
Cuando usted envíe el producto al centro de reparaciones de AVC, usted debe utilizar la caja de cartón y el material de embalaje original o un tipo
de embalaje equivalente, según lo establezca AVC.
Su responsabilidad
(1) Usted debe guardar la boleta de venta original como prueba de su compra.
(2) Estas garantías sólo son efectivas si el producto ha sido comprado y puesto a funcionar en Estados Unidos o Canadá.
(3) Las garantías sólo se extienden en caso de materiales o de fabricación defectuosa y no se extiende a productos o piezas que se hayan perdido
o tirado a la basura, ni a productos o piezas dañadas a causa del mal uso de la unidad, de accidentes, del funcionamiento o mantenimiento inapropiados del equipo, así como tampoco en caso de no haber seguido las instrucciones que acompañan este producto, o de haber modificado
o alterado el producto sin la autorización de AVC, o de haber quitado o cambiado el número de serie de las piezas o del producto.
Fuera de la Garantía
En caso que su producto necesite ser reparado y que el período de garantía ya haya expirado, sírvase contactarse con el Centro de Ayuda
al Cliente en el fono 1-800-506-5746, 1-877-252-6873 o www.RCAav.com
Hora: Lunes–Jueves: 9am–7pm, Viernes: 9am–5pm, Sábado: 9am–MEDIODÍA Tiempo del Este.
Importante:
Usted se hace responsable de cualesquier gastos por razones de transporte, envío o seguro relacionados con la devolución del producto al
Centro de Devoluciones de Productos.
Todas las garantías implícitas según la ley de un estado, incluidas las garantías implícitas de comercialización y de aptitud para un propósito específico, están limitadas expresamente a la duración de la garantía limitada expuesta más arriba. Con la excepción de cualesquiera garantías implícitas
según la ley de un estado, que por la presente quedan limitadas, la garantía precedente tiene carácter de exclusiva y predomina sobre las demás
garantías, cauciones, acuerdos y obligaciones similares del vendedor o del fabricante con respecto a la reparación o al reemplazo de cualesquier
partes del aparato. AVC en ningún caso se hará responsable de daños fortuitos ni de daños resultantes de cualquier otra situación que no sea la
indicada en la garantía limitada de este aparato.
Ninguna persona, agente, distribuidor, comerciante ni empresa está autorizada para cambiar, modificar o extender los términos de estas garantías
en ninguna manera, cualquiera que ésta fuese. El tiempo dentro del cual se debe iniciar una acción para hacer cumplir cualquier obligación de AVC
que surja en virtud de la garantía o de cualquier estatuto o ley de Estados Unidos o Canadá o de cualesquier de sus estados, queda aquí limitado
a uno año a contar de la fecha de adquisición del producto. Esta restricción no se aplica a las garantías implícitas planteadas en virtud de la ley de
un estado.
Esta garantía le brinda derechos legales específicos y puede que usted también tenga otros derechos que pueden variar, dependiendo del estado.
Algunos estados no ponen límite en cuanto a la duración de una garantía implícita, a cuándo se puede tomar acción, o a la exclusión o limitación
de los daños fortuitos o consiguientes, de modo que es posible que las disposiciones anteriores no sean aplicables en su caso.
Para mayor información acerca de otros productos y servicios, sírvase contactar nuestra página de internet en la siguiente dirección:
www.RCAav.com
Importante: Guarde su “Boleta de venta” como prueba de su compra.
N° de modelo .................................................................................................................. Nombre del producto .................................................................................................
Tipo de aparato ............................................................................................................. N° de serie ........................................................................................................................
N° de recibo ..................................................................................................................... Fecha de compra............................................................................................................
Nombre del comerciante ...........................................................................................
PARA SERVICIO Y REPARACIÓN, POR FAVOR VISTITA www. RCAav.com
Estas especificaciones y la apariencia externa de este aparato están sujetas a cambio sin previo aviso.
© 2011 AVC MULTIMEDIA
AVC Multimedia,
Markham, Ontario L3R 1E3
http://www.RCAav.com
Impreso en China
811-939291W010
RCA DRC99392_Eng & Spa IB_MTK A5_17-3-2011.indd 11
3/28/2011 10:31:09 AM


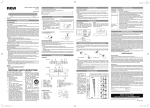
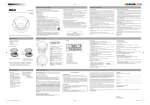
![[4] para - Riso.com](http://vs1.manualzilla.com/store/data/006041379_1-f987c63d0f56da21f929a771461d5686-150x150.png)