1
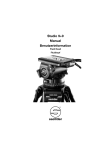
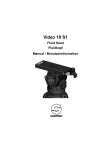
Combi Ped 1- 40
Manual
Benutzerinformation
Code: 5199
© by sachtler®. Alle Rechte vorbehalten / All rights reserved
Originalbetriebsanleitung/ Original User Manual
Version: 1.7/01/12
Ausgabedatum / Issue date: 01/12
Artikelnr. / Part No.: S2301-4980
Wir wollen, daß Ihre Sachtler
Produkte immer auf dem aktuellsten technischen Stand sind.
We want to be certain the
Sachtler products you receive
are always state of the art.
Deswegen behalten wir uns
technische Änderungen vor.
Therefore we reserve the right to
make changes based on technical advances.
sachtler®
Vitec Group Videocom Division
www.vitecgroup.com
Erfurter Strasse 16
Postfach / P.O.BOX 2039
D-85386 Eching
D-85380 Eching
Germany
Germany
Telefon: (+49 89) 321 58 200
Telefax: (+49 89) 321 58 227
E-Mail: [email protected]
Homepage: http://www.sachtler.com
Combi Ped 1-40
Table of contents
1
General Information .............................................................1
2
Intended use ........................................................................1
3
Symbols used in the user´s manual.....................................2
4
Safety Instructions................................................................3
5
Scope of Supply ...................................................................4
6
Assembly of the pedestal .....................................................5
6.1 Unfolding the dolly .......................................................5
6.2 Connecting the column to the dolly..............................5
6.3 Mount the steering ring of the pedestal .......................6
6.4 Mounting the fluid head to the pedestal.......................7
6.5 Pressurizing the pedestal.............................................8
6.6 Operation .....................................................................9
6.7 Transportation ............................................................11
7
Cleaning and maintenance ................................................12
8
Warranty .............................................................................13
9
Technical Data....................................................................13
10 Accessories ........................................................................14
-I-
Combi Ped 1-40
Inhaltsverzeichnis
1
Allgemeine Information ......................................................16
2
Bestimmungsgemäße Verwendung ...................................16
3
Symbolerklärung ................................................................17
4
Sicherheitshinweise............................................................18
5
Lieferumfang ......................................................................19
6
Aufbau Combi Ped 1- 40....................................................20
6.1 Aufbau Dolly...............................................................20
6.2 Hubsäule mit dem Dolly verbinden ............................20
6.3 Befestigen des Handrads...........................................21
6.4 Befestigen des Fluidkopfes auf dem Pedestal...........22
6.5 Säulendruck einstellen ...............................................23
6.6 Bedienung ..................................................................24
6.7. Transport ....................................................................25
7
Reinigung und Instandhaltung ...........................................26
8
Gewährleistung ..................................................................27
9
Technische Daten...............................................................27
10 Zubehör ..............................................................................28
- II -
Combi Ped 1-40
- III -
Combi Ped 1-40
- IV -
Manual
1
Combi Ped 1-40
General Information
This manual is an important part of the equipment and is aimed
at the personnel who operate and maintain the Combi Ped 1-40
pedestal. It contains information about the Combi Ped 1-40 and
its proper use. Above all, it serves to safeguard users and their
equipment.
It is the duty of each user to familiarize themselves with the
contents of the manual and to operate the equipment in compliance with all instructions related to safety.
In addition, local, national or international rules and regulations
governing the prevention of accidents must also be observed.
Please keep this manual for future reference.
Do not attempt to use this product if you have any questions as
to operate it.
2
Intended Use
This pedestal was designed for professional use in television
studios and outside locations for moving and elevating fluid
heads and cameras. Any use above and beyond this purpose is
deemed improper and will void the warranty.
The maximum payload of the Combi Ped 1-40 pedestal is
40 kg (88lb) and must not be exceeded.
The Combi Ped 1-40 pedestal must be maintained and serviced only with original Sachtler parts.
-1-
Combi Ped 1-40
3
Manual
Symbols used in the user´s manual
3.1 Danger
Indicates a possible danger to the life and
safety of users.
Non-observance of these instructions may
have seriously harmful consequences to
health, including life-threatening injuries.
3.2 Warning
Indicates a possibly harmful situation.
Non-observance can damage the machine
or equipment it supports.
3.3 Tool
Indicates that tools are needed
to complete this operation.
-2-
!
Manual
4
Combi Ped 1-40
Safety Instructions
Á A pressurized pedestal will rise rapidly when the transport lock is released. Therefore do not lean over the
pedestal when releasing the transport lock.
Á Do not carry the column by the steering rod or on the
steering ring.
Á The pneumatic column is under pressure
(max. 9.6 bar).
Á Do not use the pedestal before the column is correctly
installed and locked into the dolly.
Á Reducing pedestal pressure below 3.5 bar (50 psi) may
cause a pressure leak.
Á The pedestal is intended for use on an unobstructed
and reasonably level surface by camera operators.
Á Maintenance must be performed only by competent,
trained personnel.
Á This pedestal must be pressurized only with clean, dry
air or nitrogen.
-3-
Combi Ped 1-40
5
Manual
Scope of Supply
turning knob
trim weight storage
pockets
steering indicator
steering ring
4 bolt head
fixing
Schrader valve with cap
column lock
pressure gauge
trim weights storage
(4 trim weights)
steering rod
struts
cable clamp
column
bolting
cable guard
dolly carrying
handle
excentric clamp
cable guard adjustment knob
wheel brake
-4-
Manual
Combi Ped 1-40
transport lock
The Combi Ped 1-40 comprises a column, a steering ring and a
dolly. These units can be separated easily for transport.
A hand pump is included for pressurizing the column.
The Combi Ped 1-40 is suitable for payloads up to 40 kg (88lb).
It has a single stage telescopic column with an on-shot stroke of
54 cm (21.3 in.).
The Combi Ped 1-40 offers crab steering. The wheels have diameter of 125 mm and are fitted with brakes and cable guards.
6
Assembly of the pedestal
6.1 Unfolding the dolly
Release the arms of the dolly by pushing the buttons on
the bottom. Swing each folding leg out until they lock at the
fully open position.
Set the dolly on the ground and apply the wheel brakes.
6.2 Connecting the column to the dolly
Turn the cams of the excentric clamps outwards.
Hold the column and move out the three legs of the
pedestal.
Lower the column vertically into the dolly center casting
and make sure that the steering rod engages securely with
the dolly.
Place the spikes of the pedestal´s struts into the recesses
of the dolly.
Turn the cams inward to tighten the spikes safely to the
dolly.
Tighten the column bolting, using hand pressure only.
-5-
Combi Ped 1-40
Manual
6.3 Mount the steering ring on the pedestal
notch for valve
turning knob
Schrader valve
pin
Put the steering ring onto the top of the column. There is a
notch on the steering ring which is cut out for the valve position. Valve and pin need to be in line to achieve proper fit at the
steering ring on the column. Fix it by twisting the turning knobs
on the top of it clockwise. Make sure that they are turned
tightly.
Turn the steering ring to engage the steering rod column.
-6-
Manual
Combi Ped 1-40
6.4 Mounting the fluid head to the pedestal
The Combi Ped 1-40 has a standard four-bolt mounting
plate, allowing a Sachtler Video 25 Plus FB to be directly
mounted onto the column. Other heads such as Video 18
or Video 20 require a FB converter.
(see Accessories, page 14).
Do not release the transport lock if the pedestal pressure exceeds 3.5 bar (50 psi) without
a balancing load installed. Do not lean over a
pressurized pedestal.
!
Push down the steering ring, release the transport lock and
allow the steering ring to extend fully by using the steering
ring under hand restraint.
Apply the column lock.
Fit the fluid head.The bolt heads are accessible from the
underside of the mounting plate.
When the fluid head has been fitted, the bolts should be
tightened securely.
To fit the camera and accessories open the column lock,
apply the transport lock. Fit the camera and all accessories. (Attaching these items later may upset the pedestal´s
balance).
Remove two trim weights from the trim weight storage by
rotating the trim weight catch through half a turn anti-clockwise.
Place two trim weights in the storage pockets on the steering ring.
Replace the trim weight catch afterwards to retain remaining stowed trim weights.
-7-
Combi Ped 1-40
Manual
6.5 Pressurizing the pedestal
Release the transport lock.
An overpressurized pedestal may rise rapidly
when opening the transport lock. Do not lean
over the pedestal when releasing the transport
lock.
!
The Combi Ped 1-40 can be pressurized by using the
pump which has been supplied with the pedestal.
The pedestal is fitted with a pressure relief
valve as a safeguard against overpressurization. Do not attempt to adjust the pressure relief
valve.
!
A correctly pressurized pedestal will balance its payload,
allowing movement over the full on-shot stroke of the
column with minimum effort and will maintain its position
when steering ring is released.
If pressure within the pedestal is more than necessary,
excess pressure may be bled from the column by pushing
down the center pin of the Schrader valve with the back of
the valve cap to release air until the payload is balanced
correctly.
Reducing column pressure below 3.5 bar
(50 psi) may cause a pressure leak.
Refit the Schrader valve cap and screw it tight.
You can always check the pressure at the pressure gauge
on the column.
-8-
Manual
Combi Ped 1-40
6.6 Operation
Height adjustment
The column has an on-shot stroke of 54 cm (21.3 in).
The load can be moved over this distance, in perfect
balance, by raising and lowering the steering ring.
Column movement can be damped as required, by setting
the column lock knob located at the top of the fixed
column. Turn the knob clockwise to increase the drag
setting, and counterclockwise to decrease it.
If fixed height operation is required, turn the column lock
knob fully clockwise to lock the moving column in position.
Brakes
The dolly is fitted with a brake on each wheel. The brakes
are engaged by pushing down the lever situated above
the wheel.They are released by depressing the same lever.
Cable guards
The cable guards are height adjustable by opening the
adjustment knobs and moving the cable guard to the
required height position.
Cable clamp
A cable clamp is attached to a dolly arm for fastening
camera cables.
-9-
Combi Ped 1-40
Manual
Crab steering
The Combi Ped 1-40 offers crab steering, i. e. all three
wheels move when the steering ring is turned.
The steering ring is fitted with an indicator which can be
used to mark the straight-ahead position of the ring.
Trim Weights
The Combi Ped 1-40 has 4 trim weights which can be
used to compensate for temperature change during
production without adjusting column pressure.
- 10 -
Manual
Combi Ped 1-40
6.7 Transportation
The Combi Ped 1-40 can be separeted into its components for easy transportation.
- Apply the brakes
- Push down the column and engage the transport lock
- Put the trim weights back into the trim weight storage
and secure them with storage locking lever.
- Remove the camera and fluid head
- Remove the steering ring by opening the knobs
counter-clockwise
- Release the column bolting
- Open the excentric clamps to release the dolly legs
- Lift the column off the dolly
- 11 -
Combi Ped 1-40
7
Manual
Cleaning and maintenance
To ensure a long life and minimum need for repair please
take care as follows:
- During studio use the pedestal should be regularely
wiped over with a lint-free cloth. Dirt accumulated during
storage may be removed with a semi-stiff brush.
- During outdoor use make sure that water does not enter
the column. Sand and dirt should be removed with semistiff brush. Salt must be washed off with fresh water at
the earliest opportunity.
- Do not use oil or grease on any exposed part of the
column. Do not use oil-based cleaners, abrasives or wire
brushes, as these damage the protective surface.
- 12 -
Manual
8
Combi Ped 1-40
Warranty
The warranty is voided if the Combi Ped 1-40 is operated
improperly, or not in line with the specified technical data
(Please refer to our General Terms of Sale and Delivery).
Please register at www.sachtler.com for an extended warranty
period.
9
Technical Data
Code No.
S2301-0001
Payload max:
40 kg (88.2 lb)
Min height:
Max height:
79 cm (31.1”)
133 cm (52.4”)
On-shot stroke:
54 cm (21.3 in)
Wheel diameter:
125 mm (5 in)
Dolly weight:
9 kg (20 lbs)
Column weight:
12 kg (26.5 lbs)
Total pedestal weight:
24.6 kg (54 lbs)
Doorway tracking width:
80.6 (27.5 in)
Transit clearance:
70 cm (27.5”)
Steering ring diameter:
50 cm (19.7”)
Max working pressure:
9.6 bar (139 psi)
Relief valve pressure:
10 bar (145 psi)
Operational temperature:
-20°/+60° (-4°F/+140°F)
- 13 -
Combi Ped 1-40
Manual
10 Accessories
FB Converter (Code No: 3913)
flat base converter for mounting Video
18/20 SB and Plus fluid heads on
Combi Ped 1-40
Quickfix (Code No:3910)
fast-on connector for fluid head
Video 25 Plus FB with Multi Disc
Multi Disc (Code No: 3914)
Multi Disc for mounting Video 15 SB
on Combi Ped 1-40
Cover EFP 2 (Code No: 9315)
- 14 -
Benutzerinformation
Combi Ped 1-40
- 15 -
Combi Ped 1-40
1
Benutzerinformation
Allgemeine Information
Die Benutzerinformation ist ein wichtiger Bestandteil der
Lieferung und ist an das Bedienungs- und InstandhaltungsPersonal des Combi Ped 1-40 gerichtet. Sie enthält wichtige
Informationen und dient vor allem der Sicherheit des Bedieners
und der Umwelt.
Es ist Pflicht jedes Combi Ped 1-40 Benutzers, sich mit dem
Inhalt der Benutzerinformation vertraut zu machen und alle
Hinweise, die die Sicherheit betreffen, genau zu beachten.
Darüberhinaus sind die für den Einsatzort geltenden Regeln
und Vorschriften zur Unfallverhütung zu beachten.
Die wichtigsten Sicherheitshinweise sind in Kapitel 4
“Sicherheitshinweise” zusammengefaßt. Zusätzliche Hinweise
sind in anderen Kapiteln durch entsprechende Zeichen gekennzeichnet (siehe Kapitel 3 “Erklärung der verwendeten
Symbole”).
2
Bestimmungsgemäße Verwendung
Das Combi Ped 1-40 wurde für den professionellen Einsatz
zum Bewegen von Kameras entwickelt. Eine andere oder darüberhinausgehende Benutzung gilt als nicht bestimmungsgemäß.
Die Traglast des Combi Ped 1-40 beträgt 40 kg und darf nicht
überschritten werden.
- 16 -
Benutzerinformation
3
Combi Ped 1-40
Symbolerklärung
3.1 Gefahr
Sie werden auf eine drohende Gefahr oder
möglicherweise gefährliche Situation hingewiesen. Das Nichtbeachten dieser Hinweise
kann zu Personenschäden führen.
3.2 Warnung
Sie werden auf eine möglicherweise schädliche Situation hingewiesen.
Das Nichtbeachten dieser Hinweise kann
das Gerät oder die Umwelt schädigen.
3.3 Werkzeug
Hinweis auf zum Aufbau benötigtes
Werkzeug.
- 17 -
!
Combi Ped 1-40
4
Benutzerinformation
Sicherheitshinweise
Á Beachten Sie, daß beim Aufbau, Abbau und Transport
des Combi Ped 1-40 die Transportsicherung verwendet
werden muß.
Á Lösen Sie die Transportsicherung nicht ohne Last, da
die Hubsäule nach oben schnellen kann und dadurch
Verletzungen oder Beschädigungen verursachen kann.
Á Tragen Sie die Säule nicht am Kardan oder am
Handrad.
Á Pneumatiksäule steht unter Druck (bis 9,6 bar).
Á Säule nur entriegeln, wenn sie ordnungsgemäß im
Dolly geklemmt ist.
Á Das Pedestal wurde für den Einsatz auf relativ ebenem
und hindernisfreiem Untergrund entworfen.
Á Wartungsarbeiten dürfen nur von geschultem
Fachpersonal durchgeführt werden.
Á Das Pedestal darf nur mit sauberer, trockener Luft oder
Stickstoff befüllt werden.
- 18 -
Benutzerinformation
5
Combi Ped 1-40
Lieferumfang
Handradmarkierung
Fächer für
Trimmgewichte
Handrad
Ventil
Manometer
Säulenbremse
Transportaufnahme
für Trimmgewichte
mit Verriegelung
Hubsäule
Kardan
Strebe
Kabelklemme
Säulen
Verriegelung
Kabelschutz
Tragegriff Dolly
Exzenter
Klemmung
Radbremse
- 19 -
Combi Ped 1-40
Benutzerinformation
Transportsicherung
Das Combi Ped 1-40 besteht aus Dolly, Hubsäule und einem
Handrad. Das Pedestal kann schnell in seine Einzelkomponenten
zerlegt werden. Eine Luftpumpe ist im Lieferumfang enthalten.
Das Combi Ped 1-40 ist für Traglasten bis zu 40 kg entwickelt
worden. Es hat eine einstufige Hubsäule mit einem Säulenhub
von 54 cm.
Das Combi Ped 1-40 ist ein steuerbares Pedestal (Crab Steuerung).
Die Räder haben einen Durchmesser von 125 mm und sind mit
Radbremsen und Kabelschutz ausgestattet.
6
Aufbau Combi Ped 1-40
6.1 Aufbau Dolly
Durch Druck auf die Tasten an der Unterseite des Dolly
werden die Ausleger freigegeben. Klappen Sie sie diese
soweit auseinander, bis sie in der Endstellung hörbar einrasten. Stellen Sie die Räder fest.
6.2 Hubsäule mit dem Dolly verbinden
Lösen Sie die Säulenverriegelung vollständig.
Setzen Sie die Hubsäule senkrecht in die
Hubsäulenaufnahme ein.
Achten Sie darauf, daß der Kardan im Dolly einrastet.
Setzen Sie gleichzeitig die Streben der Hubsäule so auf
den Dolly auf, daß die Dornen der Streben in die
Aussparungen an den Dolly Auslegern greifen.
Durch Drehung der Exzenter nach innen wird die Hubsäule
mit dem Dolly sicher verbunden.
Ziehen Sie die Säulenverriegelung leicht von Hand an.
- 20 -
Benutzerinformation
Combi Ped 1-40
6.3 Befestigen des Handrads
Aussparung für Ventil
Drehknopf
Ventil
Pilz
Setzen Sie das Handrad auf die Hubsäule auf. Beachten Sie
dabei die Aussparung für das Ventil. Ventil und Pilz müssen in
Linie stehen. Befestigen Sie das Handrad durch Drehen der
vier Drehknöpfe. Alle vier Drehknöpfe müssen bis zum
Anschlag im Uhrzeigersinn geschlossen werden.
Drehen Sie das Handrad, um den Kardan einzurasten.
Bringen Sie die Handradmarkierung in die gewünschte
Position.
- 21 -
Combi Ped 1-40
Benutzerinformation
6.4 Befestigen des Fluidkopfes auf dem Pedestal
Das Combi Ped 1-40 hat eine Standard 4-SchraubenKopfbefestigung. Der Sachtler Video 25 Plus FB kann
direkt auf der Hubsäule befestigt werden. Die Schrauben
sind von der Unterseite der Montageplatte zugänglich.
Lösen Sie die Transportsicherung auf keinen
Fall, wenn der Pedestaldruck bei über 3,5 bar
(50 psi) liegt und keine Traglast auf das
Pedestal aufgebracht ist.Reduzieren Sie ggfs.
den Druck mittels der Ventilklappe.
Beugen Sie sich nicht über das Pedestal. Bei
Überdruck kann das Pedestal beim Lösen der
Transportsicherung hochschießen und dabei
Verletzungen verursachen.
!
Durch Druck nach unten auf die Hubsäule und gleichzeitigem Schwenken des Transportsicherungshakens wird die
Säule entsichert. Lassen Sie die Hubsäule unter manueller
Kontrolle mittels des Handrads vollständig ausfahren.
Stellen Sie die Säulenbremse fest.
Montieren Sie nun den Fluidkopf und sichern Sie die
Bolzen an der Unterseite der Pedestalplattform.
Lösen Sie die Säulenbremse und fahren Sie die Hubsäule
vollständig ein. Sichern Sie die Säule mit der
Transportsicherung.
Bringen Sie nun Kamera und weiteres Zubehör auf. Eine
nachträgliche Montage könnte die Balance des Pedestals
beeinträchtigen.
Legen Sie zwei Trimmgewichte in die dafür vorgesehenen
Aufnahmen am Steuerrad. Sichern Sie nach der Entnahme
der Trimmgewichte die restlichen Trimmgewichte in der
Trimmgewichte-Aufnahme an der Säule wieder.
- 22 -
Benutzerinformation
Combi Ped 1-40
6.5 Säulendruck einstellen
Öffnen Sie die Transportsicherung.
Durch Druck nach unten auf die Hubsäule und gleichzeitigem Schwenken des Transportsicherungshakens wird die
Säule entsichert.
Lassen Sie die Hubsäule unter manueller Kontrolle mittels
des Handrads vollständig ausfahren.
Beugen Sie sich nicht über das Pedestal. Bei
Überdruck kann das Pedestal beim Lösen der
Transportsicherung hochschießen und dabei
Verletzungen verursachen.
!
Schrauben Sie die Ventilklappe ab und befüllen Sie die
Hubsäule mit Hilfe der mitgelieferten Luftpumpe, bis der
benötigte Betriebsdruck erreicht ist und die Traglast korrekt
ausbalanciert ist.
Dies ist der Fall, wenn die Traglast über den gesamten
on-Air Bereich mit geringstem Kraftaufwand in jede
Position gebracht werden kann und in dieser Position verbleibt, wenn das Handrad losgelassen wird.
Bei zu hohem Druck wird durch Druck auf das Ventil mit
der umgedrehten Ventilklappe so viel Luft abgelassen, bis
die Säule wieder ausbalanciert ist.
Ein Sicherheitsventil verhindert das Überfüllen der Säule.
Versuchen Sie nicht, das Sicherheitsventil einzustellen.
Bei einer Reduzierung des Pedestaldrucks auf
unter 3,5 bar (50 psi) können unkontrollierte
Luftaustritte auftreten.
- 23 -
!
Combi Ped 1-40
Benutzerinformation
6.6 Bedienung
Höheneinstellung
Die Hubsäule hat einen Hubbereich von 54 cm.
Die Dämpfung der Hubsäulenbewegung kann mit der
Säulenbremse eingestellt werden. Um die Dämpfung zu
erhöhen, drehen Sie die Säulenklemmung im Uhrzeugersinn.
Drehen Sie die Säulenbremse im Uhrzeigersinn bis zum
Anschlag, um die Säule in einer bestimmten Höhe zu
fixieren.
Bremsen
Jedes Dolly Rad ist mit einer Radbremse ausgestattet.
Die Räder werden durch nach unten Drücken der
Bremshebel gebremst.
Kabelschutz
Die Räder sind mit einem höhenverstellbaren Kabelschutz
ausgestattet.
Crab Steuerung
Das Combi Ped 1-40 wird durch Drehen des Handrads
gesteuert. Bei der Crab Steuerung sind alle drei Räder
parallel ausgerichtet und bewegen sich alle entsprechend
der Lenkrichtung.
Am Handrad befindet sich eine verschiebbare Markierung,
die man zur Kennzeichnung der Geradeaus-Fahrt
verwenden kann.
- 24 -
Benutzerinformation
Combi Ped 1-40
6.7 Abbau für Transport
Das Combi Ped 1-40 kann zum Transport schnell in seine
Einzelkomponenten zerlegt werden.
- Räder fest stellen
- Hubsäule nach unten fahren und Transportsicherung
einrasten
- Trimmgewichte im Transportbehälter verstauen und
durch Verriegelung vor Herausfallen sichern.
- Traglast abnehmen (Kamera, Zubehör, Fluidkopf)
- Drehknöpfe am Handrad öffnen und Handrad abnehmen
- Säulenbremse lösen
- Exzenter Klemmung am Dolly öffnen
- Hubsäule senkrecht aus dem Dolly heben
- 25 -
Combi Ped 1-40
7
Benutzerinformation
Reinigung und Instandhaltung
Für eine lange Lebensdauer solten Sie das Pedestal regelmäßig reinigen:
- Während des normalen Studiobetriebs ist nur ein regel
mäßiges Abwischen mit einem weichen, fusselfreien
Tuch nötig. Schmutz oder Staub, die sich während der
Lagerung angesammelt haben, können mit einer weichen
Bürste entfernt werden.
Achten Sie dabei besonders auf die Hubsäule.
- Verwenden Sie an den freiliegenden
Teilen der Hubsäule kein Öl oder Fett.
Dies ist unnötig und sammelt lediglich
Staub und Schmutz an, was wie ein
Schleifmittel wirken kann.
- Beim Außeneinsatz sollten Sie folgende Punkte
beachten:
Vermeiden Sie, daß Wasser in die Hubsäule eindringt.
Salziges Spritzwasser sollte sofort mit frischem
Süßwasser abgewaschen werden. Sand und Schmutz
sollten mit einer weichen Bürste oder einem Staubsauger entfernt werden.
- Verwenden Sie nur milde Reinigungs
mittel. Benutzen Sie keine öl- oder
lösungsmittelhaltigen Reiniger, Sandpapier oder Stahlbürsten, da hiermit
Oberflächen beschädigt werden können.
- 26 -
Benutzerinformation
8
Combi Ped 1-40
Gewährleistung
Der Gewährleistungsanspruch verfällt, wenn das
Combi Ped 1-40 unsachgemäß oder außerhalb der
spezifizierten technischen Daten betrieben wurde
(siehe Sachtler Liefer- und Zahlungsbedingungen).
Bitte registrieren Sie sich unter www.sachtler.de, um einen
erweiterten Gewährleistungszeitraum zu erhalten.
9
Technische Daten
Code Nr.
S2301-0001
Traglast:
40 kg
Höhenbereich:
79 cm - 133 cm
Säulenhub:
54 cm
Raddurchmesser:
125 mm
Dolly Gewicht:
9 kg
Säule Gewicht:
12 kg
Trimmgewicht:
2,3 kg
Pedestal Gewicht gesamt:
24.6 kg
Torweite:
70 cm
Handrad Durchmesser:
50 cm
Maximaler Betriebsdruck:
9.6 bar
Ansprechwert Überdruckventil:
10 bar
Betriebstemperatur:
- 20°C/+60°C
- 27 -
Combi Ped 1-40
Benutzerinformation
10 Zubehör
FB Converter (Code Nr: 3913)
Flachboden für Fluidköpfe Video 18/20
SB und Plus auf Combi Ped 1-40
Quickfix (Code Nr:3910)
Schnellverbindung für
Fluidkopf Video 25 Plus FB,
Multi Disc wird benötigt
Multi Disc (Code Nr: 3914)
Multi Disc für Fluidkopf
Video 15 SB auf Combi Ped 1-40
Futteral EFP 2 (Code Nr: 9315)
- 28 -
Benutzerinformation
Combi Ped 1-40
- 29 -
Combi Ped 1-40
Benutzerinformation