1
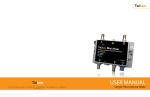
USER MANUAL
919 E. 29th St. Lawrence, KS 66046 // tel: 1-800-255-0247 // fax: 785-841-9512 // email: [email protected] // www.taikan.com
version: 42214
Optical Fiber MDU Node
Please read this manual thoroughly before use.
Retain this manual for future reference.
Taikan Optical Fiber MDU Node Owner’s Manual
This manual is intended for use by purchasers of Taikan’s family of optical fiber MDU nodes and their qualified technicians.
This document is the property of Taikan Company Inc. (“Taikan”) and embodies proprietary subject matter. All design,
manufacture, reproduction, use and sale rights regarding these products are expressly reserved. This manual may not be
reproduced without written consent from Taikan. All copyright, patent and trade secrets for this manual and products are
expressly reserved by Taikan. Specifications are also subject to change without notice.
Taikan // 919 E. 29th St. Lawrence, KS 66046 // tel: 1-800-255-0247 // fax: 785-841-9512 // email: [email protected] // www.taikan.com
Optical Fiber MDU Node | 01
SAFETY PRECAUTIONS
> Read the user manual carefully before proceeding with any part of the product.
> Installation and operation of the product must be performed only by qualified personnel and
always in accordance with applicable electrical codes.
> Unplug the product from the power outlet before cleaning. Do not use liquid or aerosol cleaners.
Use a damp cloth. For the optical connector, it is recommended that you use Greenlee
Communications’ 948 fiber connector cleaner.
> Do not block or cover openings. These are provided for ventilation and protection from
overheating. The maximum operating temperature is 50°C (122°F).
> This product should be operated only from the type of power sources indicated on the marking
label.
> This product may be equipped with a polarized AC line plug (i.e. a plug having one blade wider
than the other or a different shape). This plug will fit into the power outlet only one way. This is a
safety feature. If you are unable to insert the plug into the outlet, try reversing the plug. Contact
Please be cognizant of all safety guidelines and
adhere to the recommendations listed.
your electrician to replace the obsolete outlet if this still does not work. Do not compromise the
safety purpose of the polarized plug.
> For added protection during a lightning storm or when the equipment is left unattended or
unused for long periods, unplug it from the power outlet and disconnect the cables between the
equipment and the fiber subsystem. These precautions will prevent damage to the equipment
that could be caused by lightning strikes or power line surges.
> Do not attempt to service this equipment yourself as opening or removing the cover may
expose you to dangerous voltages or other hazards. Refer all servicing to Taikan. A Taikan
representative can be reached at [email protected] or call 1-800-255-0247.
> Notify a Taikan representative at [email protected] if any parts need to be replaced.
> Unauthorized alteration or inappropriate repair is NOT allowed and may cause irreparable
damage to product. Taikan does not assume any responsibility for these modifications.
Taikan // 919 E. 29th St. Lawrence, KS 66046 // tel: 1-800-255-0247 // fax: 785-841-9512 // email: [email protected] // www.taikan.com
Optical Fiber MDU Node | 03
TABLE OF
CONTENTS
Preface
01
Safety Precautions
03
Introduction
07
Product Summary
Features
Nominal Specifications
Unpacking
08
Static Sensitivity
Installation
09
MDU Node Placement
Ground Connection
Electrical Connection
RF Connection
Optical Connection
Operation &Trouble Shooting
10
Return & Warranty Policies
11
Taikan // 919 E. 29th St. Lawrence, KS 66046 // tel: 1-800-255-0247 // fax: 785-841-9512 // email: [email protected] // www.taikan.com
Optical Fiber MDU Node | 05
SECTION ONE
// INTRODUCTION
PRODUCT SUMMARY
Taikan’s OFMN Series is a high powered optical node designed for MDU or
large facilities that are implementing FTTx and RFoG networks. These
MDU nodes are offered at 1 GHz and are available in a wide array of return
transmitters and band splits.
The OFMN is available in a WDM single fiber port version or a more
economical dual port version. Each unit includes a separate power adapter
that will adhere to the local requirements and a built-in LED to indicate
power, optical input and transmit status.
STANDARD FEATURES
• Low Power Consumption
• Available WDM Technology
• High RF Power Output
• Compact Aluminum Alloy Housing
• External Input and Test Ports
• 1310, 1550 or ITU CWDM Return Transmitter Options
NOMINAL SPECIFICATIONS
General
Optical Receiver Feature
Optical Wavelength
Input Optical Power
1200-1600 nm
-6 dBm
Optical Power Test Point
2 dBm
1 ± 0.2 V/mW
State Green
≥ -6 dBm
State Red
≤ -6 dBm
Operating Temperature
Power Supply
-30 °C to 50 °C (-22 °F to 122 °F)
15 VDC 200 mA
Surge Withstand
6KV, 8/20 us combo wave 3kA
100 kHz ring wave 200A
Dimensions
213 x 125 x 82 mm (8.4 x 4.9 x 3.2 in.)
RF Ports
“F” Type, 75 Ohms
Optical Connector Type
SC / APC (FC / APC also available)
Optical Transmitter Feature
Output Wavelength
Output Optical Power
Optical Return Loss
Optical Power Test Point
State Green
State Red
1310, 1550 *1430, 1450, 1470, 1490, 1530, 1570, 1590 and 1610 nm *(available for DFB Laser & CWDM Options)
2 mW
1 V/mW
laser operating
output power < 50%
Taikan // 919 E. 29th St. Lawrence, KS 66046 // tel: 1-800-255-0247 // fax: 785-841-9512 // email: [email protected] // www.taikan.com
Optical Fiber MDU Node | 07
SECTION TWO
SECTION THREE
// UNPACKING
// INSTALLATION
UNPACKING
MDU NODE PLACEMENT
The Optical Fiber MDU Node is designed to fit in a cabinet mounted on the exterior of a client’s
Carefully open the package and adhere to all safety guidelines outlined in the safety
section. Check the packaging material for the following components.
premises.
It is recommended that the MDU node be placed in an environment that maintains a temperature
of approximately 25° C (77°F).
> OFMN Optical Fiber MDU Node
> User Manual
> Power Adapter
GROUND CONNECTION
The Optical Fiber MDU Node should have good grounding with a resistance < 4 Ohm. According
to international standards, the 220 V plug-in adopts tri-wire rule, while the middle wire is the
grounding wire.
It is highly recommended that the cover be left on the optical connector until you are
ready to install the optical node at the client’s premises. Not complying could “pollute”
To ground the Optical Fiber MDU Node, insert a #6 - #14 gauge grounding wire to the grounding
the connector thereby compromising the transmission quality.
contact at the bottom of the unit. Secure it in place by tightening the seizure screw with a #2 Phil-
The side effects include:
lips head screwdriver. When using the DC input power supply, the equipment chassis must be
grounded.
> Decrease in analog signal transmission quality
> Increased incorrect data rate for the digital signal
> Decrease in optical power
NOTE TO CATV SYSTEM INSTALLERS: This reminder is provided to call your attention to NEC Articles 810- 21, 820-22,
and 820-40 that provide guidelines for proper grounding. In particular, these articles specify that the cable ground shall be
connected to the building grounding system, as close to the point of cable entry as practical.
> Compromise of optical receiver’s optical power
ELECTRICAL CONNECTION
> Pollution of the other optical components
To power the Optical Fiber MDU Node, prepare a length of coaxial cable with a male F-type connector at each end. Connect the power supply included with the MDU Optical node to the PWR in
Please notify your Taikan representative ([email protected]) if any of the items
the side port.
appear lost or damaged.
When attaching the power supply, make sure to adhere to all standard safety practices.
Plug the wall adapter into a power outlet. The PWR on light will be lit when the power supply is
successfully connected.
STATIC SENSITIVITY
RF CONNECTION
Connect the RF cable and the connector on the Optical Fiber MDU Node’s RF output port. The RF
When opening or operating the product, please comply with standard static pro-
Connector is a F type plug with a resistance of 75 Ohm.
tection procedures, such as using a grounding metal wrist belt, grounding work
top and grounding conductor. Adhering to these guidelines will minimize the
risk of damaging the product.
OPTICAL CONNECTION
Connect the output fiber optic jumper to the proper input connector socket. The connector type is
SC/APC.
Taikan // 919 E. 29th St. Lawrence, KS 66046 // tel: 1-800-255-0247 // fax: 785-841-9512 // email: [email protected] // www.taikan.com
Optical Fiber MDU Node | 09
SECTION FOUR
SECTION FIVE
// OPERATION & TROUBLE SHOOTING
// RETURN & WARRANTY
FORWARD PATH SETUP
PRODUCT RETURN PROCEDURE
1. Configure the MDU Node’s downstream path by selecting the appropriate downstream pad and
Follow these steps if you need to return the product for repair:
equalizer. Prior to doing so, a 15 dB equalizer will set it up with the appropriate tilt. Use the
forward path test point to verify the output level. Note that it will be 20 dB below the actual output
level.
1. Contact a Taikan Representative at [email protected] to obtain a Return
Authorization Number.
2. When sending back the product for repair please include the following information:
> Return Authorization Number
> Model Number
RETURN PATH SETUP
> Serial Number
1. The ideal RF input level is a few dB below the peak of the NPR and input level curve. This is
> Reason for Return
the optimal location since it allows for changes in the input power while simultaneously places
the total level outside of the clipping region and thermal noise area.
2. Remember to measure the RF levels by using the Reverse test Points. Note that it will
3. Prior to repairing the device, we will inform you about the test results and any additional
repair charges that may apply (in the event the damage was caused by improper handing/
care). Once we have received your confirmation we will proceed with the repair.
be 20 dB below the actual signal level. The test point is positioned before the reverse pad
4. The repair period will depend on the severity of the problem.
location so please take this into account during the measurement process.
5. The product will still be under warranty after it is returned. The repair component is covered
for 90 days after you have received the product. (see below)
LED INDICATOR
STANDARD TAIKAN PRODUCT WARRANTY
> The working status indicator (LED) will be lit when the unit is operating correctly.
Taikan Company Inc. provides a Limited 1 year Warranty (“Warranty”) to original purchaser on its
product against manufacturing defect and workmanship under normal use and service. Taikan
> The LED status is indicated below:
Company Inc. will, during the Warranty period, repair or replace the product to correct defects in
material and workmanship. (Please note, fiber products carry a limited 3 year warranty) 1 year
> Light is green: Laser operation is OK
parts and 2 years labor.
> Light is red: Laser output is below 50%
This Warranty shall not apply to a product which has been altered in any way so as to effect its
stability or durability, nor which has been subject to misuse or negligence. This Warranty does not
TROUBLE SHOOTING
cover a product which has been damaged by severe weather conditions such as extreme wind,
ice, storms, lightning, or other natural weather conditions over which Taikan Company Inc. has no
> If the signal within the client’s premises is scrambled or otherwise unclear, detach the
control.
SC/APC connections and clean per manual instructions. Reconnect, then power on the unit.
Claimants under this Warranty shall present their claim along with the defective product to Taikan
> If the LED is not lit, check all connections and wiring between electrical socket and optical node unit.
Company Inc. Non-compliance with any part of this claim procedure may invalidate this Warranty
in whole or in part.
This Warranty is expressly in lieu of all other agreements and warranties, expressed or implied.
Taikan // 919 E. 29th St. Lawrence, KS 66046 // tel: 1-800-255-0247 // fax: 785-841-9512 // email: [email protected] // www.taikan.com
Optical Fiber MDU Node | 11