1
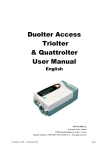
200M Home for Windows
USER’S
GUIDE
DY N A P U L S E 2 0 0 M
TO Professional DP-200M USERS:
For your reference, this User's guide describes the hardware and software
functions and features of DP-200M/Home with RS232 communication.
USB DP-200M users shall follow the Quick Guide instructions to
install USB drivers and software, and use USB connection instead.
USB DP-200M is powered via USB, NO Battery is required.
USB DP-200M supports only Windows 98SE, 2000, Vista and Win-7.
Please skip the descriptions of RS232, battery & Win-95/98 in this manual.
To help your patients tracking their blood pressures at home, you are
welcome to distribute this material to them for hypertension education.
DynaPulse USB 200M/Home BP monitoring & recording system is available.
For more information, please visit DynaPulse website at www.dynapulse.com
Tel: (760) 842- 8278
Fax: (760) 758 - 9425
http://www.dynapulse.com
POTENTIAL FOR RADIO AND TELEVISION INTERFERENCE
This equipment generates and uses radio frequency energy and if not installed
and used properly, that is, in strict accordance with the manufacturer’s instructions, may cause interference with radio and television reception. It has been
tested, together with a certified Class B computing device Personal Computer,
in accordance with the specifications of Subpart 15 of FCC Rules, which are
designed to provide reasonable protection against interference in a residential
installation. Operation with non-certified computers is likely to result in
interference with radio and television reception. Note that this equipment may
be compatible and can be used with Class A computers. However, there is no
guarantee that interference will not occur in a particular installation. If this
equipment does cause interference with radio and television reception, which
can be determined by turning the equipment off and on, the user is encouraged
to try to correct the interference as outlined in the User’s Manual for the host
computer, with the following measures: 1) reorient the receiving antenna; 2)
relocate the unit with respect to the receiver; or 3) move the unit away from the
receiver.
If necessary, the user should consult the dealer or an experienced radio/television technician for additional suggestions. Changes or modifications not
expressly approved by the party responsible for compliance could void the
user’s authority to operate the equipment.
Screen shot(s) © 1985-1997 Microsoft Corporation. Reprinted with permission
from Microsoft Corporation.
Macintosh is a registered trademark of Apple Computer, Inc.
Pulse Metric is a registered trademark and DynaPulse is a trademark of Pulse
Metric Incorporated.
Microsoft is a registered trademark and Windows is a trademark of Microsoft
Corporation.
IBM is a registered trademark of International Business Machines, Inc.
© Copyright 1988-2010 Pulse Metric, Incorporated. All rights reserved. No
part of this publication may be reproduced, transmitted, transcribed, stored in a
retrieval system, or translated into any language in any form by any means
without the written consent of Pulse Metric, Incorporated.
Rev. 009.01
Table of Contents
Introduction
Blood Pressure Defined
How is Blood Pressure Measured?
What is Mean Arterial Blood Pressure?
Facts About Hypertension
The DynaPulse Blood Pressure System
Tips for an Accurate Measurement
5
7
7
9
10
12
12
System Requirements and Setup
System Requirements
Equipment Layout
Installing the Batteries
Connecting to the Computer
Backing Up the System Diskettes
14
15
16
16
16
Software Installation
Installing System Software
Main Menu
17
18
Patient Management
Adding a New User
Selecting a User
The User List
Editing a User’s Settings
Deleting A User
Sorting the User List
20
21
22
22
23
24
Measurement & Options
Performing a Zero Reset
Putting on and Using the Cuff
Taking a Blood Pressure Measurement
The Measurement Display
Adjusting the Measurement Settings
Saving User Data
The Trend Display
The Record Table
The Personal Information Record
Retrieving the Measurement Display
Display Options
Printing
The Tool Window
25
26
29
31
35
38
39
41
42
43
44
46
47
Appendix
Warranty and Service Information
Software Licensing Agreement
COM Port Configuration
Selecting the Correct Cuff
Error Messages
DynaPulse Accuracy and Tips for Use
Specifications
49
50
51
52
53
58
60
Introduction
Thank you for purchasing the DynaPulse. To use this system
correctly and safely, read this manual carefully before operating the
DynaPulse. Retain this manual together with the DynaPulse for
future reference.
NO MEDICATION CHANGES SHOULD BE MADE BASED
ON INFORMATION PROVIDED BY THE DYNAPULSE SYSTEM WITHOUT FIRST CONSULTING A PHYSICIAN.
The DynaPulse non-invasive blood pressure system is based on a
unique oscillometric technique, known as Pulse Dynamics. This
technology allows clinically accurate measurements to be obtained
quickly and easily.
5
Indicator Used in this Manual
Used to call your attention to an important
feature of the system, or system software.
This manual is a guide to installing and using the DynaPulse
blood pressure recording system. Pulse Metric recommends
that all users read this manual before they begin using the
DynaPulse.
6
Blood Pressure Defined
Blood pressure is defined as the force generated by the blood as it
flows through the arteries. The heart pumps the blood through the
arteries, which act as "pipes" to carry the blood away from the
heart. This pumping action causes the blood pressure to rise and Introduct
fall. When the heart is contracting (pumping), the blood pressure
rises, and when the heart is relaxing (not pumping), the blood
pressure falls. The highest blood pressure achieved in a single cycle
of contraction and relaxation of the heart is systolic pressure. The
lowest pressure during a single cycle is diastolic pressure. Blood
pressure is usually recorded in units of millimeters of mercury
(mmHg), and read with the systolic pressure first. For example,
"120 over 80" indicates a systolic blood pressure of 120 mmHg and
a diastolic pressure of 80 mmHg. Since blood pressure is so
strongly related to the heart, blood pressure is used as a general
index of cardiovascular performance.
How Is Blood Pressure Measured?
There are many methods for measuring blood pressure. The most
accurate method requires the surgical insertion of a catheter into
the patient's artery. The catheter is equipped with a pressure
sensor, which measures the patient's blood pressure directly. These
measurements are considered the "gold standard" for blood pressure measurements. However, most patients do not want blood
pressure measurement to be a surgical procedure! Therefore,
indirect methods were devised to allow safe, quick blood pressure
measurements. The goal of every indirect method is to achieve
measurements that agree with catheter-based measurements.
7
The most common method for obtaining blood pressure is the
auscultatory method. In this technique, a cuff is wrapped around
the patient's arm, and the physician (or nurse) inflates the cuff, then
places a stethoscope over the arm as the cuff deflates. The physician is listening for certain characteristic sounds (known as Korotkoff sounds) to determine systolic and diastolic pressure. The
sounds are created by blood flow in the artery. This method is very
reliable, but extensive training is required to ensure accuracy. In
addition, differences in hearing ability may cause variability between
measurements taken by different people on the same patient, even if
they were taken at the same time! This method has also encountered difficulty when patient conditions, such as hypotension (i.e.
low blood pressure), mute or damp the Korotkoff sounds.
These difficulties prompted the development of the oscillometric
technique, which does not rely on a microphone. The technique
requires a cuff and a pressure sensor. Instead of listening for
characteristic sounds, oscillometric devices examine the pressures
generated by the cuff and the arterial pulsation to estimate blood
pressure. The estimations are based on large amounts of data, and
are usually accurate, but they are still estimations.
Pulse Dynamics, the patented DynaPulse technology, also measures the pressures generated by the cuff and the arterial pulsation.
However, it is the only oscillometric method to measure blood
pressure based on physical phenomena, much like the auscultatory
method. Instead of estimating blood pressure, Pulse Dynamics
uses pattern recognition to determine systolic, diastolic, and mean
arterial pressure from the Pulse Dynamic pressure waveform. This
pattern recognition technique is possible due to the effect that
blood flow has on the measured pressures. Pulse Dynamics agrees
extremely well with catheter-based "goldstandard" measurements.
8
What Is Mean Arterial Blood Pressure?
Mean arterial pressure is the average pressure in the artery over
time. High pressures cause the artery to bulge, like a balloon when
it is inflated. At very low pressures, the artery actually bends
inward slightly. The forces generated by the velocity (speed) of the Introduct
blood flow pull the arterial walls inward at these low pressures.
Mean arterial pressure corresponds to the state when the arterial
wall is not distended inwardly or outwardly. The forces due to
blood pressure are in balance with the forces caused by the arterial
wall and the blood flow. By determining mean arterial pressure, we
actually determine the pressure required to balance the arterial wall
forces. Mean arterial pressure is often used in clinical studies, but
no standards have been published regarding its role in the diagnosis
of hypertension.
9
Facts About Hypertension
Hypertension is described as a persistently elevated blood pressure
that exceeds predetermined thresholds. The Sixth Report of the
Joint National Committee on Detection, Evaluation, and Treatment
of Hypertension estimates that 50 million Americans have blood
pressures that consistently equal or exceed 140/90 mmHg, and are
therefore at increased risk for developing cardiovascular diseases
such as coronary heart disease and peripheral vascular disease.
"A blood pressure may vary with the time of day, or whether one
stands, sits or lies down. Thus, for any individual, there are variations in blood pressure from one time to the next. As a general rule,
the upper limit for systolic blood pressure is 140 mmHg, and the
upper limit for diastolic blood pressure is 90 mmHg. Younger
people have lower blood pressure than this, elderly people typically
have higher pressures. The '140 over 90 mmHg rule' is only a rough
estimate."
Dr. J. Howard Pratt, M.D. ,
Hypertension Research Center, Indiana University School of Medicine,
Indianapolis, Indiana.
Symptoms of hypertension
Headaches, dizziness, and other easily detectable symptoms have
no proven correlation with hypertension. As a result, diagnosing
the disease in the absence of blood pressure data is difficult.
10
Hypertension as a risk factor for cardiovascular disease
Hypertension increases the risk for developing many cardiovascular
diseases, including atherosclerosis and left ventricular hypertrophy.
Other risk factors for cardiovascular disease include: smoking,
diabetes mellitus, lack of exercise, and excessive alcohol intake.
Hypertension management
Mild cases of hypertension can be treated effectively by non-drug
therapies. Non-drug therapies usually consists of lifestyle changes
aimed at weight reduction, sodium intake reduction, reduction of
alcohol consumption, and increased cardiovascular fitness. Over a
long period of time, these lifestyle changes can be effective as a
method of therapy.
Many cases, however, require intervention with drug therapies.
There are many different methods to reduce blood pressure with
drugs. It is common for a physician to prescribe several different
medications, each of which acts in its own way. A type of drug that
works well for one patient often doesn't work for another. Therefore, it is important to follow the treatment plan laid out by the
physician.
11
Introduc
The DynaPulse Blood Pressure System
The DynaPulse unit is a data acquisition and communication device. It
senses the pressure caused by the application of the cuff and the arterial
pulsation, digitizes the pressure data, and sends it to your personal
computer. The DynaPulse is linked to the computer and its software by
the communications cable. All of the data is stored, displayed, and
analyzed on your computer.
Tips for an Accurate
Blood Pressure Measurement
Unlike body temperature, a person’s blood pressure is not constant,
and often varies from measurement to measurement. The following
suggestions will improve the quality of blood pressure measurements.
• Patients should rest and relax for at least 5 minutes before their
blood pressure is measured.
• Save blood pressure data for future reference. Readings should
be taken before the patient has eaten.
• Take two or three measurements each time and record the results.
DO NOT RELY ON A SINGLE MEASUREMENT.
• When taking repeated measurements, deflate the cuff and elevate
the arm. Allow 1-3 minutes between measurements to ensure
normal circulation is restored. Make sure that the cuff is not
wrapped around the arm too tightly. The cuff should be snug
around the arm when there is no air in the cuff.
12
• Repeated deep breaths, coughing, sneezing, and talking may affect the
reading. The patient should relax and remain motionless during each blood
pressure measurement.
• A rolled-up sleeve may constrict blood flow through the arm.
Putting all or part of the cuff on top of a sleeve may affect the
reading’s accuracy as well.
• Blood pressure may be higher after exercise, when under emotional or physical stress, after drinking coffee or tea, or after eating.
In general, any circumstance leading to an increase in heart rate
tends to cause blood pressure to rise.
• The cuff must be the correct size for the patient’s arm. Refer to
the Appendix for guidelines on determining correct cuff size.
13
System Requirements
To operate the DynaPulse, you will need the following equipment:
• 80386 or higher IBM, or IBM compatible computer with
2 Mb of RAM, a hard disk drive, and a CD-ROM/floppy
disk drive.
What You Nee
•Windows 3.x running in standard or enhanced mode, or
Windows 95/98, NT, 2000 or XP.
•An RS-232 serial communications port, independent of ports
incorporated by other serial devices, like mouse pointers or
serial printers (see Appendix).
•The DynaPulse software.
The DynaPulse manual pump system is comprised of the following:
1. The DynaPulse unit
2. Standard adult blood pressure cuff
3. Air hose with pressure bulb and connector
4. Communication cable
5. DynaPulse software
6. This User's Guide
14
Equipment Layout
ed
DynaPulse
measurement unit
Serial Communications
Cable
Pressure Bulb
with Valve
Pressure Cuff, Hose
and Connector
15
Installing the Batteries
Open the battery cover by pressing slightly downward while sliding
the cover in the direction shown on the cover. Install four (4) AAA
batteries in the direction indicated on the inside of the battery case.
Connecting the DynaPulse to the Computer
Connect the RS-232 cable from your computer's serial communications port (hereafter referred to as the COM port) to the DynaPulse
unit. If your COM port uses a 25 pin connector, use a 9 to 25
standard pin adaptor. Do not connect the DynaPulse unit to any
other port. Only COM ports adhering to RS-232 standards can be
used.
Backing Up the System CD/Diskettes
It is strongly recommended that you make a backup CD/diskette
of the DynaPulse system CD/diskette and use the backup to install
the program. Please refer to the Windows User Guide for instructions on copying CDs/diskettes.
16
Installing the Software
CD Installation
Put your DynaPulse CD in drive D.
The Installation program should
automatically start shortly after the CDROM drive is closed. If not, from the
Program Manager in Windows (or
from the Start menu in Windows 95/
98, NT, 2000 or XP), select the
Run...option. In the Run dialog box, enter
D:setup
then click OK. If the drive letter is different than the one shown in
this example, enter the correct drive letter.
3.5" Floppy Disk Installation
Put your DynaPulse backup diskette in drive A. From the Program
Manager in Windows (or from the Start menu in Windows 95/98,
NT, 2000 or XP), select the Run...option. In the Run dialog box,
enter
A:setup
then click OK. If the drive letter is different than the one shown in
this example, enter the correct drive letter.
If you have a previous version of DynaPulse installed on your hard
disk and want to maintain the same measurement files created with
that version, enter the drive and directory path where the original
program files are stored when the installation utility asks for the
installation path. Do not delete the previous files.
17
The Main Menu
File Edit User Measure Trend Record Options Window Help
Store measurement and personal information to disk.
Print the currently selected display.
Print the screen.
Exit the program.
Cancel the previous edit operation.
Cut selected text from the Record Table or Personal Info display.
Place selected item onto the Windows Clipboard.
Paste text from the Windows Clipboard at the selected insertion point.
Erase selected text.
Add a user to the User List.
Change the user's name and/or data storage location.
Find a user by ID.
Select a user.
Sort User List by I.D. number or user name.
Close the current user and resets to Guest.
Remove a user from the User List.
Begin a measurement using current settings.
Select the High (systolic) measurement limit.
Select the Low (diastolic) measurement limit.
Select the cuff setting for the user.
Select the Air Release index value for the user.
18
File Edit User Measure Trend Record Options Window Help
Retrieve the measurement Waveform Display
Display or edit personal medical information.
Display blood pressure measurements in tabular form.
Select the communications port to be used by the DynaPulse.
Find the communications port used by the DynaPulse.
Reset the unit due to environmental changes.
Displays the Trend window.
Display the Tool window.
Overlap all open displays.
Tile all open displays.
Arrange displayed icons.
Close all measurement windows.
List all open displays.
On-Line help.
Medical information.
Version information.
19
Adding a New User
From the User menu, select Add...
The "Enter ID" dialog box will open. Enter a
unique, easy to remember ID for the user. The ID
cannot contain spaces or punctuation, and cannot
exceed 9 characters. Click OK.
The user "Name" box will appear. Enter the user name. You may
enter up to 28 characters, including spaces.
To change the default data folder
(shown as "Current path:") type in
the new folder name in the "New
Directory" field. Select the drive
and Click OK.
20
Selecting a User
When you open the program the "User List" screen will appear.
Double click on the name that you wish to use.
If you have taken measurements then . . .
The selected user's "Trend" screen will appear, and you are given
the opportunity to recall measurements, and print the "Trend
Display" (see Trend Display). The Status Bar displays the name
and data directory of the selected user.
If you have not taken any measurements then "No trend data
available" will be displayed. Go to MEASURE option and select
start.
21
The User List
The User List displays the name, data directory, date and time in
the Status Bar. Users are listed by name, ID and data directory of
each user.
The default user is "Guest". Measurement information cannot be saved for the GUEST user. A user
from the User List must be selected before taking a
measurement to allow full use of program functions.
To clear the current user and return to Guest, choose
CLEAR for the USER option.
Editing A User's Settings
First, select a user to edit. Then
choose EDIT from the User List.
The name and data storage folder
may be changed.
The User ID may not be changed.
22
Deleting A User
Users may only be deleted from the User List
by selecting DELETE from the User options.
Sorting
Getting Started
The DynaPulse is an FDA-registered device and generates
clinical data. While the program will delete a user from the
User List, the program will not delete the measurement data
produced by the user.
From the USER List highlight the user name, select DELETE
from the USER options. Click OK to confirm the deletion from
the Confirmation Screen.
23
Sorting the User List
The User List can be sorted by either user name or user ID.
To sort the User List by ID, select USER from the Main Menu.
Select SORT and choose the BY ID NUMBER option. The User
List will be sorted with the lowest number first.
To sort the User List by the User Name, select USER from the
Main Menu. Select SORT and choose the BY NAME option. The
User List will be sorted alphabetically.
24
Performing A Zero Reset
After you have entered your user ID and name, you're ready
to take a measurement. Before taking your first measurement, it is recommended that you first perform a Zero
Reset.
Large changes in atmospheric pressure
may affect blood pressure readings. The
Zero Reset will compensate for these
variations. Select ZERO RESET from the
OPTIONS menu.
Follow the on-screen prompts to
complete the calibration.
NOTE: Do not reset the DynaPulse before each measurement.
Reset the DynaPulse only if a large change in temperature or
humidity is noticed.
25
Putting On And Using The Cuff
1
Loop the cuff with the Velcro interlock on the
inside. If the cuff does not fit, switch to a different
cuff size. See Selecting the Correct Cuff.
2
Locate the brachial artery on the left arm. It is
located on the inner side of the upper part of
the arm.
3
Place the cuff on the left arm with the metal bar on
the inner side of the arm (the brachial artery side),
and the rubber tubing toward the hand.
26
4
Pull the end of the cuff through the metal loop
so that it fits on the upper arm.
5
Fold the end of the cuff so that it fastens onto
the Velcro panel. Don't put the cuff on too
tightly.
6
Plug the tube connector into the DynaPulse
unit. Close the release valve on the pressure
bulb. (Turn the knob clockwise completely.)
27
7
The arm should rest on a table surface. Do not
let the cuff rest on any other surface. When the
program asks you to start pumping, squeeze the
pressure bulb to pump up the cuff.
8
When the program has completed its measurement, release the remaining air pressure in the
cuff by slowly turning the valve counterclockwise.
28
Taking A Blood Pressure Measurement
Select the START option from the MEASURE menu.
Put the cuff on the arm and press ENTER, or
click OK. For further information regarding
correct cuff placement, see Using The Cuff.
Adjust the Air Release Index (the knob on the
unit) to the appropriate value.
In this example, a blood
pressure reading is taken
using the default ranges.
Close the release valve of the pressure bulb by
turning the valve knob clockwise. After the
valve is shut tightly, press the ENTER key or
click OK.
29
30
Begin pumping. Don't pump
too fast. Click Quit or press
ESC to abort.
You will see the indicator
rise as the pressure increases.
Stop pumping only when
the program tells you to.
The measurement will start
at the selected upper limit
setting.
The patient should relax
while the measurement is
being made.
At the end, release the rest
of the air from the cuff.
The Measurement Display
Wavefo
USER NAME
CURRENT USER
DIRECTORY
ARTERIAL AT CURSOR
PULSE
POSITION
DATE AND TIME OF
MEASUREMENT
MEASUREMENT TIME
SCALE (IN SECONDS)
SYSTOLIC, MEAN DIASTOLIC
INDICATORS (LEFT TO RIGHT) OF
POSITIONS IN PRESSURE WAVE
CURRENT TIME
AND DATE
CUFF
PRESSURE
SCALE
CUFF PRESSURE
AT CURRENT
CURSOR POSITION
NOTE: The measurement display is intended for use as an analytical
tool. Any diagnosis must be performed by a qualified medical practitioner.
31
Looking At The Measurement Display
The application of an occlusive cuff around the artery during blood
pressure measurements results in a pressure waveform (shown
above).
The sample waveform above is representative of a high quality
measurement. The three triangles below the waveform mark the
actual points where blood pressures were determined. At these
points the cuff pressure was equal to (from left to right) systolic,
mean arterial, and diastolic blood pressures. The Pulse Dynamic
algorithm used by the DynaPulse products uses pattern recognition
to determine blood pressures.
32
For convenience, the blood pressures are displayed on the top right
hand corner of the screen, along with heart rate.
When first looking at the waveform, one may immediately notice
two striking features: the pressure oscillations (the peaks and
valleys) , and the increasing then decreasing height of the oscillations with time.
Each pressure oscillation is caused by a heartbeat. The peak of
each oscillation is systolic pressure and the lowest point (or nadir)
of each oscillation is diastolic pressure.
The varying height of each oscillation is caused by the interaction
between the occlusive cuff and the blood flow in the brachial
artery.
The systolic and diastolic pressures
generated by each heartbeat can be
seen more clearly on the arterial
pulse display. The oscillation
marked by the cursor is displayed
on the graph, with the peaks and
troughs normalized to systolic and diastolic pressure. By scaling
the pressure in this way, the height changes caused by the cuff are
minimized, and individual heartbeats can be compared for abnormalities. Using the arrows moves the cursor across the waveform.
The arterial pulse display changes automatically, to correspond to
the currently selected oscillation.
33
Estimated Measurements
The DynaPulse has the capability to estimate one measurement
parameter (such as systolic), provided that it has measured the
other two. An estimated measurement can be distinguished from
other measurements by the presence of a highlighted background.
Estimated measurements occur when either the High or Low Range
is not set correctly. Upon receiving an estimated measurement, the
user should readjust the ranges.
If systolic blood pressure (SBP) was estimated, the High Range
should be set to a value greater than the estimated SBP.
If diastolic blood pressure (DBP) was estimated, the Low Range
should be set to a value less than the estimated DBP.
34
Adjusting Measurement Settings
When taking the first set of measurements for a new user, you
should adjust the cuff size and Air Release index for the user. This
may require a few test measurements. Once these parameters have
been set, however, they will be saved along with the user's data and
will not need to be adjusted.
Adjusting the Cuff Size
This setting should be adjusted only if you need to use a small or
oversize cuff. For guidelines on determining cuff size, see Selecting
the Correct Cuff in the
Appendix. If switching
to a different size cuff,
choose CUFF SIZE
from the MEASURE
menu, and select the
appropriate cuff. The
Air Release index will automatically change to the default setting
for the new cuff size. Test measurements should be taken to adjust
the index (see Adjusting the Air Release), if necessary.
35
Adjusting the Air Release
The total measurement time should be 25-35 seconds. Measurement time is displayed above the arterial waveform (in seconds).
If the total measurement time is outside this range, the Air Release index needs to be adjusted.
Adjust the Air Release index by
choosing AIR RELEASE from the
MEASURE menu. Decrease the
value of the setting to take a
slower measurement, or increase
the value to speed up the measurement.
Retake the measurement. The
software will prompt you to set the
Air Release (the knob on the unit)
to the new value. Adjust the index
and take a test measurement.
Repeat the process until you get a
measurement time within 25-35
seconds. The index setting will be
saved for the user.
To best determine user settings, the measurement time
requirement of 25-35 seconds is used. Once these
settings are determined, however, factors such as cuff
placement and user position may cause future measurements to be outside this window. However, further
adjustment of the Air Release is not required unless the
measurement time is outside the range of 15-45 seconds.
36
Adjusting the High and Low Range Settings
The HIGH and LOW RANGE features enable the user
to set HIGH and LOW blood pressure limits. The default
settings are 160 (systolic) and 50 (diastolic) mmHg.
The HIGH RANGE varies from 100 to
280 mmHg in 20 mmHg increments.
Change the setting by dragging the
highlight bar to the desired range. Any
HIGH RANGE selection over 200
mmHg will cause the program to
confirm the selection.
The LOW RANGE varies from 20 to
80 mmHg, in 10 mmHg increments.
Change the setting by dragging the
highlight bar to the desired range.
In most cases, the program will inform the user when readjustment of either range is necessary (refer to the Appendix ).
37
Saving User Data
Select FILE from the Main Menu, then select SAVE. The current
measurement or personal information will be
saved in the user's data directory. If you try to
produce another blood pressure measurement
without saving the current measurement or
personal information, you will be asked if you
want to save the current data. If you do not
save the measurement or personal information, it will be discarded.
Information cannot be saved by selecting a user name
after a measurement has been taken. A user must be
selected before taking a measurement.
A comment line is provided in order to add a one line statement
about the current measurement (i.e. "measurement taken after
eating"). The comment is stored along with the measurement data.
If no comment is needed, simply press the ENTER key.
38
The Trend Display
The Trend Display is another informative feature of the DynaPulse
system. With it, you can track an unlimited amount of measurement
data (the actual limit is determined by the size of your hard disk
storage) for each user.
A user's Trend is displayed when the user is selected, provided that
at least one measurement has been saved for the user.
Choosing SHOW TREND WINDOW
from the OPTIONS menu will display the
Trend. Systolic, mean arterial, and diastolic measurements are displayed as line
charts, and heart rate is presented as a
scatter chart.
The Trend is divided into two scales for clarity. The top scale is in
millimeters of mercury (mmHg), and is used to determine the blood
pressure trends. The lower scale is in beats per minute (BPM) and
is used for heart rate trends. The display is organized with the most
recent measurement on the extreme right.
Use the arrows, or point-and-click to examine individual measurements. Measurement results, along with date and time of measurement, and the comment, will be displayed upon examination.
Double-click, or choose RETRIEVE from the TREND menu, to
examine the Waveform Display for the measurement.
39
The Trend Display
USER NAME
DATA
DIRECTORY
MEASUREMENT
RESULTS AT
CURSOR POSITION
CURRENT
TIME & DATE
TIME & DATE
OF MEASUREMENT
GUIDELINES OF
BLOOD PRESSURE
THRESHOLD (140/90)
BLOOD PRESSURE
SCALE ( IN mmHg )
40
COMMENT
LINE
HEART RATE
SCALE ( IN BPM)
CURSOR
SCROLL BAR
The Record Table
The Record Table lets you view measurement data in tabular form.
When measurement
data is saved, the
systolic, mean
Personal
arterial and diastolic pressures
along with heart
rate are automatically entered into
the Record Table.
Additionally, any
comments will be
displayed with the
measurement data.
You can use the mouse to move the cursor to the comment box of
each measurement and edit the comment. Press the ENTER key to
confirm the changes. Using the EDIT menu, you may cut or copy
comments into other Window applications. You may also paste text
from another application into a comment line. Consult the Windows
User Guide for further information.
Choosing the PRINT option from the FILE menu will allow you to
print either the entire Record Table, or only the page at the cursor
position.
41
The Personal Information Record
Choose PERSONAL INFO from the
RECORD menu. The Personal Information
Record may be used to store relevant medical,
doctor, hospital and insurance information.
Enter the information as needed. Save the
information by selecting SAVE from the FILE
menu.
The Personal Information record is not
available to Guest users.
42
Retrieving the Measurement Display
Recalling measurement data from the Trend screen is accomplished
quickly by either double-clicking on measurement, or choosing the
measurement and pressing the ENTER key. A Measurement
Display may also be retrieved by selecting the measurement and
choosing RETRIEVE from the TREND menu.
Multiple measurements retrieved from the Trend may be displayed
simultaneously.
43
Display Options: Cascade, Tile, and Close All
One feature of the DynaPulse for Windows is the ability to
display multiple measurements on the screen. This feature
is useful if you wish to compare data from different measurements.
Features like the CASCADE
and TILE options (located
under the WINDOWS menu)
help organize open windows.
Choosing the CASCADE
option causes each measurement window to overlap so
only title bars are visible.
Selecting the TILE option
produces a display as seen to
the right. Additionally, the
WINDOW menu also displays a list of the open measurement displays. Choosing any of the displays from the list
will bring that
display to the
foreground.
44
Display Options: Arrange Icons
You may also "clean up" the display screen and still have several
measurements available for your review by using the ARRANGE
ICONS option from the WINDOW menu. Any Measurement,
Trend, Record Table, or User List may be minimized and arranged
by selecting this feature.
Choosing the CLOSE ALL option will clear off all measurement
screens and reduce the User List and Trend windows (if open) to
icons. The icons will indicate the time and date of the measurement
associated with the icon.
45
Printing
Printing The Displays
The PRINT option is located under the FILE
menu.
Choosing the print option will open a dialog
box. Features available are dependent on both
the printer and the printer driver selected through the Windows.
Waveform, Trend, and Record Table displays may be printed out
using this control. Only the currently selected display will be printed
out. For example, if there are several selections on the screen at the
same time, only the highlighted screen will be printed. This is also
true for selections arranged using the CASCADE or TILE feature.
NOTE: Print quality is directly related to the printer used and
the printer driver selected. The DynaPulse program will print
the active window only.
46
The Tool Window
The SHOW TOOL WINDOW located
under the OPTIONS menu is a convenient
way to operate the DynaPulse system.
The Tool window contains controls that
you use the most. Once selected, the Tool
window can remain in the display area for
easy access until you close it.
Selects and/or adds a user
Starts the measurement sequence
Stores User measurement data
Displays the measurement trend screen
Displays the User Record
Prints the currently selected display
Quits the DynaPulse program
47
Appendix
Warranty Information
Software Licensing Agreement
COM Port Configuration
Selecting the Correct Cuff
Error Messages
DynaPulse Accuracy
Tips For Accurate Blood Pressure Measurements
Specifications
48
Warranty Information
Pulse Metric, Inc. warrants that the DynaPulse system unit will be free from
defects in workmanship and materials for a period of one year from the date of
purchase. This one year warranty extends only to the original purchaser. All
other accessories (pressure cuff, RS-232 cable, etc.) will be warranted for 90
days. Pulse Metric, Inc. will repair or replace at its option any defective parts or
product when shipped to the initial purchaser. This limited warranty DOES
NOT cover damages or losses due to: improper environment, temperature
extremes, or other misuse or negligence such as adjustment or repair by personnel not authorized by Pulse Metric, Inc., improper installation, failure to follow
the installation instructions, or shipment to or from the distributor or customer.
Pulse Metric, Inc.’s liability shall not exceed the price of the defective product
itself, which is the basis of the claim. Tampering with the unit voids this
warranty. In no event shall Pulse Metric, Inc. be liable for any loss of profits,
loss of use of facilities, loss of other equipment, or any incidental or consequential damages, even if Pulse Metric, Inc. has been advised of the possibility of
such damages. Some states do not allow the exclusion or limitation of incidental
or consequential damages, or allow limitations on how long an implied warranty
lasts, so the above limitations or exclusion may not apply to you. This warranty
gives you specific legal rights, and you may have other rights which vary from
state to state.
Technical Support and Service: Phone: (760) 842-8224
Fax:
(760) 758-9425
E-mail: [email protected]
Technical support representatives are available between 10:00 a.m. and
4:00 p.m. Pacific Standard Time, Monday through Friday, or visit our website,
www.dynapulse.com, for technical assistance.
All shipping to Pulse Metric, Inc. must be prepaid and products must be
accompanied by a Return Material Authorization (RMA) Number and the
original (or a copy) of the dated sales slip as proof of warranty. An RMA
Number can be obtained by calling Technical Support at (760) 842-8224.
Packages sent without an RMA Number marked on the outside of the
shipping container will be refused. Please also include a letter with your
name, address, telephone number, and brief description of the problem(s).
49
Append
Software Licensing Agreement
This is a legal Agreement between you and Pulse Metric. Inc. (PMI). By clicking the "accept"
button after you see this agreement when you install the software, you are agreeing to be bound by
the terms of this agreement. If you do not agree to the terms of this Agreement, immediately
remove all traces of the PMI software product from your computer and disk archives and promptly
return the disk package and the accompanying items (manuals, DynaPulse unit, and all accessories)
to the place you obtained them for a full refund.
LICENSE TERMS
Grant of License.
PMI grants you the right to use one copy of the enclosed DynaPulse software
program (SOFTWARE) on a single computer at a time. You may not rent or lease the SOFTWARE, but you may transfer the SOFTWARE and accompanying written material provided you do
not retain copies and the recipient agrees to the term of this Agreement. You may not reverse
engineer, decompile, or disassemble the SOFTWARE. The agreement is effective from the day you
open the sealed package until terminated. You may terminate this Agreement by returning to PMI
the original disks and any backup copies. If you breach this Agreement, PMI can terminate this
license upon written notification to you.
Copyright.
The SOFTWARE is owned by PMI and is protected by the United States
copyright laws and international treaty provisions. Therefore, you must treat the SOFTWARE like
any other copyrighted material except that you may either (a) make one copy of the SOFTWARE
solely for backup or archival purposes or (b) transfer the SOFTWARE to a single hard disk provided
you keep the original solely for backup purposes. You may not copy the written material accompanying the software.
Controlling Law.
This Agreement shall be governed by and construed in accordance with the
laws of the State of California.
50
COM Port Configuration: Windows 95/98
Windows 95/98 is capable of detecting most standard COM ports,
therefore we recommend that you use the standard serial ports
(COM 1 or COM 2) for your DynaPulse. If the use of COM ports
3 or 4 is necessary, the configuration procedure is provided below.
Before attempting to change the hardware settings, we suggest that
you run the "Add New Hardware" wizard, using the default option.
This allows Windows 95/98 to search your system and ensure that
all installed hardware has been properly configured.
To configure Windows 95/98 port settings, perform the following:
1. Click the "Start" button on the desktop. Point to "Settings" and
then click on "Control Panel".
2. Double-click on the "System icon, and select "Device Manager".
3. Double-click on the "Ports", then on the port you wish to configure.
4. Click on the "Resources" tab, and confirm that both the Input/
Output Range and Interrupt Request (IRQ) values reflect the
settings on your COM port hardware. Consult your computer
documentation if you are not sure of the hardware settings. If you
made any changes, you must restart Windows 95/98 for the
changes to take effect.
5. To change the port settings, you must first remove the check
mark next to the "Use Automatic Settings" box. The property
values must reflect the physical settings of the hardware.
When changing settings, the" Conflicting Device List"
does not report conflicts between devices with the same
IRQ settings, so be careful!
51
Selecting the Correct Cuff
The American Heart Association makes the following recommendations with regard to determining the correct cuff size:
♦For adults, the bladder inside the cuff should encircle 80% of the
arm.
♦For children less than 13 years of age, the bladder should encircle
100% of the arm.
♦If unable to decide between two cuffs, the larger cuff should be
used.
♦If all cuffs are too small, the largest cuff can be wrapped around
the forearm, and the radial artery can be used as an alternative
measurement site.
Children's/Small Adult
Cuff
Standard Adult Cuff
Oversize Adult Cuff
7" to 10.25"
10" to 13.75"
13" to 18.5"
When switching to a different cuff size for a patient, you
should change the cuff size setting in the software. Choose
CUFF SIZE from the MEASURE menu, and select the appropriate cuff. The Air Release index will automatically change to
the default setting for the new cuff size. Take test measurements to adjust the index, if necessary. Both settings will be
saved for the user.
52
Communication Error
A problem with the DynaPulse or your computer with regards to
communication is indicated. The DynaPulse unit could not be
started, or the program was not able to keep the communication
line open between the DynaPulse unit and your computer. If you
have made measurements before, and are now receiving this error,
install a fresh set of batteries and try again. If you are using the
DynaPulse for the first time, verify that the I/O PORT option is set
to the port that the DynaPulse is connected to.
User Table Is Full
You have reached the user limit of this version of the DynaPulse
200M. You will have to delete a user to add another.
53
Air Release Too Fast
If you receive this message, check for
cuff leaks or hose and connector leaks.
If no leaks are found, check the measurement time (the time scale is located
Messages
above the arterial waveform). The total
measurement time should be 25-35
seconds. If the measurement is outside
this range, the Air Release index needs
adjustment.
Adjust the Air Release index by
choosing AIR RELEASE from the
MEASURE menu. Decrease the value
of the setting to take a slower measurement, and increase the value to speed
up the measurement time.
Retake the measurement. The software
will prompt you to set the Air Release
(the knob on the unit) to the new value.
Adjust the index until you get a measurement time within 25-35 seconds.
The index setting will be saved for the
user.
To best determine user settings, the measurement time
requirement of 25-35 seconds is used. Once these
settings are determined, however, factors such as cuff
placement and user position may cause future measurements to be outside this window. However, further
adjustment of the Air Release is not required unless the
measurement time is outside the range of 15-45 seconds.
54
Messages
s
Measurement Error. Please Try Again.
The most common reasons for this
type of error are excessive cuff
movement and/or continuing to
pump the air pressure bulb after the
DynaPulse program asks you to
stop.
♦The DynaPulse program requires that you pump over the selected
"HIGH" range so the DynaPulse system can obtain useful data at the
start of the selected High range. For instance, if the High range is set
at 160 mmHg., the program will require the user to pump over 160
before told to stop pumping. By slowing down the pumping as you
reach the upper limit, you may reduce the possibility of adding
erroneous data by accidently pumping the bulb when the DynaPulse
unit is in the process of reading your blood pressure. The unit may
interpret the accidental pumping as a heartbeat pressure wave or other
anomaly, and may not be able to determine blood pressure correctly.
♦Excessive arm or cuff movement will also cause the unit to misinterpret your blood pressure. Best results will be obtained if the patient's
arm is resting on a table or similar surface, keeping the cuff and hose
free from obstructions that might cause the air pressure to change
unexpectedly.
55
High Pressure Range is Set Too Low.
The DynaPulse did not pump to a sufficiently high pressure to
measure the systolic pressure.
Messages
If the you are asked to increase the HIGH RANGE, choose HIGH
RANGE from the MEASURE menu and increase the range by one
step (for example 160 to 180).
Wait at least one minute, then retry the measurement. Waiting for a
minute or so will allow blood flow to recover in the arm before
the next measurement attempt.
In this example, the system
does not have enough high
range information to
correctly determine the
blood pressure. Increasing
the high range will center
the waveform, providing a
correct blood pressure
measurement.
56
Low Pressure Range is Set Too High.
The DynaPulse did not measure to a sufficiently low pressure to
measure the diastolic pressure.
If the you are asked to decrease the LOW RANGE, choose LOW
RANGE from the MEASURE menu and decrease the range by one
step (for example 50 to 40).
Wait at least one minute, then retry the measurement. Waiting for a
minute or so will allow blood flow to recover in the arm before the
next measurement attempt.
In this example, the
system does not have
enough low range
information to correctly
determine the blood
pressure. Decreasing
the low range will
center the waveform,
providing a correct
blood pressure
measurement.
57
DynaPulse Accuracy
All DynaPulse systems are clinical-grade. The DynaPulse is FDAregistered, and meets or exceeds Association for the Advancement
of Medical Instrumentation (AAMI) standards for non-invasive
blood pressure monitors. However, like any other device, proper
use of the DynaPulse is essential for accurate measurements.
58
General Tips
The following suggestions will increase the accuracy of blood
pressure measurements in general. They do not apply exclusively
to the DynaPulse.
•Allow 1-3 minute intervals between measurements
• The user should relax and remain motionless during each blood
pressure measurement.
• The cuff must be the right size, and must be applied correctly.
• Blood pressure may be higher due to a number of factors. In
general, any circumstance leading to an increase in heart rate tends
to cause blood pressure to rise.
Please refer to Useful Tips... (in the Introduction) for more details.
59
Specifications
DYNAPULSE 200M MANUAL PUMP SYSTEM
Measurement accuracy: ± 2 mmHg. or ± 2% whichever is greater.
Measurement Range: Blood pressure- 20 to 300 mmHg. Pulse- 30
to 200 bpm.
Deflation method: Air release valve
Inflation method: Manual pump, using rubber bulb
Power Consumption: 60mW when measuring
Operating temperature: 0°C to 45°C (32°F to 113°F)
Power Supply: Four (4) 1.5 VDC AAA batteries
Physical Dimensions: 6.1''(W) x 4.0''(D) x 1.7''(H)
Weight: 8.2 ounces, without batteries
60
2100 Hawley Drive
Vista, California 92084
telephone 760 .842 .8278 . fax 760.758 .9425
www.dynapulse.com