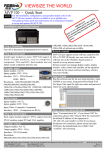
Download Input formats CVBS: PAL, NTSC, SECAM with stereo audio input
Transcript
Input formats
CVBS: PAL, NTSC, SECAM with stereo audio input
YPbPr:1080p@50/60Hz, 1080i@50/60Hz, 720p@50/60Hz, 576i/p,
480i/p with stereo audio input
VGA:640x480@60Hz, 800x600@60Hz, 1024x768@60Hz,
1280x1024@60Hz, 1280x720@60Hz, 1360x768@60Hz,
1440x900@60Hz, 1680x1050@60Hz, 1920x1080@60Hz with stereo
audio input
HDMI: 1080p@50/60Hz, 1080i@50/60Hz, 720p@50/60Hz, 576i/p,
480i/p, 640x480@60Hz, 800x600@60Hz, 1024x768@60Hz,
1280x1024@60Hz, 1280x720@60Hz, 1360x768@60Hz,
1440x900@60Hz, 1680x1050@60Hz, 1920x1080@60Hz
USB: MPEG, H.264, RM/RMVB movie decode, JPEG, BMP, PNG
Picture decode and MPEG1/2, MP3 audio decode
Setting
Remote controller
Power: Enter standby mode or re-enter normal mode
Source: Pop up source menu, press Up/Down button to select and press
OK button to enter
USB: Enter USB source directly
Picture: Soft, Standard, Bright and Personal picture mode selection
Ratio: Adjust display ratio, -5% to +5% range can be set
Navigation buttons: Left, Right, Up and Down to navigate menu items or
USB media files, press OK to enter
OK: Confirm and enter selection
Menu: Pop up main menu, press Menu button again to return
Exit: Close Menu or exit USB playback mode
Vol-: Decrease volume
Vol+: Increase volume
Output: Set 720p or 1080p output format
Source menu
1. Press Source button to pop up source menu
2. Press Up/Down button to select source item
3. Then press OK button to enter
Main menu
General control
1. Press Menu button to pop up main menu
2. Press Up/Down button to select Picture,
1
Geometry or Setting menu
3. Then press Right button to enter
Control for Picture menu
1. Press Left/Right button to select Soft, Standard, Bright or Personal
picture mode
2. Note that only Personal picture mode settings can be adjusted, others
are pre-set modes
3. Press Up/Down button to select menu item
4. Press OK button to enter
5. Then press Left/Right button to adjust
6. Press Menu button to return, or press Exit button to close menu
2
Control for Geometry menu
1. Press Left/Right button to do Auto adjust
2. Note that Auto adjust will be done automatically when VGA source
timing changed
3. Press Up/Down button to select menu item
4. Press Left/Right button to adjust
5. Press Menu button to return, or press Exit button to close menu
3
Control for setting menu
1. Press Left/Right button to set Auto Detect function On or Off
2. Note that when Auto Detect is set On, the converter will automatically
switch to the source which is connected with signal lately, except for USB
source.
USB menu
General control
1. Press USB button directly or select
USB from source menu
to enter USB device playback mode
2. Press Menu button to pop up
media type selection menu
4
3. Press Up/Down button to set which type of media to play
4. Press OK button to confirm
5. Press Left/Right to select USB device (disk alias)
6. Press OK button to browse media file
7. Press Left/Right/Up/Down button to select media file
8. Press OK button to play
Movie playback control
Play
Repeat
Pause
Repeat A<->B
Media file
Fast Backward
information
Fast Forward
Slow Forward
Previous
Ratio
Next
Brightness
Stop
Contrast
5
Picture playback control
Slide show
Zoom in
Pause
Zoom out
Previous
Move
Next
Repeat
Stop
Brightness
Rotate clockwise
Contrast
Capture and save
Rotate anti-clockwise
as logo
Background music
6
Audio playback control
Play
Next
Pause
Stop
Repeat
Fast Backward
Mute
Fast Forward
Previous
Media file information
PACKAGE CONTENTS
Before attempting to use this unit, please check the packaging and make
sure the following items are contained in the shipping carton:
1) Main unit (ALL TO HDMI CONVERTER BOX)
2) User Manual.
3) Remote control
7


