1
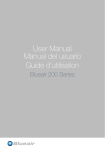
CLEONE
Water purifier
Complete User Manual
Document No 822901704 Revision BB1505
© Bluewater 2015-01
Contents
INTRODUCTION ...................................................................................................................................................03
About this manual ..............................................................................................................................................................03
Limited warranty ..................................................................................................................................................................03
Disposal .....................................................................................................................................................................................03
Safety instructions .............................................................................................................................................................03
Safety information ............................................................................................................................................................. 04
PRODUCT OVERVIEW .................................................................................................................................... 05
Cleone outside ..................................................................................................................................................................... 05
Cleone inside ......................................................................................................................................................................... 06
SYSTEM OVERVIEW.........................................................................................................................................07
Clean water tank ..................................................................................................................................................................07
Clean water faucet ............................................................................................................................................................ 08
Water filtration system .................................................................................................................................................... 08
Leak protection system.................................................................................................................................................. 08
INSTALLATION .................................................................................................................................................... 09
Before installation .............................................................................................................................................................. 09
Install clean water faucet .............................................................................................................................................. 09
Install feed water connection .......................................................................................................................................10
Install drain water connection ........................................................................................................................................11
Install clean water tank .......................................................................................................................................................11
Connect tubing ...................................................................................................................................................................... 12
Install power adapter ......................................................................................................................................................... 14
After installation .................................................................................................................................................................... 15
MAINTENANCE.....................................................................................................................................................18
Remove and install side covers...................................................................................................................................18
Each 6 months.......................................................................................................................................................................19
Each year..................................................................................................................................................................................25
Each 3-5 years ......................................................................................................................................................................28
TECHNICAL INFORMATION ..........................................................................................................................29
TROUBLESHOOTING .......................................................................................................................................30
Complete User manual
02
INTRODUCTION
About this manual
This manual contains complete user instructions for the Cleone. It gives you the necessary instructions
to safely install, operate, do maintenance and do troubleshooting on the device.
Original language
The original language of this instruction is English, all other languages are translations of the original
instruction.
Printing options
This manual is made to be printed as a double sided A4 or A5 booklet. The illustrations have a colour
code, print the manual in colour to prevent mistakes.
Limited warranty
Refer to www.bluewater.se for more information on Limited warranty.
Disposal
At the end of the water purifier’s life, disconnect the plug from the electrical supply and cut the cable
at the point where it enters the appliance. Make sure that children do not play with the left-over cable.
Contact your local authority for information about where the water purifier can be left, or contact your
dealer.
Appliances bearing this symbol must be deposited at the designated local reception point
for the disposal of electrical and electronic equipment. This product may not be disposed
of using the normal household refuse collection processes.
Safety instructions
Before you install or operate the device, you must read the safety information. Obey the instructions
in this manual to prevent injuries or damage to the equipment. This manual contains CAUTIONS and
NOTICES that are applicable for the safe operation of the device.
A CAUTION identifies conditions that can cause damage to the
equipment. Obey the instructions and do not continue until all conditions
are accepted and engaged.
A Note identifies important information for a trouble free and optimal use of
Cleone.
03
© Bluewater January 2015
Safety information
Install Cleone in accordance with local regulations. If you are not sure,
contact a Bluewater dealer for aid. Bluewater has no responsibility for
installation of Cleone.
Discard 4 tanks of water when Cleone is installed or when a filter is
replaced. This water is not safe to use.
This appliance can be used by children who are more than 8 years old.
It can also be used by persons with reduced physical, sensory or mental
capabilities or lack of experience and knowledge, if they have been given
supervision or instruction about the use of the appliance in a safe way
and understand the hazards involved.
Do not disconnect the external water tubes, and do not do work on
them. Speak to your Bluewater dealer for aid if you must disconnect
water tubes. In an emergency, follow the instructions in the Complete
User manual.
Do not repair or change the internal components of Cleone. This can
make Cleone operate incorrectly, or make it dangerous to use.
Use only the original Bluewater power adapter as electrical power source
for your Cleone. To use a different power adapter can make Cleone
dangerous to use. It can also cause damage to internal parts of the
Cleone. Do not use the cord if there are visible signs of damage on it. If
the supply cord is damaged, replace it in order to prevent danger.
Only approved Bluewater staff can do servicing, maintenance and
repairs on Cleone. Only use original replacement cartridges and parts
from Bluewater.
Do not put Cleone in water. Clean the surface with a moist cloth and a
weak soap solution. Do not use chemicals to clean the surface of Cleone.
Alcohol, petrol, organic and inorganic acids, strong basic chemicals (such
as concentrated dish washing detergent) will cause damage to the
surface of Cleone.
Do not put or keep objects on top of Cleone.
Do not use Cleone on feed water that is microbiologically dangerous, or
where the microbiological quality is not known.
Complete User manual
04
PRODUCT OVERVIEW
Cleone outside
1
Figure 1.
2 3 4 5 6 7
1
8
Cleone outside
Pos
Description
Pos
Description
1
Side cover
5
Clean water tank connector - YELLOW
2
Power switch
6
Drain water connector - RED
3
Electrical connection
7
Feed water connector - ORANGE
4
Clean water faucet connector - BLUE
8
System operation indicator
Power switch
1
0
Figure 2.
Power switch
Position
Description
1
Cleone is started. Water can be cleaned.
0
Cleone is stopped. No water is cleaned. Water from the clean water tank can be used until
the tank is empty.
05
© Bluewater January 2015
System operation indicator
1
Figure 3.
2
3
System operation indicator
Pos
Description
1
On – Cleone operates correctly.
2
Off – Cleone is shut off. If power switch is in position “1” See “Troubleshooting” on page 10.
3
Flashes – There is a problem with Cleone. Contact your Bluewater dealer.
Cleone inside
7
6
Figure 4.
5
4
3
2
1
Cleone inside
Pos
Description
Pos
Description
1
Coarse sediment prefilter (CL-20)
5
Activated carbon postfilter
(CL-Inline-C)
UV lamp
2
Fine sediment prefilter (CL-5)
3
Activated carbon prefilter (CL-C)
4
Reverse osmosis membrane
Complete User manual
6
7
06
UV lamp
Integrated mineral filter
Leak protection system switch
(Classic, MIN, UV)
(MIN-UV)
(UV)
(MIN, MIN-UV)
SYSTEM OVERVIEW
6
5
4
3
2
1
Figure 5.
System overview
Pos
Description
Pos
Description
1
Cleone water purifier
4
Feed water connection
2
Power adapter
5
Drain water connection
3
Clean water tank
6
Clean water faucet
Clean water tank
0
Figure 6.
1
Clean water tank valve
Pos
Description
0
Valve closed – no water can flow
1
Valve open – water can flow to and from the tank
07
© Bluewater January 2015
Clean water faucet
0
1
Figure 7.
Clean water faucet
Pos
Description
0
Clean water faucet in closed position
1
Clean water faucet in open position
Water filtration system
Cleone cleans water in three steps: prefiltration, membrane filtration and postfiltration. Clean water
from Cleone is collected in the clean water tank. When the tank is full, Cleone is put in standby mode.
When the clean water tank level is low, Cleone opens the feed water supply and starts to clean water.
Water connections
There are four water connectors on the connection side of Cleone. The collet rings and tubing have a
color code.
Color
Connection
Description
ORANGE
Feed water
The feed water connection supplies feed water to Cleone.
RED
Drain water
Drain water from Cleone to the drain pipe contains flushed and
rejected contamination.
YELLOW
Clean water tank
Clean water is collected in the clean water tank before it is supplied
to the clean water faucet.
BLUE
Clean water faucet
Clean water from Cleone to the clean water faucet.
Intelligent membrane flush
The reverse osmosis filter is flushed with water during filtration and in standby mode. The membrane is
also flushed before the cleaning cycle starts. This makes sure that the cleaning process always starts
with fresh feed water.
Leak protection system
A sensor at the bottom of Cleone senses water leaks. If there is a leak, the feed water supply is
stopped. Cleone cannot be started again until the leak has been repaired.
Complete User manual
08
INSTALLATION
Install Cleone in accordance with local regulations. If you are not sure,
contact a Bluewater dealer for aid. Bluewater has no responsibility for
installation of Cleone.
If the Cleone is connected to a portable water system, the system shall
be protected against backflow.
Before installation
Remove the cable ties under Cleone before it is installed. They are used for
load securing of the pump.
Figure 8.
Remove cable ties
Install clean water faucet
The measurement A is found in the specification that comes with the clean
water faucet.
1
4
5
1
2
A
3
4
5
6
A
7
Figure 9.
2
Ø 3-5 mm
(1/8”)
3
Ø 13 mm
(1/2”)
6
Install clean water faucet
09
© Bluewater January 2015
Install feed water connection
1
2
I
II
III
III
I
3
II
3
4
3
4
Ø
6-8mm
(1/4”)
5
4
5
5
6
6
7
Figure 10.
6
8
Install feed water connections
Complete User manual
10
Ø
10-13mm
(1/2”)
Install drain water connection
1
2
4
5
3
6
Ø 8 mm
(5/16”)
7
5-6
Figure 11.
Install drain water connection
Install clean water tank
1
2
3
Figure 12.
Install clean water tank
Action
Step
1
Install clean water tank valve (1).
2
Put the tank (2) under the kitchen sink. (Use the stand (3) if it is included.)
11
© Bluewater January 2015
Connect tubing
1
Figure 13.
2
Connect tubing, ORANGE (1) and RED (2)
3
Figure 14.
4
Connect tubing, YELLOW (3) and BLUE (4)
Complete User manual
12
Secure water connectors with safety locking clips
1
×8
2
Figure 15.
3
Safety locking clips
Open feed water valve
I
Figure 16.
II
III
Open feed water valve
Action
Step
III
Turn the valve handle counter clockwise until it is fully open.
13
© Bluewater January 2015
Install power adapter
See “Technical information” on page 30 for allowed electric current and
frequency.
Use only the original Bluewater power adapter as electrical power source
for your Cleone. To use a different power adapter can make Cleone
dangerous to use. It can also cause damage to internal parts of the
Cleone.
Do not use the cord if there are visible signs of damage on it. If the
supply cord is damaged, replace it in order to prevent danger.
US installation:
•
Install the power adapter in a cabinet or on a wall, adjacent to the
under counter space in which the water purifier will be installed.
•
There must be an opening in the partition between the
compartments that is large enough for the attachment plug to go
through. The longest dimension of the opening must not be longer
than 1 1/2 in (38 mm).
•
The edges of the opening must be smooth and rounded if the
partition is wood, or covered with an edge protector supplied for this
function by the manufacturer if the partition is metal.
•
Be careful when the appliance is installed or removed, to decrease
the risk of damage to the supply cord.
Figure 17.
Install power adapter
Complete User manual
14
After installation
When Cleone is installed, and after each maintenance, the following
procedures must be perfomed before operation.
Flush Cleone
1
2
3
1
1
20 s
0
6
5
5-6
4
7
8
0
9
1
0
Figure 18.
Flush Cleone
Condition Cleone
Do not use the water from the conditioning procedure! The reverse
osmosis membrane is factory disinfected with a biocidic preservative
solution.
1
2
3
3-4
100%
0%
~2 h
Figure 19.
Condition Cleone
15
© Bluewater January 2015
Do a check for leaks
The tubing connections must be tight!
1
2
3
×8
Figure 20. Check for leaks
Repair leaks
1
2
3
4
5
1
0
1
2
6
7
8
9
10
11
3
1
4
5
6
7
min
10mm
0
Figure 21.
Repair leaks
Complete User manual
16
Do a membrane flushing functionality check
1
1
2
3
5s
0
1
0
Figure 22. Membrane functionality check
Result:
The water system opens the flush solenoid valve, and flushes water during 20 seconds.
Cleone then starts to clean water again.
Do an automatic water shut off check
1
3
2
4
1
0
Figure 23. Automatic water shut off check
Result:
After 1 minute or less, Cleone closes the feed water valve. No water flows to the drain.
Do a leak protection system check
1
2
3
4
4-6
1
5s
0
Figure 24. Leak protection system check
Result:
The feed water valve closes immediately. No water flows to the drain. If Cleone has a
booster pump, it stops. The system operation indicator on the front of Cleone goes off.
When the microswitch is released, Cleone cleans water again.
17
© Bluewater January 2015
MAINTENANCE
After each maintenance, all procedures in chapter “After installation” on
page 15, must be perfomed before operation.
Regular maintenance is important for correct function and long
term operation. Only educated and approved personnel can do the
maintenance.
The water quality controls the maintenance frequency. If the feed water
contains high levels of suspended solids, more frequent maintenance can
be necessary.
Remove and install side covers
2
3
1
Figure 25. Remove side cover
1
1
2
2
3
Figure 26. Install side cover
Complete User manual
18
Each 6 months
Replace prefilters and integrated mineral filter
Always flush the activated carbon prefilter after the filter is replaced.
See “Flush Cleone” on page 15.
The instruction applies to the coarse sediment prefilter, the fine sediment
prefilter and the activated carbon prefilter.
See “Product overview” on page 05 for filter positions and models.
1
2
3
4
1
0
8
7
6
10
5
9
15
11
14
1
13
Figure 27.
19
0
16
12
17
18
30 s
Replace prefilters
19
© Bluewater January 2015
Use disinfectant to clean the system
Disinfectant is harmful! Always flush and condition Cleone after
disinfectant is used. See “Flush Cleone” on page 15 and “Condition
Cleone” on page 15.
1
2
3
4
5
6
1
0
I
7
II
III
9
8
10
×3
I
Complete User manual
II
III
20
11
12
13
1
1
10 s
0
I
2-3
0
II
14
III
15
16
17
18
×3
19
20
21
22
0%
×3
I
II
III
21
© Bluewater January 2015
23
24
25
26
27
28
2-3
1
0
I
29
1
30 s
1-2 min
0
II
III
31
30
32
×2
×3
I
Figure 28.
II
III
Use disinfectant to clean the system
Complete User manual
22
Do a feed water pressure check
1
2
3
4
1
0
I
II
5
III
6
7
×3
I
II
III
23
© Bluewater January 2015
8
9
10
11
12
1
13
1
30 s
0
0
I
II
14
III
15
16
17
18
1
×3
0
I
II
III
Figure 29. Feed water pressure check
Complete User manual
24
Each year
Replace activated carbon postfilter
Always flush the activated carbon postfilter after the filter is replaced.
See “Flush Cleone” on page 15.
See “Product overview” on page 05 for filter position.
1
2
3
4
1
0
5
6
7
8
×3
9
10
11
×3
1
13
15
0
12
14
30 s
Figure 30. Replace activated carbon postfilter
25
© Bluewater January 2015
Replace UV lamp
1
2
3
4
1
0
5
7
8
6
×2
9
10
×2
1
0
11
12
13
30 min
Figure 31.
Replace UV lamp
Complete User manual
26
14
15
Measure air cushion pressure in clean water tank
Make sure that the pressure in the air cushion in the clean water tank
agrees with the recommended levels. It is important for the clean water
flow.
1
2
3
0%
0%
Figure 32. Measure air cushion pressure in clean water tank
Correct pressure levels:
•
for tanks put below the kitchen sink: 0.48 bar (7 psi)
•
for tanks put lower than the kitchen floor: 0.48 bar (7 psi) + 0.1 bar (1.4 psi) for each metre below the kitchen floor.
Example:
Cleone is put below the kitchen sink, but the clean water tank is put in the basement
3.5 metres below the kitchen floor. The correct air cushion pressure is: 0.48 bar + 3.5 m ×
0.1 bar = approximately 0.8 bar (12 psi).
27
© Bluewater January 2015
Each 3-5 years
Replace reverse osmosis membrane
If the rejection rate of Cleone is less than 90%, and the prefilter cartride
and the postfilter cartridge are replaced, replace the reverse osmosis
membrane.
1
2
3
4
1
0
5
6
7
×3
8
×3
9
10
11
1
0
30 s
Figure 33. Replace reverse osmosis membrane
Complete User manual
28
12
13
TECHNICAL INFORMATION
Parameter/Model
Cleone Classic
Cleone MIN
Cleone UV
Cleone MIN-UV
215×380×416
(8.5×15×16.4)
215×380×416
(8.5×15×16.4)
215×380×416
(8.5×15×16.4)
215×380×416
(8.5×15×16.4)
10.4 (22.9)
11 (24.2)
11.4 (25.1)
12 (26.5)
95-240V 50-60Hz
95-240V 50-60Hz
95-240V 50-60Hz
95-240V 50-60Hz
Recovery rating
25%
25%
25%
25%
Efficency rating
27%
27%
27%
27%
Feed water temperature min. max. [° C (° F)]
2-38 (-)
2-38 (-)
2-38 (-)
2-38 (-)
Feed water pressure min. - max.
[bar (psi)]
0.8-7 (-)
0.8-7 (-)
0.8-7 (-)
0.8-7 (-)
Power consumption [W]
25
25
31
31
Purified water flow rate
[l/day (GPD)]
160 (43)
160 (43)
160 (43)
160 (43)
Average impurities separation
rate
93-99
93-99
93-99
93-99
Max. feed water TDS - [mg/l(ppm)]
2000
2000
2000
2000
9
9
Size W×D×H [mm (inch)]
Weight [kg (lbs)]
Power supply
UV lamp (6W)
9
Integrated mineral filter
9
Three stage prefiltration
9
9
9
9
Activated carbon prefilter
9
9
9
9
43 GPD Membrane
9
9
9
9
75 GPD Membrane
option
option
option
option
Water quality sensor
option
option
option
option
Water tank (8L, 12L, 17 L, 40 L)
option
option
option
option
Prolonged contact polishing filter
9
9
9
option
Integrated booster pump
9
9
9
9
option
option
option
option
Integrated membrane flushing
9
9
9
9
Leak protection system
9
9
9
9
Positive automatic water shut-off
9
9
9
9
Installation kit
9
9
9
9
High flow booster pump kit
29
© Bluewater January 2015
TROUBLESHOOTING
Symptom
Cause
Solution
The drain water flow is too low during
operation.
The prefilter cartridges are clogged.
Replace the prefilter cartridges.
There is a blockage in the drain water
line.
Remove the flush solenoid valve
and the flow restrictor. Make sure
that no flow blockages can be seen.
Use compressed air to blow the flow
restrictor in the opposite direction to
the usual flow.
The automatic water shut-off does
not function reliably.
The feed water pressure is too low.
Increase the pressure. The feed
water pressure during operation
must be equal to or more than the
minimum feed water pressure (see
“Technical information” on page
30).
The tank water pressure has been
preset to a value that is too high.
Change the preset tank water
pressure to a lower value.
The automatic water shut-off has
closed the water feed valve, but
water continues to flow to the drain.
The check valve on the filtered
water port on the reverse osmosis
membrane does not function.
Make sure that the check valve
functions correctly. Replace it if
necessary.
The feed water shut-off valve does
not shut off feed water fully. Some
water flows through the valve when
it is closed.
There is too much sediment or iron in
the the feed water, or it is too hard.
This has caused a blockage.
Disassemble the feed water valve.
Clean it carefully with citric acid and
KF_IRON. If there is a large blockage,
it can be necessary to replace the
valve. Only approved personnel can
replace or repair the valve. Contact
your Bluewater dealer for aid.
No water comes from the clean water
faucet. The system operation light
is off.
Cleone is not connected to power.
Connect Cleone to an electrical outlet
and to the power adapter. Make
sure that the 24V DC cable from the
power adapter is connected to the
electical power socket on Cleone.
Cleone is not started.
Move the power switch to position 1.
An internal leak has been sensed.
Cleone has been automatically
stopped.
Contact your Bluewater dealer to
repair the leak and reset the system.
Cleone has been installed for the
first time and the system is not filled
with water.
Wait for the system to be filled with
water.
The water tubes are not connected
or the connection is made incorrectly.
Make sure that the connections are
made correctly.
The feed water pressure is too low
and the pump protection system has
stopped the feed water supply.
Cleone will start to operate as usual
when the feed water pressure comes
back.
Regular maintenance has not been
done. Prefilters are clogged.
Contact your Bluewater dealer to do
maintenance on Cleone.
The clean water tank is empty
because of high water consumption.
Upgrade to a larger tank or to a high
capacity membrane.
The air pressure in the clean water
tank is low.
Contact your Bluewater dealer to
restore the correct air pressure in the
clean water tank.
The feed water pressure is too low.
Upgrade to a Cleone model with a
booster pump.
It is necessary to do maintenance on
the booster pump.
Contact your Bluewater dealer.
No water comes from the clean water
faucet. The system operation light
is on.
The flow rate from the clean water
faucet is low.
Too much continuous noise during
water purification.
Complete User manual
30
Bluewater Group
Danderydsgatan 11, SE-114 26 Stockholm
Sweden
Tel: +46-8-679 45 00, Fax: +46-8-679 45 45
[email protected] - www.bluewater.se
For a complete list of sales offices and dealers, please visit www.bluewater.se