1
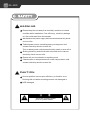
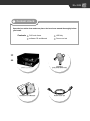
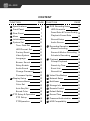
16CH & 9CH Embedded Digital Surveillance System 2008 NOV. Ver 3.07.2 VR 16CH & 9CH DVR ! WARNING Please keep this unit away from humidity, sunshine or hazard condition while installation. Poor efficiency, electricity leakage or a fire could result from the mistake. Wet hand on the power supply devices causes electricity shock or even a fire. Twisted power cord or something heavy on the power cord causes electricity shock or even a fire. Torn or naked power cord causes electricity shock or even a fire. Sharing electricity socket with other electrical device causes electricity shock or even a fire. Please call your local dealer for repairing work. Chassis open or unexpected touch on the components in side causes electricity shock or even a fire. ! CAUTION Uneven platform causes poor efficiency or function error. Rocking this unit while recording causes unit damaged or HDD damaged. ! 注 意 check the incoming power prior to system reboot 16CH & 9CH DVR ! Content check Open the box at the clean and even place. And read user manual thoroughly before you install. Contents DVR main frame HDD Key software CD and Manual Power cord set 9ch 16ch DVR mainframe Ma nu Hdd Key (only with HDD rack) al Software CD / Manual Power cord set VR VR 16CH & 9CH DVR CONTENT FUNCTION 1 2 3 4 5 6 PAGE FUNCTION PAGE Specifications 1 9 DVR Recording Setup 15 Front Panel 3 HDD Overwrite 15 Rear Panel 7 Fame Rate & Picture Quality 15 Menu 9 Playback Frame Rate 15 Initialization 10 Record Setup 15 System Set 11 Audio Source 15 Time/Date Set 11 10 Recording Operation 16 HDD Format Set 11 Manual recording Factory Reset 11 Video System 12 Sensor & Motion Recording 16 Schedule Recording 17 Language 12 Buzzer Sound 12 Prompt Playback 18 Relay Enable 12 Serach by Time 18 Audio Sound 12 Event List 18 Change Password 12 Record List 18 Firmware Update 12 7 Display Setup 13 Camera Name 13 Color Set 13 Auto Seq Set 13 Bound Color 13 8 PTZ Setup & Operation 14 PTZ Setup 14 PTZOperation 14 11 Playback 12 13 14 15 16 17 18 19 20 16 18 Video Files Backup 19 Network Setup 20 NetViewer 21 Storage Info 30 Remote Control 31 Default Setting 32 Record Time 33 Password Authorization 33 HDD Compatibility 34 16CH & 9CH DVR 1 16CH Specifications Video Format Video Input Audio Input Video Output Audio Output Display Display Resolution Record Resolution Compression Rate Record Speed Compression Algorithm OS Triplex Recording Mode Schedule Recording Status Indicator Event Mode Alarm Connect Playback Network Protocol Communication Protocol HDD Type HDD Management P/T/Z Control Archiving Firmware Update Tri-Lingual Control Mode Network Control Network Function Power Supply NTSC PAL 16 Input / 1V p-p / 75 Ohm / BNC 1Input / RCA 16 Loop / BNC,2 Composite / BNC 1 Output / RCA Display Mode Full Screen,4/8/9/13/16 Division,Sequential Switch 720 x 480 720 x 576 720 x 240 720 x 288 Normal: 13~17KB Normal: 15~19KB Noise: 20~25KB Noise: 22~27KB Max. 120 fps Max. 100 fps Modified M-JPEG Embedded Linux Recording / Playback / Network Time / Manual / Schedule / Event Daily / Four Section Power/Record/Playback/Network/USB/Zoom/Freeze/Lock Sensor & Motion Detection Recording Duration: 10 ~ 99 Second 16 Sensor / Relay ( N.O. / N.C.) Normal: x1 FF: x2/ x4 / x8 / x16 FR: x2 / x4 / x8 / x16 Frame by Frame: forward / Reverse Time Search / Event Search / Manual Search TCP/IP & DHCP RS-485 EIDE / ATA-66 / 3.5 inch / 7200rpm Format Automatically RS-485 Interface USB 2.0( USB1.1 included),CD-R/W ( Option) Via USB2.0 Memory Stick English / Chinese / Others(Customized) Front Panel / Remote Control / Keyboard(Option) NetViewer (PC Software) Live Play / Event List Play /USB Memory Stick Play / CD Play / PTZ Control AC I/P VOL: AC115V/AC230V~ CUR: 4/2A MAX. FREQ: 50~60Hz Dimension 43 ( W)x37 ( D)x9.6 ( H) cm (Standard 2U Chassis) Weight Approximately 8 kg(HDD Exclusive) Ambient Temperature 5℃ ~ 40℃ -1- VR VR 16CH & 9CH DVR 9CH Specifications Video Format Video Input Audio Input Video Output Audio Output Display Display Resolution Record Resolution Compression Rate Record Speed Compression Algorithm OS Triplex Recording Mode Schedule Recording Status Indicator Event Mode Alarm Connect Playback Network Protocol Communication Protocol HDD Type HDD Management P/T/Z Control Archiving Firmware Update Tri-Lingual Control Mode Network Control Network Function Power Supply Dimension Weight Ambient Temperature NTSC PAL 9 Input / 1V p-p / 75 Ohm / BNC 1Input / RCA 8 Loop / BNC,2 Composite / BNC 1 Output / RCA Display Mode Full Screen,4/9 Division,Sequential Switch 720 x 480 720 x 576 720 x 240 720 x 288 Normal: 13~17KB Normal: 15~19KB Noise: 20~25KB Noise: 22~27KB Max. 60 fps Max. 50 fps Modified M-JPEG Embedded Linux Recording / Playback / Network Time / Manual / Schedule / Event Daily / Four Section Power/Record/Playback/Network/USB/Zoom/Freeze/Lock Sensor & Motion Detection Recording Duration: 10 ~ 99 Second 9 Sensor / Relay ( N.O. / N.C.) Normal: x1 FF: x2/ x4 / x8 / x16 FR: x2 / x4 / x8 / x16 Frame by Frame: forward / Reverse Time Search / Event Search / Manual Search TCP/IP & DHCP RS-232,RS-485 EIDE / ATA-66 / 3.5 inch / 7200rpm Format Automatically RS-485 Interface USB 2.0( USB1.1 included),CD-R/W ( Option) Via USB2.0 Memory Stick English / Chinese / Others(Customized) Front Panel / Remote Control / Keyboard(Option) NetViewer (PC Software) Live Play / Event List Play /USB Memory Stick Play / CD Play / PTZ Control AC I/P VOL: AC115V/AC230V~ CUR: 4/2A MAX. FREQ: 50~60Hz 43 ( W)x37 ( D)x9.6 ( H) cm (Standard 2U Chassis) Approximately 8 kg(HDD Exclusive) 5℃ ~ 40℃ -2- 16CH & 9CH DVR 2 16CH Front Panel C B A USB POWER REC PLAY NETWORK USB ZOOM FREEZE LOCK B A LED Camera NO. POWER REC 1 2 3 4 4X4 5 6 7 8 3X3 9 10 11 12 2X2 13 14 15 16 AUTO Auto sequence MENU Mute PLAY NETWORK Display mode USB ZOOM FREEZE LOCK LOCK USB ZOOM Key Lock FREZ Zoom INFO System Info USB backup Image freeze C Jog / Shuttle ENTER Playback Direction Pause -3- Stop Rec VR VR 16CH & 9CH DVR 16CH Front Panel LED Indicator Camera NO Display Mode Power/Record/Playback/Network/USB/Zoom/Freeze/Lock Full screen given in condition of recording & playback Enables various display division. Double clicks for rest of the channels in the same display division. AUTO Single channel sequential switch Duration of a stay and the channel selected available ★Quadrant display (2×2) sequential switch available MENU The button to enter MENU “Save” & “Exit” in condition of setting an option INFO Access to system information(firmware version) FREZ Freezes the full screen picture In split mode hit the freeze button and select the single channel accordingly ZOOM 1.Hit this button to get a white block 2.Move the white block to the spot for zoom in 3.Hit this button again to zoom in the image USB Hit this button to start retrieving video streams Hit again to stop retrieving Turn to full screen for snapshot A hit for a still picture ★Attention:system error results from memory stick removed in the run of video retrieving LOCK Hit this button to invalid other buttons. Hit again to unlock password required accordingly. Jog/Shuttle Record Stop Pause FF & FR(outer),frame by frame(inner) Manual recording Stops recording and playback A pause in playback mode “Keypad lockup & monitor black-out” in recording mode Password required prior to unlock Play Direction Enter Starts playback procedure Moves the cruiser or changes the option Enter an option ★Read page 37 for 【Password Authorization】 -4- 16CH & 9CH DVR 9CH Front Panel C B A USB POWER REC PLAY NETWORK USB ZOOM FREEZE LOCK A LED B POWER Camera NO. PlayBack Mode 1 2 3 TIME SEARCH 4 5 6 EVENT SEARCH 7 8 9 REC SEARCH PTZ ZOOM IN ZOOM OUT REC PLAY NETWORK USB ZOOM 3X3 Display mode 2X2 AUTO Auto sequence FREEZE LOCK LOCK USB ZOOM Key Lock AUTO PAN FREZ Zoom INFO MUTE MENU Mute Menu/Exit System Info USB backup Image freeze PTZ Control C Jog / Shuttle ENTER Playback Direction Pause -5- Stop Rec VR VR 16CH & 9CH DVR 9CH Front Panel LED Indicator Power/Record/Playback/Network/USB/Zoom/Freeze/Lock Camera NO Full screen given in condition of recording & playback Display Mode Enables various display division. Double clicks for rest of the channels in the same display division. AUTO Single channel sequential switch Duration of a stay and the channel selected available ★Quadrant display (2×2) sequential switch available MENU The button to enter MENU “Save” & “Exit” in condition of setting an option INFO Access to system information(firmware version) FREZ Freezes the full screen picture In split mode hit the freeze button and select the single channel accordingly ZOOM 4.Hit this button to get a white block 5.Move the white block to the spot for zoom in Hit this button again to zoom in the image USB Hit this button to start retrieving video streams Hit again to stop retrieving Turn to full screen for snapshot A hit for a still picture ★Attention:system error results from memory stick removed in the run of video retrieving LOCK Hit this button to invalid other buttons. Hit again to unlock password required accordingly. Jog/Shuttle FF & FR(outer),frame by frame(inner) Record Manual recording Stop Stops recording and playback Pause A pause in playback mode “Keypad lockup & monitor black-out” in recording mode Password required prior to unlock Play Starts playback procedure Direction Moves the cruiser or changes the option Enter Enter an option Play Mode Time Search ---Play video files in time search mode Event Search --- Play video files from event list Rec Search --- play video files from manual recording list Mute Access to mute condition PTZ Control Hit PTZ to enter PTZ control mode Speed Dome & PTZ can be operated by navigator Zoom lens can be operated by the buttons zoon in & zoom out Auto Pan is the button to setup preset journey ★Read page 37 for 【Password Authorization】 -6- 16CH & 9CH DVR 3 16CH Rear Panel Camera loop output 1~16 POWER Monitor / VCR output LOOP OUT 9 10 11 1 2 3 12 13 14 15 16 4 5 6 7 8 VIDEO OUT VIDEO IN AUDIO XGA MONITOR IN 9 10 11 12 13 14 15 16 1 2 3 4 5 6 7 8 LAN VCR OUT RS-485 ALARM D+ D- G RS-485 Camera input 1~16 Power Input XGA RJ-45 Network connection Audio Input 110 Power switcher Speaker output 220 ALARM 1 Alarm sensor input / output (DB25) 25 1、 Sensor input of camera 1 2、 Sensor input of camera 2 3、 Sensor input of camera 3 4、 Sensor input of camera 4 5、 Sensor input of camera 5 6、 Sensor input of camera 6 7、 Sensor input of camera 7 8、 Sensor input of camera 8 9、 Sensor input of camera 9 10、Sensor input of camera 10 11、Sensor input of camera 11 12、Sensor input of camera 12 13、GND 14、Sensor input of camera 13 15、Sensor input of camera 14 16、Sensor input of camera 15 17、Sensor input of camera 16 18、NUL -7- 19、NUL 20、GND 21、Relay com output 22、Relay N.C output 23、Relay N.O output 24、GND 25、GND VR VR 16CH & 9CH DVR 9CH Rear Panel Camera loop output 1~8 POWER Monitor / VCR output RAID Interface VIDEO OUT AUDIO RS232 LOOP OUT VIDEO IN IN 1 2 3 4 5 6 7 8 1 2 3 4 5 6 7 8 LAN 9 OUT RS-485 ALARM D+ D- G RS-485 Camera input 1~9 Power Input RS-232 RJ-45 Network connection Audio Input 110 Power switcher Speaker output 220 ALARM 1 Alarm sensor input / output (DB25) 25 1、 Sensor input of camera 1 2、 Sensor input of camera 2 3、 Sensor input of camera 3 4、 Sensor input of camera 4 5、 Sensor input of camera 5 6、 Sensor input of camera 6 7、 Sensor input of camera 7 8、 Sensor input of camera 8 9、 Sensor input of camera 9 19、NUL 20、GND 21、Relay com output 22、Relay N.C output 23、Relay N.O output 24、GND 25、GND 10、N.C. 11、N.C. 12、N.C. 13、GND 14、N.C. 15、N.C. 16、N.C. 17、N.C. 18、NUL -8- 16CH & 9CH DVR 4 DVR MENU System Menu System Set(1) k Time/Date Set(1-1) 3 Date(1-1-1) g Time(1-1-2) g Format(1-1-3) g Display(1-1-4) g Local(1-1-5) g HDD Format Set (1-2) 3 Factory Reset(1-3) 3 Video System(1-4) 3 Language(1-5) 3 Buzzer Sound(1-6) 3 Relay Enable(1-7) 3 Audio Sound(1-8) 3 Change Password(1-9) 3 Admin Password Change(1-9-1) g User Password Change(1-9-2) g Firmware Update(1-10) 3 Update Method(1-10-1) g Update Start(1-10-2) g Display Set(2) k Camera Name(2-1) 3 Color Set(2-2) 3 CON(2-2-1) g BRI(2-2-2) g HUE(2-2-3) g SAT(2-2-4) g AutoSeq Set(2-3) 3 Bound Color(2-4) 3 Blank Color(2-5) 3 Quad Sequence(2-6) 3 Record Set(3) k Over Write(3-1) 3 REC Speed(3-2) 3 REC Quality(3-3) 3 PB Speed(3-4) 3 Record Ch Set(3-5) 3 Audio Select(3-6) 3 Network Set(4) k IP ADDR(4-1) 3 Sub Net(4-2) 3 Gateway(4-3) 3 IP Mode(4-4) 3 P11 Network Enable(4-5) 3 Video Port(4-6) 3 Command Port(4-7) 3 MAC ADDR(4-8) 3 Sensor Set(5) k Channel Select(5-1) 3 Alarm Enable(5-2) 3 Motion Enable(5-3) 3 Motion Level(5-4) 3 Motion Area Set(5-5) 3 Buzzer Time(5-6) 3 Sensor REC Time(5-7) 3 Alarm Screen(5-8) 3 P16 Schedule Set(6) k P17 Backup Set(7) k USB Backup(7-1) 3 Backup Mode(7-1-1) 3 USB Information(7-1-2) 3 Copy PC Application(7-2) 3 P13 CD_RW Backup(7-3) 3 Storage Info(8) k PTZ Set(9) k Channel Select(9-1) 3 Device ID(9-2) 3 Preset Adjust(9-3) 3 Preset Select(9-3-1) g Adjust Pos(9-3-2) g Save Preset(9-3-3) g Clear Preset(9-3-4) g P15 Clear All Presets(9-3-5) g Return Tour Time(9-3-6) g Fast Dome Type(9-4) 3 Protocol(9-5) 3 Baudrate(9-6) 3 Pan/Tilt Speed(9-7) 3 P20 -9- Playback Menu P19 P29 P14 P18 k Direct Play(10) P18 k Time Search(11) P18 k Select Event List(12) P18 k Select Record List(13) P18 VR VR 16CH & 9CH DVR 5 Initialization Power Supply £ Use the power cord provided by the DVR supplier in the package to connect the power supply (AC100V~AC230V) see Page.11(Page.12)。 Connect BNC of Cameras to BNC of DVR £ Coaxial cable cat6 or above in use DVR Network Cabling £ Please connect HUB or Router to the TCP/I P port with RJ-45 connector. This DVR is static IP & DHCP support details read Page 20. Alarm I/O £ Alarm I/O DB25(25PIN) details read Page 11(P.12)。 Alarm I/O details read Page16. Speed Dome Camera £ Pelco D, Pelco P & NIKAMI protocol available PTZ setup details read Page 14. Start up £ Push the switch on the rear panel upon DVR ready for start up. Hit MENU and input password to enter menu. ★Read page 37 for 【Password Authorization】 -10- 16CH & 9CH DVR 6 System Set Hit MENU to enter menu. Select【System Set(1)】 for system setting. Look up 4.【 Menu 】for the menu directory. Time/Date Setup £ 1.Enter 【Time/Date Set(1-1)】.Hit buttons to select the option. Hit buttons to change setting. Setting change invalid in recording status. 2.Different format as follows【Format(1-1-3)】:yyyy/mm/dd、mm/dd/yyyy、dd/mm/yyyy. 3.Time on screen display when 【Display(1-1-4)】ON,not on screen display when OFF. 4.【Local(1-1-5)】is the location of Time/Date display ”Top” & “Bottom” available. (1-1) TIME/DATE SETUP DATE (1-1-3) (1-1-4) (1-1-5) 2006/06/21 TIME 04:44:37 FORMAT YYYY/MM/DD DISPLAY ON LOCAL TOP ENTER SET EXIT £ HDD Format Set Select【HDD Format Set(1-2)】hit shows up a question. Select “yes” to clear all data, otherwise select “No”. ※It is impossible to undo HDD format. SYSTEM SETUP (1-2) TIME/DATE SET HDD FORMAT SET FACTORY RESET [ATTENTION ] WILL BE LOST ALL HDD DATA ARE YOU SURE ? YES NO ENTER SET EXIT £ Factory Reset Select【 Factory Reset(1-3)】hit to get back default setting if “Yes” selected. Select “No” to remain the working setting. ※Details please read “Default Setting”. SYSTEM SETUP (1-3) TIME/DATE SET HDD FORMAT SET FACTORY RESET [ATTENTION ] DO YOU WANT TO INITIALIZE ? YES NO ENTER SET -11- EXIT VR VR 16CH & 9CH DVR Video System £ Select【Video System (1-4)】hit Language £ Select【Language(1-5)】hit to change NTSC/PAL. to change language on screen display. Buzzer £ Select 【Buzzer Sound(1-6)】hit to enable/disable the buzzer. Relay Enable £ Select【Relay Enable(1-7)】hit to enable/disable the relay device. Please read page 18 for DB5 Cabling study. ※Enter【Sensor Setup(5-1-1)】to setup the sensor. Audio Sound £ Select【Audio Sound(1-8)】hit to enable/disable audio. ※Only single channel audio output/input available. Change Password £ Enter【Change Password(1-9)】 two options【Admin Password Change(1-9-1)】& 【User Password Change(1-9-2)】available.Select either of them and input password, new password and new password again to confirm the change. ※Details read【Password Authorization】 Admin Password Change (1-9-1) (1-9) (1-9-1) (1-9-2) CHANGE PASSWORD ADMIN PASSWORD CHANGE USER PASSWORD CHANGE ENTER SET EXIT £ Firmware Update Put the update firmware in a memory stick directory X:\Firmware. 'X' is the USB disk name given by Windows OS. Put the memory stick in the USB port and accordingly enter【Firmware Update(1-10)】 hit【Update Start(1-10-2)】. Select “Yes” to start update. “No” to stop proceeding. ※USB port is the only way for firmware update. Please do not remove memory stick while firmware updated. DVR must reboot after firmware update. To prevent from system error, run factory reset before use. (1-10) (1-10-1) (1-10-2) FIRMWARE UPDATE UPDATE METHOD UPDATE START ENTER SET -12- USB EXIT 16CH & 9CH DVR 7 Display Setup Hit to enter Menu. Select 【Display Set(2)】to setup display of each channel. Look up 4.【 Menu 】for the menu directory. £ Camera Name Enter【Camera Name (2-1)】to setup the name on screen display. Hit on the channel to setup for. There is a library of alphabets and symbols at the bottom for camera name setup maximum 6 bits. £ Color Set Enter【Color Set(2-2)】to adjust contrast, brightness, hue and saturation. Hit to change option. Hit to increase/decrease the volume. Picture changes upon setting change. £ AutoSeq Set 【AutoSeq Set(2-3)】&【Quad Sequence(2-6)】both available. Details read 2. 【Front Panel】(P.6)。 1. Enter【AuoSeq Set(2-3)】to setup single channel auto sequence. Maximum duration up to 99 seconds. By pass in condition of 0 second. 02 second is the default setting. 2. Select【Quad Sequence(2-5)】hit to select duration of the quad sequence maximum 99 seconds minimum 01 second default 02 seconds. £ Bound Color & Blank Color Select【Bound Color(2-4)】or【Blank Color(2-5)】hit to setup color of margin lines of blue/white or color of the background blue/black. -13- VR VR 16CH & 9CH DVR 8 PTZ Setup & Operation Be aware of the speed dome specifications and setting prior to setting【PTZ (9)】in MENU. Look up 4.【 Menu 】for the menu directory. £ PTZ setting 1. Select the number of the speed dome from 【Channel Select(9-1)】and select 【Device ID(9-2)】accordingly. 2. Setup 【Fast Dome Type(9-4)】first and setup 【Protocol(9-5)】accordingly. Finish 【Baudrate(9-6)】setup to start Speed Dome Operation. 3. 【Pan/Tilt Speed(9-7)】default 03 range 01(slow) ~ 05(fast)。 PTZ (9-1) (9-2) (9-4) (9-5) (9-6) (9-7) CHANNEL SELECT: 1 DEVICE ID: PRESET ADJUST FAST DOMW TYPE: 001 FUM 626 PROTOCAL : PELCO D BAUDRATE : 2400 bps [ PAN/TILT SPEED: ENTER ] 03 SET EXIT £ PTZ Operation Can start preset journey setup upon above setting finished. 1. Enter【Preset Adjust(9-3)】to select number of【Preset Select(9-3-1)】. 2. Enter 【Adjust Pos(9-3-2)】to preset the positions of every stop of the journey via remote control navigator and PTZ control button. 9ch unit is also available in the same setting on the front panel. 3. Back to 【Preset Adjust(9-3)】by a hit on and select 【Save Preset(9-3-3)】 to finish setting. 4. Select 【Clear Preset(9-3-4)】to clear a preset. Select 【Clear All Preset(9-3-5)】 to clear all presets. 5. Select 【Clear Preset(9-3-4)】to set the time that PTZ is not controlled for back to Tour mode. (9-3) (9-3-1) (9-3-2) (9-3-3) (9-3-4) (9-3-5) (9-3-6) PRESET PRESET SELECT: ADJUST POS 01 [ ] SAVE PRESET CLEAR PRESET CLEAR ALL PRESETS RETURN TOUR TIME: ENTER SET 30 EXIT 6. Hit the button next right hand side to the button “Auto Pan” to enter PTZ control mode. The navigator and the PTZ control button both are for PTZ control. “Auto Pan” is the button to enable the speed dome moving at the command of the presets. AUTO PAN ZOOM_IN ZOOM_OUT -14- 16CH & 9CH DVR 9 DVR Recording Setup Hit to enter menu. Select【Record Set(3)】 to setup recording. Look up 4.【 Menu 】for the menu directory. £ Over Write Select【Over Write(3-1)】hit to either overwrite or not. ※ Attention: It is impossible to undo overwritten data. £ REC Speed & Quality Select【REC Speed(3-2)】hit to setup recording speed. 60 fps is the default setting. The more frame rates, the fluently image movement. Larger frame rates bring up with larger video file size to decrease recording time. Please review 18. 【 Record Time 】for the recording time preview. ※ CIF mode NTSC;【REC Speed(3-2)】120fps (PAL:100fps) cannot work with 【Record CH Set】. CIF is not available in 9ch DVR. Select 【REC Quality(3-3)】 hit to adjust recording quality. Range 01(poor) ~ 09(high) default 03. The more REC Quality DVR comes with, the better resolution provides with. On the other hand, more REC Quality consumes more HDD capacity. Details read 18.【 Record Time 】. £ Playback Speed Select【PB Speed(3-4)】hit to setup playback speed default automatically. ※ Attention: Playback will become fast forward if the speed of【REC Speed(3-2)】 and【PB Speed(3-4)】not the same. Please setup both speed same or Auto for normal playback speed. £ Record Channel Set Enter【Record Ch Set(3-5)】hit to select channel. Hit or disable of the button default enable for all. to setup enable £ Audio Select Enter【Audio Select(3-6)】hit to select the audio recorded channel. Audio will be recorded with the video stream at the same time. The channel will be given with a yellow spot. -15- VR VR 16CH & 9CH DVR 10 Recording Operation This DVR is available in recording modes of manual recording, sensor & motion recording & schedule recording. Look up 4.【 Menu 】for the menu directory. £ Manual Recording Hit the button to start recording this is manual recording. 1. Hit the button to start recording the video stream to HDD. A red spot comes up to release the message of being recording. 2. Hit stop button to stop recording. Input password if requested. PASSWORD £ Sensor & motion Recording Hit and select 【Sensor Setup(5)】to setup sensor recording. 1. Select【Channel Select(5-1)】hit to select camera number and setup 【Alarm Enable(5-2)】,【Motion Enable(5-3)】,【Motion Level(5-4)】and 【Motion Area Set(5-5)】accordingly. 2. Sensor Recording: Select【Alarm Enable(5-2)】hit to setup external sensor (Normal Open, Normal Close & OFF). Setup N.C./ N.O. to work with external sensor device. On screen display pops up with an “M” upon sensor triggered. I t comes up with prompt recording, buzzer and screen display. 3. Motion Recording: Select【Motion Enable(5-3)】hit to setup motion detection. On screen display pops up with an “M” upon motion detected. I t comes up with prompt recording, buzzer and screen display. 4. 【Motion Level(5-4)】 sensitivity available in 01(low) ~ 09(high). Enter【Motion Area Set(5-5)】hit to select the initial area. Hit (yellow - enable/clear - disable) Hit to enable/disable motion area. Hit to exit 【Motion Area Set(5-5)】and finish setting. (5-5) A OFF -16- to select area. B ON 16CH & 9CH DVR 5. Beeping duration, 1 second to 99 seconds, is determined by 【Buzzer Time(5-6)】 default 05 second. Sensor recording time, default 10 seconds, is determined by 【Sensor REC Time(5-7)】range 10 seconds to 99 seconds. Enable【Alarm Screen (5-8)】to provide full screen display on the alarm triggered camera. £ Schedule Recording Hit select【Schedule Setup(6)】to setup schedule recording four sections a day. 1.Enter 【Schedule Setup(6)】 hit (footnote 1) & FPS. Hit to select ON/OFF, START, END, T/M to change selection. Hit to exit and finish setting. 2.“S” pops up upon setting finished. A hit on the button is not possible to stop schedule recording. 3.In condition of non-recording of schedule recording hit to start emergency manual recording. Hit to stop manual recording in this case. 4.Priority of the schedule recording --- 1 > 2 > 3 > 4 Top priority schedule runs the recording command prior to other priority schedule. For example --- Schedule 1 (00:00 ~ 06:59) runs first prior to 2(00:00 ~ 20:59). (6) START 1 ON 00:00 ~ 2 ON 00:00 ~ 3 ON 21:00 ~ 4 OFF __:__ ~ ENTER SET STOP T/M FPS 06:59 T 30 20:59 T 60 23:59 M 60 __:__ _ ___ EXIT Footnote 1: T:starts recording according to Start/end time. M:In the range of start/end time DVR starts motion recording or sensor recording in condition of setting ON motion recording or sensor recording. -17- VR VR 16CH & 9CH DVR 11 Playback DVR provides four playback features: direct play, play time select, record event list & manual record list. Hit to enter playback sub menu. Look up 4.【 Menu 】for the menu directory. Direct Play £ Select direct play to retrieve the initial video files. 1.Hit to enter playback sub menu and select 【direct play(10)】 to start playback. 2.DVR starts retrieving initial video files of the HDD. 3.FF/FR speed up to x16. (footnote 2) Hit to stop playback. Play Time Select £ Select play time select to retrieve video files by time. 1.Hit to enter playback sub menu. Select【Play Time Select(11)】 to search by time. Hit to select year/month/day/hour/minute/second. Hit to select digit. 2.Only search video files from the time in the range of the red bar Recorded video files cannot be found beyond the red bar. 3.FF/FR speed up to x16. (footnote 2) Hit to stop playback Record Event List £ Select record event list to retrieve video files recorded by event list. Hit to enter playback menu. Select【Record Event List(12)】 to get into event list. Hit to select event. Hit to enter playback. 1.FF/FR speed up to x16. (footnote 2) Hit to stop playback. Manual record List £ Select manual record list to retrieve the video files recorded by manual recording. 1.Hit to enter playback sub menu. Select【Manual Record List(13)】 to get the manual record list. Hit to select manual record list. Hit 2.FF/FR speed up to x16. (footnote 2) Hit to start playback. to stop playback. 3.Manual recording creates a record in manual record list. System builds up list record at 00:00/04:00/08:00/12:00/16:00/20:00. Suppose DVR starts recording at 07:30 until 19:30. List record 07:30-08:00、08:00-12:00、12:00-16:00、16:00 -19:30 will be found. Footnote 2: Outer ring of the shuttle is for quick search. Inner ring of the shuttle is for slow search. -18- 16CH & 9CH DVR 12 Video Files Backup DVR provides USB backup & CD-RW backup. Remote backup instruction will be available 14.【 NetViewer 】.Look up 4.【 Menu 】for the menu directory. £ USB backup Live images or recorded video can be saved a backup files in USB memory stick. It is possible to backup movie and snapshot video. Please follow the procedure below to backup video. 1.Hit to enter menu. Select【Backup Set(7)】【USB Backup(7-1)】【Backup Mode(7-1-1)】for movie and snapshot modes. Hit to finish setting and exit. (7) (7-1) BACKUP SET USB BACKUP (7-1-1) USB BACKUP BACKUP MODE : MOVIE USB INFORMATION USB BACKUP (7-1-1) BACKUP MODE : STILL USB INFORMATION COPY PC APPLICATION CD_RW BACKUP ENTER SET EXIT INSTALL : YES INSTALL : YES TOTAL SIZE : 123.8M TOTAL SIZE : 123.8M USED SIZE : 120.7M USED SIZE : 120.7M USED PER : 98% USED PER : 98% ENTER SET EXIT ENTER SET 2.Insert a memory stick in the USB port and hit the button USB to start saving video to memory stick. 3.Hit 【USB】to start movie backup. The icon A comes up. Hit【USB】again to stop. Do not remove the memory stick until the icon A gone. 4.Select single channel and hit 【USB】to start snapshot backup. Do not remove the memory stick until the icon A gone. ★Attention: System will be in big wrong if user removes memory stick while A or S on screen display. £ CD-RW Backup There are two ways to backup video via CD-RW. By Time: hit to enter menu. Select 【Backup Set(7)】 hit the button enter for 【CD_RW Backup(7-3)】. Select the start time and insert disk in the CD drive to start backup. By MB: Hit to enter menu. Select 【Backup Set(7)】 hit the button enter to 【CD_RW Backup(7-3)】 Select the MB and insert disk to CD drive to start. (7) (7-3) USB BACKUP START TIME SET START 2006/06/19 14:45 END 2006/06/20 10:06 BACKUP MEDIA : CD BACKUP SIZE : 0650MB BACKUP START ENTER SET EXIT k Hit 【USB】to format CD_RW disk before backup. -19- EXIT VR VR 16CH & 9CH DVR 13 Network Setup Hit to enter menu. Select 【Network Setup(4)】to setup network. Remote user can download user manual and netviewer through IE browser. Also can remote access to DVR via netviewer. Look up 4.【 Menu 】for the menu directory. £ Network Setup Two【IP Mode(4-4)】(footnote 3): “Static IP” & “DHCP”. Static IP setting requires 【IP ADDR(4-1)】、【Sub Net(4-2)】、【Gateway(4-3)】. DHCP does not require above settings. Hit to exit. Enter【Network Setup(4-5)】to setup the authorized channels on netviewer. 【Video Port(4-6)】default 5000.【Command Port(4-7)】 default 5001. There are twenty options of 【Video Port(4-6)】&【Command Port(4-7)】 available. 【MAC ADDR(4-8)】is the only MAC address not alternative. (4) (4-1) (4-2) (4-3) (4-4) (4-5) (4-6) (4-7) (4-8) NETWORK SET IP ADDR : 192.168.009.200 SUB NET : 255.255.240.000 GATEWAY : 192.168.009.004 IP MODE : STATIC IP ] N/W ENABLE [ VIDEO PORT : 5000 COMMAND PORT : 5001 MAC ADDR : 00.16.55.01.02.03 ENTER SET EXIT IP ADDR, Sub Net & Gateway : hit k and to increase/decrease the digits or hit to select particular digits. 255 is the maximum. Hit finish setting. Footnote 3:Please contact your ISP for 【IP Mode(4-4)】details. £ Operation User manual & netviewer software can be downloaded via IE browser upon setting finished. Please read 14.【 NetViewer 】for remote access details. -20- 16CH & 9CH DVR 14 NetViewer Introduction £ Network Viewer makes it possible to remote access, playback & backup video remotely. System Requirement £ OS:Windows 2000 or above Software Retrieving & Installation £ Retrieving software via USB from DVR Ü Insert memory stick in the USB port of the DVR. Hit (7) enter 「Backup Set(7)」: BACKUP SET USB BACKUP COPY PC APPLICATION CD_RW BACKUP ENTER SET EXIT select 「Copy PC Application」 NetViewer.exe, NVP3000_DLL_MMX.DLL & WNASPI32.DLL will be saved in memory stick. Copy NetViewer.exe, NVP3000_DLL_MMX.DLL & WNASPI32.DLL to a same file clip on the PC run NetViewer.exe to start software. Ü Retrieving via IE Browser Access DVR IP via IE browser picture comes up as follows. Hit NetViewer to download netviewer.exesoftware. PC creates an icon on the desk after installation. Hit the icon to start the software. -21- VR VR 16CH & 9CH DVR £ User Interface (1) (2) (3) (6) (4) (5) (1)Video Display Area Remote video comes up to this area in different division split subject to different setting. (2)Status Indicator :it lights up when recording. :it lights up while AVI backup. :it lights up when saving video to PC. (3)Buttons Play from Network Start Live View Pause Stop Live View Save as AVI Converting Video to AVI Save Video Stream to PC's HDD Backup video to PC Connect to the DVR Connected with DVR Disconnect to the DVR Disconnected DVR -22- 16CH & 9CH DVR (4)Division Split Option (5)Playback Area ScanDisk Select this option to read the video stream in cd-r FilePlay Select this option to play the video stream in memory stick or PC (6)Close Netviewer System the button for exit £ Network Setup Hit to enter Netviewer Setup Network → setup「IP Addr」 first and select 「AV Port」. Input 「User ID」and ¦ 「Password」hit connect to start connecting. k Attention:system provides one user ID “admin” and another two user ID “guest” remote access to this DVR at the same time. Common ¦ →「Enable One Channel Transfer」enables single channel transmission. Better disable this while video backup. →「Enable Connection Check」checks IP address automatically. k Attention:「IP Addr」will be no response from time to time. This option is not suggested to select. →「Network Mode」as follows -23- VR VR 16CH & 9CH DVR Local 「PC to DVR」 faster than LAN transmission LAN Intranet transmission up to 30 frames/ sec. WAN Internet transmission 1-3 frames / sec. Ü 「Max Channel」enables maximum channels setting. Ü 「Local rec Path」this makes saving video to PC HDD in the directory. ¦ Language 「Language」 optoin ¦ Video Can setup video size of the AVI files, video format & frame per second. k Attention: 「Video Size」 setting makes AVI images full size or half size. 30 frames per second is the maximum speed. ¦ AVI Codec Select Codec for the converted AVI files. £ Connect to the DVR Hit to enter option. Input 「IP Addr」&「Password」hit the button connect to start remote access. £ Play from Network Hit to start live view. Hit Hit to save as AVI. Hit to stop video stream. to save video stream to PC's HDD. k Attention: move the mouse to video display area and click right button can save single or all channels to JPEG files. Ü can print single channel image Ü can restore single or all channels images Ü can display watermark Ü -24- 16CH & 9CH DVR £ PTZ Network Viewer shows up PTZ control in PlayBack mode. Ü Setup PTZ prior to PTZ control Ü Operation Control Panel UP/DOWN/LEFT/RIGHT (Zoom In) Zoom In (Zoom Out) Zoom Out (Auto Pan) Auto Pan Moves to the preset points k Attention: PTZ control only available in DVR V3.07 -25- VR VR 16CH & 9CH DVR £ AVI Backup Hit to start AVI converting. Select the channel to be retrieved and select the directory. Hit enter lights up. Hit to stop. « Attention: AVI converting requires large system resources. Better hit to backup the video to PC's HDD instead if PC does not support AVI converting. « Attention: Bandwidth makes every channel different frame rates outcome. AVI files come out with various speed and audio not available. Attention: AVI Codec must be the same one on playback and converting. « £ Save Video Stream to PC's HDD Hit the icon lights up accordingly. Hit again to stop. PlayBack £ Hit to start playback. Can playback video from DVR HDD. Three search modes:「Select Event List」、 「Select record List」、「Time Search」。 Ü Select Event List Select HDD → Hit 「Select Event List」 select list → play -26- 16CH & 9CH DVR Ü Select record List Select HDD→ hit「Select record List」 select list → play Ü Time Search 1.Hit Select Record List first 2.Select time/date and hit search 3.System pops up with a message if the search time not in the list range. -27- VR VR 16CH & 9CH DVR 4.Wait if search time within the list range. 5.Can cancel if the search must stop 6.System pops up with a message if search fails. 7. DVR starts playback upon search comes to the end. Hit 「PlayBack」to start playback Ü it displays FF/FR speed. Ü Other function Play Fast Reverse Pause Fast Forward £ ScanDisk Hit for 「ScanDisk」 「ScanDisk」can read Ü the HDD from DVR Ü video files in CD-R Select the device from downpull option hit Play to play Move the slide bar to view video by time Pause -28- 16CH & 9CH DVR £ FilePlay Hit to enter FilePlay. 「FilePlay」can read Ü video files from memory stick Ü video files from PC's HDD Play First Page Pause Previous Page -29- Next Page Final Page VR VR 16CH & 9CH DVR 15 Storage Info System Info £ Hit the button INFO in live mode to review system information: HDD model/ capacity/used volume/overwritten times/record list/event list/IP address/firmware version. Background of the used % is to be yellow, that is to say, video is being recorded in master HDD. INFO MASTER SLAVE HDD MODEL SAMSUN SV ST380011A HDD SIZE 160G 80G HDD USED 50% HDD READ 100% OVERWRITE 01 REC LIST 0085 00 0047 0007 EVENT LIST 0031 NETWORK IP 192.168.111.222 S/W VER. V3.07 Hit the button INFO in playback mode to review read %. Background of the used % is to be yellow, that is to say, DVR is reading from slave HDD. INFO MASTER SLAVE HDD MODEL SAMSUN SV ST380011A HDD SIZE 160G 80G HDD USED 50% HDD READ 100% 15% OVERWRITE 01 REC LIST 0085 00 0047 0007 EVENT LIST 0031 NETWORK IP 192.168.111.222 S/W VER. V3.07 HDD INFO £ Hit to enter menu. Select 【Storage Info(8)】to review HDD information: model/capacity/used volume/overwritten times. ※ Attention:HDD must be formatted before use. STORAGE INF MASTER MODEL : SAMSUN SV CAPACITY : 160G USED SIZE : 50% OVER WRITE : 01 SLAVE MODEL : ST380011A CAPACITY : 80G USED SIZE : 100% OVER WRITE : 00 ENTER SET -30- EXIT 16CH & 9CH DVR 16 Remote Control REC OPEN/CLOSE 1 2 3 5 6 7 8 9 10 11 12 13 14 15 16 4X4 3X3 2X2 PLAY STOP 4 PIP Channel Split Mode PAUSE Navigator MENU INFO PREV NEXT FREZ ZOOM IN ZOOM USB FB AUTO ZOOM OUT AUTO PAN LOCK Enter FF MUTE PTZ Control DVR REMOTE OPEN/CLOSE : CD Drive £ REC : Start/Stop Recording £ Channel : Single channel display in recording/playback mode. £ Split Mode : Various split modes option. £ STOP : Hit this button to stop recording/playback. £ PLAY : To enter playback menu. £ PAUSE : To pause playback. To lockup keypad and shut off monitor while recording. £ Need password to unlock. Navigator : to select option and setting. £ Enter : Enter. £ MENU : To enter menu. To save the setting and exit.. £ INFO : To review system information. £ USB : Hit this button once to backup movie twice to stop. Snapshot must be in the single £ channel mode one hit one picture. ※Attention: System will be in big wrong if user removes memory stick while A or S on screen display. LOCK : Hit once for lockup twice for unlock. Password required prior to unlock. £ PREV : For previous video play. £ NEXT : For next video play. £ FB : For slow playback speed. £ FF : For fast playback speed. £ FREZ : To freeze the single channel display. £ ZOOM : To zoom in the images. £ AUTO : Quad sequence switch in quad split mode. Single channel sequence switch can setup £ channel and stay time. MUTE : Soundless. £ PTZ : £ Hit the button on the right hand side to enter PTZ control. Hit navigator to control speed dome. Hit ZOON IN & ZOOM OUT To adjust focus. Hit AUTO PAN to start scheduled journey. ★Read page 37 for 【Password Authorization】 -31- VR VR 16CH & 9CH DVR 17 1'st Menu Default Setting 2'nd Menu Time Set System Set 3'rd Menu 3'rd Menu Default Not Change IP Addr Not Change Time Not Change Gateway Not Change Format YYYY/MM/DD Sub Net Not Change Display ON IPMode Static IP Local UP Network Setup ON Network Set HDD Format Set Not Change Video Port 5000 Factory Reset Not Change Command Port 5001 Video System Not Change MAC Addr Not Change Language Not Change Channel Select Not Change Buzzer Sound ON Alarm Enable N.O. Relay Enable ON Motion Enable OFF Motion Level 05 2222 Motion Area ON Interface Not Change Buzzer Time 5 seconds Start Update Not Change Sensor REC Time 10secons Number Alarm Screen OFF CON 50 1 OFF BRI 50 2 OFF Hue 50 3 OFF SAT 50 4 OFF Change Password Firmware Update Color Set Display Set AutoSeq Setup Sensor Set 1111 Admin Password Change User Password Change Camera Name Record Set 2'nd Menu Date Audio Sound Record Set 1'st Menu Default Schedule Set 2 Seconeds Bound Color White Blank Color Blue USB Backup Backup Set Backup Mode Copy PC Application CD_RW Backup Movie Not Change USB Information Storage Info Not Change Quad Sequence 2 Seconeds Over Write Yes Channel Select Time Setting Not Change REC Speed 60 frame/sec Protocol Device ID OFF REC Quality 03 PB Speed Not Change Baudrate PEL_CD D automatically Model 2400 bps Record Ch Set ON PTZ Speed FUM_626 Audio Select OFF PTZ 03 -32- 16CH & 9CH DVR 18 Record Time Record Quality Resolution NTSC FPS 04 720 * 240 02 03 01 60 8.8 GB/hr 6.4 GB/hr 4.9 GB/hr 4.2 GB/hr 30 4.6 GB/hr 3.4 GB/hr 2.9 GB/hr 2.5 GB/hr 20 2.2 GB/hr 1.6 GB/hr 1.32 GB/hr 1.2 GB/hr 50 8.2 GB/hr 5.8 GB/hr 5.4 GB/hr 4.7 GB/hr 25 4.0 GB/hr 2.9 GB/hr 2.3 GB/hr 2.0 GB/hr 12 2.0 GB/hr 1.4 GB/hr 1.2 GB/hr 0.8 GB/hr PAL 720 * 288 19 Password Authorization Admin password User password No password Record Live Display NO Monitor Lock NO Keypad Lock NO Play NO Stop NO NO Menu NO NO Network NO NO PTZ NO NO -33- VR VR 16CH & 9CH DVR 20 HDD Compatibility Brand NameModel Size HITACHI HDT7225160 160G HITACHI HDS724040KLAT80 400G Maxtor 6Y080L0 80G Maxtor 6Y120L0 120G Maxtor 6Y160P0 160G Maxtor 6L250R0 250G SAMSUNG SV1604E 160G SAMSUNG SV0802N 80G Seagate ST3160023A 160G Seagate ST325082A 250G Seagate ST3400832A 400G Western Digital WD800BB Western Digital WD1600BB 160G Western Digital WD3200JB 320G -34- 80G H12C901601