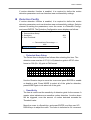
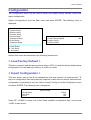
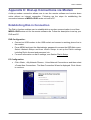
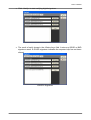
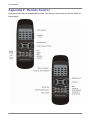
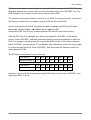
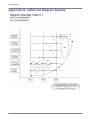
1
MPEG-4 DVR OSD Menu Setup Guide Version 1.7 D79200EA07 User’s Manual Table of Contents Menu System Overview.....................................................................................................9 < Key Usage > ..............................................................................................................9 Key Usage in OSD Menu ...............................................................................9 Key Usage in Virtual Keyboard.....................................................................10 System Setup ...................................................................................................................12 < Version > .................................................................................................................12 Model Name .................................................................................................12 Hardware Version.........................................................................................12 Software Version ..........................................................................................13 Software Upgrade via Local Device..............................................................13 Software Upgrade via Internet......................................................................13 < Language > .............................................................................................................14 < Date / Time > ...........................................................................................................14 Date / Time Setting.......................................................................................14 Time Zone ....................................................................................................14 Date / Time Display ......................................................................................15 Date Display Mode .......................................................................................15 Time Display Mode.......................................................................................15 Date/Time Order...........................................................................................15 Daylight Saving Time....................................................................................15 Network Time Protocol Setup.......................................................................16 < Unit Name > ............................................................................................................16 < Password >..............................................................................................................17 Setup Admin / User Password......................................................................17 Enable Password .........................................................................................17 Load Factory Password................................................................................17 < Network Setup > ......................................................................................................18 LAN Select ...................................................................................................18 LAN Setup ....................................................................................................19 2 DHCP ..............................................................................................19 IP .....................................................................................................19 Netmask ..........................................................................................20 Gateway ..........................................................................................20 DNS .................................................................................................20 PPPoE Account ...............................................................................20 PPPoE Password ............................................................................21 PPPoE Max Idle ..............................................................................21 User’s Manual - Connect At Booting..........................................................................22 - Network Restart ...............................................................................22 Wireless Network Setup ...............................................................................22 - Operating Mode...............................................................................22 - Choose A Wireless Network ............................................................23 - Network Name (ESSID)...................................................................24 - Network Authentication ....................................................................25 - Data Encryption ...............................................................................25 - Data Encryption Level......................................................................25 - Key Index.........................................................................................26 - Enter Network Key...........................................................................26 - Network Setting ...............................................................................26 - Connect ...........................................................................................27 Dial-in Setup.................................................................................................27 - Dial-in Service .................................................................................28 - Dial-in Account.................................................................................28 - Dial-in Password..............................................................................29 - Server IP..........................................................................................29 - Client IP ...........................................................................................29 - Dial-in Idle Time...............................................................................29 - Dial-in Max Time..............................................................................30 Dial-out Setup...............................................................................................30 - Dial-out DHCP .................................................................................30 - Dial-out IP........................................................................................31 - Dial-out Netmask .............................................................................31 - Dial-out Gateway .............................................................................31 - Dial-out DNS....................................................................................31 - Phone Number ................................................................................31 - Dial-out Account ..............................................................................32 - Dial-out Password ...........................................................................32 - Dial-out Idle Time.............................................................................33 - Dial-out Max Time............................................................................33 - Connect ...........................................................................................33 Dial Port Selection........................................................................................33 Trigger Port...................................................................................................33 Email Address ..............................................................................................34 SMTP Setup .................................................................................................34 - Email via SMTP ...............................................................................34 - SMTP Server ...................................................................................34 - SMTP Port .......................................................................................35 3 User’s Manual - SMTP Account.................................................................................35 - SMTP Password ..............................................................................36 DDNS Setup.................................................................................................36 - Enable DDNS ..................................................................................36 - Host Name.......................................................................................36 - DDNS Port.......................................................................................37 - Submit/ Update................................................................................37 - ezDDNS...........................................................................................37 < RS485 Setup > ........................................................................................................38 Unit ID ..........................................................................................................38 Baud Rate ....................................................................................................38 Bits ...............................................................................................................38 Stop ..............................................................................................................38 Parity ............................................................................................................38 < Audio Output/ Key Beep > .......................................................................................39 < IP Camera Support >...............................................................................................40 Monitor Setup...................................................................................................................41 < Show Camera Title > ...............................................................................................41 < Title Position> ..........................................................................................................41 < Monitor Brightness >................................................................................................42 < Monitor Contrast > ...................................................................................................42 < Monitor Chrominance > ...........................................................................................42 < Screen Center Adjust >............................................................................................42 < Show Color Bar > ....................................................................................................43 < VGA Resolution > ....................................................................................................43 Camera Setup...................................................................................................................44 < Analog Camera >.....................................................................................................45 Analog Camera Select .................................................................................45 Dome Protocol..............................................................................................45 Dome ID .......................................................................................................45 Camera Title .................................................................................................45 Covert...........................................................................................................46 Termination...................................................................................................46 Brightness ....................................................................................................47 Contrast........................................................................................................47 Saturation .....................................................................................................47 Hue...............................................................................................................47 Audio Association .........................................................................................47 < IP Camera > ............................................................................................................48 IP Camera Select .........................................................................................48 4 User’s Manual IP Camera Title.............................................................................................48 Hostname/IP.................................................................................................49 Model............................................................................................................49 Connection Setup.........................................................................................49 - Account............................................................................................49 - Password.........................................................................................49 - Management Port ............................................................................49 - Streaming Port.................................................................................49 - Streaming Format ............................................................................50 - Streaming Protocol ..........................................................................50 Device Setup ................................................................................................50 - Product ID........................................................................................51 - Image Resolution/ FPS/ Compression/ Quality................................51 - Sharpness/ Brightness/ Contrast/ Saturation/Hue ...........................51 - Apply................................................................................................51 Activated.......................................................................................................52 Status ...........................................................................................................52 Record Setup ...................................................................................................................53 < Record Mode > ........................................................................................................53 < Schedule Setup > ....................................................................................................56 Day / Night Time Start/ End ..........................................................................56 Weekend Schedule ......................................................................................56 Weekend Start / End.....................................................................................57 < Preset Record Configuration > ................................................................................57 < Per Camera Configuration >....................................................................................59 Camera Select..............................................................................................59 Normal PPS..................................................................................................59 Normal Qlty ..................................................................................................59 Event Max PPS ............................................................................................59 Event Qlty.....................................................................................................60 Event Active..................................................................................................60 < ezRecord Setup >....................................................................................................60 < Data Lifetime > ........................................................................................................61 < Pre-Alarm Recording > ............................................................................................61 < Circular Recording >................................................................................................62 < Audio Recording > ...................................................................................................62 < Purge Data > ...........................................................................................................62 Purge All Data ..............................................................................................62 Purge All Event Data ....................................................................................62 Purge Event Before ......................................................................................62 5 User’s Manual Start to Purge ...............................................................................................63 Sequence Setup...............................................................................................................64 < Main / Call Monitor Dwell > ......................................................................................64 < Main / Call Monitor Schedule >................................................................................64 Event Setup ......................................................................................................................66 < Internal Buzzer > .....................................................................................................66 < Event Icon > ............................................................................................................66 < Email Notice > .........................................................................................................66 < Email Attachment >..................................................................................................67 < SMS Setup > ...........................................................................................................67 SMS Notice ..................................................................................................68 PIN Authentication........................................................................................68 PIN Code Setup ...........................................................................................68 Receiver Number .........................................................................................68 Send Test Message......................................................................................68 Port Selection ...............................................................................................68 < Alert Notification Setup > .........................................................................................69 - Alert Configuration Set.....................................................................69 - Alert Notification ..............................................................................69 - Alert IP.............................................................................................69 - Alert Port..........................................................................................69 - Alive Interval ....................................................................................69 < Event Full Screen > .................................................................................................70 < Event Duration >......................................................................................................70 < Per Channel Config > ..............................................................................................70 Channel Select .............................................................................................70 Video Loss Detect ........................................................................................70 Motion Detect ...............................................................................................70 Detection Config...........................................................................................71 - Detected Area Setup .......................................................................71 - Sensitivity ........................................................................................71 - Area Threshold ................................................................................72 - Detected Area Percentage...............................................................72 Alarm In ........................................................................................................72 Alarm Out .....................................................................................................72 Database Setup ................................................................................................................73 < Total / Free Size of HDD > .......................................................................................73 < Avail. REC Time >....................................................................................................73 < Internal / External Disks >........................................................................................73 Configuration ...................................................................................................................75 6 User’s Manual < Load Factory Default > ............................................................................................75 < Import Configuration > .............................................................................................75 < Export Configuration >.............................................................................................76 Copy Destination ..........................................................................................76 Configuration Name .....................................................................................76 Begin Export.................................................................................................76 Video Export.....................................................................................................................77 < Select Device >........................................................................................................78 < Select Channel > .....................................................................................................78 < From / To Time >......................................................................................................78 < Select Events >........................................................................................................79 < Data Type > .............................................................................................................79 < Export Format >.......................................................................................................79 < Digital Signature > ...................................................................................................79 < Erase Disc > ............................................................................................................80 < Begin Export > .........................................................................................................80 Text Setup.........................................................................................................................81 < Text Function > ........................................................................................................81 < Text Overlay >..........................................................................................................81 < Exception Text Setup >............................................................................................81 Exception No. ...............................................................................................82 Trigger ..........................................................................................................82 Exception String ...........................................................................................82 By Numerals.................................................................................................82 < Input Setup > ...........................................................................................................83 Port Selection ...............................................................................................83 Input source..................................................................................................84 Camera Selection.........................................................................................84 Text Filter......................................................................................................84 Manual Filter Setup ......................................................................................84 Input Process ...............................................................................................85 Text Baud Rate.............................................................................................85 Text Bit .........................................................................................................85 Text Stop ......................................................................................................85 Text Parity ....................................................................................................85 Shutdown..........................................................................................................................86 Appendix A: Technical Specifications ...........................................................................87 Appendix B: Record Duration.........................................................................................89 Appendix C: Dial-up Connections via Modem ..............................................................91 Establishing Dial-in Connection ..................................................................................91 7 User’s Manual Establishing Dial-out Connection ................................................................................95 Appendix D: Verifying Digital Signature ......................................................................101 Appendix E: Recommended HDDs ..............................................................................105 Appendix F: Remote Control ........................................................................................106 Appendix G: ezRecord Diagram Sample .....................................................................108 Appendix H: Search Recorded Data by Text ............................................................... 111 Appendix I: Operating USB Mouse on Your DVR........................................................ 113 Appendix J: HDD COPY TOOL (EXT2IFS).................................................................... 114 Installing EXT2IFS to Your Computer ....................................................................... 114 Start Playing the *.drv file.......................................................................................... 117 To Remove the HDD from Your Computer................................................................ 118 8 User’s Manual Menu System Overview The detailed functions and settings of MPEG-4 DVR series can be set using the hierarchical OSD menu. This chapter particularizes the items and options in the OSD menu. To enter the Main Menu, press MENU and then enter Administrator or User password. The default passwords are shown in the following table. The same default passwords are used for entering the remote viewing software DVRRemote. Administrator Password 1 2 3 4 User Password 4 3 2 1 It is strongly suggested to change the passwords to prevent unauthorized access to the unit. After entering the correct password, the Main Menu is displayed. Main Menu 1. System Setup 2. Monitor Setup 3. Camera Setup 4. Record Setup 5. Sequence Setup 6. Event Setup 7. Database Setup 8. Configuration 9. Video Export 10. Text Setup 11. Shutdown < Key Usage > The key usage differs under the OSD Setup Menu and in the Virtual keyboard, which can be seen while setting some items, such as Unit Name and IP Address, in the OSD Setup Menu. Key Usage in OSD Menu Below introduce some keys used frequently to set up the unit via the OSD Setup Menu. 9 User’s Manual <Direction Key> In the OSD menu, Direction keys are used to move the cursor to previous or next fields. UP / DOWN are used to change the value in the selected field. <ENTER> In OSD menu or selection interface, press the key to make selection or save settings. <ESC> Press to cancel or exit from certain OSD menu without saving any changes. Key Usage in Virtual Keyboard A virtual keyboard shows when edit the settings, such as camera title, e-mail address, etc. The virtual keyboard displays as follows. A B C D E F G H I K L M N O P Q R S T U V W X Y Z a b c d e f g h i j k l m n o p q r s t u v w x y z 0 1 2 3 4 5 6 7 8 9 . ! @ # − _ ◄ ► Cancel Backspace J Delete OK <To input characters> Move the cursor by pressing Direction keys and press ENTER to select characters. <To move the cursor in title entry> Press MODE and LEFT / RIGHT simultaneously to move the cursor to left / right in the title entry. <To delete previous character> Select <Backspace> and press ENTER, or press MODE and UP simultaneously. 10 User’s Manual <To delete current character> Select <Delete> and press ENTER, or press MODE and DOWN simultaneously. <To exit the virtual keyboard> Select <OK> and press ENTER to save the settings and exit, or press ESC to exit without saving changes 11 User’s Manual System Setup Select <System Setup> from the Main Menu and press ENTER to enter the System Setup menu. Main Menu 1. System Setup 2. Monitor Setup 3. Camera Setup 4. Record Setup 5. Sequence Setup 6. Event Setup 7. Database Setup 8. Configuration 9. Video Export 10. Text Setup 11. Shutdown System Setup 1. Version 2. Language 3. Date/Time 4. Unit Name 5. Password 6. Network Setup 7. RS485 Setup 8. Audio Output/Key Beep 9. IP Camera Support English DVR 0 The items in the System Setup menu are described in the following sections. < Version > The Version menu allows user to view system information such as hardware and software version. From the System Setup menu, select <Version> and press ENTER. The following menu is displayed. The first three items, including <Model Name>, <Hardware> and <Software>, are for read only, which CANNOT be changed. Version Model Name Hardware Software Software Upgrade via Local Device Software Upgrade via Internet **** C3-A1-A8 xxxx-xxxx-xxxx-xxxx The items in this menu are described in the following subsections. Model Name This item shows the model name of the unit. Hardware Version The item identifies the hardware version for this unit. 12 User’s Manual Software Version The item identifies the software version installed on this unit. Software Upgrade via Local Device This item is used for updating the MPEG-4 DVR series software by local device. The menu is displayed as follows. Software Upgrade via Local Device Upgrade Version xxxx-xxxx-xxxx-xxxx Select NO Connect an USB drive contains upgrade software to the unit; the available upgrade files will be listed in the menu. To update the system, select a file and use UP / DOWN keys to choose <YES>. Press ENTER to confirm the selection and start the upgrade process. The MPEG-4 DVR series unit uploads the software, updates the system files, and reboots automatically. The upgrade may take several minutes to save the changes in the memory of the system. After reboot the unit, please check the software version again. NOTE: No power interruption is allowed during the software update. Ensure that no power interruption can occur until the unit is completely rebooted. NOTE: Do not remove the external USB ThumbDrive® / CD-ROM before the unit has completely shut down (hard drive and fan are off). Removing the external USB ThumbDrive® / CD-ROM before shut down can cause the system to update improperly. Software Upgrade via Internet The item is used to upgrade the unit’s software via the internet. Select one of the listed software versions and choose <YES>. The MPEG-4 DVR series uploads the software, updates the system files, and reboots automatically. 13 User’s Manual < Language > The Language item allows user to select the language for the OSD menu and screen messages. Language selection takes effect immediately when the selection is done. Press UP / DOWN to select from listed languages and press ENTER to confirm. < Date / Time > Users can set the current date, time and other OSD parameters in this menu. The Administrator’s privileges are required for entering the submenu. In System Setup menu, select <Date/Time> and press ENTER; the Date/Time menu displays as follows. Date/Time 1. Date 2. Time 3. Time Zone 4. Date/Time Display 5. Date Display Mode 6. Time Display Mode 7. Date/Time Order 8. Daylight Saving Time Setup 9. Network Time Protocol Setup 2005/02/21 PM10:39:26 OFF 1 Row Y/M/D 24 HR Date First NOTE: The reset date / time setting applies to record new video, the date and time of previously recorded video will not be changed. NOTE: To avoid record database corruption, after changing Date/Time setting, clear the database is recommended. Date / Time Setting Select <Date> or <Time> and press ENTER for adjusting the settings. LEFT / RIGHT keys are used to move the cursor to previous or next field, ENTER is for selecting, and UP / DOWN are used to change the value in the selected field. Time Zone Select <Time Zone> to enter the time zone. To find out your local time zone, please visit wwp.greenwichmeantime.com NOTE: The <Time Zone> must be set to your local time zone or the <Network Time Protocol Setup> will not be accessible. 14 User’s Manual Date / Time Display Users are allowed to choose to set the date / time OSD displays in 1 or 2 rows. Use the UP / DOWN keys to change the setting. The default is to display the date / time OSD in one row. Date Display Mode This function allows user to set the OSD display type of the date / time. There are three options to select from: <Y/M/D>, <M/D/Y> or <D/M/Y>. “Y” represents “Year”, “M” represents “Month” and “D” represents “Day”. Use UP / DOWN keys to change the setting. The default setting is <Y/M/D> in both NTSC / PAL formats. Time Display Mode User can choose to set the time format to <12 hour> or <24 hour>. Use the UP / DOWN keys to change the format. The default setting is <24 hour>. Date/Time Order The item is used to set the order of Date/Time display to <Date First> or <Time First>. Select this item and press ENTER, then use UP / DOWN keys to change the setting. Daylight Saving Time The item is for people who live in certain regions to observe Daylight Saving Time. Select <ON> to enable, or <OFF> to disable the function. If the function is disabled, the DST Start / End time and DST Bias will be grayed out and cannot be accessed. If this function is enabled, the date/time information will be shown on the screen with a DST icon when playing back recorded video or searching video in the event list. “S” indicates summer time and “W” indicates wintertime. 15 User’s Manual Network Time Protocol Setup After entering the time zone, the <Network Time Protocol Setup> option will appear. Select the <Network Time Protocol Setup> to set the time server. The default time server is time.nist.gov, but the user can change it to other time servers when desired. A list of IP addresses of the time servers is listed below. 129.6.15.28 132.163.4.102 192.43.244.18 206.246.118.250 207.200.81.113 129.6.15.29 132.163.4.103 131.107.1.10 208.184.49.9 64.236.96.53 132.163.4.101 128.138.140.44 69.25.96.13 64.125.78.85 68.216.79.113 After the time server is set, select <Manually Time Sync> to sync the time. The time sync can also be updated periodically. Select <Automatically Time Sync>, and choose a desired time gap to sync the time. < Unit Name > Users are allowed to assign a name, up to 11 characters, to the MPEG-4 DVR series unit. Follow the steps to edit the unit name. • Select <Unit Name> from System Setup menu and press ENTER. A virtual keyboard displays. Unit Name A B C D E F G H I K L M N O P Q R S T U V W X Y Z a b c d e f g h i j k l m n o p q r s t u v w x y z 0 1 2 3 4 5 6 7 8 9 . ! @ # − _ ◄ ► Cancel • • • 16 Backspace J Delete OK Use Direction keys to move the cursor to the wanted character. Press ENTER to add the character to the entry field (up to 11 characters). When done, move the cursor to <OK> and press ENTER to save the settings and exit. User’s Manual < Password > The Password menu allows administrator to change the password settings for accessing the unit. Select <Password> in System Setup menu and press ENTER; the menu displays as follows. Password 1. Admin1 Password 2. User1 Password 3. Admin2 Password 4. User2 Password 5. Admin3 Password 6. User3 Password 7. Enable Password 9. Load Factory Password Yes None Setup Admin / User Password Only the administrator is allowed to change the user and administrator passwords to any 4~8 digit number. Use the UP / DOWN Direction keys to select the desired account and press ENTER, the following menu is displayed. Admin Password ________ Press Channel Keys To Enter Password (4-8 Digits) Press ◄ To Delete Use CHANNEL keys to input the new password and confirm the new password. After setting the new password, press ENTER to save the settings and exit. Enable Password The item is used to determine if the password is required for accessing the OSD menu. Select <YES> to demand entering password when accessing the OSD menu; if not, select <NO>. Load Factory Password This item allows the administrator to reload the factory password in case that the administrator cannot remember the password. There are four options to select from: <Admin> (reload the Admin password only), <User> (reload the User password only), <Both> (reload the Admin and User passwords) and <None>. The factory password is 1234 for administrator and 4321 for user. 17 User’s Manual < Network Setup > The Network Setup menu allows the administrator to configure the network by specifying the network related settings, such as IP address and Netmask, etc. See your network administrator and/or network service provider for more specific information. From the System Setup menu, select <Network Setup> and press ENTER. The following menu displays. Network Setup 1. LAN Select 2. LAN Setup 3. Wireless Network Setup 4. Dial-in Setup 5. Dial-out Setup 6. Dial Port Selection 7. Trigger Port 8. Email Address 9. SMTP Setup 10. DDNS Setup LAN None 80 Items in this menu are described in the following sections. LAN Select PPPoE stands for Point-to-Point Protocol over Ethernet, which is a specification for connecting the users on an Ethernet to the Internet through a common broadband medium. This item allows you to select your service type between <LAN>, <PPPoE> or <None>; if you are using an intranet for communication, please select <LAN>, if you are using a broadband medium, such as DSL Line or cable modem, please select <PPPoE>. If <None> is selected, then there is no need to set further LAN/PPPoE setting, therefore, the second item <LAN Setup> will not be accessible. 18 User’s Manual LAN Setup The network related settings in the LAN Setup menu should be associated with the network service type. If you select <LAN> for <LAN Select>, then 6th to 8th item will not be available. Select <LAN Setup> in Network Setup menu and press ENTER for setting the parameters; the menu displays as follows. LAN Setup 1. DHCP 2. IP 3. Netmask 4. Gateway 5. DNS 6. PPPoE Account 7. PPPoE Password 8. PPPoE Max Idle 9. Connect At Booting 10. Network Restart - OFF 192.168.1.150 255.255.255.0 192.168.1.1 0.0.0.0 35min YES NO DHCP This item allows user to obtain a dynamic IP address from DHCP (Dynamic Host Configuration Protocol) server during the unit boots up. When using DHCP, the settings are dynamic and they will change every time you power up and power off the unit, depending on your network's setup. If the item is enabled (ON), a dynamic IP will be assigned to MPEG-4 DVR series unit. In this case, user does not need to configure a static IP and the Ethernet settings including IP address, Netmask, Gateway, and DNS settings will be read only. The default setting is <ON>. If you are using permanent addressing, set DHCP to <OFF> for setting the IP Address, Netmask, Gateway, and DNS. See your network system administrators or IT personnel for appropriate values for these settings. - IP The item is used to configure the IP (Internet Protocol) address of the unit. The IP address is the identifier for your computer or device on a TCP/IP LAN or WAN. Please note that to set a static IP address, DHCP must be set to <OFF>. 19 User’s Manual - Netmask A netmask is a 32-bit mask used to divide an IP address into subnets and specify the networks available hosts. Its value is defined by your network administrator. It takes the form as ***.***.***.***, for example, 255.255.255.255. This item allows user to enter the value of the Netmask for the unit. Please note that to configure the item, DHCP must be set to <OFF>. - Gateway Gateway is a node on a network that serves as an entrance to another network. Users are allowed to specify the IP address of the gateway or router associated with this unit. To configure this item, DHCP must be set to <OFF>. - DNS DNS is the abbreviation for “Domain Name System”, which is an Internet service that translates domain names into IP addresses. Because domain names are easier to remember. The item allows user to specify the IP address of the Domain Name System associated with the unit. To configure this item, DHCP must be set to <OFF>. If the network server is unavailable when using DHCP, the unit searches for the network server and boots up more slowly. This network search continues until it times out. - PPPoE Account The item allows user to setup the PPPoE login username. NOTE: For accessing the PPPoE settings, select <PPPoE> as the Network Type in Network Setup menu. 20 User’s Manual To setup the login username, follow the steps: • Select <PPPoE Account> from LAN Setup menu and press ENTER. A virtual keyboard displays. PPPoE Account A B C D E F G H I K L M N O P Q R S T U V W X Y Z a b c d e f g h i j k l m n o p q r s t u v w x y z 0 1 2 3 4 5 6 7 8 9 . ! @ # − _ ◄ ► Cancel • • • - Backspace J Delete OK Use Direction keys to move the cursor to the wanted character. Press ENTER to add the character to the username entry field. When done, move the cursor to <OK> and press ENTER to save the settings and exit. PPPoE Password The item allows user to setup the PPPoE password. Follow these steps to setup the login password. - • Select <PPPoE Password> from LAN Setup menu and press ENTER. A virtual keyboard displays. • • Use Direction keys to select character. Press ENTER to add the selected character to the password entry field. • When done, move the cursor to <OK> and press ENTER to save the settings and exit. PPPoE Max Idle The item indicates the time that the modem connection remains active if there is no acknowledgement from the remote PC. You can select the idle time from 0 to 600 minutes. The default is 35 minutes. 21 User’s Manual - Connect At Booting The unit is allowed to connect to the internet automatically when powered up. Select <YES> to connect at booting, otherwise select <NO>. - Network Restart Network restart is required after changing network settings. Select <YES> to restart the network connection. Wireless Network Setup A wireless network consists of a number of computers, which are equipped with wireless networking interface card, respectively. Each of these computers can communicate directly with all of the other wireless enabled computers. Select <Wireless Network Setup>, which is under <Network Setup> Menu, and press ENTER, the menu displays as below. Wireless Network Setup 1. Operating Mode 2. Choose A Wireless Network 3. Network Name (ESSID) 4. Network Authentication 5. Data Encryption 6. Data Encryption Level 7. Key Index 8. Enter Network Key 9. Network Setting 10. Connect - Infrastructure DynaCo… Shared Disable 64bits 1 xxxxxxxxx No Operating Mode Devices in a wireless network are set up to either communicate indirectly through a central place -- an Access Point (AP); or directly, one to the other. The first is called "Infrastructure Mode" and the other is called "Ad Hoc Mode” (it's also called peer-to-peer). Ad Hoc Mode does not require an Access Point, it's easier to set up, especially in a small or temporary network. 22 User’s Manual NOTE: You may select either mode for your wireless network, however, all devices communicating directly with each other must use the same mode. - Choose A Wireless Network This function enables the unit to scan for any wireless network in the surrounding area and list them on the table, shown as below figure: Mode Infrastructure Infrastructure Choose A Wireless Network ESSID Wireless-ap zeroneoffice ENCRYPT OFF OFF Each wireless network is listed by operating mode, network name (ESSID) and the encrypt status. “Mode” tells the operating mode; “ESSID” tells the name of those finding wireless network; and “Encrypt” tells whether the transferring data has been encrypted. Move the cursor over the wanted wireless network and press ENTER to select it. Once you select the wanted wireless network, some related items, such as <Operating Mode>, <Network Name> and <Data Encryption>, are already made for you. 23 User’s Manual NOTE: A Wireless USB Adapter must be connected to the DVR before choosing a wireless network under this submenu. - Network Name (ESSID) This item is used for setting the name of a wireless network. The set name will be shared by every member of the wireless network. Note that the Network Name will be the continuous string excluding blank. Follow these steps to set the name of a wireless network. • In the <Wireless Network Setup> Menu, move the cursor to <Network Name (ESSID)> and press ENTER. A virtual keyboard with alphanumeric characters is displayed. Network Name (ESSID) A B C D E F G H I K L M N O P Q R S T U V W X Y Z a b c d e f g h i j k l m n o p q r s t u v w x y z 0 1 2 3 4 5 6 7 8 9 . ! @ # − _ ◄ ► Cancel 24 Backspace J Delete OK • Use Direction keys the <◄>, <►>, <Backspace> or <Delete> to move the cursor in the title entry field. • Use Direction keys to move the cursor through the virtual keyboard and press ENTER to add the selected character to the title entry field. Repeat the procedure till the Network Name has been established. • When finished, move the cursor to <OK> and press ENTER to complete the setting; or, abort the setting by either ways: press ESC, or move the cursor to <Cancel> and press ENTER. User’s Manual - Network Authentication For added security on the wireless network, when enabling Encryption, the Authentication type can also be selected. If <Shared> Key is chosen, your Access Point will not be available on the wireless network except to those wireless clients that share the same WEP (short for Wired Equivalent Privacy) key. If <Open> System is chosen, only those wireless clients with the same WEP key will be able to communicate on the wireless network, but the Access Point will be visible to all devices on the network. NOTE: Wired Equivalent Privacy is a security protocol for WLANs defined in the 802.11b standard. WEP aims to provide security by encrypting data over radio waves so that it is protected as the data is transmitted from one end point to another. - Data Encryption This function is used to translate the data into a secret code. Data encryption is the most effective way to achieve data security. To read an encrypted file, you must have access to a secret key or password that enables you to decrypt it. Once you enable this function, you have to specify the secret key level (64 bits or 128 bits) and key index. - Data Encryption Level This item allows you to select the data privacy algorithm you want, including 64 or 128 bits WEP type. If you select 64 or 128 bits WEP type, a set of WEP key will be generated. 128 bits WEP type provides higher secure level than 64 bits WEP type. If <64bits> is chosen, then 10 hexadecimal digits can be entered for <Enter Network Key>; and 26 hexadecimal digits for <128bits>. NOTE: A hexadecimal digit values in the range of 0~9, A~F and a~f. e.g. abcde12345. 25 User’s Manual - Key Index Key index tells the location where the secret key is stored. You can select from 1 to 4. The option you select here should be corresponding to that of Wireless USB Adapter’s. - Enter Network Key Entering for specifying a secret key for encryption. Select <Enter Network Key> and press ENTER, below virtual keyboard appears. Enter Network Key A B C D E F G H I K L M N O P Q R S T U V W X Y Z a b c d e f g h i j k l m n o p q r s t u v w x y z 0 1 2 3 4 5 6 7 8 9 . ! @ # − _ ◄ ► Cancel Backspace J Delete OK Following the setup procedures described in <Network Name (ESSID)>. NOTE: If <64bits> is chosen as option for <Data Encryption Level>, then 10 hexadecimal digits can be entered; and 26 hexadecimal digits for <128bits>. - Network Setting Entering for setting the WLAN Network related settings, including <WLAN DHCP>, <WLAN IP>, <WLAN Netmask>, <WLAN Gateway> and <WLAN DNS>. Select this item and press ENTER, the sub-menu displays as below: Network Setting 1. 2. 3. 4. 5. 26 WLAN DHCP WLAN IP WLAN Netmask WLAN Gateway WLAN DNS OFF 192.168.70.100 255.255.255.0 0. 0. 0. 0 0. 0. 0. 0 User’s Manual <WLAN DHCP> allows you to obtain a dynamic IP address from DHCP server. If you select <ON>, then the rest items will be assigned automatically; and if <OFF> is selected, you have to enter the rest items manually. NOTE: The item <LAN Select>, which is under <Network Setup> menu, should be set to <WLAN>, otherwise, this submenu <Wireless Network Setup> cannot be accessed. - Connect When settings above are done, move cursor to this item and select <YES> to activate a wireless network (if any has been detected), and <NO> to abort. Dial-in Setup The Dial-in function enables user to establish dial-up modem communication to and from MPEG-4 DVR series unit for the remote software use. User is allowed to connect only one modem to a MPEG-4 DVR series unit. For more information on dial-up setting on PC, see Appendix C: Dial-up Connections via Modem. NOTE: The Dial-in Service is not available if no modem connects to the unit. In Network Setup menu, select <Dial-in Setup> and press ENTER to enter the Dial-in menu. The menu displays as follows. Dial-in Setup 1. Dial-in Service 2. Dial-in Account 3. Dial-in Password 4. Server IP 5. Client IP 6. Dial-in Idle Time 7. Dial-in Max Time OFF user user 192.168.0.1 192.168.0.2 0 Min 0 Min 27 User’s Manual - Dial-in Service If the MPEG-4 DVR series unit does not connect to the Internet, user can communicate to the unit from remote PC through a modem as well. Select <ON> to enable the Dial-in function, or <OFF> to disable. If you select <OFF> for this item, then the rest items will be inaccessible. - Dial-in Account This item enables user to protect the unit by establishing or changing a dial-in user name for modem connection. To setup the Dial-in Account, follow the steps. • Select <Dial-in Account> from Dial-in Setup menu and press ENTER. A virtual keyboard displays. Dial-in Account A B C D E F G H I K L M N O P Q R S T U V W X Y Z a b c d e f g h i j k l m n o p q r s t u v w x y z 0 1 2 3 4 5 6 7 8 9 . ! @ # − _ ◄ ► Cancel Backspace J Delete OK • • Use Direction keys to move the cursor to the wanted character. Press ENTER to add the selected character to the username entry field. • When done, move the cursor to <OK> and press ENTER to save the settings and exit. NOTE: The Sever IP and the Client IP must not be set the same one; but they have to set in the same domain. For example: Server IP: 192.168.0.1 Client IP: 192.168.0.2 28 User’s Manual - Dial-in Password The item allows user to setup the Dial-in password. Follow these steps to setup the login password. - • Select <Dial-in password> from Dial-in Setup menu and press ENTER. A virtual keyboard displays. • • Use Direction keys to select character. Press ENTER to add the selected character to the password entry field. • When done, move the cursor to <OK> and press ENTER to save the settings and exit. Server IP The item is for setting the IP address that identifies the MPEG-4 DVR series unit over modem connection. To set the server IP, follow these steps: - • • Select <Server IP>. Using LEFT/ RIGHT to move the cursor over the IP, and stop on where you want it to be changed. • • • Press ENTER, and then use UP/ DOWN to change the value. When done, press ENTER again to exit. Repeat the procedure till the IP is set completely. Client IP The item determines the remote PC’s IP address for connecting with the MPEG-4 DVR series unit. To set the Client IP, follow these steps: - • • Select <Client IP>. Using LEFT/ RIGHT to move the cursor over the IP, and stop on where you want it to be changed. • • • Press ENTER, and then use UP/ DOWN to change the value. When done, press ENTER again to exit. Repeat the procedure till the IP is set completely. Dial-in Idle Time This item indicates the longest amount of time that the modem connection remains active if there is no acknowledgement from the remote pc. The value can be set in the range of 0 min to 600 min. 29 User’s Manual - Dial-in Max Time The item indicates the longest amount of time that the connection via modem remains active. The value can be set in the range of 0 min to 600 min. Dial-out Setup The Dial-out function enables user to establish dial-up modem communication to and from MPEG-4 DVR series unit for remote notification use. User can connect one modem to MPEG-4 DVR series unit. For more information on dial-up setting on PC, see Appendix C: Dial-up Connections via Modem. NOTE: The Dial-out Service is not available if there is no modem connected to the unit. In Network Setup menu, select <Dial-out Setup> and press ENTER to enter the Dial-out menu. The menu displays as follows. Dial-out Setup 1. Dial-out DHCP 2. Dial-out IP 3. Dial-out Netmask 4. Dial-out Gateway 5. Dial-out DNS 6. Phone Number 7. Dial-out Account 8. Dial-out Password 9. Dial-out Idle Time 10. Dial-out Max Time 11. Connect - OFF 192.168.254.1 255.255.255.0 192.168.254.254 192.168.254.254 1234 user user 0 Min 0 Min NO Dial-out DHCP This item allows user to obtain a dynamic IP address from DHCP (Dynamic Host Configuration Protocol) server over modem connection. If the item is enabled (ON), a dynamic IP will be assigned to MPEG-4 DVR series unit. In this case, user does not need to configure a static IP and the following settings will be read only. Select <ON> to enable the DHCP function, or <OFF> to set the dial-out IP address, Netmask, Gateway and DNS manually. The default setting is <ON>. 30 User’s Manual - Dial-out IP The item is for setting a static IP address that identifies the MPEG-4 DVR series unit over modem connection. Set the <Dial-out DHCP> to <OFF> for accessing this item. Move the cursor over <Dial-out IP> and press ENTER, and then press UP / DOWN keys to change the values in the selected field. - Dial-out Netmask The item is for setting the Netmask that identifies the MPEG-4 DVR series unit over modem connection. To configure the item, DHCP must be set to <OFF>. Move the cursor over <Dial-out Netmask> and press ENTER, and then press UP / DOWN keys to change the values in the selected field. - Dial-out Gateway Users are allowed to specify the IP address of the gateway or router associated with this unit. To configure this item, DHCP must be set to <OFF>. Move the cursor over <Dial-out Gateway> and press ENTER, and then press UP / DOWN keys to change the values in the selected field. - Dial-out DNS The item allows user to specify the IP address of the Domain Name System (DNS) associated with the unit. To configure this item, DHCP must be set to <OFF>. Enter this item and press UP / DOWN keys to change the values in the selected field. - Phone Number The item is used to set the dial-out phone number. Follow these steps to setup the phone number. • Select <Phone Number> from Dial-out Setup menu and press ENTER. A virtual keyboard displays. • Use Direction keys to move the cursor for selecting number. • Press ENTER to add the selected number to the phone number entry field. • When done, press ENTER to save the settings and exit. 31 User’s Manual - Dial-out Account This item enables user to set the Dial-out user name, which is used for dialing out to Internet Service Provider server. Contact your network service provider for more specific information. To setup the Dial-out Account, follow the steps. • Select <Dial-out Account> from Dial-out Setup menu and press ENTER. A virtual keyboard displays. Dial-out Account A B C D E F G H I K L M N O P Q R S T U V W X Y Z a b c d e f g h i j k l m n o p q r s t u v w x y z 0 1 2 3 4 5 6 7 8 9 . ! @ # − _ ◄ ► Cancel - Backspace J Delete OK • • Use Direction keys to move the cursor to the wanted character. Press ENTER to add the selected character to the username entry field. • When done, move the cursor to <OK> and press ENTER to save the settings and exit. Dial-out Password The item allows user to setup the Dial-out password. Follow these steps to setup the login password. 32 • Select <Dial-out password> from Dial-out Setup menu and press ENTER. A virtual keyboard displays. • • Use Direction keys to move the cursor for selecting character. Press ENTER to add the selected character to the password entry field. • When done, move the cursor to <OK> and press ENTER to save the settings and exit. User’s Manual - Dial-out Idle Time This item indicates the longest amount of time that the modem connection remains active if there is no acknowledgement from the remote pc. The value can be set in the range of 1 min to 600 min. If selecting <0>, the modem connection keeps active continuously. - Dial-out Max Time The item indicates the longest amount of time that the connection via modem remains active. The value can be set in the range of 1 min to 600 min, or <0> to keep the connection indefinitely. - Connect When the Dial-out related settings are configured, set this item to <YES> to starting dial-out or select <NO> to disconnect. Dial Port Selection The Dial Port Selection enables the user to assign the Dial-In/Out, SMS, Text to the designated port of the DVR. For instance, when the cable of a POS system is inserted to the Serial Port of the DVR, enter the Dial Port Selection menu and assign Text to the Serial Port, the DVR will now be able to obtain the data from the POS system. Dial Port Selection 1. Serial Port 2. USB Port-Front 3. USB Port-Rear Top 4. USB Port-Rear Bottom Text NONE NONE NONE The locations of the ports are illustrated below. Trigger Port To avoid the default service port (port 100) to be blocked, the item enables user to change port 100 into another port. To change the trigger port, move the cursor over <Trigger Port> and press ENTER, then adjust the setting by UP / DOWN keys. 33 User’s Manual Email Address This item is used to edit the e-mail address where alarm event information will be sent. Follow these steps to setup the e-mail address. • Select <Email Address> from Network Setup menu and press ENTER. A virtual keyboard displays. • • Use Direction keys to move the cursor for selecting character. Press ENTER to add the selected character to the password entry field. • When done, move the cursor to <OK> and press ENTER to save the settings and exit. SMTP Setup Simple Mail Transfer Protocol (SMTP), a protocol for sending e-mail messages between servers. SMTP is a relatively simple, text-based protocol, where one or more recipients of a message are specified and the message text is transferred. Select < SMTP Setup> from Network Setup menu and press ENTER; the menu displays as follows. SMTP Setup 1. Email via SMTP 2. SMTP Server 3. SMTP Port 4. SMTP Account 5. SMTP Password - NO 25 Email via SMTP The item enables user to determine if the unit sends e-mail via SMTP. Select <YES> to send e-mail via SMTP using direction keys; if not, select <NO>. - SMTP Server This item enables user to set the SMTP server. Contact your network service provider for more specific information. Follow the steps to setup the SMTP Server. • 34 Select <SMTP Server> from SMTP Setup menu and press ENTER. A virtual keyboard displays. User’s Manual SMTP Server A B C D E F G H I K L M N O P Q R S T U V W X Y Z a b c d e f g h i j k l m n o p q r s t u v w x y z 0 1 2 3 4 5 6 7 8 9 . ! @ # − _ ◄ ► Cancel - Backspace J Delete OK • • Use Direction keys to move the cursor to the wanted character. Press ENTER to add the selected character to the username entry field. • When done, move the cursor to <OK> and press ENTER to save the settings and exit. SMTP Port The item is used to change SMTP port to another port, if necessary. SMTP usually is implemented to operate over Internet port 25. To change the SMTP port, move the cursor to <SMTP Port> in SMTP Setup menu and press ENTER. Use UP / DOWN keys to change the values in the selected field. - SMTP Account The item allows user to setup the SMTP username. Follow these steps to setup the login password. • Select <SMTP Account> from SMTP Setup menu and press ENTER. A virtual keyboard displays. • • Use Direction keys to move the cursor for selecting character. Press ENTER to add the selected character to the password entry field. • When done, move the cursor to <OK> and press ENTER to save the settings and exit. 35 User’s Manual - SMTP Password The item allows user to setup the SMTP password. Follow these steps to setup the password. • Select <SMTP password> from SMTP Setup menu and press ENTER. A virtual keyboard displays. • • Use Direction keys to move the cursor for selecting character. Press ENTER to add the selected character to the password entry field. • When done, move the cursor to <OK> and press ENTER to save the settings and exit. DDNS Setup Dynamic Domain Name System (DDNS) allows a DNS name to be constantly synchronized with a dynamic IP address. In other words, it allows those using a dynamic IP address to be associated to a static domain name so others can connect to it by name. Once the setting is completed, the DDNS address will be: http://yourhostname.ddns.iview-ddns.com Fore example, if the chosen Host name is “*******”, then the address will be: http://*******.ddns.iview-ddns.com Select <DDNS Setup> from Network Setup and press ENTER. The menu displays as below figure. DDNS Setup 1. 2. 3. 4. 5. - Enable DDNS Host Name DDNS Port Submit/Update ezDDNS ON XXXX_XXXXXX 80 No No Enable DDNS The item is used to enable or disable the Dynamic Domain Name Service. Select <YES> to enable the service, or <NO> to disable. - Host Name The item allows user to setup a domain name, which is used when entering the MPEG-4 DVR series unit through the net on your remote PC. 36 User’s Manual To setup the Host Name of the unit, follow the steps. • Select <Host Name> from DDNS Setup menu and press ENTER. A virtual keyboard displays as the figure below. Host Name A B C D E F G H I K L M N O P Q R S T U V W X Y Z a b c d e f g h i j k l m n o p q r s t u v w x y z 0 1 2 3 4 5 6 7 8 9 . ! @ # − _ ◄ ► Cancel Backspace J Delete OK Use Direction keys to select character. Press ENTER to add the selected character to the password entry field. When done, move the cursor to <OK> and press ENTER to save the settings and exit. NOTE: No any two MPEG-4 DVR series units should be set the same Host Name. - DDNS Port The item allows user to setup the port for DDNS. Press UP / DOWN Direction keys to change the port. - Submit/ Update When done, move the cursor to this item and press ENTER to submit the settings. NOTE: If there are two MPEG-4 DVRs series units set the same domain name, the later setting will not be submit successfully. - ezDDNS ezDDNS enables the users to register for the host name automatically. Press ENTER and select YES. The following screen will be displayed: 37 User’s Manual ezDDNS Submit/update ok! Host name is XXXX_XXXXXX Press any key to return NOTE: The DVR must be connected to the *Real IP address, or be assigned a specific port using **Port Forwarding technique. *A "Real IP" is the IP address that is assigned to you by your ISP. **A "Virtual IP" is the IP address assigned either manually or through DHCP. When the user is assigned a Virtual IP, the user must use Port Forwarding technique to assign a specific port to the DVR. < RS485 Setup > This menu allows setting up the parameters of the unit’s RS-485 communications port. From the Main menu, select <RS485 Setup> and press ENTER. The following menu is displayed. RS485 Setup 1. Unit ID 2. Baud Rate 3. Bits 4. Stop 5. Parity 224 9600 8 1 None Unit ID This item is used to change the RS-485 ID address of the unit. The ID is in the range of <1> to <255>. The default is <224>. Baud Rate The Baud rate options for associated with the protocol are <2400>, <4800>, <9600>, <19200> and <38400>. The default is <9600> baud. Bits User can specify the bits in a word that are associated with this protocol. The available options are <6>, <7> and <8> bits. The default is <8> bits. Stop User can specify the stop bit associated with this protocol. Options are <1> and <2> stop bits. The default is <1> stop bit. Parity This item is used to specify the parity associated with this protocol. Options are <ODD>, <EVEN>, and <NONE>. The default is <NONE>. 38 User’s Manual < Audio Output/ Key Beep > Enter this item to setup the audio output or key beep. Audio Output The item is used to set the audio output mode. The available options are as follows. • Live/PB Select the item to play the recording sounds of live image in live mode, and sounds of recorded video in playback mode respectively. • Always Live Select the item to play live sounds in both live mode and playback mode. • OFF Select the item to disable the audio output function. Key Beep The item is used to enable or disable the key tone. Select <YES> to enable the key tone, or <NO> to disable. 39 User’s Manual < IP Camera Support > Enter this item to add IP cameras to the DVR. There are 3 options to choose from, <0>, <1>, and <2>. Set this item to <0> will make DVR act as a traditional analog DVR. <1> or <2> indicates that the user will add 1 or 2 IP cameras to the DVR. After the <IP Camera Support> is set to <1> or <2>, the following message will be displayed. Press ENTER to apply the changes, or ESC to exit. Notice!! DVR must reboot to apply the change ENTER: Yes ESC: No Note: If the <IP Camera Support> option does not appear in the <System Setup> menu, you may be using an older hardware version. To check the hardware version, go to <Main Menu> <System Setup> <Version> <Hardware>. The hardware version is listed as the form as XX-YY-ZZ. To be IP camera supported, the “XX” MUST be greater than or equal to C3, and “ZZ” MUST best greater or equal to A8 (e.g. C3-YY-A8). Note: 1. The existing database will NOT be re-formatted after switching to this function. 2. The maximum acceptable resolution of the IP camera is D1. 3. Alarm I/O, Motion detection function, and audio of the IP camera are NOT currently supported. 4. This function is only available for Standard and Turbo models. 40 User’s Manual Monitor Setup The Monitor Setup menu allows user to tune the quality of the displayed image. Select <Monitor Setup> from the Main menu and press ENTER. The following menu is displayed. Main Menu 1. System Setup 2. Monitor Setup 3. Camera Setup 4. Record Setup 5. Sequence Setup 6. Event Setup 7. Database Setup 8. Configuration 9. Video Export 10. Text Setup 11. Shutdown Monitor Setup 1. Show Camera Title 2. Title Position 3. Monitor Brightness 4. Monitor Contrast 5. Monitor Chrominance 6. Screen Center Adjust 7. Show Color Bar 8. VGA Resolution YES Fit BNC 0 0 0 Execute 800x600 The following sections describe the items found in the Monitor Setup menu. < Show Camera Title > This item allows user to choose whether to display the camera title on the screen or not. The default is <YES>, which displays the camera titles with the video. < Title Position> This item sets the DVR to display the proper screen size either on a PC Monitor (VGA) or a CRT CCTV Monitor (BNC). For instance, if you are using a CRT CCTV monitor, set this item to <Fit BNC>; or set this item to <Fit VGA> for PC monitor. After switching to <Fit VGA> mode. <Wrong Setting> <Correct Setting> 41 User’s Manual PC Monitor was used in the example above. In the <Wrong Setting>, the Title Position was set to <Fit BNC>, which was supposed to be set to <Fit VGA>. Since it was not the right setting, the titles of CH1, CH5, CH9, and CH13 were shifted slightly toward the middle of each channel. After switching to <Fit VGA>, the titles have been shifted back to the proper position as shown in the <Correct Setting>. < Monitor Brightness > The function allows user to adjust the brightness of image displayed on the monitor. Move the cursor to the item then press ENTER, and use UP / DOWN keys to adjust the numeric value. The range of brightness values is <-128> to <127>. The default setting is <0>. < Monitor Contrast > The item is used to adjust the color contrast of image. The range of contrast values is <-128> to <127>; the default setting is <0>. < Monitor Chrominance > Move the cursor over the item and press ENTER for adjusting the chrominance of image displayed on the monitor. Use UP / DOWN keys to adjust the numeric value. The range of chrominance values is <-128> to <127>; the default setting is <0>. < Screen Center Adjust > The item is used to adjust the screen center of the main monitor display area. Follow the steps to set the center point. • Select <Screen Center Adjust> from the Monitor Setup menu and press ENTER. The adjusting screen is as follows. Screen Center Adjust ▲ ◄ + ▼ • • 42 Position the screen center position using the Direction keys. Press ENTER to exit when finished. ► User’s Manual < Show Color Bar > Choose this item to display a color bar pattern on the screen. The color bar helps to adjust the monitor hue, saturation, text color, and display options. Press ESC to exit the color bar pattern and return to the OSD menu. < VGA Resolution > The item allows user to select appropriate VGA resolution for the VGA monitor connected to the unit. The options are <800×600> (default), <1024×768> and <1280× 1024>. NOTE: If the selected VGA resolution is too high for the monitor, the message “No Signal’’ will be shown on screen. Then press ESC on the front panel to restore the original setting. 43 User’s Manual Camera Setup The items in the Camera Setup menu enable user to set camera parameters, including camera title, dome protocol and ID for each connected camera. The menu is shown as below. Note that there will be separated menus for analog camera and IP camera. Please refer to <Analog Camera> section if you are using an analog camera, or refer to <IP Camera> when you are using an IP camera. Main Menu 1. System Setup 2. Monitor Setup 3. Camera Setup 4. Record Setup 5. Sequence Setup 6. Event Setup 7. Database Setup 8. Configuration 9. Video Export 10. Text Setup 11. Shutdown 44 Analog Camera 1. Analog Camera Select 2. Dome Protocol 3. Dome ID 4. Camera Title 5. Covert 6. Termination 7. Brightness 8. Contrast 9. Saturation 10. Hue 11. Audio Association CH3 None 0 CH3 No Yes 0 0 0 0 Both IP Camera 1. IP Camera Select 2. IP Camera Title 3. Hostname/IP 4. Model 5. Connection Setup 6. Device Setup 7. Activated 8. Status CH16 CH16 X.X.X.X No User’s Manual < Analog Camera > If you are using an analog camera, please continue with this section. Items in this menu are described in the following subsections. Analog Camera 1. Analog Camera Select 2. Dome Protocol 3. Dome ID 4. Camera Title 5. Covert 6. Termination 7. Brightness 8. Contrast 9. Saturation 10. Hue 11. Audio Association CH3 None 0 CH3 No Yes 0 0 0 0 Both Analog Camera Select The item is used to select a camera for setting the parameters. The related settings will follow the selected camera, such as dome protocol and camera title. Move the cursor to <Analog Camera Select> and press ENTER, then select a channel using UP / DOWN keys. Dome Protocol Select the communications protocol associated with your dome camera using the ENTER and Direction keys. The available protocol includes <DynaColor>, <Pelco D>, <Pelco P>, <AD422>, <Fastrax 2>, <Panasonic_C>, <Panasonic_N>, and <None> (default). Dome ID This item is used to assign an ID number to the selected dome camera. Note that ID number must match the ID address set by the dome. Camera Title This item allows the user to change the title of each camera connected to the unit. By default, the titles of cameras are numbered from 1 through 16 respectively. The title is displayed on screen after the changes of the titles are set. Follow these steps to enter a new title for a camera. • In the Camera setup Menu, move the cursor to Camera Title and press ENTER. A virtual keyboard with alphanumeric characters is displayed. 45 User’s Manual Camera Title A B C D E F G H I K L M N O P Q R S T U V W X Y Z a b c d e f g h i j k l m n o p q r s t u v w x y z 0 1 2 3 4 5 6 7 8 9 . ! @ # − _ , “ + = * ◄ ► Cancel Backspace J Delete OK • Use Direction keys to position the cursor in the title entry field above the virtual keyboard. • Use Direction keys to move the cursor through the lists of characters to the one you need. Press ENTER to select a character. Continue until the name is established. Each title can contain up to 11 characters in it • After title entry is finished, move the cursor to <OK> and press ENTER; otherwise, either press ESC, or move the cursor to <Cancel> and press ENTER to abort. Covert This function allows user to choose certain camera to be covert while the unit is continuing recording video. Choosing <YES> means to cover the selected camera; and <NO> to remain the selected camera non-covert. The default setting is <NO>. To make a camera be covert, follow these steps: • • Select the channel that you want to be covert from <Channel Select> item. After selecting the channel, move the cursor to <Covert> item and select <YES>. Termination This item is used to enable / disable the 75-termination resistor inside the unit to adjust the image quality of each camera. <YES>= termination resistor enabled (default), <NO> = termination resistor disabled. NOTE: If the camera loop-out connectors have not been used, the termination resistor should be enabled for appropriate signal termination. 46 User’s Manual Brightness Move the cursor to the item and press ENTER for adjusting the brightness of the camera. Use UP / DOWN keys to adjust the numeric value. The range of brightness values is <-128> to <127>. The default setting is <0>. Contrast Move the cursor to the item and press ENTER for adjusting the contrast of the camera. Use UP / DOWN keys to adjust the value. Saturation Move the cursor to the item and press ENTER to adjust the color saturation of the camera using UP / DOWN keys. This value will be ignored on monochrome monitors. The range of saturation values is <-128> to <127>. The default setting is <0>. Hue Move the cursor to the item and press ENTER for adjusting the hue of the camera. Use UP / DOWN keys to adjust the value. Audio Association The item is used to establish the connection between the selected camera and the two audio-in channels. Move the cursor to <Audio Association> in Camera Setup menu and press ENTER, then select <Both>, <Left Only>, <Right Only> or <None> by UP / DOWN keys to set up the connection. 47 User’s Manual < IP Camera > If you are using an IP camera, please continue with this section. After the <IP Camera Support> is set to <1> or <2> and the DVR is rebooted, the user will be able to setup the IP camera. Items in this menu are described in the following subsections. IP Camera 1. IP Camera Select CH16 2. IP Camera Title CH16 3. Hostname/IP X.X.X.X 4. Model 5. Connection Setup 6. Device Setup 7. Activated 8. Status No IP Camera Select To select the corresponding channels. If you chose <1> in <IP Camera Support>, then channel 16 will be the corresponding channel for IP camera. When you choose <2> in <IP Camera Support>, channel 15 and 16 can be used to setup the IP cameras. NOTE: Only channels 15 and 16 are available for installing with IP cameras. IP Camera Title This item allows the user to change the title of each camera connected to the unit. By default, the titles of cameras are numbered from 1 through 16 respectively. The title is displayed on screen after the changes of the titles are set. Follow these steps to enter a new title for an IP camera. • ENTER <IP Camera Title> and a virtual keyboard with alphanumeric characters is displayed. IP Camera Title A B C D E F G H I K L M N O P Q R S T U V W X Y Z a b c d e f g h i j k l m n o p q r s t u v w x y z 0 1 2 3 4 5 6 7 8 9 . ! @ # − _ , “ + = * ◄ Cancel 48 ► Backspace OK J Delete User’s Manual • Use Direction keys to position the cursor in the title entry field above the virtual keyboard. • Use Direction keys to move the cursor through the lists of characters to the one you need. Press ENTER to select a character. Continue until the name is established. Each title can contain up to 11 characters in it • After title entry is finished, move the cursor to <OK> and press ENTER; otherwise, either press ESC, or move the cursor to <Cancel> and press ENTER to abort. Hostname/IP To be entered with the hostname or IP address of the IP camera (e.g. 192.168.1.123). Model Enter this option to choose your IP camera model. The DVR supports the following IP camera models, <Video Server>, <ViVoTek 7000>, <AXIS 200>, <SONY SNC>, and <ACTi Series>. Connection Setup This item is used to setup the connection of the IP camera, enter this item and the following menu will be displayed. Connection Setup 1. Account 2. Password 3. Management Port 4. Streaming Port 5. Streaming Format 6. Streaming Protocol - **** **** 80 8090 MPEG4 RTP+RTSP Account To be entered with the account name of the IP camera. - Password To be entered with the password of the IP Camera. - Management Port The management port is the default port of the IP camera. Different IP cameras may have different management ports. - Streaming Port Streaming port is used for transmitting video and related commands. 49 User’s Manual - Streaming Format Enter this option to choose the streaming format of your IP camera model. The DVR supports the following streaming formats, <MPEG4>, and <MJPEG>. - Streaming Protocol Enter this option to choose the streaming protocol of your IP camera model. The DVR supports the following streaming protocols, <RTP+RTSP>, <RTP/RTSP>, <RTP/RTSP/HTTP>, and <HTTP>. NOTE: Please contact the manufacturer of your IP camera for assistance if you cannot find the information of the Management Port/Streaming Port/ Streaming format/ Streaming Protocol for the IP camera. Device Setup Enter this option to set the basic settings of the IP camera. Upon entering this option, the following message will be displayed. Collecting data Please wait! If the connection cannot be detected, the following message will be displayed. Please check the <Hostname/IP>, <Model>, and <Connection Setup> again to make sure the settings are correct. Cannot get config from the IP device When the connection is detected, the following menu will be displayed. NOTE: The <Device Setup> menu may have fewer or more options than the menu below since the <Device Setup> menu is retrieved from the menu options of the IP camera. Device Setup 1. Product ID 2. Image Resolution 3. FPS 4. Compression 5. Quality 6. Sharpness 7. Brightness 8. Contrast 9. Saturation 10. Hue 11. Apply 50 **** CIF 15 40 Best 0 20 50 30 40 No User’s Manual - Product ID This item will display the product name of the IP camera. NOTE: The contents of the <Device Setup> menu differ from camera model to camera model. For instance, when you connect to IP Camera Brand A, you may have all options available. However, when you connect to IP Camera Brand B, you may only see 7 or 8 options. <IP Camera Brand A> - <IP Camera Brand B> Image Resolution/ FPS/ Compression/ Quality This can be used to setup the Image Resolution/FPS (Frames Per Second)/Compression/Quality of the IP camera. - Sharpness/ Brightness/ Contrast/ Saturation/Hue Move the cursor to the item and press ENTER for adjusting the Sharpness/Brightness/Contrast/Saturation/Hue of the camera. Use UP / DOWN keys to adjust the numeric value. - Apply Select <Yes> to apply the settings above, and the following message will be displayed. Re-collecting data Please wait! When the settings cannot be applied, the following message will be displayed. You may need to reduce the resolution, or FPS of the IP camera. Cannot set the IP device Otherwise, the <Device Setup> setting is completed. 51 User’s Manual NOTE: After changing any item under <Device Setup> menu, you MUST select <Apply> to apply the changes, or the settings will remain unchanged. Activated Select <Yes> to activate the IP camera, or <No> to deactivate it. NOTE: After activating the IP camera, Hostname/IP, Model, Connection Setup options under < IP Camera> menu will become unchangeable unless the selected IP camera is deactivated. Status After activating the IP camera, the <Status> option will be shown. Enter this option to see the currently status of the IP camera. Status 1. Model 2. Resolution 3. PPS 4. Bandwidth 5. Pkg. lost rate **** 720*480 10 20 KB/Sec 0.1% Under the <Status> menu, the user will be able to see the model, resolution, PPS, bandwidth, and package lost rate of the IP camera. 52 User’s Manual Record Setup The following three factors will effect the total record time of MPEG-4 DVR series unit: • • • HDD capacity Recording rate (Picture per Second) Image quality settings The greater the recording rate and the higher the quality setting, the shorter the recording time. Most of the related factors can be set here in this submenu. The Record Setup menu allows user to set recording quality, recording schedules, and other recording parameters. Administrator's password is required to access Record Setup menu. In the Main menu, move the cursor to <Record Setup> and press ENTER. The following menu is displayed. Main Menu 1. System Setup 2. Monitor Setup 3. Camera Setup 4. Record Setup 5. Sequence Setup 6. Event Setup 7. Database Setup 8. Configuration 9. Video Export 10. Text Setup 11. Shutdown Record Setup 720×240@120PPS 1. Record Mode 2. Schedule Setup 3. Preset Config Best Quality 4. Per Camera Config 5. ezRecord Setup 6. Data Lifetime 7 Days 7. Pre-Alarm Recording 15 Sec 8. Circular Recording ON 9. Audio Recording ON 10. Purge Data < Record Mode > The Record Mode is for selecting resolution and recording rate. The relative record settings, such as preset configuration, will follow the record mode setting. The primary (RAW) image size of the recorded video can be large and is not very effective in terms of transmitting or storing data. Thus, various compression techniques are used to reduce the image size. For instance, if the RAW image size is 10MB, after compressing the image, the size of the image will be greatly reduced depending on the complexity of the image and the compression method used. MPEG-4 and M-JPEG Compressions are two of the most commonly used video compression methods, and are used in our DVR. The differences between the two are listed on the next page. 53 User’s Manual Comparison Table MPEG-4 M-JPEG Bandwidth Consumption Low High Compression High Low Image Quality Low High Latency High Low Storage Requirement Low High Bandwidth Consumption: The MPEG-4 requires lower bandwidth than M-JPEG. So, if your internet speed is relatively slow, MPEG-4 Compression is recommended. Compression: The size of the image can be compressed into smaller size when MPEG-4 Compression is used. Since the size of the image is reduced, the storage requirement for MPEG-4 Compression is also lower. Image Quality: The quality of the M-JPEG compressed images is higher than MPEG-4 compressed images. Note that M-JPEG does not support synchronized audio capacity. Latency: Latency is the time delayed between the actual activity and the live video. Since M-JPEG is a simpler compression technique, the latency for M-JPEG is lower than MPEG-4. Storage Requirement: The MPEG-4 uses a higher compression technique to reduce the size the image, and thus the storage requirement is lower than M-JPEG. As you may have already noticed that there is no compression technique which suits every scenario. It really depends on what you prefer between the two. For instance, if you are monitoring the lobby of the National Security Agency, you will be more likely to choose the M-JPEG Compression because it provides better image quality and allows you to see clearer images. Please continue to the next page to learn about how the MPEG-4 and M-JPEG compressions work in our DVR system. 54 User’s Manual The tables below list the record modes available in the DVR system. Record Modes (NTSC) Turbo Model MPEG-4 M-JPEG Standard Model Light Model 720 x 480@ 120 PPS 720 x 480@ 60 PPS 720 x 480@ 30 PPS 720 x 240@ 240 PPS 720 x 240@ 120 PPS 720 x 240@ 60 PPS 352 x 240@ 480 PPS 352 x 240@ 240 PPS 352 x 240@ 120 PPS 720 x 480@ 60+TC 720 x 480@ 60 JPG 720 x 480@ 30 JPG 720 x 240@ 120+TC 720 x 240@ 120 JPG 720 x 240@ 60 JPG 352 x 240@ 240+TC 352 x 240@ 240 JPG 352 x 240@ 120 JPG Record Modes (PAL) Turbo Model MPEG-4 M-JPEG Standard Model Light Model 720 x 576@: 100 PPS 720 x 576@ 50 PPS 720 x 576@ 25 PPS 720 x 288@: 200 PPS 720 x 288@ 100 PPS 720 x 288@ 50 PPS 352 x 288@: 400 PPS 352 x 288@ 200 PPS 352 x 288@ 100 PPS 720 x 576@: 50+TC 720 x 576@ 50 JPG 720 x 576@ 25 JPG 720 x 288@ 100+TC 720 x 288@ 100 JPG 720 x 288@ 50 JPG 352 x 288@ 200+TC 352 x 288@ 200 JPG 352 x 288@ 100 JPG Record Mode for MPEG-4 DVR Light & Standard Model For these two models, the user will be able to choose MPEG-4 Compression or M-JPEG Compression for recording to the DVR and transmitting image through the network. For example, when you choose “720 x 480@60 JPG” for your MPEG-4 DVR Standard Model, everything in local and remote site will be in M-JPEG format. On the contrary, when you choose “720 x 480@60 PPS”, everything will be in MPEG-4 format. Record Mode for MPEG-4 DVR Turbo Model The record mode for the MPEG-4 DVR Turbo Model is slightly different from the two models above. For the MPEG-4 compression modes, there is no difference. For M-JPEG compression modes, the “TC” in the end of each resolution is an abbreviation for “Transcoding.” Our “Transcoder“ function enables both MPEG-4 and M-JPEG compression methods to coexist in your DVR system. For instance, if you choose “720 x 288 @ 100+TC”, the DVR will behave this way: Recorded Video Recorded Video Live Video Live Video (Local site) (Remote site) (Local site) (Remote site) MPEG-4 MPEG-4 MPEG-4 M-JPEG 55 User’s Manual Note that the picture per second has been divided into 1/2 because the other half of the original PPS has become the resources for the transcoding mode. To setup the record mode, move the cursor to <Record Mode> and press ENTER, then select a Record mode using UP / DOWN keys. NOTE: After changing the Record Mode setting, the warning message “This will FORMAT ALL HARDDISKS and LOAD THE FACTORY DEFAULT CONFIG!” will be shown on the screen. Press ENTER to confirm the selection, then the unit starts to format the hard disks and load the factory default settings, or press ESC to abort. We strongly recommend that you back up the configuration before making any change on Record Mode settings. < Schedule Setup > This submenu is used to set the day and night time, or weekend recording schedule. The Night and Day schedules are used to define daytime and nighttime; the Weekend schedule is tailored for weekends and holidays. Select <Schedule Setup> from the Record Setup menu and press ENTER; the following menu is displayed. Schedule Setup 1. Day Time Start 2. Day Time End 3. Night Time Start 4. Night Time End 5. Weekend Schedule 6. Weekend Start 7. Weekend End 06:00 18:00 18:00 06:00 YES Fri 18:00 Mon 06:00 Day / Night Time Start/ End The Day/Night Start Time and End Time determines the during of day/ night recording time. Time is indicated in 1-minute increments. The time display format in this menu is based on the setting of Time Display Mode. Weekend Schedule The Weekend Schedule determines whether a weekend schedule is in effect. Choose <YES> to take effect the related weekend settings. 56 User’s Manual Weekend Start / End The Weekend Start Time indicates the specific day and time that a weekend begins, for example, FRI 18:00. The Weekend End Time indicates the specific time and day that a weekend ends, for example, MON 06:00. Time is indicated in 1-minute increments. Note that the value you have set indicates when the regular Day and Night scheduling ends, and Weekend recording begins. < Preset Record Configuration > The <Preset Config> is used to select the preset recording quality and frame rate. Different default recording quality levels are offered for user to choose: <Best Quality>, <Standard>, <Extended Record>, <Event Only>, <128Kbps DSL>, <256Kbps DSL>, <512Kbps DSL> and <OFF>. According to various Record modes, the preset configuration options for normal and event status are described in terms of relative recording rate (PPS) and recording size for each channel in the table below. The preset conditions <Best Quality>, <Standard>, <Extended Record>, <Event Only>, <128Kbps DSL>, <256Kbps DSL> and <512Kbps DSL> override any other quality and rate settings. The default Preset Configuration setting is <Standard>. Lite Model (MPEG-4) NTSC 720 X 480 @ 30PPS 720 X 240 @ 60PPS 352 X 240 @ 120PPS PAL 720 X 576 @ 25PPS 720 X 288 @ 50PPS 352 X 288 @ 100PPS Best 30 KB 25 KB 15 KB Standard 18 KB 15 KB 9 KB Extend 6 KB 5 KB 3 KB Standard Model (MPEG-4) NTSC 720 X 480 @ 60PPS 720 X 240 @ 120PPS 352 X 240 @ 240PPS PAL 720 X 576 @ 50PPS 720 X 288 @ 100PPS 352 X 288 @ 200PPS Best 28 KB 20 KB 10 KB Standard 16 KB 12 KB 6 KB Extend 4 KB 4 KB 2 KB 57 User’s Manual Turbo Model (MPEG-4) NTSC 720 X 480 @ 120PPS 720 X 240 @ 240PPS 352 X 240 @ 480PPS PAL 720 X 576 @ 100PPS 720 X 288 @ 200PPS 352 X 288 @ 400PPS Best 20 KB 10 KB 5 KB Standard 12 KB 6 KB 3 KB Extend 4 KB 2 KB 1 KB Lite Model (M-JPEG) NTSC 720 X 480 @ 30JPEG 720 X 240 @ 60JPEG 352 X 240 @ 120JPEG PAL 720 X 576 @ 25JPEG 720 X 288 @ 50JPEG 352 X 288 @ 100JPEG Best 38 KB 33 KB 23 KB Standard 24 KB 21 KB 15 KB Extend 10 KB 9 KB 7 KB Standard Model (M-JPEG) NTSC 720 X 480 @ 60JPEG 720 X 240 @ 120JPEG 352 X 240 @ 240JPEG PAL 720 X 576 @ 50JPEG 720 X 288 @ 100JPEG 352 X 288 @ 200JPEG Best 38 KB 33 KB 23 KB Standard 24 KB 21 KB 15 KB Extend 10 KB 9 KB 7 KB 128KbpsDSL 256KbpsDSL 512KbpsDSL NTSC 2 KB 3 KB 4 KB PAL 2 KB 3 KB 4 KB DSL for All Models Note: PPS is limited to 4PPS for Network Usage 58 User’s Manual < Per Camera Configuration > This sub-menu is used to set the Day / Night / Weekend PPS (Picture per Second) and recording quality for each channel. The <Preset Configuration> must be set to <OFF> for accessing these schedules. The menu is displayed as below in Record mode: 720×240@60PPS in NTSC / 720×288@50PPS in PAL). Per Camera Config Cameral Select Normal PPS Normal Qlty Event Max PPS Event Qlty Event Active Day 7.5 Mid 30 Best Both Night 7.5 Mid 30 Best Both CH1 Weekend 7.5 Mid 30 Best Both Camera Select The item is used to select a desired channel for setting the parameters. Move the cursor to <Camera Select> and press ENTER, then select a channel using UP / DOWN keys. Press ENTER again to confirm the setting. Normal PPS Normal PPS (Picture per Second) is used to set the recording rate for normal status. Please note that the total normal pps for all channels is limited under the maximum PPS for each Record mode. To increase one channel’s pps, you may have to reduce other’s first. Event pps is not restricted to this rule, since a smart event scheduler will handle to the total pps with a correct weighting. Normal Qlty The item is used to set the picture size for normal status recording. The available options are listed as follow: <Low>, <Fair>, <Mid>, <High> and <Best>. Event Max PPS Event Max PPS is used to set the event recording rate for Event status. Normally, the Event PPS is set to equal or greater than Normal PPS; the setting is depending on your application. If the Event PPS is set to <0>, MPEG-4 DVR series unit stops recording event video during alarms. 59 User’s Manual Event Qlty The item is used to set the picture size for event status recording. The available options are <Low>, <Fair>, <Mid>, <High> and <Best>. Event Active Users are allowed to choose which alarm type needs to be recorded. The available options are <Alarm> (alarm events), <Motion> (motion detection events), <Both> (alarm event + motion detection), and <None> (no events active). The default setting is <Both>, which includes Alarm and Motion event recording. < ezRecord Setup > This item aims to ease the complicated record settings, and to make the setup much easier. Note that the item can be reached only when you select <ezRecord> as the option for <Preset Config>. Select <ezRecord Setup> from <Record Setup> and press ENTER, the sub-menu appears as below figure: ezRecord Setup How Many Days To Record Daytime Record Night Record Weekend Record Record Info Average Normal PPS Average Normal Quality 2 Days Yes Yes Yes 3.75 Best Follow these steps to Setup ezRecord: 60 • Select <How Many Days To Record> and press ENTER, then press UP/DOWN to choose an option. The average normal PPS & Quality will be adjusted automatically. The maximum of days depends of the size of your HDD, in the other words, the larger the HDD installed, the more days the unit can record. • Move to <Daytime Record> and press ENTER. This item is for you to select whether you want the DVR to record during daytime. If so, use UP/DOWN to select <Yes> as an option; or, select <No> for not recording during daytime. • Repeat the same procedures through the 3rd and 4th item, respectively. Note that <Weekend Record> will be not accessible if you select <NO> for the item <Weekend Schedule> in <Schedule Setup>. User’s Manual • Select <Average Normal PPS> and press ENTER, then press UP/DOWN to choose an option. The <How Many Days To Record> will be computed automatically. • Select <Average Normal Quality> and press ENTER, then press UP/DOWN to choose an option. The <How Many Days To Record> will be computed automatically. NOTE: The current number of connected cameras will affect the recording quality automatically calculated through the <ezRecord Setup>. Therefore, once you disconnect cameras or connect more cameras to the unit, you should reset the <ezRecord Setup>. < Data Lifetime > Data Lifetime indicates the time that a recording is saved and remained in the HDD, between the creation and deletion of a record. Only those video recorded during Data Lifetime will be displayed on the screen and can be played back; those video recorded outside the duration time will be hidden. Press ENTER to select this item in Record Setup menu, and then use UP / DOWN keys to set the data lifetime. The value ranges from <1> to <365> days, or select <0> to disable the function. NOTE: If you want to play back the video, which is outside the data duration of lifetime, please extend the duration till the recording data/ time of the video is included. < Pre-Alarm Recording > This item is used to set the duration of pre-alarm recording video. The pre-alarm recording function aims to make user view a more complete event video; what user can view is not only the video recorded after the alarm is triggered, but also the video recorded ahead the alarm. When an event is triggered while normal recording is in effect, the unit will start copying the pre-alarm and the post-alarm video to the event video. The pre-alarm duration can be set from 0~30 seconds. The default setting is 15 seconds. The quality of the pre-alarm video is the same as the quality setting for normal record video; and the quality of the post-alarm video is the same as the quality setting for event record video. 61 User’s Manual < Circular Recording > User can choose to record video in circular mode or in linear mode. If you choose to record in circular mode, then the unit begins to overwrite the oldest recorded video; and stores new video over the HDD spaces. If you choose to record in linear mode in stead, the unit stops recording, and the internal buzzer starts beeping when the HDD is full. From the Record Setup menu, move the cursor to <Circular Recording> and press ENTER, then select <ON> / <OFF> using UP / DOWN keys. < Audio Recording > This item allows user to enable / disable Audio recording function of the unit. When set to <ON>, audio input is recorded and saved with the video. When set to <OFF>, audio is ignored. The default setting is <ON>. < Purge Data > This item is used to delete the Normal or Event recording video. In Record Setup menu, move the cursor to <Purge Data> and press ENTER; the Purge Data menu is displayed. Purge Data 1. Purge All Data 2. Purge All Event Data 3. Purge Event Before 4. Start to Purge NO NO 2005/01/01 NO Purge All Data The item is used to delete all recorded video from database(s). Set this item to <YES> using UP / DOWN keys, and start the deleting by enable (YES) the <Start to Purge> function. Purge All Event Data The item is used to delete all event video from database(s). Using UP / DOWN keys to select <YES> and start the deleting by setting the <Start to Purge> to <YES>. Purge Event Before The item is used to delete event video before a specific date. Use LEFT / RIGHT keys to move the cursor to next or previous field, ENTER to select the item and UP / DOWN to adjust the value. 62 User’s Manual Start to Purge After selecting the video you want to delete or setting the date for deletion, set this item to <YES> for start the deleting or choose <NO> to cancel. 63 User’s Manual Sequence Setup The Sequence Setup menu allows setting the camera sequence schedule and dwell time for main and call monitor. Select <Sequence Setup> in Main menu and press ENTER; the menu displays as follows. Main Menu 1. System Setup 2. Monitor Setup 3. Camera Setup 4. Record Setup 5. Sequence Setup 6. Event Setup 7. Database Setup 8. Configuration 9. Video Export 10. Text Setup 11. Shutdown Sequence Setup 1. Main Monitor Dwell 2. Main Monitor Schedule 3. Call Monitor Dwell 4. Call Monitor Schedule 5 Sec 5 Sec Items in the Sequence Setup menu are described in the following subsections. < Main / Call Monitor Dwell > The Main / Call Monitor can be set to display full screen video of all installed cameras in sequence. This item is used to set the Main / Call Monitor dwell time, which is the amount of time elapsed between switching images. The dwell time is in the range of 1 to 120 seconds. The default value is 5 seconds. < Main / Call Monitor Schedule > This item is used to set the Main / Call Monitor camera sequence in full screen format. Move the cursor to <Main Monitor Schedule> and press ENTER; the menu is displayed as follows. Main Monitor Schedule _►_►_►_►_►_►_►_►_ ►_►_►_►_►_►_►_ Press 1-16 Key To Select Channel Press ◄ To Delete Follow these steps to set a sequence: 64 • • Press LEFT direction key to delete the original setting. Press the desired Channel keys to assign a camera to that location in the sequence. • Continue the steps until the sequence is completed. User’s Manual A sequence can have up to 16 entries. User can select fewer than 16 entries for camera sequence and leave the remaining entries blank. The sequence can include a specific camera or cameras multiple times. 65 User’s Manual Event Setup This menu allows user to determine MPEG-4 DVR series behavior in response to an alarm event. In the Main menu, move the cursor to <Event Setup> and press ENTER. The following menu is displayed. Main Menu 1. System Setup 2. Monitor Setup 3. Camera Setup 4. Record Setup 5. Sequence Setup 6. Event Setup 7. Database Setup 8. Configuration 9. Video Export 10. Text Setup 11. Shutdown Event Setup 1. Internal Buzzer 2. Event Icon 3. Email Notice 4. Email Attachment 5. SMS Setup 6. Alert Notification Setup 7. Event Full Screen 8. Event Duration 9. Per Channel Config ON ON OFF OFF None 5 Sec Items in the Event Setup menu are described in the following subsections. < Internal Buzzer > This item allows user to enable / disable the MPEG-4 DVR series internal buzzer. If set to <ON>, the buzzer is activated in response to an alarm. If set to <OFF>, the buzzer is not activated. The default setting is <ON>. < Event Icon > The item enables (ON) / disables (OFF) the display of Event Icon on the main monitor when an alarm event occurs. The default setting is <ON> (enable). The event types are represented by a character respectively; the descriptions are as below table. Event type Description A Alarm in event M Motion detection event L Video loss event < Email Notice > The item enables (ON) / disables (OFF) the Email notification of an event. When an alarm event is triggered and <Email Notice> is enabled, an e-mail concerning the alarm event will be sent. The default setting is <OFF>. 66 User’s Manual NOTE: In order to send an event notification e-mail successfully, ensure that the unit connects to the internet. < Email Attachment > The function allows the unit to send out brief AVI video regarding the event. The number of the attached AVI video will be equal to the number of cameras you connect to the unit. For example, if the unit has been connected with 8 cameras, then 8 video will be attached with the notice email. The total size of the video will be about 2 Mega, Select <ON> to enable this function; and <OFF> to disable it. The default is <OFF>. NOTE: The video clips of the Email Attachment will ONLY be in *.avi format. Please download the Divx Player from www.divx.com to play the *.avi files. < SMS Setup > SMS is the acronym for Short Message Service. SMS messages are short text messages that are sent directly to a mobile phone. They are also known as text messages. This function allows you to send an SMS message to any mobile phone on a GSM network. To perform this function, you need a GSM/ GPRS Modem, the three models listed below are recommended: TC35i Terminal MC35i Terminal TC65 Terminal Connect the GSM/GPRS Modem and the RS232 connector of the unit, which is positioned on the rear panel. Then enter the OSD setup menu and select <SMS Setup>. The following menu displayed. SMS Setup 1. SMS Notice 2. PIN Authentication 3. PIN Code Setup 4. Receiver Number 5. Send Test Message 6. Port Selection OFF ON Execute NONE 67 User’s Manual SMS Notice Select <ON> to send out short message to the assigned mobile phone; and select <OFF> to disable this function. Select <OFF>, the rest items listed in this sub-menu will no longer be accessed. PIN Authentication If you have set PIN code to protect your mobile phone, then you have to select <ON> for this item and enter the set PIN code in the next item. PIN Code Setup Used to set the PIN code which has been set for protecting your mobile phone. Receiver Number Allow you to enter the number of the assigned mobile phone, which the short message will be sent to. Send Test Message Select this item to send a test message to see the setup is successfully done or not. Port Selection The Port Selection enables the user to assign the Dial-In/Out, SMS, Text to the designated port of the DVR. For instance, when the cable of a POS system is inserted to the Serial Port of the DVR, enter the Port Selection menu and assign Text to the Serial Port, the DVR will now be able to obtain the data from the POS system. Port Selection 1. Serial Port 2. USB Port-Front 3. USB Port-Rear Top 4. USB Port-Rear Bottom The locations of the ports are illustrated below. 68 Text NONE NONE NONE User’s Manual < Alert Notification Setup > This function allows the user to send alert notifications to the CMS program which had been installed to your computer. For detailed setup instruction, please refer to the CMS user’s manual. Alert Notification Setup 1. Alert Configuration Set 2. Alert Notification 3. Alert IP 4. Alert Port 5. Alive Interval - 1 OFF 0.0.0.0 9999 120sec Alert Configuration Set <Alert Configuration Set> provides 3 combinations of Alert Notification, IP, and Port. - Alert Notification 4 options are included in this item; <OFF>, <Event>, <Alive>, and <Both>. <OFF>: The Alert Notification is turned off. <Event>: When the alarm is triggered, the DVR will send an alert message to the CMS. <Alive>: The DVR will send an alive message to the CMS every N second just to show you that the connections between the DVR and CMS are in effect. The time interval N can be adjusted in <Alive Interval>. <Both>: This enables the DVR to send both Event and Alive alert package to the CMS. - Alert IP The Alert IP must match the IP address of the computer. - Alert Port The ports for both DVR and the CMS Alert must be the same. - Alive Interval To define the time interval (1 to 255 seconds) between each alive message. 69 User’s Manual < Event Full Screen > This function allows the unit to display the alarm channel in full screen size when an alarm is triggered. Select <None> to enable this function; select <Main> to display the alarm channel on Main Monitor when an alarm is triggered; select <Call> to display the alarm channel on Call Monitor; and select <Both> to display the alarm channel on both Main Monitor and Call Monitor. < Event Duration > This item determines the duration of the buzzer and Alarm Out relay function after an alarm is triggered. The available event duration range is from 1 second to 100 seconds. The default setting is 5 seconds. < Per Channel Config > This menu is used to set the Video Loss Detect, Motion Detect and Alarm In / Out function for each channel. The menu is displayed as below. Per Channel Config 1. Channel Select 2. Video Loss Detect 3. Motion Detect 4. Detection Config 5. Alarm In 6. Alarm Out CH1 ON ON OFF None Channel Select The item is used to select a desired channel for setting the parameters. Move the cursor to <Channel Select> and press ENTER, then select a channel using UP / DOWN keys. Press ENTER again to confirm the setting. Video Loss Detect This item allows user to enable / disable Video Loss as an alarm event. Select <ON> to enable Video Loss alarm events, <OFF> to disable. The default setting is <ON>. Motion Detect Use to enable or disable the motion detection function of the MPEG-4 DVR series. By default, the value is <OFF>. 70 User’s Manual If motion detection function is enabled, it is required to define the motion detection parameters such as detection area and sensitivity settings. Detection Config If motion detection function is enabled, it is required to define the motion detection parameters such as detection area and sensitivity settings. Select a channel for setting the parameters, move the cursor to <Detection Config>, and press ENTER. The Detection Configuration menu displays as follows. Detection Config 1. Detected Area Setup 2. Sensitivity 3. Area Threshold 88% 6% ----- Detected Area Percentage ----40% ▲ - Detected Area Setup The Detect Area is displayed as follows after selecting this item. The detection area consists of 273 (21×13) detection grids in NTSC video format or 336 (21×16) grids in PAL format. ■ ■ ■ ■ ■ ■ ■ ■ ■ ■ ■ ■ ■ ■ ■ ■ ■ ■ ■ ■ ■ ■ ■ ■ ■ ■ ■ Use the Direction keys to move the cursor and press ENTER to enable or disable a grid. Press MODE to select all of the grids for detection; press MODE again to de-select all of the grids. - Sensitivity The item is used to set the sensitivity of detection grids for the camera. A greater value indicates more sensitive motion detection. A motion alarm will be triggered, once the amount of motion detected exceeds the Threshold value Move the cursor to <Sensitivity> and press ENTER, and then use UP / DOWN keys to adjust the value. The value is indicated in 4% increment. 71 User’s Manual - Area Threshold <Area Threshold> means the motion alarm triggered level; if the percentage of triggered grids to total detection area is greater than the set value, the motion alarm will be triggered. For example, if 10 grids are selected and the < Area Threshold > value is 70%, the motion alarm will be triggered when 7 grids are motion detected. Move the cursor to < Area Threshold > and press ENTER, and then use UP / DOWN keys to adjust the value. The value is indicated in 4% increment. - Detected Area Percentage The part shows the percentage and variation of the detected volume. Alarm In This item allows user to enable / disable alarm input detection. According to your application, select <N/O> (Normal Open) or <N/C> (Normal Close) to enable the alarm input detection or select <OFF> to disable the detection. The default setting is <OFF>. If you set this item to <N/C> but did not install any device to the unit, the alarm will be triggered and the Event Icon displayed continually until this item is changed to <N/O>, <OFF> or install a device to the unit. Alarm Out This item allows user to assign an alarm on certain channel to activate the relays. These signals can be used to drive a light or siren to caution an alarm event. The default setting is <None>. The available options and the corresponding activated alarm outs are listed as below table: 72 Option Activating Relay Option Activating Relay <A only> Alarm Out A <B+C> Alarm Out B & Alarm Out C <B only> Alarm Out B <A+C> Alarm Out A & Alarm Out C <C only> Alarm Out C <All> All Alarm Out <A+B> Alarm Out A & Alarm Out B <None> No Alarm Out User’s Manual Database Setup The menu displays information of internal and external disks. In the Main menu, move the cursor to <Database Setup> and press ENTER. The following menu is displayed. Main Menu 1. System Setup 2. Monitor Setup 3. Camera Setup 4. Record Setup 5. Sequence Setup 6. Event Setup 7. Database Setup 8. Configuration 9. Video Export 10. Text Setup 11. Shutdown Database Setup 1. Total Size 2. Free Size 3. Avail. REC Time 4. Internal Disks 5. External Disks xxx GB xxx GB 3Days 7Hrs 6. NAS Devices NOTE: If the hard disk is failed detected, the message “HDD fail” will display. < Total / Free Size of HDD > The Total Size of HDD shows the total capacity of HDD that has been added into database. The Free Size of HDD indicates the free space for recording of the HDD added in database. The information is read-only. < Avail. REC Time > The Avail REC Time indicates the available duration for recording. If the unit is set to record in circular mode, the item will show “Circular”. The information is read-only. < Internal / External Disks > Select <Internal Disks> or <External Disks> to see information on the storage devices connected to the unit. The submenu is displayed as below. Internal Disks Name xxx xxxxxxx-xxxxxx Active YES Action None The information of built-in HDD and external storage device will be listed by model name and status. If no storage device connects to the unit, the message “No Available Items!” will show on screen. 73 User’s Manual NOTE: If the file system of the internal HDD is not compatible for the DVR, the system will format the internal HDD automatically without notice. Active The item indicates if the storage device is added into database or not. <YES> means the device has been added into database. Action The item allows user to add storage device into database or remove device from database. The options are <None> (no action), <Add> (add the selected device into database), <Remove> (remove the selected device from database), <Format> (format the selected device). NOTE: Before removing external devices from the unit, remember to remove the device from database. 74 User’s Manual Configuration The Configuration menu can be used to restore the default factory settings, import and export configuration. Select <Configuration> from the Main menu and press ENTER. The following menu is displayed. Main Menu 1. System Setup 2. Monitor Setup 3. Camera Setup 4. Record Setup 5. Sequence Setup 6. Event Setup 7. Database Setup 8. Configuration 9. Video Export 10. Text Setup 11. Shutdown Configuration 1. Load Factory Default 2. Import Config 3. Export Config NO Items in this menu are described in the following subsections. < Load Factory Default > This item is used to load the factory setting; select <YES> to recall the factory default setup configuration from the read-only memory, or <NO> to cancel. < Import Configuration > This item allows user to load a unit configuration that was saved in an external drive. To import a configuration that was previously exported, make sure the device that saved the configuration is connected to the unit. Select <Import Config> from the Configuration menu and press ENTER. The following menu is displayed. Import Config Config Name xxxx-xxxx xxx-xx Select NO NO Press UP / DOWN to select one of the listed available configuration files, and choose <YES> to start import. 75 User’s Manual NOTE: If the imported configuration has different record mode from the unit’s, the warning message “This config has different record mode. This will FORMAT ALL HARDDISKS.” will show. NOTE: Remove the ThumbDrive® used for importing configuration after the unit restarts, or it will be formatted as well. < Export Configuration > The Administrator is allowed to save a unit configuration by exporting it to an external drive, such as a USB Flash Drive. Before exporting the configuration, make sure the device in which the configuration will be saved is attached to the unit appropriately. Select <Export Config> from the Configuration menu and press ENTER. The following menu is displayed. Export Config 1. Copy Destination 2. Config Name 3. Begin Export NO Items in this menu are described in the following sections. Copy Destination Select this item to list available destinations (external memory devices) to which the configuration can be exported. Press UP / DOWN to set a destination. Please note that saving a different configuration to the same copy destination with the same file name will overwrite the previous configuration file without warning. NOTE: Users are not allowed to select any CD-R/W or DVD+RW as a copy destination, including built-in CD-R/W and DVD+RW. Configuration Name This item allows user to assign the exported configuration file a name. Use the virtual keyboard to enter the configuration file name. Note that the file name can contain up to 15 characters, with no spaces. Begin Export Select <YES> to begin exporting the configuration file, or <NO> to abort the export. NOTE: We strongly recommend users to export configuration before upgrading your system, and back it up routinely, just in case for unexpected situation. 76 User’s Manual Video Export The Video Export menu enables the administrator to export recorded video with digital signature to a USB ThumbDrive®, a CD-RW or to DVD+RW drive. Make sure an external storage device is available and connected to the appropriate port for video export. This menu will not be able to access if you enter the OSD Setup Menu with User’s password.. If the <Pre-Alarm Recording> function is enabled, the event video will be exported into two files, including pre-alarm video and video recorded after the alarm is triggered. Each recorded video will be exported into four files when exporting with digital signature, including *.gpg, *.avi (*.drv), *.sig and readme txt. To export 1GB file with digital signature may take you about 30 minutes. From the Main menu, select <Video Export> and press ENTER. The following menu is displayed. NOTE: The inserted CD will be ejected when its capacity is 99% full. Main Menu 1. System Setup 2. Monitor Setup 3. Camera Setup 4. Record Setup 5. Sequence Setup 6. Event Setup 7. Database Setup 8. Configuration 9. Video Export 10. Text Setup 11. Shutdown Video Export 1. Select Device 2. Select Ch: 3. From 4. To 5. Select Events 6. Data Type 7. Export Format 8. Digital Signature 9. Erase Disc 10. Begin Export CH1 CH2 CH3 CH4 2005/03/19 AM 07:50:05 2005/03/28 PM 03:09:18 Normal DRV NO NO NO Items in the menu will be described in the following section. 77 User’s Manual < Select Device > The available external devices for exporting video will be listed by name and free size in Select Device menu. The Select Device menu displays as follows. Select Device Device Name xxx-xxx-x-x-xx xx-xxx-xx-xxxx Available 256 MB 1.5 GB Sel NO NO The MPEG-4 DVR series only supports EXT3 file system. Make sure the HDD format is EXT3 before connecting it with the unit. If not, please format this HDD to EXT3 first. Device Name The item shows the name of the available device. Available The item shows the free space of the available device. Sel Set the item to <YES> to set it as an exporting destination; or <NO> to cancel. NOTE: This last menu item <Erase Disk> will be grayed out when selected device is not a CD/ DVD recorder or not select yet. < Select Channel > The item is used to select channels for export. Move the cursor to the wanted channel using LEFT / RIGHT keys, select or de-select a channel by pressing ENTER. < From / To Time > The items are used to set the time which data export begins and ends. Move the cursor using Direction keys, and press ENTER to select the date / time items; adjust the selected date and time value by UP / DOWN keys. NOTE: When the Start / End Time are set, remember to select the exporting Data Type. 78 User’s Manual < Select Events > Select the item to display the event list for exporting event video. Move the cursor scroll the event list and press ENTER to select the event you want to export. < Data Type > The item is used to select exporting video type. The options are <Normal> (export normal video only), <Event> (export event video only) and <Both> (export both normal and event video). NOTE: If you want to export selected event video using the item <Select Event>, you have to set <From> and <To> at the same day and time; otherwise, not only the selected event video will be exported to the selected destination, but also other event video recorded during the period between <From> and <To>. NOTE: You will not be allowed to access the <Select Events> if the Data Type is set to <Normal>. < Export Format > The item is for selecting exporting video format. The options are <DRV> and <AVI>. The *.drv file can only be played back with DVRRemote and DVRPlayer and multiple camera video can be played from one file. The *.avi file can be played back with Windows Media Player. Note that if multiple channels are exported, each channel is exported to a separate file. < Digital Signature > The Digital Signature function enables user to export video clip with the unit’s unique signature key. It aims to authenticate a video clip exported from the unit and it has not been modified. User can export video clip with or without a digital signature file (*.sig). Set the item to <YES> to export with the signature file, or <NO> exports without the signature file. Make sure that you have an external storage device, such as a USB Hard Drive or USB ThumbDrive®, available and connected to the appropriate port for export. For more information on verifying digital signature, see Appendix D: Verifying Digital Signature. 79 User’s Manual < Erase Disc > This function is used to remove information found on a CD-RW or DVD+RW disk prior to exporting new information to the drive. Select <YES> and press ENTER to start deleting data. NOTE: This menu item will be grayed out when selected device is not a CD/ DVD recorder or not select yet. < Begin Export > Select <YES> and press ENTER to start exporting. 80 User’s Manual Text Setup The <Text Setup> function provides a connection between a DVR and a Point-of Sale equipment such as cash registers. With this function, the financial transaction data can be linked to specific camera images and recorded to your DVR. To enable this function, enter OSD Setup menu with correct administrator password, and then select <Text Setup>. Press Enter and the following OSD setup menu will show up. Main Menu 1. System Setup 2. Monitor Setup 3. Camera Setup 4. Record Setup 5. Sequence Setup 6. Event Setup 7. Database Setup 8. Configuration 9. Video Export 10. Text Setup 11. Shutdown Text Setup 1. Text Function 2. Text Overlay 3. Exception Text Setup 4. Input Setup ON Live & PB Items in this menu are described in the following subsections. < Text Function > This item is used to enable/ disable this function. Select <ON>, the text database will be created on the hard disk. < Text Overlay > This item is for you to choose which mode you want to display the test overlay on the monitor. Select <Only Live> to display the text overlay in Live mode; select <Only PB> to display the text overlay in Playback mode; and select <Live/PB> to display in both modes. NOTE: Text overlay only shown in full screen mode. NOTE: PB overlay is available only under x1 PB speed. < Exception Text Setup > This sub-menu is used to define the conditions that are to be treated as an “Exception” and thus trigger an action (the function will be implemented later). 81 User’s Manual Exception Text Setup Exception No. Trigger Exception String By Numerals Value Value (Upper Limit) 1 ON NO SALE OFF Exception No. To select an exception for further settings; you can select from <1> to <16>. Trigger Select <On>, those transactions which contain “Exception Strings” and which meet the “Numerals” conditions will be marked as exceptions in the text database and will trigger preset actions such as alarm output. Exception String To define Exception String The “exception String” is case-sensitive. Only exactly matched ones will be marked as exceptions. By Numerals “Exception String” must be defined before By Numerals” takes effect. If “By Numerals” is enabled, only transactions which meet both “Exception String” and “By Numerals” condition will be marked as exceptions and trigger and action. You can select from below options: OFF— The function is disabled. Specific— That the value of transaction meets a specific value will be marked as an exception. That specific value need to be configured through the following sub-setting <Value>, Greater Equal Than— That the value of transaction is greater then or equal to certain value will be marked as an exception. That specific value need to be configured through the following sub-setting <Value>, Less Equal Than— That the value of transaction is less than or equal to certain value will be marked as an exception. That specific value need to be configured through the following sub-setting <Value>. 82 User’s Manual Inside The Range—That the price of transaction is within certain range will be marked as an exception. The range need to be configured through the following sub-settings <Value> and <Value (Upper Limit)>. Outside the Range—That the price of transaction is outside certain range, will be marked as an exception. The range need to be configured through the following sub-settings <Value> and <Value (Upper Limit)>. NOTE: Only transactions (1) after “Exception Strings” and “By Numerals” are set and (2) after “Trigger” is <ON> will be marked as exceptions in text database. The data stored before won't be marked as exceptions. < Input Setup > This item is used to choose the connection method that is between your Text Device and DVR, and setup some relative settings of the connection method. Input Setup 1. Port Selection 2. Input Source 3. Camera Selection 4. Text Filter 5. Manual Filter Setup 6. Input Process 7. Text Baud Rate 8. Text Bits 9. Text Stop 10. Text Parity Serial Port Direct Connected 1 ASCII Canonical 9600 8 1 None Port Selection It is essential to select a port for either the POS/cash register or modem when the text function is set on. Meanwhile, also check whether the device is connected to the port selected. Port Selection 1. 2. 3. 4. Serial Port USB Port-Front USB Port-Rear Top USB Port-Rear Bottom Text None None None 83 User’s Manual Input source Select whether the input source is direct connected or connected with the Data Converter. If the input source is direct connected, users may need to go to the next item: Camera Selection to select a corresponding camera number. Camera Selection Select a camera to display the text overlay. Text Filter This item is used to choose the text filter. The supported models for pole display and printer are listed below. Pole Display Cache Technology VFD-202T Citizen C2202 Digipos CD5220 Emax Pole Display Epson DM-D Series Logic Controls LD9000 Logic Controls PD3000 Logic Controls PD6000 Logic Controls TD3000 Magellan Partnertech CD5220 Posiflex ICD-2002 Posiflex PD 302 Posiflex PD 303 Posiflex PD-2100 Posiflex PD-2200 POS-X Xp8000 Scales Sibnet STAR SCD400-PD Soteke VFD2025 Soteke VFD2029 TEC Toledo 8217 TYSSO VFD Series Ultimate Technology PD1100XL Wedderburn DS-770 Printer Citizen CBM-1000 II Citizen CT-S300 Dell T200 Epson TM-T88II/ TM-T88III/ TM-T88IV Epson TM-T90 Epson TM-930 II Epson RP-U420 IBM SureMark TF6 IBM SureMark TM6 Ithaca iTherm 280 Ithaca POSJet 1000 POS-X Xr500 Samsung SRP350 Sensor TP-288 Star TSP100 futurePRNT Star TSP600 Star TSP700 Star TSP800 TPG (Axiohm) A794 WP-520(ESC/POS) Manual Filter Setup Once enter the Manual Filter Setup menu, users should key in hexadecimal digits. The menu of the item is shown as follows. Manual Filter Setup 1. Header 1 2. Header 2 84 30 30 User’s Manual Input Process If you will be using a Pole Display from a PC based POS, select <Canonical>. <Non-Canonical> is to be selected when using a Pole Display from a Standalone POS. Text Baud Rate To setup the baud rate of RS232 via which to connect your Text Device and DVR. Text Bit To setup the bits of RS232. Text Stop To setup the stop of RS232. Text Parity To setup the parity of RS232 85 User’s Manual Shutdown The item is used to shut down or reboot the unit. If you must shut down the MPEG-4 DVR series for any reason, please use the proper shut down and power up procedures to avoid damage to your unit. To restart/ shutdown the unit, you have to enter the OSD setup menu with correct Administrator Password, otherwise, the <Shutdown> menu will be unable to access. Select <Shutdown> in Main menu and press ENTER to access the Shutdown menu, which displays as follows. Shutdown 1. Power Off 2. Reboot Execute Execute Power Off Select this item to shut down the unit. Do not remove the power during shut down until the message “You can safely turn off DVR now!” displays. Reboot Select this item to reboot the unit. The color bar and system checking information are displayed on the monitor until the unit is completely restarted. 86 User’s Manual Appendix A: Technical Specifications All specifications are subject to change without notice. Model Lite Video Operation System Video Standard Video Operation Resolution – Live Video Input Main Monitor Outputs Call monitor Loop VGA Output Picture Refresh Rate Digital Zoom Camera Installation Audio Input Output Recording Mode Compression Method File Size Operation Playback Recording Compression Method Recording Mode Pre-Alarm PAL Video Loss Detection Alarm Relay Output Embedded ( Linux ) NTSC/PAL switch selectable Triplex+( Live, Record, Playback , Remote, and Internet access ) NTSC: 720 x 480 pixels PAL: 720 x 576 pixels BNC x 16,1.0Vp-p/75 ohm BNC x 1, S-Video x 1, 1.0Vp-p/75 ohm BNC x 1, 1.0Vp-p/75 ohm BNC x 16,1.0Vp-p/75 ohm 800 x 600, 1024 x 768, 1280 x 1024 pixels @ 60Hz NTSC: 480 PPS(16CH) PAL: 400 PPS(16CH) 2x2 Plug & Play MPEG-4 Advanced Simple Profile Schedule, Alarm, Motion Detection 0~30 sec Max 30 PPS Max 60 PPS Max 60 PPS Max 120 PPS Max 120 PPS Max 240 PPS 360x240 Max 120 PPS Max 240 PPS Max 480 PPS 720x576 Max 25 PPS Max 50 PPS Max 100 PPS 720x288 Max 50 PPS Max 100 PPS Max 200 PPS 360x288 Max 100 PPS Max 200 PPS Max 400 PPS Recording Quality Image Size Storage Mode Playback Playback Playback Speed Adjustment Retrieve Data Life Time Storage Build-in Storage Built-in HDD Export Alarm Alarm Input Alarm Detection Auditory Alert Motion Detection Turbo RCA x 2, Line-In RCA x 2, Line-Out Always Real Time Record, Synchronized w/ Video ADPCM, G.726 8KB/Sec Remote + VCR mode Only for Video Original Speed NTSC 720x480 720x240 Resolution & Rate Standard 8 levels presets, adjustable 2K to 20K Byte/picture Linear/Circular Play, Stop, Pause, Rewind, Forward, Search Yes 1X, 2X…32X Date/Time, Event Yes(Programmable) X2 ATA 133 / UDMA 133 IDE, HDD/CD-RW/DVD+RW NAS X3 USB2.0 ports, support ThumbDrive®, CD-RW, or DVD+RW X4, Terminal Block X8, Terminal Block X16, Terminal Block N.C./N.O., Programmable Built-in Buzzer 21 X 13(NTSC), 21 X 16(PAL) Grid Array, Sensitivity, Trig Level Adjustable Programmable X3, Terminal Block, 1.0A/24V (Programmable) 87 User’s Manual Communication Network Connectivity Remote Control Software Access Control Remote Operation RS232C RS485 Dome Control Protocol 88 Ethernet RJ-45 connector, 10/100Mbps, supports DHCP/PPPoE/DDNS DVRRemote 2 Level Password Monitoring, Playback, Recording, System Setup, Dome Camera Control D-sub 9 pin female Terminal Block DynaColor, Pelco P, Pelco D, AD422, Panasonic_C, Panasonic_N, Fastrax 2 User’s Manual Appendix B: Record Duration The record duration relates to recording rate, image quality and HDD capacity. Refer to the following table. NOTE: Record duration times are based on actual tests and represent average file sizes. Performance may vary depending on specific installations and use. Audio recording requires 8 KB per second (or 0.7 GB per day) for data storage. 160 GB Internal Memory @ full D-1 resolution 720×480 Recording Rate Recording Picture Quality Level Lowest Total PPS Total PPS NTSC PAL NTSC PAL 6 6 Low Normal High Highest NTSC PAL NTSC PAL NTSC PAL NTSC PAL 12 12 18 18 24 24 30 30 120 100 2.70 3.24 1.35 1.62 0.90 1.08 0.67 0.81 0.54 0.65 60 50 5.4 6.5 2.7 3.2 1.8 2.2 1.3 1.6 1.1 1.3 30 25 10.8 12.9 5.4 6.5 3.6 4.3 2.7 3.2 2.2 2.6 15 12.5 21.6 25.9 10.8 12.9 7.2 8.6 5.4 6.5 4.3 5.2 11.3 9.38 28.6 34.5 14.3 17.3 9.5 11.5 7.2 8.6 5.7 6.9 7.5 6.25 43.2 51.8 21.6 25.9 14.4 17.3 10.8 12.9 8.6 10.4 3.75 3.12 86.30 103.73 43.15 51.86 28.77 34.58 21.58 25.93 17.26 20.75 1 1 323.63 160 161.82 107.88 80.91 64.73 GB Internal Memory @ half D-1 resolution 720×240 Recording Rate Lowest Total PPS Total PPS NTSC PAL NTSC PAL 4 4 Recording Picture Quality Level Low Normal High NTSC PAL NTSC PAL NTSC PAL 8 8 12 12 16 16 Highest NTSC PAL 20 20 120 100 4.05 4.85 2.02 2.43 1.35 1.62 1.01 1.21 0.81 0.97 60 50 8.09 9.71 4.05 4.85 2.70 3.24 2.02 2.43 1.62 1.94 30 25 16.18 19.42 8.09 9.71 5.39 6.47 4.05 4.85 3.24 3.88 15 12.5 32.36 38.84 16.18 19.42 10.79 12.95 8.09 9.71 6.47 7.77 11.3 9.38 42.96 51.75 21.48 25.88 14.32 17.25 10.74 12.94 8.59 10.35 7.5 6.25 64.73 77.67 32.36 38.84 21.58 25.89 16.18 19.42 12.95 15.53 3.75 3.12 129.45 155.59 64.73 77.80 43.15 51.86 32.36 38.90 25.89 31.12 1 1 485.45 242.73 161.82 121.36 97.09 89 User’s Manual 160 GB Internal Memory @ CIF resolution 352×240 Recording Rate Lowest Total PPS Total PPS NTSC PAL PAL NTSC 2 2 90 Recording Picture Quality Level Low Normal High NTSC PAL NTSC PAL NTSC PAL 5 5 8 8 11 11 Highest NTSC PAL 14 14 120 100 8.09 9.71 3.24 3.88 2.02 2.43 1.47 1.77 1.16 1.39 60 50 16.18 19.42 6.47 7.77 4.05 4.85 2.94 3.53 2.31 2.77 30 25 32.36 38.84 12.95 15.53 8.09 9.71 5.88 7.06 4.62 5.55 15 12.5 64.73 77.67 25.89 31.07 16.18 19.42 11.77 14.12 9.25 11.10 11.3 9.38 85.92 103.51 34.37 41.40 21.48 25.88 15.62 18.82 12.27 14.79 7.5 6.25 129.45 155.34 51.78 62.14 32.36 38.84 23.54 28.24 18.49 22.19 3.75 3.12 258.91 311.19 103.56 124.47 64.73 77.80 47.07 56.58 36.99 44.46 1 1 970.90 388.36 242.73 176.53 138.70 User’s Manual Appendix C: Dial-up Connections via Modem A dial-up modem connection allows user to use the remote software and receive alarm notice without an internet connection. Following are the steps for establishing the connection between a MPEG-4 DVR series unit and a PC. Establishing Dial-in Connection The Dial-in function enables user to establish dial-up modem communication to and from MPEG-4 DVR series unit for the remote software use. Follow the description to set up your DVR and PC. DVR Configuration: • Connect an USB modem to the USB socket and connect a working phone line to the modem. • Press MENU and input the Administrator password to access the OSD Main menu. Select <Network Setup> and then <Dial-in Setup> to set up the Dial-In settings, including Dial-in Account and password, etc. • For more information on dial-in settings, see Section Dial-in Setup. PC Configuration: • Click <Start>, <My Network Places>, <View Network Connections> and then select <Create New Connection>. The New Connection Wizard is displayed. Click <Next> to continue. 91 User’s Manual 92 • Set up the network connection type. Select <Connect to the Internet> and click <Next> to continue. • Select <Set up my connection manually> and click <Next> to continue. User’s Manual • Select <Connect using a dial-up modem> to connect to the internet through phone line and a modem. Click <Next> to continue. • Type the name of the connection you are creating. 93 User’s Manual 94 • Enter the phone number of the modem that is connected to the unit. • Enter the Username and Password that is set in the Dial-in Setup menu. User’s Manual • Click <Finish> to complete the dial-in connection. • Now the dial-in connection is established. Establishing Dial-out Connection The Dial-out function enables user to establish dial-up modem communication to and from MPEG-4 DVR series unit for remote notification use. Follow the description to set up your DVR and PC. DVR Configuration: • Connect an USB modem to the USB port and connect a working phone line to the modem. • Press MENU and input the Administrator password to access the OSD Main menu. Select <Network Setup> and then <Dial-out Setup> to set up the Dial-out settings. • Select the <Email Address> in Network Setup menu to edit an e-mail address for alarm notification. 95 User’s Manual • Select <Event Setup> in Main menu and set the Email Notice function to <ON> (enabled). • • Exit the OSD menu and save the configuration. For more information on dial-out settings, see Section Dial-out Setup. PC Configuration: 96 • Click <Start>, <My Network Places>, <View Network Connections> and then select <Create New Connection>. The New Connection Wizard is displayed. Click <Next> to continue. • Set up the network connection type. Select <Set up an advanced connection> and then <Accept incoming connections>. Click <Next> to continue. User’s Manual • Choose the modem device that will be used by the PC and click <Next>. • In Incoming VPN Connection menu, choose <Do Not allow virtual private connections> and click on <Next>. 97 User’s Manual 98 • In User Permission menu, select the users that will be using this connection. If needed, add a new user with the same user password that is set up in Dial-out Setup menu in local DVR. When done, click <Next> to continue. • In Networking Software menu, select <TCP/IP> and click on <Properties>. User’s Manual • • In TCP/IP address assignment, if the PC has DHCP server, then choose <Assign TCP/IP addresses automatically using DHCP>, else choose <Specify TCP/IP addresses> and enter the range of IP addresses that you wish to use. Once done, click <OK> to confirm and back to Networking Software menu. Click on <Next> to continue. Click <Finish> to complete the process. 99 User’s Manual • 100 The Incoming connection is established. User’s Manual Appendix D: Verifying Digital Signature The digital signature aims to authenticate a video file exported from the unit. Follow the description to export video with digital signature and verify the digital signature. To export recorded video with digital signature: To export recorded video with digital signature to a USB hard drive or CD-RW drive / DVD+RW drive, follow these steps. • In <Video Export> menu, select copy device, data type, expected channel and start/end time, or event video clips. • Set the <Digital Signature> function to <YES>. • Start exporting process by setting <Begin Export> to <YES>. • Video Export 1. Select Device 2. Select Ch: 3. Start Time 4. End Time 5. Select Events 6. Data Type 7. Digital Signature 8. Erase Disc 9. Begin Export CH1 CH2 CH3 CH4 2005/03/19 AM 07:50:05 2005/03/28 PM 03:09:18 Normal NO NO NO Each recorded video will be exported into four files with different filenames, including *.gpg, *.avi, *.sig and readme.txt. 101 User’s Manual To verify the exported recorded video: Following are the procedures for digital signature verification. • Start your DynaRemoteTM and click <Play> on the main window tool bar. • Click <Verify> tab to display the Verify window. • Click <Browse> to select the *.gpg, *.avi, *.sig files respectively, which belong to the exported video you want to authenticate. 102 User’s Manual • Click <Verify> to start verifying digital signature. • The result of verify shows in the <Status Log> field. It returns a GOOD or BAD signature result. A GOOD signature indicates the exported clip has not been altered. <GOOD> Signature 103 User’s Manual <BAD> Signature 104 User’s Manual Appendix E: Recommended HDDs Brand Model Name Seagate SV35 Series™ 7200.1 ST3500641AV 500G SV35 Series™ 7200.1 ST3250824AV 250G SV35 Series™ 7200.1 ST3160812AV 160G SV35 Series™ 7200.2 ST3320620AV 320G DB35 Series™ 7200.3 ST3320820ACE 320G Barracuda® 7200.8 ST3400832A 400G Barracuda®7200.8 ST3250823A 250G Barracuda® 7200.9 ST3500841A 500G Barracuda® 7200.9 ST3400633A 400G Barracuda® 7200.9 ST3300622A 300G Barracuda® 7200.9 ST3250824A 250G Barracuda® 7200.9 ST3160812A 160G Barracuda® 7200.10 ST3750640A 750G Barracuda® 7200.10 ST3320620A 320G Barracuda® ST3250620A 250G WD Caviar® SE WD3200JB 320G Caviar® WD2500JB 250G WD Caviar® WD1600BB 160G WD Caviar® WD1200BB 120G Deskstar® 7K400 HDS724040KLAT80 400G Deskstar® 7K160 HDS721616PLAT80 160G CinemaStar™ 7K500 HCS725032VLAT80 320G CinemaStar™ 7K500 HCS725025VLAT80 250G CinemaStar™ 7K160 HCS721616PLAT80 160G Western Digital WD HITACHI 7200.10 SE Model Number Size 105 User’s Manual Appendix F: Remote Control A remote control will be shipped with the box. The keys on the remote control are listed as below figure: 106 User’s Manual The keys of the remote control function as the keys of the front panel of the DVR. The only difference between the remote control and the front panel keys is the “DVR SEL” key. The DVR Selection key is used to switch control between each DVR. The remote control can be used to control up to 16 DVRs. To setup the remote control, the first thing you need to do is to assign a unique DVR Unit ID to each DVR. Use the front panel of the DVR, and follow this path to change the DVR Unit ID, <Main Menu> <System Setup> <RS485 Setup> <Unit ID> Change the DVR Unit ID to any number between 224 and 239, and exit the menu. After the DVR Unit ID is changed, you will need to setup the “DVR SEL” of the remote control. Press “DVR SEL”, and then press the Remote Control # immediately to select the DVR. For example, assuming that you have set the DVR Unit ID to 225, then you should press “DVR SEL”, and then press “2” immediately. Now, the remote control will only be able to control the specified DVR. Press “DVR SEL”, and then press the Remote control # to switch between DVRs. The ID Table is listed below for your reference. DVR Unit ID Remote Control # DVR Unit ID Remote Control # 224 225 226 227 228 229 230 231 1 2 3 4 5 6 7 8 232 233 234 235 236 237 238 239 9 10 11 12 13 14 15 16 However, if you would like to escape the single DVR control mode, press “DVR SEL”, and then press “ESC” to do so. 107 User’s Manual Appendix G: ezRecord Diagram Sample 108 User’s Manual 109 User’s Manual 110 User’s Manual Appendix H: Search Recorded Data by Text You can search recorded data by more than one way; but only those units equipped with Text function are able to search by text. To search wanted recorded data by text, you have to setup text relative settings before searching (refer to <Text Setup>). Follow below steps: Step 1: Press SEARCH key, which is positioned on the front panel, and the <Text Query Page> appears as below figure. Search -----------------------Search By Time----------------------From: 2005/07/12 AM05:42:17 End: 2006/07/16 PM03:26:49 2006/11/21 PM12:11:56 Select: Begin Playback -----------------------Search By Event----------------------Select Channel: CH1 CH2 CH3 CH4 Event List -----------------------Search By Text----------------------Text Query Page Step 2: Move your cursor and position it over <Text Query Page>. Press ENTER to enter the <Text Query Page> menu, which is shown as below figure: Text Query Page By Text Item Item By Numerals Value Value (Upper Limit) By Date/Time From: To: By Channel OFF OFF OFF 2006/07/12 AM09:35:21 2006/11/21 PM11:45:37 OFF Text Query List Step 3: There are four different searching conditions for listing the text recorded data: by text, by numerals, by date/time and by channels. • By Text To list out the transaction recorded data that matches certain keyword. 111 User’s Manual Five available options are describe as below: <OFF>: Select to disable the keyword searching. <Specific>: Select for listing recorded data matches a single keyword set in the next sub-item. <AND>: Select for listing recorded data matches two keywords that are found in the same line. You have to setup the next two sub-items. <OR>: Select for listing recorded data matches on or two of the keywords set in the following two sub-items. <Exception>: Select to list all exceptions. • By Numerals To list out the transaction record data that matches certain value. Five available options are describe as below: <OFF>: Select to disable the numerals searching. <Specific>: Select for listing recorded data <Greater Equal Than>: That the value of transaction is greater then or equal to certain value will be marked as an exception. <Less Equal Than>: That the value of transaction is less than or equal to certain value will be marked as an exception. <Inside The Range>: That the price of transaction is within certain range will be marked as an exception. <Outside The Range>: That the price of transaction is outside certain range, will be marked as an exception. • By Date/Time To list all recorded data recorded during the indicated period. The following two sub-items is offered for you to enter the start time and end time of the wanted period. • By Channel To list all recorded data that is coming form certain camera. Select <OFF> to disable this function. Step 4: After completing above settings, move cursor over <Text Query List>, and press ENTER. All recorded data that matches the searching condition will be listed out on the screen. 112 User’s Manual Appendix I: Operating USB Mouse on Your DVR The DVR gives the user the privilege to use an USB mouse to operate the DVR. To use the USB mouse, please read through the following descriptions. Insert an USB mouse to any USB port of the DVR. Move the USB mouse, and the cursor should appear. Move the cursor to the top-left of the screen, and 8 icons will be displayed. The functions of the 8 icons are illustrated on the left. They are similar to the functions of the front panel keys. Note that the Dual Main icon is only available for the Turbo Model. Click the left button of the USB mouse is same as the “ENTER” key of the front panel of the DVR. Click right button of the USB mouse is same as the “ESCAPE” key of the front panel of the DVR. The scroll wheel is used to change value. For example, if you want to change Dome ID, go to the following path: <Main Menu> <Camera Setup> <Dome ID> Left click on Dome ID, and scroll the wheel up or down, you will see the ID number changes. After the ID number is selected, left click on the Dome ID, and the ID number will be changed. 113 User’s Manual Appendix J: HDD COPY TOOL (EXT2IFS) For user who wishes to access the data of the HDD of the DVR using Windows® based computer, the user will need a special HDD Copy Tool program called EXT2IFS. This document will show you how to use the EXT2IFS. Please follow the instruction below. Installing EXT2IFS to Your Computer To install the EXT2IFS program, you need to download it from http://uranus.it.swin.edu.au/~jn/linux/ext2ifs.htm. A detailed description about the program can also be found on the website. The following steps guide you to install/use the EXT2IFS program. Step 1: Download EXT2IFS to your computer from the website listed above. Step 2: Turn off your DVR and computer. Remove the HDD from your DVR and install the HDD (Using an External Hard Drive Cartridge or the like) to your computer. Boot the computer after the HDD has been installed. Step 3: Extract the EXT2IFS program that you have just downloaded to a folder of your computer. Open the folder and click “service.exe”, and the window below will be displayed. 114 User’s Manual Step 4: Click <Step 1>, and then choose <Install to SystemRoot> and <Start driver on boot> options. Then, click <Install Driver> button. Step 5: Click <Step2b>. Assign each partition to a drive letter. After the assignments of HDDs are made, click <Save Assignments> button. Step 6: Click <Step3>. Then, click <Start Driver> button. Now, reboot the computer for the changes to take effect. The HDD installation is now completed. 115 User’s Manual Now that you are able to access the HDD, you must use the DVRPlayer to play the video clips. You can obtain the DVRPlayer from: 1. Click “DVRPlayer” located on the top right of the DynaRemoteTM window to download it.. 2. Folders of the exported video clips using ezBurn or Export function of the DVR. The exported file folders will contain a DVRPlayer. After obtaining the DVRPlayer, you can follow the instruction in the next section to play the *.drv file. NOTE: The *.drv files in the HDD are different from the *.drv files that you exported and can ONLY be played by following the instruction on the next page. 116 User’s Manual Start Playing the *.drv file After the HDD has been added to your computer, you can now use the DVRPlayer to play the *.drv file. Please follow the steps below: Step 1: Click “DVR_Player.exe” in the DVRPlayer folder to start the DVRPlayer. Step 2: Click the PLAY icon circled below. Step 3: Find the drive that you have assigned drive letter. In this example, the drive is M drive. Click OK under M drive. 117 User’s Manual Step 4: A list of files will be displayed. Select a file and click “Playback” to play the video clip or “Export” if you want to export the file to your computer. NOTE: The video files are usually stored in the first drive, in this example, the first drive is M Drive. However, if you cannot find any file under M Drive, try N Drive (The 2nd Drive) instead. To Remove the HDD from Your Computer To remove the HDD from your computer, you will need to follow the instruction below. Re-open the EXT2IFS, and go to <Step 1> menu. Click “Uninstall Driver”, and you will see a message “The service is currently started. You will have to reboot before the service is completely uninstalled.” Click “OK” and turn off the computer. Remove the HDD from your computer, and reboot the computer. The removal of HDD is now complete. 118