1
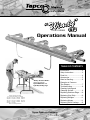
“Windy” SP Port-O-Brake
®
SETUP INSTRUCTIONS
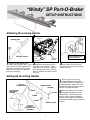
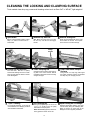
Attaching the Locking Handle
LOCKING
BLOCK
COTTER PIN
BEND ONE LEG OF COTTER
PIN OUT AFTER PASSING
THROUGH YOKE PIN
YOKE
LOCKING
HANDLE
YOKE
PINS
1
Remove Locking Handle and
Handle Grip from parts bag. Press
Grip over end of Locking Handle and
slide down until Grip is firmly seated.
Remove rest of parts from bag and
proceed to next step.
2
Insert bottom end of Locking
Handle into the bottom Yoke on
right side of Port-O-Brake.® Align
holes and insert Yoke Pin. Align top
hole in Handle with holes in Locking
Block of Slide Bar and insert second
Yoke Pin.
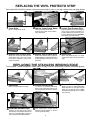
Setting Up the Lifting Handle
FACE OF
MOVING HINGE
MOVING HINGE
FASPIN
HEX NUT
SCREW
FASPIN
Insert Cotter Pins through holes in
ends of both Yoke Pins. Bend
one leg of each cotter pin forward to
secure Yoke Pin.
1
WASHER
ALIGN HOLES
AND INSERT
SCREWS
3
HANDLE PLUGS
LIFTING
HANDLE/
HANDLE PLUG
ASSEMBLY
3
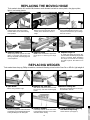
Insert the ends of the Lifting
Handle/Handle Plug Assembly
up through the holes in the bottom of
the Moving Hinge. Align holes in the
Handle Plugs with the holes located in
the face of the Moving Hinge.
2
With holes aligned, insert screws
through Moving Hinge and into
Handle Plugs. Place washers over
ends of screws in back and tighten
with hex nuts. Handle can now be detached from Handle Plugs by removing
Faspins.