1
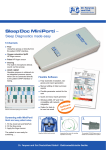
Table of Contents
1. Introduction.........................................................2
1.1. Assigned Purpose:............................................2
1.2. Accessories......................................................2
2. Information..........................................................3
2.1. Safety-related informations...............................3
2.2. General information..........................................3
2.3. Technical inspection.........................................4
2.4. Liability for functioning or damage....................4
3. Recording measurement data using the Porti
unit............................................................................4
3.1. Sensors.............................................................4
3.1.1. Sensors for flow and snoring noises.....................4
3.1.2. Thermistor sensor for breathing............................4
3.1.3. Sensor for CPAP/Bilevel-pressure........................4
3.1.4. Sensor for oxygen saturation and pulse frequency
.........................................................................................4
3.1.5. Sensor for thorax and abdominal movement........5
3.1.6. Sensor for body position.......................................5
3.1.7. Sensor for leg movement......................................5
3.1.8. Sensor for ECG.....................................................5
3.1.9. Sensor for Neuroport............................................5
3.2. Preparing for measurement (ambulatory)........5
3.3. Operating elements of the device.....................6
3.4. Attaching the Porti unit and starting the
measurement............................................................6
4. Service and Maintaining the device..................7
4.1. Charging the battery.........................................7
4.2. Cleaning instructions........................................7
4.3. Maintenance.....................................................7
4.4. Transport and storage conditions.....................7
5. Evaluation software for PC................................7
5.1. Installing the software.......................................7
5.2. Selecting a printer.............................................7
6. Troubleshooting.................................................7
7. Ordering informations........................................9
8. Technical specifications..................................10
9. Used Symbols...................................................10
10. Index.................................................................11
11. EC-Declaration of conformity........................12
-1-
1. Introduction
1.1. Assigned Purpose:
The Porti 7 Sleep Diagnosis System is a recording
system for outpatient and clinical use. It serves as a
differentiated pre-diagnosis for the sleep apnea
syndrome. The Porti unit enables continuous recording of up to 24 channels for at least 15 hours
without loss of data.
It records signals for the following physiological
variables:
•
•
•
•
•
•
•
•
•
•
Flow
Oxygen saturation SpO2
Pulse frequency
Pulse wave
Body position
Respiratory and snoring sounds
CPAP pressure
Ambient Light
Thorax effort
Abdomen effort
optional:
• LEG sensor for detecting leg movements (restless leg)
• ECG electrode for recording ECG signals
• Splitter box for connection the Leg and ECG
sensors
• EEG electrode for recording the EEG signals
• Thermistor for additional breathing detection
• Analogue Input Connection (incl. Splitter Box)
The data can be displayed and analyzed on a
standard commercial PC. The measurement curves
and the analysis results can be printed on all
commonly available printers, including dot-matrix,
laser or inkjet printers.
The OR5 (Online Recording) analysis program has
the following minimum configuration requirements:
•
•
•
•
•
•
•
optional:
• Thermistor
• ECG incl. Central heart Frequency
• PTT (Pulse Transit Time)
• Systolic Blood Pressure
• Leg movement (LEG)
• EEG (Neuroport)
• 8 x Analog channel
•
•
1.2. Accessories
The SleepDoc Porti system as a whole contains two
components:
• The microprocessor controlled Porti recording
device
• PC software for measurement data presentation
and PC analysis
It is also equipped with the following accessories:
•
•
•
•
•
•
•
•
•
•
USB Interface cable for data transfer between
the Porti unit and PC
SpO2 finger sensor with cable for obtaining
pulse frequency and oxygen saturation values
Velcro strap for securing the finger sensor to the
wrist
Flow prongs for obtaining the respiratory signal.
The 20 cm long adapter hose is identified by a
blue ring
Adapter hose for measurement during CPAP
Therapy
Flexible carry belt with integrated pressure
transducers (thorax effort) to fasten the Porti
unit to the patient
Flexible belt with integrated pressure transducer
to record abdominal effort
Battery recharger
Shoulder bag for storing the Porti unit
Transport case
PC with Windows operationg system
Microsoft Windows 2000/XP, Windows Vista,
Windows 7, Windows 8
512 MB of RAM (2 GB recommended)
1 GB of disk space on the hard drive
CD-Rom drive for installation
Mouse
128 MByte VGA graphics card with a resolution
of at least 1024 x 768 (512 MB, 1280 x 1024 /
True Colour recommended)
Free USB port
Printer with Windows driver
This manual is intended to give the operator and user
general information on how to safely handle and
operate the SleepDoc Porti device. It also explains
the intended use of the unit, the different sensors and
connections. The next chapter guides you through
the PC software installation followed by a troubleshooting guide should you encounter any problems
with the SleepDoc Porti device. Technical specifications, spare parts and accessories list and an
index complete the manual.
-2-
2. Information
2.1. Safety-related informations
Observe the instruction manual:
Every use of the device requires exact knowledge
and observance of this instruction manual. The
device is only intended for the use described herein.
Patient instruction:
Patient instruction must only be carried out by the
doctor or staff authorized by that person. The
enclosed quick reference cannot take the place of
the manuals instructions and warnings about
possible hazards.
Do not open the device!
Warning:
For online measuring you must use an electrical or
optical isolator for connection of the device to the PC
(available from your home care provider). A connection of the device to the PC without electrical or
optical isolator is only allowed if all patient connections have been removed first. Only Physicians or
trained staff is allowed to perform online measurements.
Warning:
Magnetic and electrical fields can impact on the functioning of the device. When operating the device, ensure that all third-party devices being operated in the
vicinity are meeting their relevant EMC requirements.
X-Ray equipment, HF surgical devices, tomography
devices etc. can interfere with other devices as they
may emit higher levels of electromagnetic interference.
Warning:
The device has no defibrillator protected application
parts. A direct application of the device to the heart
(esp. ECG!) is not allowed.
Warning:
Using multiple devices for patient screening could result in excessive leakage current above the allowed
value!
Warning:
Using the device together with pacemakers can
result in disturbances of the pacemaker or the
device.
Warning:
Applying the device to more than one patient at any
one time is not allowed.
Warning:
When applying sensors to the patient, please ensure
that no electrical line of the device is in contact with
any other electrical conductive parts including
ground.
Warning:
Avoid placing this instrument in direct sunlight or in
close proximity to intense heat. Prevent also the
contact with dust, lint, dirt, moisture and liquids.
Warning:
Children or incompetent persons should not use this
device unattended without first having obtained instructions for the safe use of the device. Ensure that
infants, children and animals cannot touch the device
unattended
2.2. General information
This instruction manual should be regarded as a
component of the device. It should be kept on hand
somewhere near the device at all times. Reading and
understanding the instruction manual is a prerequisite for proper use and correct handling of the device
in order to maintain the safety of the patient and
operator.
The guarantee is valid for a period of 24 months for
the device and 6 months for the equipment from the
date of sale.
Only accessories which are listed in this instruction
manual should be used with the device. We cannot
guarantee the safe operation and function of the
device if unknown proprietary accessories / consumables are used that have not been tested. (E.g.
Patient leads, Sensors, Consumables, Memory
cards etc.)
Damages resulting from the use of third-party
accessories or consumables shall render this
warranty void.
The manufacturer will only assume responsibility for
the device in terms of safety, reliability and function
if:
1. assembly, add-ons, reinstallation, changes
and repairs are carried out by the manufacturer or a qualified agent authorized by the
manufacturer to do so;
2. The device is used in accordance with the
instruction manual.
All printed material relates to the model of the device
and the safety regulations at the time of printing. All
devices, switches, processors, software programs
and names contained herein are subject to copyright
law.
-3-
F&G shall only be liable for the malfunction of the
device and its software if used in the normal
operating conditions in accordance to this manual.
3. Recording measurement data using the
Porti unit
If a PC is included in delivery third party software is
not allowed to be installed on this PC.
3.1. Sensors
Medical devices must only be operated by a qualified
experienced person(s) to ensure correct handling of
such devices.
The operator must read and understand the user
manual to operate the device correctly.
The operator must check the functionality of the
device before each use to ensure it is in sound
condition and in good working order.
Functional testing of the device must be carried out
at regular intervals. It is recommended that this is
conducted once a month.
Upon reaching the end of its service life, the device
and its accessories should be disposed of in
accordance with the WEEE Directives or relevant
Electronic Disposal protocol.
For further details please contact Dr. Fenyves and
Gut.
2.3. Technical inspection
Only devices that are regularly checked and maintained are deemed safe to use. It is recommended
that units are subject to a test protocol and the
battery is replaced every 24 months.
For more details on servicing and service contracts,
please contact the F&G Customer Service Department or your service provider
The following tests need to be carried out by the
operator before each measurement:
•
•
•
•
•
•
•
Visual inspection of the device and accessories
for obvious damage which could result in
mechanical failure.
Testing all hose connections are air tight.
Testing the thorax and abdominal sensors for
leaks.
Checking the display LEDs.
Testing the pulse and SpO2 finger sensors and
carrying out a plausibility test (timed pulse test
using).
Checking the CPAP pressure.
Testing the battery capacity.
2.4. Liability for functioning or damage
In the event of improper use or repair by the owner or
operator, the liability for the device will be transferred
to those parties. F&G shall not be liable for damages
arising from non-observance of this instruction
manual. The actual guarantee and warranty conditions in the F&G terms of sale/delivery are not extendable.
3.1.1. Sensors for flow and snoring noises
The detection of patient flow is determined by the
use of a nasal flow prong that transmits the pressure
signal to an internal pressure transducer of the
device. The flow prong can be easily applied by the
user and will have no adverse affect on the quality of
sleep. The use of a flow prong also eradicates the
problem where adhesive sensors cannot be used.
(i.e.: patients with beards). In addition the flow prong
is an economical choice of sensor as it is commonly
available.
No additional sensor is required for respiratory and
snoring detection. Respiratory sounds are transmitted to the Porti unit via the flow prong. The built in
microphone detects the sounds which are then
electronically analysed. Therefore additional microphones are not required.
Due to the high sensitivity of the internal pressure
transducer, the Porti device is capable of measuring
and recording ultra fine pressure differences
associated with patients who mouth breathe.
In order to connect the flow prong, ensure the blue
connector of the prong attaches into the blue
connector of the device.
The flow prong should be used in accordance with
the manufacturer’s instructions.
Warning:
The flow prong is intended for single patient use. No
attempt should be made to clean or use the flow
prong the more than once. Multiple use can result in
cross infection!
3.1.2. Thermistor sensor for breathing
Additional to the flow prong a Thermistor can be
used to measure the breathing. Please also observe
the instructions accompanying the sensor.
The brown connector of the Thermistor needs to be
attached to the brown connector on the Porti unit.
3.1.3. Sensor for CPAP/Bilevel-pressure
When performing measurements on a patient undergoing CPAP therapy, an adapter hose is used
instead of the flow prong.
The blue connector of the CPAP adapter needs to
be attached to the blue connector on the Porti unit.
3.1.4. Sensor for oxygen saturation and pulse
frequency
A pulse oximeter has been integrated into the Porti
-4-
device for the purpose of measuring oxygen
saturation and pulse frequency.
When using a finger sensor, please use the Velcro
wrist/armband to secure the sensor and cable. The
use of adhesive tape to secure the sensor may result
in allergic reactions to the patient, adhesive residue
damaging the sensor, loss of data. Please ensure
that blood circulation at the point of measurement is
not affected by the manner in which the sensor has
been secured.
All nail polish (coloured or clear) must be removed
from the measuring finger to obtain useable data.
Please read and understand the instructions accompanying the finger sensor.
3.1.5. Sensor for thorax and abdominal
movement
nal). The device then enables continuous recording
of leg movements and associated analysis results in
the report.
Attaching the leg sensor:
The RLS sensor is attached to the leg using a silk
band (approx 4 cm). The sensor should be positioned approximately 10 cm below the knee joint,
lateral to the shin bone.
Since the leg sensor detects muscle movements,
ensure that the sensor is placed on the muscle and
not the shin bone!
The red and black safety plugs of the sensor have to
be plugged into the red and black sockets of the
splitter box.
3.1.8. Sensor for ECG
The sensors used for recording thorax and abdominal movement consists of small rubber pressure
pads that are connected to the Porti device via measuring hoses. The sensor for recording thorax movement comprises of two pressure pads whereas the
sensor for abdominal movement contains only one.
The sensors are inserted into the pockets of the elasticated effort belts. The thorax belt is applied at the
height of the sternum, the abdominal belt in the
stomach region.
The supplied ECG cable (optional) is compatible with
all commonly available adhesive electrodes and can
be used as consumables.
Attaching the ECG electrodes:
For hygiene reasons and to avoid allergic reactions
the belts should be worn over clothes.
The red connector of the thorax sensor needs to be
attached to the red connector and the black
connector of the abdominal sensor needs to be
attached to the black connecor of the device.
The effort belts are adjustable in size due to the
Velcro fasteners, and should be suitable for most
patients. These belts are however also available in
special sizes.
Note:
Overstretching of the belts may result in poor signals
and possible loss of data.
3.1.6. Sensor for body position
The position sensor integrated in the Porti unit
displays information related to the patient’s body
position during the study.
For accurate determination of body position, ensure
the Porti device is applied to the patient correctly.
The body positions detected are: Supine, Prone, Left
side, Right side, Upright.
3.1.7. Sensor for leg movement
To diagnose restless or periodic leg movements
(restless leg), the Porti device can be equipped with
a leg sensor and internal recording software (optio-
The yellow, green and white safety plugs have to be
plugged into the yellow, green and white socket of
the splitter box.
Important: The ECG is not suitable for a differential
cardiac diagnosis!
3.1.9. Sensor for Neuroport
The Neuroport signal is obtained via the supplied
EEG cable (optional). We recommend special 3-part
EEG electrode strips as consumables.
The 3 part EEG electrode strip needs to be applied to
the forehead. Before applying the electrode the
forehead must be cleaned with a sterile solution. A
headband around the forehead will eliminate
movement of the electrode during the study.
The blue marked connecting plug of the EEG
electrode cable needs to be plugged into the blue
socket on the Porti unit.
3.2. Preparing for measurement (ambulatory)
In preparation of an ambulatory study where the
patient will use the device at home, please ensure
-5-
belts are fitted over the night clothes and not
directly onto bare skin.
the following:
1. Charge the battery: see Page 7.
2. Start the Porti program on the PC.
3. Fill out the fields relating to personal data of the
patient in the menu item ”Porti / Porti Initia) and start the
lisation“ (or mouse button
transfer.
4. Connect the Porti with the USB interface cable.
For testing purposes, both LEDs will light up
initially. The red LED will then go off. The green
LED on the Porti unit will remain lit for the
duration of the initialization process.
5. A dialogue window will be displayed in order for
the operator to determine the start time for
recording. Once confirmed the unit can then be
disconnected from the PC. Note: (remove cable
by pulling on the plug - not on the cable).
6. The Porti unit is now ready for use. The unit will
now rest in stand-by mode until the selected
Start Time of the recording. The unit will then
automatically switch on and start recording data.
3. Check the position of the pressure transducers
(black rubber pads). The sensors should be fully
inserted into the built-in pockets sewn onto the
belt. Never pull on the tubing connected to
the pressure pads.
4. Apply the flow prong and/or respiratory thermistor to the nose or fix the adapter hose to the
CPAP mask.
5. If applicable, attach the leg sensor and EEG
electrodes.
6. Apply the finger sensor (SpO2) to a finger and
secure the cable to the wrist using the velcro
armband. Whilst doing so, ensure that you do
not apply pressure to the finger thereby
disturbing the blood flow.
7. The Porti unit will automatically switch itself on
at the predetermined time. Both LEDs light up
briefly for testing purposes.
If all sensors have been connected correctly, the
red LED will go out. The green LED blinks at
regular 4 second intervals.
The red LED signals a faulty pulse signal. Check
the fingersensor and cable.
3.3. Operating elements of the device
The Porti device will automatically switch on / off
when connected / disconnected to a PC. The device
has an internal clock for timer recording. If the timer
has been programmed, recording will start automatically at the predetermined time. Up to eight recordings can be programmed.
Note: If necessary the Porti can be switched on before the selected Start Time by pressing and holding
the Start button for one second. Should you want to
stop recording at anytime press and hold the Start
button again, for seven seconds.
The charging condition of the units's battery can be
displayed by pressing the "Akku" button on top of the
device.
Attention: This function will only work when the
device is switched off and disconnected from the PC.
3.4. Attaching the Porti unit and starting the
measurement
Once the patient has been educated on fitting the
device, the device can then be packed into its hard
carry case for the patient to take home. The patient
can refer to the quick reference guide when fitting the
device at home.
When going to bed the patient needs to:
Attach the Porti unit using the elasticated thorax
belt.
• Attach the flow prong and finger sensor.
• If applicable, attach the abdominal belt, leg
sensor, ECG and EEG electrodes.
• Check that the sensors and their connectors are
positioned correctly.
The next morning:
In order to ensure reliable recording of data, you
need to observe the following points when attaching
the Porti unit and sensors. These steps should be
demonstrated and practised with the patient
beforehand in the clinic:
•
•
•
•
1. If applicable, attach te ECG electrodes.
2. Secure the Porti unit to the thorax using the
elasticated thorax belt (with the two built in
pockets). Apply the belt whilst in the standing
position and exhale. A correctly fitted belt should
not slip up or down once fastened. To record
abdominal breathing, attach the abdominal belt
(with the single built-in pocket) around the
stomach in the same way. Always ensure the
-6-
Detach the Porti unit and sensors and return all
parts to the case. Cleaning of the sensors will be
carried out by the technical staff at the clinic or
hospital.
Bring the case back to the clinic or hospital.
For automatic evaluation the measurement can
be transfered to the PC using the device
software. Select the "Porti" tab followed by
"Read measurement from device" or the mouse
button
.
4. Service and Maintaining the device
avoided.
4.1. Charging the battery
5. Evaluation software for PC
The Porti 7 unit is equipped with a special fastcharge Li-Ion battery. The battery charging adaptor
included with your device is specially designed for
this type of battery and should only be used with your
Porti 7 unit. A single charge allows up to three
measurements of 8 hours each to be performed.
Caution: It is not allowed to use a different
battery charger than the one provided!
Battery charging procedure:
•
•
•
Connect the battery charger adaptor to the Porti
device
Plug the charger into a power outlet
The integrated LED's in the top cover of the
Porti displays the charging status of the batteries. The device can remain connected to the
charger adaptor for a long period of time without
suffering any damage.
4.2. Cleaning instructions
The flow prong is designed for single patient use and
should not be used more than once or on different
patients.
The finger sensor, thermistor, leg movement sensor
and the electrodes can be cleaned using a moist
cloth or if necessary by using disinfectant. You
should never however immerse the sensors in liquid.
Any adhesive residues that may be present should
be removed regularly (e.g. using alcohol swabs). The
RLS sensor wire is very fragile. Special care is
required when cleaning this sensor.
The thorax and abdomen belts can be washed by
hand or in the washing machine with a fabric
washing detergent to a maximum temperature of
60°C. Please ensure to remove the pressure pads
from the belts before washing.
The bag can be cleaned using moist disinfectant
wipes (observe the detergent manufacturer’s instructions).
4.3. Maintenance
We recommend the device including all accessories
is serviced every two years. The servicing should
only be carried out by the manufacturer or by an
authorised agent.
Calibration of the CPAP channel should be carried
out once a week by the user.
4.4. Transport and storage conditions
The ambient temperatures for transport and storage
are between 5°C and 45°C. The maximal humidity
may not exceed 95%, condensation has to be
5.1. Installing the software
To install the Porti software program, place the CD
supplied with your device into the CD-ROM drive of
your computer. The program will automatically run. If
the program does not run automatically open the
Explorer option on your operating system and select
the CD-ROM drive. Once selected double click the
Setup.exe file from the software.
You can check your computer and network (if
applicable) for Porti software versions that may have
been previously installed. To ensure the correct up to
date version is selected, open the software installed
and click the Search button. The program will then
automatically find and use the latest version installed.
Note: Alternatively you can update the software by
selecting menu item Tools / Update from the software. (Only for updating the software).
After selecting the target drive the installation program will now automatically create the necessary
directories and copy all the required files to the hard
drive. The installation will automatically insert a new
group containing an entry for the new software in the
Programs folder of the Start Menu. In addition a
shortcut on your Windows desktop will be created.
After successful installation, remove the CD and
store it in a safe place.
5.2. Selecting a printer
The measurement curves and reports can be printed
on any commonly available type of printer (inkjet, dotmatrix or laser printer) that is already installed on
your Windows system. The correct printer driver can
be selected using the Windows Control Panel
application.
6. Troubleshooting
Channels (e.g. CPAP) are missing in the display.
The channels are deactivated and therefore do not
appear during ”Test” and ”Record”.
Check which channels are active for recording using
the menu item Options / Channel settings.
Channels are missing after loading a measurement.
They were not recorded or have been hidden for
measurement data display.
Flow signal is missing during recording or
follows the edge of the range.
The flow signal follows a straight flat line in the
middle of the channel.
Check the flow prong on the patient and the connection on the Porti unit. When measuring during CPAP
-7-
therapy, check the connection of the CPAP adapter
hose on the CPAP mask and on the Porti unit.
Signal amplitudes are very small or do not
appear.
Check the corresponding sensors on the patient and
their connections to the Porti unit. Whilst doing so,
check that the tube hoses and the black pressure
pads of the thorax sensors are intact. A leaking sensor can cause inaccurate readings in the thorax
channel. The pressure pads should be attached to
the patient securely without over tightening the belt
and the tube hoses should be routed in such a way
that they cannot kink.
Check all cables and connectors on the Porti unit and
the PC.
Pulse oximeters not responding.
The channels for oxygen saturation and pulse
frequency are registering 50% and 30 P/min respectively despite the patient being connected.
First check that the finger sensor is seated correctly
on the patient and remove any nail polish that may
be present. A small red light should be present in the
sensor when the finger is inserted. If the light doesn't
switch on when the sensor is applied to the finger,
then you need to check the connection at the Porti
unit and any intermediate extensions.
Printout not working.
The printer prints characters on the page but in no
apparent format.
The wrong printer or printer driver has been installed.
The printer is not responding to the print command.
Check the printer cable and the connections to the
printer and PC. The printer should be switched on
and operational, i.e. the control LED’s on the printer
should be lit.
Cannot establish connection to the Porti unit.
The USB cable is not connected correctly.
Check the connection of the USB cable to the Porti
unit and the PC.
USB interface was deactivated
The USB interface can be activated in the Porti
device software. Select the "Porti" tab followed by
menu "Settings".
Battery is discharged.
Charge the battery correctly.
For clarification and in case of problems during
the installation, maintenance or use, please refer
to your local distribution partner, or directly to
the manufacturer.
-8-
7. Ordering informations
Art.-No. Spare parts / consumer material / Accessories
Art.-No. Spare parts / consumer material / Accessories
926 460 Double LEG sensor
for simultaneous detection of both legs movements
920 102 Finger sensor SpO2 HP finger cuff with cable and
Lemo plug
925 305 Velco wrist strap
to fix finger sensor cable to the wrist (1 PU = 5 pieces)
920 310 Flow prong nose spectacles for flow measurement
(PU = 10 / 100 / 500)
920 314 Thermistor for Porti, with Lemo connector, reusable
920 315 Thermistor for Porti, disposable
920 316 Thermistor set for Porti: 10 x Thermistor (disposable,
Art. No. 920 315), connection cable 2m, Lemo plug
928 160 USB cable for data transmission between Porti and
PC
928 357 Electrical isolator USB for galvanic seperation
between Porti device and PC during online
measurement; complete with adapter
928 204 Power adapter Friwo for Porti with lemo connector,
medical approval
927 302 Shoulder bag cloth bag with shoulder strap for
carrying Porti
927 301 Carrying case gray plastic case for unit and
accessories
920 307 Flow pronge with O2-connector nose spectacles for
flow measurement during oxygen therapy
927 308 Patient instructions, weld together in foil, Basic
920 309 Flow prong Nasal / Oral with separate mouth tube
927 309 Patient instructions, weld together in foil, Complete
925 241 Adapter hose for flow prong
for connection with Porti basic instrument, 20cm
925 501 2-Years Inspection for SleepDoc Porti
• Check and adjustment of all measurement functions
• Calibration of CPAP pressure
• Alignment of all filters
• Replacement of the rechargeable battery
• Upgrade of firmware (in the device)
• Update of PC software
• Final inspection (European Standard ISO 13485)
• Extension of the guarantee period for other 2 years
925 246 Nipple for flow prong adapter hose, blue
925 220 CPAP adapter hose for CPAP mask
920 221 Nipple for CPAP mask (1 PU = 10 pieces)
925 233 CPAP Adapter hose for CPAP-Mask Resmed ®
925 231 CPAP Adapter hose for CPAP-Mask Respironics ®
925 234 CPAP Adapter hose for CPAP-Mask SleepNet ® /
Viasys ®
Art.-No. Spare Parts / Accessories for use with children
925 705 Manometer for quick control of CPAP pressure
925 150 Thorax sensor, complete, 2 pressure pads with
flexible connection tubes (red marked) and lengthened
tube for positioning Porti near child
925 140 Thorax sensor, complete
2 pressure pads, flexible connection tubes
926 286 Thorax strap for children, flexible, black, with
connection to splitter box 927 420, Size XS
926 281 Carrying strap for Porti, flexible, blue, with connection
to splitter box 927 420, Size S
925 396 Abdomen sensor, complete, 1 pressure pad with
flexible connection tube (black marked) and and
lengthened tube
926 280 Carrying strap for Porti, flexible, black with connection
to splitter box 927 420, Size M
926 282 Carrying strap for Porti, flexible, red with connection to
splitter box 927 420, Size L
925 393 Abdomen strap for children, flexible, black, Size XS
920 303 Flow prong for children (PU = 10 pieces)
925 395 Abdomen sensor, complete 1 pressure pad,
connection hose
920 114 Infant sensor Philips SpO2 with DSUB connector
(has to be extended with Lemo-DSUB extension),
infants 1 - 4kg
925 388 Abdomen strap
for abdomen sensor, flexible, blue, Size S
920 115 Infant sensor Philips SpO2 with lemo connector (no
extension required), infants 4 - 15kg
925 389 Abdomen strap
for abdomen sensor, flexible, black, Size M
920 116 Infant sensor Philips SpO2 with DSUB connector
(has to be extended with Lemo-DSUB extension),
infants 15 - 50kg
925 390 Abdomen strap
for abdomen sensor, flexible, red, Size L
920 112 Extension Lemo-DSUB for Porti and infant sensor
927 420 Splitter box with cable for connection of leg sensor &
ECG cable to Porti 7
926 400 ECG electrode cable to record the ECG signal
925 025 ECG adhesive electrodes (PU=500 pieces)
928 425 EEG electrode cable for Neuroport module (automatic
sleeping stage classification)
925 046 EEG adhesive electrodes (PU=150 pieces)
925 052 Headband to fix EEG elecrode cable, blue
926 450 LEG sensor for detection of leg movements (restless
legs)
-9-
8. Technical specifications
Dimensions
:
Weight
:
Housing
:
Temperature range
:
Moisture
:
Storage media
:
Storage capacity
:
Registered parameters:
Respiratory activity :
30,5mm x 62,7mm x 140mm (H x W x L, without bag)
160 g including storage battery, without bag
metallized plastic (polystyrol, UL 94HB)
+5°C...+45°C
25% - 95%
Internal flash memory
mind. 48 hours
Differential pressure measurement via flow prong (with adaptor also during CPAP
therapy), alternative or additional measurement by means of thermistor possible (option)
Thoracic effort
: Differential pressure measurement by means of rubber cuffs built into chest strap
Abdominal effort : Differential pressure measurement by means of rubber cuffs built into abdomen strap
Breathing sounds : Phonometric transducer via flow prong
SpO2/Pulse
: Built-in pulsoximeter
SpO2 measurement range: 80%-99% ± 2% SpO2
60%-79% ± 4% SpO2
Pulse measurement range: 50 1/min - 150 1/min ± 2%
Finger sensor: special rubber-coated thimble finger sensor
Pulse wave
: Plethysmogramm display; measurement via fingersensor
Position
: Acceleration sensor for position recording (5 positions)
Ambient Light
: Photometric measurement and light-Intensity display
CPAP/Bi-level
: Differential pressure measurement directly on CPAP mask
Measurement range: 0cmH2O - 45cmH2O ± 5%
Neuroport
: Special electrode for frontal lead (option)
Leg movement
: Piezo pressure sensor (option)
ECG
: One channel lead via adhesive electrodes (option)
Central heart frequ.: Measurement range: 30 1/min - 200 1/min ± 2% (option)
PTT
: Measurement range: 100 ms – 355 ms ± 4% (option)
Syst. blood pressure : Measurement range: 60 mmHg – 315 mmHg ± 4% (option)
External channels : External box with voltage input (RJ45; 0..2.5 V) for up to 8 external channels with
galvanic separation and RJ45-jack
Fault indicator
: 2 LEDs on front of the device
Power supply
: Rechargeable Li-Ion storage battery 3.7 V with built-in Semiconductor safety
Charger
: Plug-in power supply with medical approval
Output
: USB interface with cable for data transmission
Power consumption : Approx. 70mA
Online operations
: In online operation with a patient, an optical waveguide to the PC is
indispensable (option)
9. Used Symbols
- 10 -
10. Index
Abdominal sensor...................................................5
Accessories..........................................................2f.
Assigned Purpose...................................................2
Attaching the Porti..................................................6
Attaching the sensors.............................................5
Battery charging......................................................6
Charging the battery...............................................7
Cleaning instructions..............................................7
CPAP sensor..........................................................4
Declaration of conformity......................................12
Disposal..................................................................4
Equipment...............................................................2
Finger sensor..........................................................5
Flow prong..............................................................4
Flow sensor............................................................4
Functional testing....................................................4
Information..............................................................3
Installing the software.............................................7
Leg movement........................................................5
Maintenance...........................................................7
Neuroport................................................................5
Operating elements................................................6
Optical isolator........................................................3
Ordering informations.............................................9
Pacemaker..............................................................3
Position sensor.......................................................5
Preparing for measurement....................................5
Pressure pads.........................................................5
RLS sensor.............................................................5
Safety-related informations.....................................3
Selecting a printer...................................................7
Sensors...................................................................4
Starting the measurement......................................6
Symbols................................................................10
System requirements..............................................2
Technical inspection...............................................4
Technical specifications........................................10
Thermistor...............................................................4
Third-party accessories..........................................3
Third-party software................................................4
Thorax sensor.........................................................5
Transport and storage conditions...........................7
Troubleshooting......................................................7
Warranty.................................................................3
Whole system.........................................................2
- 11 -
11. EC-Declaration of conformity
EG-Konformitätserklärung
SleepDoc Porti
Anbieter:
Supplier:
Dr. Fenyves und Gut Deutschland GmbH
Anschrift:
Address
Lotzenäcker 9
D-72379 Hechingen
Medizinprodukt:
Medical Device:
Schlaf-Diagnosegerät:
Sleep Diagnosis Device:
DIMDI-# Device Group
riskclass rule
13-085
Polygraph: SleepDoc Porti 7
2a
10
17-458
Polysomnograph: SleepDoc Porti 8
2a
10
Wir erklären in alleiniger Verantwortung: Das oben beschriebene Medizinprodukt ist konform mit:
We declare under sole responsibility: The medical device described above is in conformity with:
EG-Richtlinie 93/42/EWG, Anhang II.3 des Rates vom 14.06.1993 über Medizinprodukte
Council Directive 93/42/EEC, App. II.3, 14.06.1993, concerning medical devices
zusätzliche Angaben / Additional information
Die Entwicklung, Herstellung und der Vertrieb der Produkte wird durch ein QM-System gemäß den Forderungen der
ISO 13485, des Medizinproduktegesetzes unterstützt.
Development, manufacture and distribution of the medical devices are supported by a QM-system in accordance with
the requirements of ISO 13485, the act on medical devices.
Das QM-System nach EG-Richtlinie Anhang II.3 wird überwacht durch die Benannte Stelle Nr. 0483 Medical Device
Certification GmbH, Kriegerstraße 6, D-70191 Stuttgart.
The QM-system according to EC Directive app. II.3 is controlled by notified body no. 0483 Medical Device Certification.
Verantwortlich für die Bereithaltung der Technischen Dokumentation ist der Geschäftsführer Herr Andreas Faulhaber.
The responsible person for the supply of the technical documentation is the General Manager Mr. Andreas Faulhaber.
Diese Konformitätserklärung ist gültig bis: 2014-03-21
This declaration of conformity is valid until: 2014-03-21
Andreas Faulhaber
Geschäftsführung
Hechingen, 2012-04-08
- 12 -


![User`s Manual MV2000[SU:M] Ventilator System 0470](http://vs1.manualzilla.com/store/data/005841388_1-c867b5a0773523e6306e353a41d4c56d-150x150.png)