1
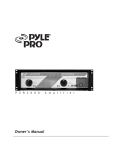
®
VIDEO - AUDIO INTERCOM SYSTEMS
NVM - 450MB
NVM - 450MC
ND - 106
NVM - 700MC
ATTENTION! BEFORE INSTALLING THE DEVICE, PLEASE READ THE USER GUIDE
FIRST!
SAFETY WARNINGS :
• Please read the warnings carefully and keep them in somewhere easy to find.
• Installation and establishment of the apparatus should strictly be carried out only by qualified electiricians.
Otherwise you may cause the device get out of guarantee.
• For correct installation, please read through these warnings and please install device according to directions.
• Isolate the mains electrical supply before you start to make or change connections to device.
• Device should be installed at places where it would not be exposed the water, steam, extreme cold or hot
air.
• Please do not install these device such damp places as bathroom and aside washing machine.
• Please do not install these device at somewhere near a moistener or heater. Keep away from places that
are exposed to spark, heat and moisture it could cause fire and electrical shock.
• Please do not make any different connection in your system that is not recommended in this user guide
and do not use different products. This will cause your system damage.
• In case of using products with different brands, device could be damaged.
20
RoHS
PAP
INDEX
NDC SERIES BUTTON TYPE BELL PANELS WITH CAMERA
Technical Characteristics
Mounting
Connection and ‹nstalling
1
2
3
NDKB (BLACK / WHITE) - NDKC (COLOURFUL) KEYPAD PANEL
Technical Characteristics
Mounting
User Instructions
6
7
8
MONITOR / DOORKEEPER MONITOR NVM-450MC - NVM-450 MB / ND-107K - ND-08K
Technical Characteristics
Wall Mounting and Connection
12
13
TELEPHONE / DOORKEEPER TELEPHONE ND 105 / ND 106
Technical Characteristics
Mounting
Internal or External Doorkeeper ID Tuning
14
15
16
SECURITY PHONE 18600
Technical Characteristics
Connection Diagram
17
17
VIDEO DISTRIBUTER
System Connection Diagram
Terminating Resistance Connection
18
19
CENTRAL ND-101 / ND-101 CT
Technical Characteristics
Mounting
General Connection Diagram
20
21
21
NVM 700MC COLOURFUL LCD MONITOR
Technical Characteristics
User Instructions
Mounting
22
22
23
BLOCK DIAGRAMS
One Central Unit Block Diagram
Double Central Unit Block Diagram
24
25
Double Central Unit Detailed Connection Diagram
One Central Unit Detailed Connection Diagram
26 - 27
28
TABLES
NVM-700MC / NVM 450 MB / NVM 450MC / ND 107K / ND 108K / ND 105 ID Table
ND 101 / ND 101CT ID Table
29
29
MAINTENANCE AND CONSERVATION
29
NDC SER‹ES BUTTON TYPE BELL PANEL WITH CAMERA
Camera Angle Tuning
Camera Lens
Camera Lighting
LEDs
Camera Angle Tuning: It is used to tune camera
viewpoint in course of installation
Speaker Volume Control Camera Lighting LEDs: They provide camera view in
dark places
Microphone
Speaker Volume Control: It is situated inner side of
Volume Control
the panel. It is used to control incoming volume in
course of installation. It should be made by specialist
technicians.
Speaker
Microphone Volume Control: It is situated inner side
of the panel. It is used to control outgoing volume in
course of installation. It should be made by specialist
System Cable Connection technicians.
Speaker: It provides audio output.
Calling Button
System Cable Connection: +20V (20V DC), GND
(GND), A (Video_A), B (Video_B), C(Audio), D(Data)
Name Plate
Calling Button: It is used to call doorkeeper or monitor.
Name Plate: There is one name plate for each button.
Microphone: It provides audio ›nput.
Microphone
FIGURE-1
TECHNICAL CHARACTERISTICS
Power Consumption
Operating Time
Material Content/Colour
Dimensions
Operating Temperature
Camera
Camera Angle
Protection Class
Functions
14W(max.),4W(min.), 20V±1V (from central unit)
Call: 30sn. Videocall: 60sn.
Aluminum / Metallic Grey
NDC 244(244x115x25 mm) NDC 320(320x115x25 mm) NDC 396(396x115x25 mm)
-20°C - +40°C
1/4 inch CCD
86° stable, 10° adjustable camera angel
IP44
Calling apartments and doorkeeper
Video communication with apartments
Camera Lighting LEDs
Speaker Volume Control
Microphone Volume Control
Support up to 64 buttons
NDC 244
NDC 320
NDC 396
NDC 396
Model Code
Button number
NDC-244-01
1
NDC-320-01
1
NDC-396-01
1
NDC-244-02
2
NDC-320-02
2
NDC-396-02
2
NDC-396-11
11
NDC-244-03
3
NDC-320-03
3
NDC-396-03
3
NDC-396-12
12
NDC-244-04
4
NDC-320-04
4
NDC-396-04
4
NDC-320-05
5
NDC-396-05
5
NDC-320-06
6
NDC-396-06
6
Model Code Button number
Model Code Button Number
NDC-320-07
7
NDC-396-07
7
NDC-320-08
8
NDC-396-08
8
1
NDC-396-09
9
NDC-396-10
10
MOUNTING
FIGURE-2
Place”NaDe” key in the keyhole that
is in the bottom of product as shown
in FIGURE - 2.
FIGURE - 3
FIGURE - 4
Slide down the speaker and
microphone cover, make the
mounting holes that are
shown in FIGURE - 4 visible.
Push the key forward, slide
down the name plate and
take it out with pulling up.
1,5 m
1,4 m
1,25 m
FIGURE-5
FIGURE-6
FIGURE-7
Run the cable that is to be connected from cable runing hole that is shown in FIGURE - 5
Note: Mounting height should be as in FIGURE - 7
External Doorkeeper Button Adjustment:
You can make the external doorkeeper button adjustment whether during the first installation or later with
the program button that is shown as “A” in FIGURE - 9. You should adjust the external doorkeeper button
starting from the first button on the panel. You can also cancel an adjusted external doorkeeper button,
as well and adjust the button again as an apartment button.
Note: The system senses the internal doorkeeper automatically. No need to adjust.
The Adjustment of Chosen Button As External Doorkeeper Button:
First you turn on the power supply, press the program button that is shown as “A” in FIGURE - 9 once.
Number 1 LED that is indicated as “LD1” in FIGURE - 9 will ligtht up. While the LD1 is ligthing up continuously,
press the button on the panel once that you want to adjust as the external doorkeeper button. During the
process while LD1 is lighting up continuously, the LED that is indicated as “LD2” in the FIGURE - 9 will start
to blink. Press the button again that you have chosen on the panel and keep going to press this button until
both LEDs start to ligth up continuously. Once you take your hand away from the button, both LEDs will
blow out. At the end of this process the button you have chosen will be adjusted as external doorkeeper
button.
Note: While the external doorkeeper button is being adjusted, firstly adjusted bell button is automatically
assinged to external doorbell button with the lowest ID. ( ID numbers start from “1“)
2
The Cancellation of Adjusted External Doorkeeper Button:
Cancellation process should be started from the highest bell number on the panel that is adjusted as external
doorbell button. First you turn on the power supply, press the program button that is indicated as “A” in
FIGURE - 9 twice. Number 2 LED that is indicated as “LD2” in FIGURE - 9 will ligtht up. While the LD2 is ligthing
up continuously, press the external doorkeeper button on the panel once that you want to cancel. During the
process while LD2 is lighting up continuously, the LED that is indicated as “LD1” in the FIGURE - 9 will start
to blink. Press the external doorkeeper button on the panel again that you want to cancel and keep going to
press this button until both LEDs start to ligth up continuously. Once you take your hand away from the button,
both LEDs will blow out. At the end of this process the external doorkeeper button will be cancelled.
If you wish to quit external doorkeeper button adjustment after you have press the program button, press the
program button twice then LD1 and LD2 will blow out.
If you wish to quit cancellation of adjusted externel doorkeeper button process, press the program button
once then LD1 and LD2 will blow out.
CONNECTION AND INSTALLATION
ON
SPK
C
D
Make the terminal blocks
visible by sliding up camera
cover. Connect the system
connection cable with care to
related places.
C
D
A
B
A - Program button
B - Panel ID Tuning
C - Midrophone Volume Control
D- Speaker Volume Control
+20V
C
D
A
B
GND
SPK
GND
C
D
A
B
GND
MIC
+20V
C
MIC
B
ON
D
A
B
GND
+20V
+20V
LD 1 LD 2 A
Make the components that are
required for installation
adjustment visible by sliding
down camera cover.
FIGURE -9
FIGURE - 8
ID Tuning :
Dual DIP Switch that is indicated in FIGURE - 9 as “B”, must be adjusted by specialist according to TABLE - 1.
If there is more than one panel in the system, ID numbers should be numbered as 0,1,2,3 and different ID
numbers should be given to each panel.
Microphone Volume Control :
Potantiometer that is indicated in FIGURE - 9 as “C”, make avaliable adjust the outgoing volume from panel
to apartments.
Speaker Volume Control :
Potantiometer that is indicated in FIGURE - 9 as “D”, make available adjust the incoming volume from apartments
to panel. Once you finish the adjustments, push the camera and speaker covers. Placing the “NaDe” key in the
keyhole, make the name plate fall into its place well. When you get the key out, panel will be closed.
Note: After you closed the panel cover, it is recommended to make a volume control by calling an apartment.
Name Plate Change:
Remove the name plate with the help of key as it is indicated FIGURE - 2 and 3. When the name plate of the
apartment is changed, close it as indicated in FIGURE - 9 (with the help of key).
ON
ON
1
2
0
ON
1
2
1
ON
1
2
2
1
2
3
TABLE - 1
3
NDC - 244 BELL PANEL CONNECTION
EXAMPLE - 1
3
4
1
5
2
6
NDC - 244
Additional Panel with 12 buttons
Plug in the one edge of the cable to the number 2 socket hole on the bell panel and the other edge in number
3 socket hole on the additional panel. This cable is given with additional panel in order to make and additional
connection to NDC-244 series bell panel connection.
NDC - 320 BELL PANEL CONNECTION
EXAMPLE - 2
1
3
7
4
8
5
9
6
10
2
NDC - 320
First additional panel
with 16 buttons
Second additional panel
with 16 buttons
Plug the one edge of the “430mm” length cable in the number 2 socket hole on the bell panel and the other
edge in number 6 socket hole on the additional panel. This cable is given with additional panel to make an
additional connection. In order to make second additional panel connection to NDC-320 series bell panel, plug
one edge of the “430 mm” length cable that is given with second additional panel in the number 3 socket hole
on the first additional panel and the other edge in the number 7 socket hole on the second additional panel.
Check the number 4 and 5 socket connecitons on the first additional panel. Check the number 8 and 9 socket
connections on the second additional panel.
4
NDC - 396 BELL PANEL CONNECTION
EXAMPLE - 3
1
2
3
7
4
8
5
9
10
6
NDC - 396
First additional panel
with 20 buttons
Second additional panel
with 20 buttons
Plug the one edge of the “385 mm” length cable in the number 2 socket hole on the bell panel and the other
edge in number 6 socket hole on the first additional panel. This cable is given with additional panel to make an
additional connection to NDC- 396 series bell panel. In order to make a second additional panel connection to
NDC-396 series bell panel, plug one edge of the “430 mm” length cable that is given with second additional
panel in the number 3 on the first additional panel and the other side in number 10 socket hole on the second
additional panel. Check the number 4 and 5 socket connecitons on the first additional panel. Check the number
8 and 9 socket connections on the second additional panel.
5
NDKB(BLACK/WHITE) - NDKC(COLOURFUL)
KEYPAD PANEL
Camera Lens
Camera Angle Tuning
abc
def
ghi
jkl
mno
pqrs
tuv
wxyz
DEL
ENTER
FIGURE - 10
Camera Angle Tuning: It is used tune camera viewpoint
in course of installation.
Camera Lighting LEDs: They provide camera view in
dark places.
Speaker Volume Control: It is situated inner side of the
panel. It is used to control incoming volume in course
Camera Lighting LEDs
of installation. It should be made by specialist technicians.
Microphone Volume Control: It is situated inner side
Speaker And Microphone of the panel. It is used to control outgoing volume in
Volume Control
course of installation. It should be made by specialist
Contrast Tuning
technicians
Contrast Tuning : Allows you to adjust contrast.
Speaker: It provides audio output.
Speaker
System Cable Connection: +20V (20V DC), GND (GND),
A (Video_A), B (Video_B), C(Audio), D(Data)
System Cable Connection Graphic LCD: It is used to show you names and
apartment’s numbers
Keypad: It provides to call apartments, search names,
write passwords, ..., etc.
Graphic LCD Display
Microphone: It provides audio input.
Microphone Volume Control: Potantiometer that is indicated
in Figure - 6 as “1” makes available to adjust outgoing volume
from panel to apartments.
Speaker Volume Control: Potantiometer that is indicated in
Keypad
Figure - 6 as “2” makes available to adjust incoming volume
from apartments to panel.
Contrast Tuning: Potantiometer that is indicated in Figure 6 as “3” makes available to adjust contrast of graphic LCD.
Note: All these, adjustments must be made by specialist
technicians.
Removable Cover Once you finish the adjustments, push the camera, speaker and
keypad covers. Placing the “NaDe” key in the keyhole, make
the removable cover fall into its place well. When you get the
key out, panel will be closed.
Note: After you closed the panel cover, it is recommended to
make a volume control by calling an apartment.
TECHNICAL CHARACTERISTIC
Power Consumption
Operational Time
Materaial Content/Colour
Dimensions
Operational Temperature
Camera
Camera Angle
Camera Lighting
Button Lighting
LCD
Protection Class
Functions
20W(max.),6W(min.),20V±1V (From central unit)
Call: 30sn. Video call: 60sn.
Aluminum / Metallic Grey
410x115x25 mm.
-20°C - +40°C
1/4 inch CCD
86° stable,10° adjustable camera angle apparatus
White LED
Blue LED
Graphic LCD
IP44
Calling apartments and doorkeeper
Video communication with apartments
Speaker volume control
Microphone volume control
Support up to 99 apartments
Open entrance door with password
Guide
6
MOUNTING
abc
def
ghi
jkl
mno
pqrs
tuv
wxyz
DEL
abc
def
ghi
jkl
mno
pqrs
tuv
wxyz
DEL
ENTER
ENTER
abc
def
ghi
jkl
mno
pqrs
tuv
DEL
FIGURE - 2
Place the “NaDe” key in
the keyhole that is in the
bottom of product as
shown in FIGURE - 2.
wxyz
ENTER
FIGURE - 4
FIGURE - 3
Pushing the key
forward, remove the
removable cover by
pulling toward yourself
from above as shown
in FIGURE- 3.
Slide down the cover of
speaker, camera and keypad
as shown in FIGURE - 4.
Make the mounting holes visible
that are shown in FIGURE - 4.
C
D
A B
SPK
MIC
CNT
def
ghi
jkl
mno
ghi
pqrs
tuv
wxyz
pqrs
ENTER
DEL
DEL
FIGURE - 5
abc
def
jkl
mno
tuv
wxyz
ENTER
FIGURE - 6
Slide up the camera cover, make the terminal blocks
visible. Connect the sixfold system cable that comes
to related places carefully as shown in FIGURE- 5.
1- Microphone Volume Tuning
2-Speaker Volume Tuning
3-LCD Contrast Tuning
7
C
D
A
B
GND
+20V
C
D
A
B
GND
+20V
C
D
A
B
GND
+20V
C
abc
SPK
CNT
A
B
GND
+20V
MIC
INSTRUCTIONS
• LANGUAGE SELECTION
First turn on the electricity. After that you make
the language choice from language menu that
appears after NADE logo on LCD screen, save the
adjustments by pressing ENTER button.
• MENU
You will see side screen
when you pressed the
ENTER button in main
screen.
Using to arrows
choose the menu option
and press ENTER button.
You need the admin
password.
Note: Default password is
“1234”
Choose the INDEX menu
from the main screen and
press ENTER button.
•CREATE NEW CONTACT
Choosing ”NEW CONTACT”
option from the INDEX menu,
press ENTER button.
After you have entered
apartment number and
name, press the ENTER
button.
When registration completed
you will see the “SAVED!”
message on the screen.
Enter the apartment
number and press ENTER
button.
Previous name will appear
in OLD line, enter the new
name and press ENTER
button.
• EDIT THE EXISTED CONTACT
Choose “EDIT CONTACT”
option from the index menu
and press the ENTER button.
When the registry is
completed, you will see
the “SAVED!” message on
the screen.
8
• DELETE THE EXISTED CONTACT
Choose the “ DELETE
CONTACT” option from the
index menu and press
ENTER button.
Press ENTER button after
you enter apartment
number.
Name will appear on the
line. Once you press ENTER
button, name will be
deleted.
You will see the
“DELETED!” message on
the screen when registry is
completely deleted. .
• EDIT THE NAME OF EXTERNAL DOORKEEPER
Choose the “ EXT.
DOORKEEPER” option
from the index menu and
press ENTER button.
If the number of external
doorkeeper on the system
is “0”, this option will not
be active.
After enter the number of
external doorkeeper that
you want to edit the name,
enter the new name and
press ENTER button.
After you have entered the
password, type it again to
following line.
Registry will be made as you
press ENTER button.
Once you enter the new
password, press ENTER
button and change will be
made.
Registry will be made as you
press ENTER button.
• CHANGE DOOR PASSWORD
Choose the “DOOR
PASSWORD” option from
the main menu and press
ENTER button.
• CHANGE ADMIN PASSWORD
Choose the “ADMIN
PASSWORD” option from
the main menu and press
ENTER button.
• ENTER BLOCK NAME
Choose the “ BLOCK NAME”
option from the main menu
and press ENTER button.
After you have entered
the block name press
ENTER button and
registry will be made.
9
You will see the “SAVED!”
message on the screen
when registry is completely
deleted. .
• SETTING THE PANEL ID NUMBER
Choose the “ SETTINGS”
option from the main menu
using arrows and press
ENTER button.
Choose the “ PANEL ID”
option from the SETTINGS
menu and press ENTER
button.
After enter the panel ID
number, press ENTER
button to save.
• SETTING THE CONTACT NUMBER
Choose the “ ALL
CONTACTS” option from
the SETTINGS menu and
press ENTER button.
After enter the number of
contacts stay in the block to
ALL CONTACTS line , press
ENTER button to save.
• SETTING THE EXTERNAL DOORKEEPER NUMBER
NOTE: You can enter the number of
external doorkeeper as much as
maximum amount of the external
doorkeepers that is sensed when the
central unit browsed the whole system.
Choose the “ EXT.
DOORKEEPER” option
from the SETTINGS menu
and press ENTER button.
After enter the number of If any external doorkeeper is not senssed
external doorkeeper on the on the system during central unit
system, press ENTER button browsing, number of external doorkeper
will be assigned as “0”.
to save.
• DEFAULT SETTINGS
Choose the “ MASTER
RESET” option from the
SETTINGS menu and press
ENTER button.
If you are sure to load default
settings press enter again to
continue.
•LANGUAGE
Choose the “LANGUAGE”
option using arrows from
the SETTINGS menu and
press ENTER button.
Choose your language using
arrows and press ENTER to
save.
10
Registry will be made as you
press ENTER button.
• OPEN ENTRANCE DOOR
To open entrance door press
“DEL” button on keypad. When you enter the
door password the entrance door will be opened.
• CALL AN APARTMENT AND MAKING A VIDEO CALL
For quick search, enter the
apartment number from the
keypad panel and press ENTER
button.
The name of the apartment
owner will appear on the
screen if it is recorded and
you will see the “CALLING”
message on the screen.
When the handset is opened
up in the called apartment,
you will see the “CONNECTED”
message on the screen.
• CANCEL OF APARTMENT CALL
When the handset is closed
down or when you press DEL
button, you will see the
“CANCELLED” message on
the screen.
If anybody do not open up
the handset, you will see the
“NO ANSWER” message on
the screen.
• ENTER WRONG APARTMENT NUMBER
If you enter bigger than the number of apartment is
determined on the system.“ INVALID APARTMENT
NUMBER” message will appear on the screen.
• GUIDE
When you press “MENU”
button in the main screen
you will see the side
screen.
Using the arrows choose
INDEX option and press
ENTER button.
• SEARCH IN THE GUIDE
Using up and down arrows,
choose the name you want
to call and press ENTER
button.
When the call is achieved,
the number of the apartment
and the owner’s name will
appear “CALLING” message
on the screen.
11
MONITOR / DOORKEEPER MONITOR
NVM-450MC - NVM-450MB /
ND-107K - ND - 108K
TECHNICAL CHARACTERISTICS
Screen
Handset
Door Open Button
Stairs automation
Input Voltage
Power Consumption
Connection System
Melody Tone
Material Content
Operating Time
Adjustments
Operating Temperature
Protection Class
Functions
Panel Display
CCTV Display
Security
Doorkeeper
FIGURE - 16 FRONT V‹EW
Brigthness Tuning
Colour/Contrast Tuning
Ring Volume Tuning
FIGURE - 17 SIDE VIEW
System Connection
Terminal Blocks
Door Bell Terminal
Blocks
DIP Switch for ID
Terminating
Resistance Tuning
FIGURE - 18 BACK SIDE VIEW
20V±1V (from central unit)
0.4W (stand by) 8W (Max)
6 Cable
Ding Dong
ABS
Call 30 seconds. Talk: 60 seconds
Audio - Brightness - Contrast/ Colour
-20°C - +40°C
IP20
Call with the panel
Call with the security/ doorkeeper
Door Automation Control
Stairs Automation Control
CCTV Display
Panel Display
Screen: Monitor, black/white CRT(NVM-450MB, ND-107) or colourful
LCD (NVM-450MC, ND-108K)
Handset: Allows audio output and input with speaker and microphone
Door Open Button
: It is used to open entrance door.
Stairs Automation : It is used to ligth up stairs.
Panel Display :When it is pressed to panel display button, monitor
gives the view of camera on the panel for 30 seconds. If there is more
than one panel on the system, if it is pressed to button again during
monitor have view of first panel, the monitor gives the view of second
panel. When you press again if there is a third camera, the view of
the third camera comes to the screen, ›f not, display turns off.
: If there is a CCTV camera on the system, it gives
CCTV Display
the view of CCTV camera on the monitor for 30 seconds. If there is
two CCTV camera on the system, before time is over when it is
pressed again displays the other CCTV camera’s view. If not, display
turns off.
Security : It is used to call security. When the handset is hooked
button is pressed, security phone is called. When the security
and
accept the call, communication starts. If either side does not end the
phone call, after 60seconds system automatically ends the call. If
there is more than one security on the system, in order to call first
security press
button, to call second security press the switch of
the handset once and press again button. If the same process is
repeated, other securities are called.
Doorkeeper : It is used to call doorkeeper in NVM series. It is not
functional in ND series. When the handset is hooked then button is
pressed, doorkeeper phone is called. When the doorkeeper accept
the call, communication starts. If the either side does not end the
phone call, after 60 seconds system automatically ends the call. If
there is more than one doorkeeper in the system, in order to call first
doorkeeper press the button, to call second doorkeeper press the
switch of the handset once and press the button again. If the same
process is repeated, other securities/doorkeepers are called
Ring volume tuning: Allows you to adjust ring volume tone.
Colour / Contrast tuning: Allows you to adjust colour for LCD monitors
and contrast for black / white CRT monitors.
Brightness tuning: Allows you to adjust brightness.
Note: If there is an alarm output giving detector connected to the
system, alarm rings for 1 min. in the apartment.
12
DIP switch: Alows you to adjust ID numbers.
Terminating resistance tuning: All monitors’ terminating resistance are adjusted as 75 ohm. Only on the dublex
apartments, adjust terminating resistance switch as 75 ohm that is situtated on the backside of the monitor that
is adjusted as master.
Door Bell Terminal Block: It is used for door bell connection.
System Connection Terminal Block: It is used for connection of monitor to the system.
WALL MOUNTING AND CONNECTION
+20V
GND
A
B
C
D
BELL
GND
Screw
hole
mounting height = 1.50 m.
Doorbell
FIGURE - 20
FIGURE - 19
Fix the wall mount apparatus as indicated
in FIGURE - 19 from the screw holes with
mounting screws and pegs, after you
have run the cables from the holes on
the device.
Connect the sixfold system connection cable
and door bell connection cable with sixfold
and double terminal blocks as indicated in
FIGURE - 20.
Place the plug in terminal blocks that have been connected to
the connection cables as shown in FIGURE - 21 to plug in terminal
blocks on monitor.
Terminal Block Connection: Place the terminal blocks that you
have connected in accordance with FIGURE - 6 in terminal block
holes that are situated on the back of monitor.
ID Adjustment: ID number adjustments should be done by specialists
in accordance with TABLE - 3 that is at the end of user manual.
Starting from “1”, adjust the ID numbers of the all doorkeepers’
apartments that are connected to a panel. The ID numbers of other
apartments should follow each other in order, after doorkeeper ID
numbers are given. Adjust the ID numbers of the apartments starting
from “1”, if there is no doorkeeper apartment.
System
Connection
Cable
Door bell
Connection
Cable
DIP switch
Terminating Resistance
FIGURE - 21
Terminating Resistance: All monitors’ terminating resistance
switches are adjusted “ON” position (as 75 ohm). Only on the dublex
apartments, adjust terminating resistance switch ”ON” position (as
75 ohm) that is situtated on the backside of the monitor that is
adjusted as master. Adjust terminating resistance switch ”OFF”
position that is situtated on the backside of the monitor that is
adjusted as slave.
Align the wall mounting apparatus nail with monitor’s wall mounting
holes as shown in FIGURE -7. Install monitor to the wall mounting
apparatus. First ensure the wall mounting apparatus holes is right
place on the monitor. Then push down the monitor slightly.
FIGURE - 22
Master / Slave: If there is one monitor on the system, monitor
must be adjusted as master (turn the number 8 switch “ON” position).
If there is more than one monitor have same ID number on the
system (dublex apartments... etc) one of them must adjust as master,
the others must adjust as slave (turn the number 8 switch “OFF”
position) This ID adjustments should be made by specialists.
GK-01
ADDITIONAL POWER SUPPLY
Operating voltage
Output voltage
Output current
GK-02
SECOND MONITOR POWER SUPPLY
Operating voltage
Output voltage
Output current
: ~220-240V / 50Hz
: +20V DC
: 1,3 A
13
: ~220-240V / 50Hz
: +20V DC
: 0,5 A
PHONE / DOORKEEPER PHONE
ND - 105 / ND - 106
TECHNICAL CHARACTERISTIC
Power Consumption
Connection System
Melody Tune
Material Content
Operating Time
Adjustments
Operating Temperature
Protection Class
Functions
Handset
Door automation
Stairs automation
Security
Doorkeeper
FIGURE - 23
Volume
Control
20V±1V (from central unit)
4 Cable
Ding Dong
ABS
Call: 30 seconds, Talk: 60 seconds
Audio
-20°C - +40°C
IP20
Call with panel
Call with security and doorkeeper
Door automation control
Stairs automation control
Handset : Allows audio output and input with speaker and microphone.
Kap› otomati¤i
: It is used to open entrance door.
Merdiven otomati¤i : It is used to open stairs automation.
Güvenlik : It is used to call security. When the handset is hooked
and button is pressed, security phone is called. When the security
accept the call, communication starts. If either side does not end the
phone call, after 60 seconds, system automatically ends the call. If
there is more than one security in the system, in order to call first
security press the button, to call second security press the switch
of the handset once and press the button again. If the same process
is repeated, other securities will be called.
Doorkeeper : It is used to call doorkeepers in ND-105 models. It is
not functional in ND - 106 models. When the handset is hooked and
button is pressed, the doorkeeper is called. When the doorkeeper
accepts, the call starts. If either side does not end the phone call, after
60 seconds system automatically ends the call. If there is more than
one doorkeeper in the system, in order to calla first doorkeeper press
the button, to call second doorkeeper press the switch of the handset
once and press the button again . If the same process is repeated,
other doorkeepers will be called.
Call with Panel: When the apartments are called from external panel,
melody rings. Once the handset is hooked, call starts.
FIGURE - 24
ID Dip Switch
System Connection Terminal
Blocks
Volume Control: Allows you to adjust the tone
and the volume of melody.
ID Tuning: Allows you to adjust ID numbers.
System Connection Terminal Blocks: It is
used for the connection of the phone to the
system.
Doorbell Terminal Blocks: It is used for doorbell
button connection. No need to use an external
bell.
Doorbell Terminal Blocks
FIGURE - 25
14
MOUNTING
1.50 mm
FIGURE - 26
FIGURE - 27
C
D
After you have run the system connection cable from the
hole on the bottom cover of the product as shown in
FIGURE - 27, mount it with the help of screws and pegs
given you with the product.
BELL
GND
GND
+20V
Seperating the bottom of the phone
with a spicular object as shown in
FIGURE - 26.
FIGURE - 28
FIGURE - 29
While the electricity is turned off, connect
the system connection cable to +20V,
GND, C, D terminal blocks that are situated
on the electronic card. If exists, connect
the doorbell connection cable to
BELL, GND terminal blocks that are
situated on the electronic card of the
product.
After all the adjustments and installations
are finished, playes the front cover of the
phone as shown in FIGURE - 29.
ID Tuning: ID number adjustment for ND -105 (apartment phone) in accordance with Table - 3, ND - 106
(doorkeeper phone) in accordance with Table - 2 (on the next page) should be made only by specialists. Tables
are situated at the end of the user manual. Starting from "1", adjust the ID numbers of the all doorkeepers'
apartments that are connected the panel. The ID numbers of other apartments should follow each other in
order, after doorkeeper ID numbers are given.
15
INTERNAL AND / OR EXTERNAL
DOORKEEPER ID TUNNING
CENTRAL
ND -106
External
Doorkeeper
20V
GND
A
B
C
D
ND - 107K
ND - 108K
20V
GND
C2
D2
Internal
Doorkeeper
FIGURE - 30
TABLO-2 FOR DOORKEEPER 4- DIP SWITCH TABLE
ON
1
ON
2
3
4
1
ON
2
3
4
ON
1
3
2
0
4
ON
1
3
2
1
4
ON
1
2
2
3
4
ON
1
2
3
3
4
ON
1
3
2
4
4
ON
1
2
5
3
4
1
2
6
3
4
External
Doorkeeper
7
External doorkeeper is
chosen when the 4th
switch of the DIP switch
is on the “0” position.
ON
ON
ON
ON
ON
ON
ON
ON
ON
Internal
Doorkeeper
1
2
3
4
Internal doorkeeper is
chosen when the 4th
switch of the DIP switch
is on the “ON” position.
1
2
0
3
4
1
3
2
1
4
1
2
2
3
4
1
3
2
4
3
1
3
2
4
4
1
3
2
5
4
1
3
2
6
4
1
2
3
4
7
Note 1: If the doorkeeper takes care the block in which he lives, doorkeeper should
be adjusted as internal doorpkeeper. If the doorkeeper takes care other block or
he lives in another block, he should be adjusted as external doorkeeper on the
center unit. (ID numbers start from “1“)
Note 2: Black part shows the position of the switch.
16
SECURITY PHONE
ND - 110
TECHNICAL CHARACTERISTICS
Input Voltage
Connection System
Melody Tone
Adjustments
Screen
Operating Temperature
Speaker
Protection Class
Functions
Keypad
Handset
FIGURE - 31 FRONT VIEW
20V±1V
4 Cables
2 Options
Voice - Contrast
-20°C - +40°C
IP20
• Calling apartments and doorkeeper
with keypad.
• Date-Clock indicator
• Two different melody tones option
•In case of alarm from external
detectors that are connect to the
central, a warning message appear
on the phone screen.
•Two leveled volume control.
• When the recorded apartments are
called, the names appear on the
screen.
• Indication of missed calls’ datetime, caller’s number and the number
of callings are shown on the screen
• Call from the guide.
Volume Control
Melody tuning
Handset: It provides audio input and output with ›ts
speaker and microphone
Screen: Graphic LCD (blue- white)
Battery pack Keypad: It is used to call apartments and menu
options.
Speaker: Allows you to hear the melody tone.
System Connection Socket: It is used for the
connection of sixfold RJ11 Jack and quarted cable.
Handset Connection Socket: It is used for the
connections of quarted RJ11 Jack and handset.
Battery Pack: It is used for 3 pieces AAA sized
batteries.
Volume Control: It is used for two levelled volume
control
Tune Adjustment: It is used for the selection of two
different melody tones.
System
Handset
Connection Connection
Socket
Socket
FIGURE- 32 BACK VIEW
Power
Supply
GND +20 V
+20 V
GND
A
B
C
D
System
+20 V
GND
A
B
C
D
Security Phone
Coupling
Apparatus
+20 V
+20 V
GND
C
D
GND
C
+20 V
GND
C
Cable
D
D
FIGURE- 33 SECURITY PHONE CONNECTION
17
1
RJ11 JACK CONNECTION
1
123456-
1
6
C
D
+20 V
GND
EMPTY
EMPTY
FIGURE- 35
FIGURE- 34
Sixfold RJ11 Jack Socket that is used for the connection of security to the system is given you with the product
as cabled. Plug in one edge of the connection cable to the security phone. Connect cut edge of the cable to
the coupling apparatus as shown in FIGURE - 33.
Note: When RJ11 Jack socket is held as in the FIGURE- 34, number 1 cable goes to “C” connection. The order
of number 2,3,4 cable is shown in FIGURE - 35.
VIDEO DISTRIBUTOR
ND - 104
Video distributor: It is used to distribute the video to apartments with high quality and isolation.
Operating voltage
: +20V
Operating temperature : -20°C~ + 40°C
Protection class
: IP 20
System
Connection
Cable
B
NVM-450 MC
A
Mounting Holes
X
A
B
+20 V
GND
A
A
B
+
B2
A2
-
B3
A3
A1
B1
B4
A4
B
B
NVM-450 BC
A
X
Video Distributer
B
A
NVM-700 MC
FIGURE- 36 CONNECTION OF THE VIDEO DISTRIBUTOR TO SYSTEM DIAGRAM
After you have finished mounting from the holes that is shown as “A” in FIGURE - 36 with the help of screws
and pegs given you with the product, make the connection to the system as shown in FIGURE - 36
If the product will not be stabilized and will be used as plated in junction box instead, make the system
connection first and place later.
18
VIDEO DISTRIBUTOR - TERMINATING RESISTANCE CONNECTION
75R
Video
Distributor
B
A
GND
+20V
75R
B
A
GND
+20V
Video
Distributor
+20V
GND
A
Video
Distributor
B
System
Cable
For each distributor that is connected in the long distance, 75R resistance must be connect to the between
“A and GND” and “B and GND” cables as shown in this connection diagram.
19
CENTRAL
ND - 101/ND - 101CT
Functions:
• Connect the external doorkeeper and security
• Two different door release.
• Two different stairs automation.
• Rail mounting
• Extra relay output
• Contains SMPS Power Supply
• It is not affected by electrical surges
• Easy connection with terminal blocks
• DIN13 type rail mounting
• Protection against short circuits
• Available to be connected two different external
detector
• Relay output working synchronous with stairs
automaiton. (Optional relay output)
• In ND - 101CT model you may connect additional two
different CCTV cameras.
FIGURE- 37
MOUNTING
TECHNICAL CHARACTERISTICS
2
3
SLED COIL
SLED
Input Voltage
Output Voltage
Output Current
Operating Temperature
Protection Class
1
CENTRAL
85-265VAC / 50 - 60 Hz
+20V DC
3,5 A max
-20°C - +40°C
IP20
RAIL
FIGURE- 38 CENTRAL RAIL MOUNTING
For the mounting of central unit to the rail, as shown in FIGURE- 38 place the central unit to the rail after you
make sure that the rail falls into well to the holes on the back of the central unit. Push the “SLED” inwards from
the space in the middle of the central unit. After finishing this process, place the “SLED COIL” in the coil hole
situated on the sled.
While the electricity is turned off, pull
the screws with the screwdriver as
shown in FIGURE - 39.
FIGURE- 39 PULLING CENTRAL UNIT’S SCREWS
RESET THE CENTRAL UNIT
When the electricity is turned off, adjust the ID number of central unit as “0”. Then turn on the electricity.
Wait, until the LEDs on the central unit start to blink. When the LEDs start to blink, the central unit will be
reset. After central unit is reset, turn off the electricity. Adjust central unit’s ID number. Turn on the electricity
again. Central unit starts to browse whole system. If the browsing is completed without a hitch, all the LEDs
will be go out. If any of the LEDs is continue to light up for 5 minutes, there is a problem on the system. It
is recommended to check the ID numbers.
20
While the electricity is turned off, pull over the
front cover in the direction of arrow as shown
in FIGURE - 40 after you have pulled the
screws.
FIGURE- 40 REMOVING CENTRAL FRONT COVER
While the electricity is turned off, central ID numbers should be adjusted by specialists in accordance with
Table - 4 from the quarted DIP Switch that is situated on the central electronic card. In presence of more than
one central unit on the system, the ID numbers of the central units should be different from one another. After
the ID adjustment, please place the front cover. Finish the mounting by placing the screws to their holes with
the help of screw driver.
85-265Vac
50-60Hz
External detector/sensor
(contact output)
Sensor
(5-30Vdc Output)
+
System
Connection
Apartment outgoing
-
System
Connection
Panel outgoing
Lamp
Phase
Stair
Automation - 1
Button
Neutral
Lamp
Phase
Button
Neutral
N
L
N
L
Contact output synchronous with
stair automation (10A, 250Vac)
It is optional.
1
2
3
4
5
6
7
8
9
10
11
12
13
14
15
16
17
18
20V
GND
A
B
C
D
GND
Sens. Ç›k›fl
GND
Sens. Kont.
MO1 COM2
MO1 NO2
MO1 NC2
MO1 COM1
MO1 NO1
MO2 COM
MO2 N0
KO1
KO COM
KO2
MON NC
MON COM
MON NO
12V
Vin
GND
GND
Vin
12V
20V
GND
C2
D2
24
23
22
21
20
19
System
Connection
Security
Phone/
External
Doorkeeper
CCTV 1
CCTV 2
Stair
Automation - 2
FIGURE - 41 GENERAL CONNECTION OF CENTRAL UNIT
Door
Release - 2
Door
Release - 1
Door
Release
Transformer
First you turn off the power supply
(85-265Vac / 50-60 Hz), make the
connection of the system and external
components as shown in FIGURE - 2.
After all connections have done, turn on the power supply, for the first time, system makes a scan of ID
numbers in the whole system. For this reason, before turn on the power supply of central, it is recommended
to finish the mounting of whole system and check the ID numbers. During the ID scan two LEDs instead of
power LED, start to blink respectively. After the scan finishes if both LEDs ligth up, it means there is a problem
on the system. ID numbers could have been given with misses, two or more apartment could have been given
the same ID number without master/slave adjustment, the ID numbers of the apartments could have been
adjusted as “0”. At the end of the scan, if both LEDs do not light up, it means there is no problem with the ID
numbers. Central unit starts to operate the system.
21
NVM 700 MC / ND-109K
7” COLOURFUL LCD MONITOR / 7” COLOURFUL LCD DOORKEEPER MONITOR
Monitor screen
Call On-Off
Door Release
Stairs Automation
Panel Display
CCTV Display
Security / Doorkeeper
11. Terminating resistance tuning: If the video
distributor is connected on the system, adjust the
handsfree 75 ohm. Turn the dip-switch as “ON” position
on the back side of the handsfree.
12. Speaker
DIP Switch
FIGURE - 42
1. Monitor screen
2.Call On-Off Button
: Allows you to answer calls
from a visitor at the door station.
3. Door automation button
: This is used to open
the entrance door .
4.Stairs automation : It is used to illuminate stairs.
5.Panel display : When it is pressed to panel display
button, monitor gives the view of camera on the panel
for 30 seconds. If there is more than one panel on the
system,, if it is pressed to button again during monitor
have view of first panel, the monitor gives the view of
second panel. When you press again if there is a third
camera, the view of the third camera comes to the screen,
›f not, display turns off.
6.CCTV Display
: If there is a CCTV camera on the
system, it gives the view of CCTV camera on the monitor
for 30 seconds. If there is two CCTV camera on the
system, before time is over when it is pressed again
displays the other CCTV camera’s view. If not, display
turns off.
7.Security / Doorkeeper
: It is used to call
security/doorkeeper. When you want to call security or
doorkeeper, first press button then press button. If
there is more than one security or doorkeeper
if you want to call third security / doorkeper, press
button three times then press button. When security
/ doorkeeper hooked up the phone, the call starts. If
anyone does not end the call, after 60 seconds system
automatically ends the call.
8. Ring volume tuning: Allows you to adjust ring volume
level.
9. Brightness tuning: Allows you to adjust brightness.
10.DIP switch: It is used to ID adjustment.
TECHNICAL CHARACTERISTICS
Power Consumption
Connection system
Audio communication
Material Content
Monitor
Monitor operating time
Dimensions
Settings
Operating temperature
Protection class
Terminating resistance tuning
Speaker
Ring
Volume
tuning
ON
1
2
3
4
5
6
7
8
Brightness
tuning
FIGURE - 43
Instructions:
1. ID tunning : ID number adjustments should be done
by specialists in accordance with TABLE - 3 at the end
of the manual. Starting from “1“, adjust the ID numbers
of all doorkeepers’ apartments that are connected to
a panel. The ID numbers of other apartments should
follow each other in order, after doorkeeper ID numbers
are given. If there is not a doorkeeper on the system,
adjust the ID numbers of the apartments starting from
“ 1 “.
2. Calling from panel : If your apartment is called from
external panel, monitor displays the view of the camera
and when you press
button the call starts.
3. Camera display: Press the button of monitor any
time, bell panel will become active and display the
outside view. If you have two panel press the button,
display shifts first camera to the second one. To close,
press the same button again.
4. Operating time : Call time is about 30 seconds.
Pressing the call button from bell panel, if there is no
answer from panel or CCTV camera in 30 seconds,
display is automatically ended. Talking time is about
60 seconds. If it is called from panel or CCTV and
answered, a 60 seconds call can be made. When it is
pressed the camera button on the monitor, a 30 seconds
view from panel can be displayed.
5. Door Open Button: To open the door just press
button on the monitor. If there is more than one panel
on the system, button open the panel you last talked
to.
0.5W(min.), 10W(max. ) +20Vdc (from central unit)
6 cables
Double direction communication
ABS
7” LCD
Waiting time : 30 seconds, Talking Time: 60 seconds
235(Length)x125(Width)x28(Heigth)mm.
Brigthness / Ring Volume Tuning
-20°C - +40°C
IP20
22
Wall Mounting Apparatus
(+): +20V
(-): Ground
(A): VIDEO_A
(B): VIDEO_B
(C): AUDIO
(D): DATA
-
Bell
1 23456 78
DCB A - +
Connection Terminal Blocks
Internal door bell connection
(BELL): Internal door bell
(-): Ground
FIGURE - 44
B
A
BELL
-
D
C
WALL MOUNTING OF NVM-700 MC
- +
1.50 mm
FIGURE - 45
Stabilize handsfree’s wall mounting apparatus to the wall from the mounting holes with pegs and screws that
are given you with the product, as shown in FIGURE - 45 after you have run system cables from the holes in
the middle of apparatus.
2’
ON
1
2
3
4
5
6
7
8
1’
1
2
1 23456 78
FIGURE - 46
First connect two cables numbered as “ 1” and “2 ”on the backside of handsfree to connector numbered as “ 1’ ”
and “2’ “ on the wall mounting apparatus as shown in FIGURE - 46. Notice that the black cable must come towards
the screw side.
1
1’
ON
1
2
3
2
3
4
5
6
7
8
3’
2’
FIGURE - 47
To fix handsfree to wall mount apparatus, please follow the directions below (as shown in FIGURE - 47)
First, fix the handsfree’s mounting hole numbered as “ 1 “ to wall mount apparatus notch numbered as “1’ ”. Slide
up the handsfree slightly and push to fix the other mounting holes on the handsfree to other nocthes numbered
as “2” and “3” on the wall mount apparatus. Then screw on from the screw holes at bottom of the handsfree as
shown in FIGURE - 47.
23
ONE CENTRAL UNIT BLOCK DIAGRAM
2+4
Video
Distributor
NVM - 450MC
Monitor
NVM - 450MC
Monitor
2+4
2+4
Video
Distributor
NVM - 450MC
Monitor
NVM - 450MC
Monitor
2+4
ND- 105
Phone / Internal
Doorkeeper
4
CABLE REFERENCE
Cables
6
18
18
22
22
20
20
6
ND - 101CT
Central
4
4
External
Dorkeeper
ND- 106
Security
24
100 m.
200 m.
AWG mm2 AWG mm2 AWG mm2
+20V System Power Supply
GND
Ground
A
Video1
B
Video2
C
Audio
D
Data
2nd. Bell Panel
NDC - 244
50 m.
Definition
ND- 110
NDC - 244
1st.Bell Panel
0.8
0.8
0.3
0.3
0.5
0.5
16
16
20
20
18
18
1.5
1.5
0.5
0.5
0.8
0.8
14
14
20
20
16
16
2.5
2.5
0.5
0.5
1.5
1.5
2+4
Monitor
2+4
Video
Distributor
2+4
2+4
Monitor
2+4
Video
Distributor
2+4
Phone / Internal
Doorkeeper
ND- 105
ND- 105
Phone / Internal
Doorkeeper
4
4
Bell Panel
NDC - 244
Bell Panel
6
6
ND - 101CT
Central
Central
4
4
4
4
Security
External
Doorkeeper
ND- 106
ND - 101CT
ND- 110
NDC - 244
Video
Distributor
Monitor
NVM - 450MC
NVM - 450MC
Monitor
2+4
25
NVM - 450MC
Video
Distributor
Monitor
NVM - 450MC
2+4
Monitor
NVM - 450MC
Monitor
NVM - 450MC
NVM - 450MC
Monitor
NVM - 450MC
DOUBLE CENTRAL UNIT BLOCK DIAGRAM
DOUBLE CENTRAL UNIT DETAILED CONNECTION DIAGRAM
Monitor
A1
B1
A2
B2
20V
GND
Video Distributor
+20V
GND
A
B
C
D
+20V
GND
A
B
C
D
A3
B3
A4
A B B4
Video Distributor
A1
A3
B1
B3
A2
A4
A B B4
B2
+20V
GND
A
B
C
D
+20V
GND
A
B
C
D
20V
GND
Monitor
Phone / Internal
Doorkeeper
Monitor
Security Phone
+20V
GND
C2
D2
+20V
GND
C
D
External
+20V Doorkeeper
GND
C2
D2
+20V
GND
A
B
C
D
C2 D2
+12V
VIN
GND
A B C D
+20V
GND
+12V
VIN
GND
+20V
GND
Panel
Monitor
D2
C2
GND
+20V
Central
26
CCTV
DOUBLE CENTRAL UNIT DETAILED CONNECTION DIAGRAM
Monitor
Video Distributor
A1
A3
B1
B3
A2
A4
A B B4
B2
+20V
GND
A
B
C
D
20V
GND
+20V
GND
A
B
C
D
Video Distributor
A1
A3
B1
B3
A2
A4
A B B4
B2
+20V
GND
A
B
C
D
+20V
GND
A
B
C
D
20V
GND
Monitor
Phone / Internal
Doorkeeper
Monitor
Security Phone
+20V
GND
C2
D2
+20V
GND
C
D
External
+20V Doorkeeper
GND
C2
D2
+20V
GND
A
B
C
D
D2
C2
GND
+20V
Central
27
C2 D2
+12V
VIN
GND
A B C D
+20V
GND
+12V
VIN
GND
+20V
GND
Panel
Monitor
CCTV
ONE CENTRAL UNIT DETAILED CONNECTION DIAGRAM
Monitor
A1
B1
A2
B2
20V
GND
Video Distributor
+20V
GND
A
B
C
D
+20V
GND
A
B
C
D
A3
B3
A4
A B B4
Video Distributor
A1
A3
B1
B3
A2
A4
A B B4
B2
+20V
GND
A
B
C
D
+20V
GND
A
B
C
D
20V
GND
Monitor
Phone / Internal
Doorkeeper
Monitor
Security Phone
+20V
GND
C2
D2
+20V
GND
C
D
External
+20V Doorkeeper
GND
C2
D2
+20V
GND
A
B
C
D
Central
28
C2 D2
+12V
VIN
GND
A B C D
+20V
GND
+12V
VIN
GND
+20V
GND
Panel
Monitor
CCTV
NVM-700MC / NVM-450MB / NVM-450MC / ND-107K / ND-108K / ND - 105
ID TABLE
Slave
ON
1
ON
1
ON
2
3
4
5
6
7
8
1
ON
2
3
1
2
3
4
5
6
7
8
1
2
3
2
3
4
5
6
7
8
2
3
4
4
1
2
3
5
6
7
8
1
5
7
8
6
7
8
1
1
3
4
5
2
3
7
8
1
4
5
6
7
8
1
3
4
5
2
3
7
8
1
4
5
6
7
8
3
4
5
2
3
4
5
4
5
2
3
4
5
7
8
1
4
6
7
8
5
2
1
6
7
8
1
7
8
1
3
4
5
2
3
7
8
4
5
6
7
8
1
3
4
5
7
8
2
3
7
8
5
4
7
8
1
2
3
6
3
4
5
3
4
3
4
7
8
1
6
7
8
7
8
1
3
4
3
4
3
6
7
8
1
5
2
7
8
5
7
8
3
5
4
3
6
5
4
3
7
5
6
7
8
5
2
3
4
5
3
8
1
7
8
4
5
6
7
8
1
3
4
5
7
8
2
3
7
8
2
3
7
8
1
4
5
4
5
7
8
1
2
3
4
5
3
4
3
4
6
7
8
1
5
3
4
5
7
8
1
3
4
5
6
7
8
1
3
4
5
7
8
1
2
3
4
5
3
6
7
8
1
7
8
1
7
8
3
4
5
2
3
4
5
2
3
7
8
1
7
8
1
4
5
6
7
8
1
2
3
7
8
1
7
8
1
2
3
4
5
6
7
8
7
8
1
8
2
3
4
5
3
4
5
4
5
6
7
8
3
4
5
3
4
5
1
2
3
2
3
4
5
2
3
4
6
7
8
4
5
6
7
8
7
1
8
1
2
3
7
2
4
7
2
3
4
5
3
4
5
2
3
4
5
6
7
8
1
2
3
2
3
4
5
7
8
6
7
8
1
1
2
3
4
5
4
6
7
8
7
2
3
7
2
5
6
7
8
1
2
4
3
4
3
4
2
3
4
2
3
4
7
8
5
6
7
8
1
5
6
7
8
1
5
7
8
1
5
1
2
3
4
2
3
7
8
1
5
4
5
6
7
8
7
8
1
1
2
3
6
7
8
1
8
2
3
4
3
4
4
5
6
7
8
3
4
4
5
6
7
8
3
4
5
6
7
8
1
5
2
3
4
1
2
3
1
2
3
2
3
4
5
6
7
8
5
1
2
3
47
6
7
8
1
7
8
1
6
7
8
1
2
3
4
5
6
7
8
5
6
7
8
1
8
4
5
6
7
8
4
5
6
7
8
4
5
6
7
8
1
2
3
4
5
6
7
8
6
7
8
6
7
8
60
ON
2
3
4
5
6
7
8
1
2
3
4
5
72
ON
2
3
4
5
6
7
8
1
2
3
83
94
7
48
71
5
6
ON
59
6
5
36
4
5
84
ON
93
4
ON
ON
2
3
24
ON
2
2
12
ON
2
1
35
82
5
7
ON
70
6
6
ON
58
6
5
ON
46
6
4
23
ON
92
3
11
ON
1
ON
2
34
81
6
1
ON
1
8
8
ON
69
6
7
ON
1
8
6
ON
57
6
5
22
ON
91
3
45
80
6
5
ON
1
ON
2
10
ON
1
8
1
ON
68
6
8
ON
1
8
7
33
56
6
6
ON
44
6
5
ON
32
ON
90
4
21
ON
2
3
ON
1
ON
2
2
9
ON
2
ON
1
ON
79
6
7
ON
67
6
6
20
55
6
5
ON
43
6
4
8
ON
89
ON
1
31
6
8
ON
78
6
6
ON
2
7
19
ON
88
2
66
6
5
ON
2
6
ON
54
6
4
ON
2
5
7
ON
2
3
42
5
4
ON
2
ON
77
6
1
ON
2
1
8
ON
65
6
7
ON
2
1
6
30
6
3
ON
53
6
5
ON
2
1
4
18
ON
87
1
2
ON
2
41
6
5
4
1
6
ON
2
1
8
29
76
6
7
ON
2
1
4
3
64
6
6
ON
52
5
5
ON
2
1
ON
2
1
ON
2
2
40
6
8
17
5
4
7
5
ON
2
1
4
6
ON
1
ON
75
6
8
ON
2
1
7
28
6
5
ON
63
6
6
ON
2
1
5
16
51
6
4
ON
86
97
6
4
ON
39
ON
3
5
ON
2
3
4
ON
85
2
3
74
6
4
3
ON
2
ON
2
1
ON
ON
1
ON
73
2
3
62
6
8
27
ON
ON
7
ON
61
2
2
50
6
6
15
ON
ON
1
5
38
6
5
ON
49
2
4
ON
26
ON
1
4
ON
3
3
ON
37
2
ON
2
3
ON
ON
1
1
14
25
1
8
ON
ON
1
7
ON
13
1
6
ON
ON
1
5
2
ON
1
4
2
Master
ON
ON
2
3
4
5
95
6
7
8
1
2
3
4
5
6
7
8
96
ON
2
3
4
5
6
7
8
1
2
3
4
98
5
6
7
8
99
TABLE - 3
On the 8- DIP switch, first 7 switches (1.2.3.4.5.6.7) are used to adjust the device’s ID number. The last switch
(number 8) is used to adjust the device as master / slave.
Master / Slave: If there is one device on the system, device must be adjusted as master (number 8 switch
must be “ON” position). If there are two or more device have same ID number (for example : Doublex apartment)
one of them must be adjusted as master, the others must be adjusted as slave (number 8 switch must be “0”
position). All these adjustments must be made by specialist technicians.
ND - 101 / ND - 101CT / ID TABLE
ON
1
ON
3
2
4
1
1
ON
1
2
3
4
3
2
4
ON
1
2
2
ON
8
ON
1
3
9
4
4
1
2
3
ON
2
3
ON
1
3
4
4
1
2
4
ON
2
3
ON
1
10
3
4
4
1
2
5
ON
2
3
ON
1
11
ON
2
3
4
12
3
4
1
2
6
1
ON
2
3
13
4
3
4
7
1
ON
2
3
14
4
1
2
3
4
15
TABLE - 4
MAINTENANCE AND PROTECTION
• Do not preserve in hot or cold places. Too hot or cold places may cause the product not work and electronic
circuits’ life shorten. Also, these places can cause flexure and melting of plastics compenents.
• In case of any drop, device may not work properly.
• Do not use and preserve in dirty and dusty places.
• Do not apply such chemicals as powerful detergent and cleaners.
• To clean the device use soap cleaners and rub up to product.
29
www.na-de.com.tr
[email protected]
0800 261 78 05
Na- de Elektronik Sanayii ve Tic.Ltd. fiti.
30