1
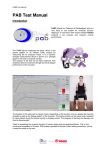
PAB® Test Manual
pab® Test Manual
Introduction
pab® stands for Pressure Air Biofeedback and is a
very easy to use system for muscular function
diagnosis. In connection with chosen inflated
TOGU® products it can evaluate and measure
muscle performance.
pab
The
® device measures the force, which a test
person applies on an inflated TOGU product by
measuring the air pressure inside. It is a dynamic
strength measurement which is shown as a strength
graph on the user’s computer screen. The duration of
the test can be freely selected. This enables to test
the maximum strength as well as fatigue performance
of the muscles.
The duration of the tests can be chosen freely. Depending on the duration one can assess the
maximal strength as well as the fatigue pattern of the muscles. The testing results can be saved and
compared for each patient during the whole training or therapy period. The progress of training and
therapy can thus be documented.
Tests for assessing the muscular function of various body parts are described below. This is not a
conclusive compilation of all tests. pab® makes it possible to devise further testing procedures, just
as it suites the need of the user.
PAB® Test Manual
Test Set up
You can test a patient as soon as you have installed the pab® program and done all the necessary
settings as described in the
pab® Pro or pab® Basic User manual.
The pab® device must be connected via USB cable with the
computer. At the same time it must be connected to a TOGU training
device by the tube with the inflator needle.
The test instructions below explain for each standard test, which
TOGU training device must be used.
These are the TOGU training devices:
TOGU Bodyroll
Senso
TOGU Senso
Balance Kissen
TOGU Throw Ring
TOGU Senso
Ball
TOGU Dynair
Ballkissen Senso
Important!
-
Moisten the inflator needle before you insert it into the needle valve of the TOGU
training device.
Carefully insert the inflator needle straight (not at an angle) into the needle valve.
The inflator needle must fit tight, without touching the material opposite of the needle
valve.
IMPORTANT! – Always remove inflator needle from TOGU training device after
completion of muscle tests or training session.
PAB® Test Manual
Calibration before testing
The test results are influenced by the air pressure inside the inflated TOGU training device. In order to
compare various tests the initial air pressure must always be the same. Therefore it is recommended
to always calibrate with an air pressure of 0 mbar. This can easily be achieved by following the steps
below:
1)
Moisten inflator needle and afterwards insert it with the tube into the needle
valve.
2)
Push blue ring (release valve) downwards and pull out the tube. Leave open
for ± 5 seconds for air to equilibrate/calibrate.
3)
Push tube back into needle attachment and pull on tube again to make sure
tube is fitting tight into needle attachment. The calibration is done.
The calibration value of 0 mbar means, that the air pressure inside the TOGU training device is equal
to the air pressure outside of the device.
PAB® Test Manual
Neck
1 Neck Extension Test
Assesses strength of the neck muscle extensors
Equipment: pab® device, TOGU Senso Balance Kissen, small towel
Muscles tested: Splenius capitis and cervicis, Longissimus
capitis, Semispinalis capitis and cervicis, Subocciptal muscles
Starting position
Lie on back (knees bend) with back of head on TOGU
Senso Cushion (if necessary, small towel can be folded
under head). Arms crossed over chest (clench teeth
slightly)
Note: If you test a person on a bed, place a thin book
under the TOGU Senso Cushion for a more firm test
Movement description: Push head down on Senso Cushion
End position: Similar to starting position
Suggested Duration: 10 seconds hold
Calibration: 0 mbar. See Simple Calibration on last page.
Chest
2 Sit chest press test
Assesses the combined chest strength of both Right & Left Chest
Equipment: pab® device, TOGU Senso Ball
Muscles tested: Pectoralis major muscle group, Coracobrachialis, Deltoid anterior, Biceps brachii
Starting position
Sit straight up on chair, hold Touch ball between palms of hands in front of chest,
ball does not touch chest. Elbows are lifted sideways.
Note: Try not to use fingers when doing press test.
Movement description: Compress ball with palms of hands
End position: Same as starting position
Suggested Duration: 10 seconds hold
Calibration: 0 mbar. See Simple Calibration on last page.
PAB® Test Manual
Shoulder Anterior Muscles
3 Empty can test
Assesses elevation strength of the Rotator Cuff and anterior shoulder muscles
Equipment: pab® device, TOGU Throwing ring with straps
Muscles tested: Supraspinatus, Deltoid anterior & middle
Starting position
Sit on chair; lift straight arm in front to shoulder height; turn arm 30° outwards (palm
faces downwards). Attach one side of strap around wrist and stand on a selected
strap number (1, 2 or 3) on other strap for proper set up. Record numbers on
straps for precise testing and re-testing.
Movement description: Pull upwards against strap
End position: Hand slightly higher than start position
Suggested Duration: 10 seconds hold per arm
Calibration: 0 mbar. See Simple Calibration on last page.
Shoulder posterior muscles
4 Shoulder extension test
Assesses extension-elevation strength of posterior shoulder and scapula muscles
Equipment: pab® device, TOGU
Muscles tested: Teres major, Latissimus dorsi, Deltoid posterior, Trapezius transversa, Deltoideus posterior,
Trapezius, Rhomboideus major and minor
Starting position
Stand up straight, attach one side of strap around wrist (arm straight) and stand on
a selected strap number (1, 2 or 3) on other strap. Palm of hand faces backwards.
Hand pulls past buttocks. Tester can also stand on strap. Record numbers on
straps for precise testing and re-testing.
Movement description: Pull backwards and up against strap
End position: Similar to starting position
Suggested Duration: 10 seconds hold per arm
Calibration: 0 mbar. See Simple Calibration on last page.
PAB® Test Manual
Hand
5 Hand Grip Test
Assesses hand grip strength
Equipment: pab® device, TOGU Bodyroll Senso
Muscles tested: Finger Flexion: Flexor digitorum profundus, Flexor digitorum superficialis, Dorsal and Palmar
interossei, Flexor digiti minimi, Thumb Flexion: Flexor pollicus brevis, Flexor pollicus longus, Adductor pollicis
Starting position
Sit on chair, elbows bent to 90°, take two (2) Bodyroll Senso (Air Grips) in hands.
Air Grips is in vertical position.
Note: You can use 1 or 2 Air grips to test grip strength.
Movement description: Hand grip squeeze
End position: Same as starting position
Suggested Duration: 10 seconds hold per hand
Calibration: 0 mbar. See Simple Calibration on last page.
6 Finger Grip Test
Assesses individual finger grip strength
Equipment: pab® device, TOGU Bodyroll Senso
Muscles tested: Finger Flexion: Flexor digitorum profundus, Flexor digitorum superficialis, Dorsal and Palmar
interossei, Flexor digiti minimi, Thumb Flexion: Flexor pollicus brevis, Flexor pollicus longus, Adductor pollicis
Starting position
Sit on chair, elbow bend to 90°, take Air Grip between index finger and thumb. Air
Grip is in vertical position and gently rests on palm of other hand..
Note: Middle, ring and small fingers can be tested in the same way
Movement description: Finger grip squeeze
End position: Same as starting position
Suggested Duration: 10 seconds hold per finger
Calibration: 0 mbar. See Simple Calibration on last page.
PAB® Test Manual
Arms
7 Tricepts Extensions Test
Assesses triceps extension strength
Equipment: pab® device, TOGU Senso Balance Kissen, small towel
Muscles tested: Triceps brachii, Anconeus
Starting position
Sit on chair, elbow bend to 90°. Place side of hand on top of TOGU Senso
Cushion (thumb facing upwards). Other hand gently supports side of cushion.
Movement description: Push downwards on Senso Cushion
End position: Same as starting position
Suggested Duration: 10 seconds hold per arm
Calibration: 0 mbar. See Simple Calibration on last page.
8 Biceps Curl Test
Assesses biceps curl strength
Equipment: pab® device, TOGU Throwing ring with straps
Muscles tested: Biceps brachii, Brachialis
Starting position
Stand up straight. Elbow bend to 90° and tucked into side (palm point up). Attach
one side of strap around wrist and stand on a selected strap number (1, 2 or 3)
on other strap for proper set up. Record numbers on straps for precise testing
and re-testing.
Movement description: Upwards pull against strap
End position: Hand slightly higher than starting position
Suggested Duration: 10 seconds hold per arm
Calibration: 0 mbar. See Simple Calibration on last page.
PAB® Test Manual
Hips
9 STANDING HIP EXTENSION TEST
Assesses the hip extensor strength of each hip
Equipment: pab® device, TOGU Throwing ring with straps
Muscles tested: Gluteus maximus, Gluteus medius and minimus posterior part, Piriformis, Adductor magnus,
Biceps femoris (long head), Semimembranosus, Semitendinosus.
Starting position
Stand and lean forward on chair/desk with both hands. Attach one side of strap
around ankle and stand on strap number 1, 2 or 3 with other foot. A ±45⁰ angle
must be formed between legs (see photo). Record numbers on straps for precise
testing and re-testing.
Movement description: Push back against strap, straight leg
End position: Same as starting position – hip extension position
Suggested Duration: 10 seconds hold per leg
Calibration: 0 mbar. See Simple Calibration on last page.
10 STANDING HIP ABDUCTION TEST
Assesses the hip abductor strength of each hip
Equipment: pab® device, TOGU Throwing ring with straps
Muscles tested: Gluteus medius and minimus, Gluteus
maximus (upper fibres), Tensor fasciae latae, Piriformis,
Sartorius.
Starting position
Stand up straight, hands on wall (arms bend slightly), attach one side of strap
around ankle and stand on a selected strap number 1, 2 or 3 on other strap with
other foot for proper set up. A ±45⁰ angle must be formed between legs (see
photo). Record numbers on straps for precise testing and re-testing.
Movement description: Push sideway against strap, straight leg
End position: Same as starting position - hip abduction position
Suggested Duration: 10 seconds hold per leg
Calibration: 0 mbar. See Simple Calibration on last page.
PAB® Test Manual
Knee
11 KNEE EXTENSION TEST (CLOSE KINETIC CHAIN)
Assesses knee extension (Quadriceps) strength
Equipment: pab® device, TOGU Senso Ball
Muscles tested: Quadriceps femoris muscles
Starting position
Client sits on bed/floor, with one Touch ball under knee
and foot pushing against other Touch ball, against
tester. Client holds sides of bed. Air pressure is
measured in Touch ball under the knee.
Movement description: Squeeze knee downwards on Touch ball while foot pushes against other Touch ball
against tester. Tester firmly holds down ankle of client.
End position: Knee is straighter than starting position
Suggested Duration: 10 seconds hold per leg
Calibration: 0 mbar. See Simple Calibration on last page.
12 KNEE EXTENSION TEST (OPEN KINETIC CHAIN)
Assesses knee extension (Quadriceps) strength
Equipment: pab® device, TOGU Throwing ring with straps
Muscles tested: Quadriceps femoris muscles
Starting position
Client sits on edge of bed, attach one side of strap around ankle, knee extended
to ±45⁰. Tester stands on a selected strap number (1, 2 or 3) on other strap for
proper set up. Record numbers on straps for precise testing and re-testing..
Movement description: Push up (knee extension) against strap at ±45⁰ of knee flexion
End position: Knee is slightly straighter than starting position
Suggested Duration: 10 seconds hold per leg
Calibration: 0 mbar. See Simple Calibration on last page.
PAB® Test Manual
13 KNEE EXTENSION TEST (OPEN KINETIC CHAIN)
Assesses knee flexion (Hamstring) strength
Equipment: pab® device, TOGU Throwing ring with straps
Muscles tested: Biceps femoris, Semitendinosus, Gracilis,
Gastrocnemius
Semimembranosus, Sartorius,
Popliteus,
Starting position
Standing up straight, with both hands on wall, attach one side of strap around ankle
while knee is flexed at ±45⁰. Stand on a selected strap number 1, 2 or 3 on other strap
with other foot (heel) for proper set up. Record numbers on straps for precise testing
and re-testing.
Movement description: Bend knee and pull up against strap
End position: Knee more bent than starting position
Suggested Duration: 10 seconds hold per leg
Calibration: 0 mbar. See Simple Calibration on last page
IMPORTANT! – Always remove inflator needle from TOGU training device after
completion of muscle tests or training session.