1
pab® Basic User Manual
In order to operate the pab® Basic system you need to:
1)
Install the pab® Basic program
2)
Connect hardware parts
3)
Set up user and patient data in pab® Basic program
These steps are described in detail in the chapters 1-3 below.
Once the pab® system is ready, you can start testing your patients/clients.
Instructions for various tests can be found in the pab® Manual for Standard
Muscle Tests”.
If you encounter any problems with running the program please contact:
[email protected]
Copyrightpab
pab
®TOGU
and TOGU
– www.pressureairbiofeedback.com
Copyright
and
GmbHGmbH
– www.pressureairbiofeedback.com
pab® Basic - General information
The pab® (Pressure Air Biofeedback) Pro Set is used for muscular function diagnosis. It
consists of a pab® Basic System (measuring device and software) and inflated TOGU
training devices, which are required for a measurement. The software must be downloaded
as described below in Chapter 1
pab® Basic parts included:
Parts
Pcs
Description
pab® Basic device
1
USB cable
1
Tube
1
Inflator needle
1
Connector
1
TOGU Bodyroll Senso (colour amethyst)
1
TOGU Throw Ring (colour amethyst)
1
TOGU Dynair Ballkissen XL Senso (colour amethyst)
1
TOGU Senso Ball 23cm (colour amethyst)
1
TOGU Balance Cushion (colour amethyst)
1
Straps, black with numbers
2
Ball pump
1
pab® Basic User Manual
pab® Manual for Standard Tests
1
Copyright
pabpab
and TOGU
www.pressureairbiofeedback.com
Copyright
® andGmbH
TOGU– GmbH
– www.pressureairbiofeedback.com
1
pab® Basic System
TOGU Training
Devices
Accessories
Manuals
1. Installation - pab® Basic
Please notice:
If you have previously installed an older pab® version on your computer, please uninstall it
and delete all related files before downloading the new one.
To download the new pab® software program, go to following website:
www.pressureairbiofeedback.com
-
Go to “Downloads” and select “Program Download”.
-
Click on the “pab® Setup” icon to download.
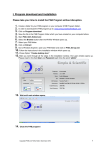
Follow the easy 9 steps as shown below :
1.
Select English language and then select - OK icon.
2.
Select - Next icon.
Copyright
pabpab
and TOGU
www.pressureairbiofeedback.com
Copyright
® andGmbH
TOGU– GmbH
– www.pressureairbiofeedback.com
3.
Select - I accept the agreement.
Then Select - Next icon.
4.
Enter User Name & Organization.
Then Select - Next icon.
5.
Select - Next icon.
Copyright pab and TOGU GmbH – www.pressureairbiofeedback.com
Copyright pab® and TOGU GmbH – www.pressureairbiofeedback.com
6.
Select - Next icon.
7.
Select - Create a desktop icon.
Then select - Next icon.
8.
Select - Install icon.
Copyright pab and TOGU GmbH – www.pressureairbiofeedback.com
Copyright pab® and TOGU GmbH – www.pressureairbiofeedback.com
9.
Select - Yes, restart computer.
Select - Finish icon.
The pab® Basic Program is now installed on your computer.
Copyright
and
GmbHGmbH
– www.pressureairbiofeedback.com
Copyrightpab
pab
®TOGU
and TOGU
– www.pressureairbiofeedback.com
2. Connecting the pab® Basic System parts
This chapter describes how to connect the hardware parts which are neccessary to run the pab®
System. You will receive the pab® Basic with the tube and inflator needle already attached, so you
only have to connect the pab® measuring device via USB cable with your computer (step 4).
1) pab® Basic system hardware parts
The pab® Basic system includes the following hardware
parts:
1 pab® Basic Device with one tube
1 Tube, gray
1 Inflator needles, metal with connector for tube
1 Connector, black with blue rings
1 USB cable, black
2) Connecting the Inflator needle
Insert tube into the connetion part of the inflator needle..
3) Connecting the tube
Connect the tube with the pab® Basic device by attaching the connector. Make sure the tube is fitting
tight into connector. When pulling on the tube it must not come.
Copyright pab and TOGU GmbH – www.pressureairbiofeedback.com
Copyright pab® and TOGU GmbH – www.pressureairbiofeedback.com
4) Connecting USB cable
The pab® Basic device features a small USB port. Connect the USB cable to the pab® Basic device
and then to your computer.
5) Disconnecting Tube
In order to detach the tube from the connector (inflator needle and pab® Basic device), press the blue
ring of the connector downwards. This will release the tube and it will come off easy.
Copyright
pab
and®TOGU
www.pressureairbiofeedback.com
Copyright
pab
and GmbH
TOGU –GmbH
– www.pressureairbiofeedback.com
3.
pab® Basic Program Set up
Once the pab® program is installed as described in Chapter 1,
this icon shall appear on your desktop.
Connect pab® Basic device to your computer before starting the pab® program.
After the pab® Basic device has been connected to the computer, double-click the Pressure Air icon
and a pab® Login window shall appear:
1) LOGIN
- Enter “admin” for User and “admin” again for Password.
- Click Login to open your pab® program.
- The pab® program can now be operated.
Copyright
® andGmbH
TOGU– GmbH
– www.pressureairbiofeedback.com
Copyright
pabpab
and TOGU
www.pressureairbiofeedback.com
2)
pab® Program and Settings
Top tool bar
The pab® Program can be operated with the buttons in the top tool bar. The buttons have the
following functions:
Setup:
The language can be chosen and the name of the organization/company can be entered
here.
Testers: All testers, who operate this program can be registered with this function. Testers are all
persons, eg. employees of a practice or organization, that use the pab® Program for
testing patients or clients.
Patients: All persons (patients, athletes, or other clients) who are being tested with pab® can be
registered with the function Patients..
Devices: This function is only necessary if the inflated TOGU training devices are to be calibrated
with a different value than 0 mbar. It is not necessary for the standard tests, which are
described in the “pab® Manual for Standard Muscle Tests”.
Perform
Test:
Tests are performed using this function. Recommendations for various tests are described
the “pab® Manual for Standard Muscle Tests”.
Results: Test results which have been previously saved can be viewed with this function.
About:
Shows information about program version and system data.
The following describes how to enter data and operate the
values and settings below are only a recommendation.
pab® Basic program. Please note that the
Copyright
pab
and®TOGU
www.pressureairbiofeedback.com
Copyright
pab
and GmbH
TOGU –GmbH
– www.pressureairbiofeedback.com
Set Up
1
1- Select the Setup icon on toolbar for general setup and the Setup window will appear.
2
6
7
3
4
5
234567-
Select the Edit icon to change the setup settings.
Enter a name which can choose yourself under Name.
Enter your appropriate email address.
Select the language for your pab® to display.
Select the Save icon to keep your setup settings.
Select the Exit icon to exit Setup.
Copyright
pabpab
and TOGU
www.pressureairbiofeedback.com
Copyright
® andGmbH
TOGU– GmbH
– www.pressureairbiofeedback.com
Testers
1
1- Select the Testers icon on toolbar for general setup and the Testers window will appear.
10
2
11
3
4
5
6
7
8
2- Select the New icon to insert a new tester.
3- Enter the name and surname of the tester.
4- The selection field User level allows to define for each tester the functions that can be used.
Level 2 = all functions can be accessed
Level 1 = only patients data can be entered and tests performed
Level 0 = only tests can be performed
At least one of the testers must have “Level 2” in order to be able to access all functions in
pab®.
5- Enter an Employee number or user code for the tester.
6- Change Login details for the new tester when logging into pab® Basic.
7- Change Password to Testers specific password.
8- Ensure the Enabled box is checked so that new login and password details change.
9- Select the Save icon to save the new tester.
10- Selecting the Edit icon you can edit tester’s details or select the Delete icon to delete testers.
11- Select the Exit icon to exit Testers.
Copyright
pabpab
and TOGU
www.pressureairbiofeedback.com
Copyright
® andGmbH
TOGU– GmbH
– www.pressureairbiofeedback.com
Patients
1
1- Select the Patients icon on toolbar for general setup and the Patients window will appear.
8
2
7
9
5
6
2- Select the New icon to insert a new patient.
Patients are defined here as every person who is being tested with the pab® (this can also
be a healthy athlete). This term serves for simplification.
3- Enter the patients Surname, Name, Date of Birth, Gender (drop down arrow), Height (using
a comma to separate decimal numbers) and Body Mass.
4- Use the drop down arrow to select whether the patient is active or inactive. (Active = 30
minutes of continuous exercise like brisk walking, cycle, swim, gym, etc. x3 per week. Inactive
= less than what is required for active).
5- Enter the identification number of the patient.
6- Enter the telephone number of the patient.
7- Select the Save icon to save the patient.
8- Selecting the Edit icon you can edit patient’s details or select the Delete icon to delete
patients.
9- Select the Exit icon to exit Patients.
Copyright
® andGmbH
TOGU– GmbH
– www.pressureairbiofeedback.com
Copyright
pabpab
and TOGU
www.pressureairbiofeedback.com
Devices
1
Please note that this function is not required for the standard tests, which are
described in the pab® Manual for Standard Muscle Tests”.
This function should be used only if you want to calibrate with other values than 0 mbar or to double
check the recommended calibration value of 0 mbar (see pab® manual for standard muscle tests).
1- Select the Devices icon on toolbar for general setup and the Devices window will appear.
2
2- Select the correct pab® device for calibration, e.g. Device 1 Black.
2
3- Remove the inflator needle with the tube from the valve of the TOGU training device and then
pump some additional air with the ball pump into the TOGU training device.
4- Check if the desired pressure value has been reached (eg. 50 mbar) by connecting the TOGU
training device with the pab® Basic System and repeating Step 2.
5- The calibration value can always be set at 0 mbar (recommended) by only inserting the inflator
needle without the tube into the TOGU training device (see pab® manual for standard muscle
tests).
6- Select the Exit icon to exit Devices.
Copyright
pabpab
and TOGU
www.pressureairbiofeedback.com
Copyright
® andGmbH
TOGU– GmbH
– www.pressureairbiofeedback.com
Perform Tests
1
The following describes the entry fields and options for performing a test. Recommendations for
particular tests are shown in the pab® manual for standard muscle tests. Apart from that, it is also
possible to perform tests according to own testing schemes.
1- Select the Perform Test icon to perform a muscle strength test and the Perform Test window
will appear.
3
13
14
15
2
4
7
11
2- Select Synch Graphs to activate strength graphs. Select Strength Bars, if you want to see
only bars, without a graph.
3- Select the New icon to enter patient to be tested.
4- Use the drop down arrow to select the patient to be tested or select search button to find
patient.
5- Use the drop down arrow to select Test Type (e.g. Air grip, Pull Ring, etc.).
6- Enter Duration of the test, standard is 10 seconds. However, you can select any time
duration depending if you want to test maximum muscle strength (3-5sec), muscle strength
and endurance (10sec), muscle endurance (30-60sec). If you enter 0, pab® will run
indefinitely unless you select the start/stop icon (no. 12) to terminate the test.
7- Enter 5 mbar in Start When Above. This means that the test will only start when air pressure
exceeds the 5 mbar threshold as soon as patient exerts force and will measure force output
from 0 sec to end of test. If you select 0 mbar, the test will start immediately without the patient
exerting force and strength/force calculation will not be accurate.
8- Select Device 1 Black.
9- Use the first drop down arrow to select Left or Right.
10- Use the second drop down arrow to select anatomical site (e.g. hand, hip, etc.) to be tested.
11- Additional information can be entered if you click on the Notes box.
12- Select Start icon to start the test.
13- After completion of the test, select the Save icon to save the test data.
14- If not satisfied with the test select the Cancel icon and redo test.
15- When testing is finished, select Exit icon to exit Perform Test.
Copyright pab and TOGU GmbH – www.pressureairbiofeedback.com
Copyright pab® and TOGU GmbH – www.pressureairbiofeedback.com
Results Option 1
1
1- Select the Results icon on toolbar for general setup and the Results window will appear.
7
6
3
5
2
2- Select the patient tested
3- Select the appropriate test results from the patient tested. It is possible to select more than
one test at a time, all of which will be presented in the same chart.
4- Select the Edit icon to activate the Comments box.
5- Type your comments in the comments box.
6- Select the Save icon to save your comments.
7- Select the Print Results icon to open the Print Results window (see window below).
8- Select Print icon to print test results.
9- Select Close icon to exit Print Results.
Copyright pab and TOGU GmbH – www.pressureairbiofeedback.com
Copyright pab® and TOGU GmbH – www.pressureairbiofeedback.com
Results Option 2
1
1- Select the Results icon to view test results and the Results window will appear.
5
3
4
2
2345-
Select the patient tested.
Select the appropriate test results from the patient tested.
Select or tick the integrated Graph and Data box (to activate graph and data together).
Select View Graph icon to view graph and data together (see window below).
6
6- Insert comments in the Comments box
7- Select Print icon to print test results
Copyright pab® and TOGU GmbH – www.pressureairbiofeedback.com
Copyright pab and TOGU GmbH – www.pressureairbiofeedback.com
Results Option 3
1
1- Select the Results icon to view test results and the Results window will appear.
5
4
3
2
2345-
Select the patient tested.
Select the appropriate test results from the patient tested.
Select AND UNTICK the integrated Graph and Data box (to activate full page graph).
Select View Graph icon to view full page graph (see window below).
7
6
7
6
Zoom-in graph
6- For zoom-in function, select from top, left click + hold, and drag cursor to bottom (see white
box area) and zoom-in graph.
7- Select Print icon to print test results of normal graph or zoom-in graph.
8- Click zoom-out icon to return to normal graph.
Copyright
pabpab
and TOGU
www.pressureairbiofeedback.com
Copyright
® andGmbH
TOGU– GmbH
– www.pressureairbiofeedback.com
Isometric training with
pab®
1- To use pab® as a biofeedback exercise system, follow same 12 steps as in Perform Test
(page 5), but do only a 3 sec maximum isometric strength test. This is to set up target training
zone (See Example Below).
2- After 3 sec max. test, select target training zone between ±70-85% of maximum strength force
(See Example Below and enlarged box).
3- Select Cancel, because it is not necessary to save maximum test and target zones.
Enlarged Box
3
Max strength
2
4- Select New to open the Perform Test window again (see window below)
5- Select Duration and enter nil (0), for unlimited time to train.
6- Select Start to begin training session.
Copyright
pabpab
and TOGU
www.pressureairbiofeedback.com
Copyright
® andGmbH
TOGU– GmbH
– www.pressureairbiofeedback.com
2
7- A standard isometric exercise rehabilitation session with
pab® will be as follows:
A: Set 1 is done at the selected 70-85% target training intensity for 6 seconds,
repeated 6 times with 10 second rest breaks in between (6 x 6 x 10 principle).
See example of one set, below.
B: After completion of a set, rest 2 minutes.
C: Do Set 2 and Set 3 in the same way. (see pab® isometric training graph below).
6x6 second isometric contractions (arrows)
5x10 second rest breaks (arrows)
Definitions:
Strength: The graph on the chart represents the pressure in millibar, which is created inside the
TOGU Training device by the patient’s application of force.
The boxes Max Strength and Rel. Strength show the force with Kilogram as unit. 1 Kilogram equals
9.81 Newton.
Total Work:
Maximum Strength:
Relative Strength:
Average work:
The total amount of strength calculated in kg/force (measured every
hundreds of a second) from 0 seconds to the end of the test.
the maximum or highest peak strength achieved in kg/force, while doing the
strength test.
the total work done (see total work above), divided by the patient/athlete’s
body mass. This indicates the strength/weight ratio of the patient/athlete in
kg/force per kg body mass.
the total work done (see total work above), divided by the total calculated
strength measurements.
You will find instructions how to test various muscle groups in the pab® Manual for
Standard Muscle Tests.
Copyright pab® and TOGU GmbH – www.pressureairbiofeedback.com
Copyright pab and TOGU GmbH – www.pressureairbiofeedback.com