1
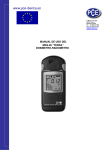
MKS-07 "POSHUK" SEARCH GAMMA, BETA RADIATION DOSIMETER-RADIOMETER Technical description and operating manual ВІСТ.412129.003-02 ТО Dear user, You had chosen well if purchased a device of ECOTEST trademark manufactured by the “Sparing-Vist Center”. The unit will reliably operate during many years. Should you have any questions concerning its use, please, contact our managers by telephone +38 (032) 242-15-15, fax +38 (032) 242-20-15 or e-mail [email protected]. We would greatly appreciate to receive your comments on its operation. The device is under 18-month (free of charge) guarantee maintenance. Best regards, International Sales Department. CONTENTS 1 INTRODUCTION.......................................................................... 2 2 PURPOSE OF USE........................................................................ 2 3 TECHNICAL SPECIFICATIONS.................................................. 2 4 DELIVERY KIT ............................................................................ 7 5 DESIGN AND PRINCIPLES OF OPERATION............................. 8 6 LABELING AND SEALING....................................................... 12 7 USE OF THE DOSIMETER ........................................................ 12 8 SAFETY MEASURES................................................................. 12 9 PREPARATION FOR OPERATION ........................................... 12 10 OPERATION PROCEDURE ..................................................... 13 11 TROUBLESHOOTING ............................................................. 22 12 VERIFICATION........................................................................ 23 13 SHIPPING AND STORAGE...................................................... 29 14 DISPOSAL ................................................................................ 29 APPENDIX А................................................................................. 30 APPENDIX B................................................................................. 32 APPENDIX C................................................................................. 34 APPENDIX D................................................................................. 36 APPENDIX E ................................................................................ 37 1 INTRODUCTION 1.1 Technical description and operating manual (hereinafter called the OM) is intended to inform the user about the principles of operation and rules of application of the MKS-07 “POSHUK” search gamma, beta dosimeter-radiometer. The manual contains all information necessary for proper operation of the dosimeter and full realization of its technical possibilities. 1.2 The OM contains the following abbreviations: DE - ambient dose equivalent; DER - ambient dose equivalent rate; ON - power on button; DISPLAY - display backlight button; DOSE - DE measurement indication button; THRESHOLD - DER and beta-particles flux density threshold level programming button; PRECISELY - average measurement result indication button; MEMORY - memory storage and memory reading button. 2 PURPOSE OF USE The MKS-07 “POSHUK” search gamma, beta dosimeter-radiometer (hereinafter called the dosimeter) is designed to measure ambient dose equivalent (DE) and ambient dose equivalent rate (DER) of gamma and X-ray radiation (hereinafter called the photon-ionizing radiation), and surface beta-particles flux density. The dosimeter is intended for dosimetry and radiometry control at industrial enterprises, nuclear power plants, and at research institutions. The unit can be used for apartment, building and housing construction monitoring, for ground surface and vehicles radiation monitoring, and for personal radiation safety. 3 TECHNICAL SPECIFICATIONS 3.1 Specifications are presented in the Table 3.1 Table 3.1 – Specifications of the dosimeter Name 1 Measurement range of photon-ionizing radiation ambient dose equivalent rate 2 Standardized values according to the specification 3 μSv/h 0.1 – 2.0·106 Unit of measurement 2 Table 3.1 (continued) 1 Main relative permissible error limit of DER measurement with 0.95 % confidence probability: - in precise measurement mode - in search mode 2 % Measurement range of photonionizing radiation ambient dose equivalent Main relative permissible error limit of DE measurement (DER from 0.1 to 1.0·104 μSv/h) with 0.95 % confidence probability Energy range of detected photonionizing radiation Energy dependence of the dosimeter readings at photonionizing radiation DER and DE measurement within the preset energy range, not more than Anisotropy of gamma radiation detecting units at 0.66 MeV for: - remote detecting unit (gammaquantum incidence at 30 to 150o angles relative to the main location area of the detectors), not more than - built-in detecting unit, not more than Note. Anisotropy charts for the remote detecting unit from 137Cs, 60 Со, 241Am isotopes are presented in the Appendix E 3 15 2 H (10) 25 2 , H (10) where H (10) – is a numeric value of measured DER in μSv/h mSv 0.001 - 9999 % ±15 MeV 0.05 – 3.00 % ±25 ±80 % ±40 3 Table 3.1 (continued) 1 Measurement range of surface beta-particles flux density Main relative permissible error limit of surface beta-particles flux density measurement with 0.95 % confidence probability: - in precise measurement mode; - in search mode Energy range of detected betaparticles Operating supply voltage of the dosimeter from the storage battery (four AA batteries) Additional relative permissible error limit at measurement caused by supply voltage variations from 5.2 to 4.2 V Additional relative permissible error limit at measurement caused by ambient air temperature variations from -25 to +55 oC Time of operating mode setting, not more than Battery lifetime (storage battery of 900 мА·h capacity) at natural background radiation and switched off display backlight, not less than Unstable readings of the dosimeter during 6 hours of continuous operation, not more than 2 3 2 part./(cm ·min) 5 – 105 200 15 25 % 200 , , where is a numeric value of measured surface flux density in part./(cm2·min) MeV 0.15 – 3.00 V 4.8 % ±5 % per each 10 ОС deviation from 20 ОС ±5 min 2 hours 400 % ±10 4 Table 3.1 (continued) 1 Useful current of the dosimeter at operating supply voltage of 4.8 V, natural background and switched off display backlight, not more than Dimensions of the control panel of the dosimeter, not more than Dimensions of the remote detecting unit of gamma radiation, not more than Dimensions of the remote detecting unit of beta-particles, not more than Weight of the control panel of the dosimeter, not more than Weight of gamma radiation remote detecting unit, not more than Weight of beta radiation remote detecting unit, not more than 2 3 mA 2 mm 86х35х154 mm 80х36х214 mm 82х43х154 kg 0.5 kg 0.6 kg 0.5 3.1.1 The threshold level values of DER and beta-particles flux density with a discreteness of a programmable unit in the whole operating measurement range are programmed in the dosimeter. 3.1.1.1 The threshold level value of DER in the range of 0 to 9.99·106 μSv/h with a discreteness of 0.1 μSv/h is programmed in the dosimeter. 3.1.1.2 The threshold level values of surface beta-particles flux density in the range of 0 to 999.9·103 part./(cm2·min) with discreteness of 0.01·103 part./(cm2·min) are programmed in the dosimeter. 3.1.2 The dosimeter allows automatic subtraction of gamma background at surface beta-particles flux density measurement. 3.1.3 The dosimeter allows performing measurement with results averaging time from 1 to 99 min in the precise mode, and from 1 to 60 min in the “startstop” mode. 3.1.4 The dosimeter allows results averaging time indication from 1 to 99 min in the mode of precise measurement. 3.1.5 The dosimeter sends a single-tone audio signal at detecting gammaquantum or beta-particle, and a two-tone audio alarm if the programmed DER or beta-particles flux density threshold level is exceeded. 5 3.1.6 DER, DE and surface beta-particles flux density values as well as DER and surface beta-particles flux density threshold level values in turns appear on the digital liquid crystal display (LCD) together with the corresponding symbols. 3.1.7 The dosimeter allows recording of up to 4096 measurement results of photon-ionizing radiation DER or beta-particles flux density in the nonvolatile memory, and up to 999 numbers of the studied objects, as well as independent self-recording of dose accumulation history with 15-minute time interval of photon-ionizing DE records. 3.1.8 The dosimeter allows alternate indication of the history of photonionizing DER measurements or beta-particles flux density on the LCD together with the numbers of the studied objects; and data transmission to the PC database through infrared port (IRDA) or serial interface (RS232). 3.1.9 Mean time to failure – not less than 6000 h. 3.1.10 Average resource of the dosimeter till the first major repair – not less than 10000 h, average lifetime until the first major repair – not less than 6 years. 3.1.11 Average maintenance term – not less than 6 years. 3.1.12 The dosimeter performs measurement under the following conditions: - temperature from minus 25 to +55 oС; - relative humidity up to 100 % at 30 oС; - atmospheric pressure from 66 to 106.7 kPa. 3.1.13 The dosimeter is resistant to sinusoidal vibrations of N1 group. 3.1.14 The dosimeter endures shocks with the following parameters: - shock pulse duration – from 5 to 6 ms; - pulse rate – from 40 to 180 per minute; - number of shocks - 1000±10; - maximal shock acceleration - 50 m/s2. 3.1.15 The dosimeter endures exposure to constant or alternating magnetic fields of 40 А/m. 3.1.16 The dosimeter in shipping container endures: - environment temperature from minus 50 to +55 oС; - relative humidity up to 95 % at 35 oС; - shocks with acceleration of 30 m/s2 and frequency from 10 to 120 shocks per minute (number of shocks - 15000). 3.1.17 The dosimeter endures exposure to photon radiation with exposure dose rate corresponding to ambient dose equivalent rate up to 200 Sv/h during 5 min or 2.0 Sv/h during 500 min. 3.1.18 Ingress protection rating - ІР51. 6 4 DELIVERY KIT 4.1 The delivery kit consists of units and maintenance documentation presented in the Table 4.1 Table 4.1 - Delivery kit of the dosimeter Type Item Quantity Note ВIСТ.468382.002-02 Control panel 1 BDBG-07 gamma ВІСТ.467979.002-02 1 radiation detecting unit BDIB-07 betaВІСТ.467979.003-02 particles 1 detecting unit ВIСТ.304592.001 Telescopic tube 1 ВІСТ.686423.001 Connecting 1 cable Technical description and ВIСТ.412129.003-02 ТО 1 operating manual ВIСТ.412129.003-02 ФО Logbook 1 ВIСТ.305636.001 Packing box 1 Model is not Purchased 1 specified battery charger Supplied at Serial port customer’s connecting ВІСТ.686423.002 1 request cable Model is not specified. Infrared port 1 Supplied at adapter customer’s request 7 5 DESIGN AND PRINCIPLES OF OPERATION 5.1 Overview 5.1.1 The dosimeter kit includes the control panel with the built-in gamma detector used to measure operator's dose, and remote detecting units of gamma radiation and beta-particles. The detecting units convert radiation into the sequence of voltage pulses; the number of pulses is proportional to the detected radiation intensity. The control panel serves to perform: scaling and linearization of the counting response of the built-in gamma detector; scaling of the counting response of the remote detecting units of gamma radiation and beta-particles; measurement of photon-ionizing radiation DER by measuring the average output pulse frequency of the gamma radiation detecting unit; measurement of beta-particles flux density by measuring the average output pulse frequency of the beta-particles detecting unit; measurement of photon-ionizing radiation DE by measuring the total number of output pulses of the built-in gamma radiation detector. 5.1.2 The operating principle of the detecting units is based on converting ionizing radiation into voltage pulses in the ionization chamber of the detectors. The pulses are coming to the input of the amplitude modulated device. 5.1.3 The dosimeter is controlled (fig.А.2, А.3) with the help of the ON, DISPLAY, DOSE, THRESHOLD, PRECISELY and MEMORY buttons (11). 5.1.4 Measurement result is indicated on the four digit liquid crystal display (7). 5.1.5 Gamma-quanta or beta-particles detected by the remote detecting units are followed by audio signaling, and exceeded DER or flux density threshold levels are followed by two-tone audio alarms. 5.1.6 The dosimeter operates from the storage battery of four AA nickelcadmium batteries. The storage battery is charged by the purchased charger included in the delivery kit. 5.2 Operation principle 5.2.1 The structure chart of the dosimeter is presented in Figure A.1. The dosimeter includes: the storage battery (SB), the data processing unit (DPU), and the BDBG-07 and BDIB-07 remote detecting units of gamma radiation and beta-particles. 8 The DPU includes the built-in detector of gamma dose of the operator (BD), the modulator (M), the connection circuit of the dosimeter (CC), the voltage supply regulator of the digital processing circuit (VR1), the voltage supply regulator of the remote detecting units (VR2), the anode voltage former of the built-in detector (VF), the standard frequency generator (SFG), the digital processing circuit (DPC), the digital liquid crystal display (LCD), the ON, DISPLAY, DOSE, THRESHOLD, PRECISELY, and MEMORY buttons, and the loudspeaker (LS). 5.2.2 Press the ON button and hold it for 4 s to switch the dosimeter on. The supply voltage from the SB is applied at the input of the connection circuit (CC) of the dosimeter, activating the VR1 and VR2 voltage regulators. Regulated supply voltage from the VR1 regulator is applied to the DPU nodes, and from the VR2 regulator – to the remote detecting units. Press the ON button and hold it for 4 s to switch the dosimeter off. 5.2.3 Photon-ionizing radiation DER or beta-particles flux density measurement (depending on the remote detecting unit connected to the control panel) is performed automatically after the dosimeter is switched on. Pulse signals are applied to the DPC input. The DPC automatically selects measurement interval and range, what depends on the intensity of the input pulses and operating mode of the dosimeter. Scaling of the input pulse flow is performed by the DPC by means of the control parallel binary-decimal code recorded in the nonvolatile memory. Measurement results are indicated on the LCD depending on the selected operating mode of the dosimeter. Each detected gamma-quantum and beta-particle is followed by audio signals provided by the DPC and the loudspeaker (LS). 5.2.4 Photon-ionizing radiation DE measurement is performed automatically after the dosimeter is switched on. Measurement result is indicated on the LCD when the DOSE button is pressed. Measurement range is automatically selected by the DPC. Scaling of the input pulse flow from the built-in detector is performed by the DPC by means of the control parallel binary-decimal code recorded in nonvolatile memory. 5.2.5 Threshold level programming is done by the PRECISELY and THRESHOLD buttons. Exceeded threshold level is indicated by two-tone audio alarms and periodical blinking of the LCD. 5.2.6 The structure chart of the BDBG-07 unit is presented on Fig. B.1. It includes eight gas-discharge СБМ-20-1 type detectors of the high sensitivity channel (DHS), the gas-discharge СИ3БГМ type detector of the low sensitivity channel (DLS), the anode voltage formers (AVF1 and AVF2), the modulator of the high sensitivity channel (MH), the modulator of the low sensitivity channel (ML), the digital circuit of the dynamic characteristics compensation (CCC) of the detectors. 9 5.2.7 The structure chart of the BDIB-07 unit is presented on the fig.C.1. It includes the low-background end-window gas-discharge beta-detector of СБТ10А type (BD), the anode voltage former (AVF), the modulator (M), the digital circuit of the dynamic characteristics compensation (CCC) of the detectors. 5.3 Design description 5.3.1 The dosimeter consists of: control panel; BDBG-07 remote detecting unit of gamma radiation; BDIB-07 remote detecting unit of beta-particles; telescopic tube. 5.3.2 The control panel of the dosimeter (fig.А.2, А.3) is a small measuring device designed as a rectangular parallelepiped with rounded corners. The control panel includes the case consisting of the base (1), the frame (2) and the cover (3), and other component parts located inside. The crucial component of the control panel is the printed-circuit board of data digital processing (4) with the built-in detector, control keys and other circuit elements. The display board (5) is fastened to the printed-circuit board in the top part by the two plates (6) and screws. The liquid crystal display (7) is located on the display board. Four light-emitting diodes are used for the display backlight. The digital processing and display boards make up a separate crucial component of the control panel that is screwed to the case with four screws. The battery compartment with the contact system and four nickel-cadmium AA batteries is located in the middle part of the control panel. The battery compartment is closed by the screwed cover. Two РС7 and РС4 plug connectors used for connection with the remote detecting units by means of the cable (PC7) and RS232 (РС4) interface are located in the bottom of the case. Protective covers (8) are used for protection of the plug connectors. Two panels (9, 10), six control keys (11) of the dosimeter, and two special screws (12), used for fastening of the device to the waist-belt, are placed in the top part of the control panel. The IR port window (13) is located on the cover under the panel with the control keys. Component parts of the case are screwed together by four screws. Rubber gaskets (14) and polyethylene terephthalate films are used to protect the plug connectors, the battery compartment and the control panel from dust and humidity. 5.3.3 The remote detecting unit of gamma radiation BDBG-07 (hereinafter the detecting unit) is designed as a rectangular parallelepiped with side slants and rounded corners (fig.B.2, B.3). 10 The detecting unit includes the case consisting of the cover (2), the base (1), and other component parts inside it. The crucial component of the detecting unit is a printed-circuit board (3) with the eight СБМ20-1 gas-discharge counters (4) and one СИ3БГМ counter (5) on the one side, and the elements of the anode voltage formers, the elements of the digital circuit of the detector dynamic characteristics compensation – on the other side. All counters are fastened to the circuit board with the help of four clamps (6) and contact points (7). The PC7 (8) plug connector is fixed in the lower part of the case, and is used for connection of the control panel with the help of the cable. The rubber gaskets (9, 10) are used to protect the connector and the case of the device from dust and humidity. The case elements, the cover and the base, as well as the printed-circuit board are fastened together by six headless screws. A spring (11) used to fasten the detecting unit to the waist-belt, is fixed in the top part of the detecting unit. A Ulike rotary cramp (12) is fastened to the unit by two original screws (13) in the middle part. A holder (14) is fastened to the cramp, and connected to the telescopic tube used for measurement in hard-to-reach places. A protection cover (15) is used to protect the РС7 connector during storage. 5.3.4 The remote detecting unit of beta-particles BDIB-07 (hereinafter called the detecting unit) is designed as a rectangular parallelepiped with side slants and rounded corners (fig.C.2, C.3). The detecting unit includes the case consisting of the base (1) and the cover (2), and other component parts located inside. The crucial component of the detecting unit is a printed circuit-board (3) with the located СБТ-10А (4) gasdischarge counter fastened to the printed circuit-board with the help of two posts, and the elements of anode voltage former – on the one side, and the elements of the digital circuit of the detector dynamic characteristics compensation – on the other side. The printed circuit-board is fastened to the base by the two headless screws (5) and two posts (6). The PC7 plug connector is fastened in the lower part of the base, and is used for the connection with the control panel with the help of the cable. A removable panel filter is located on the cover and fixed by two clamps, one of which is movable. The panel is removed during operation with the detecting unit by pressing the clamp down. A transparent polyethylene terephthalate film glued to the corresponding projections from the inside of the cover is used to protect the movable clamp and the detector from dust and humidity. Rubber gaskets (7) are used to protect the case of the detecting unit and the connector from dust and humidity. The case elements, the cover and the base are fastened together by three headless screws. A U-like rotary cramp (8) is fastened to the detecting unit by two original screws (9) in the middle part. A holder (10) is fastened to the cramp, and connected to the telescopic tube used for measurement in hard-to-reach places. A protection cover (11) is used to protect the PC7 connector during storage. 11 6 LABELING AND SEALING 6.1 The trademark of the enterprise, the name, the symbol of the unit and the approval pattern of the measuring instrument are inscribed on the control panel of the dosimeter. 6.2 The factory serial number and the date of manufacture are inscribed on the lower cover of the dosimeter. 6.3 Sealing of the dosimeter is done by the manufacturer. The lower cover of the control panel under the storage battery is sealed in the pockets for the fastening screw heads. 6.4 Removal of seals and repeated sealing of the dosimeter is done by the manufacturer after repair and verification testing. 7 USE OF THE DOSIMETER 7.1 Before putting the dosimeter into operation check if the delivery kit is complete. Inspect for mechanical damage. 7.2 Before using the dosimeter that was put in prolonged storage, remove it from storage and check its operability. 7.3 Register the removal from storage and putting the dosimeter in operation in the logbook. 8 SAFETY MEASURES 8.1 A special protection jacket is used to protect from accidental contact with conductive parts. Ingress protection rating is IP51. 8.2 The dosimeter belongs to fire safety equipment. 8.3 Radiation safety requirements should be met while working with ionizing radiation sources. In case of contamination, the dosimeter should be deactivated. Wipe its surface by a gauze tampon moistened by the standard decontaminating agent. 9 PREPARATION FOR OPERATION 9.1 Preparation of the dosimeter for operation 9.2 Study the operating manual and the control buttons before putting the dosimeter in operation. 9.3 Open the battery compartment of the control panel with the help of a screw driver. Make sure the four batteries are inserted, the connections are reliable, and there is no leakage of salts after the long-term storage of the dosimeter. In case there is salt leakage, remove the batteries. Clean them if compartment. 12 9.4 If the battery needs to be recharged, which is indicated by the battery discharge symbol on the LCD (all four battery symbol segments are blinking) when the dosimeter is switched on and irrespective of the selected mode, remove the storage battery from the battery compartment and recharge it with the help of the charger. The recharge procedure is described in the guidelines provided with the charger. Insert the charged batteries into the battery compartment observing the polarity and close the cover. Note. The storage battery should be recharged only after the battery discharge symbol appears on the LCD of the dosimeter. 9.5 Connect the necessary remote detecting unit to the dosimeter with the help of the connecting cable through the X1 connector in the lower front part of the control panel of the dosimeter. 10 OPERATION PROCEDURE 10.1 The dosimeter operates within the following modes: switching the dosimeter on/off; switching display backlight on/off; switching audio alarms on/off; photon-ionizing radiation DER measurement in search, “start-stop” and precise modes; beta-particles flux density measurement in search, “start-stop” and precise modes; audio alarm threshold levels programming; photon-ionizing radiation DE measurement indication; setting of measurement results averaging time; recording measurement results and characteristics of the studied objects in the nonvolatile memory; measurement results history indication on the personal digital indicator; measurement results history recording in the database through the infrared port of data exchange (IRDA); measurement results history recording in the database through the serial port of data exchange (RS232). Note. Type of the remote detecting unit is identified automatically after being connected to the dosimeter. The dosimeter enters the measurement mode of the corresponding physical units (photon-ionizing radiation DER or betaparticles flux density). 13 10.2 Switching the dosimeter on/off 10.2.1 Press shortly the ON button and hold it for 4 s to switch the dosimeter on. The information displayed on the LCD and audio signaling of the detected gamma-quanta or beta-particles (depending on the type of the connected remote detecting unit) indicate that the dosimeter is on. 10.2.2 Press the ON button once again and hold it pressed for 4 s to switch the dosimeter off. 10.3 Switching display backlight on/off 10.3.1 Press shortly the SCALE button to switch the display backlight on. Information on the LCD illuminated by the light-emitting diodes below it indicates that the backlight is on. 10.3.2 The display backlight is switched off automatically in 8 s after it is turned on. 10.3.3 Press the SCALE button and hold it for 4 s to switch on the continuous display backlight. 10.3.4 Press shortly the SCALE button once again to switch the display backlight off. 10.4 Switching audio alarm on/off 10.4.1 Audio signaling of detected gamma-quanta or beta-particles (depending on the type of the connected remote detecting unit), and exceeded programmed threshold levels of photon-ionizing radiation DER or beta-particles flux density is switched on automatically after the dosimeter is turned on. 10.4.2 Press shortly the ON button to switch audio signaling off. This switches off only audio signaling of detected gamma-quanta or beta-particles, while audio alarms when the programmed threshold levels are exceeded are still triggered. 10.4.3 Press shortly the ON button to switch audio signaling on again. 10.5 Measurement of photon-ionizing radiation DER in search, “startstop” and precise modes 10.5.1 To measure photon-ionizing radiation DER (hereinafter DER) in search, “start-stop” or precise mode, connect the BDBG-07 remote detecting unit of gamma radiation with the help of the connecting cable through the Х1 connector to the control panel of the dosimeter. 10.5.2 Switch the dosimeter on. The “” symbol and “Sv/h” measurement units of photon-ionizing radiation DER, and measurement results in the search mode should appear on the LCD. Digital data on the LCD is updated each 2 to 0.5 seconds depending on the measured DER level. Time, subrange and measurement unit are selected automatically. 14 The analogue intensity symbol (analogue indicator) consisting of 20 segments together with the digital measurement results simultaneously appear in the right upper field of the LCD. The number of segments is proportional (in pseudo logarithmic scaling) to the measured intensity. Response time of the analogue indicator is not longer than 1 s. During DER measurement, each gamma-quantum is followed by a short audio signal, while the exceeding of threshold level is followed by a two-tone audio alarm and periodic blinking of the LCD. The arithmetic average of five last measurements should be considered as the DER measurement result in search mode. DER measurement units are μSv/h, (mSv/h or Sv/h). 10.5.3 Press the PRECISELY button and hold it for 3 s in the search mode to start the process of measurement results averaging in the “start-stop” mode. The averaging process is started, the digits blink several times, and the last right segment of the analogue intensity indicator is lit on the LCD. Measurement results are further indicated on the LCD in the search mode, and the analogue indicator (first 19 segments) represents the measured DER intensity. Press the PRECISELY button once again and hold it for 3 s to stop the process of averaging. The average result during the period of operation in this mode is indicated on the LCD, and all 20 segments of the analogue indicator enter the mode of continuous illumination, which indicates that the “start-stop” averaging mode is stopped. Return to the search mode can be done after recording or not recording the average result in the nonvolatile memory. Recording in the nonvolatile memory is done as described in OM 10.10. Press the PRECISELY button and hold it for 3 s to return to the search mode without recording the results. After the digits blink several times, the dosimeter enters the search mode. The time of measurement results averaging is limited to one hour. If not stopped by the operator in one hour, the process will be stopped automatically and the LCD will display the average result, while all 20 segments of the analogue indicator will enter the mode of continuous illumination. 10.5.4 Press and hold the PRECISELY button in the search mode to enter the mode of precise measurement. This is followed by multiple blinking of the digits (the first blinking in some 3 s and the second one in about 6 s). Release the PRECISELY button during the second blinking of digits. The dosimeter enters the mode of precise measurement after that. 15 The time left until the process of measurement results averaging is finished is indicated in the right upper corner of the intensity indicator. The interval of averaging is preset automatically when the dosimeter is switched on, and equals 1 min, and until it is finished the LCD shows zeroes. The result of averaging in the mode of precise measurement is updated every minute on the LCD. Press shortly the PRECISELY button to manually update the averaging process result. This will reset the previous average value and start a new averaging process. Press the PRECISELY button once again and hold it down until multiple times blinking of all digits to exit the mode of precise measurement. Note. Average result can be also calculated in the search mode. Press shortly the PRECISELY button (not longer than 2 s), to do this. The result is displayed only when the PRECISELY button is pressed. After the PRECISELY button is released, the dosimeter returns to the search mode of DER measurement. 10.6 Measurement of beta-particles flux density in search, “start-stop” and precise modes 10.6.1 Connect the BDIB-07 detecting unit of beta-particles through the X1 connector with the help of the connecting cable to the control panel of the dosimeter to measure beta-particles flux density (hereinafter flux density) in search, “start-stop” and precise modes of measurement. 10.6.2 Switch the dosimeter on. The “” symbol and “103/cm2·min” measurement units of beta-particles flux density, and measurement results in the search mode should appear on the LCD. Digital data on the LCD is updated each 2 to 0.5 seconds depending on the level of measured beta-particles flux density. Time, subrange and measurement units are selected automatically. The analogue intensity symbol (analogue indicator), presented by 20 segments, and digital results are indicated in the upper right field of the indicator. The number of lit up segments is proportional (in pseudo logarithmic scale) to measured intensity. Response time of the analogue indicator is not more than 1 s. During beta-particles flux density measurement, each detected beta-particle is followed by a short audio signal, and a two tone audio alarm and periodic blinking of the LCD follows the exceeding of the threshold level. Consider the arithmetic average of five measurement results in the search mode as a result of beta-particles flux density measurement. Flux density measurement units are 103 part./(cm2· min). 16 10.6.3 For automatic consideration of gamma background in the betaparticles flux density measurement result, first measure gamma background of the beta detector and then integral (gamma + beta) ionizing radiation flow. To do this: 10.6.3.1 Place the detecting unit with the window closed by the panel filter in the position where the window is parallel and at minimum distance to the studied surface. Fulfill five measurements of gamma background of the studied surface and calculate the arithmetic average. 10.6.3.2 Remove the panel filter from the window of the beta-detector and place the detector parallel to the studied surface. Fulfill five measurements and calculate the arithmetic average. 10.6.3.3 Calculate surface beta-particles flux density according to the formula: і іф іф where (1) – is the real value of beta-particles flux density in part./(cm2min); і ф – is the average value of the dosimeter readings of the studied surface and outside gamma background (the detector is not protected by the panel) in part./(cm2 min); і ф – is the average value of the dosimeter readings of the studied surface and outside gamma background (the detector is protected by the panel) in part./(cm2min). 10.6.4 To start the process of measurement results averaging in the “startstop” mode, press the PRECISELY button in the search mode and hold it down for 3 s. This triggers the process of averaging, and multiple blinking of digits and lighting of the last right segment of the analogue intensity indicator on the LCD. The LCD displays measurement results in the search mode, and the analogue indicator (first 19 segments) indicates the intensity of surface flux density measurement. Press the PRECISELY button once again and hold it down for 3 s to finish the process of averaging. The average result calculated for the period of operation in this mode is displayed on the LCD, and all 20 segments of the analogue indicator enter the mode of continuous illumination indicating that the “start-stop” mode of averaging is finished. Return to the search mode can be done after recording or not recording the average result in the nonvolatile memory. Record the results in the nonvolatile memory according to the OM 10.10. Press the PRECISELY button and hold it down for 3 s to return to the mode without recording. After multiple blinking of digits the dosimeter enters the search mode. 17 The time of measurement results averaging is limited to one hour. If not stopped by the operator in one hour, the process will be stopped automatically and the LCD will display the average result, while all 20 segments of the analogue indicator will enter the mode of continuous illumination. 10.6.5 Press the PRECISELY button in the search mode and hold it to enter the mode of precise measurement. It is followed by multiple blinking of digits (the first one in some 3 s, and the second one in some 6 s). Release the PRECISELY button after the second blinking of digits. After the button is released, the dosimeter enters the mode of precise measurement. The time left until the process of measurement results averaging is finished is indicated in the right upper corner of the intensity indicator. The interval of averaging is preset automatically when the dosimeter is switched on, and equals 1 min, and until it is finished the LCD shows zeroes. The result of averaging in the mode of precise measurement is updated every minute on the LCD. Press shortly the PRECISELY button during precise measurement to manually update the averaging process. This will reset the previous average value and start a new averaging process. Press the PRECISELY button once again and hold it down until multiple times blinking of all digits to exit the mode of precise measurement. Note. Average result can be calculated also in the search mode. Press shortly the PRECISELY button (not longer than 2 s), to do this. The result is displayed only when the PRECISELY button is pressed. After the PRECISELY button is released, the dosimeter returns to the search mode. 10.6.6 For automatic consideration of gamma background in the betaparticles flux density measurement result in the precise mode, first measure gamma background according to the 10.6.3.1 with the difference that measurement should be done during one averaging interval. After gamma background measurement is finished, record the result in the memory for further consideration (subtraction) by pressing the DOSE button and holding it down not less than 2 s. The “” blinking symbol appears at the bottom leftwards from the LCD digits indicating that the gamma background value is saved in the memory. Gamma background will be automatically considered in further measurement of beta-particles flux density with the opened window of the beta detector. Note. Measure and record gamma background of each new object, when the object of study is changed. 10.7 Programming of audio alarm threshold levels 10.7.1 Connect the corresponding detecting unit and switch the dosimeter on to program threshold levels of audio alarm relative to gamma or beta radiation. 18 10.7.2 Press the THRESHOLD button and hold it pressed. The default programmed threshold level value (0.3 μSv/h for DER; and 0.02·103 part./(cm2·min) for surface flux density) appears on the LCD. Hold the button down for 2 s. This resets the previously programmed threshold level, and the dosimeter enters the mode of new threshold level programming, which is indicated by the blinking low-order digit on the LCD. To set the digit value, release the TRESHOLD button and by short pressing of the THRESHOLD button set the required value. To set the next digit, press shortly the PRECISELY button, the digit will start blinking afterwards. By short pressing of the THRESHOLD button, set the digit. Programming of other digits is done likewise with automatically shifting comma. After all values are set by short pressing of the PRECISELY button, the threshold level value is saved in the memory, which is indicated by triple blinking of the LCD. 10.7.3 Press the THRESHOLD button and hold it down not longer than 2 s to check the programmed threshold level of audio alarm. 10.7.4 Press the THRESHOLD button and hold it down more than 2 s to reset the threshold level of audio alarm. This will reset the previously programmed value and start programming of a new threshold level. 10.8 Indication of photon-ionizing radiation DE measurement 10.8.1 Photon-ionizing radiation DE (hereinafter DE) measurement is performed irrespective of the selected mode of measurement, and is started after the dosimeter is switched on. 10.8.2 Press the DOSE button and hold it down not longer than 2 s to display DE measurement result on the LCD. The “” symbol and “mSv” symbols indicate you have entered the appropriate mode. DE measurement result is displayed in mSv. 10.8.3 Release the DOSE button to return to the previous operating mode of the dosimeter. 10.8.4 Press the DOSE button and hold it down until the multiple blinking of the LCD to switch to the fixed mode of DE indication. Return to the search mode likewise. 10.9 Time setting of measurement results averaging The time of results averaging in the mode of precise measurement that equals 1 min is preset automatically after switching the dosimeter on. 10.9.1 Enter the mode of precise measurement to check the time of averaging, and to set a new value (according to 10.5.4 – at photon-ionizing DER measurement or according to 10.6.5 – at beta-particles flux density measurement). Press the THRESHOLD button afterwards and hold it down not longer than 2 s. Two left steady digits on the LCD display the value of the averaging time in minutes, while two right blinking digits display the statistical error of measurement in percentage with consideration of the time period since the beginning of the new averaging interval. 19 10.9.2 Press the THRESHOLD button and hold it down for more than 2 s. The value of two steady digits to the left increases on the LCD with the discreetness of 1 min in the range of 1 to 99 min. Its value is fixed after the necessary time of averaging and after the TRESHOLD button is released. Press the THRESHOLD button once again and hold it down not longer than 2 s to check the new preset value of the averaging time. 10.9.3 Repeat as stated in 10.9.2 if new correction of the time of averaging should be done. When the THRESHOLD button is held down for 2 s, the previous value of the time of averaging returns to 1 min and its increase updates. 10.10 Recording of measurement results and numbers of the studied objects in the nonvolatile memory Recording of measurement results and numbers of the studied objects in the nonvolatile memory can be done only after the “start-stop” mode of averaging is finished and in the mode of precise measurement. 10.10.1 Press shortly the MEMORY button after the “start-stop” mode is finished to record the measurement result and the number of the corresponding object in the nonvolatile memory in the “start-stop” mode. The “P” symbol and three digits that stand for the number of the object of measurement appear on the LCD, the low-order digit is blinking at that. Correct the number of the object with the help of the THRESHOLD and PRECISELY buttons if necessary. Shortly press the THRESHOLD button to change the blinking digit of the object number per unit. To correct the next digit, press shortly the PRECISELY button, the latter starts blinking at that. Press shortly the MEMORY button to record the measurement result and the number of the corresponding object in the memory. One-time blinking of the analogue indicator in the right upper field indicates that the result is recorded. The dosimeter switches to the search mode afterwards. 10.10.2 Press shortly the MEMORY button to record the precision measurement result and the number of the corresponding object in the nonvolatile memory. The “P” symbol and three digits that stand for the number of the object appear on the LCD, the low-order digit starts blinking. Correct the number of the object with the help of the THRESHOLD and PRECISELY button if necessary. Shortly press the THRESHOLD button to change the blinking digit of the object number per unit. To correct the next digit, press shortly the PRECISELY button, the latter starts blinking at that. Press shortly the MEMORY button to record the measurement result and the number of the corresponding object in the memory. One-time blinking of the analogue indicator in the right upper field indicates that the result is recorded. Note. Recording in the nonvolatile memory of measurement results and numbers of the studied objects at surface beta-particles flux density measurement is possible only after the previous measurement and recording of gamma background value of the object (blinking “” symbol on the LCD) in accordance with OM 10.6.6. 20 10.11 Measurement history indication on the LCD The dosimeter provides search and indication of the recorded in the memory measurement results and characteristics (ordinal numbers) of the corresponding objects on the LCD. The above should be done in the search mode of measurement. 10.11.1 Press shortly the MEMORY button to enter the mode of measurement history review. The last by order recorded measurement result is indicated on the LCD, and the analogue 20-segment indicator in the upper right field between the fixed first left and last right segment will show one more segment, which will occupy the last but one position to the right on the LCD. This segment indicates the last recorded measurement result. Press shortly the MEMORY button to shift the segment of the conventional index of the order of the recorded results (from the last result to the previous one) and to change the readings on the digital indicator. 10.11.2 Press shortly the PRECISELY button, to define the number of the object, referring to measurement result indicated on the digital indicator. As a result the “P” symbol and three-digit decimal number, which is the number of the object, will appear on the indicator. Press shortly the PRECISELY button once again and the measurement result referring to the predefined number of the object will be indicated on the digital indicator. 10.11.3 To search for measurement results by the specific ordinal numbers of the objects, enter the mode of the object feature indication (“P” symbol and three decimal digits) according to 10.11.2. Shortly press the MEMORY button to find the required recorded ordinal number. Press shortly the PRECISELY button after finding the required ordinal number to indicate the measurement result of this object. 10.11.4 Press the MEMORY button and hold it pressed not less than 2 s, to exit the mode of indication of the measurement history. 10.12 Measurement history data reading into the database through infrared port (IRDA) Transmission of the measurement history data into the database through the infrared port can be done only in the search mode with the help of the PC installed custom software. Before data transmission from the control panel of the dosimeter, the PC custom software should be launched in accordance with the user's manual and be ready to read data through infrared port. To transmit, the switched on control panel of the dosimeter should be located opposite the infrared port adapter so that the window of the infrared port of the control panel was parallel to the window of the adapter at not more than 30 cm. Data transmission and recording in the PC database is performed automatically during 1...30 s (depending on the volume of stored information). Audio signaling and corresponding information displayed on the PC monitor indicate that transmission is correct. 21 Note. After the data is transmitted to the database the nonvolatile memory of the control panel of the dosimeter is reset. 10.13 Measurement history data reading into the database through serial port (RS232) 10.13.1 To transmit measurement history into the database with the help of the serial port (RS232), connect the control panel of the switched off dosimeter by means of the connecting cable through the Х2 connector to СОМ-port of the computer. 10.13.2 Switch the dosimeter on. Data transmission and recording in the PC database is performed automatically during 1...30 s (depending on the volume of the stored information). Audio signaling and corresponding information displayed on the PC monitor indicates that transmission is correct. 10.13.3 Switch the dosimeter off before disconnecting the control panel of the dosimeter from the serial port. Note. After the data is transmitted to the database, the nonvolatile memory of the control panel of the dosimeter is reset. 11 TROUBLESHOOTING 11.1 Troubleshooting is presented in the Table 11.1 Table 11.1 - Troubleshooting Trouble Probable cause Troubleshooting 1 No readings on the 1 Storage battery 1 Recharge the LCD at switching the discharged storage battery dosimeter on 2 No contact between 2 Remove and the batteries clean the batteries (replace if necessary) 2 No changes in Conductor break of Find and readings on the LCD the cable of the remove the at surface betaremote detecting unit break particles flux density of beta radiation measurement 3 No changes in Conductor break of Find and readings on the LCD the cable of the remove the at photon-ionizing remote detecting unit break radiation DER of gamma radiation measurement 22 Note 11.2 In case of failure or troubles during the warranty period of the dosimeter, the user should contact the enterprise producer by e-mail (see below) to receive the address of the nearest service center: PE “SPPE “Sparing-Vist Center” Tel: (+38 032) 242-15-15, Fax: (+38 032) 242-20-15 E-mail: [email protected]. 12 VERIFICATION The verification of the dosimeter should be performed after manufacture and repair or during maintenance (periodically, at least once a year). 12.1 Verification procedure During verification, the operations presented in the Table 12.1 should be performed. Table 12.1 – Verification procedure Operation is required for: Operation name OM section Primary Periodic verification verification 1 External examination 12.4.1 Yes Yes 2 Testing 12.4.2 Yes Yes 3 Calculation of main relative Yes Yes error of photon-ionizing 12.4.3 radiation DER measurement 4 Calculation of main relative Yes Yes error of photon-ionizing 12.4.4 radiation DE measurement 5 Calculation of main relative Yes Yes error of beta-particles flux 12.4.5 density measurement 6 Determination of energy Yes No dependence of photon-ionizing 12.4.6 radiation 12.2 Verification facilities The following measuring instruments should be used for verification: 12.2.1 УПГД-3В standard equipment with gamma sources (category 2). 12.2.2 Standard sources (category 2) of 6CO type on hard pads containing 90 Sr+90Y radionuclides. 12.2.3 Customized test instrument with 137Cs source of ОСГИ type. 12.2.4 Equipment used for verification of the dosimeter should ensure supporting the 6CO type sources and mounting of the beta-particles detecting unit. 23 12.2.5 Electronic stop-watch. All verification facilities should have a valid verification certificate or state metrological certification. Note. Use of other standard measuring instruments that meet the specified accuracy is allowed. 12.3 Verification conditions 12.3.1 The verification test should be carried out under the following conditions: - ambient air temperature (20±5) oС; - relative humidity (65±15) %; - atmospheric pressure from 84 to 106.7 kPa; - natural gamma background of not more than 0.25 µSv/h; - power supply voltage of (4.8±0.2) V. 12.4 Verification procedure 12.4.1 External examination During external examination the dosimeter should meet the following requirements: - the delivery kit should be completed as described in section 3 of the ВІСТ.412129.003-02 ФО logbook; - labeling should be accurate; - Quality Control Department seals should not be violated; - the dosimeter should be free from mechanical damage that may affect its operability. Note. The completeness of the delivery kit is checked only after manufacture. 12.4.2 Testing 12.4.2.1 Connect the remote detecting unit of gamma radiation to the control panel of the dosimeter and switch the dosimeter on. Place the 137Cs gamma source of ОСГИ type near the detecting unit. Observe the increase of DER counts above the background level on the LCD, and audio signaling at detection of gamma-quanta, and audio alarm when the DER threshold level is exceeded. 12.4.2.2 Connect the remote detecting unit of beta-particles to the control panel of the dosimeter and switch the dosimeter on. Place the detecting unit above the surface of the 6CO source and observe the increase of beta flux density counts above the background level, and audio signaling at detection of betaparticles, and audio alarm when the threshold level of beta-particles flux density is exceeded. Note. Set maximum threshold according to OM 10.7 to switch audio alarms of exceeded DER and beta-particles flux density threshold levels off. 12.4.3 Calculation of the main relative error of photon-ionizing radiation DER measurement. 24 12.4.3.1 Prepare the standard equipment УПГД-3В for operation according to its operating manual. Prepare the dosimeter for measurement of photon-ionizing radiation DER in the search mode. Fix the remote detecting unit of gamma radiation (hereinafter – the unit) in the holder so that the mechanical center of gamma beam coincides with the center of the unit. Place the holder and the unit in the position, where ambient DER from 137Сs source is 0.8 µSv/h. Perform five DER measurements. Register the received readings in the protocol, and calculate the average DER value and the main relative error of measurement. 12.4.3.2 Place the holder and the unit in the position, where DER from the 137 Cs source is 8.0 µSv/h. Perform five DER measurements. Register the received readings in the protocol, and calculate the average DER value and the main relative error of measurement. 12.4.3.3 Place the holder and the unit in the position, where DER from the 137 Cs source is 80.0 µSv/h. Perform five DER measurements. Register the received readings in the protocol, and calculate the average value of DER and the main relative error of measurement. 12.4.3.4 Place the УПГД-3В holder together with the unit in the position, where DER from 137Cs source is 8·102 µSv/h. Perform five DER measurements. Register the received readings in the protocol, and calculate the average DER value and the main relative error of measurement. 12.4.3.5 Place the УПГД-3В holder together with the unit in the position, where DER from 137Cs source is 8·103 µSv/h. Perform five DER measurements. Register the received readings in the protocol, and calculate the average DER value and the main relative error of measurement. 12.4.3.6 Place the УПГД-3В holder together with the unit in the position, where DER from 137Cs source is 8·104 µSv/h. Perform five DER measurements. Register the received readings in the protocol, and calculate the average DER value and the main relative error of measurement. 12.4.3.7 Place the УПГД-3В holder together with the unit in the position, where DER from 137Cs source is 1·106 µSv/h. Perform five DER measurements. Register the received readings in the protocol, and calculate the average DER value and the main relative error of measurement. 12.4.3.8 Prepare the dosimeter for measurement of photon-ionizing radiation DER in the precise mode. 25 Take readings for each DER value, listed in 12.4.3.1 – 12.4.3.7, in the УПГД-3В holder, to calculate the main relative error in the precise mode. Register the received result of precision measurement in the protocol; calculate the main relative error of measurement. 12.4.3.9 The dosimeter is acknowledged to have passed the verification test if the main relative error of measurement for each DER level does not exceed the value calculated by the formula H (10) 25 H (10) 15 2 in the search mode and H (10) 2 in the precise mode, where H (10) is a numeric value of H (10) measured DER in µSv/h. 12.4.4 Calculation of the main relative error at photon-ionizing radiation DE measurement. 12.4.4.1 Prepare the dosimeter for photon-ionizing radiation DE measurement in accordance with the OM section 10. Press the DOSE button on the control panel of the dosimeter and hold it down for 5 s to fix the mode of photon-ionizing radiation DE indication on the digital display. Prepare the УПГД-3В verification equipment for operation according to its operating manual. Fix the control panel of the dosimeter in the holder so that the mechanical center of gamma beam coincides with the center of the gamma detector. Place the УПГД-3В holder together with the control panel of the dosimeter in the position, where DER from 137Сs source is 60.0 µSv/h. Fix the previous DE value, already accumulated on the digital indicator (for further consideration), and simultaneously switch on the stop-watch. Register the DE measurement result after 60 min of irradiation (according to the stop-watch), and calculate the main relative error of measurement. 12.4.4.2 Place the УПГД-3В holder together with the dosimeter in the position, where DER from 137Cs source is 600.0 µSv/h. Fix the previous DE value, already accumulated on the digital indicator (for further consideration), and simultaneously switch on the stop-watch. Register the DE measurement result after 30 min of irradiation (according to the stop-watch), calculate the main relative error of measurement. 12.4.4.3 Place the УПГД-3В holder together with the dosimeter in the position, where DER from 137Cs source is 6000.0 µSv/h. Fix the previous DE value, already accumulated on the digital indicator (for further consideration), and simultaneously switch on the stop-watch. 26 Register the DE measurement result after 10 minutes of irradiation (according to the stop-watch), calculate the main relative error of measurement. 12.4.4.4 The dosimeter is acknowledged to have passed the verification test if the main relative error of DE measurement does not exceed ±15 %. Note. Press the DOSE button on the control panel of the dosimeter once again and release it in 5 s to exit the mode of fixed DE measurement indication. 12.4.5 Calculation of the main relative error at beta-particles flux density measurement. 12.4.5.1 Prepare the dosimeter for beta-particles flux density measurement in the search mode in accordance with the OM section 10. Place the detecting unit of beta-particles above the 6СО source surface, providing surface beta-particles flux density from 50 to 100 part./(cm2·min), so that the work surface of the detector completely covered the active surface of the source. Perform measurements of beta-particles flux density according to the OM 10.6.3. Register the received readings in the protocol; calculate the average value of beta-particles flux density and the main relative error of measurement. 12.4.5.2 Place the detecting unit of beta-particles above the 6СО source surface, providing surface beta-particles flux density from 1000 to 10000 part./(cm2·min). Perform five measurements of beta-particles flux density from the source. Register the received readings in the protocol; calculate the average value of beta-particles flux density and the main relative error of measurement. 12.4.5.3 Place the detecting unit of beta-particles above the 6СО source surface, providing surface beta-particles flux density from 50000 to 100000 part./(cm2·min). Perform five measurements of beta-particles flux density from the source. Register the received readings in the protocol; calculate the average value of beta-particles flux density and the main relative error of measurement. 12.4.5.4 Take readings of beta-particles flux density for each type of the standard beta source, listed in 12.4.5.1 – 12.4.5.3, to calculate the main relative error of the dosimeter in the mode of precise measurement. Register the received reading in the protocol, calculate the basic relative error of measurement. 27 12.4.5.5 The dosimeter is acknowledged to have passed the verification test if the main relative error of measurement for each level of beta-particles flux density does not exceed the value calculated according to the formula 25 200 in the search mode, and 15 200 in the precise mode, where is a numerical value of measured beta-particles flux density in part./(cm2·min). 12.4.6 Test on energy dependence of photon-ionizing radiation. 12.4.6.1 Prepare the dosimeter for gamma radiation DER measurement in the search mode in accordance with the OM 10. Prepare the УПГД-3В equipment for operation in accordance with its operating manual. Fix the dosimeter in the УПГД-3В holder so that the mechanical center of gamma beam coincides with the center of the gamma detector. Place the УПГД-3В holder with the detecting unit of gamma radiation (hereinafter the unit) in the position, where DER from 241Am source is 10.0 µSv/h. Perform five DER measurements. Register the received readings in the protocol and calculate the average DER value and the main relative error of measurement. 12.4.6.2 Place the УПГД-3В holder with the unit in the position, where DER from 137Cs source is 10.0 µSv/h. Perform five DER measurements. Register the received readings in the protocol and calculate the average DER value and the main relative error of measurement. 12.4.6.3 Place the УПГД-3В holder with the unit in the position, where DER from 60Cо source is 10.0 µSv/h. Perform five DER measurements. Register the received readings in the protocol and calculate the average DER value and the main relative error of measurement. Estimate energy dependence of the dosimeter readings for 59 keV (241Ам), 1.3 MeV (60Со) and 0.66 MeV (137Cs) energies in percentage. 12.4.6.4 The dosimeter is acknowledged to have passed the verification test if energy dependence of the dosimeter relative to photon-ionizing radiation does not exceed ±25 %. 12.5 Presentation of the verification results 12.5.1 Positive results of the primary or periodic verification test are registered as follows: 1) Primary verification is registered in the “Certificate of acceptance” section of the logbook. 2) Periodic verification is registered in the issued Certificate of the established form or in the “Periodic verification of key specifications” section of the logbook. 28 12.5.2 The dosimeters that do not meet the abovementioned requirements are not allowed for manufacture and use, and get the Certificate of Inadequacy. 13 SHIPPING AND STORAGE 13.1 Shipping 13.1.1 The detecting units in the shipping container of the producer enterprise can be shipped by railway, motor, water and air transport at any distances provided the following conditions are satisfied: - by railway transport - in a dry box car; - by air transport – in pressurized compartments; - by water transport – in a ship’s hold; - by motor transport - in a closed car. 13.1.2 The dosimeters in shipping container should be placed and fastened to ensure their stable position and to avoid shocks. 13.1.3 Not more than five dosimeters may be shipped in a shipping container of the producer enterprise. Stacking of the dosimeters should be vertical. 13.2 Storage 13.2.1 The dosimeters in packing should be stored indoors at the ambient air temperature from 5 to 40 °C and relative humidity up to 80 % at the temperature of 25 °C. 13.2.2 The dosimeters without packing should be stored indoors at the ambient air temperature from 10 to 35 0С and relative humidity up to 80 % at the temperature of 25 °C. 13.2.3 The composition of dust, acid and alkali vapors, aggressive gases and other harmful admixtures that may cause corrosion in the buildings where the dosimeters are stored, should not exceed the composition of corrosion elements for the atmosphere of the 1 type (according to the Ukrainian standards). 13.2.4 The location of the devices in the storehouses should ensure their free transference and access to them. 13.2.5 The distance between the walls, the floor of the storehouses and the dosimeters should be not less than 1 m. The distance between the heating gadgets of the storehouses and the devices should be not less than 0.5 m. 14 DISPOSAL Disposal of dosimeters is performed as follows: metals are processed (melted), plastic details are dumped. Disposal of the dosimeters is not dangerous for the service personnel, and is environmentally friendly. The dosimeters should be disassembled in accordance with the established by the enterprise user procedure. 29 APPENDIX А MKS-07 “POSHUK” search dosimeter-radiometer of gamma, beta radiation VF DPU ВD SFG M SCALE DPC MEMORY LCD PRECISELY THRESHOLD DOSE LS BDBG -07 VR1 CC BDIB -07 VR2 ON SB Figure А.1 – Structure chart of the dosimeter 30 APPENDIX А Figure А.2 - Control panel Figure А.3 - Control panel with the removed cover 31 APPENDIX B BDBG-07 detecting unit of gamma radiation AVF1 DHS MH CCC AVF2 DLS ML Figure B.1 – Structure chart of the BDBG-07 detecting unit of gamma radiation Figure B.2 - BDBG-07 unit 32 APPENDIX B Figure B.3 - BDBG-07 unit with the removed cover 33 APPENDIX C BDIB-07 detecting unit of beta-particles AVF BD M СCC Figure C.1 – Structure chart of the BDIB-07 detecting unit of beta-particles Figure C.2 - BDIB-07 unit 34 APPENDIX C Figure C.3 - BDIB-07 unit with the removed cover 35 APPENDIX D Figure D.1 - Telescopic tube 36 APPENDIX E 0 Аnisot r o p y o f t h e 330 0 Cs-137 0 0 BDBG- 0 7 360 -20 0 30 0 СО-60 d o si me t e r - r a d i o me t e r МКS - 0 7 -40 ( h or i so n t a l p l a n e ) 300 Ам-241 1 0 60 Ам -241 0 -60 Cs - 137 -80 -100 270 | c 90 0 0 Co- 60 240 0 120 0 П 210 0 150 0 180 0 Cs-137 Аnisotropy of the BDBG-07 dosimeter-radiometer МКS - 07 (vertical plane) 0 330 0 СО-60 00 360 0 -20 30 0 Ам-241 1 -40 60 0 300 0 Ам -241 -60 -80 Co- 60 -100 270 0 | c 90 0 Cs - 137 240 0 120 0 П 210 0 150 180 0 Figure E.1 37 0