Download Product Manual
Transcript
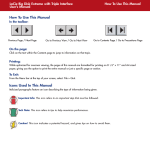
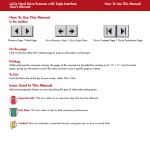
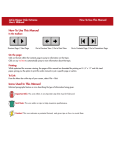
How To Use This Manual
LaCie Big Disk USB 2.0
User’s Manual
How To Use This Manual
In the toolbar:
Previous Page / Next Page
Go to Previous View / Go to Next View
Go to Contents Page / Go to Precautions Page
On the page:
Click on the text within the Contents page to jump to information on that topic.
Printing:
While optimized for onscreen viewing, the pages of this manual are formatted for printing on 8
paper, giving you the option to print the entire manual or just a specific page or section.
1/2”
To Exit:
From the Menu bar at the top of your screen, select: File > Quit.
Icons Used In This Manual
Italicized paragraphs feature an icon describing the type of information being given.
Important Info: This icon refers to an important step that must be followed.
Tech Note: This icon refers to tips to help maximize performance.
Caution! This icon indicates a potential hazard, and gives tips on how to avoid them.
x 11” and A4 sized
LaCie Big Disk USB 2.0
User’s Manual
Table of Contents
Table of Contents
Foreword
Precautions
1. Introduction
1.1. What Your LaCie Drive Can Do
2. Your LaCie Drive
2.1. Minimum System Requirements
2.2. Package Contents And Views Of The Drive
2.2.1. Package Contents
2.2.2. Views Of The Drive
2.3. USB
3. Installing Your LaCie Drive
3.1. Connecting The Power Supply
3.2. Connecting The Interface Cable
3.2.1. Mac Users
3.2.2. Windows Users
3.3. Installing Multiple Devices
3.4.. Disconnecting Your LaCie Drive
3.4.1. Mac Users
3.4.2. Windows Users
4. Using Your LaCie Drive
4.1. Formatting And Partitioning Your LaCie Big Disk USB 2.0
4.1.1. Mac Users
4.1.2. Windows Users
5. Tech Tips
5.1. File System Formats
5.1.1. Mac Users
5.1.2. Windows Users
5.2. Available Storage Capacity
5.3. Optimizing Data Transfers
4
6
7
7
8
8
9
9
10
12
13
14
15
15
19
21
22
22
22
23
24
24
26
28
28
28
29
30
30
LaCie Big Disk USB 2.0
User’s Manual
5.3.1. Hi-Speed USB 2.0 Ports And Performance
5.3.2. Computer with only USB ports
6. USB Questions & Answers
7. Troubleshooting
7.1. Mac Users
7.2. Windows Users
8. Contacting Customer Support
9. Warranty
Glossary
Table of Contents
31
31
32
34
35
38
41
43
44
LaCie Big Disk USB 2.0
User’s Manual
Foreword
page 4
Copyrights
Copyright © 2005 LaCie. All rights reserved. No part of this publication may be reproduced, stored in a retrieval system, or
transmitted in any form or by any means, electronic, mechanical, photocopying, recording or otherwise, without the prior
written consent of LaCie.
Trademarks
Apple, Mac, and Macintosh are registered trademarks of Apple Computer, Inc. Microsoft, Windows 98, Windows 98 SE,
Windows 2000, Windows Millennium Edition and Windows XP are registered trademarks of Microsoft Corporation.
Changes
The material in this document is for information only and subject to change without notice. While reasonable efforts have
been made in the preparation of this document to assure its accuracy, LaCie assumes no liability resulting from errors or omissions in this document, or from the use of the information contained herein. LaCie reserves the right to make changes or revisions in the product design or the product manual without reservation and without obligation to notify any person of such
revisions and changes.
FCC Statement:
Caution! Modifications not authorized by the manufacturer may void the user’s authority to operate this device.
NOTE: This equipment has been tested and found to comply with the limits for a Class A digital device, pursuant to Part 15 of
the FCC Rules. These limits are designed to provide reasonable protection against
LaCie Big Disk USB 2.0
harmful interference when the equipment is operated in a commercial environment.
This equipment generates, uses, and can radiate radio frequency energy and, if not
Tested To Comply
installed and used in accordance with the instruction manual, may cause harmful
With FCC standards
interference to radio communications. Operation of this equipment in a residential
area is likely to cause harmful interference in which case the user will be required to
FOR HOME OR OFFICE USE
correct the interference at his own expense.
NOTE: This equipment has been tested and found to comply with the limits for a Class B digital device, pursuant to Part 15 of
the FCC Rules. These limits are designed to provide reasonable protection against harmful interference in a residential installation. This equipment generates, uses and can radiate radio frequency energy and, if not installed and used in accordance
with the instructions, may cause harmful interference to radio communications. However, there is no guarantee that interference will not occur in a particular installation. If this equipment does cause harmful interference to radio or television reception, which can be determined by turning the equipment off and on, the user is encouraged to try and correct the interference
by one or more of the following measures:
• Reorient or relocate the receiving antenna.
• Increase the separation between the equipment and receiver.
LaCie Big Disk USB 2.0
User’s Manual
Foreword
• Connect the equipment into an outlet on a circuit different from that to which the receiver is connected.
• Consult the dealer or an experienced radio/TV technician for help.
Canada Compliance Statement
This Class A digital apparatus meets all requirements of the Canadian Interference-Causing Equipment Regulations.
Manufacturer’s Declaration for CE Certification
We, LaCie, solemnly declare that this product conforms to the following European standards:
Class B EN60950, EN55022, EN50082-1, EN61000-3-2
With reference to the following conditions:
73/23/EEC Low Voltage Directive
89/336/EEC EMC Directive
page 5
LaCie Big Disk USB 2.0
User’s Manual
Precautions
page 6
Health And Safety Precautions
Only qualified persons are authorized to carry out maintenance on this device.
• Read this User's Guide carefully, and follow the correct procedure when setting up the device.
• Do not open your hard drive or attempt to disassemble or modify it. Never insert any metallic object into the drive to avoid
any risk of electrical shock, fire, short-circuiting or dangerous emissions. Your hard drive contains no user-serviceable parts. If
it appears to be malfunctioning, have it inspected by a qualified LaCie Technical Support representative.
• Never expose your device to rain, or use it near water, or in damp or wet conditions. Never place objects containing liquids on the drive, as they may spill into its openings. Doing so increases the risk of electrical shock, short-circuiting, fire or
personal injury.
General Use Precautions:
• Do not expose the hard drive to temperatures outside the range of 5° C to 35° C (41° F to 95° F). Doing so may damage
the drive or disfigure its casing. Avoid placing your drive near a source of heat or exposing it to sunlight (even through a window). Inversely, placing your drive in an environment that is too cold or humid may damage the unit.
• Always unplug the hard drive from the electrical outlet if there is a risk of lightning or if it will be unused for an extended
period of time. Otherwise, there is an increased risk of electrical shock, short-circuiting or fire.
• Use only the power supply shipped with the device.
• Do not use the hard drive near other electrical appliances such as televisions, radios or speakers. Doing so may cause interference which will adversely affect the operation of the other products.
• Do not place the drive near sources of magnetic interference, such as computer displays, televisions or speakers. Magnetic
interference can affect the operation and stability of your hard drive.
• Do not place heavy objects on top of the drive or use excessive force on it.
• Never use excessive force on your drive. If you detect a problem, consult the "Troubleshooting" section in this manual.
• Protect your hard drive from excessive exposure to dust during use or storage. Dust can build up inside the device, increasing the risk of damage or malfunction.
• Never use benzene, paint thinners, detergent or other chemical products to clean the outside of the drive. Such products will
disfigure and discolor the casing. Instead, use a soft, dry cloth to wipe the device.
Caution! The drive's warranty may be void as a result of the failure to respect the precautions listed above.
LaCie Big Disk USB 2.0
User’s Manual
1. Introduction
page 7
1. Introduction
Thank you for the purchase of your new LaCie Big Disk USB 2.0! This hard drive system
combines compatibility, convenience and a generous storage capacity to help you manage
your data. Your LaCie external hard drive system is cross-platform, which enables you to use
it on both Macs and PCs and you can customize the format and partitions of your LaCie
drive to match your exact needs.
LaCie’s Hard Drive is ideally suited for a wide range of high-end, high-traffic environments,
including:
• Workstations
• Audio/Video Editing
• Database Management
Engineered to fit seamlessly in to any work environment, the LaCie Big Disk USB 2.0 can be stood vertically on the LaCie
Drive Stand (included), placed in the LaCie Desk Rack (sold separately) or incorporated into standard 19” computer
equipment racks with the LaCie Rackmount Kit (sold separately).
1.1. What Your LaCie Drive Can Do
• Back up your computers’ internal hard drive.
• Store and exchange data between several computers.
2. Your LaCie Drive
LaCie Big Disk USB 2.0
User’s Manual
page 8
2. Your LaCie Drive
2.1. Minimum System Requirements
Mac Users
Hi-Speed USB 2.0
Hardware Requirements for USB:
• G3 or greater, with USB 2.0 or 1.1 interface card
System Requirements for USB:
• OS 9.x and 10.x (Apple USB support 1.3.5 and greater)
Tech Note: Mac OS 9.x and Mac OS 10.1 are
limited to USB 1.1 speed.
Windows Users
Hi-Speed USB 2.0
Hardware Requirements for USB:
• Pentium II or higher -compatible processor, with a USB 2.0
or 1.1 interface card
• 32MB RAM or greater
System Requirements for USB:
• Windows 2000 and Windows XP
2. Your LaCie Drive
LaCie Big Disk USB 2.0
User’s Manual
page 9
2.2. Package Contents and Views of the Drive
2.2.1. Package Contents
2
1
1
LaCie Big Disk USB 2.0 and Drive Stand kit
2 External power supply
3 Hi-Speed USB 2.0 cable
3
4 LaCie Storage Utilities CD-ROM
4
Important Info: Please keep your box. In the event that the drive should need to be repaired or serviced, it must
be returned in its original packaging.
LaCie Big Disk USB 2.0
User’s Manual
2. Your LaCie Drive
page 10
2.2.2. Views of the Drive
2.2.2.1. Front View
1
1
On/Off Button / Power LED /Activity LED
Push the button to power the drive on. The LED remains lit to show that the drive is on, and blinks to indicate
drive activity.
2. Your LaCie Drive
LaCie Big Disk USB 2.0
User’s Manual
page 11
2.2.2.2. Back View
1
3
5
6
2
3
4
1
Power Supply Connector - This is where you plug in the AC adapter supplied with the drive. See section
3.1. Connecting The Power Supply for more information.
2
Ventilation Outlet - These holes help to keep your drive cool during operation. Be sure not to block these openings
when using your drive.
3
Rackmount Grooves - These grooves are used for mounting the drive in the Desk Rack kit (sold separately) or placing
your drive in standard 19” computer equipment racks using the LaCie Rackmount Kit (sold separately).
4
Serial Number Sticker - This is where you will find your LaCie drive's serial number. Write down the serial number
and keep it in a safe place, because you will need to provide the number in the event you have to call LaCie Technical
Support for any reason in regards to the drive’s performance. The serial number would also come in handy if your
drive is lost or stolen.
5
Hi-Speed USB 2.0 Port - This is where you plug in the Hi-Speed USB 2.0 cable furnished with the drive. See section
3.2. Connecting the Interface Cable for more information.
6
Lock Slot - This slot is used to connect an anti-theft system, such as the LaCie Security Lock, for maximum protection.
Refer to your anti-theft system documentation for details on how to connect the lock.
LaCie Big Disk USB 2.0
User’s Manual
2. Your LaCie Drive
page 12
2.3. USB
USB is a serial input/output technology for connecting peripheral devices to a computer or to each other. Hi-Speed USB 2.0 is
the latest implementation of this standard, and it provides the necessary bandwidth and data transfer rates to support highspeed devices such as hard drives, CD/DVD drives and digital cameras.
Benefits of the USB standard include:
• Backwards compatibility: Hi-Speed USB 2.0 works with the original USB specifications.
• Hot-swappable: no need to shut down or restart your computer when adding or removing devices.
Please see USB Questions And Answers for a more detailed discussion of USB’s uses and capabilities.
USB Icons
These icons will help you easily identify the USB interfaces. They appear on USB cables and next to the USB port connectors
on certain computers.
USB 1.1 icon
USB 2.0 icon
USB Cables
Your LaCie drive is shipped with a Hi-Speed USB 2.0 cable, to ensure maximum data transfer performance when connected
to a Hi-Speed USB 2.0 port. The cable will also work when connected to a USB port, but drive performance will be limited to
USB 1.1 transfer rates.
Hi-Speed USB 2.0 2.0 cable: Connects USB devices to USB ports.
LaCie Big Disk USB 2.0
User’s Manual
3. Installing Your LaCie Drive
page 13
3. Installing Your LaCie Drive
Getting your LaCie drive installed and connected is very simple; essentially there are two steps: 1)
connect the power supply to the drive and to an outlet, and 2) connecting an interface cable to the drive
and to your computer.
To get started, go to section 3.1. Connecting The Power Supply.
Caution! The LaCie Big Disk USB 2.0 utilizes the aluminum alloy casing to help dissipate heat. There are
important location consideration precautions to keep in mind when setting up your drive. Make sure to place
your drive in a well ventilated space, do not block the ventilation outlet on the back of the drive and keep the
area in front of the drive unobstructed to allow for proper airflow. If you will be stacking or racking your drive,
please follow these considerations:
• When stacking drives, place no more than three drives on top of each other.
• When stacking drives, make sure and adhere the rubber feet to the bottom of the drives.
• When racking drives in the LaCie Desk Rack (sold separately), place no more than three drives in the rack.
• When racking in 19” equipment racks, only rack the equipment in a regulated, air-conditioned room, keep
cables and other obstructions away from the rear of the drive and do not place more than three drives on top of
each other.
3. Installing Your LaCie Drive
LaCie Big Disk USB 2.0
User’s Manual
page 14
3.1. Connecting the Power Supply
B
There are two cables that are
supplied with the power supply: one
cable (A) connects to the LaCie
drive; and the other cable (B)
connects to a power outlet, such as a
wall outlet or a surge protector.
A
Power Supply brick
1
Connect Cable A to your LaCie Drive.
2
Connect Cable B to the Power Supply brick.
3
Connect Cable B to a surge protector or wall outlet.
Step 2)
You are now ready to connect the interface cable to your drive and to your computer.
Caution!
•Only use the AC adapter supplied with your specific LaCie drive. Do not use a power supply from another
LaCie drive or another manufacturer. Using any other power cable or power supply may cause damage to the
device and void your warranty.
•Always remove the AC adapter before transporting your LaCie drive. Failure to remove the adapter may result
in damage to your drive and will void your warranty.
Tech Note:
• Your LaCie Big Disk USB 2.0 comes with an autoswitching power supply. This means that if the drive is
connected to a USB connector on your computer, when you turn on the computer, the LaCie drive will turn on
automatically. Likewise, when you turn off your computer, your LaCie drive will turn off automatically. To turn the
drive off, simply push the blue On/Off button on the front of the drive. Do not turn the drive off, though, when it
is reading or writing information!
• The LaCie Big Disk USB 2.0 also manages power consumption. If the system’s power save feature supports it,
the drive will spin down during the power save mode. After the system comes of out of power save, the drive will
take a few seconds to spin up to full power before it can be accessed.
• You may use your LaCie drive when in a foreign country, thanks to its autoswitching 100-240 Volt power
supply. To be able to use this feature, you may need to purchase an appropriate adapter or cord. Consult LaCie
Technical Support for assistance in choosing the right adapter. LaCie accepts no responsibility for any damage to
the drive resulting from the use of an inappropriate adapter. Using an adapter other than one authorized by
LaCie will void your warranty.
LaCie Big Disk USB 2.0
User’s Manual
3. Installing Your LaCie Drive
page 15
3.2. Connecting the Interface Cable
The installation steps below follow the connectivity options for a Hi-Speed USB 2.0, depending on your operating system.
Important Info: Windows Users! Move to section 3.2.2. Windows Users to view installation steps for the Windows OS.
3.2.1. Mac Users
These installation steps are separated by interface and Mac OS. To view the installation steps of the interface you plan on
using, click on the appropriate operating system and interface:
Mac OS 10.x – Hi-Speed USB 2.0
Mac OS 9.x – USB
Tech Note: If you will be using your LaCie drive in a cross-platform (Mac/Windows) environment, it is
recommended that you re-format the drive to the MS-DOS (also known as FAT 32) File System format. Please see
section 5.1. File System Formats for more information.
3. Installing Your LaCie Drive
LaCie Big Disk USB 2.0
User’s Manual
page 16
Mac OS 10.x – Hi-Speed USB 2.0
1
After following the steps in 3.1. Connecting The Power Supply, power on the drive by pressing the On/Off button
on the front of the drive.
2
Connect the Hi-Speed USB 2.0 cable into the Hi-Speed USB
2.0 port on the back of the LaCie Big Disk USB 2.0.
Tech Note: Apple has just recently begun incorporating
native Hi-Speed USB 2.0 host bus interface adapters. To
achieve Hi-Speed USB 2.0 data transfer rates, you will
need to purchase a third-party Hi-Speed USB 2.0 host
interface PCI or PC card. Otherwise, you will be limited to
USB 1.1 speeds.
3
Connect the other end of the
Hi-Speed USB 2.0 cable into
an available USB port* on
your computer.
Tech Note: For more information about
USB, please see sections:
• 2.3.2. USB
• 5.3. Optimizing Data Transfers
• 7. USB Questions & Answers.
4
Please use Apple Disk Utilities to format in
HFS+ or use several partitions FAT 32 for
crossplatform. For more information please
refer to 4.1. Formatting And Partitioning Your
LaCie Drive – 4.1.1. Mac Users
5
Your drive should appear on your desktop. It
may take a few seconds for your computer to
recognize the drive and for it to appear on the
dektop.
Mac OS Drive Icons
Your LaCie Big Disk USB 2.0 will now be ready for use. You can then use the formatting and partitioning capabilities
in the Apple Disk Utility to configure your hard drive system. Please refer to 4.1. Formatting And Partitioning Your
LaCie Drive – 4.1.1. Mac Users for more information.
Computer models vary. Please consult your computer’s User’s Manual for the exact location of your interface.
LaCie Big Disk USB 2.0
User’s Manual
Mac OS 9.x – USB
To use your new LaCie Big Disk USB 2.0, first install the necessary driver software.
Silverlining Pro Installation
1) Insert the LaCie Storage Utilities CD in your computer’s internal CD/DVD drive.
2) Open the CD icon and double-click on the Silverlining Installer.
3) The Silverlining Utilities screen appears. Click on Continue.
4) The About to Install screen appears. Read the following information and click
on Continue.
5) The License Agreement screen appears. Click on Agree.
6) The Installation screen appears.
7) Check the Silverlining Pro and USB Support boxes.
8) Click on Install.
9) A message appears to confirm that the installation was successful.
10) Click on Restart to use your USB peripheral immediately.
Now you are ready to move to the next step, Connecting the Drive to the
Computer.
3. Installing Your LaCie Drive
page 17
3. Installing Your LaCie Drive
LaCie Big Disk USB 2.0
User’s Manual
page 18
Mac OS 9.x – USB
1
After following the steps in 3.1. Connecting The Power Supply, power on the drive by pressing the On/Off button
on the front of the drive.
2
Connect the Hi-Speed USB 2.0 cable into the Hi-Speed USB
2.0 port on the back of the LaCie Big Disk USB 2.0.
Tech Note: Apple does not support the Hi-Speed USB 2.0
standard under Mac OS 9.x. You will be limited to USB 1.1
speeds.
3
Connect the other end of the
Hi-Speed USB 2.0 cable into
an available USB port* on
your computer.
Tech Note: For more information about
USB, please see sections:
• 2.3.2. USB
• 5.3. Optimizing Data Transfers
• 7. USB Questions & Answers.
4
5
With Silver Lining pro you will have to reformat
in HFS+ . If you need to cross platform, you will
have to use several FAT 32 partitions. For more
informations, please refer to 4.1.1 Formatting
And Partitioning Your LaCie Drive
Your drive should appear on your desktop. It
may take a few seconds for your computer to
recognize the drive and for it to appear on the
dektop.
Mac OS Drive Icons
Your LaCie Big Disk USB 2.0 will now be ready for use. You can then use the formatting and partitioning capabilities
in Silverlining Pro to configure your hard drive system. Please refer to the Silverlining Pro documentation on the
LaCie Storage Utilities CD-ROM for more information.
Computer models vary. Please consult your computer’s User’s Manual for the exact location of your interface.
LaCie Big Disk USB 2.0
User’s Manual
3. Installing Your LaCie Drive
page 19
3.2.2. Windows Users
To view the installation steps of the interface and operating system you plan on using, see the following section:
Windows 2000/Windows XP – Hi-Speed USB 2.0
• If you will be using your LaCie drive in a cross-platform (Mac/Windows) environment, please see the following
sections for more information
4.1. Formatting And Partitioning Your LaCie Drive - 4.1.2. Windows Users
5.1. File System Formats - 5.1.2. Windows Users
3. Installing Your LaCie Drive
LaCie Big Disk USB 2.0
User’s Manual
page 20
Windows 2000 And Windows XP – Hi-Speed USB 2.0
After the first connection of a USB-based peripheral, Windows detects the drive, and will install it automatically as a new
peripheral, even if you have previously installed it on another port on the same USB bus. Let Windows install the USB drivers
of your LaCie drive.
1
After following the steps in 3.1. Connecting The Power Supply, power on the drive by pressing the On/Off button
on the front of the drive.
2
Connect the Hi-Speed USB 2.0 cable into the Hi-Speed USB
2.0 port on the back of the LaCie Big Disk USB 2.0.
Tech Note: To achieve Hi-Speed USB 2.0 transfer rates,
you have to be connected to a Hi-Speed USB 2.0 port on
your computer. Otherwise, you will be limited to USB 1.1
data transfer rates.
3
Connect the other end of the
Hi-Speed USB 2.0 cable into
an available USB port* on
your computer.
Tech Note: For more information about
USB, please see sections:
• 2.3.2. USB
• 5.3. Optimizing Data Transfers
• 7. USB Questions & Answers.
4
Your LaCie Big Disk USB 2.0 will now be ready
for use.
Computer models vary. Please consult your computer’s User’s Manual for the exact location of your interface.
LaCie Big Disk USB 2.0
User’s Manual
3. Installing Your LaCie Drive
page 21
3.3. Installing Multiple Devices
Technically, you can connect up to 127 individual USB peripherals at one time. However, you probably will not use more than
6 to 8 peripherals on your USB system. Most computers only have two USB ports, so you would need a hub to connect more
than two peripheral drives. The hub regenerates the signals, generally providing between 4 to 7 connections. To add even
more drives, connect a new hub to a connector of the original hub, creating a new series of peripherals, etc. But the hub
slows down the transfer rate by lengthening the path of the signal. To optimize performance, connect your drive directly to
one of the built-in ports in your computer.
Tech Note: For more information about USB and improving performance, please sections
5.3. Optimizing Data Transfers and 7. USB Questions & Answers.
LaCie Big Disk USB 2.0
User’s Manual
3. Installing Your LaCie Drive
page 22
3.4. Disconnecting Your LaCie Drive
USB external devices feature “plug & play” connectivity, which means that your drive can be connected and disconnected
while the computer is running. To prevent failures, it is important you follow these steps when disconnecting your Big Disk USB
2.0.
Caution! Do not disconnect the USB when the drive is reading or writing. Disconnecting while the drive is operating could cause the loss of data. Make sure that your drive is not reading or writing and that the activity LED is
off before disconnecting the USB cable.
3.4.1. Windows Users
1
From the System Tray (located in the lower right-hand side of your screen), click on the Eject icon (a small green
arrow over a hardware image).
2
A message will appear, detailing the devices that the Eject icon controls, i.e. “Safely remove…” Click on this prompt.
3
You will then be given the following message: “Safe to Remove Hardware” (or similar). It is now safe to disconnect the
device.
3.4.2. Mac Users
You must unmount the hard drive system before disconnecting it or powering it
down. Either:
• Drag the hard drive icon to the trash.
• Launch Silverlining Pro, highlight the hard drive and select “Unmount.”
The drive can now be disconnected.
Mac OS 10.x
Mac OS 9.x
LaCie Big Disk USB 2.0
User’s Manual
4. Using Your LaCie Drive
page 23
4. Using Your LaCie Drive
Once you’ve connected your drive, you are ready to format and partition the drive. In order to store information on a hard
drive, it must have a file system and be divided into sections that will contain the data that you wish to store. This process is
called formatting.
In order to utilize a hard disk drive, it has to be formatted first. Formatting a disk consists of the following: the operating
system erases all of the bookkeeping information on the disk, tests the disk to make sure that all of the sectors are reliable,
marks bad sectors (i.e., those that are scratched) and creates internal address tables that it later uses to locate information.
Once formatted, the actual available storage capacity varies, depending on operating environment, and is generally about
10% less than the non-formatted capacity.
Tech Note: Windows Users! This LaCie Hard Drive is formatted in NTFS for Windows 2000 and Windows XP.
You will need to re-format the drive in order for it to appear and operate under the Mac operating system.
After you’ve formatted the drive, you will have the opportunity to divide the hard drive into sections, called partitions. A
partition is a section of the hard drive’s storage capacity that is created to contain files and data. For instance, you could
create three partitions on your drive: one partition for your word documents, one for your spreadsheets and one for your
multi-media files.
File System Formats
There are essentially three different file system formats: FAT 32, NTFS, and Mac OS Extended (HFS+).
Use FAT 32 if:
• you will be using your drive between both Windows and Mac OS 9.x or 10.x; or sharing the drive between Windows
2000 and XP
Use NTFS if:
• you will be using the drive only under Windows 2000 or Windows XP; performance will generally be greater when
compared to FAT 32
Use HFS+ if:
• you will be using the drive on Macs only; performance will generally be greater when compared to FAT 32
For more information, please refer to section 5.1 File System Formats.
LaCie Big Disk USB 2.0
User’s Manual
4. Using Your LaCie Drive
page 24
4.1. Formatting And Partitioning Your LaCie Big Disk USB 2.0
Once you have set-up your LaCie Big Disk USB 2.0, you can reformat or partition it to suit your needs.
4.1.1. Mac Users
• Mac OS 9.x – Install and use LaCie Silverlining Pro, which is included with your drive.
• Mac OS 10.x – Use the Apple Disk Utility application, which is native to the operating system.
For instructions on installing and using Silverlining Pro, please refer to the Silverlining manual, located on your LaCie Storage
Utilities CD, in PDF format.
For instructions on using the Mac OS 10.x Apple Disk Utility application, please refer to the section below.
Formatting And Partitioning Using Mac OS 10.x
Caution! Following these steps will erase anything that is on the hard drive. Therefore, if you have information
that you want to protect or continue to use, backup this information before performing these steps.
1) Connect the drive to the computer via one of the interface ports.
2) Once the drive mounts onto the desktop, go to the Menu Bar, and open Go.
3) From the Go menu, click on Applications.
4) In the Applications menu, open the Utilities folder, and then double-click Disc Utility from the Utilities folder.
5) The Disc Utility window will open. In the left
side of the window will be a list of the available
hard disk drives. You should see a volume that
represents your internal hard drive, and one
that reads LaCie.
6) Select the LaCie drive, and then click on the
Partition tab.
7) From the Volume Scheme: button, choose the
number of partitions you want to divide the
drive into by clicking on the pull down menu
starting with Current (Mac OS 10.x gives you
the option of dividing the drive into at most 8
partitions). You can customize the size of the
partitions by using the slide bar between the
partitions in the Volume Scheme: area.
LaCie Big Disk USB 2.0
User’s Manual
4. Using Your LaCie Drive
page 25
8) In the Volume Information section, create a name for each partition, choose the volume format (Mac OS Extended, Mac
OS Standard, MS-DOS File System or UNIX File System) and the volume size.
Tech Note: • Please refer to section 5.1.1. File System Formats – Mac Users, for a more detailed discussion on
the differences between the two systems.
• If you want to format the drive in the MS-DOS File System (also known as FAT 32), you will need to create
multiple partitions no larger than 128GB.
• Apple recommends that unless you have a specific reason to use the UNIX File System (UFS), you should use
the Mac OS Extended format since it provides a more familiar experience to Macintosh users.
9) In the Options section, click the Install Mac OS 9 Disk Drivers box if you plan on sharing the drive between the Mac OS
9.x and Mac OS 10.x.
10) Once you have finalized the volume format, number of partitions, size and options, click OK. The following message will
appear: “Warning! Saving the new volume will erase all existing volumes. This can NOT be undone. Are you sure you
want to do that?” Click Partition to continue.
11) Mac OS 10.x will automatically setup the disk with the partitions and volume format you selected, and your new drive
will be available for use.
LaCie Big Disk USB 2.0
User’s Manual
4. Using Your LaCie Drive
page 26
4.1.2. Windows Users
• Windows 2000 and XP – Use the Disk Management Utility, which is native to the operating system.
Formatting And Partitioning Using Windows 2000 And Windows XP
The process of formatting and partitioning a drive on a computer running Windows 2000 or Windows XP consists of two
steps: (1) installing a signature on the drive, and (2) partitioning/formatting the drive. These steps will erase anything that is
on the disk.
1) Connect the drive to the computer via one of the interface ports.
2) Right-click My Computer and click Manage.
3) From the Computer Management window, select Disk Management (located below the Storage group).
4) If this is the first time the drive is being formatted, Windows 2000 will launch the Write Signature Wizard (Write Initialize
Wizard in Windows XP). Click Next.
5) Windows will list the new drive(s)
attached. If you are formatting a single
drive, only one drive should be visible.
Select the checkbox next to the drive and
click Next.
Important Info: Check the
"quick format" box.
6) Click Finish to exit the Wizard.
7) Now, with the disk management
window open, a new drive will be visible.
Right-click on the available space and
select Create Partition...
8) This will bring up the Create Partition
Wizard. Click Next.
LaCie Big Disk USB 2.0
User’s Manual
4. Using Your LaCie Drive
page 27
9) Select Primary Partition. Click Next.
10). Here you must specify partition size. It is recommended that you leave
the partition set to the maximum available size, unless you want multiple
partitions on the same drive. Click Next.
11) Select Assign drive letter and select the desired letter for the drive.
Click Next.
12) Select Format this partition… and then select a file system:
FAT32
FAT32 is a file system that is compatible with Windows 98 SE, Windows Me, Windows 2000 and Windows XP; however, it
has limitations. In Windows 2000 and Windows XP, you will not be able to create a partition greater than 32GB.
NTFS
NTFS is a newer file system that is compatible only with Windows NT, Windows 2000 and Windows XP. It has fewer
limitations than FAT 32 and will enable a partition to be created that is larger than 32GB.
Tech Note: Please refer to section 5.1.2. File System Formats – Windows Users, for a more detailed discussion
on the differences between the two systems.
13) Click Next.
14) Click Finish.
15) Disk Management will create the partition and begin formatting the
drive. Once completed, close Disk Management and your new drive will be ready to use.
LaCie Big Disk USB 2.0
User’s Manual
5. Tech Tips
page 28
5. Tech Tips
5.1 File System Formats
5.1.1. Mac Users
Mac OS 9.x Users:
You will be able to format the drive in one of two formats, using Silverlining Pro (for specific instructions, please refer to the
Silverlining User’s Manual, in the Silverlining folder): HFS (Mac OS Standard) or HFS+ (Mac OS Extended).
Important Info: If you will be sharing the hard drive between Mac and Windows operating environments, you
will want to format the drive in MS-DOS (FAT 32).
Mac OS 10.x Users:
You have the option of formatting the drive in one of four formats: Mac OS Standard (HFS), Mac OS Extended (HFS+), MSDOS File System and UNIX File System (UFS).
HFS - Mac OS Standard
Mac OS Standard refers to the file system used by Mac OS 8.0 and earlier. This is no longer a modern file sytem specification, and Mac OS Extended is more efficient. Only use this file system if you are creating a volume smaller than 32MB, using
a Mac with a 680X0 processor, or you are creating a file structure that will be need to be used by Macs using Mac OS 8.0
or earlier.
HFS+ - Mac OS Extended
Mac OS Extended refers to the file system used by Mac OS 8.1 and later. HFS+ represents an optimization of the older HFS
file system by using hard disk space more efficiently. Building off of HFS, they increased the number of blocks from 65,536 to
4.29 billion. With HFS+, you are no longer limited by block size.
MS-DOS File System
This is the Microsoft file system, more typically known as FAT 32. This is the file system to use if you are going to be using
your LaCie Big Disk USB 2.0 between Macs and Windows operating systems.
UNIX File System
This is the file system based on UNIX, and is preferrable for users developing UNIX-based applications within Mac OS 10.x.
Unless you have a specific reason to use the UNIX File System, you should instead format your drive using Mac OS Extended
(HFS+), because it provides Mac users with a more familiar operating experience.
LaCie Big Disk USB 2.0
User’s Manual
5. Tech Tips
page 29
5.1.2. Windows Users
There are basically two file system formats for Windows: FAT 32 and NTFS. The following information will hopefully make
choosing one or the other a little easier.
FAT 32
FAT is an acronym for File Allocation Table, which dates back to the beginnings of DOS programming. Originally, FAT was
only 16 bits, but after the second release of Windows 95 it was upgraded to 32 bits, hence the name FAT 32. In theory, FAT
32 volume sizes can range from less than 1MB all the way to 2TB. It is the native file system of Windows 98 and Windows
Me, and is supported by Windows 2000 and XP. When FAT 32 is used with Windows 2000 and XP, though, volume size is
limited to 32GB (by the Windows partition utility, i.e. Disk Manager), and the individual file size is limited to 4GB.
NTFS
This acronym stands for New Technology Filing System, and it is the native file system for Windows NT, Windows 2000 and
XP. NTFS offers several features that are not available with FAT 32; i.e. file compression, encryption, permissions, and
auditing, as well as the ability to mirror drives and RAID 5 capabilities. The minimum supported volume size for NTFS is
10MB, with a maximum of 2TB, with no limit to file size. Volumes created in NTFS can only be directly accessed (not through
shares) by Windows NT, Windows 2000 and XP, without resorting to help from third-party products.
Guidelines for Choosing FAT 32 Or NTFS
Use FAT 32 if:
• You want to access your data on any Operating System - FAT 32 is compatible with Windows 2000, XP, NT, Mac OS 9.x
and Mac OS 10.x.
• You will be dual booting with an Operating System other than Windows NT or Windows 2000.
• You may need the ability to dual boot down the line. Once you have converted a volume from FAT 32 to NTFS, there is no
going back. You can convert from FAT 32 to NTFS, but not the other way around.
Use NTFS if:
• You want to optimize drive performance under Windows 2000 or XP.
• You want to encrypt files, assign permissions to files, or want to audit files for access.
• You will be formatting partitions larger than 32GB.
• You need to store individual files that are larger than 4GB.
• You need a filing system that can be mirrored or structured like a RAID 5 configuration.
LaCie Big Disk USB 2.0
User’s Manual
5. Tech Tips
page 30
5.2. Available Storage Capacity
A gigabyte (GB) means 1,000,000,000 bytes. In order to utilize a hard disk drive, it has to be formatted first. Formatting a
disk consists of the following: the operating system erases all of the bookkeeping information on the disk, tests the disk to
make sure that all of the sectors are reliable, marks bad sectors (i.e., those that are scratched) and creates internal address
tables that it later uses to locate information. Once formatted, the actual available storage capacity varies, depending on
operating environment, and is generally about 10% less than the non-formatted capacity.
5.3. Optimizing Data Transfers
Data transfers are the flow of data that accomplishes a task, usually related to moving data from storage to computer RAM,
or between storage devices. With external drives, such as the LaCie Big Disk USB 2.0, the data is transferred from the drive to
the computer via the USB interface. The data is fed from the drive through the USB port on the drive, and passes to the
computer through either the USB host-bus adapter interface.
Computer manufacturer’s implementation of the USB host-bus adapter interfaces
vary widely. For computers running Windows 2000 and later, the Hi-Speed USB
2.0 interface is a fairly standard feature. Nearly all recent Apple computers
support the original USB standard*, while Hi-Speed USB 2.0 has only just recently
been adopted.
*Tech Note: For more
information on USB interfaces,
please see:
6.USB Questions & Answers.
The USB interfaces specify certain requirements, filed under the OHCI (Open Host
Controller Interface) standards. All LaCie drives comply to OHCI standards and have been rigorously tested on computers that
have host bus adapters that also comply to OHCI standards. Unfortunately, not all
Tech Note: Please see
manufacturers respect these guidelines, and anomalies may arise with computers
3.4 Installing Multiple Devices
that have host bus adapters that do not conform to OHCI standards.
for more information.
For the best performance, connect your LaCie Big Disk USB 2.0 directly to a
native USB port on your computer. During data transfers, it’s best to wait before launching other applications that will be
using the same port.
If you do not have a native USB port, LaCie offers USB host bust adapter cards,
also known as PCI or PC/PCMCIA cards, that have been tested and comply with
LaCie drives. Please contact your reseller or
LaCie Customer Support for more information.
Tech Note: Another important
factor in file transfer speeds is
how the drive has been
formatted. For more information
in choosing the correct file
system fomat, please see section
5.1 File System Formats.
LaCie Big Disk USB 2.0
User’s Manual
5. Tech Tips
page 31
5.3.1. Hi-Speed USB 2.0 Ports And Performance
To utilize the enhanced Hi-Speed USB 2.0 performance, your computer must be equipped with a Hi-Speed USB 2.0 host bus
adapter card (either sold separately, or integrated by your computer’s manufacturer) and the appropriate drivers. These host
bus adapter cards, which include one or more USB ports, are shipped with special Hi-Speed USB 2.0 drivers that enable the
computer to control the card. These drivers must be installed in order for USB 2.0 devices connected to the port to work at
their correct speeds.
Computers running Windows 2000 and Windows XP automatically manage Hi-Speed USB 2.0 devices and drivers.
Mac OS 9.x does not support Hi-Speed USB 2.0 functionality, and all Hi-Speed USB 2.0 devices will only operate at the
original USB specifications. Mac OS 10.2.7 and later supports Hi-Speed USB 2.0, and Mac OS 10.x also supports Hi-Speed
USB 2.0, but you will have to purchase a third-party PCI or PC Card and appropriate drivers.
Contact your LaCie reseller or LaCie Customer Support for information about Hi-Speed USB 2.0 PCI or PC Cards, or visit our
Web site: www.lacie.com.
5.3.2 Computer With Only USB Ports
If your computer is only equipped with a USB port, connect via the USB cable provided with your drive. Hi-Speed USB 2.0 is
backward compatible and can be used in USB ports. Again, you will be limited to USB speeds and performance.
Another alternative is to purchase a Hi-Speed USB 2.0 host adapter card that you would install into a PCI or PCMCIA slot on
your computer, thereby allowing your computer to take advantage of the performances that FireWire and Hi-Speed USB 2.0
have to offer.
Contact your LaCie reseller or LaCie Customer Support for information about FireWire and Hi-Speed USB 2.0 PCI or PC
Cards, or visit our Web site:
www.lacie.com.
LaCie Big Disk USB 2.0
User’s Manual
6. USB Questions & Answers
page 32
6. USB Questions & Answers
What Are The Benefits Of The USB Interfaces?
• Cross-platform: Use your USB peripherals on both Mac and Windows platforms.
• “Hot Swappable”: No need to shut down or restart your computer when adding or removing a USB device. Plug it in and
its ready.
• Automatic configuration: Once your device is connected, your computer recognizes the device and automatically configures
the necessary software.
• Daisy-Chaining: with USB ports on your computer, you can connect up to 127 peripherals using hubs.
• Easy Installation: One standardized port and plug combination makes it simple to connect.
What Is The Difference Between USB And Hi-Speed USB 2.0?
The main difference is speed. The original version of the interface is capable of throughput up to 12Mb/s. Hi-Speed USB 2.0
supports data speeds up to 480 Mb/s, making it 40 times faster than its predecessor. This increased bandwidth translates into
higher performance in demanding applications requiring high transfer rates.
What Are The Ideal Uses For USB?
USB is perfect for more traditional connections such as keyboards, mice, joysticks and scanners. These types of devices don’t
require fast data transfer rates, and operate very successfully at the slower speeds.
What Are The Ideal Applications For Hi-Speed USB 2.0?
Digital cameras, CD/DVD drives, hard drives and scanners will all benefit from the added bandwidth and performance gains
of the new implementation of the USB standard. Hi-Speed USB 2.0 provides the necessary fast data transfer rates that today’s
devices require, and combines the earlier specifications so older devices that operated under the original USB standards will
still work with Hi-Speed USB 2.0.
Will USB Devices Run Faster When Connected To A Hi-Speed USB 2.0 Bus?
Unfortunately, no. The Hi-Speed USB 2.0 specification is specifically written to allow developers to design higher speed
peripherals that can take advantage of the extra bandwidth. USB devices, though, will still operate at 12Mb/s at full-speed
and 1.5Mb/s at low-speed on a Hi-Speed USB 2.0 bus. Even though USB devices won’t run any faster, they can work
alongside Hi-Speed USB 2.0 devices on the same bus. However, if you plug in a Hi-Speed USB 2.0 device to a USB bus, the
speed of the Hi-Speed USB 2.0 device will decrease to 12Mb/s.
LaCie Big Disk USB 2.0
User’s Manual
6. USB Questions & Answers
page 33
What Is A USB Hub?
Technically, you can connect up to 127 devices to a single USB bus. For more than two devices, though, you must make new
connections using a peripheral called a "hub.” A hub, which you hook up directly to a USB connector on your computer,
usually has 4 or 7 output connections enabling you to connect the same number of peripherals. One of the hub's main
functions is to regenerate signals that lose part of their strength as they are transmitted via the USB cable. By connecting yet
another hub to a connector on the existing hub, you can then plug in a new set of peripherals and so on, up to a maximum
of 127.
Some hubs have no power supply and others are self-powered. When you choose a hub, opt for the self-powered variety, as
they have their own AC adapter. The most powerful hubs provide 0.5A of power to each port.
If you buy a hub, make sure that it supports per-port switching. This function prevents the entire chain of peripherals from
freezing up if one of them is not working properly or is down.
Will Hi-Speed USB 2.0 Devices Work On USB Hubs And Vice Versa?
You can use your Hi-Speed USB 2.0 devices with USB hubs, but the peripherals will be limited to USB performance levels.
There are Hi-Speed USB 2.0 hubs that are able to communicate in three modes: high-speed (480Mb/s), full-speed (12Mb/s),
and low-speed (1.5Mb/s). Hi-Speed USB 2.0 is backwards compatible, so you will be able to connect USB devices to HiSpeed USB 2.0 hubs; however, the USB devices will still maintain their normal performance levels (i.e. 12 Mb/s).
In order to achieve the fast data transfer rates of Hi-Speed USB 2.0, you must connect your Hi-Speed USB 2.0 device directly
to a Hi-Speed USB 2.0 port on either a computer or hub.
Tech Note:
• Avoid using USB connectors found on certain peripherals such as keyboards. These are passive (or passthrough) connectors that lead to power loss and unstable operation.
• Only use USB cables shorter than 5 meters (approximately 15 feet). Using longer cables may cause the
peripherals to malfunction due to excessive reduction in electrical signal strength.
For more information about the USB interface, please visit:
www.lacie.com/technologies
LaCie Big Disk USB 2.0
User’s Manual
7. Troubleshooting
page 34
7. Troubleshooting
In the event that your LaCie Big Disk USB 2.0 is not working correctly, please refer to the following checklist to find out where
the problem is coming from. If you have gone through all of the points on the checklist and your drive is still not working correctly, please have a look at the FAQs that are regularly published on our Web site – www.lacie.com. One of these FAQs
may provide an answer to your specific question. You can also visit the drivers pages, where the most recent software updates
will be available.
If you need further assistance, please contact your LaCie reseller or LaCie Technical Support (see 9. Contacting Customer
Service for details).
Manual Updates
LaCie is constantly striving to give you the most up-to-date, comprehensive User’s Manuals available on the market. It is our
goal to provide you with a friendly, easy-to-use format that will help you quickly install and utilize the many functions of your
new device.
If your manual does not reflect the configurations of the product that you purchased, please check our Web site for the most
current version available.
These Troubleshooting tips are divided up by operating system. Mac Users, see 7.1 Mac Users, Windows Users, see 7.2
Windows Users.
7. Troubleshooting
LaCie Big Disk USB 2.0
User’s Manual
page 35
7.1. Mac Users
The Problem
Questions to Ask
Possible Solutions
The drive is not
recognized by the
computer.
Is there an icon for the drive
appear on the desktop?
There should be an icon for the LaCie drive on the desktop.
If the drive does not appear, follow the rest of the
Troubleshooting tips to isolate the problem.
Does your computer’s
configuration meet the minimum
system requirements for use with
this drive?
Check section 2.1. Minimum System Requirements – Mac
Users for more information.
Is the drive’s power supply
connected and turned on?
Make sure that the power supply is properly connected (see
section 3.1. Connecting The Power Supply), that the drive
has been turned on by pressing the On/Off button the front
of the drive, and that the outlet the power supply is
connected to is also turned on.
Did you follow the correct
installation steps for the specific
interface and operating system.
Review the installation steps under 3.2. Connecting The
Interface Cable – 3.2.1. Mac Users.
Are both ends of the USB cables
firmly attached?
Check both ends of the USB cables and make sure that they
are fully seated in their respective ports. Try disconnecting
the cables, waiting 10 seconds, and then reconnecting them.
If the drive is still not recognized, restart your computer and
try again.
The drive turns on and off This is normal. Your drive has an autoswitching power feature, which means that if your drive is
connected to your computer, turning the computer on will automatically turn the drive on.
when you turn your
Likewise, turning the computer off will automatically turn the drive off. If you wish to power off
computer on and off.
the drive while it is connected to your computer, first make sure that your computer is not
accessing the drive and then follow the steps in section 3.5. Disconnecting Your LaCie Drive.
After you have disconnected the drive, push the blue On/Off button on the front of the drive to
turn the drive off.
7. Troubleshooting
LaCie Big Disk USB 2.0
User’s Manual
page 36
The Problem
Questions to Ask
Possible Solutions
The drive is not
recognized by the
computer.
Have the USB drivers been
installed correctly and enabled?
Mac Users: Open Apple System Profiler and click on the
Devices and Volumes tab. If your device is not listed,
recheck the cables and try the other troubleshooting tips
listed here.
Is there a conflict with other
device drivers or extensions?
Contact LaCie Technical Support for help.
Has the drive been formatted?
Make sure that the drive has been formatted properly. Please
see sections 4.1. Formatting And Partitioning Your LaCie
Drive and 5.1. File System Formats for more information.
Does your computer’s operating
system support the file system?
Check your computer’s documentation and see sections 4.1.
Formatting And Partitioning Your LaCie Drive and 5.1. File
System Formats for more information.
Did you get an “Error –50”
message while copying to a FAT
32 volume?
When copying files or folders from Mac OS 10.x to a FAT
32 volume, certain characters cannot be copied. These
characters include, but are not limited to:
?<>/\:
Check your files and folders to ensure that these types of
characters are not being used.
Did you get an error message
telling you that the drive has
been disconnected when coming
out of sleep mode?
Simply ignore this message. The drive will remount to the
desktop. LaCie drives conserve power by spinning down
when you set your computer to sleep mode, and when the
computer is “woken” from sleep, it does not give the drive
enough time to spin-up from its sleep mode.
Error messages under
Mac OS 10.x.
7. Troubleshooting
LaCie Big Disk USB 2.0
User’s Manual
page 37
The Problem
Questions to Ask
Possible Solutions
The drive is working
slowly.
Are there other USB devices
connected to the same port or
hub?
Disconnect any other USB devices and see if the drive’s
performance increases.
The drive is not running
noticeably faster when
connected via Hi-Speed
USB 2.0.
Are you operating in Mac OS
9.x?
Apple does not support the Hi-Speed USB 2.0 standard
under Mac OS 9.x. You will be limited to the slower transfer
rates of the original USB standard. For more information,
please see 5.3.1. Hi-Speed USB 2.0 Ports And Performance.
Are you operating in Mac OS
10.x?
Apple has only recently begun incorporating native HiSpeed USB 2.0 ports in their computers. To achieve HiSpeed USB 2.0 transfer rates, you will need to add a HiSpeed USB 2.0 PCI or PC card to your computer. For more
information, please see 5.3.1. Hi-Speed USB 2.0 Ports And
Performance.
Is the drive connected to a USB
port on your computer, or to a
USB hub?
If your drive is connected to a USB port or hub, this is
normal. A Hi-Speed USB 2.0 device can only operate at HiSpeed USB 2.0 performance levels when it is connected
directly to a Hi-Speed USB 2.0 port or hub. Otherwise, the
Hi-Speed USB 2.0 device will operate at the slower USB
transfer rates. For more information, please see sections
5.3.1. Hi-Speed USB 2.0 Ports and Performance and
6. USB Questions And Answers.
Is the drive connected to a HiSpeed USB 2.0 port on your
computer?
Check to see that the Hi-Speed USB 2.0 drivers for both
your host bus adapter and device have been installed
correctly. If in doubt, un-install the drivers and re-install
them.
Does your computer or
operating system support HiSpeed USB 2.0?
See sections 2.1. Minimum System Requirements – Mac
Users and 5.3. Optimizing Data Transfers for more
information.
7. Troubleshooting
LaCie Big Disk USB 2.0
User’s Manual
page 38
7.2. Windows Users
The Problem
Questions to Ask
Possible Solutions
The drive is not
recognized by the
computer.
Has the drive been formatted?
Make sure that the drive has been formatted properly. Please
see sections 4.1. Formatting And Partitioning Your LaCie
Drive and 5.1. File System Formats for more information.
Does your computer’s operating
system support the file system?
Check your computer’s documentation and see sections 4.1.
Formatting And Partitioning Your LaCie Drive and 5.1. File
System Formats for more information.
Is there an icon for the drive in
My Computer?
Go into My Computer and look for an icon and drive letter
assigned to the LaCie drive. If the drive does not appear,
follow the rest of the Troubleshooting tips to isolate the
problem.
Does your computer’s
configuration meet the minimum
system requirements for use with
this drive?
Check section 2.1. Minimum System Requirements –
Windows Users for more information.
Is the drive’s power supply
connected and turned on?
Make sure that the power supply is properly connected (see
section 3.1. Connecting The Power Supply), that the drive
has been turned on by pressing the On/Off button the front
of the drive, and that the outlet the power supply is
connected to is also turned on.
Did you follow the correct
installation steps for the specific
interface and operating system.
Review the installation steps under 3.2. Connecting The
Interface Cable – 3.2.2. Windows Users.
Are both ends of the USB cables
firmly attached?
Check both ends of the USB cables and make sure that they
are fully seated in their respective ports. Try disconnecting
the cables, waiting 10 seconds, and then reconnecting them.
If the drive is still not recognized, restart your computer and
try again.
7. Troubleshooting
LaCie Big Disk USB 2.0
User’s Manual
page 39
The Problem
Questions to Ask
Possible Solutions
The drive is not
recognized by the
computer.
Have the USB drivers been
installed correctly and enabled?
Windows 2000 Users: Go to Start > Settings > Control
Panel > System > Hardware tab > Device Manager button
> USB Controller. Click on the + sign next to the controller
icon, and you should see your device listed.
Windows XP Users: Go to Start > Control Panel >
Performance and Maintenance > System > Hardware tab >
Device Manager button > USB Controller. Click on the +
sign next to the controller icon, and you should see your
device listed.
If you still can’t see your device, recheck the cables and try
the other troubleshooting tips listed here.
Is there a conflict with other
device drivers or extensions?
The drive turns on and off
when you turn your
computer on and off.
Contact LaCie Technical Support for help.
This is normal. Your drive has an autoswitching power
feature, which means that if your drive is connected to your
computer, turning the computer on will automatically turn the
drive on. Likewise, turning the computer off will
automatically turn the drive off. If you wish to power off the
drive while it is connected to your computer, first make sure
that your computer is not accessing the drive and then follow
the steps in section 3.5. Disconnecting Your LaCie Drive.
After you have disconnected the drive, push the blue
On/Off button on the front of the drive to turn the drive off.
7. Troubleshooting
LaCie Big Disk USB 2.0
User’s Manual
page 40
The Problem
Questions to Ask
Possible Solutions
The drive is working
slowly.
Are there other USB devices
connected to the same port or
hub?
Disconnect any other USB devices and see if the drive’s
performance increases.
The drive is not running
noticeably faster when
connected via Hi-Speed
USB 2.0.
Is the drive connected to a USB
port on your computer, or to a
USB hub?
If your drive is connected to a USB port or hub, this is
normal. A Hi-Speed USB 2.0 device can only operate at HiSpeed USB 2.0 performance levels when it is connected
directly to a Hi-Speed USB 2.0 port or hub. Otherwise, the
Hi-Speed USB 2.0 device will operate at the slower USB
transfer rates. For more information, please see sections
5.3.1. Hi-Speed USB 2.0 Ports and Performance and
6. USB Questions And Answers.
Is the drive connected to a HiSpeed USB 2.0 port on your
computer?
Check to see that the Hi-Speed USB 2.0 drivers for both
your host bus adapter and device have been installed
correctly. If in doubt, un-install the drivers and re-install
them.
Does your computer or
operating system support HiSpeed USB 2.0?
See sections 2.1. Minimum System Requirements –
Windows Users and 5.3. Optimizing Data Transfers for
more information.
Are you using a certified HiSpeed USB 2.0 cable to connect
your drive?
Ensure that the cable you are using has been properly
certified. The Hi-Speed USB 2.0 cable that was shipped with
your LaCie drive has been properly certified and tested to
comply with USB standards.
LaCie Big Disk USB 2.0
User’s Manual
8. Contacting Customer Support
page 41
8. Contacting Customer Support
Before You Contact Technical Support
1) Read the manuals and review the Troubleshooting section.
2) Try to isolate the problem. If possible, make the drive the only external device on the CPU, and make sure that all of the
cables are correctly and firmly attached.
If you have asked yourself all of the pertinent questions in the troubleshooting checklist, and you still can't get your LaCie drive
to work properly, contact us via the provided Web link. Before contacting us, make sure that you are in front of your computer and that you have the following information on hand:
• Your LaCie drive's serial number
• Operating system(Mac OS or Windows) and version
• Computer brand and model
• Names of CD or DVD drives installed on your computer
• Amount of memory installed
• Names of any other devices installed on your computer
LaCie Big Disk USB 2.0
User’s Manual
9. Contacting Customer Support
page 42
LaCie Technical Support
LaCie Asia, Singapore and Hong Kong
Contact Us At:
http://www.lacie.com/asia/contact
LaCie Australia
Contact Us At:
http://www.lacie.com/au/contact/
LaCie Belgium
Contact Us At:
http://www.lacie.com/be/contact/
LaCie Canada
Contact Us At:
http://www.lacie.com/caen/contact/ (English)
LaCie Denmark
Contact Us At:
http://www.lacie.com/dk/contact/
LaCie Finland
Contact Us At:
http://www.lacie.com/fi/contact
LaCie France
Contact Us At:
http://www.lacie.com/fr/contact/
LaCie Germany
Contact Us At:
http://www.lacie.com/de/contact/
LaCie Italy
Contact Us At:
http://www.lacie.com/it/contact/
LaCie Japan
Contact Us At:
http://www.lacie.co.jp
LaCie Netherlands
Contact Us At:
http://www.lacie.com/nl/contact/
LaCie Norway
Contact Us At:
http://www.lacie.com/no/contact/
LaCie Spain
Contact Us At:
http://www.lacie.com/es/support/request
LaCie Sweden
Contact Us At:
http://www.lacie.com/se/contact/
LaCie Switzerland
Contact Us At:
http://www.lacie.com/chfr/contact
LaCie United Kingdom & Ireland
Contact Us At:
http://www.lacie.com/uk/support/request
LaCie USA
Contact Us At:
http://www.lacie.com/contact/
LaCie Grand Export
Contact Us At:
http://www.lacie.com/intl/contact/
9. Warranty
LaCie Big Disk USB 2.0
User’s Manual
page 43
9. Warranty
LaCie warrants your drive against any defect in material and workmanship, under normal use, for the period designated on
your warranty certificate. In the event this product is found to be defective within the warranty period, LaCie will, at its option,
repair or replace the defective drive.
This warranty is void if:
• The drive was operated/stored in abnormal use or maintenance conditions;
• The drive is repaired, modified or altered, unless such repair, modification or alteration is expressly authorized in writing by
LaCie;
• The drive was subjected to abuse, neglect, lightning strike, electrical fault, improper packaging or accident;
• The drive was installed improperly;
• The serial number of the drive is defaced or missing;
• The broken part is a replacement part such as a pickup tray, etc.
• The tamper seal on the drive casing is broken.
LaCie and its suppliers accept no liability for any loss of data during the use of this device, or for any of the problems caused
as a result.
LaCie will not, under any circumstances, be liable for direct, special or consequential damages such as, but not limited to,
damage or loss of property or equipment, loss of profits or revenues, cost of replacement goods, or expense or inconvenience
caused by service interruptions.
Any loss, corruption or destruction of data while using a LaCie drive is the sole responsibility of the user, and under no circumstances will LaCie be held liable for the recovery or restoration of this data.
Under no circumstances will any person be entitled to any sum greater than the purchase price paid for the drive.
To obtain warranty service, call LaCie Technical Support. You will be asked to provide your LaCie product’s serial number, and
you may be asked to furnish proof of purchase to confirm that the drive is still under warranty.
All drives returned to LaCie must be securely packaged in their original box and shipped with postage prepaid.
Important Info: Register online for free technical support:
www.lacie.com/register
LaCie Big Disk USB 2.0
User’s Manual
Glossary
page 44
Glossary
Asynchronous – Data transfer method where the data is transferred independently of other processes. With this transfer
method, the intervals between transmissions can vary, and data can be resent if it is initially missed.
Backup – (1) The act of creating at least one additional copy of data onto a different (and safe) storage device from where it
can be retrieved at a later time if needed. (2) A copy of a file, directory, or volume on a separate storage device from the
original, for the purposes of retrieval in case the original is erased, damaged, or destroyed.
Bit – The smallest measure of computerized data, either a 1 or a 0. Eight
bits equal one byte, or one character.
Block – A very small section of the storage media comprised of one or more sectors. A block is the smallest amount of space
allocated on a drive for data storage. By default, a sector of data consists of 512 bytes.
Buffer – RAM cache that is faster than the data that is being delivered. Buffers are used so data may be stored and delivered
to the receiving item as it is needed.
Bus – Electronic links that enable data to flow between the processor, RAM and extension cables (peripherals).
Byte – A sequence of adjacent binary digits, or bits, considered as a unit, 8 bits in length. There are 8 bits in 1 byte. See also
MB (Megabyte) or GB (Gigabyte).
Cache, -ing – This is an area of electronic storage (usually RAM) set aside to store frequently used data from electromechanical storage (hard drives, floppy disks, CD/DVD-ROM, tape cartridges, etc.) Therefore, storing frequently used data in
RAM can enhance your system’s overall response to disk-intensive operations significantly.
Configuration – When talking about a PC, configuration is understood to be the sum of the internal and external components
of the system, including memory, disk drives, the keyboard, the video subsystem and other peripherals, such as the mouse,
modem or printer. The configuration also implies software: the operating system and various device managers (drivers), as
well as hardware settings and options set by the user via configuration files.
Controller – This is a component or an electronic card (referred to in this case as a "controller card," such as PCI or PCMCIA
cards) that enables a computer to communicate with or manage certain peripherals. The controller manages the operation of
the peripheral associated with it, and links the PC bus to the peripheral via a ribbon cable inside the PC. An external
controller is an expansion card which fills one of the free slots inside your PC and which enables a peripheral (CD-ROM
drive, scanner or printer, for instance) to be connected to the computer.
Cross-platform – Term that refers to a device that is able to be operated by both Mac and Windows operating systems.
Data Stream – The flow of data that accomplishes a task, usually related to moving data from storage to computer RAM or
between storage devices.
LaCie Big Disk USB 2.0
User’s Manual
Glossary
page 45
Digital – Discrete information that can be broken down to zero or one bits.
Driver (peripheral manager) – A software component that enables the computer system to communicate with a peripheral.
Most peripherals will not operate correctly – if at all – if the appropriate drivers are not installed on the system.
File System – Links the physical map of a disc to its logical structure. Thanks to the file system, users and computers can easily
display path, directories and files recorded onto the disc.
Firmware – Permanent or semi-permanent instructions and data programmed directly into the circuitry of a programmable
read-only memory or an electronically-erasable, programmable read-only memory chip. Used for controlling the operation of
the computer or tape drive. Distinct from the software, which is stored in random access memory and can be altered.
Folder – A list created on a disk to store files. Creating folders and sub-folders enables you to organize the storage of your
files in a logical, hierarchical manner so that you can find and manage them more easily.
Format, -ting, -ted – This is a process where a device is prepared to record data. In this process, the hard disk writes special
information onto its own recording surfaces into areas (blocks) that are ready to accept user data. Since this operation causes
all current user data stored on the hard disk to be lost, this is an infrequent operation that usually only happens at the factory
that created the hard disk. It is unusual for something to happen to a hard disk that requires the end-user to initially perform
this operation.
GB (GigaByte) – This value is normally associated with data storage capacity. Basically, it means a thousand million or a
billion bytes. In fact, it equals 1,073,741,824 bytes (or 1,024 x 1,024 x 1,024).
Hardware – Physical components of a computer system, including the computer itself and peripherals such as printers,
modems, mice, etc.
Host Bus Adapter (HBA) – A printed circuit board that installs in a standard microcomputer and an interface between the
device controller and the computer. Also called a controller.
Initialize, -ed, Initialization – After a hard drive (or other storage device) is formatted and partitioned, some special data
needs to be written to it that helps the Mac and Windows create files and save data. The process is called initialization. This
process, like formatting, causes all user data on the storage device to be lost.
Interface – The protocol data transmitters, data receivers, logic and wiring that link one piece of computer equipment to
another, such as a hard drive to an adapter or an adapter to a system bus. Protocol means a set of rules for operating the
physical interface, such as: do not read or write before the drive is ready.
I/O (Input/Output) – Refers to an operation, program or device whose purpose is to enter data into or to extract data from a
computer.
Isochronous – Data transfer method that ensures that data flows continuously and at a steady rate. These transfers provide
guaranteed transmission opportunities at defined intervals.
LaCie Big Disk USB 2.0
User’s Manual
Glossary
page 46
Kb (Kilobit) – Equivalent to 1,000 bits.
Kb/s – Kilobits per second. 480Kb/s is equal to 60KB/s.
KB (KiloByte) – Basically, this means 1,000 bytes, but it is actually 1,024 bytes.
KB/s – Kilobytes per second. A means of measuring throughput.
Mb (Megabit) – Equivalent to 1,000,000 bits.
Mb/s – Megabits per second. A means of measuring throughput. 480Mb/s is equal to 60MB/s.
MB (Megabyte) – Basically means one million bytes, but is actually 1,024 Kilobytes or 1,024 x 1,024 bytes, which equals
1,048,576 bytes.
MB/s – Megabytes per second. A means of measuring throughput.
Media – The material or device used to store information in a storage subsystem, such as a tape cartridge, CD, DVD or disk
drive.
Operating System (OS) – Software that controls the assignment and use of hardware resources such as memory, processor
time, disk space and peripherals. An operating system is the basis on which software (applications) run. Windows, Mac OS
and UNIX are among the most common.
Overwrite – To write data on top of existing data thus erasing the original data.
Partition, -ing – After formatting, the hard drive is not yet ready to store files. It must be divided into sections that will contain
special information required for a Mac or PC to operate and other sections that will contain the files. This process of dividing
up the hard drive is called partitioning. A partition is just one section of the hard drive that will contain either special data put
there by Silverlining or other files and data.
Peripheral – A generic term applied to printers, scanners, mice, keyboards, serial ports, graphics cords, disk drives and other
computer subsystems. This type of peripheral often relies on its own control software, known as a peripheral driver.
Port, hardware – A connection component (SCSI port, for example) that enables a microprocessor to communicate with a
compatible peripheral.
Port, software – A memory address that identifies the physical circuit used to transfer information between a microprocessor
and a peripheral.
RAM (Random Access Memory) – Generally referred to as a computer’s “memory.” An integrated circuit memory chip that
allows information to be stored and retrieved by a microprocessor or controller. The information can be stored or accessed in
any order, and all storage locations are equally accessible.
LaCie Big Disk USB 2.0
User’s Manual
Glossary
page 47
Seek Time – The amount of time (in thousandths of a second, or milliseconds) that it takes a hard drive’s read/write head to
move to a specific location on the disk. Average seek, then, is the average of a large number of random samplings all over
the disk. Seek time is CPU independent, meaning that seek time is the same for a disk drive, whether it is attached to a
computer or not.
Software – In a nutshell, software is a set of instructions for the computer. A set of instructions to perform a particular task is
called a program. There are two main types of software: system software (an operating system such as Mac OS or Windows)
which controls the operation of the computer and application software (programs such as Word or Excel) which enable users
to perform tasks such as word processing, spreadsheet creation, graphics, etc.
Storage – In computers, any equipment in which information may be kept. PCs generally use disk units and other external
storage media (diskettes, CD-ROMs, magnetic disks, etc.) for permanent storage of information.
Striping – Spreading data evenly over multiple disk drives to enhance performance. Data striping can be performed on a bit,
byte or block basis for optimum application performance.
Transfer Rate – The rate at which the drive sends and receives data from the controller. Transfer rates for reading data from
the disk drive may not be the same as the transfer rate for writing data to the disk drive. Transfer rates are CPU dependent,
meaning that regardless of how great a transfer rate your drive is capable of, the actual transfer rate can only be as fast as
the slowest of your hard drive and computer.
Volume – A desktop mountable storage area, may be a partition of a hard drive, a removable disk or a cartridge. Typically
measured in Megabytes or Gigabytes.
Utility – Software designed to perform maintenance tasks on the system or its components. Examples include backup
programs, programs to retrieve files and data on disk, programs for preparing (or formatting) a disk or and resource editors.


