1
7
5
4
1
2
3
8
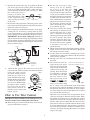
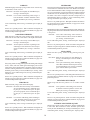
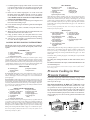
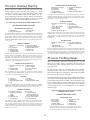
5. LOCKING BRACKET
6
The locking bracket on the inside of the
canner body engages with the air vent/cover
lock to prevent the cover from being opened
when there is pressure in the unit.
6. SEALING RING
The sealing ring fits into the canner cover
and forms a pressure-tight seal between
the cover and body during canning and
cooking.
7. OVERPRESSURE PLUG
The overpressure plug is located in the canner cover. It will automatically pop out and
release steam in case the vent pipe becomes
blocked and/or clogged and pressure cannot
be released normally.
1. PRESSURE DIAL GAUGE
The pressure dial gauge registers pressure
in both pounds (outer scale) and metric
measure (inner scale). The pointer moves
around the dial indicating the pressure
within the unit.
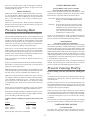
8. CANNING-COOKING RACK
The canning-cooking rack is placed in the
bottom of the canner to hold jars off the
bottom of the unit while canning. When
cooking, the rack is used for steaming
foods. It can also be used to hold foods
such as vegetables out of the cooking liquid
which allows several foods to be cooked at
the same time without an intermingling of
flavors. When it is desirable to blend flavors, do not use the canning-cooking rack.
The canning-cooking rack must always be
used when canning.
The dial gauge is a delicate instrument
which must be handled with care. Before first use, it will
be necessary to assemble the dial gauge properly and attach
it to the canner cover (see page 3). The pressure dial gauge
needs to be checked for accuracy prior to each canning season
and if any of the following conditions exist: cover has been
submerged in water or dropped, gauge glass is broken or has
fallen out, parts are rusty, pointer is not in the “0” block, or
if you believe the gauge may not be accurate.The gauge can
usually be checked at your local county extension office. If
you are unable to have your dial gauge checked locally, carefully remove and package the gauge and send it to the Presto
Consumer Service Department. See Service Information on
page 23. An accurate gauge is necessary to help prevent food
spoilage and possible food poisoning.
Before Using Canner for the
First Time
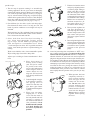
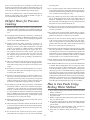
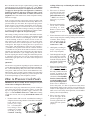
1. Remove the air vent/cover
lock from the canner cover.
The cup portion of the air
vent/cover lock, on the inside
of the cover, unscrews from
the pin (Fig. A).
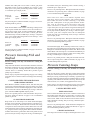
.2. PRESSURE REGULATOR
The pressure regulator is a solid onepiece unit. Pressure readings on the pressure canner are registered only on the
pressure gauge (see above) and can be
controlled and maintained by adjusting
heat settings.
2. Remove the sealing ring by
simply pulling it from the
sealing ring groove.
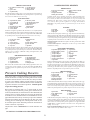
Pin
Fig. A
Small
Gasket
Cover
Cup
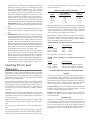
3. Remove the overpressure plug by pushing it out of its
opening from the top of the cover.
3. VENT PIPE
4. Wash the cover and body with hot, sudsy water. Do not
submerse the cover in water or let the gauge come in
contact with any liquid. The inside mechanism of the
gauge may be damaged if it is submersed or if water is
allowed to run over it. Scrub the sealing ring groove to
remove the manufacturing oils.
The pressure regulator fits over the vent
pipe and allows excess pressure to be
released.
4. AIR VENT/COVER LOCK
The air vent /cover lock automatically
“vents” or exhausts air from the canner
and acts as a visual indication of pressure
in the canner. The small gasket must be
in place for the air vent/cover lock to seal
completely.
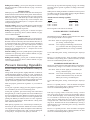
5. Reinsert the air vent/cover
lock making sure the
small gasket is in place
as shown (Fig. B).
2
Fig. B
Cover
Cup
Pin
Small Gasket