1
H E A T S T A R
USER MANUAL
Models:
THP750S
THP450
R A D I A N T
HEATSTAR RADIANT PANEL HEATER
P A N E L
1.
2.
3.
4.
Important Safety Instructions
Specification Data
Selection Guidelines
Installation and Operating Instructions – THP750S
4.1
Model THP750S
4.2
Ceiling Mounting
4.3
T-Bar Ceiling Mounting
4.4
Flush Mounting
4.5
Security Mounting
5. Installation and Operating Instructions – THP450
5.1
Model THP450
5.2
Ceiling Mounting
5.3
Wall Mounting
6. Warranty
THERMOFILM AUSTRALIA 27 Rosalie Street, Springvale VIC 3171
Ph: +61 (0) 3 9562 3455
Fx: +61 (0) 3 9548 3979
www.thermofilm.com.au
H E A T E R S
TABLE OF CONTENTS
H E A T S T A R
•
Indoor use only.
•
Ensure the rated voltage is 230-240V.
•
Do not install the heater directly below a socket.
•
Do not operate this appliance if the cable or plug becomes damaged.
•
In case of heater fault or damaged supply lead, the appliance should be returned to the
distributor / manufacturer for repair.
•
Ensure the appliance is switched OFF before connecting to the mains power supply.
•
Do not cover heater in any manner, as the appliance may overheat and become a fire risk.
•
Do not operate in areas where gasoline, paint or other flammable liquids are used or stored.
•
Switch off the power supply and unplug from the mains socket when not in use, before
cleaning or changing accessories.
•
Do not immerse in liquid or allow liquid into the interior of the appliance, as this could create
an electric shock hazard.
•
Do not operate appliance with wet hands. Always ensure that hands are dry before operating
or adjusting any switch on the product or touching the plug and mains supply connections.
•
Do not cover. NEVER use the heater to dry clothes or similar articles.
•
Do not position the appliances close to curtains or other combustible materials. Keep
combustible material such as furniture, cushions, bedding, paper, clothes, curtains etc. at least
1.0m away from the heater.
•
This appliance heats up when in use. To avoid burns, do not let bare skin touch hot surface.
Switch off and let cool down before moving. Store the heater in a cool, dry location when not
in use.
•
This appliance is not intended for use by persons (including children) with reduced physical,
sensory or mental capabilities, or lack of experience and knowledge, unless they have been
given supervision or instruction concerning use of the appliance by a person responsible for
their safety.
THERMOFILM AUSTRALIA 27 Rosalie Street, Springvale VIC 3171
Ph: +61 (0) 3 9562 3455
Fx: +61 (0) 3 9548 3979
www.thermofilm.com.au
H E A T E R S
Prior to installing and operating the heater, read these instructions carefully and retain
for future reference.
P A N E L
•
R A D I A N T
1. Important Safety Instructions
H E A T S T A R
Model
THP750
THP450
Power (W)
750W
450W
Voltage (V)
230-240V
230-240V
Dimension (mm)
1190 x 590 x 30mm
1080 x 380 x 25mm
Rating
IP44
IP44
3. Selection Guidelines
For comfort heating applications, a heat load calculation should be made and HEATSTAR units
selected to meet the heating requirements.
Model THP750S
The THP 750S model is designed for ceiling mounting. As a guideline for normally insulated areas with
a ceiling height from 2.4 to 3.6m, allow 15 square meters of floor space per heater.
For example, a room of 45 square meters would require 3 x THP 750S units
(45 sq m ÷ 15 sq m = 3 units)
For zone heating applications, allow one (1) THP 750S unit per person, and mounting height should be
2.4 meters.
Model THP450
The THP 450 model is suitable for ceiling or wall mounting. As a guideline for normally insulated areas
with ceiling height of 2.4 to 3.2m, allow 9 square meters of floor space per heater.
Note: The THP 450 will heat larger rooms than 9 square meters but longer warm up time is required.
4. Installation and Operating Instructions – THP 750S
4.1 Model THP750S
The THP 750S is designed to mount directly onto ceilings, suspend from high ceilings, fit into T-Bar
ceilings, or flush mount in plastic ceilings.
It is recommended that an appropriate thermostat control and or timer control is used in conjunction
with the THP 750S.
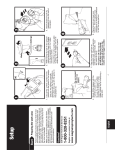
4.2 Ceiling Mounting
Fix mounting bracket in the desired location
with suitable fixing devices more than capable
of safely supporting the heater.
The fixing devices should be suitable for the
type of mounting surface; plaster, timber,
concrete etc
Position the heater onto the bracket
THERMOFILM AUSTRALIA 27 Rosalie Street, Springvale VIC 3171
Ph: +61 (0) 3 9562 3455
Fx: +61 (0) 3 9548 3979
www.thermofilm.com.au
H E A T E R S
For example, a room of 18 square meters would require 2 x THP 450 units
(18 sq m ÷ 9 sq m = 2 units)
P A N E L
Note: The THP 750S will heat larger rooms than 15 square meters but a longer warm up time is
required.
R A D I A N T
2. Specification Data
H E A T S T A R
4.3 T-Bar Ceiling Mounting
Remove ceiling tile from the standard 600 x 1200 T-Bar ceiling grid and fit the heater into position.
4.4 Flush Mounting – Plaster Ceilings
Purchase a standard 600 x 1200 flush mounting bracket (same as used for skylight brackets). Fit flush
mounting bracket into ceiling, and locate heater into bracket.
4.5 Security Mounting – Prison Locations
5. Installation and Operating Instructions – THP 450
5.1 Model THP 450
The THP 450 is designed for wall or ceiling mounting.
5.2 Ceiling Mounting
Fix mounting bracket in the desired location
with suitable fixing devices more than capable
of safely supporting the heater.
Position the heater onto the bracket
Then use the 2 screws provided to lock the
heater into the bracket.
5.3 Wall Mounting
Fix mounting bracket in the desired location
with suitable fixing devices more than capable
of safely supporting the heater.
The fixing devices should be suitable for the
type of mounting surface; plaster, timber,
concrete etc
THERMOFILM AUSTRALIA 27 Rosalie Street, Springvale VIC 3171
Ph: +61 (0) 3 9562 3455
Fx: +61 (0) 3 9548 3979
www.thermofilm.com.au
H E A T E R S
The fixing devices should be suitable for the
type of mounting surface; plaster, timber,
concrete etc
P A N E L
Special security mounting brackets are available from Thermofilm. These are suitable for high security
locations and areas where vandalism may occur.
R A D I A N T
Then use the 2 screws provided to lock the
heater into the bracket.
H E A T S T A R
Then use the 2 screws provided to lock the
heater into the bracket.
R A D I A N T
Position the heater onto the bracket
5. Warranty
To claim for Warranty, please retain your receipt as proof of purchase and return the faulty heater to
the place you purchased it.
Warranty does not apply to heaters which have been misused or used in conditions other than those
for which they were intended for. Nor will it apply in the event of damage or accident resulting from
negligence, lack of care or maintenance, or if the heater has been modified in any way.
Thermofilm Australia Pty Ltd reserve the right to reject any Warranty claim deemed to be false.
P A N E L
HEATSTAR heaters have a TWO (2) YEAR WARRANTY*.
Retailers must have Warranty claims authorised by Thermofilm Australia. Ph 03 9562 3455
THERMOFILM AUSTRALIA 27 Rosalie Street, Springvale VIC 3171
Ph: +61 (0) 3 9562 3455
Fx: +61 (0) 3 9548 3979
www.thermofilm.com.au
H E A T E R S
* Conditions apply. Please refer the Thermofilm standard terms of sale and warranty for details.