1
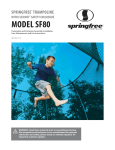
www.sister.ee
User’s Manual for TRAMPOLINE
INTRODUCTION
Before you begin use of this trampoline, be sure to carefully read all the information
Provided to you in this manual. Just like any other type of physical recreational activity,
Participants can be injured. To reduce the risk of injury, be sure to follow appropriate safety rules
and tips.
Misuse and abuse of this trampoline is dangerous and can cause serious injury!
Trampoline, being rebounding devices, propel the performer to unaccustomed heights and
into a variety of body movements.
Always inspect the trampoline before each use for wear-out mat, loose or missing parts.
Proper assembly, care and maintenance of product, safety tips, warnings, and proper
Techniques in jumping and bouncing are all included in this manual. All users and
Supervisors must read and familiarize themselves with these instructions. Anybody who
chooses to use this trampoline must be aware of their own limitations in regards to
performing various jumps and bounces with this trampoline.
Warning !
NO MORE THAN ONE PERSON AT A TIME ON THE TRAMPOLINE! MULTIPLE
JUMPERS INCREASE THE RISK OF INJURY SUCH AS BROKEN HEAD, NECK, LEG, OR
BACK.
INCREASE
CHANCES
DO NOT PERFORM SOMERSAULTS (FLIPS AS THIS WILL
YOUR
OF LANDING ON YOUR HEAD OR NECK.
Do not attempt or allow somersaults, Landing on the head or neck can cause serious injury, paralysis, or
death, even when landing in the middle of the bed.
Do not allow more than one person on the trampoline. Use by more one person at the same time can
increase the chance of injury.
Use trampoline only with mature, knowledgeable supervision.
Do not attempt or allow somersaults. Serious injuries, paralysis, or death may result.
Do not allow more than one person on the trampoline at a time.
Use trampoline only with mature, knowledgeable supervision.
Not recommended for children under 6 years of age.
Inspect before use. Keep frame padding in place.
Climb on and off the trampoline. Do not use the trampoline as a springboard.
Stop bounce by flexing knees as feet come in contact with the bed.
Learn fundamental bounce and body positions thoroughly.
Avoid bouncing too high. Maintain control.
While keeping the head erect, focus eyes on the trampoline toward the perimeter.
Bounce in the center of the bed.
Avoid bouncing when tired.
Secure the trampoline against unauthorized use.
Keep objects away which could interfere with the performer.
Do not use the trampoline while under the influence of alcohol or drugs.
For equipment information, contact manufacture or instructor.
For skill training information, contact a trainer certification organization.
Do not use when trampoline is wet or in windy conditions.
Read instructions before use.
Always consult a physician before performing any kind of physical activity.
PLEASE RETAIN THIS INFORMATION FOR FUTURE REFERENCE
INFORMATION ON USE OF THE TRAMPOLINE
Initially, you should get accustomed to the feel and bounce of the trampoline. The focus must be on the
fundamentals of your body position and you should practice each bounce (the basic bounces) until you can
do each skill with ease and control.
1
To brake a bounce, all you need to do is flex your knees sharply before they come in contact with the
mat of the trampoline. This technique should be practiced while you are learning each of the basic bounces.
The skill of braking should be used whenever you lose balance or control of your jump.
Always learn the simplest bounce first and be consistent with the control of your bounce before moving on to
more difficult and advanced bounces. A controlled bounce is one when your take off point and landing
point is the same spot on the mat. If you move up to the next bounce without first mastering the previous,
you increase your chances of getting injured.
Do not bounce on the trampoline for extended periods of time because fatigue can increase your chances of
becoming injured. Bounce for a brief period of time and then allow others to join in on the fun! Never have
more than one person bouncing on the trampoline.
Jumpers should wear t-shirt, shorts or sweats, and regulation gymnastics shoes, heavy socks, or be barefoot.
If you are just beginning, you may want to wear long sleeve shirts and pants to protect against scrapes and
abrasions until you master correct landing positions and form. Do not wear hard sole shoes, such as tennis
shoes, on the trampoline as this will cause excessive wear on the mat material.
You should always mount and dismount properly in order to avoid injury. To mount properly, you should
PLACE your hand on the frame and either step or roll up onto the frame, over the springs, and onto the
trampoline mat. You should always remember to place your hands onto the frame while mounting or
dismounting. Do not step directly onto the frame pad or grasp the frame pad. To dismount properly, move over
to the side of the trampoline and place your hand onto the frame as a support and step from the mat to the
ground. Smaller children should be assisted when mounting and dismounting the trampoline.
Do not bounce recklessly on the trampoline since this will increase your chances of getting injured. The key to
safety and having fun on the trampoline is control and mastering the various bounces. Never try to
out-bounce another bouncer in terms of height! Never use the trampoline alone without supervision.
ACCIDENT CLASSIFICATION
Mounting and Dismounting: Be very careful when getting on and off the trampoline. DO NOT mount the
trampoline by grabbing the frame pad, stepping onto the springs, or by jumping onto the mat of the trampoline
from any object (i.e. a deck, roof, or ladder). This will increase your chances of getting injured! DO NOT
dismount by jumping off the trampoline and landing on the ground regardless of the makeup of the ground. If
small children are playing on the trampoline, they may need help in mounting and dismounting.
Use of Alcohol or Drugs: DO NOT consume any alcohol or drugs when using this trampoline! This will
increase your chances of getting injured since these foreign substances impairs your judgements, reaction
time, and overall physical coordination
Multiple Jumpers: If you have multiple jumpers (more than on person on the trampoline at any on time), you
increase the chance of getting injured. Injuries could occur when you fly off the trampoline, lose control,
collide with the other jumper(s), or land on the springs. Generally, the lightest person on the trampoline will
get injured.
2
Striking the Frame of Springs: When playing on the trampoline, STAY in the center of the mat. This will reduce
your risk of getting injured by landing on the frame or springs. Always keep the frame pad covering the frame
of the trampoline. DO NOT jump or step onto the frame pad directly since it was not intended to support the
weight of a person.
Loss of Control: DO NOT try difficult manoeuvres, or any manoeuvres until you have mastered the previous
manoeuvre, or if you are just learning how to jump on a trampoline. If you do, you will increase your risk of
getting injured by landing on the frame, springs, or off the trampoline completely because you might lose
control of your jump. A controlled jump is considered landing on the same spot that you took off from. If you
do lose control when you are jumping on the trampoline, bend your knees sharply when you land and this will
allow you to regain control and stop your jump.
Somersaults (Flips): DO NOT PERFORM somersaults of any type (backwards or forwards) on this trampoline.
If you make a mistake when trying to perform a somersault, you could land on your head or neck.. This will
increase your chances of getting your neck or back broken, which will result in death or paralysis.
Foreign Objects: DO NOT use the trampoline if there are pets, other people, or any objects underneath the
trampoline. This will increase the chances of an injury occurring. DO NOT hold any foreign objects in your
hand and DO NOT place any objects on the trampoline while anyone is playing on it. Please be aware of what
is overhead when you are playing on the trampoline. Tree limbs, wires, or other objects located over the
trampoline will increase your chances of getting injured.
Poor Maintenance of Trampoline: A trampoline in poor condition will increase your risk of getting injured.
Please inspect the trampoline before each use for bent steel tubes, torn mat, loose or broken springs, and
overall stability of the trampoline.
Weather Conditions: Please be aware of the weather conditions when using the trampoline. If the mat of the
trampoline is wet, the jumper could slip and injure him or herself. If it is to windy, jumpers could lose control.
Limiting Access: When the trampoline is not in use, always store the access ladder in a secure place so that
unsupervised children cannot play on the trampoline.
TIPS TO REDUCE THE RISK ACCIDENTS
Jumper’s role in accident prevention
The key here is to stay in control of your jumps. DO NOT move onto more complicated, more difficult
manoeuvres until you have mastered the basic, fundamental bounce.
Education is also key to safety and very important. Read, understand, and practice all safety precautions and
warnings prior to using the trampoline. A controlled jump is when you land and take off from the same location.
For additional safety tips and instructions, contact a certified trampoline instructor.
Supervisor’s Role in Accident Prevention
Supervisor need to understand and enforce all safety rules and guidelines. It is the responsibility of the
supervisor to provide knowledgeable advice and guidance to all jumpers of the trampoline. If supervision is
unavailable or inadequate, the trampoline could be stored in a secure place, disassembled to prevent
unauthorized use, or covered with a heavy tarpaulin that can be locked or secured with lock or chains. The
supervisor is also responsible to ensure that the safety placard is placed on the trampoline and that jumpers
are informed of these warnings and instructions.
3
TRAMPOLINE SAFETY INSTRUCTIONS
CARE AND MAINENANCE:
Inspect the trampoline before each use and replace any worn, defective or missing parts. The following
conditions could represent potential hazards:
Missing, improperly positioned, or insecurely attached the frame padding
Punctures, frays, tears, or holes worn in the bed or frame padding
Deterioration in the stitching or fabric of the bed or frame padding
Ruptured springs
A bent or broken frame
A sagging bed
Sharp protrusions on the frame or suspension system
JUMPERS:
Trampolines over 20in.(51cm) tall are not recommended for use by children under 6 year of age
Do not use trampoline if you have consumed alcohol or any drugs
Remove all hard sharp objects from person before using trampoline
You should climb on and off in a controlled and careful manner. Never jump on or off the trampoline and
never use the trampoline as a device to bounce onto or into another object.
Always learn the basic bounce and master each type of bounce before trying more difficult types of
bounces. Review the Basic Skills Section to learn how to do the basics
To stop your bounce, flex your knees when you land on the mat with your feet
Always be in control when you are bouncing on the trampoline. A controlled jump is when you land at the
same spot that you took off from. If at any time you feel out of control, try to stop your bouncing.
Do not jump or bounce for prolonged periods of time or too high for a number of jumps
Keep your eyes on the mat to maintain control. If you do not, you could lose balance or control
Never have more than 1 person on the trampoline at any time
Always have a supervisor watching you when you are on the trampoline
For additional information concerning the trampoline equipment, contact the manufacturer.
SUPERVISORS
Educate yourself with the basic jumps and safety rules. To prevent and reduce the risk of injuries, enforce all
safety rules and ensure that new jumpers learn the basic bounces before trying more difficult and advanced
jumps
All jumpers need to be supervised, regardless of skill level or age.
Never use the trampoline when it is wet, damaged, dirty, or worn out. The trampoline should be inspected
before any jumpers start bouncing on it.
Keep all objects that could interfere with the jumper away from the trampoline. Be aware of what is
overhead, underneath, and around the trampoline.
To prevent unsupervised and unauthorized use, the trampoline should be secured when not in use.
TRAMPOLINE PLACEMENT
The minimum overhead clearance required is 24 feet (7.3 meters). In terms of horizontal clearance, please
4
ensure that no hazardous objects are near the trampoline such as tree limbs, other recreational objects (i.e.
swing sets, swimming pools), electrical power wiring, walls, fences, etc.
For safe use of the trampoline, please be aware of the following when selecting a place for your trampoline:
Make sure it is placed on a level surface
The area is well-lighted
There are no obstructions beneath the trampoline
If you do not follow these guidelines, you increase the risk of someone getting injured.
LESSON PLAN
The following lessons are suggested in order to learn basic steps and bounces before moving onto more
difficult, complicated bounces. Before actually getting on and using the trampoline, you should read and
understand all safety instructions. A complete discussion and demonstration of body mechanics and
trampoline guidelines should occur between the supervisor and student as well.
Lesson 1
A. Mounting and Dismounting - Demonstration of proper techniques
B. The Basic Bounce-Demonstration and practice
C. Braking (Check the Bounce) - Demonstration and practice. Learn to brake on command
D. Hands and knees - Demonstration and practice. Stress should be on four- point landing and alignment
Lesson 2
A. Review and practice of techniques learned in Lesson 1
B. Knee Bounce-Demonstration and practice. Learn the basic down to knee and back up before trying half
5
twist to left and right
C. Seat Bounce -Demonstration and practice. Learn basic seat bounce then add a knee bounce, hands and
knees; repeat
Lesson 3
A. Review and practice skills and techniques learned in previous lessons
B. Front Drop-To avoid mat burns and teach the front bounce position, all students should be requested to
assume the prone position (face down on the ground) while the instructor checks for faulty positions that
could cause injury.
C. Start with a hands and knees bounce and then extend body into prone position, land on the mat and
return to feet
D. Practice Routine-Hands and knees Bounce, Front Bounce, back to feet, seat bounce, back to feet
Lesson 4
A. Review and practice skills and techniques learned in previous lessons
B. Half-Turn
i. Start from front drop position and as you make contact with the mat, push off with arms in either the
right or left direction and turn head and shoulders in same direction.
ii. During turn, be sure to keep back parallel to mat and head up.
iii After completing turn, land in front drop position
After completing this lesson, the student now has a basic foundation of trampoline bounces. Jumpers should
be encouraged to try and develop their own routines with the emphasis on control and form.
A game that can be played in order to encourage students to try and develop routines is “BOUNCE”. In this
game, players count from 1 to X. Player one starts with a maneuver. Player two has to do Player One’s
maneuvered and adds on another. Player Three does the maneuvers of one and Two and then adds a third
maneuver. This continues until a player cannot do the routine until someone spells out the word “BOUNCE”.
The last remaining contestant is deemed the winner! Even when playing this game, it is important to perform
your routines under control and not try difficult or highly skilled bounces that you have not yet mastered.
A certified trampoline instructor should be contacted to further develop your trampoline skills.
BASIC TRAMPOLINE BOUNCES
THE BASIC BOUNCE
1. Start from standing position, feet shoulder width apart
and with bead up and eyes on mat
2. Swing arms forward and up and around in a circular
motion.
3. Bring feet together while in mid-air and point toes
downward
4. Keep feet shoulder width apart when landing on mat.
KNEE BOUNCE
1. Start with basic bounce and keep it low
2. Land on knees keeping back straight, body erect and
use your arms to maintain balance
3. Bounce back to basic bounce position by swinging
arms up
SEAT BOUNCE
6
1. Land in a flat sitting position.
2. Place hands on mat besides hips
3. Return to erect position by pushing with hands.
FRONT BOUNCE
1. Start with front bounce position
2. Land in prone ( face down) position and keep hand
and arms extended forward on mat
3. Push off the mat with arms to return to standing
position
180 DEGREE BOUNCE
1. Start with front bounce position
2. Push off with left or right hands and arms (depending
on which way you wish to turn)
3. Maintain head and shoulders in the same direction and
keep back parallel to mat and head up
4. Land in prone position by return to standing position by
pushing up with hands and arms
ASSEMBLY INSTRUCTIONS
To assemble this trampoline all you need is our special spring loading tool provided with this product.
During periods of non-use. This trampoline can be easily disassembled and stored.
Please read the assembly instructions before beginning to assemble the product.
PRIOR TO ASSEMBLING
Please refer to page for part descriptions and numbers. The assembly steps use these descriptions and
numbers as reference for your convenience.
Make sure that you have all parts listed. If you are missing any parts, please refer to page for Instructions on
how to attain any parts.
To prevent any injuries to your hands from pinch points during assembly, please use gloves to protect your
hands.
PARTS LIST
Please select your trampoline size.
Reference Part
Number
Number
Description
8'
10'
12'
13'
14'
15'
1
TX01
Top rail with leg sockets(left)
6
8
8
4
4
12
2
TX02
Leg base
0
0
0
4
4
0
3
TX03
Leg Extensions
0
0
0
4
4
0
4
TX04
Top rail
6
8
8
8
12
7
8
5
TX05
Top Rail with Leg Sockets(right)
6
TX06
Frame pad
7
TX07
Trampoline mat, stitched with
1
V-Rings
8
TX08
3
Galvanized springs
4
1
4
1
4
1
4
1
1
1
1
1
1
48
64
72
80
84
6
1
1
96
9
TX09
Safety Instruction Placard
1
1
1
1
1
1
REMEMBER TO USE GLOVES DURING ASSEMBLY TO AVOID PINCHING and IT WILL TAKE AT LEAST
TWO PEOPLE TO ASSEMBLE THE TRAMPOLINE
STEP 1 – Frame Layout
Please select your OWN tubing parts’ quantity according to the products in your hand from following
illustrations. All parts with the same par # are interchangeable and have not “right” or “left” orientation, to
connect the parts, simply slide a section tubing that is smaller on one end into the adjacent section that has a
larger opening. These joints are called “connector points”
STEP 2 - Support Assembly
Slide all Vertical Leg Extensions (3) onto the Leg Base
(2) as shown
STEP 3-Top Rail Assembly
Two people will be necessary at this point to assemble the
trampoline. One person lifts the Support Assembly from
step 1 to a standing (vertical) position and inserts one of
the sockets of the Top Rail with Sockets (1) into the Vertical
Leg Extension portion of the Support Assembly. The other
person holds the other end and inserts that portion into the
8
other Support Assembly as shown. You should now have 2
Support Assemblies held together by 1 Top Rail with
Socket
STEP 4 - Trampoline Mat Assembly
When Attaching springs to the trampoline mat, Please be careful. You will need another person to help you
with this portion of the assembly. CAREFUL-When attaching the springs, the Connector Points can become
pinch points since the trampoline is tightening up.
A. Lay out the Trampoline Mat (1) inside the frame
B. How to use the spring special tool.
STEP I : Position the spring on the eyelet of the jumping mat, attach tool and link up to the end of the
spring hook.
STEP II : Extend spring tool and link up spring hook to the hole on the trampoline frame.
Please be careful where you place your hands and other parts of your body during spring assembly
as connector points become pinch points!
C. Select your spring quantity.
9
10
11
D. If you notice that you have skipped a hole and V Ring connection, recount and remove or attach any
springs required to maintain the count of springs.
STEP 5-Safety placard Attachment
A. Using the tie wrap, attach the Safety Instruction Placard (9) to the trampoline. The tie wrap should go
around the Vertical Frame joint and the Top Rail to ensure that it doesn’t slide off the trampoline.
STEP 6-Frame Pad Assembly
A. Attaching the frame pads securely to the frame and in the proper position prior to use the trampoline
B. Lay the Frame Pad (6) over the trampoline so that the springs and the steel frame is covered.
Please ensure that the Frame Pad covers all metal parts.
C. Tie the strap located at the under side of the frame pad to the frame.
D. Select your Pad model.
12
CARE AND MAINTENANCE
This trampoline was designed and manufactured with quality materials and craftsmanship. If proper care and
maintenance is provided, it will provide all jumpers with years of exercise, fun, and enjoyment as well as
reduce the risk of injury. Please follow the guidelines listed below:
This trampoline is designed to withhold a certain amount of weight and use. Please make sure that only one
person at any one time uses the trampoline. Also, the person should weigh less than 102kgs. Jumpers should
either wear socks, gymnastics shoes, or be barefoot when using the trampoline. Please be aware that street
shoes or tennis shoes should NOT be worn while using the trampoline. In order to prevent the trampoline mat
from getting cut or damaged please do not allow any pets onto the mat. Also, jumpers should remove all
sharp objects from their person prior to using the trampoline. Any type of sharp or pointed objects should be
kept off the trampoline mat at all times.
Always inspect the trampoline before each use for worn, abused or missing parts. A number of
conditions could arise that may increase your chances of getting injured. Please be aware of:
Punctures, holes, or tears in the trampoline mat
Sagging trampoline mat
Loose stitching or any kind of deterioration of the mat
Bent or broken frame parts, such as the legs
Broken, missing, or damaged springs
Damaged, missing, or insecurely attached frame pad
Protrusions of any types (especially sharp types) on the frame, springs, or mat
IF YOU FIND ANY OF THE PREVIOUS CONDITIONS, OR ANYTHING ELSE THAT YOU FEEL COULD
CAUSE HARM TO ANY USER, THE TRAMPOLINE SHOULD BE DISASSEMBLED OR SECURED FROM
USE UNTIL THE CONDITION(S) HAS BEEN RESOLVED.
WINDY CONDITIONS
In severe wind situations, the trampoline can be blown about. If you expect windy weather conditions, the
13
trampoline should be moved to a sheltered area or disassembled. Another option is to tie the round, outside
portion (top frame) of the trampoline to the ground using ropes and stakes. To ensure security, at least three
(3) tie downs should be used. Do not just secure the legs of the trampoline to the ground because they can
pull out the frame sockets.
MOVING THE TRAMPOLINE
If you need to move the trampoline, two people should be used. All connector points should be wrapped
secured with weather resistant tape, such as duct tape. This will keep the frame intact during the move and
prevent the connector points from dislocating and separating. When moving, lift the trampoline slightly of the
ground and keep it horizontal to the ground. For any type of other move, you should disassemble the
trampoline.
Manual for trampoline enclosure
WARNING:
Please read and follow all instructions before you start exercising with your enclosure,
Warnings and instructions for the care maintenance, and use of this trampoline enclosure
are included to promote, safe, enjoyable use this equipment.
Please inspect the safety net before each use, make sure the barrier and the enclosure
support (frame) padding is correctly and securely positioned. And inspect the bent steel
tubes, torn mat, loose and broken springs and overall stability of the trampoline; Replace
any worn, defective, or missing parts.
You shall always be sure that the equipment is working normally and safety before you work
out on your safety net.
Don’t allow more than one person inside the trampoline enclosure; Use by more than one
person at the same time can result in serious injuries.
A supervisor is absolutely necessary when children use this trampoline. Use trampoline
enclosure only with mature, knowledgeable supervision.
Do not attempt or allow somersaults on the trampoline. Landing on the head or neck can
cause serious injury, paralysis, or death, even when landing in the middle of the bed.
Safety net isn't created in order to replace adult supervising.
Do not attempt to jump over the barrier.
Do not attempt to crawl under the barrier.
Do not intentionally rebound off the barrier.
Do not hang from, kick, cut or climb on the barrier.
Wear clothing free of drawstrings, hooks, loops, or anything that could get caught in the
barrier.
Do not attach anything to the barrier that is not a manufacturer-approved accessory or part
of the enclosure system.
Enter and exit the enclosure only at the enclosure door or barrier opening designated for
that purpose.
This product is intended for home use only.
Wind or air movement shall be calm and gentle, Don't use trampoline in gusty or severe
wind
The trampoline enclosure is only to be used as an enclosure for a trampoline of a size for
which the enclosure is designed.
14
Trampoline enclosure must be dismantled when it’s raining, raining can damage foam and
net.
CARE AND MAINTENANCE INSTRUCTIONS:
Inspect the trampoline enclosure before each use and replace any worn, defective or missing
parts. The following conditions could represent potential hazards:
Missing improperly positioned or insecurely attached barrier or enclosure support system
(frame) padding and pole caps.
Punctures, frays, tears, or holes worn in the barrier or support system (frame) padding.
Bent or broken support system (frame).
Sagging barrier.
Sharp protrusions on the support (frame) or suspension system.
15