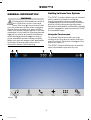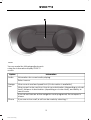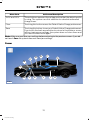
1
SYNC 3 Supplement (if equipped)
®
owner.ford.com
ford.ca
May 2015
First Printing
Supplement
SYNC 3
Litho in U.S.A.
GJ5J 19A285 DA
The information contained in this publication was correct at the time of going to print. In the interest of
continuous development, we reserve the right to change specifications, design or equipment at any time
without notice or obligation. No part of this publication may be reproduced, transmitted, stored in a
retrieval system or translated into any language in any form by any means without our written permission.
Errors and omissions excepted.
© Ford Motor Company 2015
All rights reserved.
Part Number: 20150414212807
Table of Contents
SYNC™ 3
General Information........................................3
Home Screen.....................................................17
Using Voice Recognition...............................18
Entertainment.................................................25
Climate...............................................................35
Phone.................................................................42
Navigation.........................................................47
Electric Vehicle Information.......................56
Apps....................................................................75
Settings...............................................................77
SYNC™ 3 Troubleshooting........................90
1
enUSA, First Printing
2
enUSA, First Printing
SYNC™ 3
Getting to Know Your System
GENERAL INFORMATION
The SYNC 3 system allows you to interact
with a variety of features using the
touchscreen and voice commands. By
integrating with your Bluetooth-enabled
phone, the touchscreen provides easy
interaction with audio, multimedia, climate
control, navigation, and your phone's SYNC
3 compatible apps.
WARNING
Driving while distracted can result in
loss of vehicle control, crash and
injury. We strongly recommend that
you use extreme caution when using any
device that may take your focus off the
road. Your primary responsibility is the safe
operation of your vehicle. We recommend
against the use of any hand-held device
while driving and encourage the use of
voice-operated systems when possible.
Make sure you are aware of all applicable
local laws that may affect the use of
electronic devices while driving.
Using the Touchscreen
To operate the touchscreen, you can
simply touch the item or option that you
want to select. The button changes color
when you select it.
The SYNC 3 layout allows you to quickly
select the feature you wish to use.
E205444
3
enUSA, First Printing
SYNC™ 3
Item
Menu Item
Action and Description
A
Status Bar
This bar displays icons and messages pertaining to current
system activities including climate settings, voice
commands and phone functions such as text messages.
B
Home
This button is available on the main screens. Pressing it
takes you to the home screen view.
C
Clock
This shows the current time. You can set the clock manually
or have it controlled by the vehicle's GPS location. See
Settings (page 77).
D
Outside
Temperature
This displays the current outside temperature.
E
Feature Bar
You can touch any of the buttons on this bar to select a
feature.
The Status Bar
The touchscreen allows you quick access
to all of your comfort, navigation,
communication and entertainment
options. Using the status and feature bar
you can quickly select the feature you want
to use.
Additional icons also display in the status
bar depending on market, vehicle options
and current operation. If a feature is not
active, the icon does not display. Certain
icons may move to the left or right
depending on what options are active.
Note: Your system is equipped with a
feature that allows you to access and
control audio features for 10 minutes after
you switch the ignition off (and no doors
open).
4
enUSA, First Printing
SYNC™ 3
E205802
Callout
A
Item
Driver Temperature
Description
This shows the temperature the driver selects through
the climate control system.
(If equipped)
B
Heated steering
wheel
(If equipped)
C
Passenger
Temperature
(If equipped)
D
Microphone Mute
When you activate the heated steering wheel option
on the touch screen, this icon displays. It only displays
when there is not a physical button for the heated
steering wheel.
When the passenger's temperature has been
adjusted and is no longer linked to the driver's
temperature, it displays here. If Dual is turned off and
the temperatures are linked, the passenger's
temperature does not display.
This icon displays when your microphone is muted.
A caller can not hear you.
5
enUSA, First Printing
SYNC™ 3
Callout
Item
Description
E
Mute
This icon displays when the audio system is muted.
F
Download
The SYNC 3 system has been updated, press this
icon for more details.
G
Wi-Fi in Range
This icon appears if a Wi-Fi network is connected or
available.
H
Roaming
This icon displays when your cell phone is roaming.
I
Text Message
This icon displays when you receive a text message
on your phone.
J
911 Assist Off
This icon displays when 911 Assist is set to off and
your phone is connected to SYNC.
(If Available)
K
Bluetooth Alert
The Bluetooth alert icon displays when there is an
active Bluetooth alert.
L
Bluetooth
This icon displays to show an active Bluetooth
connection.
Messages may also appear in the status
bar to provide you with notifications. You
can select the message to view the
associated feature.
Feature Bar
Feature Bar Item
Functions
Audio
Allows you to control the media playing in
your vehicle. You can control all audio
features including AM, FM and satellite
radio, CDs, and media streaming over a
Bluetooth device or through a USB
connection.
Climate
Allows you to adjust the temperature, fan
speed and airflow within the vehicle.
(If equipped)
Phone
Allows you to make calls, receive calls, and
access the phonebook of your connected
device.
6
enUSA, First Printing
SYNC™ 3
Feature Bar Item
Functions
Allows you to see your vehicle's location on
a virtual road map, get driving directions to
your destination and find points of interest
along your route.
Navigation
(If equipped)
Connect and control SYNC 3 compatible
apps running on your iphone or android
device. Also, access built-in additional
features such as SiriusXM Traffic and Travel
Link (if equipped).
Apps
If your vehicle is a hybrid, plug-in hybrid, or
electric this is also where your settings and
power information is located.
You can customize your system with
various settings for the touchscreen display,
feature preferences, and how you want to
interact with your vehicle.
Settings
The system also asks short questions
(confirmation prompts) when it is not sure
of your request or when there are multiple
possible responses to your request.
Cleaning the Touchscreen
You can remove fingerprints with a dry,
clean, soft cloth.
When using voice commands, words and
icons may appear in the status bar
indicating the status of the voice command
session. See Using Voice Recognition
(page 18).
If dirt or fingerprints are still on the screen,
apply a small amount of alcohol to the
cloth and try to clean it again.
Note: Do not use detergent or any type of
solvent to clean the touchscreen.
Accessing and Adjusting Modes
Through Your Vehicle Information
Display (If Equipped)
Note: Do not pour or spray alcohol onto the
touchscreen.
Using Voice Recognition
Depending on your vehicle and selected
options you may be able to control some
of the SYNC 3 features on your information
display. The features are visible either in
the right hand display (A) or in the center
of the display (B).
Using voice commands allows you to keep
your hands on the wheel and focus on
what is in front of you. The system provides
feedback through audible tones, prompts,
questions and spoken confirmations
depending on the situation and the chosen
level of interaction (voice settings).
7
enUSA, First Printing
SYNC™ 3
E208626
8
enUSA, First Printing
SYNC™ 3
E208634
You can make the following adjustments
using the information display SYNC 3
screen:
Option
Audio
Information
Information for current audio playing.
Select source.
Navigation
View current road and speed limit (if information is available).
View current route, next turn, time to your destination (depending on cluster
level), distance to destination (depending on cluster level), and ability to
cancel route.
If you do not have an active navigation route programed, the compass is
shown.
Phone
If you are not on a call, a call can be made by selecting: *
9
enUSA, First Printing
SYNC™ 3
Option
Information
Quick
dial
All calls
Incoming calls Outgoing calls Missed calls
If you are on a call, the call information is displayed on the information display.
If you are receiving a call, you can accept it by selecting OK on the right-hand
steering wheel controls.
* Depending on your vehicle options, all of these choices may not display.
Voice: Press to start a voice session. Press
again to stop the voice prompt and
immediately begin speaking. Press and
hold to end a voice session.
Use the OK and arrow buttons on the right
side of your steering wheel to scroll
through the available modes.
The selection menu expands and different
options appear.
• Press the up and down arrows to scroll
through the modes.
• Press the right arrow to enter the mode,
use the left arrow to exit the mode.
• Press the up and down arrows to make
adjustments within the chosen mode.
• Press OK to confirm your selection.
SEEK Forward and PHONE ACCEPT:
• While in radio mode, press to seek
between memory presets.
• While in USB, Bluetooth Audio or CD
mode, press to seek between songs or
press and hold to fast seek.
• While in phone mode, press to answer
a call, or to switch between calls.
SEEK Reverse and PHONE REJECT:
• While in radio mode, press to seek
between memory presets.
• While in USB, Bluetooth Audio or CD
mode, press to seek between songs or
press and hold to fast seek.
• While in phone mode, press to end a
call, or to reject an incoming call.
Note: If your vehicle is not equipped with
navigation, compass appears in the display
instead of navigation. If you press the right
arrow to go into the compass menu, you can
see the compass graphic. The compass
displays the direction in which the vehicle
is traveling, not true direction (for example,
if the vehicle is traveling west, the middle
of the compass graphic displays west; north
displays to the left of west though its true
direction is to the right of west).
Source: Touch the control repeatedly to
switch between media modes.
For more information, see the steering
wheel chapter in your owner manual.
Using the Steering Wheel Controls
Depending on your vehicle and option
package, you can use different controls on
your steering wheel to interact with the
touchscreen system in different ways.
Using Your Bezel Controls
Depending on your vehicle and option
package, you may also have these controls
on your instrument panel:
VOL: Control the volume of audio output.
Mute: Mute the audio output.
10
enUSA, First Printing
SYNC™ 3
•
•
•
•
•
•
•
•
Power: Switch the media or climate
features on and off.
VOL: Control the volume of playing
audio.
Seek and Tune: Use as you normally
would in media modes.
Eject: Eject a CD from the
entertainment system.
SOURCE or MEDIA: Touch the word
repeatedly to see all available media
modes.
SOUND: Touch the word to access the
Sound menu where you can adjust
sound settings and other audio
settings.
DISP: Switch the display on or off. You
can also touch the screen to switch the
display back on.
Temperature, fan and climate
control buttons: Control the
temperature, fan speed or settings of
the climate control system.
WARNINGS
Always place your phone in a secure
location in your vehicle so it does not
become a projectile or get damaged
in a crash. Failure to do so may cause
serious injury to someone or damage the
phone which could prevent 911 Assist from
working properly.
Note: The SYNC 911 Assist feature must be
set on before the incident.
Note: The SYNC 911 Assist feature only
operates in the U.S., Canada or in a territory
in which 911 is the emergency number.
Note: Before setting this feature on, make
sure that you read the 911 Assist Privacy
Notice later in this section for important
information.
Note: If any user sets 911 Assist to on or off,
that setting applies for all paired phones. If
911 Assist is switched off and the phone is
connected to SYNC, an icon displays on the
status bar.
911 Assist
Note: Every phone operates differently.
While SYNC 911 Assist works with most
cellular phones, some may have trouble
using this feature.
WARNINGS
Unless the 911 Assist setting is set on
before a crash, the system will not
dial for help which could delay
response time, potentially increasing the
risk of serious injury or death after a crash.
If a crash deploys an airbag (excluding
knee airbags and rear inflatable safety
belts [if equipped]) or activates the fuel
pump shut-off, your SYNC-equipped
vehicle may be able to contact emergency
services by dialing 911 through a paired and
connected Bluetooth-enabled phone. You
can learn more about the 911 Assist
feature, by visiting:
Do not wait for 911 Assist to make an
emergency call if you can do it
yourself. Dial emergency services
immediately to avoid delayed response
time which could increase the risk of
serious injury or death after a crash. If you
do not hear 911 Assist within five seconds
of the crash, the system or phone may be
damaged or non-functional.
Website
owner.ford.com
owner.lincoln.com
www.syncmyride.ca
11
enUSA, First Printing
SYNC™ 3
Before making the call:
• SYNC provides a short window of time
(about 10 seconds) to cancel the call.
If you fail to cancel the call, SYNC
attempts to dial 911.
• SYNC says the following, or a similar
message: "SYNC will attempt to call
911, to cancel the call, press Cancel on
your screen or press and hold the
phone button on your steering wheel."
Website
www.syncmaroute.ca
For important information about airbag
deployment and the fuel pump shut-off
please see the Supplementary Restrains
and Roadside Emergencies sections of
your owner manual.
To switch 911 Assist on and off please view
the settings information. See Settings
(page 77).
If you do not cancel the call, and SYNC
makes a successful call, a pre-recorded
message plays for the 911 operator, and
then the occupant(s) in your vehicle is able
to talk with the operator. Be prepared to
provide your name, phone number and
location immediately, because not all 911
systems are capable of receiving this
information electronically.
To make sure that 911 Assist works
correctly:
• SYNC must be powered and working
properly at the time of the incident and
throughout feature activation and use.
• The 911 Assist feature must be set on
before the incident.
• You must pair and connect a
Bluetooth-enabled and compatible
cell phone to SYNC.
• A connected Bluetooth-enabled phone
must have the ability to make and
maintain an outgoing call at the time
of the incident.
• A connected Bluetooth-enabled phone
must have adequate network coverage,
battery power and signal strength.
• The vehicle must have battery power
and be located in the U.S., Canada or
in a territory in which 911 is the
emergency number.
911 Assist May Not Work If
•
•
•
911 Assist Privacy Notice
When you switch on 911 Assist, it may
disclose to emergency services that your
vehicle has been in a crash involving the
deployment of an airbag or activation of
the fuel pump shut-off. Certain versions or
updates to 911 Assist may also be capable
of electronically or verbally disclosing to
911 operators your vehicle location or other
details about your vehicle or crash to assist
911 operators to provide the most
appropriate emergency services. If you do
not want to disclose this information, do
not switch the feature on.
In the Event of a Crash
Not all crashes will deploy an airbag or
activate the fuel pump shut-off (the
triggers for 911 Assist). If a connected cell
phone sustains damage or loses its
connection to SYNC during a crash, SYNC
will search for and try to connect to a
previously paired cell phone; SYNC will
then attempt to call the emergency
services.
12
enUSA, First Printing
Your cellular phone or 911 Assist
hardware sustains damage in a crash.
The vehicle's battery or the SYNC
system has no power.
The phone(s) thrown from your vehicle
are the ones paired and connected to
the system.
SYNC™ 3
Safety Information
•
WARNING
Driving while distracted can result in
loss of vehicle control, crash and
injury. We strongly recommend that
you use extreme caution when using any
device that may take your focus off the
road. Your primary responsibility is the safe
operation of your vehicle. We recommend
against the use of any hand-held device
while driving and encourage the use of
voice-operated systems when possible.
Make sure you are aware of all applicable
local laws that may affect the use of
electronic devices while driving.
•
•
•
Do not leave playing devices in your
vehicle during extreme conditions as it
could cause them damage. See your
device's user guide for further
information.
For your safety, some SYNC 3 functions
are speed-dependent. Their use is
limited to when your vehicle is traveling
at speeds under 3 mph (5 km/h). Make
sure that you review your device's
manual before using it with SYNC 3.
Speed-restricted Features
Some features of this system may be too
difficult to use while your vehicle is moving
so they are restricted from use unless your
vehicle is stationary.
Do not attempt to service or repair the
system. Have an authorized dealer
check your vehicle.
Do not operate playing devices if the
power cords or cables are broken, split
or damaged. Place cords and cables
out of the way, so they do not interfere
with the operation of pedals, seats,
compartments or safe driving abilities.
•
•
•
Screens crowded with information,
such as Point of Interest reviews and
ratings, SiriusXM Traffic and Travel Link
sports scores, movie times or ski
conditions.
Any action that requires you to use a
keyboard is restricted, such as entering
a navigation destination or editing
information.
All lists are limited so the user can view
fewer entries (such as phone contacts
or recent phone call entries).
See the following chart for more specific
examples.
Restricted features
Cellular Phone
Pairing a Bluetooth phone.
Browsing of list entries is limited for phone contacts and
recent phone calls.
System Functionality
Editing the keypad code.
Enabling Valet Mode.
Editing settings while the rear view camera or active park
assist are active.
13
enUSA, First Printing
SYNC™ 3
Restricted features
Wi-Fi and Wireless
Editing wireless settings.
Editing the list of wireless networks.
Text Messages
Viewing received text messages.
Navigation
Using the keyboard to enter a destination.
Demo navigation route.
Adding or editing Navigation Favorites entries or Avoid
Areas.
Website
Creating a SYNC Owner Account
owner.lincoln.com
www.syncmyride.ca
www.syncmaroute.ca
Why do I need a SYNC owner account?
•
•
•
Essential for keeping up with the latest
software and connected features.
Access to customer support for any
questions you may have.
Maintain account permissions.
The website notifies you if an update is
available. You can then select to download
the update.
You will need an empty USB drive. Please
check the website for minimum
requirements. Once you have inserted the
USB drive into your computer, choose to
start the download. Follow the instructions
provided to download the files to the USB
drive.
Visit the website to sign up and register.
Website
owner.ford.com
owner.lincoln.com
www.syncmyride.ca
www.syncmaroute.ca
The update can be installed while you are
driving or for up to 30 minutes after the
vehicle is switched off. The installation of
most files occurs in the background, and
does not interrupt your use of the system.
Navigation updates cannot be installed in
the background, because the files are too
large.
Updating Your System
You can choose to download the update
onto a USB drive or use Wi-Fi to deliver
automatic updates.
USB Updates
To use the USB update you need to log
into your owner account and visit the SYNC
software update page.
Website
owner.ford.com
14
enUSA, First Printing
SYNC™ 3
To install the update in your vehicle,
remove anything that is plugged in the USB
ports on the media hub and plug in the
USB drive containing the update. When
the USB drive is plugged in, the installation
should begin immediately. After a
successful installation, the update is
available the next time the vehicle is
started.
You must also give the system permission
to update automatically. Upon vehicle
delivery, the System asks you if you would
like to use the automatic update feature.
If you agree to automatic updates, you can
press OK to confirm. If this selection does
not appear upon vehicle delivery you can
access it through the General Settings. See
Settings (page 77). You can also perform
a master reset. See SYNC™ 3
Troubleshooting (page 90).
When the installation is complete, take the
USB drive back to the computer to report
the update. Log into your owner account
and return to the SYNC software update
page and confirm that you have installed
the update. Insert the USB drive used for
the update into your computer and choose
to report your update. The website updates
your records to reflect your current
software version.
If you would like to switch this feature
on later, select:
Menu Item
Settings
General
Automatic
System
Updates
Updating Over Wi-Fi
To update your System over Wi-Fi your
vehicle must be within the range of a Wi-Fi
access point. Data rates may apply.
To connect your system to Wi-Fi,
select:
When Wi-Fi and automatic updates are
enabled, your system checks for software
updates periodically. If a new version is
available, it downloads at that time.
Software downloads can take place for up
to 30 minutes after you have switched your
vehicle off. The updates do not interrupt
the normal use of your SYNC 3 system. If
a download does not complete for any
reason, the download continues where it
left off at the next Wi-Fi connected
opportunity. Upon activation of an update,
a banner displays on the touchscreen
indicating the system update. Select the
icon to see more detail. This icon displays
for two ignition cycles.
Menu Item
Settings
Wi-Fi
Available
Wi-Fi
Networks
You can then select your
Wi-Fi network. You may
have to enter the security
code if the network is
secured. The system
confirms when it has
connected to the network.
15
enUSA, First Printing
From this menu, you can
enable automatic updates.
If you have not done so
already, the system
prompts you to set up a
Wi-Fi connection when you
enable this feature.
SYNC™ 3
may contain data about your cellular
phone book, text messages (read and
unread), and call history, including history
of calls when your cell phone was not
connected to the system. In addition, if you
connect a media device, the system
creates and retains an index of supported
media content. The system also records a
short diagnostic log of approximately 10
minutes of all recent system activity. The
log profile and other system data may be
used to improve the system and help
diagnose any problems that may occur.
To switch this feature off:
Menu Item
Settings
General
Automatic
System
Updates
In this menu selection, you
can change the selection
for automatic updates to
OFF.
Support
The cellular profile, media device index,
and diagnostic log remain in your vehicle
unless you delete them and are generally
accessible only in your vehicle when the
cellular phone or media player is
connected.
The SYNC support team is available to
help you with any questions you are not
able to answer on your own.
Monday-Saturday, 8:30am-8:00pm EST.
For Ford:
If you no longer plan to use the system or
your vehicle, we recommend you perform
a Master Reset to erase all stored
information. You can find more information
about the Master Reset in General
Settings. See Settings (page 77). System
data cannot be accessed without special
equipment and access to your vehicle's
SYNC 3 module. Ford Motor Company,
Ford of Canada and The Lincoln Motor
Company do not access the system data
for any purpose other than as described
absent consent, a court order, or where
required by law enforcement, other
government authorities, or other third
parties acting with lawful authority. Other
parties may seek to access the information
independently of Ford Motor Company,
Ford of Canada and The Lincoln Motor
Company.
United States: 1-800-392-3673.
Canada: 1-800-565-3673.
Mexico: 01-800-719-8466.
For Lincoln
United States: 1-800-521-4140.
Canada: 1-800-387-9333.
Mexico: 01-800-719-8466.
Times are subject to change due to
holidays.
Privacy Information
When you connect a cellular phone to
SYNC 3, the system creates a profile within
your vehicle that links to that cellular
phone. This profile helps in offering you
more cellular features and operating more
efficiently. Among other things, this profile
16
enUSA, First Printing
SYNC™ 3
HOME SCREEN
E209015
Item
Tile
A
Audio
B
Passenger
Heated
and
Climate
Controlled
Seats
C
Phone
Home screen display
Shows the active media source.
If your vehicle does not have navigation, this space contains the
compass.
*
Displays the current setting of the passenger heated or climate
controlled seats.
This icon does not display if your vehicle has hard button
controls for heated and climate controlled seats.
If your vehicle is not equipped with navigation, this option
displays under the audio information.
The name of the connected phone appears on the screen. The
status of the phone features also appear. This includes signal
strength, battery charge, 911 assist setting state (On or Off),
text messaging and roaming.
17
enUSA, First Printing
SYNC™ 3
Item
*
Tile
D
Driver
Heated
and
Climate
Controlled
Seats
E
Navigation
Home screen display
*
*
Displays the current setting of the heated or climate controlled
driver seat.
This icon does not display if your vehicle has hard button
controls for heated and climate controlled seats.
If your vehicle is not equipped with navigation, this option
displays under the audio information.
This map displays your current location or current route in real
time.
When you have navigation active, you also see the next turn
and the length of time and distance to your destination.
If your vehicle does not have navigation, this space contains the
audio information.
If equipped.
You can access each feature controlled by
SYNC 3 through a variety of commands.
You can touch any of the feature displays
to access that feature.
To activate the SYNC 3 voice
commands push the voice
E142599
button on the steering wheel and
wait for the prompt.
Anytime you select the home button, the
system returns you to this screen.
USING VOICE RECOGNITION
___ is a dynamic listing, meaning that it can
be the name of anything, such as artist, the
name of contact or number. The context
and the description of the command tell
you what to say for this dynamic option.
The SYNC 3 system allows you to use voice
commands, to control features like audio
and climate controls. By using voice
commands, you can keep your hands on
the wheel and your eyes on the road.
Voice Command
There are some commands that work for
every feature, these commands are:
Action and Description
Main Menu
Brings you to the main menu.
Go Back
Returns you to the previous screen.
Cancel
Ends the voice session.
List of Commands
Gives you a list of possible voice commands.
___ List of Commands You can name any feature and the system gives a list of
commands available for the feature. For example, you could
say:
Phone List of Commands
18
enUSA, First Printing
SYNC™ 3
Voice Command
Action and Description
Navigation List of Commands
Next Page
You can use this command to view the next page of options on
any screen where multiple pages of choices are given.
Previous Page
You can use this command to view the previous page of options
on any screen where multiple pages of choices are given.
Help
Gives you available commands you can use on the current
screen.
Audio Voice Commands
Included here are some of the most
popular commands for each SYNC 3
feature.
___ is a dynamic listing, meaning that for
audio voice commands it can be the name
of a Sirius channel or a channel number, a
radio frequency number, or the name of a
artist, album, song or a genre.
To control the media features, press the voice button and when prompted, say:
Voice command
Sirius Channel ___
Description
*
AM ___
Allows you to tune to a specific FM or AM
frequency such as "88.7 FM" or "1580 AM".
FM ___
FM ___ HD ___
You can say the Sirius channel name or number
such as "Sirius channel 16". You can also just say
the name of a Sirius station such as "The Pulse".
*
Allows you to tune to a specific HD frequency
such as “88.7 FM HD 1”.
Bluetooth Audio
Allows you to listen to music on your Bluetoothconnected device.
USB
Allows you to listen to music on your USB
connected device.
Play Genre ___
For USB audio only, you can say the name of an
artist, album, song or a genre to listen to that
selection. Your system must finish indexing
before this option is available. For example, you
could say "Play artist, The Beatles" or "Play song,
Penny Lane".
Play Playlist ___
Play Artist ___
Play Album ___
Play Podcast ___
19
enUSA, First Printing
SYNC™ 3
Voice command
Description
Play Song ___
Play Audiobook ___
For USB audio only, you can say the name of an
artist, album, or a genre to browse by that selection. Your system must finish indexing before this
option is available. For example you can say
"Browse The Beatles" or "Browse folk".
Browse ___
* This option may not be available in all markets or may require a subscription.
___ is a dynamic listing, meaning that for
climate voice commands it can be the
desired degrees for the temperature
setting.
Climate Voice Commands (If Equipped)
You can control the temperature of the
vehicle using voice commands.
To adjust the temperature, say:
Voice command
Description
Climate Set Temperature ___
Adjust the temperature between 59.0°F
(15°C)-86.0°F (30°C).
Climate Help
Phone Voice Commands
Pairing a Phone
You can use voice commands to connect
your Bluetooth-enabled phone to the
system.
To pair your phone, press the voice button and when prompted, say:
Voice command
Pair Phone
Description
Follow the on-screen instructions to complete the pairing
process. See Settings (page 77).
20
enUSA, First Printing
SYNC™ 3
Making Calls
phone voice commands it can be the name
of the contact you wish to call or the digits
you want to dial.
___ is a dynamic listing, meaning that for
Press the voice button and say a command similar to the following:
Voice command
Description
Call ___
Allows you to call a specific contact from your phonebook
such as "Call Jenny".
Call ___ at ___
Allows you to call a specific contact from your phonebook
at a specific location such as "Call Jenny at Home".
Dial ___
Allows you to dial a specific number such as “Dial 867-5309”.
Please make sure that you are saying the
contact name exactly as it appears in your
contact list.
Once you have provided the digits of the phone number, you can say the following
commands:
Voice Command
Description
<0-9>
If the full number was not entered with the first command, you
can continue saying the number.
Dial
Tells SYNC 3 to make the phone call.
Delete
Tells SYNC 3 to erase the last block of digits stated.
Clear
Tells SYNC 3 to erase the entire number.
Text Message Voice Commands
To access text message options, press the voice button and say:
Voice command
Description
Listen to Message
Listen to text message ___
You can say the number of the message you
would like to hear.
Reply to Message
21
enUSA, First Printing
SYNC™ 3
Navigation Voice Commands
commands to set a destination or find a
point of interest.
Setting a Destination
___ is a dynamic listing, meaning that for
navigation voice commands it can be a POI
category or an address.
You can use any of the following
You can find an address, a point of interest (POI), or search for points of interest
by category:
Voice command
Description
Find an Address
Allows you to enter the address search functionality.
Find a ___
State the name of the POI category you would like to search for
such as "Find restaurants".
Find POI
Allows you to enter the POI search functionality.
Find Intersection
Allows you to enter the intersection search functionality.
Destination Nearest
___
State the name of the POI category you would like to search for
nearby such as "Destination nearest restaurants".
Destination Previous Allows you to see a list of your previous destinations.
Destination
Destination Home
Allows you to route to your home address.
In addition, you can say these commands when a route is active:
Voice command
Description
Cancel Route
Cancels the current route.
Detour
Allows you to select an alternate route.
Repeat Instruction
Repeats the last guidance prompt.
Show Route
Repeats the last guidance prompt.
Where Am I
Provides current location.
Zoom In
Allows you to zoom in on the map.
Zoom Out
Allows you to zoom out from the map.
22
enUSA, First Printing
SYNC™ 3
Mobile App Voice Commands (If Equipped)
The following voice commands are always available:
Voice command
Description
Mobile Apps
SYNC 3 will prompt you to say the name of an app to start it on
SYNC 3.
List Mobile Apps
SYNC 3 will list all of the currently available Mobile Apps.
Find New Apps
SYNC 3 will search and connect to compatible app(s) running on
your mobile device.
There are also voice commands that you can use when app(s) are connected to
SYNC 3:
Voice command
Description
Say the name of an At any time, you can say the name of a mobile app to start the
app
mobile app on SYNC 3.
Say the name of an SYNC 3 will list the available voice commands for the specified
app, followed by
app if the app is running on SYNC 3.
help
SiriusXM Traffic and Travel Link
Voice Commands (If Equipped)
SiriusXM Traffic and Travel Link may not
be available in all markets. Activation and
a subscription are required.
You can say the following commands to access SiriusXM Traffic and Travel Link:
Voice command
Show Traffic
Description
Displays a list of traffic incidents.
Show Weather Map Displays the current weather map.
Show Fuel Prices
Displays a list of fuel prices.
Show 5 Day Forecast
Displays the 5 day weather forecast.
Help
23
enUSA, First Printing
SYNC™ 3
Voice Settings Commands
You can say the following commands to access the voice settings:
Voice command
Description
Voice Settings
Allows you to enter the voice settings functionality.
Interaction Mode
Standard
Sets standard prompting with longer prompts.
Interaction Mode
Advanced
Sets advanced prompting with shorter prompts.
Phone Confirmation On
Allows the system to confirm before making a phone call.
Phone Confirmation Off
The system does not confirm before placing a call.
Voice Command Lists On The system displays a short list of available commands.
Voice Command Lists Off The system does not display the list of commands.
24
enUSA, First Printing
SYNC™ 3
ENTERTAINMENT
E205443
Message
You can access these options using the
touchscreen or voice commands.
Message and description
A
Sources
Sources
B
Direct Tune
C
Presets
Press this button to select the source of
media you want to listen to.
Menu item
AM
FM
SIRIUS
*
CD
USB
The name of the USB that is plugged in displays here.
25
enUSA, First Printing
SYNC™ 3
Menu item
Bluetooth Stereo
Apps
If you have SYNC 3 compatible apps on your connected smart phone, they
display here as individual source selections.
* This feature may not be available in all markets and requires an active subscription.
Once you have entered the station's
call numbers, you can select:
AM/FM Radio
Tuning a Station
Menu item
You can use the tune or seek controls on
the radio bezel to select a station.
Action and description
Enter
Press to begin
playing the station
you have entered.
Menu item
Cancel
Press to exit
without changing
the station.
A pop up appears, allowing you to type in
the frequency of a station. You can only
enter a valid station for the source you are
currently listening to.
Presets
To tune a station using the
touchscreen, select:
Direct Tune
To set a new preset, tune to the station
and then press and hold one of the
memory preset buttons. The audio mutes
briefly while the system saves the station
and then returns.
You can press the backspace button to
delete the previously entered number.
There are two preset banks available for
AM and three banks for FM. To access
additional presets, tap the preset button.
The indicator on the preset button shows
which bank of presets you are currently
viewing.
SIRIUS® Satellite Radio (If
Activated)
Note: This feature may not be available in
all markets and requires an active
subscription.
26
enUSA, First Printing
SYNC™ 3
For more information on extended
subscription terms (a service fee is
required), the online media player and a
list of SIRIUS satellite radio channels, and
other features, please visit
www.siriusxm.com in the United States,
www.siriusxm.ca in Canada, or call SIRIUS
at 1-888-539-7474.
E142593
SIRIUS satellite radio is a
subscription-based satellite radio service
that broadcasts a variety of music, sports,
news, weather, traffic and entertainment
programming. Your factory-installed
SIRIUS satellite radio system includes
hardware and a limited subscription term
that begins on the date of sale or lease of
your vehicle. See an authorized dealer for
availability.
Note: SIRIUS reserves the unrestricted right
to change, rearrange, add or delete
programming. This includes canceling,
moving or adding particular channels, and
its prices, at any time, with or without notice
to you. Ford Motor Company and The
Lincoln Motor Company shall not be
responsible for any such programming
changes.
Note: This receiver includes the eCos
real-time operating system. eCos is
published under the eCos License.
The following buttons are available for Sirius:
Menu item
Action and description
Browse
Touch this button to see a list of available stations.
Direct Tune
A pop-up appears, allowing you to type in the call numbers of
a station.
Once you enter the stations call numbers, you can select:
Enter
The system tunes to the station you select.
Cancel
You exit the pop-up and the current station
continues to play.
You can press the backspace button to delete the previous
number.
27
enUSA, First Printing
SYNC™ 3
Menu item
Replay
Action and description
Replay audio on the current channel. You can replay approximately 45 minutes of audio as long as you remain tuned to
the current station. Changing stations erases the previous
audio.
When you are in replay mode, you are not
able to select a different preset until you
return to live audio. Pressing this button
returns you to the live broadcast.
Live
ALERT
Save the current song, artist, or team as a favorite. The system
alerts you when it plays again on any channel.
Selecting this button allows you to enable and edit alerts. See
Settings (page 77).
There are three preset banks available for
SIRIUS. To access additional presets, tap
the preset button. The indicator on the
preset button shows which bank of presets
you are currently viewing.
Memory Presets
To set a preset, tune to the station then
press and hold one of the memory preset
buttons. The audio mutes briefly while the
system saves the station and returns once
the station is stored.
Satellite Radio Electronic Serial
Number (ESN)
You need your ESN to activate, modify or
track your satellite radio account. See
Settings (page 77).
SIRIUS Satellite Radio Reception Factors and Troubleshooting
Potential reception issues
Antenna obstructions
For optimal reception performance, keep the antenna clear
of snow and ice build-up and keep luggage and other
materials as far away from the antenna as possible.
Terrain
Hills, mountains, tall buildings, bridges, tunnels, freeway
overpasses, parking garages, dense tree foliage and thunderstorms can interfere with your reception.
Station overload
When you pass a ground-based broadcast-repeating tower,
a stronger signal may overtake a weaker one and the audio
system may mute.
Satellite radio signal
interference
Your display may show ACQUIRING... to indicate the interference and the audio system may mute.
28
enUSA, First Printing
SYNC™ 3
Troubleshooting tips
Message
Acquiring Signal
Cause
Action
Radio requires more than two
seconds to produce audio for
the selected channel.
Satellite antenna fault There is an internal module or
system failure present.
SIRIUS system failure
Invalid Channel
No action required. This
message should disappear
shortly.
If this message does not clear
shortly, or with an ignition key
cycle, your receiver may have
a fault. See an authorized
dealer for service.
The channel is no longer avail- Tune to another channel or
able.
choose another preset.
Unsubscribed Channel Your subscription does not
include this channel.
Contact SIRIUS at 1-888-5397474 to subscribe to the
channel, or tune to another
channel.
Satellite acquiring
signal…
The signal is lost from the
The signal is blocked. When
SIRIUS satellite or SIRIUS
you move into an open area,
tower to your vehicle antenna. the signal should return.
Updating…
Update of channel programming in progress.
No action required. The
process may take up to three
minutes.
Questions? Call 1888-539-7474
Your satellite service is no
longer available.
Contact SIRIUS at 1-888-5397474 to resolve subscription
issues.
None found. Check
channel guide.
All the channels in the selected Use the channel guide to turn
category are either skipped or off the Lock or Skip function on
locked.
that station.
Subscription Updated SIRIUS has updated the chan- No action required.
nels available for your vehicle.
HD Radio™ Information (If
Available)
To activate HD radio, please see the Radio
Settings in the Settings Chapter. See
Settings (page 77).
Note: This feature may not be available in
all markets.
Note: HD Radio broadcasts are not
available in all markets.
29
enUSA, First Printing
SYNC™ 3
HD Radio technology is the digital
evolution of analog AM/FM radio. Your
system has a special receiver that allows
it to receive digital broadcasts (where
available) in addition to the analog
broadcasts, it already receives. Digital
broadcasts provide a better sound quality
than analog broadcasts with free,
crystal-clear audio and no static or
distortion. For more information, and a
guide to available stations and
programming, please visit:
E142616
The HD logo is grey when acquiring a digital
station, and then changes to orange when
digital audio is playing. When this logo is
available, you may also see Title and Artist
fields on-screen.
Website
www.hdradio.com
The multicast indicator appears in FM
mode (only) if the current station is
broadcasting multiple digital broadcasts.
The highlighted numbers signify available
digital channels where new or different
content is available. HD1 signifies the main
programming status and is available in
analog and digital broadcasts. Other
multicast stations (HD2 through HD7) are
only available digitally.
When HD Radio is on and you tune to a
station broadcasting HD Radio technology,
you may notice the following indicators on
your screen:
When HD Radio broadcasts are active, you can access the following functions:
Message
Presets
Action and description
Allows you to save an active channel as a memory preset.
Touch and hold a memory preset slot until the sound returns.
There is a brief mute while the radio saves the station. Sound
returns when the channel saves. When switching to an HD2
or HD3 memory preset, the sound mutes before the digital
audio plays, because the system has to reacquire the digital
signal.
Note: As with any station you save, you cannot access the saved station if your vehicle is
outside the station’s reception area.
30
enUSA, First Printing
SYNC™ 3
HD Radio Reception and Station Troubleshooting
Potential reception issues
Reception area
If you are listening to a multicast station and you are on the
fringe of the reception area, the station may mute due to
weak signal strength.
If you are listening to HD1, the system changes back to the
analog broadcast until the digital broadcast is available again.
However, if you are listening to any of the possible HD2-HD7
multicast channels, the station mutes and stays muted unless
it is able to connect to the digital signal again.
Station blending
When the system first receives a station (aside from HD2HD7 multicast stations), it first plays the station in the analog
version. Once the receiver verifies the station is an HD Radio
station, it shifts to the digital version. Depending on the station
quality, you may hear a slight sound change when the station
changes from analog to digital. Blending is the shift from
analog to digital sound or digital back to analog sound.
In order to provide the best possible
experience, use the contact form to report
any station issues found while listening to
a station broadcasting with HD Radio
technology. Independent entities own and
operate each station. These stations are
responsible for ensuring all audio streams
and data fields are accurate.
Potential station issues
Issues
Cause
Action
Echo, stutter, skip or
This is poor time alignment by No action required. This is a
repeat in audio.
the radio broadcaster.
broadcast issue.
Increase or decrease in
audio volume.
Sound fading or
blending in and out.
The radio is shifting between
analog and digital audio.
There is an audio mute
delay when selecting
HD2 or HD3, multicast
preset or Direct Tune.
The digital multicast is not
No action required. This is
available until the HD Radio
normal behavior. Wait until the
broadcast is decoded. Once
audio is available.
decoded, the audio is available.
31
enUSA, First Printing
No action required. The reception issue may clear up as you
continue to drive.
SYNC™ 3
Potential station issues
Issues
Cannot access HD2 or
HD3 multicast channel
when recalling a preset
or from a direct tune.
Cause
Action
The previously stored multicast No action required. The station
preset or direct tune is not
is not available in your current
available in your current recep- location.
tion area.
Text information does Data service issue by the radio Fill out the station issue form.
not match currently
broadcaster.
*
playing audio.
There is no text
Data service issue by the radio Fill out the station issue form.
information shown for broadcaster.
*
currently selected
frequency.
HD Radio Technology manufactured under
license from iBiquity Digital Corp. U.S. and
foreign patents. HD Radio and the HD and
HD Radio logos are proprietary trademarks
of iBiquity Digital Corp. Ford Motor
Company, The Lincoln Motor Company
and iBiquity Digital Corp. are not
responsible for the content sent using HD
Radio technology. Content may be
changed, added or deleted at any time at
the station owner's discretion.
Website
http://www.ibiquity.com/automotive/
report_radio_station_experiences
CD
Once you select this option, the system
returns you to the main audio screen.
The current audio information appears on
the screen.
* You can find the form here:
The following buttons are also available:
Button
Function
Browse
You can use the browse button to select a track.
Repeat
Select this button and a small number one displays to indicate
the track is set to repeat.
For MP3 CDs, this button allows you to toggle through repeat
off, repeat one track (a small number one displays), and repeat
current folder (a small folder displays).
Shuffle
Select the shuffle symbol to have the audio on the disk play
in random order.
You can use the forward, reverse, pause or
play buttons to control the audio playback.
32
enUSA, First Printing
SYNC™ 3
Bluetooth Stereo or USB
access media that you store on your
Bluetooth device or USB device such as
music, audio books or podcasts.
Bluetooth Stereo and USB allow you to
The following buttons are available for Bluetooth and USB:
Button
Function
Repeat
Pressing the repeat button toggles the repeat setting through
three modes: repeat off (button not highlighted), repeat all
(button highlighted) and repeat track (button highlighted with
a small number one).
Shuffle
Play the tracks in random order.
For some devices, SYNC 3 is able to
provide 30-second skip buttons when you
listen to audio books or podcasts. These
buttons allow you to skip forward or
backward within a track.
You can use the forward, reverse, pause or
play buttons to control the audio playback.
To get more information about the
currently playing track, press the cover art
or Info button.
While playing audio from a USB device you
can look for certain music by selecting the
following:
Button
Function
Browse
If available, displays the list of tracks in the
Now Playing playlist.
New Search
This option, which is available under
browse, allows you to play all tracks or to
filter the available media into one of the
below categories.
Play All
Playlists
Artists
Albums
Songs
Genres
Podcasts
Audio books
33
enUSA, First Printing
SYNC™ 3
Button
Function
Composers
A-Z Jump
This button allows you to choose a specific
letter to view within the category you are
browsing.
Explore Device
If available, this allows you to browse the
folders and files on your USB device.
Select this option to play audio from your
USB device.
USB Ports
Apps
The system supports the use of certain
audio apps such as Pandora or iHeartRadio
through a USB or bluetooth-enabled
device.
Each app gives you different on-screen
options depending on the app's content.
See Apps (page 75).
Supported Media Players, Formats
and Metadata Information
E211463
The system is capable of hosting nearly
any digital media player, including iPod,
iPhone, and most USB drives.
Supported audio formats include MP3,
WMA, WAV, AAC, and FLAC.
Supported audio file extensions include
MP3, WMA, WAV, M4A, M4B, AAC, and
FLAC.
Supported USB file systems include: FAT,
exFAT, and NTFS.
SYNC 3 is also able to organize the media
from your USB device by metadata tags.
Metadata tags, which are descriptive
software identifiers embedded in the
media files, provide information about the
file.
E201595
The USB ports are in the center console or
behind a small access door in the
instrument panel. There may also be a
remote USB port on the Instrument panel.
This feature allows you to plug in USB
media devices, memory sticks, flash drives
or thumb drives, and charge devices if they
support this feature.
34
enUSA, First Printing
SYNC™ 3
If your indexed media files contain no
information embedded in these metadata
tags, SYNC 3 may classify the empty
metadata tags as unknown.
CLIMATE
Touch the climate button on the
touchscreen to access your climate control
features. Depending on your vehicle line
and option package, your climate screen
may look different from one of the screens
shown below. Your screen may not contain
all of the features shown.
SYNC 3 is capable of indexing up to
50,000 songs per USB device, for up to 10
devices.
Note: You can switch temperature units
between Fahrenheit and Celsius. See
Settings (page 77).
I
E208804
A
AUTO: Touch the button to switch automatic operation on. Select the desired
temperature using the temperature control. The system adjusts fan speed, air
distribution, air conditioning operation, and selects outside air or recirculated
air to heat or cool the vehicle in order to maintain the desired temperature.
B
Power: Touch the button to switch the system on and off. Switching the climate
control system off prevents outside air from entering the vehicle.
35
enUSA, First Printing
SYNC™ 3
C
Dual: This button lights up when the passenger controls are active. To switch
the dual zone operation off and link the passenger temperature to the driver
temperature, touch the DUAL button to switch it off.
D
Passenger temperature: Touch up or down to adjust the temperature.
E
Fan speed: Touch up or down to increase or decrease the volume of air
circulated in your vehicle.
F
Rear: A pop up appears on the screen to display the rear control options.
Touch the power icon to switch the rear climate control functions off and on.
Touch Rear Control to allow the rear seat passengers to adjust the rear climate
settings. Touch it again to prevent the rear seat passengers from adjusting the
settings. Rear Control automatically turns off when you use the touchscreen
to adjust the rear climate settings.
If your vehicle has automatic climate controls, select Auto to connect the rear
climate settings to the Auto settings of the driver.
Touch the up and down arrows to adjust the temperature.
To adjust fan speed, touch the up and down arrows above and below the fan
icon.
Touch Close to close the rear controls. Closing the rear climate control functions
does not affect their current settings.
G
A/C: A pop up appears on the screen to display the air conditioning options.
MAX A/C: Touch to cool your vehicle with recirculated air. Touch again for
normal A/C operation. MAX A/C distributes air through the instrument panel
vents and may help reduce odors from entering your vehicle. MAX A/C is more
economical and efficient than normal A/C mode.
A/C: Touch to switch the air conditioning on or off. Use A/C with recirculated
air to improve cooling performance and efficiency. A/C engages automatically
in MAX A/C, defrost and footwell/defrost.
Recirculated air: Touch to switch the recirculated air on or off which may
reduce the amount of time needed to cool down the interior and help reduce
odors from reaching the interior. Recirculated air also engages automatically
when you select MAX A/C. You can engage this manually in any airflow mode
except defrost. It may also turn off in all airflow modes except MAX A/C to
reduce fog potential.
H
Manual airflow distribution controls:
Defrost: A pop up appears on the screen to display the defrost options.
Note: To prevent window fogging, you cannot select recirculated air when
Defrost is on.
36
enUSA, First Printing
SYNC™ 3
MAX Defrost: Touch the button to maximize defrosting. Outside air flows
through the windshield vents, the fan automatically adjusts to the highest speed
and the temperature dial returns to the full heat position. You can use this
setting to defog or clear a thin covering of ice from the windshield. The heated
rear window also automatically turns on when you select MAX Defrost.
Panel: Distributes air through the instrument panel vents.
Floor: Distributes air through the demister vents, floor vents and rear seat floor
vents.
I
Driver temperature: Touch up or down to adjust the temperature.
E208806
A
Driver temperature: Touch up or down to adjust the temperature.
B
Heated steering wheel: Touch the heated steering wheel icon to switch the
heated steering wheel on and off (if equipped).
C
Defrost: A pop up appears on the screen to display the defrost options.
37
enUSA, First Printing
SYNC™ 3
MAX Defrost: Touch the button to maximize defrosting. Outside air flows
through the windshield vents, the fan automatically adjusts to the highest speed
and the temperature dial returns to the full heat position. You can use this
setting to defog or clear a thin covering of ice from the windshield. The heated
rear window also automatically turns on when you select MAX Defrost.
Defrost: Touch to clear the windshield of fog and thin ice. Touch again to return
to the previous airflow selection. When on, defrost provides outside air to reduce
window fogging and distributes air through the windshield defroster vents and
demister vents.
Note: To prevent window fogging, you cannot select recirculated air when
Defrost is on.
Heated rear window: Turns the heated rear window on and off. See the Heated
Windows and Mirrors chapter in your owner manual.
D
AUTO: Touch the button to switch on automatic operation. Select the desired
temperature using the temperature control. The system adjusts fan speed, air
distribution, air conditioning operation, and selects outside air or recirculated
air to heat or cool the vehicle in order to maintain the desired temperature.
E
Power: Touch the button to switch the system on and off. Switching off the
climate control system prevents outside air from entering the vehicle.
F
DUAL: This button lights up when the passenger controls are active. To switch
the dual zone operation off and link the passenger temperature to the driver
temperature, touch the DUAL button to switch it off.
G
Passenger temperature: Touch up or down to adjust the temperature.
H
Passenger heated and climate controlled seats:
Touch the heated seat icon to adjust the heated seat off and on (if equipped).
Touch the climate-controlled seat icon to adjust the climate-controlled seat
off and on (if equipped).
I
Fan speed: Touch up or down to increase or decrease the volume of air
circulated in your vehicle.
J
Rear: A pop up appears on the screen to display the rear control options.
Touch the power icon to switch the rear climate control functions off and on.
Touch Rear Control to allow the rear seat passengers to adjust the rear climate
settings. Touch it again to prevent the rear seat passengers from adjusting the
settings. Rear Control automatically turns off when you use the touchscreen
to adjust the rear climate settings.
If your vehicle has automatic climate controls, select Auto to connect the rear
climate settings to the Auto settings of the driver.
Touch the up and down arrows to adjust the temperature.
38
enUSA, First Printing
SYNC™ 3
K
Manual airflow distribution controls: Select these controls individually or
together to direct the air flow to the desired area.
Panel: Distributes air through the instrument panel vents.
Floor: Distributes air through the demister vents, floor vents and rear seat floor
vents.
L
A/C: A pop-up appears on the screen to display the air conditioning options.
MAX A/C: Touch to cool your vehicle with recirculated air. Touch again for
normal A/C operation. MAX A/C distributes air through instrument panel vents
and may help reduce odors from entering your vehicle. MAX A/C is more
economical and efficient than normal A/C mode.
A/C: Touch to switch the air conditioning on or off. Use A/C with recirculated
air to improve cooling performance and efficiency. A/C engages automatically
in MAX A/C, defrost and footwell/defrost.
Recirculated air: Touch to switch the recirculated air on or off which may
reduce the amount of time needed to cool down the interior and help reduce
odors from reaching the interior. Recirculated air also engages automatically
when you select MAX A/C. You can engage this manually in any airflow mode
except defrost. It may also turn off in all airflow modes except MAX A/C to
reduce fog potential.
M
Driver heated and climate controlled seats:
Touch the heated seat icon to adjust the heated seat off and on (if equipped).
Touch the climate-controlled seat icon to adjust the climate-controlled seat
off and on (if equipped).
39
enUSA, First Printing
SYNC™ 3
E208805
A
Driver temperature: Touch up or down to adjust the temperature.
B
Heated steering wheel: Touch the heated steering wheel icon to switch the
heated steering wheel on and off (if equipped).
C
Defrost: A pop up appears on the screen to display the defrost options.
MAX Defrost: Touch the button to maximize defrosting. Outside air flows
through the windshield vents, the fan automatically adjusts to the highest speed
and the temperature dial returns to the full heat position. You can use this
setting to defog or clear a thin covering of ice from the windshield. The heated
rear window also automatically turns on when you select MAX Defrost.
Defrost: Touch to clear the windshield of fog and thin ice. Touch again to return
to the previous airflow selection. When on, defrost provides outside air to reduce
window fogging and distributes air through the windshield defroster vents and
demister vents.
Note: To prevent window fogging, you cannot select recirculated air when
Defrost is on.
Heated rear window: Turns the heated rear window on and off. See the Heated
Windows and Mirrors chapter in your owner manual.
40
enUSA, First Printing
SYNC™ 3
D
AUTO: Touch the button to switch on automatic operation. Select the desired
temperature using the temperature control. The system adjusts fan speed, air
distribution, air conditioning operation, and selects outside air or recirculated
air to heat or cool the vehicle in order to maintain the desired temperature.
E
Power: Touch the button to switch the system on and off. Switching off the
climate control system prevents outside air from entering the vehicle.
F
DUAL: This button lights up when the passenger controls are active. To switch
the dual zone operation off and link the passenger temperature to the driver
temperature, touch the DUAL button to switch it off.
G
Passenger temperature: Touch up or down to adjust the temperature.
H
Passenger heated and climate controlled seats:
Touch the heated seat icon to adjust the heated seat off and on (if equipped).
Touch the climate-controlled seat icon to adjust the climate-controlled seat
off and on (if equipped).
I
Fan speed: Touch up or down to increase or decrease the volume of air
circulated in your vehicle.
J
Rear: A pop up appears on the screen to display the rear control options.
Touch the power icon to switch the rear climate control functions off and on.
Touch Rear Lock to prevent the rear seat passengers from adjusting the rear
climate settings. Touch it again to allow the rear seat passengers to adjusting
the settings. Rear Lock automatically turns on when you use the touchscreen
to adjust the rear climate settings.
If your vehicle has automatic climate controls, select Auto to connect the rear
climate settings to the Auto settings of the driver.
Touch the up and down arrows to adjust the temperature.
To adjust fan speed, touch the up and down arrows above and below the fan
icon.
Touch Rear again to close the rear controls. Closing the rear climate control
functions does not affect their current settings.
K
Manual airflow distribution controls:
Footwell and defrost: Distributes air through the windshield defroster vents,
demister vents, floor vents and rear seat floor vents, and provides outside air
to reduce window fogging.
Panel: Distributes air through the instrument panel vents.
Floor: Distributes air through the demister vents, floor vents and rear seat floor
vents.
Panel and floor: Distributes air through the instrument panel vents, demister
vents, floor vents and rear seat floor vents.
41
enUSA, First Printing
SYNC™ 3
L
A/C: A pop-up appears on the screen to display the air conditioning options.
MAX A/C: Touch to cool your vehicle with recirculated air. Touch again for
normal A/C operation. MAX A/C distributes air through instrument panel vents
and may help reduce odors from entering your vehicle. MAX A/C is more
economical and efficient than normal A/C mode.
A/C: Touch to switch the air conditioning on or off. Use A/C with recirculated
air to improve cooling performance and efficiency. A/C engages automatically
in MAX A/C, defrost and footwell/defrost.
Recirculated air: Touch to switch the recirculated air on or off which may
reduce the amount of time needed to cool down the interior and help reduce
odors from reaching the interior. Recirculated air also engages automatically
when you select MAX A/C. You can engage this manually in any airflow mode
except defrost. It may also turn off in all airflow modes except MAX A/C to
reduce fog potential.
M
Driver heated and climate controlled seats:
Touch the heated seat icon to adjust the heated seat off and on (if equipped).
Touch the climate-controlled seat icon to adjust the climate-controlled seat
off and on (if equipped).
Pairing Your Cell Phone for the
First Time
PHONE
WARNING
Hands-free calling is one of the main
features of SYNC 3. Once you pair your cell
phone, you can access many options using
the touchscreen or voice commands. While
the system supports a variety of features,
many are dependent on your cell phone’s
functionality.
Driving while distracted can result in
loss of vehicle control, crash and
injury. We strongly recommend that
you use extreme caution when using any
device that may take your focus off the
road. Your primary responsibility is the safe
operation of your vehicle. We recommend
against the use of any hand-held device
while driving and encourage the use of
voice-operated systems when possible.
Make sure you are aware of all applicable
local laws that may affect the use of
electronic devices while driving.
The first thing you must do to use the
phone features of SYNC 3 is to pair your
Bluetooth-enabled cell phone with SYNC
3. This allows you to use your cell phone
in a hands-free manner.
42
enUSA, First Printing
SYNC™ 3
To begin paring, make sure you activate
Bluetooth on your device.
To add a phone, select one of two methods:
Menu Item
Add Phone
Action and Description
Follow the on-screen instructions.
You hear a prompt telling you to search for SYNC on your
device.
Select SYNC on your device.
Confirm that the six-digit PIN appearing on your phone
matches the six-digit PIN that displays on the SYNC 3 screen.
Once you have confirmed the PIN, the display indicates when
the pairing is successful.
SYNC 3 asks you to choose your settings for certain features.
Your cell phone may also prompt you to give SYNC 3
permission to access information. For more information on
your cell phone's capability, see your cell phone's manual
and visit the website.
Menu Item
Add Phone
Action and Description
You will also hear a prompt telling you to search for SYNC
on your device.
Discover Other Bluetooth Follow the on-screen instructions.
Devices
Make sure you switch Bluetooth On and that your device is
discoverable through Bluetooth. See your cell phone’s manual
if necessary.
Select your device's name when it appears on the screen.
If your device prompts you to enter a PIN to pair, enter the
PIN that appears on the touchscreen. Skip the next step.
When your device prompts you, confirm that the PIN provided
by SYNC 3 matches the PIN on your cell phone.
The display indicates when the pairing is successful.
SYNC 3 prompts you to choose your settings for certain
features. Your cell phone may also prompt you to give SYNC
3 permission to access information. For more information on
your cell phone's capability, see your cell phone's manual
and visit the website.
•
•
•
At a minimum, most cell phones with
Bluetooth wireless technology support the
following functions:
• Answering an incoming call.
• Ending a call.
43
enUSA, First Printing
Dialing a number.
Call waiting notification.
Caller ID.
SYNC™ 3
Other features, such as text messaging
using Bluetooth and automatic phonebook
download, are phone-dependent features.
To check your phone’s compatibility, see
your phone’s user manual or visit:
Websites
owner.lincoln.com
www.syncmyride.ca
www.syncmaroute.ca
Phone Menu
Websites
owner.ford.com
This menu becomes available after pairing
a phone.
E205447
Item
A
Menu Item
Recent Call
List
Action and Description
Displays your recent calls.
You can place a call by selecting an entry from this list.
44
enUSA, First Printing
SYNC™ 3
Item
Menu Item
Action and Description
You can also sort the calls by selecting the drop down menu at
the top of the screen. You can choose:
All
B
Contacts
Incoming
Outgoing
Missed
All of your contacts from your phone display in alphabetical
order.
A-Z Jump
Selecting this button allows
you to choose a specific letter
to view.
C
Phone Settings Displays the name of your phone and takes you to the phone
settings options.
From this menu, you can pair subsequent devices, set ring tones
and alerts. See Settings (page 77).
D
Text Messages Displays all recent text messages.
E
Phone Keypad Use this keypad to dial in a phone number.
Use the backspace button to delete numbers.
Call
F
Press this button to begin a
call.
Do Not Disturb Touch this button to send all calls directly to your voicemail. All
ringtones and alerts will be set to silent.
iPhone users also see a button that allows
them to access Siri on the touchscreen.
You can also access Siri by pressing and
and holding the voice button on the
steering wheel.
Making Calls
There are many ways to make calls from
the SYNC 3 system, including using voice
commands. See Using Voice
Recognition (page 18). You can use the
touchscreen to place calls as well.
45
enUSA, First Printing
SYNC™ 3
To accept the call, select:
To call a number in your contacts,
select:
Menu Item
Contacts
Menu Item
Action and Description
Accept
You can then select the
name of the contact you
want to call. Any numbers
stored for that contact
display along with any
stored contact photos. You
can then select the
number that you want to
call. The system begins the
call.
Note: You can also accept the call by
pressing the phone button on the steering
wheel.
To reject the call, select:
Menu Item
Reject
Note: You can also reject the call by
pressing the phone button on the steering
wheel.
To call a number from your recent calls,
select:
Menu Item
Action and Description
Recent Call
List
You can then select an
entry that you want to call.
The system begins the call.
Ignore the call by doing nothing. SYNC 3
logs it as a missed call.
During a Phone Call
During a phone call, the contacts name
and number display on the screen along
with the call duration.
To call a number that is not stored in
your phone, select:
Menu Item
The phone status items are also visible:
•
•
•
Action and Description
Phone
Keypad
Select the digits of the
number you wish to call.
Call
The system begins the call.
You can select any of the following during
an active phone call:
Pressing the X button will delete the last
digit typed.
Receiving Calls
During an incoming call, an audible tone
sounds. Caller information appears in the
display if it is available.
46
enUSA, First Printing
Signal Strength.
Battery.
911 Assist (United States and Canada
Only). See Settings (page 77).
SYNC™ 3
Item
Item
End Call
Privacy
Immediately end a
phone call. You can
also press the
button on the
steering wheel.
Transfer the call to
the cell phone or
back to SYNC 3.
Text Messaging
Keypad
Press this to access
the phone keypad.
Note: Downloading and sending text
messages using Bluetooth are cell
phone-dependent features.
Mute
You can switch the
microphone off so
the caller does not
hear you.
Note: Certain features in text messaging
are speed-dependent and not available
when your vehicle is traveling at speeds over
3 mph (5 km/h).
Receiving a Text Message
When a new message arrives, an audible tone sounds and the screen displays a
pop-up with the caller name and ID, if supported by your cell phone. You can select:
Menu Item
Action and Description
Hear It
Have SYNC 3 read the message to you.
View
View the text on the touchscreen.
Call
To call the sender.
Reply
You can select from 15 preset message. Press the message
that you would like to use and confirm to send the message.
You can also cancel the message. SYNC 3 confirms when
the message is sent successfully.
Close
To exit the screen.
Map Mode
NAVIGATION
Map mode shows advanced viewing
comprised of 2D city maps, 3D landmarks
and 3D city models (when available). 2D
city maps show detailed outlines of
buildings, visible land use, landscape
features, and detailed railroad
infrastructure for the most essential cities
around the globe.
Your navigation system is comprised of
two main features, destination mode and
map mode.
47
enUSA, First Printing
SYNC™ 3
3D landmarks appear as clear, visible
objects that are typically recognizable and
have a certain tourism value.
E207751
3D city models are complete 3D models
of entire city areas including navigable
roads, parks, rivers and rendered buildings.
3D landmarks and city models appear in
3D map mode only. Coverage of these
varies and improves with updated map
releases.
Re-center the map by pressing
this icon whenever you scroll the
map away from your vehicle’s
current location.
Points of Interest (POI)
grouping icon: You can choose
up to three POI icons to display
E207754 on the map. If the chosen POIs
are located close together or are
at the same location a box is used to
display a single category icon instead of
repeating the same icon, in order to reduce
clutter. When you select the box on the
map, a pop-up appears indicating how
many POIs are in this location. Select the
pop up to see a list of the available POIs.
You can scroll through and select POIs
from this list.
Select the zoom in icon to see a
closer view of the map.
E207752
Select the zoom out icon to see
a farther away view of the map.
E207753
You can adjust the view in preset
increments. You can also pinch to zoom in
or out of the map.
If your vehicle is low on charge or fuel,
station icons automatically display on the
map.
The information bar tells you the names
of streets, cities or landmarks as you hover
over them with the crosshair curser.
If you have subscribed to SiriusXM Traffic
and Travel Link (where available), traffic
flow will be indicated on the map by green
(clear), yellow (slowing), and red
(stopped) road highlights. Traffic flow is
indicated where the information is
available and varies across the US.
You can change your view of the map by
tapping on the location indicator icon on
the right hand side of the screen. You can
choose from the following options:
E207750
You can choose to display traffic icons on
the map representing twelve different
types of incidents. See Settings (page
77).
Heading up (2D map) This
always shows the direction of
forward travel to be upward on
the screen. This view is available
for map scales up to 3 mi (5 km).
You can set a destination by hovering
above a location and selecting:
North up (2D map) always
shows the northern direction to
be upward on the screen.
Button
E207749
Start
3D map mode provides an
elevated perspective of the map.
Adjust this viewing angle and
rotate the map 180 degrees by
E207748
touching the map twice, and
then dragging your finger along the shaded
bar with arrows at the bottom of the map.
48
enUSA, First Printing
SYNC™ 3
Destination Mode
To set a destination, press:
Menu Item
Description
Destination
Enter a navigation destination in any of the following formats:
Search
Street Address
(number, street, city, state)
For example "12 Mainstreet Dearborn MI"
Partial Address
(number, street) if searching in current state
(number, street and zip code (or postal code in Canada)) if searching
out of state
You can enter unique addresses that contain door number prefixes
with or without the prefix. For example, you could enter "6N340
Fairway Lane" or "340 Fairway Lane".
City
(name or zip code)
Point of Interest
(name or category)
Intersection
(street 1 / street 2)
(street 1 and street 2)
(street 1 @ street 2)
(street 1 at street 2)
Latitude and Longitude
(##.###### - ##.######)
One to six decimal places are accepted.
You are given autocomplete options below the address bar to select
as you type.
If you do not give an exact destination, a menu displays with your
possible selections.
Previous Destina- Collections of your last 25 navigation destinations display here.
tions
You can select any option from the list to select it as your destination.
These locations cannot be deleted individually. To delete them,
preform a master reset. See SYNC™ 3 Troubleshooting (page 90).
49
enUSA, First Printing
SYNC™ 3
Menu Item
Home
Description
Select to navigate to your set Home destination.
The time it takes to travel from your current location to Home displays.
To set your Home, press:
Home
A prompt appears asking if you would like to create a
favorite for home. Select:
Yes
Enter a location into the search bar and press:
Save
Work
Select to navigate to your set Work destination.
The time it takes to travel from your current location to Work displays.
To set your Work:
Work
A prompt appears asking if you would like to create a
favorite for work. Select:
Yes
Enter a location into the search bar and press:
Save
Favorites
Favorites include any location you have previously saved.
To add Favorites:
Add a
Select this button and enter a location into the destination
Favorite bar.
Search
Select this option to have the system locate the address
you have entered.
Save
Select this button when the address you have entered
appears on the screen.
The address saves as a favorite and you see the favorites screen. You
can now select this address from the favorites screen.
Point of Interest POI categories that may display (based on market and vehicle
(POI) Categories configuration):
Food
Fuel
hotel
ATM
See All
Press to view additional categories. Once you have selected
a category, follow the menus to find what you are looking
for.
50
enUSA, First Printing
SYNC™ 3
Menu Item
Description
Inside of these categories you can search by:
Nearby
Along Route
Near Destination
In a City
Once you have chosen your destination, press:
Menu Item
Action and Description
Save
This saves the destination to your favorites.
Start
This shows you a map of your entire route. You can then choose your
route from three different options.
Fastest
Uses the fastest moving roads
possible.
Shortest
Uses the shortest distance possible.
Economical Route
Uses the most fuel-efficient route.
The time and distance for each route also displays.
Cancel
On the route screen, you can choose to cancel the current navigation.
The system asks for confirmation then returns you to the map mode
screen.
Once you have chosen you destination, press:
Menu Item
Start
Action and Description
The system uses a variety of screens and prompts to guide you to your
destination.
During Route guidance, you can press the maneuver arrow icon on the
map if you want the system to repeat route guidance instructions.
When the system repeats the last guidance instruction, it updates the
distance to the next guidance instruction, since it detects that the
vehicle is moving.
The navigation map shows your estimated time of arrival, remaining
travel time and the distance to your destination.
51
enUSA, First Printing
SYNC™ 3
Menu Item
Action and Description
If you have "Always Use Preferred Route" disabled, you can have the
system demo your route. Press and hold the start route button to
preview your route.
Sync may not always announce vehicle arrival at the exact point of
your destination and you may have to cancel a route manually.
During active navigation, touch the bottom
of the screen to view the menu and other
buttons.
Navigation Menu
In map mode and during active navigation
you can access the navigation menu.
To access the Navigation menu, press:
Button
Menu
You can then select:
Screen View
Full Map
A full screen map displays during navigation.
Highway
Exit Info
Highway exit information displays on the right hand side
of the screen during navigation.
Points of interest icons display for restaurants, hotels,
fuel stations and ATMs when they are present at the
exit. You can select the POI icons to receive a listing of
specific locations. You can select the POI location as a
waypoint or destination if desired.
Turn List
Only available during an active route. Displays all of the
turns on the current route.
You can choose to avoid any road on the turn list by
selecting the road from the list. A screen then appears
and you can press:
Avoid
The system calculates a new route and displays a new
turn list.
Traffic List
You can find the SiriusXM Traffic and Travel Link information by
pressing this button. This information requires an active subscription
to SiriusXM Traffic and Travel Link.
When a route is not active, a list of nearby traffic incidents displays
(if any are present).
When a route is active, you can choose to display a list of traffic nearby
or on the route.
52
enUSA, First Printing
SYNC™ 3
Button
Navigation
Settings
Press this button to adjust your preferences. See Settings (page 77).
Where Am I?
Provides your current location city, longitude and latitude and the
nearest road.
The following are only available on the menu during an active navigation route:
Cancel Route
The system asks for confirmation and then returns you to the map
mode screen.
Mute Guidance
Selecting this option switches off the audio navigation guidance. Press
the button again to un-mute guidance.
View Route
Press this to see a map of the full route.
Detour
An alternate route displays in comparison with the current route.
Edit Waypoints
Only available if you have an active waypoint on your route. See
Waypoints later in this section for information on how to set
waypoints.
Use this button to re-order or remove your waypoints.
You can
also have
the system
set the
order for
you by
pressing:
Optimize Order
To return to Go
your route
press:
1.
Select the search icon (magnifying
glass) while on an active route. This
brings up the destination menu.
2. Set your destination using any of the
given methods. Once the destination
has been selected, the screen allows
you to set the destination as a
waypoint by selecting:
Waypoints
You can add a waypoint to a navigation
route as a destination along your route.
To add a waypoint:
53
enUSA, First Printing
SYNC™ 3
Menu Item
Add Waypoint
The waypoint list then appears and you are
able to re-order all of your waypoints by
selecting the menu icon on the right hand
side of the location. You can select up to
five waypoints.
You can also have the system set the order Optimize Order
for you by pressing:
To return to your route, press:
Go
For restaurants, cityseekr can provide
information such as star rating, average
cost, review, handicap access, hours of
operation, and website address.
cityseekr (If Equipped)
Note: cityseekr point of interest (POI)
information is limited to approximately 1110
cities (1049 in the United States, 36 in
Canada and 15 in Mexico).
For hotels, cityseekr can provide
information such as star rating, price
category, review, check-in and checkout
times, hotel service icons and website
address. Hotel service icons include:
•
•
•
•
•
•
•
•
•
•
E142634
cityseekr, when available, is a service that
provides more information about certain
points of interest such as restaurants,
hotels and attractions.
When you have selected a point of interest,
the location and information appear, such
as address, phone number and a star
rating.
Attractions include nearby landmarks,
amusement parks, historic buildings and
more. cityseekr can provide information
such as star rating, reviews, hour of
operation and admission price.
Press More Information to see a photo,
a review, a list of services and facilities, the
average room or meal price and the web
address. This screen displays the point of
interest icons.
54
enUSA, First Printing
Restaurant
Business center
Handicap facilities
Laundry
Refrigerator
24 hour room service
Fitness center
Internet access
Pool
Wi-FI
SYNC™ 3
SiriusXM Traffic and Travel Link
Navigation Map Updates
SiriusXM Traffic and Travel Link is available
on vehicles equipped with navigation and
only in select markets. You must activate
and subscribe to receive SiriusXM Traffic
and Travel Link information. It helps you
locate the best gas prices, find movie
listings, get current traffic alerts, view the
weather map, get accurate ski conditions
and see current sports scores. See Apps
(page 75).
Annual navigation map updates are
available for purchase through your
dealership, by calling 1-866-462-8837 in
the United States and Canada or
01-800-557-5539 in Mexico. You can also
visit:
Website
www.navigation.com/sync
The system calculates a reasonable
efficient route based on available speed
limits, traffic, and road conditions. You may
know a local short cut that is more efficient
at a given time than the route provided by
SYNC 3, but you should expect a slight
difference in minutes or miles with the
SYNC 3 route.
You need to specify the make and model
of your vehicle to determine if there is an
update available.
HERE is the digital map provider for the
navigation application. If you find map data
errors, you may report them directly to
HERE by going to
www.here.com/mapcreator. HERE
evaluates all reported map errors and
responds with the result of their
investigation by e-mail.
Map coverage includes the USA (including
Puerto Rico and the US Virgin Islands),
Canada and Mexico.
55
enUSA, First Printing
SYNC™ 3
ELECTRIC VEHICLE INFORMATION
E211289
If your vehicle is a Hybrid Electric Vehicle
or a Plug-In Hybrid Electric vehicle, it has
unique electric vehicle information that is
available through the Apps section of the
touch screen.
56
enUSA, First Printing
SYNC™ 3
E210727
Callout
Note: You can set up and edit these profiles
using the MyFord Mobile internet
application. For more information on MyFord
Mobile and to set up your MyFord Mobile
account, visit:
Item
A
Power Flow
B
Charge Settings
Website
Charge Settings (Ford Energi
Vehicles Only)
www.myfordmobile.com
This screen allows you to set up the
charging convenience features.
57
enUSA, First Printing
SYNC™ 3
To improve the charging experience, your vehicle has the following convenience
features:
Feature
Description
Value Charge
Your vehicle schedules its charging time for when the utility rates
are lowest. Contact your utility company to see what rates are
available.
Charge Now
Your vehicle starts charging immediately after you connect the
charging plug.
Cabin Conditioning
Get the most miles out of every charge by conditioning your
plugged in vehicle. Set the cabin temperature when you set your
GO Time in order to use energy from your home, or charging
station, instead of your vehicle battery.
My GO Times
Setting GO Times allows you to control charging schedules and
cabin conditioning settings so your vehicle is ready to drive when
you are. By setting a GO Time, your vehicle can use your value
charge settings to minimize your electricity costs but still prioritize
getting a full charge before your GO Time. A calendar view allows
you to program two GO Times per day for each day of the week.
Note: Remember, you must plug in your vehicle for My GO Time
to work.
Charge Settings Screen
Each of the four areas highlighted below
show a different feature of the charge
settings screen.
58
enUSA, First Printing
SYNC™ 3
E210843
A
My GO Time summary displays the next GO Time and cabin temperature
setting.
B
Charging status and actual times displays charging status with the charging
start time, end time, and duration.
C
Charge profile and mode displays the charging profile and charging mode for
the vehicle's present location.
D
Estimated charge time limits displays the estimated minimum and maximum
times to fully charge the high-voltage battery and the battery’s present state
of charge as a percentage of total plug-in capacity.
59
enUSA, First Printing
SYNC™ 3
My GO Time Summary
E210844
Item
Menu Item
Action and Description
A
My Go Time
This area of the screen shows your scheduled Go Time and your
cabin conditioning information.
B
Next GO
Time
This is the time and date of your next set drive time. Your vehicle
automatically schedules charging and cabin conditioning to finish
by this time.
C
Temperature This is the chosen cabin conditioning setting for this GO Time.
D
Edit
This accesses your GO Time Schedule (see GO Time Schedule
later in this section).
E
Skip
This cancels the cabin conditioning for the present GO Time.
Once you touch Skip, the GO Time and Temperature grey out,
and the LED illuminates on the Skip button. Touch the button
again to switch on the cabin conditioning. This feature allows
you to ignore the present GO Time without having to delete it or
having to switch off the entire schedule (see GO Time Schedule
later in this section). After the present GO Time passes, this
feature resets.
60
enUSA, First Printing
SYNC™ 3
Conflict Notification
highlighting areas of the screen in colored
text.
The system alerts you to any conflicts by
If your battery cannot have a full charge by the scheduled drive time, the system
highlights your next GO Time and Charge Complete time and the following
message appears:
Menu Item
Action and Description
Charge at GO This is normal; the vehicle is informing you of the conflicting situation.
Time: under This notification only displays when the gearshift selector lever is in
100%
position P.
Note: Charging occurs as soon as you plug the vehicle in. The system
limits cabin conditioning to 15 minutes before your GO Time.
To eliminate the conflict notification
immediately or to prevent a conflict in the
future, try the following:
• Switch the present GO Time to occur
later.
• Plug the vehicle into a 240V high
current charging station instead of
using the 120V low current convenience
cord. Higher power charging yields
shorter charge times.
• Plug the vehicle in sooner.
61
enUSA, First Printing
SYNC™ 3
Charging Status and Actual Times
E210845
Item
A
Menu Item
Charge
Status
Action and Description
This is the status of the charging system, which includes the
charging plug, high-voltage battery and charger.
Next Charge
This means the vehicle is
unplugged. Charge Start
and Complete information
is for the present vehicle
location.
Waiting to charge
This means you plugged
the vehicle in and it is ready
to charge. Typical of Value
Charge mode, the vehicle
may not start charging
right away because it is set
to charge at times with
lower utility costs.
Charging
This means the highvoltage battery is charging.
62
enUSA, First Printing
SYNC™ 3
Item
B
Menu Item
Complete
Action and Description
Charged
This informs you that the
high-voltage battery is fully
charged and not currently
scheduled for further charging.
Fault
This alerts you that a fault
is present and is preventing
the high-voltage battery
from charging. Check the
charge plug connection,
charge cord, and charging
station.
This is the estimated time of charge completion.
Charge Now Duration
When the vehicle is in
Charge Now mode, and
unplugged, the system
displays the charging duration in hours. Once you
plug in the vehicle, the
value shows the estimated
time to finish charging.
Scheduled Charge Complete Time
When the vehicle is in
Value Charge mode, the
system displays the estimated charge complete
time. It is normal for the
estimated complete time
to change when charging.
The vehicle keeps charging
until the high-voltage
battery is fully charged.
63
enUSA, First Printing
SYNC™ 3
Item
C
Menu Item
Start
Action and Description
This is the scheduled start time of charging.
At Plug In
When the vehicle is in
Charge Now mode, and
unplugged, the message At
Plug In appears, indicating
the vehicle immediately
starts charging once you
plug it in. Once you plug it
in, the system shows the
actual charge start time.
Scheduled Charge Start Time
When the vehicle is in
Value Charge mode, the
system displays the
scheduled charge start
time (for example, 8:00
PM). Once charging starts,
the system continues to
display the actual charge
start time.
Value Charge Profile and Mode
E210846
64
enUSA, First Printing
SYNC™ 3
Item
A
Menu Item
Action and Description
Value Charge This is the name of the presently detected Value Charge Profile.
Profile
The system detects a customer defined value charge profile
when the vehicle is within approximately 300 ft (91.4 m) of the
GPS location registered for the profile. If the vehicle is close to
more than one charge profile location, it chooses the closest.
Default Profile
Displays if you have not set up value
charge profiles for specific locations
through MyFord Mobile or if you are not
close enough to a defined profile location.
B
Charge Now
Touch this button if you want your vehicle to immediately charge
when plugged in at this profile location. This button illuminates
when Charge Now is the charge mode selected for the presently
detected charge profile.
C
Value Charge Touch this button if you want to take advantage of off-peak
electricity rates. The vehicle optimizes the charge schedule to
be complete by the next GO Time. This button illuminates when
Value Charge is the charge mode selected for the presently
detected charge profile.
D
Edit
Touch this button to access your Value Charge profiles settings
screen (see Value Charge Profiles later in this section).
65
enUSA, First Printing
SYNC™ 3
Estimated Charge Time Limits
E210847
Item
Menu Item
Action and Description
A
Battery
This shows you the battery's current charge displayed as a
percentage. A reading of 100% means the battery has a full
charge. A reading of 0% indicates the battery has no plug-in
energy left.
B
To Fully
Charge
240V / High Power is the estimated minimum charging time
from the present high-voltage battery level to full charge (100%).
This represents the shortest amount of time you should expect
the high-voltage battery to recharge under ideal conditions. Ideal
conditions include a 240V charging station and a minimum 30A
service and high-voltage battery at a moderate temperature.
Note: Some charging stations use lower voltage (208V), which
result in longer charge times.
120V / Low Power is the estimated maximum charging time
from the present high-voltage battery level to full charge (100%).
This represents the longest amount of time you should expect
the high-voltage battery to recharge under normal conditions.
Normal conditions include a 120V convenience cord and 12A
service.
66
enUSA, First Printing
SYNC™ 3
Item
Menu Item
Action and Description
Note: Charging may take longer when the AC line voltage is low
and may indicate your electrical source is not meeting certain
requirements.
Note: These charging times are only estimates. It is normal for your actual charge duration
to be longer.
GO Time Schedule
You can access the GO Time Schedule by
selecting the edit option under MY GO
Time on the Charge Setting screen.
Menu Item
Action and Description
On
This turns on the GO Time schedule.
Off
This turns off the GO Time schedule. This also turns off the cabin
conditioning function. Use this mode to prevent using energy for
cabin preconditioning when you leave your vehicle plugged in and
do not plan to use it for a while, such as when on vacation.
Note: If you choose to perform Value Charging with the schedule
off, the vehicle schedules charging to finish at the lowest cost
within 24 hours of plugging the vehicle in.
This displays the GO Time day-of-week and time. The blue highlighted GO Time is the present GO Time, which the vehicle is using
for charge scheduling and cabin conditioning. You can schedule
two GO Time events per day for each day of the week.
My GO Times
Allows you to edit the GO Time and
cabin conditioning temperature.
--:--
Indicates that you can add a GO
Time to this slot.
GO Time 1
GO Time 2
Note: If you set GO Time 2 to occur before GO Time 1, a message
pops up alerting you. You need to go back to the previous screen
and switch the times so GO Time 1 occurs before GO Time 2.
Press any GO Time on the Schedule screen
to enter the editing screen for that GO
Time.
GO Time and Cabin Conditioning
This screen allows you to enter or change
the GO Time and cabin conditioning
temperature.
67
enUSA, First Printing
SYNC™ 3
Menu Item
Action and Description
Time (+ and -)
These change the hours and minutes of your GO Time. The
minutes change in increments of five. You can also switch the
settings for AM and PM by touching those buttons.
Cabin Conditioning
(+ and -)
These switch the setting for your selected cabin conditioning
temperature for this GO Time event. You can select from four
settings:
65°F (18.5°C) 72°F (22°C)
85°F (29.5°C)
Off
Note: Cabin conditioning can perform differently depending on
if you plug into a 120V convenience cord or 240V charging station.
The power available for conditioning is limited to the charging
station power available.
Note: Your vehicle may not always reach the set cabin temperature due to charging and ambient temperature conditions. This
is normal operation.
Clear
Touching this button erases the GO Time and cabin conditioning
temperature.
Save
Touching this button stores the GO Time and temperature
settings.
Note: If you select a GO Time, but choose Off for the temperature setting, the vehicle
schedules charging to be complete by your GO Time and does not condition the cabin.
Note: Make sure you save your settings before returning to the previous screen. If you do
not touch Save, the system will not automatically store the settings.
Value Charge Profiles
You can access the Value Charge Profile
screen by selecting the edit option in the
bottom right hand corner of the Charge
Settings screen.
68
enUSA, First Printing
SYNC™ 3
Menu Item
Default
Customer Defined
Value Charge
Profiles
Action and Description
This displays the charging mode and off-peak times for your
Default Value Charge profile. The system displays off-peak times
for weekdays; the remaining hours of the day are considered peak
time. The system displays similar off-peak times for weekend
days.
Charge Now
If you want your vehicle to immediately
charge when you plug it in at this profile
location.
Value Charge
If you want to take advantage of off-peak
electricity rates. The vehicle optimizes the
charge schedule to be complete by the next
GO Time.
Edit
To access your Default Value Charge Profile
settings screen (see Default Value Charge
Profile later in this section).
Once you create profile names, this section displays the Value
Charge Profile names and current Charge Mode for specific locations. You can set up and edit these profiles using the MyFord
Mobile internet or smartphone application. You can program up
to nine unique charge profiles.
Default Value Charge Profile
You can access your Default Value Charge
Profile by selecting the edit option on the
Value Charge Profiles screen.
Menu Item
Weekday
Weekend
Weekday Start
Action and Description
Set the Weekday times and Weekend times by pressing the
Weekday and Weekend buttons.
This displays the start and finish of off-peak charge times, which
you can modify, using the following:
+ and -
Allows you to switch the hours of your start
and finish times.
Weekday Finish
AM
Weekend Finish
PM
Allows you to switch the time of your start
and finish time. This setting is viewable in
12-hour mode.
Weekend Start
69
enUSA, First Printing
SYNC™ 3
Menu Item
Action and Description
240V and 120V
These buttons represent the voltage service that the default profile
is using. The system uses this selection to calculate estimated
charge times.
Clear
Touching this button erases the Default Value Charge preferences.
Save
Touching this button stores your Default Value Charge preferences.
If you touch the back arrow button to return to the previous screen
without saving your settings, the system does not store them and
you need to enter them again.
Note: Make sure you save your settings before returning to the previous screen. If you do
not touch Save the system does not store your settings.
Power
C
D
F
E
G
B
A
N
M
L
K
J
E208694
70
enUSA, First Printing
I
H
SYNC™ 3
Callout
Item
Description
A
Motor-to-Wheel Flow
Shows the direction of power flow
between the wheels and the electric
motor.
B
Electric Motor
Represents the hybrid electric motor. The
higher the motor power is, the larger the
circle around this node. Any time the
vehicle is ready to be driven, the motor
node illuminates.
C
Battery-to-Motor
Flow
D
Plug
(Engeri Only)
E
Other
2
F
Climate
2,3
Shows the direction of power flow
between the high-voltage battery and the
electric motor. Flow toward the motor
indicates the battery is providing power to
accelerate the vehicle (discharging the
battery). Flow toward the battery indicates
the electric motor is providing power to the
battery (charging the battery).
1
Includes all power usage from the low
voltage accessories such as the climate
control fan, headlights and heated seats.
The higher the power usage is from these
accessories, the larger the circle around
the node. This node illuminates anytime
the vehicle is on since there is always some
low level power in use.
Includes the power usage from the highvoltage climate control components such
as the electric A/C compressor and the
electric heater (Energi only). The higher
the power usage is from these components, the larger the circle around this node.
71
enUSA, First Printing
Appears when you plug your vehicle into
the charging station. When charging the
high voltage battery from the charging
station, you can see flow from the plug to
the battery on the screen.
SYNC™ 3
Callout
Item
Description
G
High Voltage Battery Power
Represents your high-voltage battery. A
circle illuminates around the node when
the high-voltage battery is receiving power
from regenerative braking or engine charging. The higher the power going into the
high-voltage battery, the larger the circle
around this node.
H
Fuel
Represents the fuel tank in the vehicle.
I
Fuel-to-Engine Flow
Shows flow from the fuel tank to the
engine when the engine is on and using fuel
(there are some cases where the engine is
on, but not using any fuel). When the
engine is on, but not using fuel, the engine
node is active, but the fuel flow path is off.
An example of this is when your foot is off
the accelerator pedal and the vehicle is
traveling at a high speed.
J
Engine On Due to:
Provides you with the reason(s) the
gasoline engine is on. When the gasoline
engine is off, this display does not appear.
Engine On due to reasons displayed by
the system are in a chart following this list.
K
Motor-to-Engine Flow
Shows the direction of power flow
between the engine and the electric motor.
The direction indicates if the engine is
providing power to the high-voltage electrical system, or if the high-voltage electrical system is providing power to control
or start the engine.
L
Engine Power
Represents the gasoline engine. It illuminates only when the gasoline engine is on.
The higher the engine power is, the larger
the circle around this node.
M
Engine-to-Wheels Flow
Shows the direction of the power flow
between the engine and the wheels.
N
Drive Power
Represents the power going to the wheels.
The higher the wheel power is, the larger
the circle around this node. When the
engine is off, drive power displays in blue.
When the engine is on, drive power displays
in grey.
72
enUSA, First Printing
SYNC™ 3
1
2
The battery-to-motor flow includes
battery power the vehicle is using for
acceleration. It does not include energy the
vehicle is using for accessories (such as air
conditioning, headlights and radio). This
screen displays accessories and climate
usage separately.
Accessories indicates electrical power
demands from your vehicle’s accessory
systems. Accessories use power but do not
contribute to making the vehicle move. The
power flow displays power usage from the
climate control system and other
accessories separately.
3
The climate control system may
determine A/C is necessary even when you
turn it off. In this case, you may see some
climate power when the A/C is off.
Engine On due to
Heater Setting
The engine is on because of the heater setting. Reduce
or turn off the heater setting to return to electric mode.
High Speed
The engine is on because the vehicle speed exceeds
the level for electric mode operation. Reduce the speed
to return to electric mode.
Drive Power
The engine is on when applying pressure to the accelerator pedal or switching on the speed control. Reduce
pressure on the accelerator pedal or switch off the
speed control to return to full electric mode.
Neutral Gear
The engine is on because the vehicle is in neutral gear.
Shift out of neutral gear to return to electric mode.
Low Gear
The engine is on because the vehicle is in low gear. Shift
out of low gear to return to electric mode.
Battery Charging
The engine is on to charge the high-voltage battery. The
vehicle returns to electric mode once the battery is
charged.
Low Use
The engine is on to maintain engine oil quality. The
vehicle returns to electric mode when low engine use
mode is complete. See Plug-in Hybrid Vehicle Operation
in your owner manual.
(Energi Only)
Battery Temperature
The engine is on due to high or low high-voltage battery
temperature. This is a normal operating condition. The
vehicle returns to electric mode automatically when
possible.
73
enUSA, First Printing
SYNC™ 3
Engine On due to
(Energi Only)
Normal Operation
The engine is on to optimize vehicle operation. The
vehicle returns to electric mode when possible.
Engine Braking Active
The engine is on to provide increased powertrain
braking. This can occur when you turn on the grade
assist feature, when speed control is on or when driving
with your foot off the accelerator pedal. Turning off
grade assist or speed control may allow the vehicle to
return to electric mode.
Status
This indicates which mode is active within
the vehicle system.
Menu Item
Action and Description
Status: Hybrid Drive
The electric motor and gasoline engine are powering
the vehicle.
Status: Charging HV Battery
The hybrid system is storing power in the high-voltage
battery.
Status: Idle
The vehicle is either at rest, or sharing very little power
between the electric system parts.
Status: Electric Drive
The vehicle is driving in electric mode (the power is
coming from the electric motor). The gasoline engine
is off in this mode.
Status: Charge Complete
The high-voltage battery charging from the charging
station is complete.
(Energi Only)
74
enUSA, First Printing
SYNC™ 3
Note: iPhone users need to connect the
phone to the USB port.
Status
Privacy Notice for GPS Mapping with
MyFord and MyLincoln Mobile
Note: For information on available apps,
supported smartphone devices and
troubleshooting tips please visit:
MyFord or MyLincoln Mobile allows for GPS
mapping when a vehicle is registered to a
MyFord or MyLincoln Mobile account. To
remove the vehicle from the account,
thereby removing GPS mapping ability, a
Master Reset can be performed in the
vehicle. See Settings (page 77).
Websites
owner.ford.com
owner.lincoln.com
www.syncmyride.ca
www.syncmaroute.ca
Before transferring ownership of a vehicle,
owners may choose to execute a Master
Reset or Factory Reset (completed via the
MyFord or MyLincoln Mobile website).
Either method removes the vehicle from
all MyFord or MyLincoln Mobile accounts.
Note: Make sure you have an active account
for the app that you have downloaded.
Some apps will work automatically with no
setup. Other apps will want you to configure
your personal settings and personalize your
experience by creating stations or favorites.
We recommend you do this at home or
outside of your vehicle.
It is recommended that new owners
conduct a Master Reset upon taking
possession of the vehicle to remove it from
any existing MyFord or MyLincoln Mobile
accounts. The new owner can activate a
MyFord or MyLincoln Mobile account by
completing registration process on the
website.
Note: We encourage you to review the
smartphone app’s terms of service and
privacy policies because Ford is not
responsible for your app or its use of data
Note: In order to use an app with SYNC 3,
the App needs to be running in the
background of your phone. If you shut down
the app on your phone, it shuts down the
app on SYNC 3 as well.
Website
www.myfordmobile.com
owner.lincoln.com
www.syncmyride.ca
www.syncmaroute.ca
Note: If a SYNC 3 AppLink compatible app
is not shown in the Apps Domain, make sure
the required app is running on the mobile
device.
APPS
The system enables voice, steering wheel,
and touch screen control of SYNC 3
AppLink enabled smartphone apps. Once
an app is running through AppLink, you can
control main features of the app through
voice commands and steering wheel
controls.
Note: You must pair and connect your
smartphone via Bluetooth to SYNC 3 to
access AppLink.
75
enUSA, First Printing
SYNC™ 3
App Permissions
Menu Item
Action and Description
Find New Apps
SYNC 3 will search
and connect to
compatible app(s)
running on your
mobile device.
The system organizes the App permissions
into groups. You can grant these group
permissions individually. You can change
a permission group status any time when
not driving, by using the settings menu.
While in the settings menu, you can also
see the data included in each group.
When you launch an app using SYNC 3,
the system may ask you to grant certain
permissions, for example Vehicle
information, Driving characteristics, GPS
and Speed, and/or Push notifications. You
can enable all groups or none of them
during the initial app permissions prompts.
The settings menu offers individual group
permission control.
Enabling SYNC 3 Mobile Apps
In order to enable mobile apps, SYNC 3
requires user consent to send and receive
app authorization information and updates
using the data plan associated with the
connected device.
The connected device sends data to Ford
in the United States. The information is
encrypted and includes your VIN, SYNC 3
module number, anonymous usage
statistics and debugging information.
Updates may take place automatically.
Note: You are only prompted to grant
permissions the first time you use an app
with SYNC 3.
Note: If you disable group permissions,
apps will still be enabled to work with SYNC
unless you deactivate All Apps in the
settings menu.
Note: You must enable mobile apps for
each connected device the first time you
select a mobile app using the system.
SiriusXM Traffic and Travel Link (If
Note: Ford reserves the right to limit
functionality or deactivate mobile apps at
any time.
Equipped)
WARNING
Note: Standard data rates apply. Ford is
not responsible for any additional charges
you may receive from your service provider,
when your vehicle sends or receives data
through the connected device. This includes
any additional charges incurred due to
driving in areas when roaming out of a home
network.
Driving while distracted can result in
loss of vehicle control, crash and
injury. We strongly recommend that
you use extreme caution when using any
device that may take your focus off the
road. Your primary responsibility is the safe
operation of your vehicle. We recommend
against the use of any handheld device
while driving and encourage the use of
voice-operated systems when possible.
Make sure you are aware of all applicable
local laws that may affect the use of
electronic devices while driving.
You can enable and disable apps through
settings. See Settings (page 77).
Note: SiriusXM Traffic and Travel Link may
not be available in all markets.
76
enUSA, First Printing
SYNC™ 3
Note: In order to use SiriusXM Traffic and
Travel Link, your vehicle must have
navigation.
Note: Neither Sirius nor Ford is responsible
for any errors or inaccuracies in the SiriusXM
Traffic and Travel Link services or its use in
vehicles.
Note: A paid subscription is required to
access and use these features. Go to
www.siriusxm.com/travellink for more
information.
When you subscribe to SiriusXM Traffic
and Travel Link, it can help you locate the
best gas prices, find movie listings, get
current traffic alerts, view the current
weather map, get accurate ski conditions
and see scores to current sports games.
Note: Visit www.siriusxm.com/traffic and
click on Coverage map and details for a
complete listing of all traffic areas covered
by SiriusXM Traffic and Travel Link.
Menu Item
Traffic on Route
Traffic Nearby
Action and Description
Touch these buttons to identify traffic incidents on your route,
near your vehicle’s current location or near any of your favorite
places, if programmed.
Fuel Prices
Touch this button to view fuel prices at stations close to your
vehicle’s location or on an active navigation route.
Movie Listings
Touch this button to view nearby movie theaters and their
show times, if available.
Weather
Touch this button to view the nearby weather, current weather,
or the five-day forecast for the chosen area.
Map
Select to see the weather map,
which can show storms, radar
information, charts and winds.
Area
Select to choose from a listing of
weather locations.
Sports Info
Touch this button to view scores and schedules from a variety
of sports. You can also save up to 10 favorite teams for easier
access. The score automatically refreshes when a game is in
progress.
Ski Conditions
Touch this button to view ski conditions for a specific area.
Sound
SETTINGS
Pressing this button allows you to adjust
the following:
Under this menu, you can access and
adjust the settings for many of the system
features. To access additional settings,
swipe the screen left or right.
77
enUSA, First Printing
SYNC™ 3
Sound Settings
Reset All
Returns Treble, Midrange, and Bass sound settings to factory levels.
Treble
Midrange
Bass
Balance / Fade
Speed Adaptive Volume
Occupancy Mode
Sound Settings
Stereo
Surround
Your vehicle might not have all of these features.
Media Player
This button is available when a media
device such as a Bluetooth Stereo or USB
device is the active audio source. Pressing
the button allows you to access the
following options for active devices only.
Menu Item
Podcast Speed
Action and Description
For some Apple devices, SYNC 3 can adjust the playback speed of
podcasts. When a podcast is playing, you can choose:
Slower
Normal
Faster
Audiobook Speed For some Apple devices, SYNC 3 can adjust the playback speed of
audiobooks. When an audiobook is playing, you can choose:
Slower
Cover Art Priority
Normal
For some Apple devices, SYNC 3 can adjust the playback speed of
audiobooks. When an audiobook is playing, you can choose:
Media Player
Cover art displays from your device’s music
files. If no cover art for the files exists on the
device, then the Gracenote Database provides
cover art.
78
enUSA, First Printing
Faster
SYNC™ 3
Menu Item
Action and Description
Gracenote®
The Gracenote Database supplied cover art is
used for your music files. This overrides any
cover art from your device.
Gracenote® Data- This allows you to view the version level of the Gracenote Database.
base Info
Device Information
This allows you to view the manufacturer and model number of your
media device.
You can adjust the following features:
Clock
To adjust the time, select the up and down
arrows on either side of the screen. The
arrows on the left adjust the hour and
arrows on the right adjust the minute. You
can then select AM or PM.
Menu Item
Action and Description
Clock Format
Select how time displays.
Auto Time Zone
Update
When active, the clock adjusts to time zone changes.
Reset Clock to
GPS Time
When selected, the vehicle clock resets to GPS satellite time.
Bluetooth
The system automatically saves any
updates you make to the settings.
Pressing this button allows you to access
the following:
Menu Item
Bluetooth
Action
On
Off
Phone
You must activate Bluetooth to pair a
Bluetooth-enabled device.
You must activate Bluetooth to pair your
phone.
The processes of pairing a Bluetooth
device is the same as pairing a phone. See
Pairing a Device in Phone settings for how
to pair a device and the available options.
79
enUSA, First Printing
SYNC™ 3
Pairing a Device
Add a Bluetooth Make sure that Bluetooth is set to On and that your cell phone is in
Device
the correct mode. See your cell phone’s manual if necessary.
Website
There are two ways to pair a Bluetooth
enabled device.
www.syncmaroute.ca
Have the system find your device
Have your device find the system
Make sure your device is discoverable.
In the Bluetooth menu of your device,
select SYNC.
Select your device when it appears on
the system screen.
A six-digit PIN appears on your device
and on the system screen.
If your device prompts you to enter a PIN,
enter the PIN displayed on the touchscreen.
If you are not asked to enter a pin,
confirm that the PIN provided by SYNC
3 matches the PIN on your cell phone
when you are prompted by the system.
The display indicates when the pairing is
successful.
SYNC 3 asks you to choose your settings
for certain features. You cell phone may
also prompt you to give SYNC 3 permission to access information. For more
information on your cell phone's capability, see your cell phone's manual and
visit the Ford or Lincoln website.
A six-digit PIN appears on your device
and on the system screen.
If your device prompts you to enter a PIN,
enter the PIN displayed on the touchscreen.
If the system does not ask you to enter a
pin, confirm that the PIN provided by
SYNC 3 matches the PIN on your cell
phone when you are prompted by the
system.
The display indicates when the pairing is
successful.
SYNC 3 asks you to choose your settings
for certain features. Your cell phone may
also prompt you to give SYNC 3 permission to access information. For more
information on your cell phone's capability, see your cell phone's manual and
visit the Ford or Lincoln website.
Website
owner.ford.com
owner.lincoln.com
www.syncmyride.ca
www.syncmaroute.ca
Website
owner.ford.com
owner.lincoln.com
www.syncmyride.ca
Once you have paired a device you can
adjust the following options.
80
enUSA, First Printing
SYNC™ 3
Menu Item
Action and Description
View Devices
You can then select:
Add a Bluetooth
Device
You can add a Bluetooth-enabled device by following the steps in
the previous table.
You can select a phone by touching the name of the phone on the screen. You then
have the following options:
Connect
Disconnect
Depending on the status of the device, you can select either of these
options to interact with the selected device.
Device Information
Allows you to see phone and device information.
Make Primary
Allows you to select this device to be your preferred device.
Delete
Removes the selected device from the system.
Menu Item
Action and Description
Manage Contacts
You can then select:
Auto Phonebook
Download
Enable this option to have SYNC 3 periodically re-download your
phonebook to keep your contact list up to date.
Display Contact
Photos
Enable this option to have the photos associated with your contacts
displayed on the touchscreen, if this feature is supported by your
phone.
Sort By:
Choose how you would like the system to display your contacts. You
can choose:
First Name
Last Name
Re-download
Phonebook
Select this option to re-download your contact list manually.
Delete Phonebook
Select this option to delete the in vehicle contact list. Deleting the
in vehicle list does not erase the contact list on the connected phone.
81
enUSA, First Printing
SYNC™ 3
Menu Item
Action and Description
Set Phone Ringtone
You can then select:
No Ringtone
No sound plays when a call comes to your phone.
Use Phone Ring- The currently selected ringtone on your phone plays when you receive
tone
a call. This option may not be available for all phones. If this option
is available, it is the default setting.
You can also select one of the three available ringers.
Menu Item
Action and Description
Text Message Notification
You can then select:
No Alert
(Silence)
No sound plays when a message comes to your phone.
You can select one of the three available notification sounds.
Voice Readout
When enabled, the caller's information is read to you.
You can enable and disable the following options as well:
Menu Item
Action and Description
Mute Audio in
Privacy
When enabled, vehicle audio (such as radio or apps) is muted for the
duration of the phone call even when the phone call is in privacy.
Roaming
Warning
When enabled, an alert displays when your phone indicates that it is
roaming. Please see your phone manual for more details.
Low Battery
Notification
When enabled, a message displays when the battery on your phone
is running low.
Select this button to modify the on or off
setting for this feature. If the mobile
phone’s contacts have been downloaded,
you can adjust the following option:
911 Assist
Note: This service is only available in the
United States and Canada.
82
enUSA, First Printing
SYNC™ 3
Menu Item
Action and Description
Set Emergency
Contacts
You can select up to two numbers from your mobile device's phonebook as emergency contacts for quick access at the end of the 911
Assist call process.
Radio
This button is available if a Radio source
such as AM or FM is the active media
source. Pressing the button allows you to
access the following features:
Menu Item
FM HD Radio
Action and Description
Activation of this feature allows you to listen to HD radio broadcasts.
AM HD Radio
(Dependent on
current radio
source, If Available)
Radio Text
This feature is available when FM Radio is your active media source.
Activate this feature to have the system display radio text.
Autoset Presets Refresh
(AST)
Selecting this option stores the six strongest stations in your current
location to the last preset bank of the currently tuned source.
Navigation
You can adjust many of the Navigation
preferences by selecting the following
menus.
83
enUSA, First Printing
SYNC™ 3
Map Preferences
Menu Item
Action and Description
Map Preferences
Then select any of the following:
3D City Model
When this option is active, the system shows 3D renderings of buildings.
Breadcrumbs
When enabled, your vehicle’s previously traveled route displays with
white dots.
POI Icons
Enable this feature to display up to 3 POI icons on the navigation map.
Once this feature is activated you can select
the icons you want displayed by selecting:
Incident Map
Icons
Select POIs
This menu allows you to choose which incident icons you would like
to have displayed on the navigation map.
Route Preferences
Menu Item
Second Level Messages, Actions and Descriptions
Route Preferences
Then select any of the following:
Preferred Route Choose to have the system display your chosen route type.
Shortest
Always Use ___
Route
Fastest
Eco
Bypass route selection in destination programming. The system only
calculates one route based on your preferred route setting.
When activated, the system uses your selected route type to calculate
only one route to the desired destination.
Use HOV Lanes The system selects High Occupancy Vehicle or car pool lanes when
providing route guidance.
Automatic Find The system searches for and displays available parking locations as
Parking
you approach your destination.
84
enUSA, First Printing
SYNC™ 3
Menu Item
Second Level Messages, Actions and Descriptions
Eco Time
Penalty
Select a level of cost for the calculated Eco Route. The higher the
setting, the longer the time allotment is for the route.
Avoid Traffic
Problems
You can select the following to have the system:
Avoid Freeways Avoid Toll Roads
Avoid Ferries/Car Trains
Navigation Preferences
Menu Item
Action and Description
Navigation Preferences
Guidance
Prompts
You can adjust how the system provides prompts.
Then select any of the following:
Voice and Tones
Voice Only
Tones Only
The connected devices sends data to Ford
in the United States. The encrypted
information includes your VIN, SYNC 3
module number, anonymous usage
statistics and debugging information.
Updates may take place automatically.
Mobile Apps
You can enable the control of compatible
mobile apps running on your Bluetooth or
USB device on SYNC 3. In order to enable
mobile apps, SYNC 3 requires user consent
to send and receive app authorization
information and updates using the data
plan associated with the connected device.
Menu Item
Mobile Apps
Note: Standard data rates will apply. Ford
is not responsible for any additional charges
you may receive from your service provider,
when your vehicle sends or receives data
through the connected device. This includes
any additional charges incurred due to
driving in areas when roaming out of a home
network.
Action and Description
On
Enable or disable the use of
mobile apps on SYNC 3.
85
enUSA, First Printing
SYNC™ 3
Menu Item
Action and Description
Off
Disabling mobile apps in the
settings menu disables automatic updates and the use of
mobile apps on SYNC 3.
You can view the status of mobile app permissions in the settings
menu.
Once Mobile Apps is enabled, you have the following options:
Update Mobile
Apps
This provides information on the current state of available app
updates.
There are three possible statuses:
Update Needed
Up-To-Date
Updating Mobile Apps…
The system has
No update is
detected a new app
required.
requiring authorization or a general
permissions update is
required.
The system is trying to receive
an update.
Request Update
Select this button if an
update is required and you
want to request this update
manually. For example, when
your mobile device is
connected to a Wi-Fi hotspot,
select:
Request Update
All Apps
Grant or deny permissions to all apps at once.
There may also
be SYNC 3
enabled apps
listed under
these options.
Grant or deny an individual app particular permissions. App permissions are organized into groups. By pressing the info book icon, you
can see which signals are included in each group.
Note: Ford and Lincoln are not responsible
or liable for any damages or loss of privacy
relating to usage of an app, or dissemination
of any vehicle data that you approve Ford
and Lincoln to provide to an app.
General
Access and adjust the system settings,
voice features, as well as phone, navigation
and wireless settings.
86
enUSA, First Printing
SYNC™ 3
Menu Item
Language
Select to have the touchscreen display in English,
Spanish or French.
Distance
Select to display units in
kilometers or miles.
Temperature
Select to display units in
Celsius or Fahrenheit.
Touch Screen Beep
Select to have the system
beep to confirm choices
made through the touchscreen.
Automatic System Updates
When activated, the
system automatically
updates when a Wi-Fi
network or mobile connection is available.
About
Information pertaining to
the system and its software.
Software Licenses
Documentation of the
software license for the
system.
Master Reset
Select to restore factory
defaults. This erases all
personal settings and
personal data.
Wi-Fi
You can adjust the following:
Menu Item
Action and Description
Wi-Fi
Enable this option to connect to Wi-Fi for vehicle software updates.
Available
Networks
This provides you with a list of available Wi-Fi networks.
When you select a network from the list you can choose:
87
enUSA, First Printing
SYNC™ 3
Menu Item
Wi-Fi Available
Notifications
Action and Description
Connect
A security code may be required.
Wireless Network Details
More information about the network
displays such as the signal strength
and security type.
The system alerts you when your vehicle is parked and a Wi-Fi
network is within range if SYNC is not already connected.
Vehicle
Ambient Lighting (If Equipped)
Note: You vehicle may not have all of these
features.
Tap a color once to active ambient lighting.
This sets the color to the highest intensity.
You can select the following features to
update their settings.
You can drag the colors up and down to
increase or decrease the intensity.
Door Keypad Code
To switch ambient lighting off, press the
active color once or drag the active color
all the way down to zero intensity.
Select this button to edit the door keypad
code. The first time you change the code,
you need to enter the five-digit factory set
code. You can find this code on the owner's
wallet card in the glove box or from your
authorized dealer.
Camera Settings
To make adjustments using the touchscreen, select:
Message
Action and Description
Camera Settings
Then select from the following:
Rear Camera
Delay
You can enable or disable this option using the slider.
You can find more information on the rear-view camera system in the parking aids chapter
of your owner manual.
Onboard Modem Serial Number (ESN)
Selecting this button on the settings menu
shows you the ESN number for your
system. You need this number for certain
registrations such as Satellite Radio.
88
enUSA, First Printing
SYNC™ 3
Display
To make adjustments using the touchscreen, select:
Menu Item
Action and Description
Brightness
Make the screen display brighter or dimmer.
Mode
You can select:
Auto
The screen automatically switches between day and
night modes based on the outside light level.
Day
The screen displays with a light background to enhance
daytime viewing.
Night
The screen displays with a darker background to make
nighttime viewing easier.
Off
The screen goes black and does not display anything.
To switch the screen back on, simply tap the screen.
Voice Control
You can adjust the voice control settings
by selecting the following options.
Menu Item
Advanced Mode
Enable this option to remove
additional voice prompts
and confirmations.
Phone Confirmation
Enable this option to have
the system confirm a
contacts name with you
before making a call.
Voice Command List
Enable this option to have
the system display a list of
available voice commands
when the voice button is
pressed.
Valet Mode
Valet mode allows you to lock the system.
No information is accessible until the
system is unlocked with the correct PIN.
89
enUSA, First Printing
SYNC™ 3
When you select valet mode a pop up
appears informing you that a four digit
code must be entered to enable and
disable valet mode. You can use any PIN
you chose but you must use the same PIN
to disable valet mode. The system asks
you to input the code.
To unlock the system, enter the same pin
number. The system reconnects to your
phone and all of your options are available
again.
Note: If the system is locked and you
cannot remember the PIN, please contact
the Customer Relationship Center.
Your SYNC 3 system is easy to use.
However, should questions arise, please
refer to the tables below.
For Ford
United States: 1-800-392-3673
Canada: 1-800-565-3673
Mexico: 01-55-5899-7594
For Lincoln
United States: 1-800-521-4140
Canada: 1-800-387-9333
Mexico: 01-55-5899-7594
To check your cell phone's compatibility,
visit the Ford or Lincoln website.
SYNC™ 3 TROUBLESHOOTING
Website
owner.ford.com
owner.lincoln.com
www.syncmyride.ca
www.syncmaroute.ca
To enable valet mode, enter your chosen
PIN. The system then asks to confirm your
PIN by reentering it. The system then locks.
Cell phone issues
Issue
Possible cause
Possible solution
There is background noise
during a phone
call.
The audio control
settings on your cell
phone may be affecting
SYNC 3 performance.
Refer to your device's manual about audio
adjustments.
During a call, I
can hear the
Possible cell phone
other person
malfunction.
but they cannot
hear me.
This is a cell phonedependent feature.
SYNC 3 is not
able to download my phone- Possible cell phone
book.
malfunction.
Try switching your cell phone off, resetting
it or removing the battery, then try again.
Make sure that the microphone for SYNC
3 is not set to off.
Check your cell phone's compatibility.
Try switching your cell phone off, resetting
it or removing the battery, then try again.
Make sure you allow SYNC 3 to retrieve
contacts from your phone. Refer to your
cell manual.
90
enUSA, First Printing
SYNC™ 3
Cell phone issues
Issue
Possible cause
Possible solution
You must switch on your cell phone and
the automatic phonebook download
feature on SYNC 3.
The system
says "Phonebook downloaded" but my Limitations on your cell
SYNC 3 phone- phone's capability.
book is empty or
is missing
contacts.
This is a cell phonedependent feature.
Make sure you allow SYNC 3 to retrieve
contacts from your phone. Refer to your
cell manual.
If the missing contacts are stored on your
SIM card, move them to your cell phone's
memory.
You must switch on your cell phone and
the automatic phonebook download
feature on SYNC 3.
Check your cell phone's compatibility.
Try switching your cell phone off, resetting
it or removing the battery, then try again.
I am having
trouble
connecting my
cell phone to
SYNC 3.
Possible cell phone
malfunction.
Try deleting your device from SYNC 3 and
deleting SYNC from your device, then trying
again.
Always check the security and auto accept
prompt settings relative to the SYNC 3
Bluetooth connection on your cell phone.
Update your cell phone's firmware.
Switch the auto download setting off.
This is a cell phonedependent feature.
Check your cell phone's compatibility.
Possible cell phone
malfunction.
Try switching your cell phone off, resetting
it or removing the battery, then try again.
Text messaging
iPhone
is not working
on SYNC 3.
•
•
•
•
91
enUSA, First Printing
Go to your cell phone's Settings.
Go to the Bluetooth Menu.
Press the blue circle to the right of the
device named SYNC enter the next
menu.
Turn Show Notifications on.
SYNC™ 3
Cell phone issues
Issue
Possible cause
Possible solution
Your iPhone is now set up to forward
incoming text messages to SYNC 3.
Repeat these steps for every other SYNC 3
vehicle that you connect. Your iPhone will
only forward incoming text messages to
SYNC 3 if the iPhone is not unlocked in the
messaging application.
Replying to text messages using SYNC 3 is
not supported by iPhone.
Text messages from WhatsApp and Facebook Messenger are not supported.
This is a cell phonedependent feature.
Audible text
messages do
not work on my
This is a cell phone limitacell phone.
tion.
Your cell phone must support downloading
text messages through Bluetooth to receive
incoming text messages.
Because each cell phone is different, refer
to your device's manual for the specific cell
phone you are pairing. In fact, there can be
differences between cell phones due to
brand, model, service provider and software
version.
USB and Bluetooth Stereo issues
Issue
Possible cause
Possible solution
Disconnect the device from SYNC 3. Try
switching your device off, resetting it or
removing the battery, then reconnect it to
SYNC 3.
I am having
trouble
connecting my
device.
Make sure you are using the manufacturer's
Possible device malfunc- cable.
tion.
Make sure to correctly insert the USB cable
into the device and your vehicle's USB port.
Make sure that the device does not have
an auto-install program or active security
settings.
The device has a lock
screen enabled.
Make sure your device is unlocked before
connecting it to SYNC 3.
92
enUSA, First Printing
SYNC™ 3
USB and Bluetooth Stereo issues
Issue
Possible cause
Possible solution
SYNC 3 does
not recognize
Make sure you are not leaving the device in
my device when This is a device limitation. your vehicle during very hot or cold
I start my
temperatures.
vehicle.
This is a deviceBluetooth audio dependent feature.
does not
The device is not
stream.
connected.
Make sure you connect the device to SYNC
3 and that you have started the media
player on your device.
Your music files may not
contain the correct artist, Make sure that all song details are popusong title, album or genre lated.
information.
The file may be
corrupted.
Try replacing the corrupt file with a new
version.
SYNC 3 does
The song may have
not recognize
copyright protection that
music that is on does not allow it to play.
my device.
The file format is not
supported by SYNC 3.
Some devices require you to change the
USB settings from mass storage to media
transfer protocol class.
Convert the file to a supported format. See
Entertainment (page 25).
The device needs to be
re-indexed.
Perform a master reset. See Settings
(page 77).
The device has a lock
screen enabled.
Make sure your device is unlocked before
connecting it to SYNC 3.
Disconnect the device from SYNC 3. Try
switching your device off, resetting it or
removing the battery, then connect it back
to SYNC 3.
When I connect
my device, I
To listen to Apple devices through USB,
sometimes do
This is a device limitation.
select AirPlay from the devices Control
not hear any
Center, then select Dock Connector.
sound.
To listen to Apple devices through
Bluetooth Stereo, select AirPlay from the
devices Control Center, then select SYNC.
93
enUSA, First Printing
SYNC™ 3
Wi-Fi Issues
Issue
Possible cause
Possible solution
Failed connection.
Password error.
Verify password.
Disconnecting after
successful connection.
Weak signal probably due
to distance from the
hotspot, obstruction or high
interference.
Position the vehicle close to
the hotspot with the front of
the vehicle facing the
hotspot direction and
remove obstacles if
possible. Other Wi-Fi,
Bluetooth, microwave and
cordless phones may cause
interference.
Poor signal seen by Sync
despite being near a
hotspot.
There may be an obstruction If the vehicle is equipped
with heated windshield, try
between SYNC 3 and the
positioning the vehicle so
hotspot.
that the windshield is not
facing the hotspot. If you
have metallic window tinting
but not on the windshield,
position the vehicle to face
the hotspot. If all windows
are tinted, you can open the
windows in the direction of
the hotspot if that is feasible.
Try to remove other
obstructions that may
impact signal quality such
as opening the garage door.
A hotspot is not listed in the The hotspot was defined as Please set the network to
list of available networks.
a hidden network.
visible and try again.
94
enUSA, First Printing
SYNC™ 3
Wi-Fi Issues
Issue
Possible cause
SYNC 3 is not seen when
SYNC 3 does not provide a
searching for Wi-Fi networks hotspot.
from your phone or other
devices.
Possible solution
SYNC 3 currently does not
provide a hotspot
Software download takes
too long.
Poor signal strength, too far
from the hotspot, hotspot is
supporting multiple
connections, slow Internet
connection or other problems.
Check the signal quality
(under network details), if
SYNC 3 indicates good or
excellent, test with another
high-speed equipped
hotspot where the environment is more predictable.
SYNC 3 seems to connect
with a hotspot and the
signal strength is excellent
but the software is not being
updated.
It is possible that there is no
new software. The
connected hotspot may be
a managed one and it
requires either a subscription or agreeing to the terms
and conditions.
Test the connection with
another device, if the
hotspot requires a subscription, you may contact the
service provider.
AppLink issues
Issue
AppLink Mobile Applications: When I select "Find
New Apps," SYNC 3 does
not find any applications.
Possible cause(s)
Possible solution(s)
You did not connect an
Applink Compatible phone
to SYNC 3.
Make sure you have a
compatible smartphone; an
Android with OS 2.3 or
higher or an iPhone 3GS or
newer with iOS 5.0 or higher.
Additionally, make sure you
pair and connect your phone
95
enUSA, First Printing
SYNC™ 3
AppLink issues
Issue
Possible cause(s)
Possible solution(s)
to SYNC 3 in order to find
AppLink-capable apps on
your device. iPhone users
must also connect to a USB
port with an Apple USB
cable.
Make sure you have downloaded and installed the
latest version of the app
from your phone's app store.
Make sure the app is running
AppLink-enabled apps are on your phone. Some apps
My phone is connected, but
not installed and running on require you to register or
I still cannot find any apps.
your mobile device.
login to the app on the
phone before using them
with AppLink. Also, some
may have a "Ford SYNC"
setting, so check the app's
settings menu on the phone.
Closing and restarting apps
may help SYNC 3 find the
application if you cannot
discover it inside the vehicle.
On an Android device, if
apps have an 'Exit' or 'Quit'
Sometimes apps do not
option, then select it and
My phone is connected, my properly close and re-open
restart the app. If the app
app(s) are running, but I still their connection to SYNC 3,
does not have that option,
over ignition cycles, for
cannot find any apps.
select the phone's settings
example.
menu and select 'Apps',
then find the particular app
and choose 'Force stop.' Do
not forget to restart the app
afterward, then select "Find
New Apps" on SYNC 3.
96
enUSA, First Printing
SYNC™ 3
AppLink issues
Issue
Possible cause(s)
Possible solution(s)
On an iPhone with iOS7+, to
force close an app, double
tap the home button then
swipe up on the app to close
it. Tap the home button
again, then select the app
again to restart it. After a
few seconds, the app should
then appear in SYNC 3's
Mobile App's Menu.
My Android phone is
connected, my app(s) are
running, I restarted them,
but I still cannot find any
apps.
There is a Bluetooth issue
on some older versions of
the Android operating
system that may cause apps
that were found on your
previous vehicle drive to not
be found again if you did not
switch Bluetooth off.
97
enUSA, First Printing
Switch Bluetooth off and
then on to reset it on your
phone. If you are in your
vehicle, SYNC 3 should be
able to automatically reconnect to your phone if you
press the "Phone" button.
SYNC™ 3
AppLink issues
Issue
Possible cause(s)
Possible solution(s)
Unplug the USB cable from
the phone, wait a moment,
and plug the USB cable
My iPhone is connected, my
back in to the phone. After a
app is running, I restarted
You may need to reset the
few seconds, the app should
the app but I still cannot find USB connection to SYNC 3.
appear in SYNC 3's Mobile
it on SYNC 3.
Apps Menu. If not, "Force
Close" the application and
restart it.
Increase the Bluetooth
volume of the device by
using the device's volume
control buttons which are
most often found on the
side of the device.
I have an Android phone. I
found and started my media
The Bluetooth volume on
app on SYNC 3, but there is
the phone may be low.
no sound or the sound is
very low.
Some Android devices have
a limited number of
Bluetooth ports that apps
can use to connect. If you
I can only see some of the
AppLink apps running on my have more AppLink apps on
phone listed in the SYNC 3 your phone than the number
of available Bluetooth ports,
Mobile Apps Menu.
you will not see all of your
apps listed in the SYNC 3
mobile apps menu.
Force close or uninstall the
apps you do not want SYNC
3 to find. If the app has a
"Ford SYNC" setting, disable
that setting in the app's
settings menu on the phone.
Voice command issues
Issue
Possible cause
Possible solution
You may be using the
SYNC 3 does
wrong voice commands.
not understand
what I am
saying.
You may be speaking too
soon or at the wrong
time.
Review the cell phone voice commands
and the media voice commands at the
beginning of their respective sections.
Refer to the audio display during an active
voice session to find a list of voice
commands there.
Wait for the system to prompt you before
you state your command.
98
enUSA, First Printing
SYNC™ 3
Voice command issues
Issue
Possible cause
Possible solution
You may be using the
Review the media voice commands at the
wrong voice commands. beginning of the media section.
Say the song or artist name exactly as it is
displayed on your device. For example, say
"Play Artist Prince" or "Play song Purple
Rain".
You may not be saying
SYNC 3 does
the name exactly as it
not understand appears on your device.
the name of a
song or artist.
SYNC 3 does
not understand
or is calling the
wrong contact
when I want to
make a call.
The SYNC 3
voice control
system is having
trouble recognizing foreign
names stored
on my cell
phone.
Make sure you are saying the complete title
such as "California remix featuring Jennifer
Nettles".
If there are any abbreviations in the name,
like ESPN or CNN, you have to spell those:
"E-S-P-N" or "C-N-N".
The song or artist name
may have some special
characters that are not
being recognized by
SYNC 3.
Make sure that song titles, artists, album,
and playlists names do not have any special
characters like *, - or +.
You may not be saying
the name exactly as it
appears on your phonebook.
Make sure that you are saying the name
exactly as it appears on your phone. For
example, if your contact is "Joe Wilson",
say "Call Joe Wilson". If your contact name
is "Mom", say "Call Mom".
The contact name may
contain special characters.
Make sure that your contact names do not
have any special characters like *, - or +.
SYNC 3 applies the phonetic pronunciation
rules of the selected language to the
contact names stored on your cell phone.
You may not be saying
the name exactly as it
appears on your phonebook.
Helpful Hint: You can select your contact
manually. Press PHONE. Select the option
for phonebook and then contact name.
Press the soft-key option to hear it. SYNC
3 will read the contact name to you, giving
you some idea of the pronunciation it is
expecting.
99
enUSA, First Printing
SYNC™ 3
Voice command issues
Issue
The SYNC 3
voice control
system is having
trouble recognizing foreign
tracks, artists,
albums, genres
and playlist
names from my
media player or
USB flash drive.
Possible cause
Possible solution
You may be saying the
foreign names using the
currently selected
language for SYNC 3.
SYNC 3 applies the phonetic pronunciation
rules of the selected language to the names
stored on your media player or USB flash
drive. It is able to make some exceptions
for very popular artist names (for example,
U2) such that you can always use the
English pronunciation for these artists.
The system
generates voice
prompts and
SYNC 3 uses text-tothe pronuncispeech voice prompt
ation of some
technology.
words may not
be accurate for
my language.
SYNC 3 uses a synthetically generated
voice rather than pre-recorded human
voice.
SYNC 3 offers several new voice control
features for a wide range of languages.
Dialing a contact name directly from the
phonebook without pre-recording (for
example, “call John Smith”) or selecting a
track, artist, album, genre or playlist directly
from your media player (for example, "play
artist Madonna").
100
enUSA, First Printing
SYNC™ 3
General
Issue
The language
selected for the
instrument
cluster and
information and
entertainment
display does not
match the
SYNC 3
language
(phone, USB,
Bluetooth
audio, voice
control and
voice prompts).
Possible cause
Possible solution
SYNC 3 only supports four languages in a
single module for text display, voice control
and voice prompts. The country where you
bought your vehicle dictates the four
languages based on the most popular
SYNC 3 does not support languages spoken. If the selected language
is not available, SYNC 3 remains in the
the currently selected
language for the instru- current active language.
ment cluster and inform- SYNC 3 offers several new voice control
ation and entertainment features for a wide range of languages.
display.
Dialing a contact name directly from the
phonebook without pre-recording (for
example, “call John Smith”) or selecting a
track, artist, album, genre or playlist directly
from your media player (for example, "play
artist Madonna").
SYNC 3 System Reset
The system has a System Reset feature that can be performed if the function of a SYNC
3 feature is lost. This reset is intended to restore functionality and will not erase any
information previously stored in the system (such as paired devices, phonebook, call
history, text messages, or user settings). To perform a System Reset, press and hold
the Seek Up (>>) button while pressing and holding the Radio Power button. After
approximately 5 seconds the screen will go black. Allow 1-2 minutes for the system
reset to complete. You may then resume using the SYNC system.
For additional assistance with SYNC 3
troubleshooting please call or visit the Ford
or Lincoln Website.
Ford Support
Customer Relation- United States: 1-800-392-3673
ship Center
Canada: 1-800-565-3673
Mexico: 01-800-719-8466
Website
owner.ford.com
www.syncmyride.ca
101
enUSA, First Printing
SYNC™ 3
Ford Support
www.syncmaroute.ca
Lincoln Support
Customer Relation- United States: 1-800-521-4140
ship Center
Canada: 1-800-387-9333
Mexico: 01-800-719-8466
Website
owner.lincoln.com
www.syncmyride.ca
www.syncmaroute.ca
102
enUSA, First Printing
Index
A
P
Apps.....................................................................75
Phone..................................................................42
.....................................................................................75
SiriusXM Traffic and Travel Link......................76
During a Phone Call............................................46
Making Calls...........................................................45
Pairing Your Cell Phone for the First
Time......................................................................42
Phone Menu...........................................................44
Receiving Calls......................................................46
Text Messaging......................................................47
C
Climate...............................................................35
E
S
Electric Vehicle Information.......................56
Settings...............................................................77
Charge Settings (Ford Energi Vehicles
Only).....................................................................57
Power........................................................................70
911 Assist..................................................................82
Ambient Lighting.................................................88
Bluetooth.................................................................79
Clock..........................................................................79
Display.....................................................................89
General....................................................................86
Media Player...........................................................78
Mobile Apps...........................................................85
Navigation...............................................................83
Phone........................................................................79
Radio.........................................................................83
Sound........................................................................77
Valet Mode.............................................................89
Vehicle......................................................................88
Voice Control.........................................................89
Wi-Fi..........................................................................87
Entertainment.................................................25
AM/FM Radio.........................................................26
Apps..........................................................................34
Bluetooth Stereo or USB...................................33
CD...............................................................................32
HD Radio™ Information (If Available).........29
SIRIUS® Satellite Radio (If
Activated)..........................................................26
Sources.....................................................................25
Supported Media Players, Formats and
Metadata Information...................................34
USB Ports................................................................34
H
SYNC™ 3.............................................................3
Home Screen.....................................................17
General Information...............................................3
SYNC™ 3 Troubleshooting........................90
N
U
Navigation.........................................................47
Using Voice Recognition...............................18
cityseekr...................................................................54
Destination Mode................................................49
Map Mode...............................................................47
Navigation Map Updates..................................55
Navigation Menu...................................................52
SiriusXM Traffic and Travel Link.....................55
Waypoints...............................................................53
Audio Voice Commands.....................................19
Climate Voice Commands................................20
Mobile App Voice Commands.........................23
Navigation Voice Commands..........................22
Phone Voice Commands..................................20
SiriusXM Traffic and Travel Link Voice
Commands........................................................23
Voice Settings Commands...............................24
103
enUSA, First Printing