1
__________________________________________________
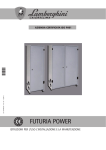
FUTURIA power
Sold and serviced by:
Hurlcon Heating.
90 Hanna Street
Noble Park VIC 3174
Ph: 03 9554 2275
INSTRUCTIONS FOR USE, INSTALLATION AND MAINTENANCE
1
1. GENERAL INSTRUCTIONS
• Carefully read the instructions contained in this
instruction booklet and store booklet in a safe place.
• After boiler installation, inform the user regarding its
operation and give them the instruction manual, this is an
integral and essential part of this product and must be kept
with care for future reference.
The plumbing circuits of the heat exchangers, each
equipped with its own local circulating pump, combine into
system Flow and return manifolds inside the module. The
control system has a microprocessor, user interface with a
large display and advanced cascade control functions.
2.2 Control panel
• Installation and maintenance must be carried out by
professionally qualified trained personnel in accordance
with national installation code AS/NZ 5601 and any
relevant electrical and local requirements and the
manufacturer's instructions. Do not carry out any operation
on the sealed control parts.
• Incorrect installation or inadequate maintenance can
result in damage or injury.
The manufacturer declines any liability for damage due to
errors in installation and use or failure to follow the
instructions.
• Before carrying out any cleaning or maintenance
operation, disconnect the unit from the power supply using
the system isolating power switch.
• In case of a fault and/or poor operation, deactivate the
unit and do not attempt to repair it or directly intervene.
Contact professionally qualified trained personnel at
Hurlcon heating. Repair and replacement of the parts must
only be carried out by a qualified technician using original
spare parts. Failure to comply with the above could affect
the safety and warranty of the unit.
• This unit must only be used for its intended purpose.
Any other use is considered improper and therefore
hazardous. (Not for use as a pool heater).
• After removing the packing, check the integrity of the
contents. If in doubt do not use the unit and report this
directly to the supplier Hurlcon Heating. Packing materials
are potentially hazardous and must not be left within the
reach of children.
• The images given in this manual are a simplified
presentation of the product only.
2. OPERATING INSTRUCTIONS
2.1 Introduction
Dear Customer,
Thank you for choosing the Lamborghini FUTURIA power,
one of the latest-generation in heat generators, featuring
advanced design and cutting-edge technology.
Please read this manual carefully since it provides
important information on safe installation, use and
maintenance.
The Lamborghini FUTURIA power condensing boiler is a
high-efficiency modular premix heat generator for heating
with very low operating emissions, running on Natural gas
or LPG and can be arranged for installation in both single
and cascade format if required.
Each module FUTURIA power is equipped with one single
(version 80 - 125) or with twin (version 160 - 250 ) boiler
with aluminium finned tube exchangers with steel premix
burners, housed in a vertical cabinet finished in epoxy
powder coated steel to resist atmospheric agents.
2
The control panel is located inside the cabinet. Access is
via a steel lockable front door opened with special key
supplied.
Operation Key
1= DHW temperature setting
optional hot water tank installed).
decrease button (with
2= DHW temperature setting increase button (with optional
hot water tank installed).
3 = Heating system temperature setting decrease button.
4 = Heating system temperature setting increase button.
5 = Display.
6 = Summer/Winter mode selection button.
7 = Economy/Comfort mode selection (with optional hot
water tank installed) and unit On/Off button.
8 = Reset button.
9 = DHW operation (with optional hot water tank installed).
10 = Summer mode.
11 = Multifunction.
12 = Eco (Economy) mode (with optional hot water tank
installed).
13 = Heating mode.
14 = Unit On / Off button.
15 = Burner On.
16 = Appears on connecting the Remote Timer Control
(optional).
symbol (detail 12 - Fig 1). To activate the COMFORT
mode, press the eco/comfort button (detail 7 - Fig. 1)
again.
17 = Information symbol.
18 = Top boiler shell.
19 = Top boiler shell system fault reset request.
20 = Fault.
2.3 Lighting and turning
Boiler lighting
Press the On/Off button (detail 14 Fig 1).
21 = Circulating pump on.
22 = Appears on connecting the external probe (optional
23 = Boiler off.
24 = Bottom boiler shell.
25 = Bottom boiler shell system fault reset request (model
160 -250only).
Indication during operation heating
A heating demand (generated by the room thermostat or
remote timer Control or 0-10 Vdc signal) is indicated by
activation of the circulating pump and the radiator (details
shown 13 & 21 - Fig. 1).
The display (detail 11- Fig. 1) shows the actual heating
delivery temperature and, during heating standby time, the
message "d". Activation of the arrows (details 18 and 24 Fig. 1) indicates which boiler module shell is in operation.
• For the following 120 seconds the display will show FH
which identifies the heating system pre-purge air venting
cycle.
• During the first 10 seconds the display will also show the
software version of the programming card:
A
= Display card software version
B
= Top boiler shell control unit software version
C
= Bottom boiler shell control unit software
version (model FUTURIA power 160 -250 only).
• Open the gas cock supply valve to the boiler.
• When the message FH disappears, the boiler is ready to
operate automatically, when the room thermostat is in the
demand mode.
Turning the boiler off
Press the button (eco comfort detail 7 – Fig 1) for 5
seconds.
DHW (with optional hot water tank installed)
A potable hot water tank heating demand is indicated by
activation of the circulating pump and the tap display
(details 9 & 21- Fig. 1).
The display (detail 11 - Fig. 1) shows the actual hot water
tank sensor temperature and, during heating standby time,
the message "d" Activation of the arrows (details 18 and
24 - Fig. 1) indicates which boiler module shell is in
operation.
Exclude hot water storage tank (economy)
Hot water tank temperature maintaining/heating can be
excluded by the user. If excluded, domestic hot water will
not be delivered. The hot water tank can be deactivated by
the user (ECO mode) by pressing the eco/comfort button
(detail 7 - Fig 1). In ECO mode the display activates the
3
When the boiler is turned off, the PCB is still powered.
Domestic hot water (with optional hot water tank installed)
and heating operation are disabled.
The antifreeze system remains activated.
To relight the boiler, press the button eco comfort detail 7
Fig. 1) again for 5 seconds.
The boiler will be immediately ready to operate whenever
domestic hot water is drawn (optional hot water tank
installed) or in case of a room thermostat demand.
To completely disconnect the power to the unit, press the
button detail 14 Fig.1B. The antifreeze system will not
work when the power and/or gas to the unit are turned off.
To avoid damage caused by freezing during long idle
periods in winter, it is advisable to drain all water from the
boiler, DHW circuit and system; or drain just the DHW
circuit and add an approved antifreeze to the heating
system, complying with that prescribed in sec. 3.3.
2.4 Adjustments
Summer/Winter Switchover
Press the button, Summer ☼/ * W inter detail 6 - Fig. 1 for
1 second.
The display activates the Summer symbol detail 10 - 1.
The heating function is deactivated, whereas the possible
production of domestic hot water (with optional external
hot water tank) remains activated. The antifreeze system
remains activated.
To deactivate Summer mode, press the button (detail 6 Fig. 1) again for 1 second.
Heating temperature adjustment
Use the heating buttons + /- (details 3 and 4 - Fig 1) it is
possible to adjust the temperature from a min of 20°C to a
max of 90°C.
DHW temperature adjustment (with optional hot water
tank installed)
Use the DHW buttons (details 1 and 2 - Fig. 1) to adjust
the temperature from a min. of 10°C to a max of 65°C.
4
Room temperature adjustment (with optional room
thermostat)
Using the room thermostat, set the personal temperature
requirement for the building.
Room temperature adjustment (with optional remote
timer control)
Using the remote timer control, set the temperature
desired in the rooms. The boiler unit will set the system
water according to the required room temperature. For
information on the remote timer control, please refer to its
user's manual.
Sliding temperature
When the optional external ambient sensor probe is
installed the corresponding symbol (detail Fig 122 - ) is
activated on the control panel display (detail 5 - Fig. 1).
The boiler control system operates with "Sliding
Temperature". In this mode, the heating system
temperature is adjusted according to the outside weather
conditions, to ensure both high comfort and energy saving
throughout the year. In particular, as the outside
temperature increases, the system delivery water
temperature is decreased according to a specific
"compensation curve".
With Sliding Temperature adjustment, the temperature set
with the heating buttons +/- (details 3 and 4 -Fig. 1)
becomes the maximum system delivery temperature.
It is advisable to set a maximum value to allow system
adjustment throughout its useful operating range.
The boiler must be adjusted at the time of installation by
trained qualified personnel. Final adjustments can be
made later if required by the user, to improve comfort.
Compensation curve and curve offset.
Press the button RESET (detail 8 - Fig. 1) for 5 seconds,
to display the actual compensation curve (Fig. 10) which
can be modified with the DHW buttons +/- (details 1 and 2
- Fig 1).
Adjust the required curve from 1 to 10 according to the
characteristic (Fig 12). By setting the curve to 0, sliding
temperature adjustment is disabled.
Press the heating buttons +/- (details 3 and 4 - Fig 1) to
access parallel curve offset (Fig 13), adjustable with the
DHW buttons +/- (details 1 and 2- Fig. 1).
Press the button reset (detail 8 - Fig 1) again for 5
seconds to exit parallel curve adjustment mode.
If the room temperature is lower than the required value, it
is advisable to set a higher order curve and vice versa.
Proceed by increasing or decreasing in steps of one then
check the results in the room.
A
Once the system pressure is restored, the boiler will
activate the 120-second per purge air venting cycle
indicated on the display by FH.
3. INSTALLATION
3.1 General Instructions
THE BOILER MUST ONLY BE INSTALLED BY TRAINED
QUALIFIED PERSONNEL, IN COMPLIANCE WITH ALL
THE INSTRUCTIONS GIVEN IN THIS TECHNICAL
MANUAL, THE PROVISIONS OF CURRENT LAWS,
NATIONAL AND LOCAL REGULATIONS, PLUS THE
RULES OF PROPER WORKMANSHIP.
FUTURIA power is a hot water heat generator that can be
operated alone or in cascade (group). When two or more
generators are installed in cascade with the original
installation kits following the installation requirements laid
down by Lamborghini in this manual, they can be
considered as a single heat generator of total power equal
to the sum of the powers of all the units connected in
cascade.
A
If the Remote Timer Control (optional) is used to set
the boiler, the above adjustments are managed according
to that given in table 1.
System water pressure adjustment
The filling pressure with the system cold must be approx.
1.0 bar. If the system pressure falls to values below
minimum, the boiler card will activate fault F37 (Fig 14).
Flashing of the arrows (details 18 & 24 - Fig 1) together
with the error code indicates which boiler shell is in fault
status.
5
All the requirements of the current standards and
regulations applicable to this "equivalent" total heating
capacity generator must be met. In particular, the location
and place of installation, safety devices and the fume
exhaust system must be adequate for the total heating
capacity of the bank of units. In fact, each FUTURIA
power is a complete and independent heat generator,
equipped with its own safety devices. In case of over
temperature, (no water or no circulation in the unit), the
protection devices cause the unit or units to shutdown,
preventing its operation.
The installation instructions given in the following
paragraphs concern single units and connection in
cascade. Given below are the possible configurations for
connection in cascade
1 Model 160 - 250
2 Model 80 - 125
4 Safety devices and separator module
Table 2 Configurations in line
6
Table 3 Opposed configurations
3.2 Place of installation
The generator can be installed directly outside or in a
suitable room with ventilation openings to the outside as
prescribed by the current regulations. If there are several
burners or extraction units that can work together in the
same room, the ventilation openings must be sized for
simultaneous
operation
of
all
the
units.
The place of installation must be free of flammable
materials, corrosive gases, volatile substances or dusts.
For positioning, leave enough space around the modules
for normal maintenance operations.
Make sure the front door opens without hindrance.
B
The air necessary for combustion enters through
special openings in the bottom and top part of the unit.
Make sure these air passages are not obstructed in any
way.
W ater system characteristics
In the presence of water harder than 25° Fr, it is advised
to use a suitable water treatment to avoid possible scaling
within the boiler, or possible corrosion caused by
aggressive water. Due to its low thermal conductivity,
scaling of just a few mm thick causes significant
overheating of the generator tube walls, with consequent
serious problems.
Water treatment is indispensable in the case of very large
systems (containing large amounts of water) or with the
frequent introduction of replenishing water to the system.
If partial or total emptying of the system becomes
necessary in these cases, it is advisable to refill with
correctly treated water.
Gas connection
The gas supply must be connected to the corresponding
union with a rigid metal pipe.
The gas meter must be of a size adequate for the
simultaneous use of all units connected to it.
Carry out the boiler gas connection in accordance with all
current regulations. The diameter of the gas pipe leaving
the generator does not determine the diameter of the pipe
between the unit and the supply line, it must be sized
according to its length and pressure loss.
Make sure to install a gas isolation shut off valve
externally to the boiler modules, enabling the gas to be
turned off even without opening the modules doors
equipped with key lock closing.
3.3 Gas and water connections
Make the relevant connections according to the
instructions given below. Make the boiler connections in
such a way that its internal manifold pipes are free of
stress for proper operation and long life of the generator.
The plumbing system must be sized correctly and
complete with all the accessories that guarantees correct
operation conditions.
In particular, provide for all the protection and safety
devices prescribed by current regulations for the complete
modular generator. They must be installed on the hot
water circuit delivery piping, immediately downstream of
the last module, within a distance of 0.5m, with no shutdevices in between. A "Safety Device and Circuit Breaker
module” equipped with internal hydraulic circuit breaker
and safety units with ISPESL certification is available by
request. Refer to the price-list or contact our sales
network.
The unit is not supplied with an expansion tank; its
connection must therefore be made by the Installer.
A filter must also be installed on the system return piping
to prevent impurities or sludge from the system clogging
and damaging the heat generators.
The filter must be installed when installing or replacing
boiler in existing systems. The manufacturer declines any
liability for damage caused to the unit by failure to install or
inadequate installation of an appropriate line filter.
7
Connection instructions
Futuria Power hot water boiler is equipped inside the
casing module with 3 manifolds (system flow delivery,
system return flow, gas lines) and a condensate drain pipe
to facilitate cascade connections and connections of a
single module to the heating system. The manifolds are
sized for a connection in series of up to 1000 kW.
The boiler is supplied with a set of seals (2 for water
manifolds, 1 for the gas manifold) with respective bolts
and nuts, (found inside the cabinet) to be used for
connection to a subsequent module (connection in
cascade). The optional kit code 042027X0, containing
Din 6 flanges, 3 blind flanges and 3 drilled flanges with
respective seals and screws, is available on request for
connection to the system.
To connect a single module
• Connections can easily be made from both sides of the
boiler. After establishing which side of the boiler to make
the water and gas connections, connect the flanges using
the joining seals supplied. When connecting to the heating
system pipes make sure that the special seals contained
in the kit have been installed correctly to avoid leaks.
• Connect a Ø40 pipe to the condensate drain pipe for
removing the condensate produced during operation (see
Fig 48).
• Fit the blind flanges contained in the kit on the opposite
side of the module, placing the special seals in between
the flanges.
1
2
3
4
5
7
Gas inlet
System delivery
System return
Condensate drain
Blind flanges - kit 042027X0 (optional)
Blind flanges - kit 042027X0 (optional)
To connect several modules in line
• Connect the first module to the system and gas pipes, as
described above, but without fitting the blank flanges on
the opposite side of the module to that of the connection.
• Connect the second module on this side, making sure to
align the connection flanges and the condensate drain
pipe. Place the seals contained in the kit between the
flanges of the two modules.
• Fit the bolts supplied with the kit into the flanges from the
inside of the first module, allowing them to protrude
through the flange in the second module. Partially tighten
the nuts on the bolts from inside the second module.
• Before tightening the nuts, make sure all the seals are
correctly positioned and the condensate drain pipes of the
two modules (see g. 49).
• Tighten the nuts and repeat the connection operations
for the following modules.
1
2
3
4
5
7
8
Gas inlet
System delivery
System return
Condensate drain
Blind flanges - kit 042027X0 (optional)
Blind flanges - kit 042027X0 (optional)
Seals and screws (standard)
To connect several opposed modules
Optional kit code 042026X0 is available for connecting the
water and gas manifolds in series. The kit contains 3
flanged "U" pipes.
A 1st Module
B 2nd Module
C 3rd Module
D 4th Module
1 Gas inlet
2 System delivery
3 System return
5 Blind flanges
7 Drilled flanges
8 Seals and screws (standard)
• Arrange the modules according to the layout of Fig. 21.
• Connect the module to the system and gas pipes using
the flanges with pipe section and respective seals
contained in the kit 042027X0 .
• Position the second module, making sure to align the
connection flanges and the condensate drain pipe. Fit the
seals (supplied) between the flanges of the two modules.
• Fit the bolts (supplied) on the flanges from inside the first
module, so they protrude through the flanges in the
second module. Partially tighten the nuts on the bolts from
inside the second module.
• Before tightening the nuts, make sure all the seals are
correctly positioned and the condensate drain pipes of the
two modules (see Fig 49).
• Tighten the nuts and repeat the connection operations
for the "U" pipes and next modules. Fit the blind flanges
contained in the kit 042027X0 on the last module.
Hydraulic Safety device and separator module
(optional)
The Hydraulic Safety Device and Separator Module for
series modular generators is an ISPESL certified module
containing a hydraulic separator and safety, protection and
control devices required by "R" section R3A and R3B,
intended for use with series modular generators
.
Every ISPESL hydraulic safety device module comprises
a cabinet of the same size and appearance as the
modular hot water generators FUTURIA power, containing
a hydraulic separator with air valve and thermal insulation,
the respective system delivery and return manifolds, a gas
manifold, and a discharge manifold for the safety valve.
The safety devices required by "R" section R3A and R3B
are fitted on the hydraulic manifolds and hydraulic
separator body. Provision is also made for the probe
pocket for a possible gas shutoff valve to be installed in
the system, on the outside of the bank of modules.
The hydraulic separator contained in the module allows
the hydraulic circuit of the modules (primary circuit) to
8
operate independently of the hydraulic circuit of the
respective heating system (secondary circuit).
The separator is sized for correct operation up to 1000
kW, and the main advantages offered are:
• An external circulating pump for the (primary circuit) is
not necessary. In fact, circulation in the primary circuit is
ensured by the small integral circulating pumps contained
inside the Futuria power hot water generators.
• When the secondary pump is deactivated, the circulation
in the system circuit also stops; the entire flow delivered
by the circulating pumps contained inside the Futuria hot
water generators is bypassed through the hydraulic
separator.
• The flow rate in the primary circuit can remain constant,
whereas the secondary circuit can function with a variable
or intermittent flow rate.
• There are no anomalous operating conditions in which
the system pumps interact with the circulating pumps
inside the hot water generators, thus creating unwanted
head and flow-rate variations in the circuits.
• Sizing of the system circulating pump can be carried out
according to the needs of just the secondary circuit and
not the boilers.
I
D
42
72
72b
95
130
138
139
298
306
307
SM
TS
PZ
FZ4
ISPESL safety devices
Hydraulic separator
DHW temperature sensor (not supplied)
Room thermostat (not supplied)
Room thermostat (not supplied)
3-way valve - with spring return: at rest on DHW
side (not supplied)
Hot water tank circulating pump (not supplied)
External probe (not supplied)
Remote control (not supplied)
Cascade temperature sensor (not supplied)
Heating system circulating pump (not supplied)
Heating system second circulating pump (not
supplied)
Delivery probe (supplied with kit FZ4)
Safety thermostat (not supplied)
Zone pump (not supplied)
Zone regulator
Parameters
Each system requires a different parameterisation. Follow
the procedure for accessing the two menus, given below;
for the parameters to be modified, refer to the tables given
alongside the plumbing diagrams.
"Service Menu"
Press the Reset button for 10 seconds to access the card
service menu.
Press the following heating buttons to select:
tS
In
Hi
rE
A 1st Module
B 2nd Module
1 Gas inlet
2 System delivery
3 System return
4 Hydraulic separator
The hydraulic safety devices separator module must be
installed directly next to the last module making up the
modular generator. The particular symmetrical shape of
the module allows it to be installed on the right side and
left side of the generator bank. Some possible connection
examples are given below.
Transparent Parameters Menu
Information menu.
History Menu.
History Menu Reset.
Select "tS" and press the RESET button.
The card has 29 transparent parameters also modifiable
from Remote Control (Service Menu).
Press the Heating buttons to scroll the list of parameters in
increasing or decreasing order.
Press the DHW buttons to modify the value of a
parameter: the change will be automatically saved.
Press the Reset button to return to the Service Menu.
Press the Reset button for 10 seconds to exit to the card
Service Menu.
"System Type Menu"
Press the Summer/Winter button for 10 seconds to access
the card System Type Menu.
The card has 21 transparent parameters.
Press the Heating buttons to scroll through the list of
parameters in increasing or decreasing order.
C 3rd Module containing the hydraulic separator
1 Gas inlet
2 System delivery
3 System return
4 Hydraulic separator
Plumbing circuit examples
Key of examples
9
Press the DHW buttons to modify the value of a
parameter: the change will be automatically saved.
Press the Summer/Winter button for 10 seconds to exit the
card System Type Menu.
One direct heating circuit
Check/Change parameter
Parameters Menu" to 4.
P.02
of
the
"Transparent
Change parameter P.02 of the "System Type Menu" to 1
Change parameter P.09 of the "System Type Menu" to 1
Two direct heating circuits
Check/Change parameter P02
Parameters Menu" to 4.
of
the
"Transparent
Change parameter P.01 of the "System Type Menu" to 4.
One direct heating circuit and one DHW circuit with
pump
Check/Change parameter P02 of the "Transparent
Parameters Menu" to 5.
Change parameter P.02 of the "System Type Menu" to 1.
Change parameter P.09 of the "System Type Menu" to 1.
Change parameter P.02 of the "System Type Menu" to 1.
Change parameter P.09 of the "System Type Menu" to 1.
Two mixed heating circuits and one direct heating
circuit
Check/Change parameter P02 of the "Transparent
Parameters Menu" to 4.
One direct heating circuit and one DHW circuit with
diverter valve
Check/Change parameter P02 of the "Transparent
Parameters Menu" to 6
Change parameter P.02 of the "System Type Menu" to 1.
Change parameter P.09 of the "System Type Menu" to 1.
Change parameter P.11 of the "System Type Menu" to 1.
10
Change parameter P.02 of the "System Type Menu" to 1.
Change parameter P.09 of the "System Type Menu" to 1.
For the electrical connection and the zone system
settings, refer to the "FZ4 zone regulator" handbook.
Two mixed heating circuits, one direct heating circuit
and one DHW circuit with pump.
Check/Change parameter
Parameters Menu" to 5.
P02
of
the
"Transparent
Change parameter P.02 of the "System Type Menu" to 1.
preferably be installed on the South, South-east wall in
Australia, or on the wall facing most of the main livingroom. The probe must never be exposed to the early
morning sun, and in general (as far as possible) it should
not be exposed to direct sunlight or weather, protect it if
necessary. In any case, the probe must not be installed
near windows, doors, vents, flues or heat sources that
could affect the reading.
Change parameter P.09 of the "System Type Menu" to 1.
For the electrical connection and the zone system
settings, refer to the "FZ4 zone regulator" Handbook.
3.4 Electrical connections
Connection to the electrical supply.
B The unit's electrical safety is only guaranteed when
correctly connected to an efficient earthing system
executed according to current safety standards. Have the
efficiency and suitability of the earthing system checked by
professionally trained and qualified personnel.
The manufacturer is not responsible for any damage
caused by failure to earth the system. Also make sure that
the electrical system is adequate for the maximum power
absorbed by the unit, as specified on the boiler data plate.
The boiler is prewired and provided with a 240 Volt cable
and plug for connection to the electricity line. The
connections to the power supply must be made with a
permanent connection and equipped with a bipolar switch
whose contacts have a minimum opening of at least 3mm,
interposing fuses of max. 3 amp between the boiler and
the line. It is important to respect the polarities (LINE:
brown wire / NEUTRAL: blue wire / EARTH: yellow-green
wire) when making connections to the electrical line.
During installation or when changing the power cable, the
earth wire must be left 2 cm longer than the others.
Accessing the electrical terminal block
The electrical terminal block is located inside a sealed box
at the bottom left hand side of the cabinet.
Make the electrical connections as shown in the wiring
diagram on sec. 64 and run the cables through the special
electrical cable glands supplied.
42
72
72b
95
A = Heating phase
B = DHW phase
C = Neutral
Note:
The end user must never change the unit's power cable. If
the cable gets damaged, switch the unit and have it
changed solely by professionally qualified personnel.
If changing the electric power cable, use solely “HAR H05
VV-F” 3x0.75mm2 cable with a maximum outside
diameter of 8 mm.
Room thermostat (optional)
CAUTION: The room thermostat must have clean
contacts. CONNECTING 230 V. TO THE TERMINALS OF
THE ROOM THERMOSTAT WILL IRREPARABLY
DAMAGE THE ELECTRONIC CARD.
When connecting a remote timer control or a timer switch,
do not take the power supply for these devices from their
cut-out contacts. Their power supply must be taken with a
direct connection from the mains or with batteries,
depending on the kind of device.
External probe (optional)
Connect the probe to the respective terminals. The
maximum permissible length of the electric cable
connecting the boiler - external probe is 50 m. A common
2-wire cable can be used. The external probe should
11
DHW temperature sensor (not supplied)
Room thermostat (not supplied)
Room thermostat (not supplied)
Diverter valve (not supplied)
130
138
139
298
299
300
301
302
306
307
For valves with 2 wires and spring return, use
the connections B and C
DHW circulating pump (not supplied)
External probe (not supplied)
Remote timer control (not supplied)
Cascade temperature sensor (not supplied)
Input 0-10 Vdc
Burner lit contact (voltage-free contact)
Fault contact (voltage-free contact)
Remote reset input (230 Volt)
Heating system circulating pump (not supplied)
Heating system second circulating pump (not
supplied)
For connection in cascade (MAX. 5 MODULES)
1. Connect the modules as shown in Fig 32
(example with 4 modules)
2.
B
The unit is equipped with one (Futuria power models
80 - 125) or two (models160 - 250) separate Ø80 flue
connections for the two burner- exchanger units.
The combustion circuits of the two units are completely
independent. When joining the two flue outlets to a single
flue or manifold (in case of a single module or connection
in cascade) it is necessary to install a fume anti-backflow
valve on each outlet to prevent operation anomalies or the
creation of hazardous conditions. Make sure to use the
optional Lamborghini kits, provided with special
anti-backflow valves.
Please note:
Before carrying out the connection, make sure to fill the
condensate trap with approx. 0.5 litres of water through
the flue connections.
A 1st Module
B 2nd Module
C 3rd Module
D 4th Module
2.
3.
4.
5.
• Module
• Module
• Module
• Module
Carry out all the electrical connections
(terminals 4 to 24) on module no. 1
On the remaining modules only connect the
power supply and possible contacts for:
burner lit (300), fault contact (301) and remote
reset input (302).
Switch on the power to the entire cascade
After the "FH" procedure,
operation of the cascade:
1:
2:
3:
4:
arrow
arrow
arrow
arrow
symbol
symbol
symbol
symbol
at
at
at
at
check
correct
top left of the display
bottom right of the display
bottom right of the display
top right of the display
If this does not occur, disconnect the power and check the
wiring in Fig. 32.
Settings
All adjustments must be made on all the modules.
Possible faults
If the electrical connection to a module is disconnected for
any reason, module 1 will activate fault F70.
If the electrical connection of a module is disconnected for
any reason, the next module will activate fault F71.
3.5 Flue connection
Important
The unit is a non-room sealed appliance with combustion
air drawn from the installation room and flue fumes
exhausted by means of a power fan (operating with flue
under pressure) and must be connected to one of the
discharge systems indicated below. Before proceeding
with installation, check and carefully comply with the local
regulations and provisions. Also comply with the
provisions concerning the positioning of wall and/or roof
terminals and the minimum distances from windows, walls,
ventilation openings, etc.
Manifold, ducts and flues must be suitably sized, designed
and made in compliance with the current standards. They
must be made of suitable materials, i.e. resistant to heat
and corrosion, smooth on the inside and hermetic. In
particular, joints must be condensate proof.
Also provide for suitable condensate drainage points,
connected through a trap to prevent the condensate
produced in the flues from running into the generators.
12
Connection with separate pipes
Separate Ø80 ducts can be connected directly to the unit.
Insert the seal 1KWMA84A on the Ø80 pipes leaving the
unit and make it adhere to the upper wall of the cabinet.
Before proceeding with installation, make sure the
maximum permissible length has not been exceeded, by
means of a simple calculation:
1. Establish the layout of the system of split Flues,
including accessories and outlet terminals for each of the
two burner/exchanger bodies.
2. Consult the table 5 and identify the losses in meq
(equivalent metres) of every component according to the
installation position.
3.
Check that the sum total of losses is less than or
equal to the maximum permissible length in
table 4.
Direct connection of Ø80 terminals code 041013X0
Each single module can be connected directly to the
terminal kits 041013X0 as shown in fig 33 connection in
bank.
Each flue kit comprises an Ø80 straight flue and flue
terminal (ref. 3), a seal (ref.1) and a centre ring (not used
in this model). For models Futuria 160 - 250 modules use
2 kits and for 80 - 125 modules use 1 kit.
B
Before installing the flues, fill the trap with approx. 0.5
litres of water through the flue connections.
B
For outside installations make the seal 1 adhere
perfectly to the top part of the cabinet, to prevent possible
infiltration of rain and atmospheric agents.
Connection with manifolds
To connect one or more modules in bank to a single flue, it
is advisable to use the special manifolds (option) given in
the table. The choice of diameter must be made according
to the total power of the bank of units, refer to information
that provided in the tables. Use a starting kit for each bank
containing manifold plug and trap) and a suitable number
of manifolds (one for each 80 - 125 and two for each 160 250).
90° bends and manifold extensions are also available for
the flue connection.
13
A - 041026X0
B - 041027X0
C - 041028X0
D - 041029X0
- Starting kit Ø200
- Starting kit Ø300
- Manifold kit Ø200 in line
- Manifold kit Ø300 in line
Arrange the height and slope of the manifold by means of
the special holes in the brackets (Fig 40 and Fig 41).
A - 041026X0
B - 041027X0
E - 041030X0
F - 041031X0
- Starting kit Ø200
- Starting kit Ø300
- Manifold kit Ø200 opposed
- Manifold kit Ø300 opposed
Fume manifold installation
Fix the fume manifold support brackets in the special
holes arranged in the modules; see (Fig 38) for side by
side modules and (Fig 39) for opposed modules.
14
Couple together the fume manifolds and the trap cap
using an appropriate “o” ring grease; see Fig.42)
Position the manifolds on the previously fixed brackets
(Fig. 43) and fix them using the special clamps Fig 44)
Insert the fume dampers (Fig 46), loosening screw “D”,
and correctly fit them on the fume flue manifold. Then
tighten screw “D” (Fig 47).
Fix the trap Fig 45)
3.6 Condensate drain
The boiler has an internal condensate drain trap
connected to an internal condensate outlet manifold.
B
Condensate outlet connection using one Boiler
15
2. Using the special key supplied, open the cabinet of the
upper exchanger body.
3. Detach the electrical connections from the gas valve
controller.
4. Loosen the gas valve (e) Fixing ring Fig” 50“A Fig 51.
5. Undo the two screws "B" and remove the fan assembly
as indicated in Fig 50 for the model 80 - 160 and in for Fig
51 the model 125 - 250.
a Place the Ø40 pipe 1 (not supplied) on the side of the
generator.
b
Slide the pipe 2 towards the arrow side at least 2-3 cm
in order to insert it in the pipe 1.
Condensate outlet connection using two or more
generators
A Place the Ø40 pipe 1 (not supplied) on the side of the
generator.
B Slide the pipe 2 (of each generator) towards the arrow
side at least 2-3 cm in order to insert it in the pipe 1.
6. Undo the screws "C" and remove the fan "D" (Fig 52)
model (125- 250) only.
4. SERVICE AND MAINTENANCE
All adjustment, conversion, start up and maintenance
operations described below must only be carried out by
qualified fully trained personnel (meeting the professional
technical requirements prescribed by current regulations)
such as those of the Local After-Sales Technical Service.
Lamborghini declines any liability for damage and/or injury
caused by unqualified and unauthorised persons
tampering with the unit.
4.1 Adjustments
Gas conversion (Contact the supplier first)
The unit can operate on both natural gas, or on LPG and
is factory-set for use with one of these two types of gas,
this is clearly shown on the packing and on the data plate.
Whenever a gas is different from that shown on the unit, a
conversion kit will be required, proceed as follows:
1. Disconnect the power supply to the boiler.
16
7. Undo the g screws "E" Fig 53 model 80 - 160 and Fig
54 FUTURIA power Model (125 - 250) and remove the
gas valve.
The heating symbol (detail 13 - Fig 1) and DHW symbol
(detail 9 - Fig 1) flash on the display; the heating power
will be displayed alongside.
To deactivate the TEST mode, repeat the activation
sequence.
The TEST mode will automatically disable after 15
minutes.
Only for models FUTURIA power 160 – 250
In TEST mode, press the button (detail 7 - Fig 1) to obtain
the following operation:
• Top boiler shell on - bottom boiler shell off.
• Top boiler shell - bottom boiler shell on.
• Top boiler shell on- bottom boiler shell on.
Heating power adjustment
To adjust the heating power, switch the boiler to TEST
mode (see sec. 4.1)
Press the heating buttons (details 3 and 4 - Fig 1) to
increase or decrease the power (min. = 00 - max. = 100).
8. Replace the gas nozzle "F" (see Fig 53 for the model
80 - 160 and Fig 54 the model 125 - 250) with the one
contained in the conversion kit, positioning it inside
the seal "G". Refit the parts and check their gas leaks.
Press the reset button (detail 8 - Fig. 1) within 5 seconds;
the max power will remain as that just set. Exit the TEST
mode (see sec. 4.1).
9. Modify the parameter for the type of gas:
B
• put the boiler in standby mode
• press the DHW buttons (details 1 and 2 - Fig. 1) at the
same time for 10 seconds: the display shows " P01 "
flashing.
• Press the DHW buttons (details Fig 11 & Fig 2) to set
parameter 00 (for use with natural gas) or 01 (for use
with LPG).
• Press the DHW buttons (details 1 and 2 - Fig. 1)
together for 10 seconds. The boiler will return to standby
mode.
10. Apply the label, contained in the conversion kit, near
the data plate.
.
11. Using a combustion analyser connected to the boiler
flue fume outlet, make sure the Co2 content in the fumes,
with the boiler operating at max and min output, complies
with that given in the technical data table for the
corresponding type of gas.
TEST mode activation
Press the heating buttons +/- (details 3 and 4 - Fig 1)
together for 5 seconds to activate the TEST mode.
The boiler lights at the maximum heating power set as
described in the following section.
17
4.2 Start-up
Checks to be made at first lighting, and after all
maintenance operations that involved disconnection from
the systems or an operation on safety devices or parts of
the boiler: Before lighting the boiler.
• Open all valves between the boiler and the systems.
.
• Check the tightness of the gas system, proceeding with
caution and using a soapy water solution to detect any
leaks in connections.
• Check correct pre-filling pressure of the expansion tank
(ref. sec. 5.4).
• Fill the system with water and make sure all air trapped
inside the boiler and the system has been vented, by
opening the air vent valve in the boiler. Make sure the
internal circulating pump impeller is free and any
automatic air vents in the system are open.
• Fill the condensate trap with water and check the
connection of the condensate elimination system.
• Make sure there are no water leaks in the system, DHW
circuits, connections to the boiler.
• Check connections of the electrical system are correct
and efficiency of the earthing system.
• Make sure the gas pressure value for heating is that
required. (Sufficient gas supply pressure to allow the boiler
to operate correctly).
4.4 Troubleshooting
• Make sure there are no flammable liquids or materials
stored in the immediate vicinity of the boiler.
Checks during operation
• Turn the unit on as described in sec. 2.3
.
• Make sure the gas supply and water systems are tight.
• Check the efficiency of the flue and air-fume ducts while
the boiler is working.
• Check the correct tightness and functionality of the
condensate elimination system and trap.
• Make sure the water is circulating properly between the
boiler and the systems.
Diagnostics
The boiler is equipped with an advanced self-diagnosis
system. In case of a boiler fault, the display will flash
together with the fault symbol (detail 20 - Fig 1) indicating
the fault code.
There are faults that cause permanent shutdown (marked
with the letter "A"): to restore operation
just press the RESET button (detail 8 - 1) for 1 second or
RESET on the optional remote timer control if installed, if
the boiler fails to start, it is necessary firstly eliminate the
fault.
Other faults (marked with the letter “F”) cause temporary
shutdowns that are automatically reset as soon as the
value returns within the boiler's normal working range,
except for fault F37 which is reset by turning the unit off
and on using button 14 see Fig 1.
Table of faults
• Make sure the gas valve modulates correctly in both the
heating and domestic hot water production phases.
• Check for correct boiler lighting by doing several tests,
turning it On & Off with the room thermostat or remote
control.
• Using a combustion analyser connected to the boiler
fume flue test outlet, check that the Co2 content in the
combustion fumes, with the boiler operating at max and
min output, corresponds to that given in the technical data
table for the corresponding gas type.
• Make sure the gas consumption indicated on the gas
meter matches that given in the technical data table on
sec. 5.4.
• Check the correct programming of the parameters and
carry out any necessary customization (compensation
curve, power, temperatures, etc).
4.3 Maintenance
Periodical check
To keep the unit working and performing correctly over
time, it is necessary to have qualified trained personnel
make an annual check that includes the following tests:
• The control and safety devices (gas valve, flow meter,
thermostats, etc.) are functioning correctly.
• The fume extraction system is operating at maxefficiently.
• The airtight chamber is sealed correctly.
• The air-fume end piece and ducts must be free of
obstructions and leaks.
• The condensate evacuation system must be efficient with
no leakage or obstructions.
• The burner and exchanger must be clean and free of
scale. When cleaning, do not use chemical products or
wire brushes. (Contact the supplier).
• The ignition electrode must be free of scale and properly
positioned.
• Check the gas and water systems for leaks.
• The water pressure in the cold water system must be
approximately 1 to 1.5 bar, otherwise reset to that value.
• Check the operation of the internal circulation pump.
• The expansion tank must be set to the correct pressure.
• The gas flow and pressure must correspond to that given
in the respective tables.
A
The boiler casing, panel and aesthetic parts can be
cleaned with a soft damp cloth, possibly soaked in soapy
water. Do not use any abrasive detergents and solvents.
18
196
215
220
252
253
278
298
299
300
301
302
306
307
Condensate tray
Air inlet reducer
Ignition card
3-way drain and shut-o cock
cock
Double sensor (Safety + Heating)
Cascade temperature sensor (not supplied)
Input 0-10 Vdc
Burner lit contact (voltage-free contact)
Fault contact (voltage-free contact)
Remote reset input (230 Volt)
Heating system circulating pump (not supplied)
Heating system second circulating pump (not
supplied)
A = Heating phase
B = DHW phase
C = Neutral
Note: For valves with 2 wires and spring return, use the
connections B and C
5. TECHNICAL DATA AND CHARACTERISTICS
Key of cap. 5
7
10
11
14
16
22
29
32
36
38
42
44
72
72b
81
82
95
98
114
130
138
139
154
179
186
191
193
19
Gas inlet
System delivery
System return
Safety valve
Fan
Burner
Fume outlet manifold
Heating circulating pump
Automatic air vent
Flow switch
DHW temperature sensor (not supplied)
Gas valve
Room thermostat (not supplied)
Second room thermostat (not supplied)
Ignition electrode
Detection electrode
Diverter valve (not supplied)
Switch
Water pressure switch
DHW circulating pump (not supplied)
External probe (not supplied)
Remote timer control (not supplied)
Condensate outlet pipe
Check valve
Return sensor
Fume temperature sensor
Trap
5.2 General view and main components
Model 80 – 125
20
FUTURIA power model 160 – 250
FUTURIA power model 160 – 250
5.3 W ater circuit
FUTURIA power model 80 – 125
5.4 Technical data table
The column on the right gives the abbreviation used on
the data plate
21
Circulating pump head / pressure losses
Pressure losses model FUTURIA power 80 – 125
Pressure losses model FUTURIA power 80 - 125
A Boiler pressure losses
1 - 2 - 3 Circulating pump speed
Circulating pump head / pressure losses
Pressure losses model FUTURIA power 160 – 250
Pressure losses model FUTURIA power 160 - 250
A Boiler pressure losses
1 - 2 - 3 Circulating pump speed
22
5.6 W iring diagram
A
A
FUTURIA power model 160 – 250 only.
Important: Before connecting the room thermostat or the remote timer control, remove the jumper from the terminal
block located in the electrical box of the FUTURIA power boiler.
23
Declaration of conformity
Manufacturer: FERROLI S.p.A.
Address: Via Ritonda 78/a 37047 San Bonifacio VR Italy
Declares that this unit complies with the following EU directives:
• Gas Appliance Directive 2009/142
• Efficiency Directive 92/42
• Low Voltage Directive 73/23 (amended by 93/68)
• Electromagnetic Compatibility Directive 89/336 (amended by 93/68)
President and Legal Representative
Cav. del Lavoro
Dante Ferroli
FERROLI S.p.A.
Via Ritonda 78/a
37047 San Bonifacio - Verona - ITALY
www.ferroli.it
24