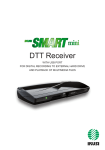
1
DSA-100
USER’S MANUAL
& NAVIGATION MENUS
Combined Analogue and Digital Analyzer for Radio,
TV and Satellite signals, 47–2250 MHz
Subject to change without notice
USER’S MANUAL CODE: UG-DSA--100-1.36-1.0-EN-1.00
VERSION: Graphic 1.0
Draft Version
DSA-100 User’s Manual
INDEX
USEFUL SUGGESTIONS............................................................................. 5
main keys................................................................................................... 9
Meter power up................................................................................... 10
Configuration menu............................................................................11
TV MODE (ANALOGUE AND DIGITAL)
1.0 TV MEMory plan menu................................................................... 16
2.0 Buzzer (digital TV only)............................................................... 17
3.0 analogue tv signal measurement: MEAS.............................. 18
4.0 TV digital signal measurements: MEAS.................................. 21
5.0 spectrum measurements: spect............................................. 25
6.0 HELP: automatic tuning function............................................ 28
7.0 AutoMEMORY: automatic channel search............................. 29
SAT MODE (ANALOGUE AND DIGITAL)
8.0 SAT memory plan Menu................................................................. 31
9.0 dish alignment: Sat finder......................................................... 32
10.0 DUAL lnb: DUAL FEED dish alignment . ................................... 33
11.0 Buzzer SAT....................................................................................... 34
12.0 satellite signal measurements: MEAS................................ 35
13.0 SAT spectrum measurements: spect................................... 40
14.0 HELP: automatic tuning funCtion.......................................... 42
15.0 SCR LNB............................................................................................. 43
COMMON TV AND SAT FEATURES
16.0 dc on/off: line feed command................................................ 45
17.0 MPEG PROG SERVICE...................................................................... 46
18.0 memory: Memorization function........................................... 47
19.0 store: FAST memory key ........................................................... 49
20.0 Data logger................................................................................... 50
pag. 3
DSA-100 User’s Manual
appendix
A1 - main technical specifications................................................ 52
A2 - ACCESSORIES................................................................................... 56
A3 - trouble shooting........................................................................ 57
A4 - batteries maintenance and recharge................................ 58
A5 - front panel description........................................................... 59
A6 - side panel description.............................................................. 60
A7– maintenance of your analyzer.............................................. 61
A8- service notes and guarantee regulations...................... 62
A9 - MAINTENANCE AND REPAIR FORM................................................. 63
A10 - standard equipment repair AND OR SERVICE FORM.............................64
A-11 DISPOSAL OF ELECTRONIC EQUIPMENT RULES......................... 66
pag. 4
DSA-100 User’s Manual
Introduction
USEFUL SUGGESTIONS
Thank you for choosing our measurement equipment, which is currently used
and appreciated by the most important Service Providers, Broadcasters and
by many installers because it is very user-friendly and provides complete and
accurate measurements. On our part we will do our very best to fulfil your requirements now and in the future.
This manual is a new concept quick User’s Guide, which is easy to read. Select
the function/measurement you need directly from the index and on the respective page you will find useful information to start the specific function or a required
measurement.
Every section that descibes a specific measurement is divided into three
parts:
a. Measurement/Function brief description : provides a high level description of the specific Measurement or function.
b. Measurement start-up: is a list of steps to be followed in order to start
the specific measurement.
c. Push buttons and displays: graphic description of the push buttons
that need to be used and relevant displays that will result during
the measurement exercise.
The meter is very User-friendly. Just press the MEAS key to start the analogue
or digital measurements of any specified satellite transponder or TV channel.
The DSA-100 analyzer has a vast memory, which is structured in Memory Plans
in which 199 programmes may be stored. These programmes may be in the satellite or TV band and may be analogue or digital. You may also build your own
plan with a any TV channels list by means of the MEMORY function or utilizing
the SMART PC optional programme. The memory plan may be used related to
any specific canalized installation or customer.
IMPORTANT: the meter is delivered by the manufacturer with some default settings for testing and demonstration purposes.
a. The meter turns off after 5 minutes inactivity in order to optimize the
battery duration and also for air transportation,
b. Make sure that you are using the meter with the proper TV standard,
pag. 5
DSA-100 User’s Manual
Introduction
relevant to the geographical area you find yourself (Italy, Euro-ind,
France ecc.),
c. Some memory plans have been previously memorised in the meter
and may be recalled by name.
pag. 6
DSA-100 User’s Manual
Introduction
USEFUL SUGGESTIONS
Analyzer’s prememorized canalisations
nome
standard
descrizione canalizzazione
EUROPE
PAL BG
CCIR Europe
UK HK
PAL I
England
AUST.A
PAL B
Australia terrestrial transmissions
CHINA
PAL D
China
CEPOOI
PAL D
Est country
FOXTEL
QAM - PAL B
Australia CATV Foxtel
FRANCE
SECAM
France
NEW ZE
PAL B
new Zealand
RUSS.A
SECAM B
Russia terrestrial transmissions
RUSS.B
PAL
Russia terrestrial transmissions
USABRO
NTSC
Usa terrestrial transmissions
USACAB
NTSC
USA CATV Network (Cable)
USAHRC
NTSC
Usa HRC
USAIRC
NTSC
Usa IRC
AUST.D
PAL B
Australia digital
ITALY
PAL BG
Italy
INDIA
PAL BG
India
pag. 7
DSA-100 User’s Manual
Introduction
USEFUL SUGGESTIONS
Analyser’s Pre-memorized trasponder lists
Plan name
Satellite
Satellite
Plan name
Satellite
Plan name
ASTRA 28
ASTR28
TELS 15
TELS15
Panamsat 72
PANS72
ASTRA 23
ASTR23
TELEC 8
TELEC8
LMI 75
LMI75
ASTRA 19
ASTR19
ATLNB 12
ATLB12
NILES 07
NILES57
Hotbird 13
HBIR13
Hispasat 30
HISP30
Intesat 18
INTE18
HotbirdName
HBIRna
Eutelsat 21
EUTE21
NSS 22
NSS22
Eutelsat 07
EUTE07
Arabsat 25
ARAB25
Intelsat 27
INTE27
Eutelsat 10
EUTE10
Arabsat 26
ARAB26
Panamsat 43
PANS43
AMOS 4
AMOS4
EBIR 28
EBIR28
Panamsat 45
PANS45
SIRIUS 4
SIRIU4
Ebir 33
EBIR33
Panamsat 58
PANS58
SIRIUS 5
SIRIU5
Expr 53
EXPR53
Asia 105
ASI105
INTEL 1
INTEL1
NSS 57
NSS57
INSAT4A
INSA83
HELLAS 39
HELL39
Panamsat 68
PANS68
NSS 6
NSS95
Turksat 42
TURK42
Eutelsat 70
EUTE70
Asia Sat 2
ASI100
Navigation through all the possible selections may be archieved using keys
SELECT, UP and DOWN:
using the SELECT key that will highlight a field which can be changed in a menu. This field may be a value (i.e. frequency) or a state
to be modified (i.e. START? or STORE?).
The UP and DOWN keys will modify the value of the highlighted field or will change its status depending on what this
field is representing.
The meter’s keys, as shown in the following section, have a double function that
may be enabled by pressing the key for more than two seconds. The description of this double function written on the front panel label immediately above
the main key.
pag. 8
DSA-100 User’s Manual
Introduction
main keys
Allows you to select the menu modifiable fields. The selected fields are
highlighted with a dark background.
Will modify the field values highlighted with the SELECT key.
• provides the list of memory plans.
• If pressed for 2” the TV autoscan function automatically starts to allocate
a terrestrial channel plan.
• Enables the automatic satellite search function.
• If pressed for 2” it will enable the Dual Feed dish alignment feature.
• Spectrum analysis of the RF input signal.
• If pressed a second time it will enable the spectrum MaX Hold.
• If pressed for 2” it will enable the SAT POINT function that will optimize all
the spectrum settings for a dish alignment task.
• Provides analogue or digital transponder measurements.
• By pressing this key more than once, all the menus will appear in sequence
showing all the provided measurements.
• If pressed for 2” it will allow you to escape from any active funtion.
• Starts the automatic measurement procedure and memorizes the measurements results of these for all the transponders contained in the active
memory plan.
• If pressed for 2” turns on/off the RF feed.
• Enables the memory function to create a custom memory plan. A memory
plan may contain up to 199 different programmes.
• If pressed for 2” you may memorize the tuned transponder directly to the
first available programme in the memory plan.
• Key to start the automatic tuning of a digital transponder.
• If pressed for 2” this key will turn on the BUZZER function based on the
Noise Margin measurement.
• Reads all the services transmitted by a digital transponder. In this list all
the Video and audio PIDs wil be shown.
• If pressed for 2” the Configuration Menu will be displayed to change all the
meter working settings.
pag. 9
DSA-100 User’s Manual
Introduction
Meter power up
To power up the meter press the
[14] key.
On the meter’s display [2] a welcome screen will show for about 6”, this display
will provide all the detailed identification data for the meter.
DISPLAY LAYOUT.
Logo
Model Name
Hardware Versione
Boot Loader Versione
Serial Number
Start Up Bar
Firmware Versione
DSA-100 Model name, Firmware Version and Serial Number.
pag. 10
Introduction
DSA-100 User’s Manual
Configuration menu
Brief description
The configuration menu will allow you to set the main working parameters that
will be applied during the meter operation. This menu will also enable some
special functions like “FILE
MANAGER” (to cancel memory plans),
Measurement start up
• Press the “MPEG PROG SERVICE” [1] key for 2 seconds
• On display [2] the Configuration Menu will be shown
• Select “VOLUME” to change the meter volume setting,
• Select “METER SET UP” to access the typical meter settings,
• Select “TV CONFIG & COUNTRY” to set the canalisation and TV standard to be
used during all measurements,
• Select “SAT CONFIG.” to chose a SAT standard,
• Select “FILE MANAGER” to delete memory plans,
• Select “DiSEqC MOTOR” to drive a motorized antenna.
Push buttons and displays
Press key
for 2” to display the configuration menu
fig. 1.1
pag. 11
DSA-100 User’s Manual
Introduction
continue: CONFIGURATION MENU
“VOLUME” (Volume level setting):
Press key
to modify the meter volume intensity
• 0%
• 20%
• 40%
• 60%
• 80%
• 100%
“METER SET UP” :
Referring to fig. 1.1, press key
and press the
to choose the “METER SETUP” menu entry
key to access the menu
Auto Shut off time when no key is pressed: OFF,
5 min., 10 min.
Measurement unit: dBµV, dBmV, dBm
available languages
key pressed BEEP sound status: Low, Medium,
High and OFF.
Display backlight:Full ON (always on), 30 sec
(shuts off 30 sec after the last key was pressed).
“TV CONFIGUR. COUNTRY” (TV canalisation and standard):
Referring to Fig. 1.1, press key
and press the
to select the “TV CONFIG. & COUNTRY” menu entry
key to access the menu
List of all the available prememorized
standard canalisations (see. also
to the paragraph “Useful Suggestions”: “ Analyser Pre-memorised
canalisations”)
from 0 to 2500 MHz
Level - Tilt - Aud/Lev
pag. 12
DSA-100 User’s Manual
Introduction
continue: CONFIGURATION MENU
“SAT CONFIGUR.” :
Referring to fig. 1.1, press the
and press the
key to choose “SAT CONFIGUR”
key to access the “SAT CONFIGUR. MENU”:
• DSS for USA
• DVB for EUROPE
Standard - 0MHz (IF)
LNB1 DiSEqC: a-b-c-d. See Par. 14.0
LNB2 DiSEqC: a-b-c-d. See Par. 14.0
Sat SRC Menu
“FILE MANAGER” :
The File Manager function allows only manual AutoTV memory plansfile deletion from the main meter
memory. The Manual and AutoTV files are user’s defined memory plans. The AutoTV memory plans
are automatic canalisation memory plants obtained by a Meter scan. The LOGGER files are obtained
by running the datalogger function.
Referring to fig. 1.1, press key
and press key
to choose the “FILE MANAGER” menu entry
to access the menu
File Type: • PLAN • LOGGER •AUTOSCAN
See note
NOTES:
After selecting a File Type name, the Deletion has to be confirmed by highlighting the “DELETE
FILE” command and by confirming this selection with the UP or DOWN key.
pag. 13
DSA-100 User’s Manual
Introduction
continue: CONFIGURATION MENU
“DiSEqC MOTOR” (menu to drive motorized antennas):
Referring to fig. 1.1, press the
key to select “DiSEqC MOTOR”
key to access the “SYSTEM MENU MOTOR” menu:
and then press the
Selected satellite
Motor Action (see table below)
Motor action enabling (see table below). The information on this line depends on the selection made
in the “ACT” field.
received signal Power measurement
The first display line shows the satellite to which we want to aim the motorized dish (i.e. Hot Bird 13°
E). The wanted satellite may be selected using the PLAN [3] key (see par. 1.0).
The motor action is called “ACT”. Depending on the verb selected in this field, using the UP and
DOWN keys, sub fields will be shown (see table below) that will allow the completion of the desired
action. Once the wanted action has been properly configured, move to the Next line of the display
using the SELECT key and change its status using the UP and DOWN keys (see ACT enabling
column in the table below).
ACT
ACT sub fields
Description
ACT enabling
MOVE
none
allows the meter movement
towards the wanted direction
EAST or WEST
DIR:
• EAST
• WEST
GOTO
from POS 1 to
POS 99
selects one of the 99 motor prememorized positions
APPLY?
(move to the selected position)
STORE
from POS 1 to
POS 99
memorizes the current motor position in one of the 99 possible
memory locations.
STORE?
(stores the current
motor position)
RESET
none
removes any eventual rotational APPLY?
preset EAST or WEST motor (removes rotation
movements limits.
blockages)
During the alignment phase, the displayed measurements is only the average digital power measurement .
Once the satellite has been recognized, the meter will show the Noise Margin measurement and the quality
analysis (PASS, MARGINAL, FAIL) as well as the Service handler data.
NOTE
Press any key to exit the “DiSEqC MOTOR” function.
pag. 14
DSA-100 User’s Manual
TV Mode
TV MODE (Analogue and digital)
1.0 TV MEMory plan menu................................................................... 16
2.0 Buzzer (digital TV only)............................................................... 17
3.0 analogue tv signal measurement: MEAS.............................. 18
4.0 TV digital signal measurements: MEAS.................................. 21
5.0 spectrum measurements: spect............................................. 25
6.0 HELP: automatic tuning function............................................ 28
7.0 AutoMEMORY: automatic channel search............................. 29
pag. 15
DSA-100 User’s Manual
TV Mode
1.0 TV MEMory plan menu
Brief description
The memory plan function [3], provides the list of pre-memorised canalisations
that can be chosen for antenna alignment and TC channel measurements.
When the meter is turned on, the last selected Memory Plan is activated.
Measurement start up
• Press the PLAN [3] key to select a Memory plan (channel list),
• Select the required Memory Plan using the UP [7] and DOWN [9] keys,
• The highlighted list will have a dark background,
• Press any key to quit the menu, for example the MEAS [6] key, to start the
measurements on the selected canalisation.
Push buttons and displays
Press the
key and select the required plan using the
or
keys.
The list that arrives will always be the one highlighted with a black background.
Press the
key to start measuring.
NOTES
There are 4 types of Memory plans:
1) SATELLITE: Satellite Factory Prememorized plans (see SAT section of this manual)
2) TELEVISION: Standard TV canalizations
3) MANUAL MEMORY: custom made Memory
Plans.
4) AUTOtvMEMORY: memory plans automatically generated by the Automemory (autoscan)
feature in the TV band.
pag. 16
DSA-100 User’s Manual
TV Mode
2.0 Buzzer (digital TV only)
Brief description
The buzzer is a beep sound which varies its tone according to the Noise Margin
of the signal received. This helps antenna alignment. Press the HELP [12] key
for 2 seconds to enable this feature. The meter will display the noise margin
measurement, the quality analysis (PASS, MARGINAL, FAIL) and the network data
(NIT tables). These measurements are shown only if the COFDM MUX is locked.
Measurement start up
• Select the required Multiplex,
• Press the HELP [12] keys for 2”,
• The meter will show the BUZZER FUNCTION. This provides an audible buzzer
tone, related to the noise margin measurement.
• The Buzzer sound turns on only when the MULTIPLEX is locked.
• Press any key to disable this function.
Push buttons and displays
Press the
for 2” to start the BUZZER FUNCTION.
The current channel of the active Memory Plan is shown on the first line of
the display. The channel frequency value can be changed. If this is done the
frequency association to the channel name is lost and three horizontal lines are
shown. When the selected Multiplex is locked the meter activates the buzzer
and the relevant measurements are shown (see fig. below) .
Frequency
active measurements when the MUX is locked
NOTE:
1) The buzzer function works only for digital TV channels
pag. 17
DSA-100 User’s Manual
TV Mode
3.0 analogue tv signal measurement: MEAS
Brief description
The MEAS key starts the available measurements on the tuned channel. In this
section we describe all the measurements available for an analogue TV channel. If you
repeatedly press the MEAS key, the display shows, in sequence (see next paragraph),
all the measurements carried out on the selected channel as a numerical value and
with a graphic bar that varies its length proportionally according to the represented
measurement. This bar memorises the peak measurement value (Max Hold).
Measurement start up
Tuning:
The upper part of the display shows the tuning parameters for the TV channel.
The displayed parameters are those of the active channel. To change them
use the SELECT [10] key to highlight the fields to be changed and use the UP
[7] and DOWN [9] keys to modify their values. The following parameters can
be modified in the user generated plans: channel number, frequency, signal
modulation (FM Radio, analogue or digital TV), audio carrier and its relevant
modulation type (this only applies to analogue signals) and power feed on the
RF input. It is possible to obtain all the tuning parameters only in the first measurement level.
Measurements:
The bottom part of the display shows all the measurements available for the
tuned channel. See the “Useful Suggestions” section at the beginning of this
User’s Guide for more details.
Repeatedly press the “MEAS” [6] key and the following measurements will be
displayed for analogue signals:
• Measurement level 1: Analogue video carrier level (ref. par. 3.1),
• Measurement level 2: Measures the V/A ratio (the difference in dB between
the video and audio carrier level) and the C/N measurement (ref. par. 3.2).
• Measurement level 3: Measures the audio carrier level and it is possible to
evaluate the sound quality from the built-in speaker (ref. par. 3.3).
NOTES:
1. It is possible to vary all the tuning parameters, memory plan, channel number, frequency and
channel type (FM Radio, analogue or digital TV) only when in the first level measurement display (where the analogue video carrier measurement is shown). In all other measurement levels
only the memory plan number, the channel or the frequency values can be changed.
2. For the “Television” plan (standard canalization) only the chanel number and the RF power feed
may be changed (ON/OFF).
pag. 18
DSA-100 User’s Manual
TV Mode
continuation: ANALOGUE TV SIGNAL MEASUREMENTS: MEAS
Push buttons and displays
3.1 Analogue level measurement (Level 1)
Press the
key to choose the field to be
key and then use the
modified. Use keys
and
to modify the displayed value
Memory plan (see section 1.0)
Channel frequency
Channel (see section 1.0)
Analogue or digital modulation: COFDM (DVB-T/
H), FM Radio
Audio Frequency carrier
DC at RF IN
Fig. 3.1 Analogue signal First Measurement Level
NOTES:
1) lt is only possible to change all the tuning parameters in the first mesurement level, shown in fig.
3.1 and only for the user generated plans.
2) You can return to the first measurement level at any time by pressing the ON/OFF [1] key.
4.2 A/V and C/N analogue measurement (Level 2)
Press the
again to display the second measurement level:
Memory plan (see section 1.0)
Channel (see section 1.0)
Channel Frequency
NOTE
There
are
only
two
modifiable fields in this
measurement
level:
channel number and frequency.
Fig. 3.2 Second Measurement level: V/A and C/N ratio. There are only two modifiable fields in this level:
Channel and frequency.
pag. 19
DSA-100 User’s Manual
TV Mode
continuation: ANALOGUE TV SIGNAL MEASUREMENTS: MEAS
3.3 Analogue Audio level measurement (Level 3)
Press the
key again to display the third measurement level:
Memory plan (see section 1.0)
Channel (see section 1.0)
Channel frequency
Fig. 3.3 Third measurement level for the analogue audio carrier.
NOTES:
• When the third measurement level is active it is possible to evaluate the audio quality using the
built in loudspeaker.
• To listen to the TV channel audio make sure that the meter’s volume is not OFF.
NOTES:
• If there is no signal or if the signal level is below the meter’s measurement dynamic range, the
string PWR_TOO_LOW (power too low) will be shown,
• The meter always shows a graphic bar proportional to the signal level or power measurement,
• The graphic bar memorises the peak signal level or power value this is represented by a vertical
line on the display,
• To display all the signal measurements available, the MEAS key has to be pressed repeatedly
(see next paragraphs in this section for more details),
• If you press the “POWER ON” key [14] the meter automatically returns to the first measurement
level shown in Fig. 3.1 regardless of the previous measurement level.
pag. 20
DSA-100 User’s Manual
TV Mode
4.0 TV digital signal measurements: MEAS
Brief description
The MEAS key starts the measurements available for the tuned channel. In this section we describe all the measurements available for a digital TV channel. If you repeatedly press the MEAS
key, the display shows, in sequence, (see next paragraph) all the measurements carried out on
the selected Channel as a numerical value and with a graphics bar that varies its length proportionally to the represented measurement. This bar memorises the peak measurement value.
Measurement start up
Tuning:
The upper part of the display shows the tuning parameters for the TV channel.
The displayed parameters are those of the active channel. To change them use
the SELECT [10] key to highlight the fields to be changed and use the UP [7]
and DOWN [9] keys to modify their value. The parameters that can be modified
are: Channel Number, frequency, signal modulation (FM Radio, analogue or
digital TV), audio carrier and its relevant modulation type (this only applies to
analogue signals) and power feed on the RF input. It is only possible to obtain
all the tuning parameters in the first measurement level (see note below).
Measurements:
The lower part of the display shows all the measurements available for the
tuned channel. See section “Useful Suggestions” at the beginning of this User’s
Guide for more details.
Repeatedly press the “MEAS” [6] key to see the following measurements for
analogue signals:
• Measurement level 1: measures the digital power (PWR) (ref. par. 4.1),
• Measurement level 2: measures the Noise Margin (N. MARG.), the signal
quality (QLTY), the MER and SNR with a relevant graphic bar (ref. par. 4.2),
• Measurement level 3: measures the bBER (Pre BER) and aBER (Post
BER) with relevant graphic bars (ref. par. 4.3),
• Measurement level 4: Eye Constellation diagram and all the basic tuning parameters are displayed (ref. par. 4.4).
• Measurement level 5: all data provided by the NIT card: FEC, Network name,
(NETW NAME), bouquet name (BOUQ. NAME), and DATE (ref. par. 4.5).
NOTE:
• It is possible to vary all the tuning parameters, memory plan, channel number, frequency and channel type (FM
Radio, analogue or digital TV) only when in the first level measurement display. In all other measurement levels only
the memory plan number, the channel or the frequency values may be changed this, only for the user generated
plans. For the Standard TV channel plans (Television) only the channle may be changed, frequncy en RF power
feed can be changed.
• The status bar at the bottom of the display always shows the basic information regarding the measured signal. For
a digital MUX: the network name, the encryption system and a lock icon that indicates if the digital MUX is locked. If
the active channel is digital, a “D” will be displayed on top of the “DIG” writing on the display front panel label.
pag. 21
DSA-100 User’s Manual
TV Mode
continuation: DIGITAL TV SIGNAL MEASUREMENTS: MEAS
Push buttons and displays
4.1 COFDM Digital multiplex Power Measurement COFDM (Level 1)
Press the
key to choose the field to be
key and use the
modified. Press keys
and
to modify the displayed value.
Memory plan (See section 1.0)
Channel (See section 1.0)
Channel frequency
Analogue or digital
measurement: COFDM
(DVB-T/H), FM Radio
Channel band width (i.e. PAL
BG: 7 MHz in VHF and 8
MHz in UHF band).
DC at RF IN
Fig. 4.1 Digital signals first measurement level.
Pressing the
RF input.
key it is possible to select the channel and the power at the
Only on the user generated memory plans it is possible to Select and Change
the fields mentioned in Paragraph 4.0.
NOTE:
1) If there is no signal or if the signal level is below the meter’s measurement dynamic range, the
string PWR_TOO_LOW (power too low) is shown,
2) The meter always shows a graphic bar proportional to the signal level or power measurement,
3) The graphic bar memorises the peak signal level or power value. This is represented by a vertical line on the display,
4) To display all the signal’s available measurements, the MEAS key has to be pressed repeatedly
(see next paragraphs in this section for more details),
5) If you press the “POWER ON” key [14] the meter automatically returns to the first measurement
level shown in Fig. 4.1, regardless of the previous measurement level.
pag. 22
DSA-100 User’s Manual
TV Mode
continuation: DIGITAL TV SIGNAL MEASUREMENTS: MEAS
4.2 N. MARG, QLTY, MER and SNR measurements (Level 2)
Press the
key again to start the second level measurement:
Memory plan (See section 1.0)
Channel (See section 1.0)
Channel frequency
NOTE
There are three variable fields
in this measurement level:
the Memory Plan, the channel
number and frequency. Only
on user generated plans.
Fig. 4.2 The second level measurement provides the Noise Margin the MER (modulation error rate)
with their relevant graphic bars. Also the SNR measurement is shown as well as the quality analysis
(PASS, MARGINAL FAIL).
4.3 BER measurement before and after error correction (Level 3)
Press the
key again to start the third level measurement:
Memory plan (See section 1.0)
Channel (See section 1.0)
Channel frequency
NOTE
There are three variable fields
in this measurement level:
the memory plan, the channel
number, and frequency. Only
on user generated plans.
Fig. 4.3 the third measurement level provides the BER (Bit Error Rate) before and after the error
correction algorithms. The aBER (after Viterbi) shows the <10-8 value for signals that can be considered error free after the correction algorithms.
pag. 23
DSA-100 User’s Manual
TV Mode
continuation: DIGITAL TV SIGNAL MEASUREMENTS: MEAS
4.4 Eye constellation display (Level 4)
Press again the
key again to start the third level measurement:
Memory plan (See section 1.0)
Channel (See section 1.0)
The ZOOM allows constellation
enlargement in order to view
one quadrant at a time
Fig. 4.4 the 4th level provides the constellation display.
4.5 Net-ID data (Level 4)
Press again the
key again to start the fourth level measurement:
Memory plan (See section 1.0)
Channel (See section 1.0)
Channel frequency
NOTE
There are three variable fields
in this measurement level:
the Memory Plan, the channel
number and frequency. Only
on the user genereated plans.
Fig. 4.5 This display shows the Network name, the bouquet and date.
pag. 24
DSA-100 User’s Manual
TV Mode
5.0 spectrum measurements: spect
Brief description
The SPECT [5] key gives you access to the meter’s spectrum analysis measurements.
When accessing this measurement mode, the meter automatically sets the
reference level in order to show all the detected carriers within the screen
display for the selected SPAN value.
Measurement start up
• Select a Memory Plan (See section 1.0),
• Connect the antenna or TV outlet to the meter’s RF input [17],
• Press the SPECT [5] key,
• Use the SELECT [10] key to change the spectrum variable fields as shown in
fig. 8.1: SPAN, channel or programme number, Frequency, Reference level.
The chosen field will be highlighted with a dark background,
• Use the UP [7] and DOWN [9] keys to change the chosen field,
• Press the SPECT [5] key again to enable the Max Hold feature (See par. 5.2).
With this feature the meter memorises the RF input signal’s maximum value,
this is shown as a profile that overlaps the real time spectrum curve.
NOTES:
1) If you vary the channel or programme name, the spectrum marker moves to the selected carrier centre frequency,
2) If you vary the marker frequency, it will move gradually on the spectrum and the speed of this
displacement will automatically increase it you keep the UP [7] or DOWN [9] keys pressed,
3) If you vary the displayed frequency, the channel or programme name will be replaced by horizontal lines. This is because the correspondence between the frequency value and the transponder or programme name is lost,
pag. 25
DSA-100 User’s Manual
TV Mode
continuation: SPECTRUM MEASUREMENTS: SPECT
5.1 Spectrum analysis of a digital signal
Press the
Press the
keys to select the fields to be modified
key and use the
and
keys to vary the selected value.
Spectrum Span: sweep span in
MHz : 2,5,7,10,20,50,100,200, 500
MHz & Full.
Channel Number
Channel Frequency
Level Marker: 0,1 dB
Automatic Reference Level: Grid reference level va-
resolution
lue in dB; this can be varied
manually. From 60 to 125
dB with 5 dB steps
Spectrum
analysis
curve: 5 dB division in
Frequency Marker: 0,1
almost real time
MHz resolution
Closed Lock =
locked signal
Opened Lock =
signal not locked
Level/Power: value in dBuV of the
signal’s level/power according to the
frequency marker
Fig. 5.1 COFDM MUXLTIPLEX spectrum with 20 MHz SPAN.
5.2 Analogue signal spectrum analysis
Press the
key and use the
Press the
and
key to select the fields be modified.
keys to change the value shown.
Spectrum Span: sweep span in
MHz: 2,5,7,10,20,50,100,200, 500
MHz & Full.
Channel Number
Channel Frequency
Level Marker: 0,1 dB
Automatic
Reference
Level: Grid reference level
resolution
value in dB; can be adjusted
manually. From 60 to 125
dB with 5 dB steps
Spectrum
analysis
curve: 5 dB division in
almost real time
Frequency Marker: 0,1
MHz resolution
This symbol indicates
that the signal under test
is analogue.
Level/Power: signal Level/Power value in dBuV
at the frequency marker position
Fig. 5.2 Analogue channel spectrum with a 10 MHz span
pag. 26
DSA-100 User’s Manual
TV Mode
continuation: SPECTRUM MEASUREMENTS: SPECT
5.3 Digital signal spectrum analysis: Max Hold
Press the
key again to enable the spectrum MAX HOLD feature.
Max Hold
feature: memorises the peak value reached by the received signal
Max Hold feature: peak
memory function is active
Fig. 5.3 COFDM multiplex spectrum with active max hold feature.
pag. 27
DSA-100 User’s Manual
TV Mode
6.0 HELP: automatic tuning function
Brief description
The HELP [12] key starts an automatic search of all the tuning parameters of a selected digital multiplex. This function is particularly useful if it is necessary to lock a
COFDM multiplex, found in SPECTRUM or MEAS mode, which has not been prememorized in any Memory Plan and of which we know only its frequency.
Measurement start up
1. Press the SPECT [5] key and place the frequency marker on the centre frequency of the digital multiplex shown on the display,
OR
2. Press the MEAS [6] key to set the channel number, for which we want to
obtain all the tuning parameters,
Press the HELP [12] key to start the auto-tuning function.
Push buttons and displays
If you need help to lock a digital signal,Press the
key.
The meter will start the automatic tuning search for the missing parameters.
after
locking the
signal
Fig. 6.1 Start the automatic search for the tuning parameters of a digital Multiplex.
NOTE:
1) When the MUX is locked the meter will go to the measurement menu. If this channel
is not memorized it can be stored in a MANU memory plan.
pag. 28
DSA-100 User’s Manual
TV Mode
7.0 AutoMEMORY: automatic channel search
Brief description
The Autoscan function allows the automatic search of analogue and
digital channels, which are above a settable level/power settable
threshold. The channels that are automatically found by this feature will
memorized in a plan called Auto1 upt o Auto 10.
Measurement start up
• Press the PLAN [3] key for two seconds
• Press keys SELECT [10], UP [7] and DOWN [9] to choose the destination Memory Plan from Auto1 to Auto10 and the threshold values for
the level/power of the analogue/digital channels to be detected,
• Start the automatic search function moving the cursor to the START?
selection using the SELECT [10] key, then confirm your selection by
pressing UP [7].
Push buttons and displays
Press the
key for 2” to start the Autoscan feature
Active standard channel plan
Destination channel plan
Analogue signal threshold level
Digital signal threshold level
Fig. 7.1 Autoscan menu display
Press the
key to start channel scanning
Standard & Canalization
Scanning status
Destination memory plan
Total digital channels found
Total analogue channels found
Fig. 7.2 Scanning Complete
NOTE
• During scanning the meter finds and recognises the digital and analogue channels.
pag. 29
DSA-100 User’s Manual
Satellite Mode
sat MODE (Analogue and digital)
8.0 SAT memory plan Menu................................................................. 31
9.0 dish alignment: Sat finder......................................................... 32
10.0 DUAL lnb: DUAL FEED dish alignment . ................................... 33
11.0 Buzzer SAT....................................................................................... 34
12.0 satellite signal measurements: MEAS................................ 35
13.0 SAT spectrum measurements: spect................................... 40
14.0 HELP: automatic tuning funCtion.......................................... 42
15.0 SCR LNB............................................................................................. 43
pag. 30
DSA-100 User’s Manual
Satellite Mode
8.0 SAT memory plan Menu
Brief description
The Memory Plan menu provides a list of all the available transponder files which can be selected to be used for measurement or dish alignment tasks. Upon
meter power on, the last selected Memory Plan will be active. Using the Select
key [10], highlight a “Satellite” plan list (these lists are factory prememorized) or
a “Manual Memory” list if we have memorized our own transponders.
Measurement start up
• To select a Memory Plan (transponder list) press the PLAN [3] key,
• Select the wanted Memory Plan under the previously selected highlighted list
using keys SELECT [10], UP [7] and DOWN [9],
• The active memory plan wil have a dark background,
• Press any key to exit the menu, for example the MEAS [6] key in order
to start the measurements on the transponders contained in the selected
Memory Plan.
Push buttons and displays
Press the
to choose one of the available transponder
key and use
lists and press
or
to select the specific memory plan.
The active list will always be the one highlighted with the black background.
Press
to start measuring.
NOTES:
There are 4 types of Memory plans:
1) SATELLITE: Satellite Factory Prememorized
plans (see SAT section of this manual)
2) TELEVISION: Standard TV canalizations
3) MANUAL MEMORY: custom made Memory
Plans.
4) AUTOtv MEMORY: memory plans automatically generated by the Auto-memory (autoscan)
feature in the TV band (Rif. Par. 7.0).
pag. 31
Satellite Mode
DSA-100 User’s Manual
9.0 dish alignment: Sat finder
Brief description
This function allows a Dish Alignment based on the identification of three transponders contained in the
active Memory Plan. These three transponders may be selected manually. When the satellite is recognized by the meter, it will automatically display the fine alignment display that will also allow cross-pol
adjustments. The meter will also show on the bottom part of the display the Network Identification and
the Satellite orbital position.
Measurement start up
• Press the PLAN [3] key only if the transponder list needs to be changed (Ref. Sec. 8.0),
• Press the SAT FINDER [4] key to access the menu function,
• Use the SELECT [10] key to chose the 3 listed transponders and with the UP
[7] and DOWN [9] keys select the wanted transponder (see note below),
• Use SELECT [10] to highlight the START? command, press UP [7] or DOWN
[9] to begin the Sat Finder function,
• A rotating bar will indicate that the function is active. Start the dish alignment
task until the buzzer will be enabled by the meter. This is the indication that the
satellite has been identified,
• The display will change and will show the Noise Margin measurement with a
graphic bar and a numeric value. See figure below.
• Proceede with the fine alignment until the bar length has been maximised.
Push buttons and displays
Press the
Use keys
Use
key and press
and
to chose the field to be changed.
to change the listed transponder.
to highlight “START?” and press
after the satellite
is found
pag. 32
or
to start the sat search.
DSA-100 User’s Manual
Satellite Mode
10.0 DUAL lnb: DUAL FEED dish alignment
Brief description
This special function will allow the alignment of a satellite dish which has two
LNBs by making simultaneous measurements from both LNBs (without moving
the RF feed between LNBs and without changing frequency values), further
more it will allow the SKEW adjustment (polarization plan).
Measurement start up
• Press the SAT FINDER [4] key for 2 seconds,
• Choose the memory plans relevant to the satellite to which the dish is to
be align,
• Connect a DiSEqC Switch (i.e. model DiSEqC-SWI-2-01, Ref. Appendix A2)
to the RF meter input,
• Connect the DiSEqC switch to the LNBs coax cables,
• Start the dish alignment.
Push buttons and displays
Press the
key for 2 seconds to start the DUAL LNB feature.
Select the Memory Plans relevant to the satellites to aim the dish. Press the
to highlight the Memory Plan and Transponder fields to modify and
press the
and
keys to apply the wanted values.
LNB IN 1 Memory Plan
Ref. Sec. 8.0
LNB 1 Memory Plan transponder number or programme
(Ref. Sec. 8.0)
LNB IN 2 Memory Plan
Ref. Sec. 8.0
LNB 2 Memory Plan transponder number or
programme (Ref. Sec. 8.0)
Fig. 10.1 Dual LNB.
NOTA:
1) The graphic bars represent the Noise Margin measurements for both satellites.
2) As a reference and to help optimize the dish alignment, both bars have a maximum value memory indication. This is a vertical line which represents the maximum Noise Margin value obtained for each LNB during the dish alignment process.
pag. 33
DSA-100 User’s Manual
Satellite Mode
11.0 Buzzer SAT
Brief description
The Buzzer is tone a which varies proportionally to the signal’s Noise Margin measurement. This is a dish alignment aid feature, when the selected satellite digital
transponder is locked (satellite is found) the meter will start the Buzzer and at the
same time show the Noise Margin measurement, the quality analysis (PASS, MARGINAL, FAIL) and the Network data (NIT tables).
Measurement start up
• Select the Memory plan and the wanted transponder (Ref. Sec. 8.0).
• Press the HELP [12] key for 2 seconds,
• The meter will show the BUZZER FUNCTION menu,
• the Buzzer will be heard only when the selected transponder is locked,
• Press any key to disable this function,
• It is possible to modify the transponder frequency when the meter is in this mode.
Push buttons and displays
Press the
key for 2” to start the BUZZER FUNCTION.
On the first line of the Display the active Memory Plan transponder or programme name will be shown. The transponder relevant frequency value may be
changed, if this is done the transponder name will be replaced by three Horizontal lines. When the digital transponder is locked, the meter will start the Buzzer
and display the measurements shown here below ref. fig. 11.1.
active memory plan transponder
measurement that will be shown when the tranponder
is locked
Fig. 11.1 Buzzer
pag. 34
DSA-100 User’s Manual
Satellite Mode
12.0 satellite signal measurements: MEAS
Brief description
MEAS starts the measurements on the tuned transponder. By pressing repeatedly
the MEAS key, the display will show in sequence all the measurements made on
the selected transponder as a numerical value and with a graphic bar that varies
its length proportionally to the represented measurement. This bar memorizes the
peak measurement value.
Measurement start up
Tuning:
The upper part of the display shows the transponder tuning parameters. These
parameters are those of the active transponder. To change them use the SELECT [10] key to highlight the field to be changed and use UP [7] and DOWN
[9] keys to modify its value. The tuning parameters that may be changed are: :
Transponder number, frequency, Symbol Rate and Standard. Refer to section
“Push buttons and displays” in this section for more information.
Measurements:
The lower part of the display will show all measurements. The digital signal measurements will show only if the transponder is locked. Refer to section “Useful
Suggestions” at the beginning of this User’s Manual for more details.
By pressing repeatedly the “MEAS” [6] key the following measurements will be
displayed (for analogue signals only the level measurement will show):
• Measurement level 1: displays the average power (PWR) for a digital
signal or the level measurement in case of an analogue signal (ref. par. 12.1),
• Measurement level 2: displays the Noise Margin (N. MARG.), the signal
quality (QLTY), the MER and EVM measurements with a relevant graphic
bar (ref. par. 12.2),
• Measurement level 3: displays the bBER (Pre BER) and aBER (Post
BER) measurements with relevant graphic bars (ref. par. 12.3),
• Measurement level 4: data obtained from the NIT tables: FEC,
Network name(NETW NAME),bouquet name (BOUQ. NAME) & DATE (ref.
par. 12.4)
pag. 35
DSA-100 User’s Manual
Satellite Mode
NOTE:
1) on the bottom display status line the transponder main information is always shown.
For digital transponders: Network name, orbit position, encryption system and a lock
that is closed if the signal is locked. For analogue transponders, a square will be placed on top of the “AN” writing of the front panel.
pag. 36
DSA-100 User’s Manual
Satellite Mode
continues: SATELLITE SIGNAL MEASUREMENTS: MEAS
Push buttons and displays
12.1 Power measurement (digital) or Level measurement (analogue)
Press the
and use the
use keys
and
key to choose the field to be modified
to modify the displayed value.
Memory Plan (Ref. Sec. 8.0)
LNB line feed
• Vertical low: VL 12
• Vertical high: VH 12
• Horizont low: HL 12
• Horizontal high: HH 12
• OFF
Active Memory Plan transponder or programme number (Ref. Sec. 8.0)
Transponder Frequency
MW o IF
Modulation: analogue
or Digital QPSK
DiSEqC:
• Position A
• Position B
• Position C
• Position D
• OFF
Local oscillator: from 0 to
20.000 MHz
fig. 12.1 Digital signal first level measurements.
Symbol Rate: from 2 to
45 MS/s
There are 7 modifiable fields
in this measurement level:
Transponder, frequency,
Modulation, lnb, diseqc, l.o.
and symbol rate. This only
for the user defined memory
plans.
fig. 12.2 Analogue signal first level measurements.
NOTES:
1.If there is no signal or if the signal level is below the meter’s measurement dynamic range, the
string PWR_TOO_LOW (power too low) will be shown,
2. The meter will always show a graphic bar proportional to the signal level or power measurement,
3.The graphic bar memorizes the peak signal level or power value this is represented by a vertical
line on the display,
4. To display all the signal available measurements, the MEAS key has to be pressed repeatedly
(see next paragraphs in this section for more details),
5. Regardless of the measurement level the meter is, by pressing the “Power On” key [14], meter
will return to the First Level or Power measurements display (Ref. fig. 12.1 or 12.2) depending on
the type of transponder being measured (Digital or Analogue).
pag. 37
DSA-100 User’s Manual
Satellite Mode
continue: SATELLITE SIGNAL MEASUREMENTS: MEAS
12.2 Noise Margin, Quality, MER and SNR measurements (Level 2)
Press the
key again to display the second measurement level:
Memory Plan (Ref. section 8.0)
Active Memory Plan transponder or Programme number (Ref. section 8.0)
Transponder Frequency: MW or IF if
L.O.=0
NOTE
There are variable fields
in this measurement level:
Memory Plan, Transponder or
Programme number and Frequency.
fig. 12.3 The second measurement level provides the Noise Margin and the MER (modulation
error) measurements with the relevant graphic bars. The instruments supplies both the EVM measurement and the quality analysis (PASS, MARGINAL, FAIL).
12.3 BER before and after error correction (Level 3)
Press the
key again to display the third measurement level:
Memory Plan (Ref. section 8.0)
Active Memory Plan transponder or Programme number (Ref. section 8.0)
Transponder Frequency: MW or IF L.O.=0
NOTE
There are variable fields
in this measurement level:
Memory Plan, Transponder or
Programme number and Frequency.
fig. 12.4 The third measurement level provides the BER (Bit Error Rate) before and after error
correction. The aBER (post Viterbi) shows a value of “<10-8“ for signals that may be considered as
error free after the error correction process.
pag. 38
DSA-100 User’s Manual
Satellite Mode
continues: SATELLITE SIGNAL MEASUREMENTS: MEAS
12.4 FEC, NETW. NAME and BOUQ. NAME (Level 4)
Press the
key again to display the fourth measurement level:
Memory Plan (Ref. section 8.0)
Active Memory Plan trasponder or Programme number (Ref. section 11.0)
Transponder Frequency: MW
o IF
NOTE
There are variable fields
in this measurement level:
Memory Plan, Transponder or
Programme number and Frequency.
fig. 12.5 This display will show the network name, the bouquet, the data and the FEC (forward error
correction) value for the measured digital transponder.
NOTES:
1. If there is no signal or if the power measurement is below the meter’s dynamic range or when the
signal is not locked, the measurements will show only horizontal lines,
2. From the second to the fourth measurement levels the variable fields are only the Memory Plan,
the Transponder or Programme number and the signal frequency value,
3. When the signal frequency value is changed, the Transponder or Programme number is replaced by three horizontal lines, this is because the correspondence between the memory location
and the new frequency is lost,
4. From any measurement level the meter is, by simply pressing the Power ON key [14] it is possible to return to the first measurement level shown in fig. 12.1 or fig. 12.2,
5. On the bottom line of the display and starting from the measurement level 2, the NIT readings
are displayed: network name, orbit position, encryption system, “S” letter to indicated that this is
a satellite signal and a lock that will be closed when the digital signal is locked.
pag. 39
DSA-100 User’s Manual
Satellite Mode
13.0 SAT spectrum measurements: spect
Brief description
The “SPECT” [5] key will access the meter’s spectrum analysis measurements.
when accessing this measurement mode, the meter will automatically set the
reference level in order to show all the detected carriers within the screen display for the selected SPAN value.
Measurement start up
• Select a Memory Plan (Ref. section 8.0),
• Connect the LNB to the meter’s RF input [17],
• Press the SPECT [5] key,
• Use the SELECT [10] key to change the spectrum variable fields as shown
in fig. 17.1: SPAN, transponder or programme number, Frequency, Reference
level. The chosen field will be highlighted with a dark background,
• Use the Up [7] and DOWN [9] keys to change the chosen field,
• Press the SPECT [5] key again in order to enable the Max Hold feature (Ref.
par. 13.2). With this feature the meter memorizes the RF input signal maximum
value, this will be shown as a trace that overlaps to the real time spectrum
curve.
NOTES:
1. Varying the transponder or programme name the spectrum marker moves to the selected
carrier centre frequency,
2. Varying the marker frequency, this will move gradually on the spectrum, the speed of this displacement will automatically increase just by keeping the UP [7] or DOWN [9] keys pressed,
3. Varying the displayed frequency, the transponder or programme name will be replaced by horizontal lines. This because the correspondence between the frequency value and the transponder or programme name is lost,
4. If during the dish alignment process, the Spectrum displays a transponder pattern of an unknown Satellite it is possible to tune these carriers by simply pressing the HELP [12].
pag. 40
DSA-100 User’s Manual
Satellite Mode
continues: SPECTRUM MEASUREMENTS: SPECT
13.1 Measured Signal Spectrum analysis
Press the
key and use the
Use keys
and
Spectrum Span: sweep width in
MHz : 50, 100, 200, 500, FULL
key to choose a field to be modified
to modify the displayed value.
Transponder Number
Transponder
(ordered by frequency value) Centre Frequency
Level Marker:
Automatic Reference Level: dB scale reference
value; may be varied ma-
0,1 dB resolution
Spectrun
Analysis
Curve: 5 dB division in
nually
Frequency Marker:
quasi Real Time
0,1 MHz resolution
Closed Lock =
Locked signal
Open Lock =
un-locked signal
Power/Level: frequency
Level/Power value in dBuV
marker
fig. 13.1 ASTRA transponder spectrum with a 500 MHz SPAN.
13.2 Measured Signal Spectrum analysis with Max Hold
Press the
key again to enable the signal max hold feature.
Max Hold Trace: peak
memory value reached by
the measured signal
Max Hold Function:
Max Hold function enabled
fig. 13.2 ASTRA transponder spectrum with the Max Hold Function enabled
pag. 41
DSA-100 User’s Manual
TV Mode
14.0 HELP: automatic tuning funCtion
Brief description
The HELP [12] key will start an automatic search of all the tuning parameters of a seleted transponder. This function is particularly useful if there is the need to recognize
a transponder found in SPECTRUM or MEAS mode which has not been pre-memorized in any Memory Plan and of which we know only its frequency.
Measurement start up
• Press the SPECT [5] key and place the frequency marker on the centre frequency of the digital carrier shown on the display,
OR
• Press the MEAS [6] key to set the transponder centre frequency, Local Oscillator frequency, the Polarization and Band of the received signal for which we
want to get all the tuning parameters,
• Press the HELP [12] key to start the auto-tuning function.
Push buttons and displays
When help is need in order to lock a digital signal press the
key,
the meter will start an automatic search of all the missing tuning parameters.
lo strumento avvierà automaticamente una funzione di
(signal standard: DSS or DVB and Symbol Rate).
Use SELECT
to choose a
Memory Plan
when
locked
choose with select and press
up or down to
memorize
fig. 14.1 Automatic search of a transponder tuning parameters
NOTES:
1. When the transponder is locked, the meter will display a memorization menu to store
the transponder in the first available memory location of the active memory plan (fig,
14.1),
2. In this menu it is possible to choose a different memory plan,
3. If the memory location is already used, the meter will display “OVERWRITE?” otherwise it will show “SAVE”.
pag. 42
DSA-100 User’s Manual
TV Mode
15.0 SCR LNB
Brief description
The meter implements the SCR communication protocol to drive an LNB that supports this standard. This feature can be used to check satellite single cable distributions.
Measurement start up
• Select the satellite memory plan (Par. 8.0).
• Press the MPEG PROG SERVICE [1] key, use SELECT to choose “SAT & CONFIG.
SCR” and press UP [7] and DOWN [9] to enter the SAT configuration menu.
• Use the SELECT [10] key to select SAT SCR SETUP and press UP [7] to enter the SAT
SCR menu.
• Use SELECT [10], UP [7] y DOWN [9] to choose the sat SCR USER (suggested) or the
SCR frequency.
• Start the Test moving the cursor on Sat SCR CABLE TEST and confirm by pressing the
UP [7] key.
Push buttons and displays
Select the satellite memory plan by pressing the
key for 2” to enter the configuration menu.
Press
Use
key.
,
and
to select “SAT CONFIG. SCR” and after “SAT
SCR SETUP”.
from 930 to 2250 MHz
from User N° 1 to User N° 8
Fig 15.1 Example of SCR parameters.
pag. 43
DSA-100 User’s Manual
Common TV & SAT Features
TV AND SAT FEATURES
16.0 dc on/off: line feed command................................................ 45
17.0 MPEG PROG SERVICE...................................................................... 46
18.0 memory: Memorization function........................................... 47
19.0 store: FAST memory key ........................................................... 49
20.0 Data logger................................................................................... 50
pag. 44
Common TV and SAT Features
DSA-100 User’s Manual
16.0 dc on/off: line feed command
Brief description
DC ON/OFF key will allow to remove or add the LNB line feed. This feature
is useful if the LNB is already powered by any other active distribution device
(Head End).
Measurement Start up
16.1 Remove LNB line feed
• Verify that the DC at RF IN [8] LED is on,
• Press the DATA LOGGER [13] key for two seconds,
• Verify that the DC at RF IN [8] LED is off.
16.2 Turn on the LNB line feed
• Verify that the DC at RF IN [8] LED is off,
• Press the DATA LOGGER [13] key for two second,
• Verify that the DC at RF IN [8] LED is on.
Push buttons and display
Press
for two seconds and verify that the yellow DC at RF IN [8] LED
status changes :
• LED off: line feed is active.
• LED on: no line feed.
pag. 45
Common TV and SAT Features
DSA-100 User’s Manual
17.0 MPEG PROG SERVICE
Brief description
Every transponder carries a given number of TV and Radio programmes.
This function will display the full programme list of the broadcasted programmes. Besides the services names also the audio and video PID values are
provided, and verify if the channel is coded (Y/N). Press UP or DOWN to view
up to 64 programmes. The radio PID are displayed only as audio PID.
Measurement Start up
• Tune with SELECT [10] a COFDM multiplex or a digital satellite transponder
(Ref. Par. 11.0 - 12.0).
• Press the MPEG [1] key,
• After some seconds a full list of transmitted services from the specific satellite
will be displayed,
• Use the UP [7] and DOWN [9] keys to go through the full list.
Push buttons and display
Lock the wanted transponder (Ref. section 4.0-5.5 or 12.0-13.0) and press the
key to get the full programme list and relevant audio and video PIDs as
shown in figure here below.
programme name
Video PID
Audio PID
Encripted Y= SI, N=NO
Fig. 17.1 MPEG Prog. Service.
pag. 46
DSA-100 User’s Manual
Common TV & SAT Features
18.0 memory: Memorization function
Brief description
The Memory function will allows to modify an existing Memory Plan or to define
a new one.
Only the “MANU” memory plans may be handled by this feature.
Measurement start up
18.1 Create a new memory plan:
• Press key MEMORY [11],
• Use the SELECT [10], UP [7] and DOWN [9] keys to choose a new Memory
plan (Ref. fig. 18.1), the name of the Memory PLan is automatically assign by
the meter with the prefix “PLAN” followed by the first available plan number
(es.PLAN45),
• Use the SELECT [10] key to choose all the fields that will define the transponder to be memorized (Ref. fig. 18.1): Frequency, Standard, Polarization and
Band, Symbol Rate and Local Oscillator and then set the wanted value using
keys UP [7] and DOWN [9] Keys,
• Use the SELECT [10] key to highlight the SAVE? command and press UP [7]
or DOWN [9] to confirm the programme storage.
18.2 Modify an existing Memory Plan:
• Press the MEMORY [11] key,
• Use the SELECT [10], UP [7] and DOWN [9] keys to choose an existing Memory Plan (rif. fig. 18.1) and the programme number that needs to be changed.
• Use keys SELECT [10] to highlight the transponder field to be changed: Frequency, Standard, Polarization and Band, Symbol Rate and Local Oscillator
and set the new wanted values using keys UP [7] and DOWN [9],
• highlight the command OVERWRITE? to store the updated transponder programme position.
18.3 Add a new programme to an existing Mermoy Plan:
• Press the MEMORY [11] key,
• Follow the procedure described in paragraph 18.2 with the only difference that a nee
programme number must be selected (Ref. fig. 18.1),
• The command line on the bottom part of the menu will be SAVE?, use keys UP [7] or
DOWN [9] to confirm the new programme number.
pag. 47
DSA-100 User’s Manual
Common TV & SAT Features
continue: MEMORY: MEMORIZATION FUNCTION
Push buttons and displays
Press the
key to start the memory task.
Use the key
to highlight the memory fields that need to be changed
and set the new values using the keys
and
and applying one of
three procedures described in “MEASUREMENT START UP”.
Channel Frequency
Channel (See Par. 1.0)
Memory plan (See Par. 1.0)
Channel Band Width: 8 MHz
UHF, 7 MHz ifVHF
Modulation: Analogue or
Digital COFDM (DVB-T/
H), FM Radio and Emulated QAM
if
command that confirms the
memory change: : SAVE?
(adds a new programme) or
OVERWRITE? (replaces an
existing programme)
Memory Plan (Ref. section 8.0)
LNB line feed
• Vertical low: VL 12
• Vertical high: VH 12
• Horizont low: HL 12
• Horizontal high: HH 12
• OFF
Active Memory Plan transponder or programme number (Ref. Sec. 8.0)
Transponder frequency:
MW o IF
Modulation: analogue or
Digital QPSK
DiSEqC:
• Position A
• Position B
• Position C
• Position D
• OFF
Local Oscillator: from 0 to
20.000 MHz
command that confirms the
memory change: : SAVE?
(adds a new programme)
or OVERWRITE? (replaces
an existing programme)
Symbol Rate: from
2 to 45 MS/s
fig. 18.1 MEMORY : creating or modifying a Memory Plan.
NOTES:
1. If a manual tuning is made (Ref. par. 3.0-4.0-12.0) the tuning parameters are transfered to the
memory menu
2. If a manuals tuning is made in spectrum mode (Ref. par. 5.0-13.0) the modified tuning parameters will be trasfered to the memory menu.
3. The “MANU” files may be renamed using the oprional SMART programme
pag. 48
Common TV and SAT Features
DSA-100 User’s Manual
19.0 store: FAST memory key
Brief description
The STORE or fast memorization key will allow to add a transponder in a new
programme location in the active Memory Plan.
Measurement start up
• Tune an analogue or digital transponder (Pr. 3.0-4.0 “MEAS”, 12.0-13.0
“SPECT”)
• Press the MEMORY [11] key for two seconds,
• The transponder will be automatically stored in a new memory location of the
active Memory Plan.
Push buttons and displays
Press the MEMORY [11] key for 2 seconds to start the fast memorization function. The meter will update the memory programme number to the first available
free location in the active Memory Plan and will memorize it.
Once this task is completed the meter will show the Memory Menu in order to
allow any further change to the newly memorized transponder.
pag. 49
Common TV and SAT Features
DSA-100 User’s Manual
20.0 Data logger
Brief description
The Data Logger function allows automatic measurements to be carried out
on all transponders contained in a given Memory Plan after the dish has been
aligned. These measurements may be made at the dish or at any installation
outlet.
Measurement start up
• Press the DATA LOGGER [13] key,
• Use keys SELECT [10] , UP [7] and DOWN [9] to choose:
a) the Memory Plan to be used for the automatic measurements,
b) the LOGGER file where the measurements will be memorized (from 1 to 99),
• Start the Logger function highlighting with the SELECT [10] key the command
START? and pressing the UP [7] or DOWN [9] key to confirm,
• A status bar will indicate that the task is in progress. When the measurements
are completed the display will show the message “DONE!”.
NOTES:
• All the automatic measurements are carried out on the selected Memory Plan,
• The maximum number of logger files is 99,
• The logger files may be exported to EXCEL® spread sheets using the SMART programme,
• The meter shows the OVERWRITE command if the chosen logger file already exists.
Push buttons and displays
Press the
key to start the automatic measurements.
Use key
values using keys
to highlight the fields to be changed and set the wanted
and
keys.
Memory Plan to use for automatic measurements
Logger file that will store all measurements: from LOG 01 to LOG. 99
Memory command: SAVE? or
OVERWRITE?
fig. 20.1 DATA LOGGER function menu.
pag. 50
DSA-100 User’s Manual
appendixes
A1 - main technical specifications................................................ 52
A2 - ACCESSORIES................................................................................... 56
A3 - trouble shooting........................................................................ 57
A4 - batteries maintenance and recharge................................ 58
A5 - front panel description........................................................... 59
A6 - side panel description.............................................................. 60
A7– maintenance of your analyzer.............................................. 61
A8- service notes and guarantee regulations...................... 62
A9 - MAINTENANCE AND REPAIR FORM................................................. 63
A10 - standard equipment repair AND OR SERVICE FORM.............................64
A-11 DISPOSAL OF ELECTRONIC EQUIPMENT RULES......................... 66
pag. 51
DSA-100 User’s Manual
A1 - main technical specifications
ANALOGUE TV
• Frequency band: 47–870 MHz
• Direct selection of: custom memory plan, program, channel, frequency, dc at RF IN, with front
panel keyboard
• Memorisation of: plan, program, channel, frequency, audio carrier, standard, freq. offset
• Frequency resolution: 62.5 KHz
• Input impedance: 75 ohm
• Interchangeable input connector: “F” (“IEC” or “BNC” or “N” optional)
• Power supply at RF IN: OFF, + 5 V (0.2 A)
• Analogue measurement dynamic range at RF input: from 25 to 116 dBuV, from –35 to + 56
dBmV (selectable), with limit indication: level too low, level too high
• Measurement resolution: 0.1 dB
• Level measurement accuracy: 1.5 dB typ. (2 max) with SW correction (after 5 minutes warm–up)
• Measurement filter bandwidth: 130 KHz at –3 dB
• Measurement stability versus temperature between –10 and 50°C: 0.03 dB/°C
• Multi–standard: M–N–B–G–I–D–K PAL–NTSC–SECAM.
FM RADIO
•
•
•
•
•
Frequency band: tunable from 47 to 870 MHz (default 88–108)
Memorisation of: memory plan, programme, channel, frequency
Frequency resolution: 62.5 KHz
Audio demodulation: FM
Demodulation filter bandwidth: 100 KHz @ –3 dB. Audio heard with built–in loudspeaker: 0.5 W
adjustable volume
• For all other specifications see ANALOGUE TV
COFDM Demodulated
(Digital or analogue fully automatic selection also in channel navigation)
• COFDM frequency band: 47–870 MHz
• Direct selection of: memory plan, programme, channel, frequency, dc at RF IN, with front panel
keyboard
• Memorisation of: memory plan, programme, channel, frequency, channel bandwidth, offset–frequency
• Frequency resolution: 62.5 KHz
• Offset frequency 166 KHz: automatic
• Input impedance: 75 ohm
• Interchangeable input connector: “F” (“IEC” or “BNC” or “N” optional)
• Power supply at RF IN: OFF, +5 V (0.2 A)
• Power measurement dynamic range at the RF input: from 30 to 120 dBuV, from –25 to + 60
dBmV (selectable) with limit indications: level too Low, level too high
• Power measurement resolution: 0.1 dB
• Power measurement accuracy: 1.5 dB typ. (2 dB max.) with software correction (after 5 minutes’
warm-up)
• MER & SNR measurement accuracy: 1 dB typ. (1.5 dB max), with > 45 dBuV power
• Measurement filter BW: 130 KHz at –3 dB
• Measurement stability versus temperature between –10 and 50°C: 0.03 dB/°C
• Noise Margin Measurement accuracy: 0.5 dB
BER measurement before and after Viterbi:
–
bBER up to 2 x 10⁻⁵ (Pre BER)
–
aBER up to 2 x 10⁻⁸ (Post BER)
pag. 52
DSA-100 User’s Manual
•
•
•
Automatic recognition & visualisation of: HP/LP rate, guard interval, constellation
–
Rate: 1/2, 2/3, 3/4, 5/6, 7/8
–
Guard interval: 1/4, 1/8, 1/16, 1/32
–
Constellation: QPSK, 16 QAM, 64 QAM
Automatic Digital signal quality TEST on channel: PASS–MARG–FAIL
Spectrum inversion: automatic
TV SPECTRUM ANALYSIS
•
•
•
•
•
•
•
•
•
•
Frequency band: 47–870 MHz
Span in TV band: 2–5–7–10–20–50–100– 200–500–FULL
dB/div: 10
Dynamic range on the display: 60 dB
MRK Measurement resolution: 0.1 dB
Measurement filter bandwidth: TV 130 KHz at –3 dB
Reference level: from 0 to 120 dBµV, from –50 dBmV to +70 dBmV
Reference level setting: automatic, and manual adjustable
Frequency/level marker position:
–
For digital signals in channel centre
–
For analogue signals on video carrier
Other spectrum selections:
–
MAX HOLD
pag. 53
DSA-100 User’s Manual
ANALOGUE SAT
• Frequency Band: 930–2250 MHz
• Direct selection of: memory plan, programme, frequency, LNB, DiSEqC, with front panel key
board
• Memorizaton of: plan, programme, transponder, frequency, LNB, DiSEqC, local oscillator
frequency
• Frequency resolution: 0,1 MHz
• Input impedance: 75 ohm
• Interchangeable input connector: “F” (“IEC” or “BNC” or “N” optional)
• Power Supply at RF input: OFF, +13, +18 V, 22 kHz (0,3 A) (with ON/OFF key)
• DiSEqC 1,1: 4, 8, 12 or 16 polarizations, DiSEqC “a.b.c.d” already pre-programmed in sequence
and very easy to use. IT can power any type of LNB (analogue or DiSEqC, single or dual feed)
and any type of multiswitch (analogue or DiSEqC con 4, 8, 12, 16 inputs and SCR LNB)
• Analogue level measurement dynamic range at the RF input: from 35 to 120 dBuV, from –25
to + 60 dBmV (selectable) with limit indications: level Too Low, level Too High
• Measurement resolution: 0,1 dB
• Level measurement accuracy: 1.5 dB typ. (2.5 dB max.) with software correction (after 5 minutes warm-up)
• Measurement filter bandwidth in SAT mode: 4 MHz at –3 dB
• Measurement stability versus temperature between –10 and 50°C: 0,1 dB/°C
• LNB L.O. frequency selection: continuous from 0 to 20.000 MHz, for “L” bands (direct IF–SAT
reading), “S”, “C”, “KU”, “KA”.
QPSK (Demodulated)
• Frequency band: 930–2250 MHz
• Direct selection of: memory plan, programme, frequency, LNB, DiSEqC, with front panel keyboard
• Memorization of: plan, programme, transponder, frequency, LNB, DiSEqC, local oscillator frequency, standard, symbol rate
• Frequency resolution: 0,1 MHz
• Input impedance: 75 ohm
• Interchangeable input connector: “F” (“IEC” or “BNC” or “N” optional)
• Power Supply at RF input: OFF, +13, +18 V, 22 kHz (0,3 A) (with ON/OFF key)
• DiSEqC 1,1: 4, 8, 12 or 16 polarizations, DiSEqC “a.b.c.d” already pre-programmed in seuqence
and very easy to use. It can power any type of LNB (analog or DiSEqC, single or dual feed) and
any type of multiswitch (analogue or DiSEqC with 4, 8, 12, 16 inputs and SCR LNB)
• Digital power measurement dynamic range at RF input: from 35 to 120 typ. dBuV, from –30 to
+ 60 dBmV (seelctable) with limit indications: level Too Low, level Too High
• Power Measurement Resolution: 0,1 dB
• Power Measurement accuracy: 1,5 dB typ. (2.5 dB max.) with software correction (after 5 minutes warm up)
• Noise Margin Measurement accuracy: 0,5 dB typ. (1 dB max) with software correction
• Measurement filter bandwidth in SAT mode: 4 MHz at –3 dB
• Measurement stability versus temperature between –10 and 50°C: 0,1 dB/°C
• QPSK Symbol Rate setting: 2–45 MS/s, in 1 kS/s steps
• BER measurement before and after Viterbi:
– bBER up to 2x10⁻⁵
– aBER up to 2x10⁻⁸
• FEC, automatic recognition and visualizaton of value: FEC 1/2, 2/3, 3/4, 4/5, 5/6, 6/7, 7/8, 8/9
• Automatic quality test: FAIL, MARGINAL, PASS
pag. 54
DSA-100 User’s Manual
continue: A1 - MAIN TECHNICAL SPECIFICATION
• Noise Margin Measurements: from –1 to 12 dB with special algorithm which automatically takes
into account the FEC value
• LNB L.O. frequency selection: continuous from 0 to 20.000 MHz, for “L” bands (direct IF–SAT
reading), “S”, “C”, “KU”, “KA”.
• QPSK standard selection: DVB/DSS
NET. ID. and MPEG Service/Programme list
• Provides the name of the programmes (Services) the bouquet and transponder names the encryption system, orbitall position and date.
SAT SPECTRUM ANALYSIS
• Frequency band: 930–2250 MHz
• Span: 50–100–200–500–FULL
• dB/div: 5
• Display dynamic range: >30 dB
• Marker measurement resolution: 0.1 dB
• Measurement filter bandwidth: 4 MHz at –3 dB
• Reference level: from 0 to 120 dBµV, from –60 dBmV to +60 dBmV
• Reference level settings: automatic and manual adjustable
• Other selectable spectrum modes:
– MAX HOLD (peak hold)
– SAT POINTING: automatic optimum setting for satellite dish alignment
OTHERS
• Buzzer: Level or Quality according to measurement mode (with on/off Key)
• Power Supply:
– Built in rechargeable batteries: 7,2 V x 2,5 Ah (Ni–MH) – Volage load: 12 Vca or 12 Vcc (1 A), (connector: Ø 5,5 x 2,2)
– AC/AC adapter : 230 Vac, output: 12 Vac (supplied)
• Battery duration at 25°C: 4 hours depending on LNB consumption (9 hours optional)
• Low Battery indicator: with acoustic signalling and visual indication on graphic display and automatic meter power down by microcontroller
• Indication of battery status charge: always shown on display
• Battery recharge time: 1 hour for approx 50% capacity, 3/6 hours for full charge
• Instrument size: H 80 x L 225 x DD 215 mm
• Instrument weight: 1.3 kg with batteries, bag and accessories
• Casing structure: ABS plastic housing rain-dust and shock proof
• USB interface: for PC interfacing; possibility of SW up-grades downloaded from internet, (memory plan configuration, printouts etc optional)
• B/W graphic display: 64 x 128 pixel
• Auto-Off timer: after 5 or 10 min without use (selectable on/off, always re-starts from last function)
• RF input overload protection: electronic, up to 60 Vac
pag. 55
DSA-100 User’s Manual
A2 - ACCESSORIES
INCLUSIVE ACCESSORIES
• TRASF-HKDH24A12: Adapter input 100-230 Vac, output 12 V, 2A
• CNN-F-0150: interchangeable F - F double female input connector
• TRACOLLA-50-GI: Shoulder strap
• BAG-ST: soft poliester protective bag
• CAVO-USB-AM-BM: USB cable to connect DSA-100 to PC for software up-grades via
Internet. Length 180 cm
• CA-12: Vehicle cigarette lighter adapter (Input 12 Vdc, output 12 Vdc)
• TRA-FFEM-CEIFEM: Interchangeable “F” female/ “IEC” female input connector
• TRA-BNCF-FFEM: Interchangeable “F” female/ “BNC” female input connector
• DiSEqC-SWI-2-01: Two way DiSEqC switch for dual LNB dish pointing
OPTIONAL ACCESSORIES
• 1BAT-PACK-DSTEX: Extra power Ni - MH 4,5 A battery pack
• TRA-FFEM-NFEM: Interchangeable “F” female/ “N” female input connector
• TRASF-CPP2A012O: 100-240 V to 12 V adapter , 1A with implut plug IEC 320-C8 and with the possibility to be supplied with Autraslian, European, UK or USA adapter.
• RIGHTS-SMART-1: Authorisation code for SMART PRO PC management SW
pag. 56
DSA-100 User’s Manual
A3 - trouble shooting
For all faults always call the manufacturer or the service centre in your country.
Never return the analyzer to the manufacturer before approvade and obtaining
his specific instructions.
Please find below the most common problems that could occur and which can
easily be solved:
PROBLEMS AND SOLUTIONS:
P: S: The analyzer does not work or work incorrectly even if it is connected
to the mains:
Verify that the green “MAINS” LED is on. If it is off verify the supplied
ac/ac adapter.
P: S: The batteries can not be charged:
Verify that when the meter is off the “MAINS” LED is on. Verify the
internal battery status.
P: S: The meter does not respond to any command:
In the rare cases that the analyzer does note respond to the front pa
nel commands, keep the ON/RESET [14] key pressed for about 10
seconds. This will reset the meter without any memory loss
(i.e. Memory Plans, Datat Loggers etc).
NOTES:
• To identify and report any faults photocopy and fill in the attached “FAULT
IDENTIFICATION FORM”. See Appendix A9.
• As the meter is very complex we strongly suggest that repair should be carried out only by expert staff authorized by IKUSI.
• The analyzer is built almost completely using SMD components and it is
there for not easy to repair: for this reason IKUSI does not provide any circuit
diagramme.
• If the IKUSI considers that the meter has to be sent back for repair, photocopy and fill in the “EQUIPMENT REPAIR and or Service form” and attach it
to the meter when returning it. Appendix A8.
pag. 57
DSA-100 User’s Manual
A4 - batteries maintenance and recharge
a) In normal operational conditions the battery duration is 4 hours. This time
depends on the LNB current absorption.
b) The meter provides a visual indication on the battery charge status. In
an almost dry battery conditions, this indication remains on the display.
This indication is shown with an icon on the bottom left side of the display.
c) The ac/ac adapter power socket [15] is located on the left side of the meter. The meter works also when it is being charged.
Always recharge the batteries using the supplied ac/ac adapter. The use of a
different AC/AC adapter may cause a permanent battery damage.
d) In order to preserve the battery change it is possible a to activate a shut
down timer in order to automatically turn off the meter when it is not used for
more than 5 or 10 minutes. For more details on this configuration possibility
see the “Menu Configuration” at section 1.1 of this User’s Manual.
pag. 58
DSA-100 User’s Manual
A5 - front panel description
1
MPEG (press for 2 seconds to access the configuration menu)
2
Graphic display
3
PLAN (press for 2 seconds to access the AUTOSCAN function)
4
SAT FINDER (press for 2 seconds to access the DUAL LNB function)
5
SPECT (press for 2 seconds to access the SAT POINT function)
6
MEAS
7
UP
8
DC at RF IN battery charge LED
9
DOWN
10 SELECT
11 MEMORY (press for 2 seconds to make a quick memorization of the tuned transponder)
12 HELP (press for 2 seconds to enable the BUZZER function)
13 DATA LOGGER (press for 2 seconds to turn ON/OFF the power supply to the RF input)
14 ON/OFF switch (press for 10 seconds to reset the meter)
pag. 59
DSA-100 User’s Manual
A6 - side panel description
15 ~ 12 Vac power feed
16 USB serial port
17 “F” RF input
pag. 60
DSA-100 User’s Manual
A7– maintenance of your analyzer
CLEANING
Cleaning the unit is easy, provided that you follow the following warning. Do not use chemical
solvents or rough or abrasive cloths. Instead, use a soft cloth, dampened with water mixed with
alcohol or degreasing non-abrasive cleanser.
UNIT MAINTENANCE AND CARE :
Avoid leaving the unit at extreme temperatures for long periods of time. If the unit is exposed to
temperatures over 60°C for a long time, the display might be damaged. Also, the batteries could
become damaged if the instrument is exposed to high or low temperatures for long periods of time.
In particular, high temperatures accelerate the natural exhausting time of batteries. Charge the batteries by keeping the network transformer uncovered and out of its transport case. Do not immerse
the unit in water or the electrical circuit could be damaged. In this event, let the unit dry completely
before switching it on and contact IKUSI technical service.
The graphic display is covered by a special transparent protection glass. If, because of an impact,
the glass adheres to the display by causing a “stain” effect, solve this problem by applying a piece
of adhesive paper tape on the glass and lift it upwards.
NOTE:
1)do not use adhesive tapes that are overly strong because they could leave traces of glue on the
glass and they are hard to remove.
pag. 61
DSA-100 User’s Manual
A8- service notes and guarantee regulations
1) IKUSI guarantees the repair of its manufactured equipment for a period of 24 months.
2) IMPORTANT: the guarantee becomes valid when an invoice or receipt is presented to IKUSI, clearly showing the date of
purchase.
3) The guarantee covers the replacement, free of charge, of all parts, which are not functioning correctly due to manufacturing faults. The part not covered by guarantee are the aesthetic parts. Faults due to deteriorated or aged equipment, or caused
by improper because, not following the user’s manual suggestions or caused by atmospheric phenomena or accidents or
catastrophes or because the meter is used in dusty or not adequate environment.
4) The guarantee is considered void if:
a. the equipment is tampered with or repaired by non-authorized personnel;
b. damage is found, caused by the incorrect use of the equipment, without following the advice explained in the User’s Guide accompanying the equipment;
c. damage is found caused by the use of the equipment in unsuitable working environments.
5) The following parts are not covered by the guarantee:
a. Parts subject to wear, such as aesthetic ones;
b. Batteries;
c. Bags.
6) The equipment can only be repaired by the manufacturer or by an authorized IKUSI service center in your country.
a. Before returning the meter for repair, always contact IKUSI service center to obtain the return procedure for your analyzer.
b. When returning the meter, always send it with the following documentation attached: the fully-compiled FAULT IDENTIFICATION FORM, a transport document and the eventual request for an estimate of repair costs.
d. Please note that the request for an estimate of repair costs must be submitted upon return of the analyzer with a written note. If the repair cost estimate is not accepted, IKUSI reserves the right to charge the customer for the estimate analysis costs.
7) The guarantee will not apply if the equipment is manipulated by unauthorized personal
8) Risks and costs for transport to and from IKUSI must be sustained by the buyer.
9) The equipment can not be replaced and the guarantee extended after the repair of a fault.
10) The guarantee does not cover compensation for direct or indirect damages of any kind to people or goods caused by the use of the equipment and/or compensation caused by the suspension of use due to eventual repairs.
11) IKUSI is not responsible for eventual tampering and/or modifications that may cause the goods to no longer adhere to the
European “CE” regulations, especially regarding EMC and safety.
12) IKUSI instruments are recognised and are fully compliant with DVB regulations and specifications (ETS 300 421 –12 / 94)
and are consequently marked with the DVB logo and registered with id. N. 3088.
pag. 62
DSA-100 User’s Manual
A9 - MAINTENANCE AND REPAIR FORM
• Fill section A of this form and attach to the faulty equipment to be part to ikusi. This will facilitate the repair of your
equipment.
SECTION A :
FILLED BY CUSTOMER
Date: ........./....../.......
• Company or person name:
• VAT.
• Street
• No
• Province
• Tel.
• Fax
• Contact Person
• Return of the meter with full
ensurance (Value: 1% declared value) • declared value =
• NO
• Model
• Serial Number
• Guarantee Repair:
• SI (Attach guarantee or envoice)
• Accessories included details
• NO
• Quantity
• Description
• Fault or Problem description by customer:
NOTES AND GUARANTEE REGULATIONS
Hereafter are detailed our Guarantee rules and regolation of our measurement equipment. IKUSI
guarantees the manufactured equipment for a period of 24 months.
Guarantee intends the free of charge replacements of all factory defective parts excluding the
aesthetic parts and faults caused by improper use of the meter, dirtiness, erroneous manipulation
of the meter and batteries.
1. The guarantee is voided if the meter is manipulated or repaired by unauthorized not
official IKUSI service centre.
2. The equipment will not be replaced and the guarantee extended after repair.
3. If the repair a guarantee repair, contact IKUSI for shipment authorization and indicate
clearly the the guarantee has not expired.
4. Attach to the shipment: the copy of the guarantee coupon, copy of the invoiceand the
fault identification form or a detailed description for shipment approval.
5. If the repair is out of guarantee. contact IKUSI for shipment approval.
NOTES:
The goods may be refused if the shipment is made not accordingly to what is described above.
The cost of the repair will be paid by the customer upon return of the meter together will all costs
thet will derive from this handling.
IKUSI - Ángel Iglesias S.A. Paseo Miramón, 170 - 20009 San Sebastián ESPAÑA
Tlf.: +34 943 44 88 00 Fax: +34 943 44 88 20 [email protected]
pag. 63
DSA-100 User’s Manual
A10 - standard equipment repair AND OR SERVICE FORM
• Customer:.......................................................................
• Tel. No.:..........................................................................
• Instrument Mod.:............................................................
• Software version:...........................................................
• Contact person:...........................................................
• Fax No:.......................................................................
• Serial No:....................................................................
(shown on the display when the instrument is turned)
Please would you kindly answer the following questions to facilitate fault identification (tick the appropriate boxes)
IN WHICH CONDITION DID THE FAULT OCCUR?
Instrument turned off & being recharged
When the instrument was cold
Whilst turning on the instrumentWhen the instrument was hot
After an accidental fall
Other.......................................
IN THE FAULT ALWAYS PRESENT OR DOES IT ONLY OCCUR IN THE FOLLOWING CONDITIONS?
When tapping on the casing
When tr Instrum. is powered using internal batteries When the instrum. is powered using the AC adapterWhen the instrument has just been turned on
When the instrument is cold
When the instrument is hot
HAS THE INSTRUMENTS HAD ANY MECHANICAL BREAKAGES?
To the front panel
To the back panel
Dents in the casing
TURN OFF THE INSTRUMENT & POWER IT USING THE AC/AC ADAPTER, WHICH OF THE FOLLOWING LEDS ARE ON?
The “MAINS” LED in the front panel
NO LEDs
TURN ON THE INSTRUMENT & POWER IT USING THE AC/AC ADAPTER, WHICH OF THE FOLLOWING FAULTS OCCUR?
The keys do not push down well
The LEDs do not light up with the correct luminosity, etc. (please specify fault in the space below)
WHEN DOES THE FAULT OCCUR?
With all the channelsWith only some channels, e.g.................
During the analog C/N measurement
During the analog level measurement In spectrum mode
During the digital C/N measurement
During the digital power measurement
During the A/V ratio measurement
PLEASE INDICATE IN THE SPACE PROVIDED WHAT IS SHOWN ON THE ALPHANUMERICAL DISPLAY:
If the error occurs when turning on the instruments
If the error occurs at another stage
DO THE KNOBS FUNCTION CORRECTLY WHEN ADJUSTING THE PARAMETERS
yes
NO (If “NO” please clearly specify the fault in the space provided below)
ARE THERE PROBLEMS WITH THE LOUDSPEAKER?
There is no sound
The sound is distorted
The sound is disturbed
ARE THERE ANY OF THE FOLLOWING PROBLEMS WITH THE MONITOR SREEN (if present)?
There is no picture
The monitor screen is while There is a lot of interference on the picture
The picture is distorted
The monitor screen is black
Other (clearly specify in the space provided below)
ARE THERE ANY OF THE FOLLOWING PROBLEMS WITH THE SCART SOKET (if present)?
The videm or audio outputs are not present
The video and audio inputs are not functioning
ARE THERE PROBLEMS WITH THE RS 232 -USB SOCKET (if present))?
It does not print
It does not connect ti the PC IMPORTANT: Please clearly describe any further information which may be useful to us in order to identify the fault:
...............................................................................................................................................................................................................................................
...............................................................................................................................................................................................................................................
...............................................................................................................................................................................................................................................
Send to IKUSI
(Copy and keep the original. Send with the analyzer to be repaired)
pag. 64
DSA-100 User’s Manual
NOTES
pag. 65
DSA-100 User’s Manual
A-11 DISPOSAL OF ELECTRONIC EQUIPMENT RULES
English
Disposal of Old Electrical & Electronic Equipment (Applicable in the European Union and other European countries with separate collection system.)
The symbol on the product or no its packaging indicates that this product shall not be treated as waste. Instead it shall be handed over the apllicable collection point for the recycling of electrical and
electronic equipment. By ensuring this product is disposed of correctly, you will help prevent potential negative consequences for the environment and human health, which could otherwise be caused by inppropriate waste handling of this product. The recycling of materials will help to conserve
natural resources. For more detailed information about recycling of this product, please contact your
local city office, your household wate disposal service or the shop where you purchased the product
pag. 66
DSA-100 User’s Manual
NOTES
pag. 67
IKUSI - Ángel Iglesias S.A.
Paseo Miramón, 170 - 20009 San Sebastián
ESPAÑA
Tlf.: +34 943 44 88 00 Fax: +34 943 44 88 20
[email protected]
MADE IN EUROPE