Download Perfect Resize

Transcript
Perfect Resize
User Manual
Copyright ©2007­2015 on1, Inc. All Rights Reserved.
Table of Contents
Chapter 1: Welcome to Perfect Resize
Chapter 2: Introduction
Using the Help System
Contacting onOne Software
Additional Help
System Requirements
Installation
Licensing and Registration
Opening Files
Smart Photos
Module Selector
Using as Standalone
Using with Adobe Photoshop
Using with Adobe Lightroom
Using with Apple Aperture
Using with Other Applications
Printing
Managing Extras
Preferences
Chapter 3: Perfect Resize
Getting Started
How Big Can You Print
Understanding Resolution
When Should I Use Perfect Resize
Supported Color Modes
User Interface
Navigating the Preview
Navigator, Loupe, Histogram and Info
Browsing Presets
Using Perfect Resize
Crop Tool
Adjusting the Image Size
Using Document Size Presets
Settings
Sharpening
Film Grain
Tiling
Gallery Wrap
Presets
Menus
Keyboard Shortcuts
Chapter 4: Perfect Batch
1
2
3
4
5
6
7
8
9
11
12
13
14
15
17
19
20
21
24
27
28
29
30
31
32
33
34
35
37
39
40
42
43
44
45
46
47
48
50
54
Chapter 4: Perfect Batch
Getting Started
Batch Workspace
How to Access Batch
Using Perfect Batch
Selecting Files
Adding a Module
Destination Pane
Batch Presets
55
56
57
58
59
60
61
63
65
Chapter 5: Index
66
Welcome to Perfect Resize 1
Welcome to Perfect Resize
Get the highest quality image enlargements with Perfect Resize, which features Genuine Fractals® technology—patented,
fractal­based interpolation algorithms—that quickly enlarge your images without the loss of sharpness or detail that you might
normally expect. Relied on by industry professionals, you too can create high quality enlargements easily and showcase your
images at their best—even those taken with your mobile device!
Perfect Resize
2 Introduction
Introduction
This introductory chapter includes general helpful information about how to use this help system, how to contact onOne Software, how to install and access the
software, etc. It covers many of the foundation topics that you will need to understand to get started.
Pages in this Section
Using the Help System
Contacting onOne Software
Additional Help
System Requirements
Installation
Licensing and Registration
Opening Files
Smart Photos
Module Selector
Using as Standalone
Using with Adobe Photoshop
Using with Adobe Lightroom
Using with Apple Aperture
Using with Other Applications
Printing
Managing Extras
Preferences
Perfect Resize
Introduction 3
Using the Help System
This user guide is html based and readable in most web browsers. On the left side, you will see a table of contents that make it easy to find the section you are
looking for. The table of contents is hyperlinked and will take you to the specified section by clicking on them. The main body of the page will show you the
content you have requested. Use the scroll-bar at the right to scroll down for additional content. You may see hyperlinks in the body text. They will be blue and
underlined. Clicking on one of these hyperlinks will take you to more relevant information.
You use the same forward and back buttons in your browser to navigate this user guide as you would a regular web page. You can even bookmark pages so
you can find them quickly later.
If you don't see what you are looking for in the table of contents, try the search field at the upper right. You can type in what you are looking for and an index
of pages will be created automatically that contain your search term.
Printing the Manual
You can print individual pages by pressing the Print button at the top of the page. A complete printable PDF version of this user guide is available in the user
guide section of the onOne website. This version may be downloaded and viewed when you do not have an internet connection. The PDF version may also be
installed on your tablet or eReader device for viewing off our computer.
Perfect Resize
4 Introduction
Contacting onOne Software
At onOne Software, we value our customers and offer a variety of ways to be contacted.
• Visit our company website at:
www.on1.com
• For technical support please visit:
www.on1.com/support
on1, Inc.
15333 SW Sequoia Parkway Suite 150
Portland, OR 97224
© 2007­2015 onOne Software, Inc. All rights reserved. onOne Software is a registered trademark of onOne Software, Inc. The onOne Software logo are trademarks
of onOne Software, Inc. Adobe, Photoshop, Photoshop Elements, Lightroom are either registered trademarks or trademarks of Adobe Systems, Incorporated in the United
States and/or other countries. Mac OS X, the Mac logo, iPhoto and Aperture are trademarks of Apple, Inc., registered in the U.S. and other countries. Microsoft, Windows
7, Windows 8 are registered trademarks of Microsoft Corporation. All other trademarks are the property of their respective owners. The activation system used
by onOne Software, Inc. is licensed under Patent No. 5,490,216. For a full list of license disclosures view the LICENSE.TXT file installed with the software.
Perfect Resize
Introduction 5
Additional Help
Technical Support
Contact technical support at www.on1.com/support or by filing out a request form.
Knowledge Base
Search the Knowledge Base for common issues, tips & tricks, and compatibility questions.
Frequently Asked Questions
Check the list of Hot Topics on the onOne web site. This covers the most frequently asked questions.
Video Tutorials
Visit the onOne University for free online video tutorials and archived webinars. Many users find these to be the best and fastest way to get
started and learn new techniques.
Perfect Resize
6 Introduction
System Requirements
Operating System
Processor
RAM
Hard Drive
Display
Optional Application
Integration
Other
Minimum
Recommended
Mac OS X 10.8, 10.9, 10.10
Windows Windows 7 or Windows 8
current maintenance releases, 64 bit only
Intel Core 2 Duo, Xeon or better
processor(s)
8 GB RAM
Mac OSX 10.9, 10.10
Windows Windows 7 or Windows 8
current maintenance releases, 64 bit
Quad-core Intel Core i5, Xeon or better
processors(s)
8+ GB RAM
1 GB for installation
Fast 7200 RPM or SSD drives
10% of boot volume should be free for
scratch disk
OpenGL 2.0 compatible video card with 256 OpenGL 4.0 compatible video card with
MB dedicated video RAM, 1280x720
1GB dedicated video RAM, 1920x1080
resolution
resolution
Photoshop CS6, CC, CC 2014
Photoshop CC, CC 2014
Photoshop Elements 11, 12, 13
Photoshop Elements 12, 13
Photoshop Lightroom 4, 5, 6
Photoshop Lightroom 5, 6
Apple Aperture 3.6
Internet connection for activation, auto
Wacom tablet for pressure sensitive
update checking, content downloads and
input
tutorials.
Hardware display calibration tool
About Windows Video Cards
If you are using Perfect Resize from a Windows based computer, it is important that you have the latest drivers for your video card installed to get the best
performance. Check with your video card manufactures website for the latest drivers. Be sure your video card is OpenGL 2 compliant and has 256MB or more of
dedicated VRAM. Many integrated video cards on low-end laptops may not meet these requirements.
Perfect Resize
Introduction 7
Installation
To install Perfect Resize, double click the installer icon and allow the installer to guide you. You may have downloaded the installer from the on1, Inc. website or
it may be on a DVD if you elected for a physical shipment.
You should close any supported host applications such as Photoshop, Lightroom or Aperture as well as any standalone versions of
onOne products before installing or updating.
Mac OS X
The application is installed in the Perfect Resize folder in the Applications folder.
All plug-in files for supported host applications (such as Photoshop, Lightroom, Aperture, and Photoshop Elements) found during the installation process
will be installed automatically. You will see a summary of installed plug-ins at the end of installation.
If a previous versions of Perfect Resize is found, it will be maintained or replaced based on your preference during installation.
Support files are installed into /Library/Application Support/ and ~/Library/Application Support/ folder.
Windows
The application is installed in the Perfect Resize directory in the onOne Software directory in the Program Files directory.
All plug-in files for supported host applications (such as Photoshop, Lightroom, Aperture, and Photoshop Elements) found during the installation process
will be installed automatically. You will see a summary of installed plug-ins at the end of installation.
If a previous versions of Perfect Resize is found, it will be maintained or replaced based on your preference during installation.
Support files are installed into \ProgramData\onOne Software\.
Uninstalling
To uninstall Perfect Resize, follow these instructions.
You should deactivate your product before uninstalling. This will allow you to transfer your license to another computer.
Mac OSX
1. Go to the Applications/Perfect Resize/Documentation folder.
2. Double click on the Remove Perfect Resize application.
Windows
1. Go to Control Panels.
2. Under Programs select Uninstall a program.
3. In the list that comes up select Perfect Resize and then click on the Uninstall button.
Perfect Resize
8 Introduction
Licensing and Registration
Perfect Resize will operate as a trial version for 30 days from when it is installed. If you have purchased Perfect Resize, you will want to license it so you can
continue to use it past the trial period. When you install Perfect Resize it will prompt you to license it. Simply click on the license button and enter your license
code. Your license code can be found in your order confirmation email if you purchased the download version directly from on1, Inc. If you purchased a physical
copy of Perfect Resize, a sticker on the information card will have the license code on it. Your license code allows you to install Perfect Resize on two computers.
When you enter your license code, Perfect Resize communicates with the on1, Inc. activation server and will activate your software. Your software must be
licensed and activated to function past the trial period. If the computer you are activating does not have access to the internet, you can manually activate your
software by following the manual activation instructions in the license dialog.
If you wish to move your copy of Perfect Resize from one activated computer to new computer you will need to deactivate it first. Deactivation is a simple
process. Simply open Perfect Resize and select Deactivate from the Help menu. This will deactivate Perfect Resize on the current machine, allowing you to install
and activate it on another machine.
If you lose your activation code, have your computer stolen and can not deactivate it, need to install on more than two computers or have other activation
issues please contact on1, Inc. customer by visiting the support section of the on1, Inc. website.
Product Improvement Program
We believe that the best products are made by listening to our customers. We use many methods to gather your ideas and feedback including: emails, surveys,
direct conversations, market analysis and the Product Improvement Program. The Product Improvement Program is built into our software and gathers
information about how our software is used. It is the most accurate way for us learn what features are important to you and how our products fit into your
workflow.
Enrollment in the program is voluntary. When you participate, we collect basic information about how you use our programs and basic information about your
computer. This information helps us learn what features are important to you and how we can make our software easier to use. No personal information is
collected and you will not be contacted.
You can choose to participate in the Product Improvement Program the first time you launch an on1, Inc. product. You can change your participation later, just
click the Help menu, then Help Improve on1, Inc. Products.
You can learn more about the Product Improvement Program here.
Perfect Resize
Introduction 9
Opening Files
Supported File Types
Perfect Resize uses the Photoshop (PSD) file format as its default file type. The Photoshop file format is a commonly supported, publicly documented file format
that is also the standard file for Adobe Photoshop. It is also supported by Photoshop Elements, Lightroom, Aperture and many other image editing applications.
It supports multilayered images and layer masks making it the perfect format for durable, adjustable imaging. Perfect Resize also supports the opening and
saving of the following file types, in RGB either 8 or 16-bits per pixel.
Photoshop (PSD)
Photoshop Large Document (PSB)
Tagged Image File Format TIFF (TIF)
Joint Photographic Experts Group JPEG (JPG)
Portable Network Graphic (PNG)
Camera Raw files from over 200 digital cameras
Photoshop PSD files will maintain all the layers and layer masks you create in Perfect Resize and are recommended as your main file format. Photoshop files may
also be saved as a Smart Photo , which is an onOne specific variant of the Photoshop format that allows you to re-edit your settings at a later date. If your
saved file will be larger than 2 GB or 30,000 pixels on a side, your image will automatically be saved in the .PSB or Large Document format. This is a newer
version of the PSD file format and still maintains all your layers and masks.
You can use the Edit a Copy or Save As command to save flattened TIF and JPG files or PNG files with transparency. Camera raw files can only be opened, not
saved directly. They must be saved as another file type.
Opening Files
You may open an existing file in several ways depending on which product you are using.
Perfect Photo Suite
Perfect Browse
Perfect Layers
Premium Editions of:
Perfect B&W
Perfect Effects
Perfect Enhance
Perfect Portrait
Perfect Resize
Perfect Effects Free
Basic Editions of:
Perfect B&W
Perfect Effects
Perfect Enhance
Perfect Portrait
Perfect Resize
Open
Command in
the File Menu
Open via
Perfect
Browse
Drop on the
Application
Icon
Plug-in from
Adobe
Photoshop
Plug-in from
Adobe
Lightroom
Plug-in from
Apple
Aperture
Yes
Yes
Yes
Yes
Yes
Yes
Yes
Yes
Yes
Yes
Yes
Yes
Yes
Yes
Yes
Yes
Yes
Yes
Yes
Yes
Yes
Yes
Yes
Yes
Yes
When opening an existing PSD file that has been editing in Photoshop it may contain unsupported layer types such as text layers, adjustment
layers, etc. you will see a warning. You can still open a flattened version of the image if this happens. You can learn more here.
Opening Options
Perfect Resize
10 Introduction
When you open a file(s) you will be presented with the dialog to the
right. It allows you to choose to work on the original file, a copy, or to
stack the files together as layers.
Edit a Copy: A copy of the original file is made using the Copy
Options below and saved in the same folder as the original.
Edit Original: The original file is edited directly. This overwrites
the original file with your changes. This option is disabled for
Raw or read-only files.
Add as a Layer: The original file is added as a layer(s) into the
current image in Perfect Layers. If no image is opened, a copy
of the first image in your selection is created.
If you select to open a copy, you can control the file type, color
space, bit-depth and resolution. If you have multiple files selected,
they will all be handled the same way.
Checking the "Don't ask me again" box will bypass this dialogue box in
the future and use the current options selected the next time you
open an image.
Perfect Resize
Introduction 11
Smart Photos
Smart Photos are a special PSD format that allows you to save your settings and masks from each module that you use so you can go back and re-edit them
later. Any settings you make, including masks and control points, are readjustable later.
Creating a Smart Photo
To create a Smart Photo, select the Smart Photo checkbox in the Edit What dialog when you open an image. If you access Perfect Resize as a plug-in from
Lightroom or Aperture you have the choice each time you send a Photoshop file. You can also convert a layer in Perfect Layers to a Smart Layer, which
converts the image to a Smart Photo, if you have Perfect Layers.
Re-Editing a Smart Photo
There are several ways to open and re-edit a Smart Photo depending on your product configuration:
If you have the Perfect Photo Suite you can re-edit a Smart Photo by double-clicking on the module entry in the Smart Photo
History pane in Perfect Browse or the Layers pane in Perfect Layers or just click on the module in the module selector.
If you have a standalone application like Perfect Effects, Perfect B&W, Perfect Portrait or Perfect Enhance, simply open the
image and your settings will be reloaded automatically.
Similar to Smart Objects in Photoshop, Smart Photos have certain limitations. You cannot use any tool that will change the original pixels, such as
crop or transform. This includes the retouching tools in Perfect Layers, however you can use them in Portrait and Enhance. You cannot change the
image size or proportions either, so no crop or Resize.
Perfect Resize
12 Introduction
Module Selector
The Module Selector is a feature of the full Perfect Photo Suite only.
The Perfect Photos Suite is a complete photo editor. It uses a modular approach, allowing each module to focus on one task. This makes accomplishing the task
easier by removing unnecessary tools and giving access to just what you need to get the task done. When used as a standalone application, Perfect Browse is
the default module upon first launch, it is used to navigate your drives and cloud services to find images to begin working. In the Preferences you may change
the default startup module to Perfect Layers. If you prefer a layered workflow you can use the Layers module as the heart of your workflow, similar to using
Adobe Photoshop. Depending on how you access the Perfect Photo Suite you may never notice Browse or Layers.
The Module Selector
If you access the Perfect Photo Suite as a standalone application you
will start in Browse or Layers module.
When you are ready to edit an image you will select the module you
wish to use from the Module Selector in the upper right corner of the
main window. You can easily switch between modules by clicking on
another in the Module Selector. This allows you to perform multiple
tasks during the same editing session.
This is the module selector from the Perfect Photo Suite. It contains all of the
available modules that onOne Software makes. If you have purchased a single
product, you will only see that product module and Perfect Layers in your module
selector.
If you access the Perfect Photo Suite as a Photoshop Plug-in you see the Module Selector, but it will be disabled, you can only use one module at a time through
Photoshop. The Module Selector will also be disabled if you use the following modules through Lightroom or Aperture:
Perfect Portrait
Perfect Effects
Perfect B&W
Perfect Enhance
Perfect Resize
When you access these modules, you use them on their own and then return back to Lightroom or Aperture directly. Your file will be saved and closed
automatically.
If you want to have access to all your modules during an editing session from Lightroom or Aperture, select the Perfect Photo Suite or Perfect Layers
plug-in. This will start you in Perfect Layers and the Module Selector will be visible, allowing you to access all of the installed modules.
Perfect Resize
Introduction 13
Using as Standalone
Perfect Resize can be used as a standalone application without the need of Photoshop, Lightroom or other host application. To launch it follow these steps:
Mac OS X
1.
2.
3.
4.
Open your Hard Drive.
Navigate to the Applications folder.
Navigate to the Perfect Resize folder.
Double click on the Perfect Resize application icon.
You can add Perfect Resize to your dock for easy access by clicking and holding the icon in the dock, then select the Keep In Dock option. If you use Launchpad
it can be found there as well.
Windows 7
1. Go to your Start Menu.
2. Select the onOne Software group.
3. Select Perfect Resize.
If you selected the "Add Icon to Desktop" option during installation you can also access Perfect Resize from there.
Windows 8
1. Open the Start screen by pressing the Window key.
2. Select Perfect Resize.
If you selected the "Add Icon to Desktop" option during installation you can also access Perfect Resize from there.
Perfect Resize
14 Introduction
Using with Adobe® Photoshop®
If you have the Premium Edition of Perfect Resize, you can access it as a plug-in through Adobe® Photoshop® or Photoshop® Elements®. This
includes the onOne panel for Photoshop for fast access to plug-ins and their presets. As a Photoshop plug-in you can use modules in the
Photoshop workflow. This includes using selections and masks as well as Smart Objects and Smart Filters. You can also record actions for
automating and batch processing.
If you do not have the Premium Edition of Perfect Resize and would like to use it inside of Photoshop, contact onOne Customer Service about
upgrading to the Premium Edition.
To use Perfect Resize inside of Adobe Photoshop
follow these steps:
1. Open the image you want to work on.
2. Select the layer you want to work on.
Generally Perfect Resize works on a copy
of your selected layer, not the entire
image.
3. From the File menu, select Automate,
and then the module you would like to
use.
To use Perfect Resize inside of Adobe Photoshop
Elements, follow these steps:
1. Open the image you want to work on.
2. Select the layer you want to work on.
Generally Perfect Resize works on a copy
of your selected layer, not the entire
image.
3. From the File menu, select Automation
Tools, and then the module you would
like to use.
Perfect Layers and Browse are not accessible from Adobe Photoshop or Photoshop Elements.
onOne Panel
Users of Adobe Photoshop can also access Perfect Resize as plug-ins using the onOne Extension Panel.
This provides fast access to the Perfect Resize and its presets. To access the onOne panel, go the
Window > Extensions menu in Photoshop and select onOne.
The onOne panel behaves just like any other panel in Photoshop. It can be minimized or nested with
other panels. To access a module, simple double-click on it. To use a preset, single click on the module
name. A menu of available presets will be displayed. Simply double-click on one to apply it to your
selected layer.
If you wish to record actions using Perfect Resize be sure to access it from the File >
Automate menu when recording.
Perfect Resize
Introduction 15
Using with Adobe® Lightroom®
If you have the Premium Edition of Perfect Resize you can access Perfect Resize as a plug-in inside of Lightroom. This provides an integrated,
round-trip workflow.
Perfect Resize is the perfect companion for Adobe Photoshop Lightroom. It integrates tightly with it and provides a seamless experience for
enhancing your images. There are several ways to use Perfect Resize with Lightroom.
Plug-In Extras
Perfect Resize can be accessed from the File > Plug-in Extras menu.
This is the preferred way to access it. It gives you access to all installed
modules and has the most flexibility in how the files are handled. To edit
an image in Perfect Resize follow these steps.
1. Select the image in Lightroom.
2. Go the File menu and select the Plug-In Extras flyout.
3. Select the module you would like to use.
When you access Perfect Resize as a plug-in from Lightroom the module
selector is only available for Perfect Layers or Perfect Mask. When you
select one of these modules you can use as many modules as you
desire during the same editing session. At the end of the editing session
you must save and close the image from the Perfect Layers module.
When you select a module other than Perfect Layers or Perfect Mask
your image will be sent to it directly and when you press Apply, the
image is saved and closed automatically and you are returned back to
Lightroom.
Selecting Multiple Images
If you have multiple images selected, the behavior varies depending on
which modules you select.
Perfect Layers or Perfect Mask: Each file will be opened in its
own tab. Then you may access any modules available in the
Module Selector.
All other plug-ins: Each image is opened in turn and you may
adjust the settings on an image by image basis.
Lightroom Plug-in Preferences
When you use Perfect Resize through the Plug-In Extras menu there
are important file handling options that are controlled in the
Preferences dialog of the Perfect Layers module. These need to be
configured in advance based on your desired workflow.
File Type: The file type drop-down menu determines what
type of file will be created. The default is PSD, which
maintains layers. You can also select JPG or TIF if you prefer
those formats and are not concerned about maintaining
layers. The last option is same as source, which maintains the
file type of the original file, except for Camera raw files which
are saved as PSD.
Color Space: The color space drop-down menu determines
what RGB working color space is used; Adobe RGB 1998,
sRGB or ProPhotoRGB.
Bit Depth: The bit-depth drop-down menu determines the
bit depth, either 8-bit or 16-bit per pixel.
Resolution: The resolution drop-down menu determines the
resolution of the file.
Stack with Original: When enabled, the new image is
stacked with the original image, making it easier to organize.
Use Original for Single PSDs: When enabled, if you select
a single PSD file, it will be edited directly, rather than having
a copy made.
External Editor
Perfect Resize
16 Introduction
You can also access modules as external editors for all modules except
Perfect Layers or Perfect Mask. You can access them from the Edit In...
contextual menu. These behave similarly to the plug-ins in the Plug-In
Extras menu but ignore the preferences set in Perfect Layers. Instead
you have the option to control a subset of these options each time you
access a module, in the same way you do when you access Photoshop
or any other external editor.
Batch Processing
There are two ways to batch process multiple images in Lightroom with Perfect Resize.
Perfect Batch
Perfect Batch is the preferred way to batch process. You start with a
selection of images in Lightroom or folder on disk, then batch-process
them with multiple modules at the same time to solve complex
workflows. For example a portait photographer can prepare images for
a sales session by retouching every face, adding their stylized look and
output small JPGs with their logo watermark, all in the same batch
process. You can access Perfect Batch from the File > Plug-In Extras
menu in Lightroom. You can learn more about using in the Perfect Batch
section of this user guide.
Key batch processing features include:
Start with a selection of images from Lightroom or
any folder you select.
Batch process with a single module for simple jobs or
create workflows where you string multiple modules
together.
Save workflows to use over and over.
Pause on the first image to confirm your set-up, then
automatically process the rest to match.
Add a visual watermark, like your logo, to every
image.
Edit files in place or create new files with different
size, name or file type.
Lightroom Export
You can also batch process with a single module through the Export
menu in Lightroom. This is useful if you need to remove metadata or are
more comfortable with Lightroom's Export. Batch processing through
Export is driven by presets, so you need to create a preset that
accomplishes the work you desire first.
1. Select the images you wish to batch process.
2. Go the Export under the File menu.
3. At the top under the Export to drop-down, select the module to
use.
4. Complete the module specific options below. These will start
with the preset, followed by options for selecting the export
location, file naming, file size, etc.
5. Press the export button.
You cannot save Lightroom export presets or use
the Export with Previous option.
Perfect Resize
Introduction 17
Using with Apple® Aperture®
If you have the Premium Edition of Perfect Resize you can access Perfect Resize as a plug-in inside of Aperture. This provides an integrated,
round-trip workflow.
Perfect Resize integrates tightly with Apple Aperture and provides a seamless experience for enhancing your images.
Perfect Resize can be accessed from the Photo > Edit with Plug-In menu. To edit an image in Perfect Resize follow these steps.
1. Select the image in Aperture.
2. Go the Photo menu and select the Edit with Plug-In flyout.
3. Select the module you would like to use.
When you access Perfect Resize as a plug-in from Aperture the module selector is only available for Perfect Layers or Perfect Mask. When you select one
of these modules you can use as many modules as you desire during the same editing session. At the end of the editing session you must save and close
the image from the Perfect Layers module.
When you select a module other than Perfect Layers or Perfect Mask your image will be sent to it directly and when you press Apply, the image is saved
and closed automatically and you are returned back to Aperture.
Selecting Multiple Images
If you have multiple images selected, the behavior varies depending on which modules you select.
Perfect Layers or Perfect Mask: Multiple images will be opened in separate tabs.
All other plug-ins: Each image will open in a series so you can adjust the settings on each image.
The file type, bit-depth and color space of the image is determined by the preferences in Aperture for external editors. Perfect Resize will maintain
the file type, either PSD or TIF automatically to support compatibility with plug-ins from other manufactures. Keep in mind only PSD files store reeditable layers and mask.
Batch Processing
Perfect Resize
18 Introduction
Perfect Batch is the preferred way to batch process. You start with a
selection of images in Aperture or folder on disk, then batch-process
them with multiple modules at the same time to solve complex
workflows. For example a portait photographer can prepare images for
a sales session by retouching every face, adding their stylized look and
output small JPGs with their logo watermark, all in the same batch
process. You can access Perfect Batch from the Photo > Edit with Plugin menu in Lightroom. You can learn more about using in the Perfect
Batch section of this user guide.
Key batch processing features include:
Start with a selection of images from Lightroom or
any folder you select.
Batch process with a single module for simple jobs or
create workflows where you string multiple modules
together.
Save workflows to use over and over.
Pause on the first image to confirm your set-up, then
automatically process the rest to match.
Add a visual watermark, like your logo, to every
image.
Edit files in place or create new files with different
size, name or file type.
Perfect Resize
Introduction 19
Using with Other Applications
You can use Perfect Resize as an external editor with many other workflow applications such as Adobe Bridge or Apple iPhoto. First check the application user
guide to see if it supports external editors. It should detail how to configure the host application to use an external editor. Generally this will include selecting
Perfect Resize setting the file type to send to it. It is best to use PSD files if supported. Below are the instructions for configuring iPhoto.
1. Open the Preferences dialog, from the iPhoto menu.
2. Click on the Advanced tab.
3. From the Edit Photos: pop-up select the In Application... option
(note if you have ever selected another external editor, it may
be listed here instead.)
4. From the Choose dialog that appears, navigate the the Perfect
Resize folder, inside the Applications folder and select [Product
Name].
5. In the RAW Photos: option, uncheck the Use RAW when using
external editor option, and check the Save edits as 16-bit TIFF
files option .
Perfect Resize
20 Introduction
Printing
You can print your photos to your printer using the Print function.
1. Select Print from the File menu.
2. Select your printer from the Printer pop-up.
3. Press the Print Setup button to adjust printer specific options
such as paper size and type and printer specific color
management options.
4. Adjust the number of copies, orientation and output
resolution.
5. In the Print Area section set the area you would like to fill with
image. The preview on the left shows the paper size and
margins as well as the print area and how the image will fit or
fill the print area.
6. Select the output Printer Profile and Rendering Intent to
properly adjust the photos colors to your printer and paper
combination. You may also select the Printer Managed Color
option to let your printer driver manage the color instead.
Tip: If you have already cropped and sized your image to your desired print area size, simply set the width and height to match in the Print Area
section.
Perfect Resize
Introduction 21
Managing Extras
What are Extras?
The Extras Manager let's you import and manage
your own Extras content. Extras are:
Backgrounds that can be imported and
used in Perfect Layers.
Borders than can be imported and used in
Perfect Layers, Perfect Effects and
Perfect B&W.
Textures that can be imported and used
in Perfect Layers and Perfect Effects.
Presets for Perfect B&W, Perfect Effects,
Perfect Enhance, Perfect Portrait and
Perfect Resize.
Extras can be content that you download from
the onOne website or content that you create on
your own.
The Extras manager lets you create categories
for each Extra type, import files as extras and
delete user-added extras you no longer want.
You can access the Extras Manager from the File
menu in Browse and Perfect Layers or the Preset
menu in modules that use presets.
How to Import Extras
Importing extras is simple. Start by opening the Extras Manager then follow these steps.
1. Select the type of extras you wish to import in the left column (Backgrounds, Borders, etc.) You can only import extras of one type at a time.
2. Click on the Import button in the footer of the left column. A Finder or Explorer Window will appear where you can select the files to import. If you
want to import an entire folder, click into the folder then select the first file, then shift-click on the last file. Click import when you selection is
complete
3. Select a category for your extras to live in. This is where you will be able to find it inside of the Perfect Resize. You can select from an existing
category or create a new one.
When your extras have been imported you will see them in the Extras Manager in the category you selected, in the type of extra they belong to.
What Type of Images Can I Import as Extras?
Backgrounds and Textures may be any image file that Perfect Resize can open including jpg, tif, raw or psd files. Border files
must have a large central area that is transparent. This means that only files that support transparency like png can be imported
as borders.
If you have a .ONPreset file that you have downloaded from the onOne Software website, simply double-click on it to install it. There is no need to
import it through the Extras Manager.
Perfect Resize
22 Introduction
Browsing Extras
You can browse and open Extras from the Browse
module. In the Sources pane there are sources
for onOne Extras (extras that are provided by
onOne when you installed Perfect Resize) and
User Extras where you can browse and open
extras you have installed.
Inside each source folder are folders for the
Backgrounds, Borders and Textures. You can
open these as layers into Perfect Layers to add
them to an image or layout you are working on.
Using Extras in Perfect Layers
Browsing extras in Perfect Layers is similar to the
Browse module. Click on the Extras tab of the left
column mini-browser. You will see top-level folders
for onOne Extras and User Extras. Inside of
these will be sub-folders for Backgrounds,
Borders and Textures. You can double-click on an
extra to add it to your current image, just use the
"Add as a Layer" option when asked how you
want to open the file.
Then you can use the transform
tool to size and position the extra
on your image.
Use the Layers pane to change the
order, opacity and blending mode.
Use the Masking Brush and
Masking Bug to selectively apply
the extra.
Use the Perfect Eraser to remove
distractions from the extra if
needed.
If you save your file as a layered PSD file, you
can always re-open the file again and have
access to all of the layers and masks for further
editing.
Perfect Resize
Introduction 23
How to use in a Module
You can access certain extras, like borders and
textures, inside of modules like Perfect Effects
and Perfect B&W. To use them follow these
steps:
1. Open an image into Perfect Effects.
2. In the Filter Options pane, select the
correct filter type, either Borders or
Texturizer.
3. From the Category pop-up, select a
category you have imported. User added
extras categories appear at the bottom
of the category list.
4. From the Texture pop-up select a texture
from the category you selected.
How to Delete Extras
You can remove imported extras using the Extras Manager. Follow these steps:
1.
2.
3.
4.
Open the Extras Manager.
Click on the extras type that contains the content you wish to remove. This will display categories within that extras type.
To delete an entire category, select in the left column and click on Delete button in the footer of the left column.
To delete individual extras, select them in the right column and click on the Delete button in the footer of the right column.
Deleting extras is permanent and can not be undone!
Perfect Resize
24 Introduction
Preferences
Note: This page refers to the Preferences dialog for the Perfect Photo Suite. If you have an individual product not all of the options detailed below may
be available.
The preferences dialog contains general application settings. The preferences are accessed from the Perfect Resize menu on Mac or the Edit menu on
Windows.
The preferences contain the following controls:
General Settings
1. Working Color Space: When a new file is created or
file is opened and has no color profile associated with it,
this is the assumed color profile for the image. Images
that come from plug-ins or have tagged or embedded
profiles will use the associated profile instead.
2. Scrolling Controls: Lets you select how the mouse
scroll wheel or scrolling gesture works. The options are:
1. None: Default
2. Preview Zoom: Adjusts the zoom of the
preview window. Scrolling up increases the
zoom, scrolling down decreases the zoom. It is
important that the zooming is comfortable, not
too fast or slow or jerky.
3. Preview Pan: Pans the image, like using the
pan tool or navigator. It is important that the
panning is comfortable, not too fast or slow or
jerky.
4. Brush Size: Adjusts the size of the current tool
if relevant, such as a brush tool.
3. Preview Background Color: You may select the color
of the background behind the preview image. The default
color is black. There should be options for black, white,
light gray, dark gray and custom... The custom option a
color picker where you can select your own background
color
4. Start In: Determines which module will open
at launch. Browse is the default.
5. Check of Updates on Launch: Enabled by default,
the product will communicate with onOne server at
launch and if an update is available it will prompt you to
download, or skip.
6. Warn when leaving files in Layers: Enabled by
default, if you have unsaved files open in Layers and
want to close the program a warning dialog will appear
with the options to Save & Close, Cancel, or OK which will
close without saving.
7. Language: Select which language the app user
interface is presented in. Usually this is
determined automatically but the locale of the
operating system but can be manually set.
Plug-ins
Perfect Resize
Introduction 25
1. Smart Photos Save PSD Files As: When you send a
PSD to Perfect Resize via a plug-in from Lightroom or
Aperture you can choose between saving the file as a
normal photo or a Smart Photo.
2. File Type: Specifies four options. PSD (Supports Layers,
Defaults Setting. Same as Source (PSD for Raw). TIFF
(No Layers). JPEG (No Layers).
3. Color Space: Specifies the color space to use when
processing copies from Lightroom. This is similar to the
working color space pop-up in the general preferences
tab, however there are only the three options supported
by Lightroom: sRGB, Adobe RGB 1998 and ProPhotoRGB.
4. Bit Depth: Sets the bit depth for the copies created by
Lightroom, the options are 8 and 16-bit.
5. Resolution: Sets the resolution of copies created by
Lightroom.
6. Stack with Original: Enabled by default, copies
created by Lightroom are stacked with their original or
source image.
7. Use Original for Single PSDs: Enabled by default. If
your selection is a single PSD file, the original PSD is
opened rather than creating a copy.
Performance Settings
1. Memory Usage: Specifies the amount of system
memory (RAM) that is used by the application. The
default is 80%.
2. VRAM Usage: Specifies the amount of video memory
(VRAM) that is used by the application. The default 80%.
3. Process 8-bit images as 16-bit: When enabled, 8-bit
images are handled in a 16-bit space to reduce
processing artifacts. This is recommended unless you
have a computer with low memory.
4. Scratch Folder Location: Allows you to move or reset
your memory cache. This is helpful if you have a small
SSD drive as your system drive. This information is
purged after each time you quit the application.
5. Browse Cache: Stores thumbnails previews on disk so
that the next time you browse a folder it loads much
faster. Here you can adjust the memory cache size or
amount of information stored, empty, move, and or
reset.
Services
Perfect Resize
26 Introduction
1. Services in Sources: Control which online storage
services are displayed in the Sources pane in Perfect
Browse.
Perfect Resize
Perfect Resize 27
Perfect Resize
Welcome to onOne Software™ Perfect Resize
Perfect Resize, the next generation of Genuine Fractals, is the industry standard for image resizing. It is renowned
across the photographic and printing industries for its ability to increase image size over 1000% without the loss of
sharpness or detail that you would normally expect. Its patented, fractal based interpolation algorithms work like
nothing else and the results speak for themselves. Perfect Resize 8 allows you to crop and resize your image in a single
step with no guess work. Its new Tiling and Gallery Wrap features make it easy to get your enlargements printed just
the way you want. Fire up the batch processing engine to resize an entire folder of images quickly. You can even
access the power of Perfect Resize inside of Adobe Photoshop, Lightroom or Apple Aperture.
Perfect Resize
28 Perfect Resize
Getting Started
This getting started section will give you the basics of using Perfect Resize 8. If you have never used Perfect Resize 8 before,
this is a good place to start. You might also try watching the getting started video tutorial. For detailed information on steps
and controls mentioned in the getting started section, see the "Using Perfect Resize" section instead.
Perfect Resize
Perfect Resize 29
How Big Can You Print
People often ask how large a print can be made with Perfect Resize. If your original image is sharp, has good details and little noise, you could go as large
as 1000% of the original size. 1000% is ten times the size of the original file. For example, an original file that is 8"x10" could be resized to 80"x100".
Viewing distance plays a big part of this. Standard viewing distances are two-times the diagonal of a print. For example, for an 8"x10" it would be about
two feet away. An 80"x100" would be about 21 feet. That seems like a lot but that image is almost 7'x9'. Keep in mind that many photographers scrutinize
their images closer than standard viewing distances.
Images are perceived in color, tonality and sharpness. Other interpolation techniques maintain color and tonality but sacrifice sharpness by "inflating" the
image uniformly. The image still looks familiar but will not be crisp. Depending on the amount of interpolation, this can be severe and noticeable even at
standard viewing distances. Perfect Resize maintains the color, tonality, and sharpness of an image at all sizes. It will always look the same when viewed
at the proper distances.
It is unrealistic to assume that the fidelity when viewed at 100% will be the same for an 8x10 and an 80x100 created by Perfect Resize. Perfect Resize will
maintain the edges which perceptually make the image sharp, but it cannot create detail where there was none in the past. When the shutter is pressed, a
finite amount of detail is captured. A good way to think about this is to look at an insect on a leaf. If you look at it with a magnifying glass, you will see
more detail than you did than when looking at it with the naked eye. Now if you take a digital photograph of that same insect and look at it in the computer
and zoom in past 100% you do not see any more detail. The information you see is limited by what the camera captured. Perfect Resize works the same
way, it can not create new detail but instead takes the finite amount of detail available and increase it in size.
Perfect Resize isn't magic. We have all watched CSI where they take a security photo and enlarge the reflection in the victim’s eye to see the killer, with
results that look amazing. This is pure science fiction. You cannot create detail where there was none before. But if your original file has good detail and
little noise, you will be able to make very good looking enlargements from your files. This is what Perfect Resize does better than any other software.
Perfect Resize
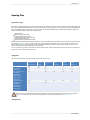
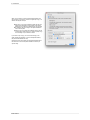
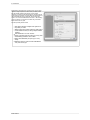
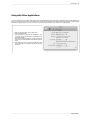
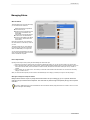
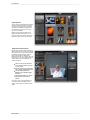
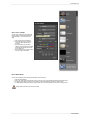
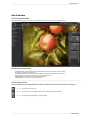
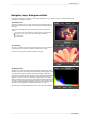
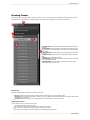
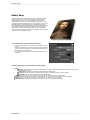
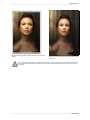
30 Perfect Resize
Understanding Resolution
How Much Resolution Do I Need?
To answer this, you need to know two things:
The size of the print you need to make.
The resolution that your printer needs for best results.
The size of the print is as large you would like. This may be limited by the size of your printer. Resolution is the density of the pixels for a given distance,
usually measured in pixels or dots per inch. Most modern inkjet printers print anywhere from 1200 to 4800 dots per inch (what the printer manufacturers
really mean is 1200-4800 droplets of ink per inch). Inkjet printers use many tiny round droplets of 4-12 ink colors to reproduce one square pixel in your
image that could be one of any millions of colors. A common mistake is to set the resolution of the file to the resolution of the printer. In all but a few
special printers this will lead to huge files that will not print well, if at all. The secret is that the human eye cannot see more than 250-300 pixels per inch.
So the ideal resolution for your files should be close to this. Once you know the print size and resolution, it is easy to use Perfect Resize 7.5 to resize your
file to the desired output. Simply input the resolution and then either the print width or height. You'll see that the corresponding dimension is automatically
filled in by Perfect Resize 7.5 based on the proportions of your image.
Keep the proportions in mind because the proportions of film, digital camera sensors and paper can all be different. For example, most digital camera
sensors are proportioned so that the height is two-thirds the width or 1:1.5; While the most common paper size, in the US, is the letter which is 8.5x11
inches or about 1:1.25. These kind of proportion mis-matches are common and require that the original image be cropped to fit the proportions of the
paper size. If your image cannot be cropped without ruining the composition then you will need to adjust your print size to a longer dimension.
Resizing an image larger than the original size requires new pixels to be created. This process is called interpolation or resampling. There are many
mathematical ways, called algorithms, to do this. The most common method used by many pixel editing applications is called bicubic interpolation. Bicubic
along with its newer variants bicubic smoother and bicubic sharper work by averaging a small group of neighboring pixels to determine the color value of
the new pixels to be added. While this technique is fast, it does not distinguish edges so there is a uniform loss of sharpness and detail across the image.
Perfect Resize patented scaling algorithm is fundamentally different from bicubic or other interpolation methods. While other methods sample nearby pixels
and decide new pixel values one by one, Perfect Resize uses a sampling technique called Fractal Scaling. Fractal Scaling samples nearby "blocks," square
groups of pixels, and varying sizes, compares them to smaller versions of the original image and mosaics these patches together to create a larger version
of the original. By doing this repeatedly, often the characteristics of the image like edges, smooth areas, and textures are reinforced for each larger
version. Noise is de-emphasized and sharp details are maintained. All this number crunching may take a bit longer than the single pass interpolation
methods like bicubic, but good things come to those who wait and the reward is far superior results.
Perfect Resize
Perfect Resize 31
When Should I Use Perfect Resize
Perfect Resize should be used as one of the last steps in your workflow before printing. The power of Perfect Resize is in the concept of resolution on demand.
You can work with a modest size file, which makes your editing faster and takes less hard drive space and memory. Then when you are ready to output your
file, you resize it with Perfect Resize to the desired size and sharpen it for output. This means you don’t have to keep multiple versions of a file at different print
sizes; you just create what you need on-the-fly. Perfect Resize also supports layered Photoshop files so you can maintain all your layers in the entire process.
Perfect Resize
32 Perfect Resize
Supported Color Modes
When used as a standalone application or through Lightroom and Aperture, Perfect Resize supports 8 or 16-bit RGB images. These are the most common among
Photographers.
If you use Perfect Resize through Photoshop, you have access to a larger range of color modes, depending on the version of Perfect Resize you have. Consult
the chart below for details.
Perfect Resize Basic Edition
Perfect Resize Premium Edition
Perfect Resize Premium Edition via Standalone
via Photoshop
Perfect Resize Premium via Lightroom or Aperture
RGB 8-bit
RGB 16-bit
Grayscale 8-bit
Grayscale 16-bit
Lab 8-bit
Lab 16-bit
CMYK 8-bit
CMYK 16-bit
Photoshop Layers
Layer Masks
Text Layers
Adjustment Layers
Alpha Channels
Paths
Smart Objects
Perfect Resize
Yes
Yes
No
No
No
No
No
No
Yes
Yes
No
No
No
No
No
Yes
Yes
Yes
Yes
Yes
Yes
Yes
Yes
Yes
Yes
Yes
Yes
Yes
Yes
No
Perfect Resize 33
User Interface
The Perfect Resize Main Window
Perfect Resize provides you with an easy-to-use work area for editing your photos. Below is an overview of the main sections.
The main sections of Perfect Resize:
A. Preset Browser: This panel is located on the left side of the window and is where you view a Library of presets.
B. Tool Well: This is where the tools are located.
C. Tool Options Bar: This strip above the preview window contains the options for the selected tool.
D. Preview Window: This is the main section where you preview and work on images.
E. Module Selector: This is where you select other modules to work in.
F. Control Panel: This is where you access the Control Panes.
The Perfect Resize Tool Well
There are three different tools in the Perfect Resize tool well. More details about each tool will be covered in the next chapters.
Crop Tool
This tool lets you crop the image.
Hand Tool
This tool drags your image within the preview window when it's larger than the viewable area.
Zoom Tool
This tool changes the magnification in the preview window.
Perfect Resize
34 Perfect Resize
Navigating the Preview
Perfect Resize provides several ways to navigate and view your image in the Preview window.
The Preview Window above is the main section where you preview and work on images.
Hand Tool
The Hand tool is used to position the image within the Preview window, whenever the preview zoom is larger than the viewable area.
To pan (scroll) in the Preview window:
Select the Hand Tool and drag the image until you locate the area you wish to view.
With any other tool selected, hold down the spacebar while you drag the image in the window.
Double-click the Hand tool in the Toolbar to set the image to a magnification that fits completely in the current window size.
Zoom Tool
The Zoom tool changes the magnification of the image in the Preview window.
With the Zoom tool selected:
Click in the Preview window to zoom in and center the image at the location clicked.
Click and drag in the Preview window to draw a rectangular, the screen fills with the area within the rectangle when you release the mouse.
Hold the Option key (Mac) or Alt key (Win) and click to zoom out.
Double-click the Zoom tool in the Toolbar to set the image to 1:1 or 100% magnification, showing every pixel. This is best when examining small details.
Perfect Resize
Perfect Resize 35
Navigator, Loupe, Histogram and Info
At the top of the control panel on the right of the main window is the Navigator | Loupe | Histogram | Info panes. It contains four useful tools for
inspecting and viewing details of your image.
The Navigator Pane
This gives you a birds-eye view of your image. The blue square region marks the image area
that is visible in the preview pane. You can pan your image by clicking and dragging inside the
blue region.
At the bottom of the Navigator pane are several Zoom presets. Click on a Zoom preset to
activate.
FIT: Zooms to fit the current canvas size. This allows you to see your entire image.
100: Zooms to 100% or actual pixels. This is best for judging small details.
50: Zooms to 50%
25: Zooms to 25%
The Loupe Pane
This gives you a magnified view of the section of the preview under the cursor. This allows you
to view the quality of your results while maintaining a complete view of your image.
At the bottom of the Loupe Pane is a sliding for adjusting the zoom level.
The Histogram Pane
This gives you a color chart of the shadow, mid-tone and highlight areas based on the image
RGB values. This is useful to show areas within the image that may be clipping. Clipping is when
your image contains pure blacks or white and can signify loss of highlight or shadow detail.
The left side of the histogram represents the shadows, while the right represents the highlights.
At the top of each end is a triangle. If the triangle is lit, there is clipping on that side of the
histogram. If you click on the arrows, you will activate the clipping overlay on your image. The
areas of your image with a blue overlay are pure black, while the areas with the red overlay are
pure white. You can turn the clipping view off again by clicking on one of the triangles. You can
also temporarily enable clipping view by holding down the J key at any time. The clipping view is
useful when you are making adjusts to the brightness and contrast of your image.
The Histogram pane also displays the RGB values under the cursor at the bottom of the pane.
Perfect Resize
36 Perfect Resize
The Info Pane
The info pane will display important metadata about your file including:
Camera type
File type
Focal length and lens information
Date and time captured
Exposure information
ISO
Shutter Speed
Aperture
Exposure Value
Filename
Color Space
Dimensions
File Size and Bit Depth
If your camera allows for GPS the GPS button will be viewable and you can click on it to get the
GPS cordinates for where the image was taken. This feature only works if you have GPS enabled
on your camera or mobile device. Otherwise you will not see the GPS button.
The Info panel is not visible when you access B&W Module as a Photoshop plug-in.
Perfect Resize
Perfect Resize 37
Browsing Presets
Built into Perfect Resize is a preset browser, located in the left panel. You can use it to browse the factory supplied presets, presets you have created or
downloaded from the onOne website or for marking and finding your favorites. Below is a description of the controls in the file browser.
A. Browser Tabs: This switches between the Library tab, Favorites tab and My
Presets tab.
B. Search Field: Use the search field to locate presets in the current tab. Simply
start to type and your results will appear in a new sub-category called search results
while you type.
C. Closed Category: A closed category has a dark gray tab and the arrow faces
to the right.
D. Open Category: An open category has a light gray tab and the arrow faces
down.
E. Preset: A preset is displayed by its name.
F. Favorite Flag: Click on the this flag to mark a preset as a favorite. It will appear
in the Favorites tab automatically.
G. Resize Handle: On the right edge is a resize handle that you can drag to
change the size of the browser or close it.
Browser Tabs
The Browser is divided into three tabs; Library, Favorites and My Presets.
Library: The Library tab contains the factory presets provided by onOne Software. They are a good place to start.
Favorites: When you click on the favorite flag on a preset, in any tab, it is added to the Favorites tab automatically. This makes it fast to find the
presets you use most frequently.
My Presets: When save your own presets, or install presets from the onOne website, they will be located here.
Navigating the Browser
To open a category, click on it. To close it, click on it again.
Only one top-level folder can be open at a time.
The selected item, either a category or preset, will have a light silver box around it.
You can use the up and down arrow keys to change your selection in the browser.
You can open or close categories using the command (control on Windows) up and down arrows.
Perfect Resize
38 Perfect Resize
Selecting a Preset to Use
To activate a preset on your image, simply click on the preset.
Searching for Presets
To search for presets in the current browser tab, type in the name of the file in the search field.
The search results appear in a new sub-folder called search results, which will be selected automatically.
You can clear the search field by pressing the x at the right end of the search field.
Browser Pop-Up
To view a larger preview on a preset, enable the Show Browser Pop-up in the
View menu.
When you mouse over a thumbnail, a larger preview will be displayed in a pop-up
window.
Resizing and Closing the Browser
The browser can be resized by dragging the resize handle on the right margin of the browser.
The browser can be closed or reopened by clicking on the resize handle or using the cmd (control on Windows) left and right arrow keys.
Perfect Resize
Perfect Resize 39
Using Perfect Resize
Pages in this Section
Crop Tool
Adjusting the Image Size
Using Document Size Presets
Settings
Sharpening
Film Grain
Tiling
Gallery Wrap
Presets
Menus
Keyboard Shortcuts
Perfect Resize
40 Perfect Resize
Crop Tool
Crop Tool: This is used to crop and resize the entire image. The crop tool removes any pixels outside a crop box
and changes the canvas size at the same time. To crop the image, select the Crop Tool from the tool well. Then
adjust the corner handles of the crop tool overlay. The area outside the crop box appears darkened for guidance. You
can resize and move the image inside the crop box. When you are satisfied with your settings, press the Apply button
in the Tool Options Bar or press enter.
Moving the Image: To move the image inside the crop box,
simply click and drag inside the box. You can also nudge the
image using the arrow keys on your keyboard.
Resizing a Crop Box: To resize the Crop Box, click and drag
on any of the resize handles. Clicking on a corner handle
allows you to adjust two sides at the same time. Clicking on
a side handle allows you to adjust that side. If you hold the
shift key down while adjusting the size, the proportions of
the box are maintained. To rotate the crop box, move
outside a corner until the tool changes to rotate. You
can also set the aspect ratio or size of the crop box in the
tool options bar.
The Crop tool is not available when using a Smart Photo.
Crop Tool Options
Preset pop-up: Pop-up controls the crop tool mode as well as aspect ration and document size presets.
Width: Sets the width of the crop box.
Swap Dimensions: Swaps the width and height. Handy for rotating the crop box.
Height: Sets the height of the crop box.
Units: Determines the unit of measure: Pixels, inches, centimeters, etc.
Leveling Tool: Click and drag this tool across an element in your image that should be level.
Angle: See and adjust the angle of rotation.
Rotate: Rotates the image 90 degrees.
Cancel: Resets the crop tool.
Apply: Applies the crop and resizes your photo.
Crop Tool Modes
Perfect Resize
Perfect Resize 41
The Crop Tool works in three modes:
Freeform: In this mode you can adjust the crop box
any way you like. The image will not be resized. Any
area outside the crop box will be trimmed off. Use
this mode if you just want to change the shape or
recompose your image for general use.
Aspect Ratio: You can lock the crop box to an
aspect ratio. This makes sure the crop box shape
doesn't change, just the size. Use this option to
trim existing pixels while maintaining a ratio without
resizing the image.
Document Size Presets: Document Size Presets
allow you to crop and resize your image at the same
time. If you know your intent is to print the image at a
certain size you can crop and resize the image at the
same time. Many common sizes are included plus you
can create your own.
Leveling the Image
The Crop Tool has a special Leveling Tool for automatically rotating your
image to be level.
1. Select the Crop Tool.
2. Select the Leveling Tool from the Crop Tool Options
Bar. Your cursor will change to the Leveling Tool.
3. Click and drag a line across your image that should be
level, either horizontally or vertically. When you
release the mouse the image will be rotated
automatically to the correct angle.
Perfect Resize
42 Perfect Resize
Adjusting the Image Size
In Perfect Resize, you can adjust your image size using either the Document Size pane or the Crop Tool Options Bar. The information in these areas are
interrelated and locked together. Adjusting the values in either pane will lead to changes in the other pane.
In the Document Size pane it displays the current desired Document Size or the original image size if
you have not adjusted anything. You can simply type into the Width or Height fields to change the
Document Size.
Keep in mind that the Width and Height fields are locked together to maintain the photo proportions.
Changing the width will change the height proportionally. Perfect Resize does not support nonproportional scaling. If you would like to change the proportions of the image it requires cropping, so
use the crop tool.
The Document Size Presets make it easy to crop and resize your photo at the same time. Simply
select one to set the width and height automatically. This also selects the Crop Tool so you can
adjust the document size to fit your photo.
You also control your resolution, known as pixels per inch or dots per inch. This is important to adjust
based on your output device.
The Pixel Dimensions pane displays the current image size in pixels as well as the file size, bit-depth
and scaling factor.
Perfect Resize
Perfect Resize 43
Using Document Size Presets
Document size presets allows you to crop and resize your image simultaneously. Often,
when you are using Perfect Resize it is to create a file for print output at a known
common size. In these cases, using a Document Size Preset can be the fastest way to set
your Document Size and crop your image to the needed proportions.
Follow these instructions to use a Document Size Preset:
1. Select your desired size from the Document Size preset pull-down in the
Document Size pane, or Crop Tool Options Bar. You will see that the Document
Size fields will be completed automatically for you and that a crop box is drawn on
your image matching the proportions of the Document Size Preset that you
selected.
2. If needed, select the rotate crop box to rotate your crop box to the proper
orientation. It will automatically rotate to match the orientation of your image,
but if you want to crop differently you may need to rotate it.
3. Now, you can use the crop tool to reposition and change the size of the crop box
so that it contains just the image area that you want. Note that the crop box
proportions and Document Size are locked so that you will always have the
finished document size that you requested.
4. Adjust your resolution to what is needed for your output device. If you are
unsure what to select, use the resolution drop-down menu for common settings.
Perfect Resize comes with many commonly used print, paper and video Document Size
Presets but also allow users to create their own.
To create your own Document Size Preset follow these instructions:
1. Select your image and launch Perfect Resize.
2. From the Document Size Preset pull-down, select custom > Manage Custom
Sizes.
3. Click on the Add button.
4. Double-click on the highlighted untitled name and name your preset.
5. Double-click on the width and height and fill in the proper values.
6. Click on the units and select the proper unit.
7. Click on the Okay button.
Tip: If you select the incorrect Document Size Preset you can change it by selecting a different one. If you do not
wish to use a Document Size Preset after you have selected one you can press the Reset button in the Document Size pane or the Cancel button
in the Crop Tool Options Bar.
Tip: The lock crop option locks the proportions and document size settings for the given crop. This is enabled by default
when you use a Document Size Preset.
Perfect Resize
44 Perfect Resize
Settings
The settings dialog contains the controls for selecting the resizing method, or algorithm, and
its settings. Every image is different and selecting the correct settings here can improve the
quality of the results. To help you get started, try one of the presets in the Image Type
drop-down menu.
Image Type: This pop-up contains presets that adjust the settings for Amount and
Threshold automatically.
Method: The method drop-down selects the the method, or algorithm, used to resize the
image. The options are:
Genuine Fractals: This is the classic, patented, fractal-based algorithm that has made
Perfect Resize the standard for over a decade.
Perfect Resize Portrait: This is a new variation on the Genuine Fractals algorithm
designed for portrait images. It is slightly softer and does a better job representing
skin and hair textures.
Texture Controls
When you select the Genuine Fractals method there are several other controls that tune the
resizing algorithm based on the image. These deal with the texture of the image. If you were
to analyze an image from a detail perspective you could break it into three categories: Edges,
Continuous Tone and Textures. Edges are obvious; these are the sharp details that define
the edges of the subject in your image. It’s paramount that these are maintained in order for
your enlargement to maintain quality. The continuous tone areas are things like skin or skies
that are mostly solid or graduated color. These resize easily as there is little detail in these
areas. The last area, what we call texture is areas that fall between these two. They are
areas that still contain detail but are not sharp edges. These are things like the surface of
rocks, tree bark, fabric, animal fur, etc. The amount of detail in these texture areas can have
a large impact on the perceived sharpness and quality of an image. In Perfect Resize you can
control the key algorithm variables that effect these areas. In Perfect Resize there are even
presets for different image types and subject matters that help you get the best results in
reproducing these textured areas.
Texture: This controls the amount of detail in flat, non-edge areas of an image. If your
image contains lots of small detail that does not have defined edges (many organic patterns
like leaves, rock, bark; or man-made patterns like fabric) it may be good to increase the
amount to a setting of 4 or 5. Settings beyond 5 will often introduce a bumpy noise pattern
which is undesirable unless your original image was from scanned film. Settings lower than the
default 3 are useful for images with large areas of continuous tone that have no appreciable
detail (sand, snow, sky) but have hard edged foreground subjects such as landscape images,
architecture or portraiture.
Threshold: This controls the amount of hard edge detail that is enhanced. The default
setting is 25. Decreasing the threshold will focus the algorithms only on edge information. This
may be useful for portraiture or for reducing noise in your image. Settings higher than 25 will
increase the amount of small detail in flatter areas of the image. Settings as high as 100 are
useful for highly detailed images such as hair or feathers. Higher threshold settings will also
make Perfect Resize process faster. A good way to start adjusting these controls is by
setting the threshold to 100 and then move the amount up until the image is too noisy
(bumpy) and then reduce the threshold to smooth out the noise in continuous tone areas. For
detailed images with no little or no continuous tone, you might try the amount at 4 and the
threshold at 100. For portrait images or images with significant JPG artifacts you should try
an amount of 2-3 and threshold of 25 or lower.
Smoothness: The smoothness slider is used to reduce artifacts along hard curved edges.
Use the lowest setting needed.
Tip: Always make sure your zoom is set to 100% or 1:1 when adjusting the
controls in the Texture Control Pane.
Perfect Resize
Perfect Resize 45
Sharpening
The sharpening pane contains the controls to add additional sharpness to your image.
Perfect Resize features three different sharpening methods:
Unsharp Mask: Good for general sharpening. Similar to Photoshop's unsharp mask
function except it is only applied to the luminance of the image to prevent color artifacts.
Highpass: Highpass sharpening is helpful when the original image is not sharp.
Progressive: Similar to the unsharp mask except it sharpens different amounts
depending on the size of the details in the image. Small details are enhanced more than
large ones.
Using the Sharpening controls can save you the workflow step of adding additional Sharpening
before printing and can help compensate for loss of sharpness due to dot gain from your printer.
Sharpening should only be applied at the end of your workflow just before printing. If you plan
to do additional retouching or compositing work after resizing your image, you should disable the
Sharpening controls.
To sharpen your image for output, use these steps after you have adjusted the Document Size pane controls.
1.
2.
3.
4.
5.
Zoom in on your image to 1:1. You can do this easily by using the 1:1 Zoom preset located in the Navigator pane.
Enable the Sharpening controls by toggling the on/off control in the Sharpening pane title bar.
Select the sharpening method that will provide the best results for your image. You may need to experiment to determine this.
Adjust the amount slider to determine the amount of sharpening desired.
Use the Highlight and Shadow sliders to limit the sharpening from being applied to the darkest and lightest areas of the image which can prevent
sharpening of noise.
Sharpening Off
Sharpening On
Perfect Resize
46 Perfect Resize
Film Grain
The Film Grain setting controls the amount of simulated Film Grain (noise) to
your image. Adding a modest amount of Film Grain can make your image
appear sharper visually and can help hide imperfections like JPG artifacts.
This is especially useful for monochrome images. Film Grain should only be
added just before printing. If you need to do other retouching or
compositing work in Photoshop after resizing your image, you should disable
the Film Grain controls.
To add Film Grain to your image follow these steps:
1.
2.
3.
4.
Zoom in on your image to 1:1. You can do this easily by using the 1:1 Zoom preset located in the Navigator pane.
Enable the Film Grain controls by toggling the on/off control in the Film Grain pane title bar.
Adjust the slider up or down until the desired amount of Film Grain is added.
You can preview just the effect of the Film Grain by toggling the Film Grain on/off control.
Film Grain Off
Perfect Resize
Film Grain On
Perfect Resize 47
Tiling
The tiling feature in Perfect Resize will divide an
enlargement into smaller pieces that can be printed on a
smaller printer.
Lets say you want to create a mural that is 8 feet tall by
12 feet long but your printer can only print 24 inch wide
strips. With the tiling feature you could automatically
create four separate files that are 24" wide and 8 feet tall
so you can create your mural in sections. With the tiling
feature all you do is specify the size of paper you have to
print on and if you would like the pages to overlap. Then
Perfect Resize 7.5 will resize your image and section it
down into the individual tiles.
To use the Tiling feature, follow these
instructions:
1. Turn tiling on by toggling the on/off switch in the
pane header.
2. Set the Width and Height fields to the size and
orientation of paper that you wish to print on, or
you can select the number of rows and columns
instead.
3. Set the Overlap size. The overlap makes each tile
overlap so you can tape multiple panels together
and corrects for printer margins if you are not
printing borderless.
4. Set the file type for the newly created files for
each tile.
5. Set the destination folder for the new files. Each
file will be named with the original filename and the
tile indicated in the filename.
The preview will show cyan guide lines for each tile that will
be created. The bottom of the Tiling pane will tell you how
many tiles will be created.
Perfect Resize
48 Perfect Resize
Gallery Wrap
The Gallery Wrap feature is designed to help you print on canvas. When making
enlargements for canvas it is common to wrap a portion of the image around
wooden stretcher bars. These can be several inches thick and are used for
mounting the canvas. These are commonly called gallery wraps. However, if the
photographer had important detail near the edges of the image they may be lost in
the wrapping process. The Gallery Wrap feature in Perfect Resize Professional
Edition automatically creates extended margins by reflecting or stretching the areas
near the edge of the image allowing the photographer to create a gallery wrap
without having to sacrifice any of the original image. The Gallery Wrap feature
allows you to select the thickness of the canvas mounting bars and offers a variety
of techniques for creating additional margins.
To use the Gallery Wrap feature follow these instructions:
1. Turn on the Gallery Wrap feature by toggling the on/off switch in the pane
header.
2. Set the Thickness control to the amount of margins you would like to add. A
good rule of thumb is the thickness of the stretcher bars, plus half an inch.
3. Select the Type you would like to use.
4. If you wish to add a color overlay to the gallery wrap wings set the color
and opacity.
The Gallery Wrap feature has several methods for adding margins:
Type:
Reflect: Copies an area equal to the thickness setting around your image, then flips each side and adds it as the margins. This is a good
general purpose technique.
Reflect Soft: Does the same as the Reflect method but softens the added margins.
Stretch: The Stretch method takes a small area around the edge of the image and stretches it to add the margins.
Stretch Soft: Does the same as stretch, but softens the added margins.
Thickness: This how thick your canvas stretcher bars are. Generally two inches works well for most gallery wraps.
Overlay Color: You can also add a color overlay over the wrap area. This can be used to darken the wrap or fill it with a solid color.
Opacity: This sets the opacity of the overlay color. At the default of zero, there is no color overlay added.
Add to New Layer: This places the wrap wings on their own layer, rather then merging them with the image.
Perfect Resize
Perfect Resize 49
Without the Gallery Wrap feature, important parts of the image get lost when
wrapped.
With Gallery Wrap enabled, you can maintain the original image area
but still have the extended margins needed to wrap canvas on thick
stretcher bars.
Note: It is not recommended that you use the borderless printing option on a printer or use borderless lab prints when the overlap is set to
zero. Both borderless methods increase the image size 1-3 percent to allow for overprinting and/or trimming. The resulting prints may not
align properly.
Perfect Resize
50 Perfect Resize
Presets
Presets store all of the adjustments you make in Perfect Resize. Presets are a fast and easy way to get consistent results. You can save your own presets
for batch processing or for simply reproducing your look when retouching.
Presets do not store masks created by tools other than the Masking Bug.
Using a Preset
Using a preset is simple, just click on it in the Preset Browser.
Saving a Preset
Saving a preset is simple. Once you have your settings that you wish
to save, go to the Preset menu and select Save Preset.
The New Preset dialog will appear (shown to the right). There are
several fields to complete including the preset name, the category,
creator and description.
In the category pull-down you can select which existing category the
preset should saved into. You can also create a new category this way
by selecting new category from the bottom of the list.
You can edit a preset's name, creator or description by
selecting it and then selecting Edit Preset Info from the
Preset menu. If you want to edit the settings in a preset,
load it into, make your adjustments and then re-save the
preset with the same name and location.
Deleting a Preset
You can remove a preset if you no longer want to have access to it.
To remove a preset, follow these steps:
1. Select the preset you wish to remove in the preset browser.
2. Select Delete Preset from the Preset menu.
Importing & Sharing Presets
You can import presets you have downloaded from the onOne website
using these steps.
1. Download the preset pack from the onOne website. It should
have a .ONPreset extension.
2. Double-click on the preset pack, it will install the presets into a
category named the same as the preset pack.
That's it, next time you use Perfect Resize the new presets will be
located in the My Presets tab, in a category named after the preset
pack. You can delete the files you downloaded, they have been copied
into Perfect Effects.
You can share presets like you would share any other file, such as
email or posting them to a website. First you need to find the preset
files. The easiest way it to open Perfect Resize then from the Preset
menu select Show Presets Folder. A window will open and will display
the presets folder. In the presets folder are sub-folders for your
preset categories. Inside each sub-folder are the individual preset
files. You can copy these presets to another computer, attach them to
an email or post them on a website.
Perfect Resize
Perfect Resize 51
Menus
Application Menu
About Perfect Resize: Opens the about dialog box. It contains your serial number,
version number and information on contacting onOne Software for support.
Preferences: Opens the Perfect Resize preferences dialog.
Services: Opens the OS level Services flyout (Mac only).
Hide Perfect Resize: Hides the window.
Quit Perfect Resize: Quits Perfect Resize.
File Menu
Cancel: Cancels Perfect Resize and returns back to the host application with no changes.
Apply: Applies the current document size settings and options to your image and returns to the host application.
Edit Menu
Undo: Reverses adding a preset
Redo: Unused
Copy: Unused
Cut: Unused
Paste: Unused
Reset All: Resets all the controls back to their default settings.
Preset Menu
Perfect Resize
52 Perfect Resize
Save Preset: Saves the current settings as a new preset.
Delete Preset: Deletes the current preset.
Edit Preset Info: Opens the preset dialog so you can edit
the name, author or description information.
Import Preset: Opens the import preset dialog to help you
import presets you have downloaded.
Show Presets Folder: Opens a Finder or Explorer window
showing the presets folder.
Manage Extras: Opens the Extras Manager where you can
import and manage extras like Borders, Backgrounds,
Textures and Presets.
View Menu
Zoom In: Zooms the preview window in one increment. This will make the preview image
larger.
Zoom Out: Zooms the preview window out one increment. This will make the preview
image smaller.
Fit to Screen: This sets the preview image so that the entire image is on screen at
once. Think of this as an overview of the entire image. This is the setting you will use
most of the time.
Fill with Layer: Sets the zoom so the current layer fills the entire screen.
Actual Pixels: This sets the preview image so that it zooms to actual pixels or 1:1 also
called 100%. This setting allows you to see every pixel in the image. This is useful when
making adjustments to the Settings, Sharpening or Film Grain.
Show Browser Pop-up: Enables the browser pop-up window. A checkmark should
appear next to this when it is enabled.
Show Clipping: Shows the clipping overlay view, which overrides the current mask
view. No checkmark is displayed for this mode. The user can temporarily show this mode
by holding down J as well.
Preview Background Color: Flyout with background color options, the selected
item should have a checkmark next to it.
Window Menu
Navigator/Loupe/Histogram: Opens or closes the
Navigator/Loupe/Histogram pane.
Pixel Dimensions: Opens or closes the Pixel Dimensions pane.
Document Size: Opens or closes the Document Size pane.
Settings: Opens or closes the Settings pane.
Sharpening: Opens or closes the Sharpening pane.
Film Grain: Opens or closes the Film Grain pane.
Tiling: Opens or closes the Tiling pane.
Gallery Wrap: Opens or closes the Gallery Wrap pane.
Solo Mode: Enables or disables Solo Mode.
Show Browser Panel: Opens or closes the Browser Panel.
Show Control Panel: Opens or closes the Control Panel.
Hide Panel: Opens or closes all Panels.
Full Screen: Opens the window to full screen.
Help Menu
Perfect Resize
Perfect Resize 53
Search: Searches the Menus (Mac only)
Perfect Resize Online Help: Opens this html help in your default web
browser.
Video Tutorials: Opens a web browser to the tutorial section of the
onOne website.
Getting Started: Opens the Getting Started section in your default
web browser.
Keyboard Shortcuts: Opens a dark style dialog that displays the
keyboard shortcuts for that platform.
Perfect Inspiration: Opens the onOne Perfect Inspiration Gallery in
your default web browser.
Check For Updates: Checks for updates with the onOne auto update
server.
Deactivate: Opens the activation dialog. This is used to deactivate
your software so you can move it to another computer or make a
return.
Register: Opens the default web browser and navigates to the
registration page.
Provide Feedback: Opens the default web browser and navigates to
the feedback page.
Help Improve onOne Products: Opens the Improve onOne Products
dialog.
Perfect Resize
54 Perfect Resize
Keyboard Shortcuts
Action
Mac
Win
Print
cmd p
ctl p
Undo
cmd z
ctl z
Redo
cmd shift z
ctl shift z
Cut
cmd x
ctl x
Copy
cmd c
ctl c
Paste
cmd v
ctl v
Save Preset
cmd shift s
ctl shift s
Navigate Browser Selection
Arrow Keys
Arrow Keys
Open Selected Category
Right Arrow
Right Arrow
Close Selected Category
Left Arrow
Left Arrow
Zoom In
cmd +
ctl +
Zoom Out
cmd -
ctl-
Fit to Screen
cmd 0
cmd 0
Actual Pixels
cmd opt 0
ctl alt 0
Show Clipping
opt j
alt j
Navigator/Loupe/Histogram
cmd 1
ctl 1
Pixel Dimensions
cmd 2
ctl 2
Document Size
cmd 3
ctl 3
Settings
cmd 4
ctl 4
Sharpening
cmd 5
ctl 5
Film Grain
cmd 6
ctl 6
Tiling
cmd 7
ctl 7
Gallery Wrap
cmd 8
ctl 8
Show Browser Panel
cmd left arrow
ctl left arrow
Show Control Panel
cmd right arrow ctl right arrow
Full Screen Mode
cmd ctl f
F11
Keyboard Shortcuts
cmd shift k
ctl shift k
h
Hand Tool
h
Zoom Tool
z
z
Crop Tool
c
c
Temporarily Select Hand tool
Hold Space
Hold Space
Rotate Crop Clockwise
opt right arrow
alt right arrow
Rotate Crop Counter Clockwise opt left arrow
Perfect Resize
alt left arrow
Perfect Batch 55
Perfect Batch
Perfect Batch is an engine for automating processes or applying presets that are available in each module. It is ideal for
applying universal adjustments across a large number of images. It can be launched from the Browse module or through Perfect
Layers. There are a number of reasons to use a Batch process.
Some features of onOne Batch include:
Convert Files: Select a source folder and create a new child folder and convert a large number of files to a new
desired format.
Resize Files: Prepare files for printing, web or simply changing the dimension and/or resolution.
Apply Module Presets: Use the factory presets or apply your own custom preset created from Perfect; Enhance,
Portrait, Effects, B&W and Resize.
Perfect Resize
56 Perfect Batch
Getting Started
This getting started section will give you the basics of using Perfect Batch. If you have never used Perfect Batch before, this is a good place to start. You
might also try watching the getting started video tutorial. For detailed information on steps and controls mentioned in the getting started section, see the
"Using Perfect Batch" section instead.
Pages in this Section
Batch Workspace
How to Access Batch
Perfect Resize
Perfect Batch 57
Batch Workspace
To launch the Batch dialog box you must first be inside of either Perfect Layers or the Browse module. Go to File > Batch to bring up the workspace dialog box.
Within this dialog box you will be able to select a source, the preset(s) that will be applied, the destination and even place a watermark on the image.
The Batch Dialog:
Perfect Resize
58 Perfect Batch
How to Access Batch
Launch the stand alone application of Perfect Photo Suite 8. The Batch module can be
accessed inside of either Browse or Perfect Layers. Go to File > Batch and this will
launch the batch dialogue.
You can also select a group of images in the Browse module and select Perfect Batch
from the right-click contextual menu.
You can also access Perfect Batch inside of Adobe Photoshop, Adobe Lightroom or
Apple Aperture.
Perfect Resize
Perfect Batch 59
Using Perfect Batch
This section covers the complete use of Perfect Batch. It includes how to select files, adding a
module preset and saving to a destination.
Pages in this Section
Selecting Files
Adding a Module
Destination Pane
Batch Presets
Perfect Resize
60 Perfect Batch
Selecting Files
The first step to beginning a Batch process is to select the Folder or Files. The Source defines those Files or Folders. There are
two ways to choose the Source.
Selected Items: Inside of Browse you can simply select the the Folder or Files before going to File > Batch. The Source drop
down menu will read "Selected Items."
Folder: This option will require you to click the Choose button. The Choose button presents you with a Finder or Windows
Explorer dialogue where you will navigate to and select a Folder. After you have a folder selected the description will appear next
to Folder.
Include SubFolders: If this box is checked the Batch will also process any that reside within subfolders of the parent Folder you
have selected.
Perfect Resize
Perfect Batch 61
Adding a Module
After you select a source you choose the module(s) you wish to use for the Batch process.
Each Module has its own pane that contains a choice of Type, Category and Preset.
If you are not familiar with Presets we recommend you review the Preset pages for each module to better understand how this works.
Type: Choose between either a Factory
Preset or a Personal Preset you have
created or installed.
Category: Select the category in which
the Preset lives.
Preset: Pick the preset you want to
apply during the Batch.
Pause on the first image:
When checked the first image is
processed and the batch will pause so
you can evaluate.
The Perfect Resize module includes additional
options for output. You can apply a preset, either
factory supplied or a user saved preset, or you
can enter the size you desire. If you manually
enter a size you can select to fit in a specified size
(width & height) or to scale the long or short side
of the images to a specified dimension. This can be
good for resizing images for web or for proofs.
Perfect Resize
62 Perfect Batch
The Watermark module allows you to add an
overlay to the image, typically used for your logo,
signature or copyright.
File: Click the Choose button to select
the file you wish to use as your
watermark.
Size: This slider controls the size of the
watermark file.
Inset: This will determine the percentage
in which the file is inset from the edge.
Opacity: This sets the opacity of the
watermark.
Location: This grid sets the location of
the watermark. Click on the square of the
location you desire.
Perfect Resize
Perfect Batch 63
Destination Pane
Perfect Resize
64 Perfect Batch
The destination pane is the last step in the Batch
workflow. This determines where the processed
files are saved, how they are named, the file type
and additional options.
Save To: This drop down
menu includes three options; Round
Trip, Current Location or Folder.
Roundtrip saves the file over the
original and uses the same file
format, bit-depth, color space and
name. Naturally all the additional
options will be grayed when this
option is selected. Current
Location will write the file to the
same location as the original file.
The Folder option will allow you to
choose a new location the files will
be saved to. Click the Choose
button to select the new location.
Folder: The Folder will list the path
the file is going to be saved. This
line will only be seen when the
Folder option is selected under
Save To.
Put in Subfolder: When checked
this will create a subfolder in the
destination and you may name the
subfolder in the field on the right.
Match Source Folders: When
checked this option will match the
hierarchy of the source folder.
Existing Files: This drop down
determines what will happen if
there is a file name conflict.
Overwrite without warning or
Prevent overwrite. If Prevent
overwrite is chosen the word 'copy'
will be added to the file(s).
File Type: This drop down
determines the file format or
extension. The choices include;
Same as Source, Photoshop,
Photoshop Large Document, JPEG,
TIFF and PNG. The quality slider is
only available for JPEG.
Color Space: This drop down will
include all the available color
profiles installed on your system.
Naming Element: This option
may be used to determine the file
name. The options include;
Current Name, Text and Number.
The field to the right allows you to
enter a custom name. The plus
and minus icons will allow you to
add or remove naming elements.
Current Name will use the source
name without the file extension.
Text is used for assigning a custom
text string. Number creates an
automatically incremented number,
starting with the number input in
the field.
Perfect Resize
Perfect Batch 65
Batch Presets
Presets for the Batch settings can be saved and used again. Presets will remember all of the settings and details selected on the right, in the Batch
dialogue.
Saving Presets: To save a preset click the "+" icon at the lower left. This opens a preset dialogue
where you define the name, category, creator and description.
Using Presets: To use a preset simply double click on the name. This will load the preset settings in
the batch dialogue.
Deleting Presets: To delete a preset select the item and click the "-" icon at the bottom left.
Perfect Resize
Index
A
About Perfect Photo Suite
About Resize 27
Activation 8
Adding a Module 61
Additional Help 5
Address 4
Adjusting the Image Size 42
Adjustment Layers 32
Alpha Channels 32
Aperture 17
application menu
B
Batch 56
Batch 17 ,15
Batch destination 63
Batch dialogue 57
Batch Presets 65
Batch processing 56 ,55
Batch Workspace 57
Bridge 19
Browser 37
C
CMYK 16-bit 32
CMYK 8-bit 32
Contacting 4
Contacting onOne Software 4
creating presets 43
D
Deactive 8
deleting a preset 50
Destination 63
Directory 37
Display 6
document size 43
document size presets 43
DPI 30
E
edit menu
Edit with Plug-in 17
eReader 3
Export 17 ,15
External Editor 17 ,15 ,19
F
FAQ 5
File Browser 37
File Formats 9
file menu
,37
Film Grain 46
Folder 37
Frequently Asked Questions 5
G
Gallery Wrap 48
Geting Started 56
Getting Started 28
Grayscale 16-bit 32
Grayscale 8-bit 32
H
help
Help 5 ,3
highpass 45
Histogram 35
How Big Can You Print 29
How to Access Batch 58
I
image type 44
importing a preset 50
Installation 7
Interface 33
Introduction 2
iPhoto 19
K
Keyboard Shortcuts 54
Knowledge Base 5
L
Lab 16-bit 32
Lab 8-bit 32
largest print 29
Layer Masks 32
Legal 4
Licensing 8
Lightroom 15
Loupe 35
M
Mac OSX 6
menus
method 44
Module Selector 12
N
Navigator 35
O
onOne Panel 14
onOne Software
onOne University 5
OpenGL 6
Opening 9
TIF
Tiling 47
tool well 33
U
P
Paths 32
PDF 3
Perfect Batch 55
Perfect Layers 12
Phone 4
Photoshop 14
Photoshop Elements 14
Photoshop Layers 32
Plug-In Extras 15
PNG 9
preset menu
presets 43 ,50
Print capabilities 29
Printing 3 ,30
printing resolution 30
progressive 45
PSB 9
PSD 9
R
RAW 9
Registration 8
resizing 29
Resolution 30
RGB 16-bit 32
RGB 8-bit 32
S
Save As 9
Saving 9
saving a preset 50
sections 33
Selecting Files 60
Settings 44
sharing a preset 50
Sharpening 45
sizing 43
Smart Objects 32
smoothness 44
Source 60
Standalone 13
Support 4
Support File Types 9
Supported File Types 32
System Requirements 6
T
Tablet 3
Text Layers 32
texture 44
threshold 44
Uninstalling 7
unsharp mask 45
User Guide 55 ,1
Using a preset 50
Using Modules 12
Using Perfect Batch 59
Using Perfect Resize 39
Using the Help System 3
Using with Photoshop 14
V
Video Tutorials 5
view menu
W
Watermark 61
Webinar 5
Welcome 27
When use Perfect Resize 31
window menu
Windows 6
Work Area 33