1
FortiClient Endpoint Security ™
User Guide
Version 4.0 MR2
FortiClient Endpoint Security User Guide
Version 4.0 MR2 (
31 March 2010
04-420-116429-20100108
© Copyright 2010 Fortinet, Inc. All rights reserved. No part of this publication including text, examples,
diagrams or illustrations may be reproduced, transmitted, or translated in any form or by any means,
electronic, mechanical, manual, optical or otherwise, for any purpose, without prior written permission of
Fortinet, Inc.
Trademarks
Dynamic Threat Prevention System (DTPS), APSecure, FortiASIC, FortiBIOS, FortiBridge, FortiClient,
FortiGate®, FortiGate Unified Threat Management System, FortiGuard®, FortiGuard-Antispam,
FortiGuard-Antivirus, FortiGuard-Intrusion, FortiGuard-Web, FortiLog, FortiAnalyzer, FortiManager,
Fortinet®, FortiOS, FortiPartner, FortiProtect, FortiReporter, FortiResponse, FortiShield, FortiVoIP, and
FortiWiFi are trademarks of Fortinet, Inc. in the United States and/or other countries. The names of actual
companies and products mentioned herein may be the trademarks of their respective owners.
Contents
Introduction .............................................................................................. 1
What’s new in this release ............................................................................................. 1
About FortiClient Endpoint Security ............................................................................. 1
Fortinet Security Framework ......................................................................................... 3
FortiClient Editions ......................................................................................................... 3
Additional FortiGuard Services ..................................................................................... 3
About this document ...................................................................................................... 4
Using the FortiClient system tray menu ....................................................................... 4
Documentation ................................................................................................................ 5
Fortinet Tools and Documentation CD ....................................................................... 6
Fortinet Knowledge Center ......................................................................................... 6
Comments on Fortinet technical documentation ........................................................ 6
Customer service and technical support...................................................................... 6
Installation ................................................................................................ 7
System requirements...................................................................................................... 7
Supported Operating Systems.................................................................................... 8
Supported FortiGate and FortiManager versions ....................................................... 8
Language Support .......................................................................................................... 8
Installing FortiClient ....................................................................................................... 8
Installing the Standard or Premium FortiClient Editions........................................... 10
Installation notes.......................................................................................................
Installing software updates.................................................................................
FortiClient Proxy.................................................................................................
Servers ...............................................................................................................
Installing from a drive created with subst ...........................................................
Antivirus performance optimization ....................................................................
11
11
11
11
12
12
Install log ....................................................................................................................... 12
Installing the FortiClient SSL VPN Client.................................................................... 13
General.................................................................................................... 15
Entering a license key or registration code................................................................ 15
Complying with corporate policy ................................................................................ 16
Locking and unlocking the software........................................................................... 17
Configuring proxy server settings .............................................................................. 17
FortiClient Endpoint Security Version 4.0 MR2 User Guide
04-420-116429-20100108
http://docs.fortinet.com/ • Feedback
i
Contents
Updating FortiClient...................................................................................................... 18
Keeping FortiClient updated without FortiGate or FortiClient Manager .................... 20
Backing up and restoring FortiClient settings ........................................................... 20
Logs................................................................................................................................ 21
Configuring log settings ............................................................................................ 21
Viewing log files ........................................................................................................ 22
VPN.......................................................................................................... 23
Configuring VPNs ......................................................................................................... 23
Setting up a VPN with automatic configuration.........................................................
Setting up a VPN with manual configuration ............................................................
Configuring basic FortiClient VPN settings ........................................................
Configuring IKE and IPSec policies ...................................................................
Configuring Virtual IP address acquisition .........................................................
Configuring eXtended authentication (XAuth) ....................................................
Setting up a VPN with SSL VPN connection ............................................................
23
24
24
27
30
31
31
Using the FortiClient VPN client .................................................................................. 32
Testing the connection..............................................................................................
Setting connection options........................................................................................
Connecting to the remote network............................................................................
Using the FortiClient SSL VPN tunnel client.............................................................
Connecting to a VPN before Windows logon............................................................
32
33
34
34
35
Monitoring VPN connections ....................................................................................... 36
Exporting and importing VPN policy files.................................................................. 37
Troubleshooting VPN connections ........................................................................... 37
Managing digital certificates........................................................................................ 38
Getting a signed local certificate...............................................................................
Getting a signed smartcard certificate ......................................................................
Getting a CA certificate.............................................................................................
Validating certificates................................................................................................
38
41
42
42
WAN Optimization.................................................................................. 45
Enabling WAN Optimization......................................................................................... 46
Antivirus and Anti-Malware................................................................... 47
Scanning for viruses and malware.............................................................................. 47
Scanning for viruses in safe mode............................................................................ 50
Configuring antivirus settings ..................................................................................... 50
Selecting file types to scan .......................................................................................
Selecting files, folders and file types to exclude from scanning................................
Specifying an SMTP server for virus submission .....................................................
Integrating FortiClient antivirus scanning with Windows shell ..................................
52
53
53
54
Configuring real-time protection ................................................................................. 54
Configuring email scanning......................................................................................... 56
ii
FortiClient Endpoint Security Version 4.0 MR2 User Guide
04-420-116429-20100108
http://docs.fortinet.com/ • Feedback
Contents
Configuring server protection ..................................................................................... 56
If a virus is found .......................................................................................................... 57
Quarantine ......................................................................................................... 57
Clean .................................................................................................................. 58
Monitoring Windows startup list entries..................................................................... 58
Restoring changed or rejected startup list entries .................................................... 59
Firewall.................................................................................................... 61
Selecting a firewall mode ............................................................................................. 61
Selecting a firewall profile ......................................................................................... 61
Viewing network statistics ........................................................................................... 62
Configuring application access permissions............................................................. 63
Managing address, protocol and time groups........................................................... 64
Configuring network security zones ........................................................................... 65
Adding IP addresses to zones .................................................................................. 65
Customizing security settings ..................................................................................... 66
Network Detection......................................................................................................... 67
Configuring intrusion detection .................................................................................. 67
Configuring advanced firewall rules ........................................................................... 67
Using Advanced Firewall Rules to block all traffic to and from a computer .............. 69
Managing groups ...................................................................................................... 69
WebFilter................................................................................................. 71
Modifying web filter settings........................................................................................ 71
Configuring the webfilter global settings ................................................................... 71
Managing webfilter profiles ....................................................................................... 72
Configuring webfilter user settings ...................................................................... 74
Anti-spam................................................................................................ 77
Installing anti-spam plug-in ......................................................................................... 78
Enabling anti-spam ....................................................................................................... 78
Adding white, black, and banned word lists .............................................................. 78
Manually labelling email ............................................................................................... 79
Submitting misclassified email to Fortinet................................................................. 80
App Detection......................................................................................... 81
Viewing applications running on your computer....................................................... 81
Index........................................................................................................ 83
FortiClient Endpoint Security Version 4.0 MR2 User Guide
04-420-116429-20100108
http://docs.fortinet.com/ • Feedback
iii
Contents
iv
FortiClient Endpoint Security Version 4.0 MR2 User Guide
04-420-116429-20100108
http://docs.fortinet.com/ • Feedback
Introduction
This chapter introduces you to FortiClient Endpoint Security software and the following
topics:
•
About FortiClient Endpoint Security
•
About this document
•
Using the FortiClient system tray menu
•
Documentation
•
Customer service and technical support
What’s new in this release
This section describes the new features and changes in FortiClient v4.0 MR2.
•
The extended antivirus database is now available in the Standard edition client. No
configuration changes are needed. The extended antivirus database is automatically
downloaded when the client first connects to the FortiGuard servers. Once the
extended antivirus database has been downloaded, future updates include only those
that have changed. The only difference between the Standard and Premium editions is
the update frequency which is daily and hourly (if configured), respectively, for the
antivirus functionality.
•
Due to the addition of the extended antivirus database to the Standard editon, the
option to enable or disable the extended antivirus database has been removed.
•
FortiGuard anti-spam services are available in the Standard edition.
•
Enhancements to the Web Filtering includes:
•
Easier to use configuration.
•
Schedule web filter profiles so that web access can be determined for time of day
and day of week.
•
Block additional types of web content.
•
Improvements have been made to decrease the number of Firewall pop-up messages
asking to allow access to the network.
•
Resume download feature allows you to pause software and antivirus signature
updates and resume at a later time.
About FortiClient Endpoint Security
Computer desktop and laptop devices have empowered today’s business users with the
capability to access enterprise applications and mission critical data both in the office and
on the road. While expanding productivity, remote access to the secure network perimeter
increases security risk. Unfortunately, all devices are exposed to blended threats such as
viruses, trojans, worms, spyware, keyloggers, botnets, spam and Internet attack. While
utilizing network security architectures that isolate segments from one another can
mitigate infection or breach, computers within the same subnet can still potentially infect
one another.
FortiClient Endpoint Security Version 4.0 MR2 User Guide
04-420-116429-20100108
http://docs.fortinet.com/ • Feedback
1
About FortiClient Endpoint Security
Introduction
Users may inadvertently circumvent policy by bringing in portable storage devices, failing
to keep antivirus signatures up-to-date, or even disabling personal firewall protection.
Users accessing inappropriate and dangerous web content jeopardize device integrity,
negatively impact productivity and create security and legal exposure. While point product
security technology, such as antivirus agents, are available to protect devices from certain
threats, such methods fall short from comprehensively protecting against blended threats
and do not enforce content access guidelines.
FortiClient offers the full range of Fortinet threat protection to computers, even when being
used on insecure public networks. This comprehensive, modular protection suite secures
desktops against viruses, trojans, worms and more. The FortiClient product is a clientbased software solution designed to be used in connection with our FortiGate appliances
to provide security features like Endpoint Control and WAN Optimization for enterprise
computers. The feature set includes VPN (IPSec and SSL), antivirus/antispyware,
personal firewall, Web filtering, and antispam – each with separate modular installs to
completely avoid any potential conflicts with other security software. Powered by
FortiGuard security services, FortiClient has access to constantly-updated protection on a
real-time basis against current and emerging threats.
Table 1: Features and benefits of FortiClient.
Endpoint Control
Ties into your FortiGate appliance to monitor and enforce endpoint
security policy at the network fi rewall, including FortiClient version
enforcement, ensuring signatures are up-to-date and personal firewall is
enabled.
Application Detection
Extends Endpoint Control to allow admins to detect if endpoints run
applications against security policy and automates denial of network
access.
Endpoint Management Ties into your FortiManager appliance to discover, deploy, update and
monitor clients on the network. Ties into your FortiAnalyzer appliance for
advanced reporting that leverages FortiClient logs.
Secure IPSec VPN
Client
Empowers mobile laptops and remote desktops with the capability to
access enterprise applications securely with DES / 3DES encryption.
SSL VPN Tunnel Client Connects securely from anywhere for remote access to web applications
behind the fi rewall, protecting confidential communications.
WAN Optimization
Speeds services like VPN for remote PC connections over the WAN.
Wan Optimization is installed only if it is enabled using FCRepackager.
However, if you are upgrading from an older version of FortiClient where
WAN Optimization was installed, the installer will not remove it. For more
information on FCRepackager, see the FortiClient Administration Guide.
Antivirus &
Antispyware
Provides comprehensive protection against viruses, spyware,
keyloggers, Trojans, adware and grayware on the client, with updates by
FortiGuard.
Powerful Personal
Firewall
Monitors network traffic and enforces the appropriate application access
control in your security policies.
Web Filtering
Provides real-time web content access enforcement to ensure
compliance.
Advanced Antispam
Built in antispam that incorporates into MS Outlook to reduce unsolicited
emails, email-borne viruses and phishing attempts.
Data Leak Prevention
Data Leak Prevention is available to those users upgrading from 3.0 who
were previously using this feature and it is enabled in the
FCRepackager. If you do not see this option in the FortiClient console,
then it is unavailable to you. For more information on FCRepackager,
see the FortiClient Administration Guide.
FortiClient can be downloaded directly from www.forticlient.com.
2
FortiClient Endpoint Security Version 4.0 MR2 User Guide
04-420-116429-20100108
http://docs.fortinet.com/ • Feedback
Introduction
Fortinet Security Framework
Fortinet Security Framework
FortiClient plays an important role in completing most any FortiGate installation. This
advanced endpoint protection solution helps close potential security gaps in network
architecture, strengthening your security posture by adding an essential layer of protection
to computers and laptops connecting from the LAN or from offsite remote locations.
FortiClient provides integration with FortiGate, FortiManager and FortiAnalyzer:
•
Fortigate — Enhances FortiGate endpoint control by enforcing a policy-based
approach to FortiClient use such as application detection, VPN, and WAN
Optimization.
•
FortiManager — Users benefit from streamlined FortiClient deployment and
centralized management. For example, bulk deployments of FortiClient updates, auto
discovery of new FortiClients, and set management events and alerts.
•
FortiAnalyzer — Users benefit from FortiClient log capture for integrated endpoint
reporting and analysis.
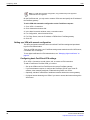
Figure 1: Fortinet security framework.
FortiClient Editions
Fortinet offers FortiClient in two editions: a Standard (free) edition for consumers, and a
Premium edition for small, mid-sized enterprises, and other large organizations. The
Premium edition can be used in combination with FortiGate and other Fortinet products.
The premium edition includes antispam, enables central management with FortiManager,
and comes with Enhanced Support. See “Installing the Standard or Premium FortiClient
Editions” on page 10.
Additional FortiGuard Services
Fortinet provides stand-alone malware removal tools on the FortiGuard website. The tools
have been developed by FortiGuard Labs to disable and remove specific malware and
related variants. Some tools have been developed to remove specific malware as well as
a universal cleaning tool, called FortiCleanup.
The latest release can by obtained from the following web page:
http://www.fortiguard.com/antivirus/malware_removal.html
FortiClient Endpoint Security Version 4.0 MR2 User Guide
04-420-116429-20100108
http://docs.fortinet.com/ • Feedback
3
About this document
Introduction
About this document
This document explains how to install and use the features of FortiClient Endpoint
Security.
This document contains the following chapters:
•
Installation explains how to install the FortiClient application on your computer.
•
General describes how to enter a license key, how to lock or unlock the application
settings, how to configure optional proxy server settings, and log settings and log view.
•
VPN describes how to configure an IPSec VPN with the FortiClient application.
•
WAN Optimization describes to enable WAN optimization.
•
Antivirus and Anti-Malware describes how to scan files for viruses, how to configure
real-time scanning of files as you access them, how to configure virus scanning of
incoming and outgoing email, and how to prevent unauthorized modifications to the
Windows startup list or to the registry.
•
Firewall describes how to configure the FortiClient firewall. You can use pre-defined or
custom settings.
•
WebFilter describes how to configure the FortiClient application to control the types of
web page content accessible on your computer using the Fortinet FortiGuard Web
Filtering service.
•
Anti-spam describes how to configure spam filtering for your Microsoft Outlook or
Outlook Express email client. The FortiClient application works with the Fortinet
FortiGuard AntiSpam service to determine which email messages are spam. You can
also create your own black list and white list of email addresses.
•
App Detection displays the applications that are currently running on your computer.
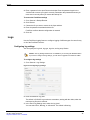
Using the FortiClient system tray menu
Many frequently used FortiClient features are available from the system tray menu.
Right-click the FortiClient icon to access the menu.
If FortiClient is trying to notify you of an event that needs your attention, the system tray
icon will blink. Click the icon to view the message, such as an alert, that requires your
attention.
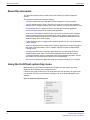
Figure 2: FortiClient system tray menu
4
FortiClient Endpoint Security Version 4.0 MR2 User Guide
04-420-116429-20100108
http://docs.fortinet.com/ • Feedback
Introduction
Documentation
Open FortiClient Console
Opens the management console so that you can configure the
settings and use the services.
FortiClient Help
Opens the online help.
About FortiClient
Displays version and copyright information.
Make Compliant with
Corporate Policy
Enables antivirus, anti-spam, firewall, or web filtering features as
required to comply with the security policy. This item is visible if
the FortiClient computer is centrally managed and a security
policy is set, but the FortiClient settings do not comply.
For more information, see “Complying with corporate policy” on
page 16.
Compliant with
Corporate Policy
FortiClient complies with the security policy. This item is visible if
the FortiClient computer is centrally managed, a security policy is
set, and the FortiClient settings comply.
VPN
If you have already added VPN(including SSL VPN) tunnels, you
can start or stop the VPN connections by selecting or clearing the
connection names. See “Connecting to the remote network” on
page 34.
Enable/Disable Realtime
antivirus Protection
For details, see “Configuring real-time protection” on page 54.
Enable/Disable Startup
Registry Monitor
For details, see “Monitoring Windows startup list entries” on
page 58.
Firewall
You can select Deny All, Normal, or Pass All. See “Selecting a
firewall mode” on page 61.
Enable/Disable WebFilter
For details, see “WebFilter” on page 71.
Enable/Disable AntiSpam
For details, see “Anti-spam” on page 77.
Update Now
Update Antivirus definitions and Anti-spam rules.
Show antivirus scan
window(s)
View antivirus scan windows, hidden during scheduled scans.
This menu item is available only during a scan.
Shutdown FortiClient
Stops all FortiClient services and closes FortiClient console. The
confirmation dialog imposes a four second wait for the Yes button
to be available.
Documentation
You can access FortiClient documentation using the links provided in the General > Help
& Support page. The Fortinet Technical Documentation web site at
http://docs.forticare.com provides current documentation for all Fortinet products.
In addition to this FortiClient Endpoint Security User Guide, the FortiClient online help
provides information and procedures for using and configuring the FortiClient software.
If you are responsible for deploying FortiClient Endpoint Security to an enterprise, see the
FortiClient Endpoint Security Administration Guide for information about customized
installation, central management using a FortiManager system, network-wide per-user
web filtering, and configuration of FortiGate devices to support FortiClient VPN users.
Information about FortiGate Antivirus Firewalls is available from the FortiGate online help
and the FortiGate Administration Guide.
FortiClient Endpoint Security Version 4.0 MR2 User Guide
04-420-116429-20100108
http://docs.fortinet.com/ • Feedback
5
Customer service and technical support
Introduction
Fortinet Tools and Documentation CD
All Fortinet documentation is available on the Fortinet Tools and Documentation CD
shipped with your Fortinet product. (You do not receive this CD if you download the
FortiClient application.) The documents on the CD are current at shipping time. For up-todate versions of Fortinet documentation visit the Fortinet Technical Documentation web
site at http://docs.forticare.com.
Fortinet Knowledge Center
Additional Fortinet technical documentation is available from the Fortinet Knowledge
Center. The knowledge center contains troubleshooting and how-to articles, FAQs,
technical notes, a glossary, and more. Visit the Fortinet Knowledge Center at
http://kb.fortinet.com.
Comments on Fortinet technical documentation
Please send information about any errors or omissions in this document, or any Fortinet
technical documentation, to techdoc@ fortinet.com.
Customer service and technical support
Fortinet Technical Support provides services designed to make sure that your Fortinet
systems install quickly, configure easily, and operate reliably in your network. You can
access FortiClient support using the links provided in the General > Help & Support page.
Please visit the Fortinet Technical Support web site at http://support.fortinet.com to learn
about the technical support services that Fortinet provides.
6
FortiClient Endpoint Security Version 4.0 MR2 User Guide
04-420-116429-20100108
http://docs.fortinet.com/ • Feedback
Installation
There are two types of installation packages available for FortiClient software:
•
a Windows executable file
•
a Microsoft Installer (MSI) package compressed into a .zip file
The Windows executable file provides easy installation on a single computer. For details
see “Installing FortiClient” on page 8.
The MSI package is customizable for a larger roll-out to many computers in an
organization. For more information, see the FortiClient Administration Guide.
If you are installing the FortiClient application on a 64-bit platform, you must use a 64-bit
installer. The 64-bit installer files have “_x64” in their name.
System requirements
To install FortiClient you need:
To install FortiClient 4.2 you need:
•
Microsoft® Windows® compatible computer with Pentium processor or equivalent
•
Compatible operating systems and minimum RAM:
•
Microsoft® Windows 7: 512 MB
•
Microsoft® Windows Server 2008: 512 MB
•
Microsoft® Windows Vista: 512 MB
•
Microsoft® Windows Server 2003: 384 MB
•
Microsoft® Windows XP: 256 MB
•
Microsoft® Windows 2000: 128 MB
•
600 MB free hard disk space
•
Native Microsoft TCP/IP communications protocol
•
Native Microsoft PPP dialer for dial-up connections
•
Ethernet NIC for network connections
•
Wireless adapter for wireless network connections
•
Microsoft Internet Explorer® 5.0 or later
•
Adobe Acrobat® Reader 5.0 or later for user manual
•
MSI installer 3.0 or later
Note: The FortiClient software installs a virtual network adapter.
Note: While Windows Server is supported, Fortinet does not recommend installing
FortiClient onto Domain Controllers without first doing testing on your specific server
configuration in a non-production environment.
FortiClient Endpoint Security Version 4.0 MR2 User Guide
04-420-116429-20100108
http://docs.fortinet.com/ • Feedback
7
Language Support
Installation
Supported Operating Systems
FortiClient supports the following operating systems:
•
Microsoft® Windows 7™ (both 32-bit and 64-bit)
•
Microsoft® Windows Server 2008 including SP2 (both 32-bit and 64-bit)
•
Microsof®t Windows Server 2008 R2 (64-bit)
•
Microsoft® Windows Vista including SP1 and SP2 (both 32-bit and 64-bit)
•
Microsoft® Windows Server 2003 R2 including SP2 (both 32-bit and 64-bit)
•
Microsoft® Windows Server 2003 including SP1 and SP2 (both 32-bit and 64-bit)
•
Microsoft® Windows XP including SP2 and SP3 (both 32-bit and 64-bit)
•
Microsoft® Windows 2000 Professional
Note: It is not necessary to disable the Microsoft® Windows 7 firewall when the FortiClient
firewall is installed; they are compatible. The FortiClient installer does not disable the
Windows firewall when installing on Windows 7.
Supported FortiGate and FortiManager versions
The officially supported versions for FortiGate is 4.0 MR2 and for FortiManager is 4.0
MR2.
Language Support
The FortiClient Endpoint Security supports the following languages:
Language
FortiClient
English
Documentation
Yes
Yes
Chinese (Simplified and Traditional) Yes
Yes
French
Yes
No
German
Yes
No
Japanese
Yes
No
Portuguese (Brazilian)
Yes
No
Spanish (Spain)
Yes
No
The FortiClient installation software detects the language of the operating system and
installs the matching language version of the application. If a language other than one of
the above is detected, the English language version of the software is installed.
Installing FortiClient
Before beginning the installation, ensure you uninstall any other VPN client software.
FortiClient may not function properly with other VPN clients installed on the same
computer.
It is recommended that all other Antivirus software is removed before installing FortiClient
with the exception of Windows® Defender.
8
FortiClient Endpoint Security Version 4.0 MR2 User Guide
04-420-116429-20100108
http://docs.fortinet.com/ • Feedback
Installation
Installing FortiClient
If you have an older version of FortiClient software installed on your computer, the
Windows executable version of the installer automatically upgrades your FortiClient
installation to the new version, retaining your current configuration. FortiClient 4.0 MR2
can reuse configuration data from FortiClient versions 2.0, 1.6 or 1.2, but not from version
1.0.
Note: For FortiClient version 1.0 and 1.2 installations, it is recommended that you uninstall
the software before installing version 4.0 MR2 to ensure a clean install.
You can also perform an upgrade installation of FortiClient software using the .zip version
of the installer, which contains an MSI installer package.
To install the FortiClient software - Windows executable installer
1 Double-click the FortiClient installer program file.
2 Follow the instructions on the screen, selecting Next to proceed through the installation
options.
When the installation has completed, the FortiClient Configuration Wizard begins,
unless you are upgrading an existing installation.
To install the FortiClient software - MSI installer
1 Extract the files from the FortiClient Setup .zip archive into a folder.
2 Do one of the following:
• To perform a new installation, double-click the FortiClient.msi file.
• To perform an upgrade installation, execute the following command at the command
prompt (all on one line, case as shown):
msiexec /i <path_to_installation_folder>\FortiClient.msi
REINSTALL=ALL REINSTALLMODE=vomus
3 Follow the instructions on the screen, selecting Next to proceed through the installation
options.
When the installation has completed, the FortiClient Configuration Wizard begins,
unless you are upgrading an existing installation.
To use the FortiClient Configuration Wizard after installation
1 In the FortiClient Configuration Wizard Welcome window, do one of the following:
•
Select Basic Setup if you are installing FortiClient on a standalone computer.
•
Select Advanced Setup if you are installing FortiClient on a computer in a network.
2 For Basic Setup, configure the Antivirus schedule settings. For more update
information, see“To manage scan schedules” on page 49 and “Updating FortiClient” on
page 18.
3 For Advanced Setup, do the following:
•
Add IP addresses to FortiClient’s public, trusted, blocked zones. For more
information, see “Configuring network security zones” on page 65.
•
If you computer uses a proxy server, enter the proxy server information. See
“Configuring proxy server settings” on page 17.
•
Configure the update settings. See “Updating FortiClient” on page 18.
•
Set the schedule for the Antivirus scans. See “To manage scan schedules” on
page 49 and “Updating FortiClient” on page 18.
4 Click Update. It may take a few minutes to download the Antivirus database.
FortiClient Endpoint Security Version 4.0 MR2 User Guide
04-420-116429-20100108
http://docs.fortinet.com/ • Feedback
9
Installing the Standard or Premium FortiClient Editions
Installation
5 Once FortiClient has been successfully configured, click Close to start scanning your
hard drive for viruses.
Installing the Standard or Premium FortiClient Editions
When installing FortiClient, you can choose to install either the Standard (Free) or
Premium edition. Table 2 describes the differences between the two editions. To install the
Premium edition, you need to purchase a license key.
You can upgrade to the Premium edition after you have installed the Standard edition. See
“Entering a license key or registration code” on page 15 for more information.
If you are using the Standard edition of FortiClient, it will be shown on the General > Status
page. If you are using the Premium edition, there is no edition name in the General >
Status page.
Note: If you have a registration code, it cannot be activated during installation. You will
need to enter the registration key in the FortiClient console after the installation of
FortiClient. See “Entering a license key or registration code” on page 15.
Figure 3: FortiClient showing the Standard (Free) edition
Table 2: FortiClient Standard and Premium Edition features
10
Feature
Standard Edition
Premium Edition
Antivirus updates
Daily
Hourly
Anti-spyware updates
Daily
Hourly
IPSEC VPN client
Included
Included
SSL VPN client
Included
Included
Endpoint Application Detection
Daily
Daily and custom application
submission
Endpoint NAC monitoring and
control
Included (requires FortiGate)
Included (requires FortiGate)
WAN optimization
Included (requires FortiGate)
Included (requires FortiGate)
Anti-Spam
Included
Included
Web content filtering
Included
Included
Firewall protection
Included
Included
Central Management
Not included
Included (requires
FortiManager)
FortiClient Endpoint Security Version 4.0 MR2 User Guide
04-420-116429-20100108
http://docs.fortinet.com/ • Feedback
Installation
Installing the Standard or Premium FortiClient Editions
Table 2: FortiClient Standard and Premium Edition features
Online forum (self-help)
Included
Included
Product support
Not included
Included
Log configuration and
centralized reporting with
FortiAnalyzer
Not included
Included
Installation notes
Installing software updates
Make sure that other applications, such as Windows®, are not installing updates while you
install the FortiClient application. If an update has been run and it requested a reboot, be
sure to reboot your computer before installing the FortiClient application.
FortiClient Proxy
FortiClient uses a local proxy. If you have other local proxy software installed it may cause
conflicts which may result in loss of network connections. To resolve this issue, you must
either disable/uninstall the other proxy.
Servers
In the FortClient 4.0 release, antivirus protection that integrates with Microsoft Exchange
is available for evaluation. Install the FortiClient application from the command line with
the WITHEXCHANGE=1 option. (If you use the .exe installer, the command line option is
/v”WITHEXCHANGE=1”.) FortiClient Endpoint Security automatically detects Microsoft
Exchange installations and enables the Exchange Server Options under Antivirus >
Server Protection. Fortinet recommends that you enable the options that exclude
Exchange filesystem folders and associated files from virus scanning. A preset list of files
to exclude is then added to the antivirus and real-time protection settings.
FortiClient Endpoint Security automatically detects SQL Server installations and enables
the SQL Server Options under Antivirus > Server Protection. Fortinet recommends that
you enable the options that exclude SQL Server file system folders and associated files
from virus scanning. A preset list of files to exclude is then added to the antivirus and realtime protection settings.
For all server software, verify that server software product folders and files are excluded
from The core signature database is comprised of viruses that currently active. This option
will take less time to scan your computer because of the smaller database. The core
signature database does not require a license and is updated frequently. scanning as their
vendors recommend. Do not enable real-time protection or initiate virus scanning until you
have done this. Go to both Antivirus > Settings and Antivirus > Realtime Protection to edit
the exclusion lists.
Note: If FortiClient is directly installed on SQL or Exchange server, the AntiVirus > Server
Protection window is disabled. To enable antivirus server protection, use the msi package
with the public property WITHEXCHANGE=1. For example: msiexec /i
forticlient.msi WITHEXCHANGE=1
Note: While Windows Server is supported, Fortinet does not recommend installing
FortiClient onto Domain Controllers.
FortiClient Endpoint Security Version 4.0 MR2 User Guide
04-420-116429-20100108
http://docs.fortinet.com/ • Feedback
11
Install log
Installation
Installing from a drive created with subst
Installing from an MSI package does not work if the MSI file is located on a drive created
with the subst command. You can do any of the following:
•
specify the real path to the file
•
move the MSI file to a location where this is not an issue
•
use the .exe installer instead, if possible
Antivirus performance optimization
FortiClient optimization performs a pre-scan of files in the Microsoft® Windows,
//Windows/System32 files and select program files folders. The pre-scan is optimised to
speed up the pre-scan process so that a list of critical files are scanned first. Critical files
are those that are loaded during the boot and logon process. The pre-scan process
creates a digital signature database of files that are digitally signed by trusted vendors.
The digital signature database superceeds a hard-coded database that is used in previous
versions.
The database is used by the antivirus feature to reduce the number of files that are
required to be scanned. The firewall feature also uses this list as a "known good list" so
that the end user is not asked if they want applications such as iexplore.exe and
explorer.exe to access network resources.
After the scan completes the digital signature database is updated automatically with new
signatures by components in the antivirus and firewall features. The optimization cannot
be stopped until key critical files have been scanned. This takes approximately 10
seconds.
Once installed, optimization cannot be scheduled; it is unnecessary due to the
optimization process. The optimization database is updated whenever antivirus or firewall
encounters a file that has not been scanned before. As soon as that file has been
processed and the optimization database updated, subsequent encouters with that file are
processed significantly faster.
The installer pre-scan can be completely disabled by setting the MSI public property
OPTIMIZE=0. This setting does not stop the post-installation automatic database updates
by the antivirus and firewall features.
Install log
During the installation, FortiClient logs all install activities to a log file automatically. Should
any problems arise during the install, you can review the install log to see where and when
the issue occurred.
The install log file, fcinstalllog.txt is located in the following directory:
•
on Windows 2000 in the c:\winnt\ directory.
•
on Windows XP, in the c:\windows\ directory.
When installing using the msi installation, the install does not create the install log
automatically. For an msi installation to produce a log, use the following command:
msiexec /i FortiClient.msi /L*v c:\logfile.txt
Alternatively, you can install the appropriate logging active directory group policies.
12
FortiClient Endpoint Security Version 4.0 MR2 User Guide
04-420-116429-20100108
http://docs.fortinet.com/ • Feedback
Installation
Installing the FortiClient SSL VPN Client
Installing the FortiClient SSL VPN Client
The FortiClient SSL VPN client can be installed during FortiClient installation. Once the
SSL VPN client is installed, you can use either FortiClient or the SSL VPN client to create
VPN connections.
If you are upgrading FortiClient from a previous version and want to install the SSL VPN
client, you will have to install the SSL VPN separately.
For more information on using FortiClient to create SSL VPN connections, see the
FortiClient User Guide.
For more information on SSL VPNs, see the FortiGate SSL VPNs handbook.
To install the SSL VPN client, you can do one of the following:
•
Select the FortiClient SSL VPN check box during FortiClient installation.
Figure 4: Selecting the FortiClient SSL VPN check box during FortiClient installation.
•
Download the SSL VPN installer package (SslvpnClient.msi or SslvpnClient.exe) from
https://support.fortinet.com/ if you are using a previous version of FortiClient.
•
Connect to your FortiGate unit to install it automatically.
FortiClient Endpoint Security Version 4.0 MR2 User Guide
04-420-116429-20100108
http://docs.fortinet.com/ • Feedback
13
Installing the FortiClient SSL VPN Client
14
Installation
FortiClient Endpoint Security Version 4.0 MR2 User Guide
04-420-116429-20100108
http://docs.fortinet.com/ • Feedback
General
Use the General menu to:
•
View the FortiClient software version and serial number
•
View the status of the VPN service
•
Enable or disable real-time antivirus protection
•
Enable or disable Windows system startup list monitoring
•
View the current version of the antivirus files and the last scan time
•
Set the FortiClient console to open automatically at startup
•
Enter a product license key
•
Check and restore compliance with the corporate security policy
•
Lock or unlock the FortiClient application
•
View and configure logging
Entering a license key or registration code
The FortiClient application uses license keys or registration codes to distinguish between
the Standard (Free) edition and the Premium (licensed) edition. The edition type (Free or
Premium) will be displayed in the General > Status window.
You will use a license key if you are already have an existing license key and are
registered with FortiCare. You will use a registration code if you are not registered with
FortiCare.
When you purchase and enter a license key into the software, antivirus updates are
available until the license expires. The General > Status window displays the license serial
number and expiry date.
If your FortiClient is managed by FortiManager, then license keys can be pushed out to
your FortiClient by your IT department.
Once the license has been entered, FortiClient will connect to the FortiGuard license
server and retrieve the FortiClient license serial number. The license serial number is
displayed on the General > Status window. The license serial number is used when
communicating with Fortinet support.
Contact your authorized reseller or visit http://www.forticlient.com to buy or renew a
license key.
Note: All Premium Edition FortiClient Editions are issued with the following serial number
range FCT1000XXXXXXXXX.
Note: If you have a registration code, it cannot be activated during installation. You will
need to enter the registration key in the FortiClient console.
FortiClient Endpoint Security Version 4.0 MR2 User Guide
04-420-116429-20100108
http://docs.fortinet.com/ • Feedback
15
Complying with corporate policy
General
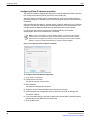
Figure 5: Entering a license key from the General > Status tab.
To enter a license key
1 Go to General > Status and click Enter License Key.
2 In the FortiClient Activation Wizard Welcome screen, click OK.
3 Enter your valid license key or registration code and click OK.
If you entered a registration code, the Online Activation screen appears.
4 Once the wizard has successfully activated FortiClient, click Finish.
5 If you used a registration code, you can now register your product by clicking on the
Fortinet link.
Figure 6: License window.
6 To view the serial number, go to General > Status. It is shown in the top right corner of
the window.
Complying with corporate policy
If FortiClient is centrally managed, a security policy can be set that requires antivirus, antispam, firewall, or web filtering features to be enabled. The Corporate Policy Compliance
section of the General page is visible if this is the case.
If FortiClient is not in compliance with the security policy, it cannot operate a VPN tunnel.
16
FortiClient Endpoint Security Version 4.0 MR2 User Guide
04-420-116429-20100108
http://docs.fortinet.com/ • Feedback
General
Locking and unlocking the software
The Corporate Policy Compliance section shows “FortiClient is compliant with corporate
policy” or it shows the Make FortiClient compliant with corporate policy check box. Select
the check box to bring FortiClient settings into compliance with the policy.
For more information, see the Endpoint Network Access Control chapter in the
Administrator’s Guide.
Locking and unlocking the software
You can modify FortiClient software settings only if your Windows account has
administrative privileges. You can prevent other administrative users from modifying the
settings by locking FortiClient with a password. If your FortiClient software is remotely
managed using the FortiManager System, the FortiManager administrator can lock your
configuration settings. If your FortiClient application is locked, the General Settings page
shows an Unlock button.
To lock the FortiClient application locally
1 Go to General > Status and click Lock Settings.
2 In the Input Password window, enter the password in the Password field and re-enter it
in the Confirm field.
3 Select OK.
To unlock the FortiClient application locally
1 Obtain the password from your administrator.
2 Go to General > Status and click Unlock.
3 Enter the password in the Password field.
4 Optionally, select Remove Password to permanently unlock the application.
This is not available if FortiManager has locked the FortiClient application.
5 Select OK.
6 When you have finished modifying settings, select Relock.
Note: Even if your FortiClient software is locked, you can perform antivirus scans, use VPN
tunnels, change VPN certificates and change CRLs.
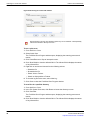
Configuring proxy server settings
If you use a proxy server for your LAN, you can specify the proxy server settings so that
the FortiClient software can go through the proxy server to get antivirus signature updates,
to submit viruses, and to obtain certificates online using simple certificate enrollment
protocol (SCEP).
FortiClient software supports HTTP, SOCKS v4, and SOCKS v5 proxy protocols.
To configure proxy server settings
1 Go to General > Connection.
FortiClient Endpoint Security Version 4.0 MR2 User Guide
04-420-116429-20100108
http://docs.fortinet.com/ • Feedback
17
Updating FortiClient
General
Figure 7: General > Connection settings
2 Select Enable proxy for Updates, Virus submission, and Online SCEP as needed.
3 For Proxy Type, select HTTP, SOCKS V4, or SOCKS V5.
4 Enter the proxy server’s IP Address and Port number.
You can get this information from your network administrator.
5 Enter the User name and Password.
6 Select Apply.
Updating FortiClient
You can view the current antivirus definition and antivirus engine version information and
configure updates on the Update page.
Each copy of the FortiClient software has a unique identifier called UID. The UID is
displayed at the upper right corner of the General > Update page. Whenever FortiClient
sends out an update request, it also sends out the ID number. If you encounter any update
problem, Fortinet technical support can use this number to pinpoint the problem.
If the FortiClient computer uses a proxy server, you can specify the proxy server settings
so that the FortiClient software can get updates through the proxy server. See
“Configuring proxy server settings” on page 17.
Updates can be run manually or scheduled to run automatically on a daily basis.
Note: If you are running the Standard edition of FortiClient, the definition files are updated
daily. They cannot be updated hourly. If you want hourly updates, you need to upgrade to
the Premium edition.
To initiate immediate updates
1 Go to General > Update.
18
FortiClient Endpoint Security Version 4.0 MR2 User Guide
04-420-116429-20100108
http://docs.fortinet.com/ • Feedback
General
Updating FortiClient
Figure 8: The General > Update window used to maintain FortiClient.
2 Click Update Now.
In the Update Status area, you can view the update process and results. A status of
“No data/engine update is available” means that your antivirus definitions and antivirus
engine are using the latest version.
To schedule updates
1 In the Update Schedule area, select Enable scheduled update.
2 Do one of the following:
• Select Daily and enter the time of day.
• Select Every and select the interval (1 to 24 hours).
3 Click Apply.
Caution: If you are running the Standard edition of FortiClient, you can only set the time of
day for which updates occur. The Standard edition can only be updated once a day. If you
want to be able to have hourly updates, you will need to purchase the Premium edition.
Note: The default update server is forticlient.fortinet.com. If you want to use a different
server, select the Use this server to update option at the top of the update page and enter
the URL of the update server. You do not need to specify http:// or https:// as part of the
URL.
Caution: If you are using the Standard edition of FortiClient, the Use this server to update
check box and field is unavailable. To use a different server, you need to upgrade to the
Premium edition.
To manually update the software and antivirus signatures
1 Download the FortiClient update package file (.pkg file) to the FortiClient computer.
FortiClient Endpoint Security Version 4.0 MR2 User Guide
04-420-116429-20100108
http://docs.fortinet.com/ • Feedback
19
Backing up and restoring FortiClient settings
General
2 Go to General > Update and click Manual Update.
3 In the Open window, locate the update package file and click Open.
Caution: If you have the Standard edition of FortiClient installed, you will not be able to
perform manual updates. If you want to perform manual updates, you will need to upgrade
to the Premium edition.
Keeping FortiClient updated without FortiGate or FortiClient Manager
If you are running FortiClient and it is not connected to a FortiGate unit or managed
through FortiClient Manager, you can keep the version up-to-date in the Update tab.
If your FortiClient is managed by a FortiGate unit or FortiClient Manager, this setting is not
available.
To download the latest FortiClient version without a FortiGate or FortiClient
Manager
1 Go to General > Update.
2 In the When a new version of FortiClient is available area, select one of the following:
•
Download and install the new version without notification
•
Download the new version and notify me before installing
•
Notify me before downloading or installing the new version
3 Click Apply.
Backing up and restoring FortiClient settings
If you have administrative privileges on your computer, you can save all FortiClient
settings to a file so that you can easily restore them at a later date. For example, if you are
forced to reinstall the software after replacing a hard drive, loading a backup will restore
FortiClient to the same settings it had when you made the backup. You can also use a
single backup file to configure multiple FortiClient installations with identical settings.
Note: Backup/Restore features are not available if the FortiClient application is centrally
managed by a FortiManager unit.
To back up the FortiClient settings
1 Go to General > Backup/Restore.
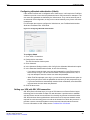
Figure 9: Backup and Restore settings
2 Click Backup.
3 Enter a file name and location in the Save As window.
20
FortiClient Endpoint Security Version 4.0 MR2 User Guide
04-420-116429-20100108
http://docs.fortinet.com/ • Feedback
General
Logs
4 Enter a password in the Input Password window. Enter the password again in the
Confirm field to ensure you typed it correctly. Remember this password because you
must enter it correctly when you restore the backup file.
To restore the FortiClient settings
1 Go to General > Backup/Restore.
2 Click Restore.
3 Choose the file you want to restore in the Open window.
4 Enter the password associated with the file.
FortiClient confirms that the configuration is restored.
5 Click OK.
Logs
Use the FortiClient logging feature to configure logging of different types of events for any
or all of the FortiClient services.
Configuring log settings
You can specify the log level, log type, log size, and log entry lifetime.
Caution: The Log Settings features are not available if you are using the Standard edition.
If you want to configure the log settings, you will need to upgrade to the Premium edition.
To configure log settings
1 Go to General > Log Settings.
Figure 10: Configuring log settings
2 Enter the Maximum Log Size.
The default is 5120 KB. Log entries are overwritten, starting with the oldest, when the
maximum log file size is reached.
3 In the Event Log Settings area, select the Log Level.
You can select Error, Warning, or Information. The default is Warning.
FortiClient Endpoint Security Version 4.0 MR2 User Guide
04-420-116429-20100108
http://docs.fortinet.com/ • Feedback
21
Logs
General
4 Select what to log.
You can select either All events or Check to select. If you choose Check to select,
specify the types of events to log.
5 Click Apply.
To configure remote logging
1 Go to General > Log Settings.
2 In the Remote logging section, select Server and enter the server IP address or FQDN
in the adjacent field.
3 Select FortiAnalyzer if you are using a FortiAnalyzer unit to record logs, otherwise
select Syslog.
4 From the Facilities list, select the name used to identify this FortiClient computer in the
logs. The default is local7.
5 If you are logging to a syslog, from the Syslog log level list, select the minimum severity
of logs to record.
6 Click Apply.
Viewing log files
The Log View displays logs of all events or only the events associated with a specific
service. You can view, save, clear, or refresh the log entries.
Figure 11: Viewing logs
To manage the log messages
1 Go to General > Log View.
2 From the dropdown list, select the log entry type you want to view.
3 Use the log navigation buttons to move between log entries or to move to the top or
bottom of the log file. The most recent log entries are displayed at the top of the list.
Optionally select a specific log entry from the log window to view the complete log entry
information.
4 To save the log messages, click Export.
5 To delete all the log messages, click Clear All.
6 To display the most recent log messages, click Refresh.
22
FortiClient Endpoint Security Version 4.0 MR2 User Guide
04-420-116429-20100108
http://docs.fortinet.com/ • Feedback
VPN
Virtual Private Network (VPN) technology allows users to connect to remote networks in a
secure way. Someone could be traveling to a business conference or working at home,
but thanks to VPNs, accessing a remote network from anywhere in the world is possible.
FortiClient Endpoint Security can establish a VPN tunnel between your computer and a
FortiGate unit or other VPN gateway. With the aid of this manual, you need only a few
pieces of information from the VPN administrator to configure the FortiClient VPN settings
Configuring VPNs
If the VPN gateway is a FortiGate unit running FortiOS 3.0 or later, it can download the
settings to your FortiClient application. You need to know only the IP address or domain
name of the VPN gateway. See “Setting up a VPN with automatic configuration” on
page 23.
If the VPN gateway is a FortiGate unit running FortiOS 2.80 or earlier, or it is a third-party
gateway, you must configure the FortiClient VPN settings manually. You need to know:
•
the IP address or domain name of the VPN gateway
•
the IP address and netmask of the network(s) you want to reach through the VPN
gateway
•
in some cases, a virtual IP address setting
•
unless default settings are used, IKE and IPsec policy settings
•
if extended authentication (XAuth) is used, your user name and password
See “Setting up a VPN with manual configuration” on page 24.
If you are setting up an SSL VPN connection, see “Setting up a VPN with SSL VPN
connection” on page 31.
If you are configuring a VPN to use either local digital certificates or smartcard/eToken
certificate for authentication, see “Managing digital certificates” on page 38 before
proceeding.
Digital certificates are not required for configuring FortiClient VPN connections. Digital
certificates are an advanced feature provided for the convenience of system
administrators. This manual assumes the user has prior knowledge of how to configure
digital certificates for their implementation.
Setting up a VPN with automatic configuration
If the remote FortiGate gateway is configured as a VPN policy deployment server, you can
configure the FortiClient software to download the VPN policies from the FortiGate
gateway.
The policy server has a daemon running all the time for incoming policy download
requests. This daemon communicates with the FortiClient computer to process user
authentication, policy lookup, and delivery. After the policy is sent out, the daemon closes
the SSL connection, and you can start up the VPN tunnel from the FortiClient side.
FortiClient Endpoint Security Version 4.0 MR2 User Guide
04-420-116429-20100108
http://docs.fortinet.com/ • Feedback
23
Configuring VPNs
VPN
Note: For VPNs with automatic configuration, only preshared keys are supported.
Certificates are not supported.
On the FortiClient side, you only need to create a VPN name and specify the IP address of
the FortiGate gateway.
To add a VPN with automatic configuration on the FortiClient computer
1 Go to VPN > Connections.
2 Click Advanced and select Add.
3 In the New Connection window, enter a connection name.
4 For Configuration, select Automatic IPsec.
5 For Policy Server, enter the IP address or FQDN of the FortiGate gateway.
6 Click OK.
Setting up a VPN with manual configuration
This VPN configuration described here uses default FortiClient settings and preshared
keys for VPN authentication.
To set up a VPN connection, your FortiClient settings must match those of the VPN server,
a FortiGate unit, for example.
To use digital certificates for VPN authentication, see “Managing digital certificates” on
page 38.
Configuring basic FortiClient VPN settings
Go to VPN > Connections to add, delete, edit, or rename a VPN connection.
To add a FortiClient to FortiGate VPN, you need to:
24
•
Set up the VPN tunnel from FortiClient to the remote FortiGate gateway.
•
If your administrator requires it, configure the FortiClient VPN to use a virtual IP
address, either manually assigned or obtained using DHCP over IPSec.
•
Optionally, add the IP addresses of additional networks behind the remote gateway.
•
Configure Internet browsing over IPSec if you want to access the Internet through the
VPN tunnel.
FortiClient Endpoint Security Version 4.0 MR2 User Guide
04-420-116429-20100108
http://docs.fortinet.com/ • Feedback
VPN
Configuring VPNs
Figure 12: Creating a new VPN connection
To create a FortiClient VPN configuration
1 Go to VPN > Connections.
2 Click Advanced and select Add.
3 Enter the following information and click OK.
Connection Name
Enter a descriptive name for the connection.
VPN Type
Select Manual IPsec
Remote Gateway
Enter the IP address or the fully qualified domain name (FQDN) of
the remote gateway.
Remote Network
Enter the IP address and netmask of the network behind the
FortiGate unit.
Authentication Method
Select one of the following:
• Pre-shared Key - Enter the pre-shared key in the Preshared
Key field.
• X509 Certificate - Select the certificate in the X509 Certificate
field.
• Smartcard X509 Certificate - Insert the Smartcard into the
reader and select the certificate.
To create a configuration based on an existing configuration
1 Go to VPN > Connections.
2 Select the connection to use as the basis for this connection.
3 Click Advanced and select Clone.
4 Enter a name for the new connection and click OK.
5 Select the name of the clone in the VPN Connections list.
6 Click Advanced and select Edit.
FortiClient Endpoint Security Version 4.0 MR2 User Guide
04-420-116429-20100108
http://docs.fortinet.com/ • Feedback
25
Configuring VPNs
VPN
7 Modify the settings of the new connection as needed.
To set the virtual IP address
If your configuration requires a virtual IP address, do the following:
1 Go to VPN > Connections.
2 Double-click a connection.
The Edit Connection window opens.
3 Click Advanced.
4 In the Advanced Settings window, select the Acquire Virtual IP Address check box.
5 Click Config.
6 In the Virtual IP Acquisition window, do one of the following:
• Select Dynamic Host Configuration Protocol (DHCP) over IPSec.
• Select Manually Set and enter the IP address, Subnet Mask, DNS Server and WINS
Server addresses as required. For details, see “Configuring Virtual IP address
acquisition” on page 30.
7 Click OK.
8 Click OK.
To add additional remote networks to a connection
1 Go to VPN > Connections.
2 Double-click the connection which can access the network that you want to add.
The Edit Connection window opens.
3 Select Advanced.
The Advanced Settings window opens.
4 In the Remote Network area, click Add.
5 In the Network Editor window, enter the IP Address and Subnet mask of the remote
network and click OK.
6 Repeat Steps 4 and 5 for each additional network you want to add.
You can specify up to 16 remote networks.
7 Click OK.
8 Click OK.
To use Internet browsing over IPSec
1 Go to VPN > Connections.
2 Double-click a connection.
The Edit Connection window opens.
3 Click Advanced.
4 In the Advanced Settings window, click Add.
5 Enter 0.0.0.0./0.0.0.0 and click OK.
6 Click OK.
7 Click OK.
26
FortiClient Endpoint Security Version 4.0 MR2 User Guide
04-420-116429-20100108
http://docs.fortinet.com/ • Feedback
VPN
Configuring VPNs
Note: For the FortiClient computer to be able to use Internet browsing over IPSec, the
remote FortiGate gateway must also be configured to allow such traffic.
To transfer VPN configuration settings to your Windows mobile device
1 Connect your mobile device to your computer using the USB cable.
2 Start Microsoft ActiveSync and make sure that it detects your device.
3 Go to VPN > Connections.
4 Click Advanced and select Sync to Mobile Device.
Your tunnel definitions are transferred to your mobile device.
Configuring IKE and IPSec policies
FortiClient has two preconfigured IKE and IPSec policies:
•
Use the Legacy policy for a VPN to a FortiGate unit running FortiOS v2.36, and for any
Cisco gateways that only support legacy settings.
•
Use the Default policy for a VPN to a FortiGate unit running FortiOS v2.50 or higher.
Note: Two IKE phase1 authentication methods can be used for IPSec VPN :
• Pre-shared key
• RSA signature (rsa-sig)
The key pair (private key + certificate) used for rsa-sig authentication can be :
• Stored on the FortiClient itself ('X509 Certificate')
• Retrieved from a secured eToken repository ('SmartCard X509 Certificate')
FortiClient v3.0 and v4.0 are only able to use MD5 hash algorithm to create the HASH
payload when SmartCard is used. If SHA-1 is used then an erroneous HASH payload is
generated and subsequently signed (SIG payload) by FortiClient.
This SIG payload is then sent to the remote peer which fails to process it. If FortiOS is used
as dialup server then FortiOS IKE debug will report "signature verification failed" upon
receipt of the erroneous SIG payload.
For FortiClient v4.0 MR1 Patch 4 and above, there is HMAC SHA-1 support. For FortiClient
v3.0 to v4.0 MR1 Patch 3, only selct MD5 as a hash algorithm in phase 1 when Smartcard
is used.
To modify the Legacy or Default policy settings
1 Go to VPN > Connections.
2 Double-click a connection.
Click Edit Connection window opens.
3 Select Advanced.
The Advanced Settings window opens.
4 In the Policy area, click Legacy or Default.
The policy settings appear in the IKE and IPSec boxes. You can use the Legacy or
Default policies. If you want to configure the detailed settings, continue with following
steps.
5 In the Policy area, click Config.
6 In the Connection Detailed Settings window, configure the settings in the following
table. Click OK to save the settings.
You can also click Legacy or Default to go back to the original legacy or default
settings.
FortiClient Endpoint Security Version 4.0 MR2 User Guide
04-420-116429-20100108
http://docs.fortinet.com/ • Feedback
27
Configuring VPNs
VPN
Figure 13: Editing the detailed configuration settings
Table 3: FortiClient IKE settings correspond to FortiGate phase 1 settings (Part 1 of 2)
28
IKE Proposals
Add or delete encryption and authentication algorithms.
The proposal list is used in the IKE negotiation between the FortiClient
software and the remote FortiGate unit. The FortiClient software will
propose the algorithm combinations in order, starting at the top of the list.
The remote FortiGate gateway must use the same proposals.
Mode
Select either Main or Aggressive.
Main mode provides an additional security feature called identity protection
which hides the identities of the VPN peers so that they cannot be
discovered by passive eavesdroppers. Main mode requires the exchange
of more messages than Aggressive mode. It is also difficult to use efficiently
when a VPN peer uses its identity as part of the authentication process.
When using aggressive mode, the VPN peers exchange identifying
information in the clear.
FortiClient Endpoint Security Version 4.0 MR2 User Guide
04-420-116429-20100108
http://docs.fortinet.com/ • Feedback
VPN
Configuring VPNs
Table 3: FortiClient IKE settings correspond to FortiGate phase 1 settings (Part 2 of 2)
DH Group
Select one or more Diffie-Hellman groups from DH group 1, 2,
and 5.
• When the VPN peers have static IP addresses and use aggressive
mode, select a single matching DH group.
• When the VPN peers use aggressive mode in a dialup configuration,
select up to three DH groups for the dialup server and select one DH
group for the dialup user (client or gateway).
• When the VPN peers employ main mode, you can select multiple DH
groups.
Key Life
Enter the number in seconds.
The keylife is the amount of time in seconds before the IKE encryption key
expires. When the key expires, a new key is generated without interrupting
service. P1 proposal keylife can be from 120 to 172,800 seconds.
Local ID
If you are using peer IDs for authentication, enter the peer ID FortiClient will
use to authenticate itself to the remote FortiGate gateway.
If you are using certificates for authentication, you can enter the local ID,
which is the distinguished name (DN) of the local certificate.
Note there is no limit to how many FortiClient peers can use the same local
ID.
Table 4: FortiClient IPSec settings correspond to FortiGate phase 2 settings
IPSec Proposals
Add or delete encryption and authentication algorithms.
The remote FortiGate gateway must use the same proposals.
DH Group
Select one Diffie-Hellman group from DH group 1, 2, and 5. DH group 1 is
least secure. DH group 5 is most secure. You cannot select multiple DH
Groups.
The remote FortiGate gateway must use the same DH Group settings.
Key Life
Select either Seconds or KBytes for the keylife, or select both.
The keylife causes the IPSec key to expire after a specified amount of time,
after a specified number of kbytes of data have been processed by the VPN
tunnel, or both. If you select both, the key does not expire until both the time
has passed and the number of kbytes have been processed.
When the key expires, a new key is generated without interrupting service.
P2 proposal keylife can be from 120 to 172800 seconds or from 5120 to
2147483648 kbytes.
Table 5: FortiClient advanced VPN settings
Replay Detection
With replay detection, the FortiClient software checks the sequence
number of every IPSec packet to see if it has been previously received. If
the same packets exceed a specified sequence range, the FortiClient
software discards them.
PFS
Perfect forward secrecy (PFS) improves security by forcing a new
Diffie-Hellman exchange whenever keylife expires.
NAT Traversal
Enable this option if you expect the IPSec VPN traffic to go through a
gateway that performs NAT. If no NAT device is detected, enabling NAT
traversal has no effect.
If you enable NAT traversal, you can set the keepalive frequency.
NAT traversal is enabled by default.
Keepalive
Frequency
If NAT Traversal is selected, enter the Keepalive Frequency in seconds.
The keepalive frequency specifies how frequently empty UDP packets are
sent through the NAT device to ensure that the NAT mapping does not
change until the IKE and IPSec keylife expires.
The keepalive frequency can be from 0 to 900 seconds.
Autokey Keep Alive Enable this option to keep the VPN connection open even if no data is
being transferred.
Dead Peer
Detection
Enable this option to clean up dead VPN connections and establish new
VPN connections.
FortiClient Endpoint Security Version 4.0 MR2 User Guide
04-420-116429-20100108
http://docs.fortinet.com/ • Feedback
29
Configuring VPNs
VPN
Configuring Virtual IP address acquisition
The FortiClient software supports two methods for virtual IP address acquisition: dynamic
host configuration protocol (DHCP) over IPSec and manual entry.
Select the DHCP over IPSec option to allow the DHCP server in the remote network to
dynamically assign an IP address to your FortiClient computer after the VPN connection is
established.
Select the Manually Set option to manually specify a virtual IP address for your FortiClient
computer. This virtual IP address must be an actual address in the remote network. You
can also specify the DNS and WINS server IP addresses of the remote network.
For information about how to configure the FortiGate gateway, see FortiGate
Administration Guide and FortiGate IPSec VPN Guide.
Note: If you are connecting to a v2.50 FortiGate gateway, you cannot set the virtual IP
address to be in the same subnet of the remote network, because the v2.50 FortiGate
gateway does not support proxy ARP. If you are connecting to a v2.80 or later FortiGate
gateway, consult your network administrator for a proper virtual IP address.
Figure 14: Configuring virtual IP address acquisition
To configure virtual IP address acquisition
1 Go to VPN > Connections.
2 Double-click a connection.
The Edit Connection window opens.
3 Click Advanced.
The Advanced Settings window opens.
4 Select the Acquire virtual IP address check box and click Config.
5 Select Dynamic Host Configuration Protocol (DHCP) over IPSec or Manually Set.
The default is DHCP.
6 If you select Manually Set, enter the IP address and Subnet Mask. Optionally specify
the DNS Server and WINS Server IP addresses.
7 Click OK three times.
30
FortiClient Endpoint Security Version 4.0 MR2 User Guide
04-420-116429-20100108
http://docs.fortinet.com/ • Feedback
VPN
Configuring VPNs
Configuring eXtended authentication (XAuth)
If the remote FortiGate unit is configured as an XAuth server, it will require the FortiClient
software to provide a user name and password when a VPN connection is attempted. The
user name and password are defined by the XAuth server. They can be saved as part of
an advanced VPN configuration, or they can be entered manually every time a connection
is attempted.
For information about how to configure the XAuth server, see FortiGate Administration
Guide and FortiGate IPSec VPN Guide.
Figure 15: Configuring eXtended authentication
To configure XAuth
1 Go to VPN > Connections.
2 Double-click a connection.
The Edit Connection window opens.
3 Click Advanced.
4 In the Advanced Settings window, click Config for the eXtended Authentication option.
5 In the Extended Authentication window, do one of the following:
• If you want to enter the login user name and password for each VPN connection,
select Prompt to login. You can choose whether FortiClient permits three, two, or
only one attempt to enter the correct user name and password.
• When FortiClient prompts you to log in, you can select the password save option so
that you do not have to enter the password the next time you are prompted to log in.
• If you want FortiClient to automatically send the XAuth credentials, select Automatic
login and enter the user name and password.
6 Click OK three times.
Setting up a VPN with SSL VPN connection
SSL VPN (Secure Sockets Layer) is a type of VPN that runs on Secure Socket Layers
technology and is accessible via https over web browsers. It permits users to establish
safe and secure remote access sessions from virtually any Internet connected browser.
SSL VPN solutions allow organizations to deliver the level of corporate network access
required for each connecting person as well as the location from which they access it. It
provides a secure connection between remote users and internal network resources.
For more information on SSL VPNs, see the FortiGate SSL VPN Guide.
FortiClient Endpoint Security Version 4.0 MR2 User Guide
04-420-116429-20100108
http://docs.fortinet.com/ • Feedback
31
Using the FortiClient VPN client
VPN
To create an SSL VPN connection
1 Go to VPN > Connections.
2 Click Advanced and select Add.
3 In the New Connection window, enter the Connection Name.
4 Select the SSL VPN type.
5 Enter the IP address or the fully qualified domain name (FQDN) of the remote gateway.
6 Enter the Username and Password for the remote gateway.
7 Click OK.
Using the FortiClient VPN client
When you have configured your VPN connections, you can use FortiClient to make secure
connections.
Testing the connection
After you configure a VPN, you can test the VPN connection from your FortiClient
computer. This is optional, but it provides more information than the Connect function if
the connection fails.
To test the connection
1 Go to VPN > Connections.
2 Select the connection you want to test.
3 Click Advanced and select Test.
A Test Connectivity window opens and begins to negotiate the VPN connection with
the remote FortiGate unit.
If the test is successful, the last line of the log will read “IKE daemon stopped”.
Note: For a VPN with automatic configuration, the FortiClient software downloads the
VPN policy first. To test the VPN connection, the FortiClient software attempts to
negotiate the VPN connection but does not actually open a VPN connection.
If the last line of the log reads “Next_time = x sec”, where x is an integer, the test
was not successful. The FortiClient software is continuing to try to negotiate the
connection. See “Troubleshooting VPN connections” on page 37.
4 Click Close.
32
FortiClient Endpoint Security Version 4.0 MR2 User Guide
04-420-116429-20100108
http://docs.fortinet.com/ • Feedback
VPN
Using the FortiClient VPN client
Figure 16: A successful connection test
Figure 17: A failed connection test
Setting connection options
The following options apply to VPN connections. You can find them on the VPN >
Connections page. Select Apply after making any changes.
Start VPN before logging on to
Windows
Select this option if you need to log on to a Windows domain
through a VPN when you start up your Windows workstation.
See “Connecting to a VPN before Windows logon” on page 35.
Keep IPSec service running
forever unless manually
stopped
Select to retry dropped connections indefinitely. By default, the
FortiClient software retries a dropped connection four times.
Beep when connection error
occurs
Select if you want the FortiClient software to sound a beep
when a VPN connection drops.
By default, the alarm stops after 60 seconds, even if the
connection has not been restored. You can change the duration
or select Continuously so that the alarm stops only when the
connection is restored.
FortiClient Endpoint Security Version 4.0 MR2 User Guide
04-420-116429-20100108
http://docs.fortinet.com/ • Feedback
33
Using the FortiClient VPN client
VPN
Connecting to the remote network
After you set up a VPN connection, you can start or stop the connection as required.
Note: If the FortiClient computer is centrally managed and does not comply with the
corporate security policy, the VPN will not operate. Select Make Compliant with Corporate
Policy from the system tray menu to make the required changes to FortiClient settings. For
more information, see “Complying with corporate policy” on page 16.
To connect to a remote FortiGate gateway
1 Go to VPN > Connections.
2 Select the connection you want to start.
3 Click Connect.
The FortiClient software opens a log window and begins to negotiate a VPN
connection with the remote FortiGate firewall. If the negotiation is successful and the
connection is established, the last line of the log will read “Negotiation
Succeeded!”
4 Select OK or wait for the log window to close automatically.
If the last line of the log is “Negotiation failed! Please check log” and the
log window does not close automatically, the connection attempt failed. Test the
connection to verify the configuration.
5 To stop the connection, select Disconnect.
Using the FortiClient SSL VPN tunnel client
The FortiClient SSL VPN tunnel client is available for Windows, and Mac OSx systems.
The list of available connections are from the list of VPN Connections in FortiClient.
Figure 18: FortiClient SSL VPN
To use the SSL VPN standalone tunnel client
1 Go to Start > All Programs > FortiClient > FortiClient SSL VPN.
2 Select the Connection Name from the list.
34
FortiClient Endpoint Security Version 4.0 MR2 User Guide
04-420-116429-20100108
http://docs.fortinet.com/ • Feedback
VPN
Using the FortiClient VPN client
3 Enter the Username and Password, if required. The username and password may
already be entered.
4 Select a Client Certificate, if required.
5 Click Connect.
6 To manually terminate the connection, click Exit.
To create a new connection
1 Go to Start > All Programs > FortiClient > FortiClient SSL VPN.
2 Click Settings.
3 Click New Connection.
4 Enter the following information and click OK:
•
Connection Name — Enter a name for the connection.
•
Description — Enter a description name.
•
Server Address — Enter the IP address of the server you need to access.
•
Username — Enter your user name.
•
Password — Enter the password associated with your user account.
•
Client Certificate — Select a certification, if required.
5 In the Global Settings area, select the Keep connection alive until manually stopped
check box to have the connection stay up until you log out.
6 Click OK.
7 Click Connect.
Connecting to a VPN before Windows logon
You can connect to a VPN before you log onto Windows if you have selected the Start
VPN before logging on to Windows option (see “Setting connection options” on page 33).
A FortiClient VPN icon is displayed on the Windows login screen.
Figure 19: VPN icon on Windows login screen
No VPN
connection
Active VPN
connection
You need to connect to the VPN before logging onto Windows only if the VPN provides the
connection to your Windows domain. In this case, you should not disconnect from the
VPN until you log off of the Windows domain.
To connect to a VPN from the Windows login screen
1 Click the VPN icon.
2 Select the required VPN connection from the Connections list.
3 Click Connect.
The FortiClient software opens a log window and begins to negotiate a VPN
connection with the remote FortiGate firewall. If the negotiation is successful and the
connection is established, the last line of the log will read “Negotiation
Succeeded!”
4 Click OK or wait for the IKE Negotiation window to close automatically.
FortiClient Endpoint Security Version 4.0 MR2 User Guide
04-420-116429-20100108
http://docs.fortinet.com/ • Feedback
35
Monitoring VPN connections
VPN
5 Log on to the Windows domain.
6 After you log off of the Windows domain, select the VPN icon to disconnect the VPN.
Monitoring VPN connections
Go to VPN > Monitor to view current VPN connection and traffic information.
Figure 20: VPN Monitor
Current connection
Name
The name of the current VPN connection.
Local Gateway
The IP address of the local gateway (the FortiClient computer).
Remote
The IP address of the remote gateway (the FortiGate unit).
Time Out (sec)
The remaining lifetime of the VPN connection.
Incoming
Packets
The number of packets received.
Bytes
The number of bytes received.
Encryption
The encryption algorithm and key.
Auth
The authentication algorithm and key.
Outgoing
Packets
The number of packets sent.
Bytes
The of number bytes sent.
Encryption
The encryption algorithm and key.
Auth
The authentication algorithm and key.
Traffic summary
The traffic summary displays a graph of the incoming and outgoing VPN traffic. The left
column displays incoming traffic and the right column displays outgoing traffic. The total
number of incoming and outgoing bytes transferred is also displayed.
36
FortiClient Endpoint Security Version 4.0 MR2 User Guide
04-420-116429-20100108
http://docs.fortinet.com/ • Feedback
VPN
Monitoring VPN connections
Note: When traffic is transferred over an open VPN connection, the FortiClient system tray
icon will change to a traffic summary graph. The red column indicates incoming traffic. The
green column indicates outgoing traffic.
Exporting and importing VPN policy files
You can export a VPN policy file to your local or network computer as a backup of the VPN
configuration settings. If required, you can import this file back to your local FortiClient
computer or to other FortiClient computers.
To export a VPN policy file
1 Go to VPN > Connections.
2 Select the connection for which you want to export the VPN policy file.
3 Click Advanced and select Export.
4 In the Open window, select a file folder and enter a file name.
5 Click Save.
To import a VPN policy file
1 Go to VPN > Connections.
2 Click Advanced and select Import.
3 Locate the file and click Open.
Note: If the imported file has the same file name as an existing connection, it will overwrite
the existing one.
Troubleshooting VPN connections
Most connection failures are due to a configuration mismatch between the remote
FortiGate unit and the FortiClient software.
The following are some tips to troubleshoot a VPN connection failure:
•
PING the remote FortiGate firewall from the FortiClient computer to verify you have a
working route between the two.
•
Check the FortiClient software configuration.
Table 6 lists some common FortiClient software configuration errors.
•
Check the FortiGate firewall configuration.
Table 7 lists some common FortiGate Antivirus Firewall configuration errors.
Table 6: Common FortiClient software configuration errors
Configuration Error
Correction
Wrong remote network information.
Check the IP addresses of the remote gateway and
network.
Wrong preshared key.
Reenter the preshared key.
Wrong Aggressive Mode peer ID.
Reset to the correct Peer ID.
Mismatched IKE or IPSec proposal
combination in the proposal lists.
Make sure both the FortiClient software and the remote
FortiGate gateway use the same proposals.
Wrong or mismatched IKE or IPSec
Diffie-Hellman group.
Make sure you select the correct DH group on both
ends.
No Perfect Forward Secrecy (PFS) when Enable PFS.
it is required.
FortiClient Endpoint Security Version 4.0 MR2 User Guide
04-420-116429-20100108
http://docs.fortinet.com/ • Feedback
37
Managing digital certificates
VPN
Table 7: Common FortiGate Antivirus Firewall configuration errors
Configuration Error
Correction
Wrong direction of the encryption policy.
For example, external-to-internal instead
of internal-to-external.
Change the policy to internal-to-external.
Wrong firewall policy source and
destination addresses.
Reenter the source and destination address.
Wrong order of the encryption policy in
the firewall policy table.
The encryption policy must be placed above other nonencryption policies.
Managing digital certificates
To use local or smartcard digital certificates, you need:
•
a signed certificate,
•
the certificate authority (CA) certificates for any CAs you are using,
•
any applicable certificate revocation lists (CRLs) or the URL for Online Certificate
Status Protocol (OCSP) validation.
Getting a signed local certificate
If you want to have a local certificate signed by the CA server and then import it into
FortiClient, following the steps below.
The FortiClient software can use a manual, file based enrollment method or the simple
certificate enrollment protocol (SCEP) to get certificates. SCEP is simpler, but can only be
used if the CA supports SCEP.
File-based enrollment requires copying and pasting text files from the local computer to
the CA, and from the CA to the local computer. SCEP automates this process but CRLs
must still be manually copied and pasted between the CA and the local computer.
Note: The digital certificates must comply with the X.509 standard.
General steps to get a signed local certificate
1 Generate the local certificate request. See “To generate a local certificate request” on
page 39.
2 Export the local certificate request to a .csr file. See “To export the local certificate
request” on page 40.
3 Send the signed local certificate request to a CA. See “To send the certificate request
to a CA” on page 40.
4 Retrieve the signed certificate from a CA. See “To retrieve the signed local certificate
from the CA” on page 40.
5 Import the signed local certificate into FortiClient. You can also backup the certificate
by exporting it. See “To import the signed local certificate” on page 40 and “To export
the signed local certificate” on page 41.
38
FortiClient Endpoint Security Version 4.0 MR2 User Guide
04-420-116429-20100108
http://docs.fortinet.com/ • Feedback
VPN
Managing digital certificates
Figure 21: Generating a local certificate request
To generate a local certificate request
1 Go to VPN > My Certificates.
2 Click Generate.
3 Enter a Certificate Name.
4 Under subject information, select the ID Type for the subject.
You can select from Domain Name, Email Address or IP Address.
5 Enter the information for the ID type that you selected.
Domain name
Enter the fully qualified domain name of the FortiClient computer being
Email address
Enter the email address of the owner of the FortiClient computer being
IP address
Enter the IP address of the FortiClient computer being certified.
certified.
certified.
6 Optionally, click Advanced and enter the advanced setting information and click OK.
Email
Enter a contact email address for the FortiClient computer user.
Department
Enter a name that identifies the department or unit within the organization
requesting the certificate for the FortiClient computer (such as
Manufacturing or MF).
Company
Enter the legal name of the organization requesting the certificate for the
FortiClient computer.
City
Enter the name of the city or town where the FortiClient Computer is
located.
State/Province
Enter the name of the state or province where the FortiClient computer is
located.
Country
Enter the name of the country where the FortiClient computer is located.
7 Select either File Based or Online SCEP as the Enrollment Method.
FortiClient Endpoint Security Version 4.0 MR2 User Guide
04-420-116429-20100108
http://docs.fortinet.com/ • Feedback
39
Managing digital certificates
VPN
8 If you selected file based enrollment, click OK.
The private/public key pair is generated and the certificate request is displayed in the
My Certificates list with the type of Request. Continue with “To export the local
certificate request”.
9 If you selected Online SCEP as the Enrollment Method, select an issuer CA from the
list provided or enter the URL of the CA server.
If the FortiClient computer uses a proxy server, you must configure the proxy server
settings before you can use online SCEP. See “Configuring proxy server settings” on
page 17.
10 In the Challenge Phrase field, enter the challenge phrase if the certificate authority
requires it.
11 In the Key Size (bits) field, select the VPN certificate key size (1024 - 4096 bits).
12 Click OK. The FortiClient software:
• submits the local certificate request,
• retrieves and imports the signed local certificate,
• retrieves and imports the CA certificate.
The signed local certificate is displayed on the Local Certificates list with the type of
Certificate. The CA certificate is displayed on the CA Certificates list. The expiration
dates of the certificates are listed in the Valid To column of each list. The FortiClient
software generates 1024bit keys.
Continue with “Validating certificates” on page 42.
To export the local certificate request
1 Go to VPN > My Certificates.
2 From the certificate list, select the local certificate to export.
3 Click Export.
4 Name the file and save it in a directory on the FortiClient computer.
After exporting the certificate request, you can submit it to the CA so that the CA can
sign the certificate.
To send the certificate request to a CA
1 On the FortiClient computer, open the local certificate request using a text editor.
2 Connect to the CA web server.
3 Follow the CA web server instructions to:
• add a base64 encoded PKCS#10 certificate request to the CA web server,
• paste the certificate request to the CA web server,
• submit the certificate request to the CA web server.
To retrieve the signed local certificate from the CA
After you receive notification from the CA that it has signed the certificate request, connect
to the CA web server and download the signed local certificate to the FortiClient computer.
To import the signed local certificate
1 Go to VPN > My Certificates.
2 Click Import.
40
FortiClient Endpoint Security Version 4.0 MR2 User Guide
04-420-116429-20100108
http://docs.fortinet.com/ • Feedback
VPN
Managing digital certificates
3 Enter the path or browse to locate the signed local certificate on the FortiClient
computer.
4 Click OK.
The signed local certificate is displayed on the My Certificates list with the Type as
Certificate. The expiration date of the certificate is listed in the Valid To column.
To export the signed local certificate
1 Go to VPN > My Certificates.
2 Select the certificate and click Export.
3 In the Save As window, select the folder where you want to save the file.
4 Enter a file name.
5 Select either PKCS7 or PKCS12. If you select PKCS12, you must enter a password of
at least eight characters.
6 Click Save.
Getting a signed smartcard certificate
If you are using a USB token (smartcard) certificate for authentication, you must also have
the certificate signed by the CA server and install the signed certificate on your token.
The following procedures use a Windows 2000 Advanced Server as an example.
Note: Current FortiClient releases have been tested with the Aladdin eToken PRO and
Aladdin eToken NG-OTP series USB tokens.
General steps to get a signed smartcard certificate
1 Send the certificate request to the CA server. See “To send a certificate request” on
page 41.
2 Install the signed certificate on the token. See “To install a certificate” on page 42.
To send a certificate request
1 Log on to the CA server, for example, http://<CA_server>/certsrv.
2 Select Request a certificate, then select Next.
3 Select Advanced request, then select Next.
4 Select Submit a certificate request to this CA using a form.
5 In the request form:
• Enter the identifying information.
• For Intended Purpose, select Client Authentication Certificate.
• For CSP, select eToken Base Cryptographic Provider.
• Leave all other default settings.
6 Click Submit.
7 When prompted to enter the eToken password, enter the password. If you have not
plugged the USB token into your computer’s USB port, you must do so now. Then the
CA Web page displays that your certificate request has been received.
FortiClient Endpoint Security Version 4.0 MR2 User Guide
04-420-116429-20100108
http://docs.fortinet.com/ • Feedback
41
Managing digital certificates
VPN
To install a certificate
1 Log on to the CA Server if the certificate has been signed.
2 Select Checking on a pending certificate, then select Next.
3 Select the certificate request, then select Next.
4 Select Install this certificate to install the certificate to the USB token.
Getting a CA certificate
For the FortiClient software and the FortiGate gateway to authenticate themselves to each
other, they must both have a CA certificate from the same CA.
The FortiClient computer obtains the CA certificate to validate the digital certificate that it
receives from the remote VPN peer. The remote VPN peer obtains the CA certificate to
validate the digital certificate that it receives from the FortiClient computer.
Note: The CA certificate must comply with the X.509 standard.
To retrieve the CA certificate
1 Connect to the CA web server.
2 Follow the CA web server instructions to download the CA certificate.
To import the CA certificate
1 Go to VPN > CA Certificates.
2 Click Import.
3 Enter the path or browse to locate the CA certificate on the FortiClient computer.
4 Click OK.
The CA certificate is displayed on the CA Certificates list. The expiration date of the
certificate is listed in the Valid To column.
Validating certificates
FortiClient can validate certificates using Online Certificate Status Protocol (OCSP) or
Certificate Revocation Lists (CRL).
A CRL is a list of CA certificate subscribers paired with digital certificate status. The list
contains the revoked certificates and the reason(s) for revocation. It also records the
certificate issue dates and the CAs that issued them.
The FortiClient software uses the CRL to ensure that the certificates belonging to the CA
and the remote VPN peer are valid.
OCSP, if available, provides more up-to-date validation of certificates without maintaining
CRLs in the FortiClient application.
To enable OCSP
1 Go to VPN > CRL.
2 Select Enable OCSP.
3 In the Responder Host box, enter your OCSP responder host name.
Your network administrator can provide this information.
4 In the Port box, enter your CA’s OCSP port number. The default is 80.
5 Click Apply.
42
FortiClient Endpoint Security Version 4.0 MR2 User Guide
04-420-116429-20100108
http://docs.fortinet.com/ • Feedback
VPN
Managing digital certificates
To retrieve the CRL
1 Connect to the CA web server.
2 Follow the CA web server instructions to download the CRL.
To import the CRL
1 Go to VPN > CRL.
2 Click Import.
3 Enter the path or browse to locate the CRL on the FortiClient computer.
4 Click OK.
The CRL is displayed on the CRL list.
FortiClient Endpoint Security Version 4.0 MR2 User Guide
04-420-116429-20100108
http://docs.fortinet.com/ • Feedback
43
Managing digital certificates
44
VPN
FortiClient Endpoint Security Version 4.0 MR2 User Guide
04-420-116429-20100108
http://docs.fortinet.com/ • Feedback
WAN Optimization
WAN (Wide Area Network) optimization accelerates a broad range of applications
accessed by distributed workforces. Factors that can affect the performance of
applications deployed in a WAN include:
•
bandwidth
•
latency
•
throughput
•
congestion
•
packet loss
Configuring WAN optimization consists of adding rules that match traffic accepted by a
firewall policy according to source and destination addresses and destination ports of the
traffic in addition to defining the WAN optimization techniques to be applied to the traffic.
FortiClient WAN optimization works together with WAN optimization on a FortiGate unit to
accelerate network traffic between a computer running version 4.0 or greater of the
FortiClient application and a network behind a FortiGate unit. When a user of a computer
with FortiClient WAN optimization enabled attempts to connect to network resources
behind a server-side FortiGate unit, the FortiClient application automatically detects if
WAN optimization is enabled on the FortiGate unit. If WAN optimization is detected and
the FortiClient application can successfully negotiate a WAN optimization tunnel with the
FortiGate unit, a WAN optimization tunnel starts.
FortiClient WAN optimization includes protocol optimization settings selected in the
FortiClient application and byte caching (byte caching is enabled by default in the
FortiClient application and cannot be disabled). Web caching is applied if selected in the
passive rule on the FortiGate unit that accepts FortiClient WAN optimization tunnel
requests.
Figure 22: FortiClient WAN optimization topology
Caution: For new installation of 4.0 MR2, the feature is only available via customizing the
MSI package with fcrepackager, which makes the feature an installable option. If you are
upgrading from a earlier release where WAN optimization is already installed, the feature
will be preserved by the upgrade.
For more information, see the FortiClient Administration Guide.
FortiClient Endpoint Security Version 4.0 MR2 User Guide
04-420-116429-20100108
http://docs.fortinet.com/ • Feedback
45
Enabling WAN Optimization
WAN Optimization
Note: Setting the MSI public property OPTIMIZE=0 will mean that even critical files are not
pre-scanned. However, this setting does not stop the post-installation automatic database
updates by the antivirus and firewall features.
For more information on WAN Optimization with a FortiGate unit, see the FortiGate WAN
Optimization, Web Cache, and Web Proxy Guide.
Enabling WAN Optimization
FortiClient WAN Optimization works exclusively with WAN optimization on a FortiGate unit
to accelerate network access. FortiClient will automatically detect if WAN optimization is
enabled on the optimizing FortiGate unit it is connected to and transparently make use of
the byte caching and protocol optimization features available. Byte caching and protocol
optimization are bidirectional.
Note: WAN Optimization is supported by FortiGate v4.0 and above.
To configure WAN Optimization on the FortiGate unit, see the FortiGate Web
Optimization, Web Cache, and Web Proxy User Guide.
To enable WAN Optimization
1 Go to WAN Optimization.
Figure 23: WAN optimization
2 Select Enable WAN Optimization.
3 Enable the protocols to be optimized: HTTP (web browsing), CIFS (file sharing), MAPI
(Microsoft Exchange) and FTP (file transfers).
4 Set Maximum Disk Cache to 512, 1024, or 2048MB.
The default is 512MB. If your hard disk can accommodate a larger cache, better
optimization performance is possible.
5 Click Apply.
46
FortiClient Endpoint Security Version 4.0 MR2 User Guide
04-420-116429-20100108
http://docs.fortinet.com/ • Feedback
Antivirus and Anti-Malware
Using the FortiClient antivirus feature, you can protect your computer by regularly
scanning your files for viruses and malware. The FortiClient software can also perform
real-time scanning for email, internet traffic, and files, malware protection, and monitor
Windows Registry changes.
For email real-time scanning protocols, FortiClient scans POP3, SMTP, and Outlook.
This section includes the following topics:
•
Scanning for viruses and malware
•
Configuring antivirus settings
•
Configuring real-time protection
•
Configuring email scanning
•
Configuring server protection
•
If a virus is found
•
Monitoring Windows startup list entries
Scanning for viruses and malware
You can run a quick scan to detect the most malicious software. Malicious software or
“malware” includes computer viruses, worms, trojan horses, most rootkits, spyware,
dishonest adware, crimeware and other malicious and unwanted software.
You can also set up scan schedules and scan the files in a specified folder.
Depending on the option you set in Antivirus > Settings, the FortiClient software does one
of the following when it finds viruses:
•
Displays a virus alert message.
•
Quarantines the virus-infected file.
•
Cleans the virus-infected file.
Note: If your FortiClient is being managed by a FortiGate unit or FortiClient Manager, then
your antivirus definitions may be checked to see they are up-to-date. If your antivirus are
not up to date, then access to the internet may be blocked. You will need to update your
antivirus definition files in order to access the internet.
For information about how to configure what happens when the FortiClient software finds
a virus, see “Configuring antivirus settings” on page 50.
FortiClient Endpoint Security Version 4.0 MR2 User Guide
04-420-116429-20100108
http://docs.fortinet.com/ • Feedback
47
Scanning for viruses and malware
Antivirus and Anti-Malware
Figure 24: Scanning for viruses and malware
During antivirus scanning, the FortiClient system tray icon is animated. A bar repeatedly
rolls from the bottom to the top of the icon.
To run a quick scan
1 Go to AntiVirus > Scan.
2 Select Quick Scan.
The FortiClient Scan Progress window opens, displaying the scanning process and
results.
3 Click Pause/Resume or Stop to interrupt the scan.
4 Click Show Details to view the Infected file list. The Infected file list displays the names
of any infected files.
5 Right-click on entries and choose from the following actions:
• Delete the file
• Quarantine the file
• Submit Virus to Fortinet
• Submit as false positive to Fortinet
6 To view the log file for the scan, select View Log.
7 Click Close to close the FortiClient Scan Progress window.
To scan files in a specified directory
1 Go to AntiVirus > Scan.
2 In the File System Scan area, click Browse to locate the directory to scan.
3 Click Scan Now.
The FortiClient Scan Progress window opens, displaying the scanning process and
results.
4 Click Show Details to view the Infected file list. The Infected file list displays the names
of any infected files.
48
FortiClient Endpoint Security Version 4.0 MR2 User Guide
04-420-116429-20100108
http://docs.fortinet.com/ • Feedback
Antivirus and Anti-Malware
Scanning for viruses and malware
5 Right-click on entries and choose from the following actions:
• Delete the file
• Quarantine the file
• Submit Virus to Fortinet
• Submit as false positive to Fortinet
6 To view the log file for the scan, select View Log.
7 Click Close to close the FortiClient Scan Progress window.
To perform a full system scan
1 Go to AntiVirus > Scan.
2 In the File System Scan section, click Full System Scan.
3 Select Network drives or Removable media if you want them included in the scan.
Optionally, you can change the relative priority of virus scanning compared to other
processes.
4 Click Start.
The FortiClient Scan Progress window opens, displaying the scanning process and
results.
5 Click Show Details to view the Infected file list. The Infected file list displays the names
of any infected files.
6 Right-click on entries and choose from the following actions:
• Delete the file
• Quarantine the file
• Submit Virus to Fortinet
• Submit as false positive to Fortinet
7 To view the log file for the scan, select View Log.
8 Click Close to close the FortiClient Scan Progress window.
To manage scan schedules
1 Go to AntiVirus > Scan.
2 In the Scheduled Scan area, click Add.
3 In the New Schedule window, set up a new schedule.
You can set up daily, weekly, or one-time schedules. You can also specify which folder
to scan.
4 Select the type of scan:
•
Directory scan — Click Browse and select the directory to scan. This type will only
scan the selected directory.
•
Full system scan — Select the Network Drives or Removable Media options. Select
the scan priority. This type will scan the entire computer.
•
Quick scan — You cannot set a scan priority for Quick Scans. This type scans only
running processes.
FortiClient Endpoint Security Version 4.0 MR2 User Guide
04-420-116429-20100108
http://docs.fortinet.com/ • Feedback
49
Configuring antivirus settings
Antivirus and Anti-Malware
5 If you selected a Directory or Full System scan, select the scan priority:
•
Low — The operating system allocates less CPU time to scanning
•
Normal — The operating system allocates a “normal” amount of CPU time to
scanning.
•
High — The operating system allocates more amount of CPU time to scanning.
The higher the priority, the sooner the scan will complete. You may notice a difference
in system performance depending on the priority selected.
6 Click OK.
7 To modify a schedule, select the schedule and then click Edit.
8 To delete a schedule, select the schedule, then click Delete.
During scheduled antivirus scans, the FortiClient Scan Progress window normally does
not display unless a virus is found. Optionally, to view this window right-click the FortiClient
system tray icon and select Show antivirus scan window(s).
Scanning for viruses in safe mode
You can scan for viruses in Microsoft® Windows safe mode. Safe mode helps you
diagnose problems. If a virus or malware is causing problems, you can use safe mode to
remove the virus.
This is only available for users running Microsoft® Windows 2000 or later versions.
To scan for viruses in safe mode
1 Boot the computer in safe mode. For more information, see your Microsoft® Windows
documentation.
2 In Windows Explorer, navigate to C:\Program Files\Fortinet\FortiClient.
3 Double-click FortiTray.exe to start the FortiClient system tray program.
4 Select Start > Command Prompt.
5 In the command window, enter cd "c:\program
files\fortinet\forticlient" to switch to the FortiClient program folder.
6 In the command window, enter one of the following commands:
•
To scan a particular file or folder, enter av_task.exe -s a_0 -t 0 -d <file
or folder name>
•
To scan the entire system, enter av_task.exe -s a_0 -t 0 -f
Configuring antivirus settings
You can specify what types of files to scan and what to do when malware or a virus is
detected. You can also specify an SMTP server to use when submitting a quarantined file
to Fortinet for analysis. For information on how to submit a quarantined file, see “If a virus
is found” on page 57.
Malware/virus detection is enabled by default.
50
FortiClient Endpoint Security Version 4.0 MR2 User Guide
04-420-116429-20100108
http://docs.fortinet.com/ • Feedback
Antivirus and Anti-Malware
Configuring antivirus settings
Figure 25: Configuring antivirus settings
To configure antivirus settings
1 Go to AntiVirus > Settings.
2 Select the file types to be scanned.
3 Add or delete file types to be scanned for viruses. See “Selecting file types to scan” on
page 52.
4 Select files, folders and file types to be excluded from virus scanning.
• To exclude a file or folder, click Select file and folders, then click Add to add the file
or folder to the exemption list.
• To exclude a file type, click Select file types, then add the file types. For more
information, see “Selecting file types to scan” on page 52.
5 Select what to do when a virus is found. The default is Clean.
• Alert — display a message if a virus is detected during real-time file system
monitoring.
• Clean — Does the following:
•
For infected files (not worms or spyware), FortiClient attempts to disinfect them.
If this fails, then the files are quarantined.
•
For worms or spyware, the files are quarantined.
•
For all other file types, FortiClient cleans up registry keys associated with the
files, including auto run, browser helper objects, system services, and COM
objects.
Note: If the malware is found by the antispyware engine, all the associated registry keys
and files will be removed. A backup of these files and registry keys are located in the
Quarantine tab. Users can restore the files from here if a false positive is triggered.
6 Configure the settings to submit viruses. See “Specifying an SMTP server for virus
submission” on page 53.
7 If you want to add a FortiClient antivirus scan command to the Windows Explorer
shortcut menu, select Integrate with Windows shell. See “Integrating FortiClient
antivirus scanning with Windows shell” on page 54.
FortiClient Endpoint Security Version 4.0 MR2 User Guide
04-420-116429-20100108
http://docs.fortinet.com/ • Feedback
51
Configuring antivirus settings
Antivirus and Anti-Malware
8 Optionally, select Integrate with Windows Shell check box. This allows you to
selectively scan files in Windows® Explorer by right-clicking on the file name and
selecting Scan with FortiClient AntiVirus.
9 Optionally, select the Notify user the virus signature is out of date check box. If
selected, the user will receive a message stating that they will need upgrade their virus
signature.
10 Optionally, select the Scan removable media on insertion check box. If selected, media
such as CDs, DVDs, USBs will be scanned for viruses when the are inserted into the
computer.
11 Optionally, select the Pause background scanning on battery power check box.
12 Optionally, click Advanced Settings.
On the Advanced Settings window, do the following:
• Specify whether to scan compressed files and set the file size limit. The default size
limit is 0, which means no limit.
• Specify whether to scan grayware and what types of grayware to look for.
• Enable heuristic scanning. FortiClient software uses heuristic techniques to scan
files to find unknown viruses and threats that have not yet been cataloged with
signatures. Heuristics looks at characteristics of a file, such as size or architecture,
as well as behaviors of its code to determine the likelihood of an infection and
subsequently, quarantines any file it deems suspicious based on these checks.
Selecting file types to scan
If you do not want the FortiClient software to scan all files for viruses or malware, you can
select file types from the default list of file types. You can add file types to or delete file
types from the default file types list. You can also reset the file types list to defaults.
Note: The exclusion list takes priority over the inclusion list. For example, if you select a file
extension to scan, and also add the same file extension to the exclusion list, files with this
extension will not be scanned.
Figure 26: Adding a new file extension
To add a new file type to the scanned file types
1 Go to AntiVirus > Settings.
2 In the File types to scan area, select Program files and documents.
3 Click Select File Types.
The Scan File Extensions window opens.
52
FortiClient Endpoint Security Version 4.0 MR2 User Guide
04-420-116429-20100108
http://docs.fortinet.com/ • Feedback
Antivirus and Anti-Malware
Configuring antivirus settings
4 Click New.
5 In the New File Extension window, type the file extension to add to the list. You can
also add file types with double extensions.
6 Click OK.
7 Click OK.
Note: Scanning files with no extension is enabled by default.
Selecting files, folders and file types to exclude from scanning
There may be some folders or specific files and file types that you do not want FortiClient
software to scan for viruses or malware. You can add these files and folders to the files
and folders exclusion list.
To add files and folders to the exclusion list
1 Go to AntiVirus > Settings.
2 In the Exclusion List area, click Select files and folders.
The AntiVirus Options window opens.
3 Click Add.
4 Navigate to the desired file or folder and click OK.
5 Add or remove other files and folders as needed.
6 Click OK.
Note: You can also exclude a file or folder from antivirus scanning after it has been
quarantined. In the quarantine file list, right-click the file and select Exclude file/folder from
antivirus scanning. For more information see “If a virus is found” on page 57.
To add files types the exclusion list
1 Go to AntiVirus > Settings.
2 In the Exclusion List area, click Select file types.
The File Scan Extensions window opens.
3 Click New.
4 In the New File Extension window, enter the file extension and click OK.
5 Add or remove other files types as needed.
6 Click OK.
Specifying an SMTP server for virus submission
Instead of using the default mail server, you can specify an SMTP server to use when
submitting the quarantined files.
To specify an SMTP server
1 Go to AntiVirus > Settings.
2 Under Virus Submission, select Use this mail account to submit virus.
3 In the SMTP server field, enter the SMTP server that you use for outgoing email.
4 If the SMTP server needs authentication to log on, select Need authentication and
enter the logon user name and password.
FortiClient Endpoint Security Version 4.0 MR2 User Guide
04-420-116429-20100108
http://docs.fortinet.com/ • Feedback
53
Configuring real-time protection
Antivirus and Anti-Malware
5 Select the Enable automatically submitting suspicious files to Fortinet Inc. check box to
send any suspicious virus files to Fortinet.
6 Click Apply.
Integrating FortiClient antivirus scanning with Windows shell
By integrating FortiClient antivirus scanning with Windows shell, you can use the
FortiClient antivirus shortcut menu in Windows Explorer to scan the selected folders or
files for viruses or malware.
To integrate with Windows shell
1 Go to AntiVirus > Settings.
2 Select Integrate with Windows Shell.
3 Click Apply.
In Windows Explorer, you can right-click on folders or files and select Scan with
FortiClient Antivirus to scan them.
Configuring real-time protection
Configure real-time protection settings to specify:
•
Which file types to scan.
•
What types of malware to detect.
•
Which file types to exclude from scanning.
•
What to do when a virus is detected during real-time monitoring.
For email real-time scanning protocols, FortiClient scans POP3, SMTP, and Outlook.
Content inspection within IMAP, FTP, HTTP, IM and P2P protocols.
Note: If your FortiClient is being managed by a FortiGate unit or FortiClient Manager, then
your antivirus settings may be checked to see if it is enabled (Enable real-time protection is
selected). If your antivirus is not enabled, then access to the internet may be blocked. You
will need to enable your antivirus protection in order to access the internet.
Figure 27: Configuring real-time protection
To configure real-time protection
1 Go to AntiVirus > Realtime Protection.
54
FortiClient Endpoint Security Version 4.0 MR2 User Guide
04-420-116429-20100108
http://docs.fortinet.com/ • Feedback
Antivirus and Anti-Malware
Configuring real-time protection
2 In the File types to scan area, select either All files or Program files and documents, as
needed.
If you select Program files and documents, you can modify the list of file types to be
scanned. See “Selecting file types to scan” on page 52.
3 Optionally, select files, folders and file types to be excluded from virus scanning.
• To exclude a file type, see “To add files types the exclusion list” on page 53.
• To exclude a file or folder, see “To add files and folders to the exclusion list” on
page 53.
4 Under What to do when a virus is found, select Deny Access or Clean.
• Deny Access — You cannot open, run or modify the file until it is cleaned.
• Clean —Does the following:
•
For infected files (not worms or spyware), FortiClient attempts to disinfect them.
If this fails, then the files are quarantined.
•
For worms or spyware, the files are quarantined.
•
For all other file types, FortiClient cleans up registry keys associated with the
files, including auto run, browser helper objects, system services, and COM
objects.
Note: If FortiClient cannot clean an infected file, it quarantines the file automatically.
5 Select or clear the following two options:
• Do not pop up alert message box in real-time scan
• Do not pop up alert message box in registry monitor
6 Optionally click Advanced Settings.
On the Advanced Settings window, you can:
• enable scanning of compressed files. You can also specify the largest compressed
file that FortiClient will scan. A size limit of 0 means no limit.
• enable grayware scanning and specify which types of grayware to look for.
• enable heuristic scanning. FortiClient software uses heuristic techniques to scan
files to find the unknown viruses and threats that have not yet been cataloged with
signatures. Heuristics looks at characteristics of a file, such as size or architecture,
as well as behaviors of its code to determine the likelihood of an infection. You can
choose to deny access to files heuristics finds suspicious or to only display a
warning.
• enable scanning of files when written to or read from disk, optionally including files
on network drives.
7 Click OK.
8 Click Apply.
To enable real-time protection
1 Go to General > Status.
2 In the Antivirus section, select Enable real-time protection.
FortiClient Endpoint Security Version 4.0 MR2 User Guide
04-420-116429-20100108
http://docs.fortinet.com/ • Feedback
55
Configuring email scanning
Antivirus and Anti-Malware
Note: If you disable real-time protection, confirmation is required. The confirmation dialog
imposes a four second wait for the Yes button to be available.
Configuring email scanning
FortiClient software can scan incoming and outgoing email and email attachments for
malware/viruses. For email real-time scanning protocols, FortiClient scans POP3, SMTP,
and Outlook.
FortiClient software can also use heuristic techniques to scan email attachments to find
unknown viruses and threats that have not yet been cataloged with signatures. Heuristics
looks at the characteristics of a file, such as size or architecture, as well as the behavior of
its code to determine the likelihood of an infection.
To scan email for viruses
1 Go to Antivirus > Email.
2 In the Virus scanning section, select SMTP for outgoing mail, POP3 for incoming mail
and MS Outlook if Outlook connects to a Microsoft Exchange server.
3 To prevent worms from spreading via email, select Enable email worm detection. Then
select what to do when a malicious action is detected: either Terminate the offending
process or Prompt user to ask whether to terminate the process.
This is available only if you enabled SMTP virus scanning.
4 To apply heuristic scanning, in the Heuristics scanning section, select Enable email
attachments heuristics scanning. Then select what to do when a suspicious attachment
is detected: either Log warning message or Strip and quarantine.
5 Click Apply.
Configuring server protection
If FortiClient Endpoint Security is installed on a server, you have access to settings
relevant to servers.
Exchange Server protection in version 4.2 of FortiClient Endpoint Security is included for
customer evaluation and is available only if enabled at installation.
Figure 28: Server protection settings
56
FortiClient Endpoint Security Version 4.0 MR2 User Guide
04-420-116429-20100108
http://docs.fortinet.com/ • Feedback
Antivirus and Anti-Malware
If a virus is found
To configure server protection
1 Go to AntiVirus > Server Protection.
2 In the Exchange Server Options section, select the following options as needed:
Integrate virus scanning Scan Exchange data stores for viruses.
into Exchange 2003/2007
When a virus is found Select the action to take:
Quarantine the attachment — You can go to Antivirus >
Quarantine to see the quarantined attachment files and restore or
delete them.
Remove the attachment only — The infected attachment is
removed, but the body of the message remains.
Exclude the Exchange
filesystem files from file
scanning
Fortinet recommends that you enable this setting to avoid
impairing the operation of the Exchange server.
Exclude all files that have Fortinet recommends that you enable this setting to avoid
impairing the operation of the Exchange server.
extensions associated
with Exchange Server
3 In the SQL Server Options section, select the following options as needed:
Fortinet recommends that you enable this setting to avoid impairing
Exclude SQL Server
filesystem files from file the operation of SQL server.
scanning
Exclude all files that have Fortinet recommends that you enable this setting to avoid impairing
the operation of SQL server.
extensions associated
with SQL Server from
virus scanning
4 Select Apply.
If a virus is found
If FortiClient finds a virus, it can be cleaned automatically or will be quarantined if it cannot
be cleaned.
Quarantine
Infected files are files that have been detected as being a virus or malware. Infected files
are quarantined if they cannot be cleaned.
Go to AntiVirus > Quarantine to manage quarantined files.
Automatically delete
quarantined files
Delete files older than
Quarantine retains all files until you delete or restore them, unless
you configure automatic deletion.
Enable to automatically delete quarantined files. Enter the number
of days to retain files. Select Apply.
Restore
Move the selected file back to its original location.
Caution: The restored file might be infected.
Refresh
Update the displayed list of files.
Delete
Delete the selected file.
FortiClient Endpoint Security Version 4.0 MR2 User Guide
04-420-116429-20100108
http://docs.fortinet.com/ • Feedback
57
Monitoring Windows startup list entries
Submit >>>
Antivirus and Anti-Malware
You can submit a file file on your computer for FortiGuard analysis.
Click Browse to locate the file and click OK. Click Submit.
Note: You can submit a maximum of five files per day.
Submission uses the default mail server unless you specify an
alternate SMTP server in Antivirus > Settings. See “Specifying an
SMTP server for virus submission” on page 53.
Submit virus
Right-click on the quarantined file to submit the selected file to
Fortinet as a virus.
Submit as false positive
Right -click on the quarantined file to alert Fortinet that the
selected file is not a virus.
Exclude file/folder from AV
scanning
Right-click on the quarantined file that you do not want scanned in
future.
Clean
If the malware can be cleaned from your computer, you will receive a message stating that
the malware has been removed and that you should reboot your computer.
Figure 29: FortiClient message stating that malware has been removed and your computer
needs to be rebooted.
Monitoring Windows startup list entries
Some malware/viruses can modify existing Windows registry entries or insert new entries
to cause malicious code to be executed when you start or log on to Windows. The
FortiClient software can monitor the Windows startup list and detect unauthorized
changes to the registry. The FortiClient software assumes the following registry changes
are unauthorized if the changes were not made by an authorized user:
•
adding, removing or modifying an application installation,
•
changing an existing application’s configuration settings.
Note: Monitoring the Windows Registry is not supported on 64-bit Microsoft Windows XP.
The startup list shows the Windows registry entries for any applications that are started as
part of your Windows profile when you log on to Windows. The list includes applications
that are displayed in the system tray. The list also includes any applications that are
started transparently and are not displayed in the system tray.
Entries are displayed in three lists:
58
•
The Rejected entries list displays new, unauthorized startup entries.
•
The Changed entries list displays previously existing entries that have changed since
the last Windows startup.
•
The Current startup list displays all current registry entries.
FortiClient Endpoint Security Version 4.0 MR2 User Guide
04-420-116429-20100108
http://docs.fortinet.com/ • Feedback
Antivirus and Anti-Malware
Monitoring Windows startup list entries
The startup list is checked when the FortiClient software starts.
The registry keys listed are:
•
HKLN indicates local machine and runs for all users.
•
HKCU indicates current user.
•
ShellServiceObjectDelayLoad is equivalent to the "Run" key but the entries in the key
are explicitly loaded by the shell (such as Explorer.exe) during logon. Each entry is a
shell extension.
Figure 30: Registry Monitor
To enable startup list monitoring
•
In General > Status, select the Enable startup list monitoring check box. By
selecting this check box, FortiClient warns you if there are changes to the startup
list, such as malware changes, every time your computer is started.
To view Windows startup list entries
1 Go to AntiVirus > Registry Monitor.
2 Under What to view, select Rejected entries, Changed entries or Current startup list.
3 Optionally click Refresh to refresh the startup list entries to view recently added,
changed or rejected registry entries.
Restoring changed or rejected startup list entries
Changed or rejected entries can be restored.
Caution: If you are unsure what application an entry is for, do not restore the startup list
entry.
To restore a changed or rejected startup list entry
1 Go to AntiVirus > Registry Monitor.
2 Under What to view, select Changed entries or Rejected entries.
FortiClient Endpoint Security Version 4.0 MR2 User Guide
04-420-116429-20100108
http://docs.fortinet.com/ • Feedback
59
Monitoring Windows startup list entries
Antivirus and Anti-Malware
3 Select the entry you want to restore.
4 Click Restore.
60
FortiClient Endpoint Security Version 4.0 MR2 User Guide
04-420-116429-20100108
http://docs.fortinet.com/ • Feedback
Firewall
Using the FortiClient firewall feature, you can protect your computer by using the following
FortiClient firewall features:
•
Application level network access control — You can specify the applications that
can access the network and be accessed by the network.
•
Network security zone — The network is categorized into three zones: the Public
Zone, Trusted Zone, and the Block Zone. You can configure different security settings
for each zone.
•
Intrusion detection — FortiClient firewall can detect and block common network
attacks.
•
Advanced firewall rules — You can create specific rules to control the traffic based
on source addresses, destination addresses, protocols, or time frames.
For outbound traffic, the application rules are applied first, then advanced rules, then
generic application rules, and lastly, zone rules are applied.
For inbound traffic, the advanced firewall rules will be applied first, then the application
control rules.
If either the source or destination address is a blocked zone address, then it will be
blocked.
For the traffic related to system processes, such as NetBIOS, traffic is accepted only when
it is allowed by both advanced rules and zone security settings.
Note: If your FortiClient is being managed by a FortiGate unit or FortiClient Manager, then
your firewall settings may be checked to see if it is enabled (set to Normal). If your firewall is
not enabled, then access to the internet may be blocked. You will need to enable your
firewall (set your firewall mode to Normal) in order to access the internet.
Selecting a firewall mode
By default, FortiClient firewall runs in Normal mode to protect your system. You can go to
Firewall > Status to select a different firewall mode (protection level).
FortiClient firewall has the following running modes:
Deny all
Blocks all the incoming and outgoing traffic.
Normal
You can select from the three protection profiles. See “Selecting a
firewall profile” on page 61.
Pass all
No firewall protection.
Selecting a firewall profile
If you select the Normal firewall mode on Firewall > Status, you can select from the
following three firewall protection profiles:
FortiClient Endpoint Security Version 4.0 MR2 User Guide
04-420-116429-20100108
http://docs.fortinet.com/ • Feedback
61
Viewing network statistics
Firewall
Basic home use
Allows all outgoing traffic and denies all incoming traffic. Select this
profile if your computer is a standalone home computer and not
connected to other networks or computers.
Basic business
Allows all outgoing traffic, allows all incoming traffic from the trusted
zone, and denies all incoming traffic from the public zone. For zone
information, see “Configuring network security zones” on page 65.
Custom profile
This is the default profile.
The Custom profile allows you to configure the application level
permissions, network zone permissions, and advanced firewall
filtering rules.
See “Configuring application access permissions” on page 63,
“Configuring network security zones” on page 65, and “Configuring
advanced firewall rules” on page 67.
Viewing network statistics
You can configure the FortiClient software to display the following network traffic
information:
Figure 31: Firewall status
Inbound traffic
Number of incoming network packets.
Outbound traffic
Number of outgoing network packets.
Blocked network packets
Network packets that are blocked by the firewall.
Blocked application request
Number of blocked requests from outside to access your local
applications and vice versa.
Current connections
Number of current connections between your system and the
network.
To view the traffic information
1 Go to Firewall > Status.
2 Select the traffic type you want to view. The information displays in the graphical
monitor.
3 Click View Connections to view the current active connections, listening ports, PID,
and other detailed information.
4 Click Close.
5 By default, whenever FortiClient firewall blocks network traffic, a notification pops up in
the FortiClient system tray area. To disable the blocked traffic notification, select the
Disable taskbar notification for blocked network traffic check box.
62
FortiClient Endpoint Security Version 4.0 MR2 User Guide
04-420-116429-20100108
http://docs.fortinet.com/ • Feedback
Firewall
Configuring application access permissions
Configuring application access permissions
You can specify which applications can access the network and be accessed by the
network. To do this, you assign the applications access permissions. Three levels of
access permissions are available: Allow, Ask, and Block.
Note: For applications not listed in the access control list, you will be asked whether to
allow them network access. By default, FortiClient allows the legitimate Windows system
applications to access the network. These applications are displayed in the application
control list. You can modify or delete the permission levels of these applications.
Note: You cannot edit or delete settings for the Fortiproxy application.
Apart from application access control, network zone security, and intrusion detection,
FortiClient firewall protects your computer with another layer of security: advanced firewall
rules.
The firewall rules allow or block network traffic according to the following three types of
filtering criteria you specify:
•
Source and destination addresses can be your own computer, one of the two zones
(Public Zone and Trusted Zone), a single IP address, a range of IP addresses, a
subnet, or a address group. For information about adding an address group, see
“Managing groups” on page 69.
•
Network protocols can be TCP, UDP, or TCP/UDP.
•
Day and Time ranges can be applied to a rule to restrict access based on the day of
the week and the time of day.
The advance firewall rules take precedence over the zone security settings. For example,
if a rule blocks the traffic to the Trusted Zone, the traffic will be blocked.
To add an application to the access control list
1 Go to Firewall > Applications.
2 Click Add.
3 In the Add New Application window, enter or browse to the application Path.
4 Select permission levels for the public zone and trusted zone:
•
Allow — Allows the application network access.
•
Ask — Prompts to ask your permission for the application to have network access.
•
Block — Blocks all network access for the application.
5 Click OK.
Note: Permission levels for the public zone can only be lower than or equal to those for the
trusted zone.
To create a firewall rule
1 Go to Firewall > Applications.
2 Click Edit > Advanced > Add.
3 In the Advanced Firewall Filtering Rule window, enter the following information and
click OK.
FortiClient Endpoint Security Version 4.0 MR2 User Guide
04-420-116429-20100108
http://docs.fortinet.com/ • Feedback
63
Configuring application access permissions
Firewall
Name
Enter a name for the rule.
Description
Optionally, enter a short description.
State
Either Enable or Disable the rule.
Action
Either Allow or Block the traffic.
Source
Apply the rule to the traffic that originates from the source address
and terminates at your computer. Select Add>>> to add the source
address. For information about adding an address group, see
“Managing address, protocol and time groups” on page 64.
Destination
Apply the rule to the traffic that originates from your computer and
terminates at the destination address. Select Add>>> to add the
destination address. For information about adding an address group,
see “Managing address, protocol and time groups” on page 64.
Protocol
Select Add>>> to add a protocol to the rule. While specifying the
protocol in the Add Protocol window, you can also specify the
destination and source ports.
Time
Select Add>>> to add a day/time range when the rule should be
executed. In the Add Time window, specify a description, time range
and one or more days. Time range is specified using a 24 hour clock.
Bind this rule to
Select all adapters or a single ethernet adapter on your computer to
apply this rule.
Note: You can use any combination of the filtering criteria.
4 Click Close.
5 Click OK.
Managing address, protocol and time groups
To simplify management, you can combine the source addresses, destination address,
protocols, and time schedules into groups and use the groups when creating rules.
To create a group
1 Go to Firewall > Applications.
2 Click Edit > Advanced > Groups.
3 Select Address Group, Protocol Group, or Time Group.
4 Click Add.
5 Enter a name and description.
6 Click Add.
7 Do one of the following:
•
For an address group, enter the Subnet, IP Range, IP Address, or FQDN (fully
qualified domain name).
•
For a protocol group, specify the Protocol, Destination Port, and Source Port
numbers.
•
For a time group, specify the day and time range.
8 Click OK three times.
9 Click Close.
10 Click OK.
64
FortiClient Endpoint Security Version 4.0 MR2 User Guide
04-420-116429-20100108
http://docs.fortinet.com/ • Feedback
Firewall
Configuring network security zones
Configuring network security zones
FortiClient firewall protects your system by categorizing the network systems into three
zones. Go to Firewall > Network to configure these zones:
Public Zone
By default, FortiClient firewall treats IP addresses in the public zone with the
highest security level. You can also customize the security levels. See
“Customizing security settings” on page 66.
Trusted Zone
By default, FortiClient firewall treats IP addresses in the trusted zone with
medium-level security settings. For information about security level settings,
see “Customizing security settings” on page 66.
Blocked Zone
All traffic to and from IP addresses in the blocked zone is not allowed.
FortiClient firewall prioritizes the zones in the order of blocked zone, trusted zone, and
public zone. This means:
•
If an IP address is listed in all of the three zones, it will be blocked.
•
If it is listed in both the trusted and public zones, it will be trusted.
•
If it is not listed in any of the three zones, it will be public.
Figure 32: Network security zones
Adding IP addresses to zones
You can add a subnet, an IP range, or an individual IP address to the network zones. You
can also edit or delete the existing IP entries.
To add IP addresses
1 Go to Firewall > Network.
2 Click Add.
3 In the IP Address window, select a zone and enter the IP addresses that belong to it.
4 Optionally, enter a description.
5 Click OK.
FortiClient Endpoint Security Version 4.0 MR2 User Guide
04-420-116429-20100108
http://docs.fortinet.com/ • Feedback
65
Customizing security settings
Firewall
Customizing security settings
For the public and trusted zones, you can use the default high, medium, or low level
security settings. You can also customize these default settings.
High
By default, incoming connections are allowed only if there are listening ports for
these connections.
Medium
By default, most connections are allowed unless you customize the settings.
Note that the default medium security level settings for public and trusted zones are
different:
• For public zone, the incoming ICMP and NetBIOS packets are blocked
• For trusted zone, these packets are allowed.
Low
Packet level rule is disabled and application level control is on.
Note: The security level for the public zone can only be higher than or equal to that for the
trusted zone.
To customize the security settings
1 Go to Firewall > Network.
2 In the Public Zone Security Level or Trusted Zone Security Level areas, move the
slider to High or Medium.
Note: Low level security disables packet level rules and you cannot customize the Low
level settings.
3 Click Setting.
4 If you select High level, modify the following settings and select OK.
Allow ICMP in
Allow incoming ICMP (Internet Control Message Protocol)
traffic. By default, this option is not selected.
Allow NetBIOS in
Allow incoming NetBIOS traffic. By default, this option is not
selected.
Allow NetBIOS out
Allow outgoing NetBIOS traffic. By default, this option is not
selected.
Select one of the following options:
Allow other inbound traffic This option is selected by default.
coming from this zone
Block other inbound traffic This option is not selected by default.
coming from this zone
5 If you select Medium level, modify the following settings and select OK.
Block ICMP in
Block incoming ICMP (Internet Control Message Protocol)
traffic. By default, this option is not selected.
Block NetBIOS in
Block incoming NetBIOS traffic. By default, this option is not
selected.
6 Click OK.
66
FortiClient Endpoint Security Version 4.0 MR2 User Guide
04-420-116429-20100108
http://docs.fortinet.com/ • Feedback
Firewall
Network Detection
Network Detection
When a new network is detected by FortiClient, you can determine if the network is trusted
or let a ping server decide the status.
To determine what to do when a new network is detected
1 Go to Firewall > Advanced.
2 In the Network Detection area, select one of the following:
•
Ask the user if it is trusted — An alert will display and the user can determine if the
network is allowed or denied.
•
Use ping servers to decide the status — The network is considered trusted if the
ping is returned from the server. FortiClient will start with the first trusted ping server
and will continue down the list until a ping is returned. You will need to enter the
trusted ping server addresses. For details, see To manage trusted ping servers.
To manage trusted ping servers
1 Go to Firewall > Advanced.
2 In the Trusted Ping Servers area, do one of the following:
•
Click Add (+) and enter a ping server address. You can enter an IP address or an
FQDN (web address).
•
Click Delete to delete a ping server address.
•
Click Edit and modify the ping server address.
Configuring intrusion detection
FortiClient software can detect and block some common network attacks using the hardcoded signatures. Because the signatures are hardcoded into the program, to get the
latest signatures, you must install the latest FortiClient build.
Go to Firewall > Intrusion Detection to view the IP addresses where the detected attacks
originate.
You can move the IP addresses to the blocked zone by clicking Move to blocked zone so
that the traffic from these IP addresses will be blocked.
If any of the IP addresses can be trusted, you can move the IP address to the trusted IP
list by clicking Trust this IP so that FortiClient will not detect traffic from this IP address any
more.
You can also remove an IP from the Trusted IP list by clicking Don’t trust this IP.
Configuring advanced firewall rules
Apart from application access control, network zone security, and intrusion detection,
FortiClient firewall protects your computer with another layer of security: advanced firewall
rules.
The firewall rules allow or block network traffic according to the following three types of
filtering criteria you specify:
FortiClient Endpoint Security Version 4.0 MR2 User Guide
04-420-116429-20100108
http://docs.fortinet.com/ • Feedback
67
Configuring advanced firewall rules
Firewall
•
Source and destination addresses can be your own computer, one of the two zones
(Public Zone and Trusted Zone), a single IP address, a range of IP addresses, a
subnet, or a address group. For information about adding an address group, see
“Managing groups” on page 69. If the field is left blank, then this indicates “All.”
•
Network protocols can be ICMP, TCP, UDP, or TCP/UDP.
•
Day and Time ranges can be applied to a rule to restrict access based on the day of
the week and the time of day. If this is left blank, then this indicates “All.”
The advanced firewall rules take precedence over the zone security settings. For
example, if a rule blocks the traffic to the Trusted Zone, the traffic will be blocked.
Note: You can use any combination of the filtering criteria to create advanced firewall
rules. See the examples given in the table below.
To create a firewall rule
1 Go to Firewall > Advanced.
2 Click Add.
3 In the Advanced Firewall Filtering Rule window, enter the following information and
select OK.
68
Name
Enter a name for the rule.
Description
Optionally, enter a short description.
State
Either Enable or Disable the rule.
Action
Either Allow or Block the traffic.
Source
Apply the rule to the traffic that originates from the source address and
terminates at your computer. Select Add to add the source address. For
information about adding an address group, see “Managing groups” on
page 69. If the Source field is left empty, this indicates “All”.
Destination
Apply the rule to the traffic that originates from my computer and
terminates at the destination address. Select Add to add the destination
address. For information about adding an address group, see “Managing
groups” on page 69. If the Destination field is left empty, this indicated
“All”.
For example, if the Source is set to “My Computer” and the Destination
field is left empty (All), then this rule means “block all traffic from My
Computer to any Destination addresses using any protocol at any time of
day.”
Protocol
Select Add to add a protocol to the rule. While specifying the protocol in
the Add Protocol window, you can also specify the destination and source
ports.
To refine the advanced firewall rules, add settings to the Protocol field. For
example, if you add “ftp” to the Protocol field and to the rule above (“block
all traffic from My Computer to any Destination addresses using any
protocol at any time of day”), then the rule becomes “block all ftp traffic
from My Computer to any Destination addresses at any time of day.”
Time
Select Add to add a day/time range when the rule should be executed. In
the Add Time window, specify a description, time range and one or more
days. Time range is specified using a 24 hour clock.
To further refine the advanced firewall rules, add “Time” to the rule. For
example, add “Friday” to the Time field and to the rule above (“block all ftp
traffic from My Computer to any Destination addresses at any time of
day”), to change the rule to “on Fridays, block all ftp traffic from My
Computer to any Destination address.”
Bind this rule to
Select all adapters or a single ethernet adapter on your computer to apply
this rule.
FortiClient Endpoint Security Version 4.0 MR2 User Guide
04-420-116429-20100108
http://docs.fortinet.com/ • Feedback
Firewall
Configuring advanced firewall rules
4 Click OK.
Using Advanced Firewall Rules to block all traffic to and from a computer
If you want to block all traffic to a computer during certain times of day, such as from 7pm
to 8am, you will need to configure two advanced firewall rules. Ensure you have the action
set to Block:
1 For the first rule, set Source to My Computer and leave the Destination blank.
2 For the second rule, leave the Source blank and set Destination to My Computer.
You need to create two separate rules to block all traffic. If you create a firewall rule set to
“block all traffic to my computer from public zone and trusted zone” it may seem like you
are blocking all traffic but the rule, in effect, does not actually block traffic. This is because,
by definition, the “public zone” set of IPs is everything that is not in the “trusted zone” set
of IPs. The “trusted zone” negates the “public zone” so when the rule is compiled, the
output is invalid because it does not contain any IP addresses.
See “Configuring advanced firewall rules” on page 67 for more information on creating
advanced firewall rules.
Managing groups
To simplify management, you can combine the source addresses, destination address,
protocols, and time schedules into groups and use the groups when creating rules.
To create a group
1 Go to Firewall > Advanced.
2 Click Groups.
3 Select Address Group, Protocol Group, or Time Group.
4 Click Add.
5 Enter a name and description.
6 Click Add.
7 For an address group, enter the subnet, IP range, or IP address.
For a protocol group, enter specify the protocol and port number.
For a time group, specify the day and time range.
8 Click OK twice.
Note: You can edit existing groups, but you cannot change their names.
FortiClient Endpoint Security Version 4.0 MR2 User Guide
04-420-116429-20100108
http://docs.fortinet.com/ • Feedback
69
Configuring advanced firewall rules
70
Firewall
FortiClient Endpoint Security Version 4.0 MR2 User Guide
04-420-116429-20100108
http://docs.fortinet.com/ • Feedback
WebFilter
FortiClient Endpoint Security uses the Fortinet FortiGuard Web Filtering service to help
you control web URL access.
FortiGuard Web Filtering sorts hundreds of millions of web pages into a number of content
categories. Each web site belongs to one or more categories. Unrated is also considered
a category.
FortiGuard Web Filtering can also assign one of several classifications to web sites that
provide cached content, such as Google search, or web sites that allow image, audio, or
video searches.
Your FortiClient accesses the nearest FortiGuard Web Filtering Service Point to determine
the categories and classification of a requested web page. The FortiClient application
blocks the web page if the web page is in a category or classification that you have
blocked.
Web filter profiles specify which categories and classifications of web sites are allowed or
blocked. There are three predefined web filter profiles: Default, Child and Adult. You can
modify the categories blocked in each profile and create new profiles as needed.
You specify which profile applies to each user of the computer. For instance, you can use
the predefined Child web access profile to prevent your children from accessing
inappropriate web sites. You also specify a global profile that applies to unknown users.
FortiClient web filtering filters both HTTP and HTTPS web traffic. The filtering process
does not compromise the security of the HTTPS connection in any way.
Note: If the FortiGuard service is unreachable or the subscription is expired, URLs are not
blocked even if Block all unrated URLs is enabled.
FortiClient web filtering also allows you to specify URLs to always block or to allow by
bypassing the web filter.
Modifying web filter settings
Web filter profiles define which categories of web sites are blocked. You can modify the
predefined web filter profiles or define additional profiles as needed.
You can assign a web filter profile to each user and assign a global profile that applies to
any user not specified in the per-user settings.
Configuring the webfilter global settings
FortiClient comes with three predefined web filtering profiles to allow or block different
combinations of web categories:
Basic profile
Default web filter profile, which is initially the same as the Child profile.
Child
Blocks categories that are not suitable for children.
Adult
Only blocks the security violating web sites.
You cannot delete the predefined profiles. You can, however, modify these profiles. Also
you can specify URLs to always block or to bypass category blocking.
FortiClient Endpoint Security Version 4.0 MR2 User Guide
04-420-116429-20100108
http://docs.fortinet.com/ • Feedback
71
Modifying web filter settings
WebFilter
Figure 33: Web filter global settings
To enable the webfilter
1 Go to WebFilter > Global Settings.
2 In the WebFilter Settings window, select the Enable webfilter check box.
To set a default profile
1 Go to WebFilter > Global Settings.
2 In the Filtering Profiles area, select the default profile from the drop-down list. You can
select a predefined profile (Basic profile, Child or Adult) or a profile that you have
created.
Managing webfilter profiles
With webfilter profiles, you can:
•
Create new profiles.
•
Modify existing profiles.
•
Delete unwanted profiles (except Default, Child and Adult).
•
Determine the type of content to block.
•
Specify URLs to block or bypass.
To configure a new webfilter profile
1 Go to WebFilter > Global Settings.
2 To create a new webfilter profile, click New.
3 Select one of the following:
•
Start with a blank template — Select this option to start with a blank template.
•
Use this profile as a template — Select this option and then select a profile to base
your new profile on.
4 Click Next.
72
FortiClient Endpoint Security Version 4.0 MR2 User Guide
04-420-116429-20100108
http://docs.fortinet.com/ • Feedback
WebFilter
Modifying web filter settings
5 Enter a profile name.
6 Enter a description for the profile.
7 In the This profile blocks the following content area, select the content types to block. A
red “X” indicates a blocked category or classification.
8 In the Exceptions and keywords area, click Add to enter websites that are allowed or
blocked. See To specify URLs to block or bypass.
9 Click OK. The profile is added to the list.
To specify URLs to block or bypass
1 In the WebFilter > Global Settings tab, click create a new profile or edit an existing
profile.
2 In the Exceptions and keywords area, click Add to enter websites that are allowed or
blocked.
3 In the Set URL Permission window, enter the URL. In the URL field, you can enter:
• wildcard characters (* and ?) in URLs,
• complete URLs,
• IP addresses,
• partial URLs,
• file types, such as *.jpg to block all jpeg files, and *.swf to block all flash animations.
4 As you enter the URL, the Protocol, Hostname, and URL Path fields are automatically
filled out. FortiClient breaks the components of the URL down which is useful for
scenarios where a slash character is missed in the URL or URLs that contain
wildcards.
5 In the Permission area, select Block or Bypass.
•
Block — Blocks the URL.
•
Bypass — Allows the URL to be accessed.
6 Click OK.
7 Repeat steps 2 through 6 for each URL that you want to add.
8 You can also edit existing entries or delete unwanted entries.
To set advanced web filtering features
1 Go to WebFilter > Global Settings.
2 To set the advanced web filter settings, click Advanced.
3 Select the Enable URL rating with FortiGuard Filtering Services if you want to use
FortiGuard rating services and the black/white list to check to determine if the URL is
allowed or denied. FortiGuard rating services will use the categories and/or
classifications that are used listed in FortiClient to block URLs. Leave the check box
clear if you only want to use the black/white list to decide whether to allow or deny
access to the URL.
4 Select the Block access to content if it is not rated check box. If the check box is clear,
unrated URLs are allowed.
5 If a URL is found in both black and white lists, select if you want to Deny access or
Allow access to the URL.
6 Click OK.
FortiClient Endpoint Security Version 4.0 MR2 User Guide
04-420-116429-20100108
http://docs.fortinet.com/ • Feedback
73
Modifying web filter settings
WebFilter
To view webfilter profile
1 Go to WebFilter > Global Settings.
2 Select a profile from the list and click View.
3 View the properties of the profile and click Edit or Close.
To edit a webfilter profile
1 Go to WebFilter > Global Settings.
2 Select a profile from the list and click Edit.
3 Edit the profile and click OK.
To remove a webfilter profile
1 Go to WebFilter > Global Settings.
2 Select a profile from the list and click Remove. The profile is deleted from the list.
•
Configuring webfilter user settings
If you have administrator privileges on the computer, you can specify which webfilter
profile applies to each user and set the time and day for when the user and global profiles
are used. The Global profile specified in webfilter Global Settings applies to any user not
specified in User settings.
If a user has a check mark on their profile, this indicates that a default profile has been
assigned.
Figure 34: Webfilter users showing default profile has been assigned (indicated by check
mark).
To specify user webfilter settings
1 Go to WebFilter > Users.
2 In the Customize Web Filtering Profiles for Users area, select a user to customize.
3 Select the default profile from the drop-down list.
4 To set the daily schedule to use the default profile, select the Set a time schedule of
using this profile check box.
74
FortiClient Endpoint Security Version 4.0 MR2 User Guide
04-420-116429-20100108
http://docs.fortinet.com/ • Feedback
WebFilter
Modifying web filter settings
5 In the Grid, select the area for the time and date you want to set the profile for and do
one of the following:
•
Global profile of computer (blue) — During this time/date, the profile uses the
Global web filter settings. See “Configuring the webfilter global settings” on page 71
for more information.
•
User Profile (green) — During this time/date, the profile uses the user’s default
profile set in Step 3.
•
Block all web sites (black) — During this time/date, all internet access is blocked.
FortiClient Endpoint Security Version 4.0 MR2 User Guide
04-420-116429-20100108
http://docs.fortinet.com/ • Feedback
75
Modifying web filter settings
76
WebFilter
FortiClient Endpoint Security Version 4.0 MR2 User Guide
04-420-116429-20100108
http://docs.fortinet.com/ • Feedback
Anti-spam
The Anti-spam feature is a plug-in for Microsoft Outlook and Microsoft Outlook Express
(2000 or newer versions). It is supported by the Fortinet FortiGuard AntiSpam service.
Once this feature is enabled and installed on the Outlook/Outlook Express, it filters your
incoming email and sets up a spam folder on your Outlook/Outlook Express to collect
spam automatically.
Note: On Microsoft Windows Vista, anti-spam works in Microsoft Outlook but not in
Windows Mail.
You can do the following:
•
Installing anti-spam plug-in
•
Enabling anti-spam
•
Adding white, black, and banned word lists
•
Manually labelling email
•
Submitting misclassified email to Fortinet
Figure 35: AntiSpam
Figure 36: Anti-spam plug-in on Outlook
FortiClient Endpoint Security Version 4.0 MR2 User Guide
04-420-116429-20100108
http://docs.fortinet.com/ • Feedback
77
Installing anti-spam plug-in
Anti-spam
Installing anti-spam plug-in
Install the anti-spam plug-in on Microsoft Outlook or Outlook Express (2000 or newer
version).
To install anti-spam plug-in on Outlook
1 On your computer, install Microsoft Outlook or Outlook Express if you do not already
have it.
2 Install FortiClient software.
3 Reboot your computer.
A Spam folder appears on the Outlook folder List. Spam sent to you will be put into the
Spam folder automatically.
Fortinet Inc., Mark As Spam and Mark Not Spam icons appear on the Outlook toolbar.
Enabling anti-spam
You must enable the FortiClient anti-spam feature for the Outlook plug-in to work.
To enable anti-spam
1 Go to AntiSpam > Settings.
2 Select Enable AntiSpam.
3 Click Apply.
Note: On Outlook Express, anti-spam filtering is not effective with an IMAP email server.
Adding white, black, and banned word lists
You can allow (whitelist) or block (blacklist) email addresses and ban email containing the
words you specify. By doing so, incoming email will be first filtered against these lists.
•
If the email address is in the white list and the email content does not contain any of the
banned words, the email will go through without being filtered.
•
If the email address is in the black list or the email content contains any of the banned
words, the email will be sent to the spam folder.
•
If the email address is neither in the white list or black list and the email content does
not contain any of the banned words, the email will be filtered by the Fortinet
FortiGuard AntiSpam service.
Note: When adding banned words and email addresses to the White/black list, you can
use regular expression meta characters.
Caution: FortiClient will allow banned words in an email if the sender is in your Address
Book.
78
FortiClient Endpoint Security Version 4.0 MR2 User Guide
04-420-116429-20100108
http://docs.fortinet.com/ • Feedback
Anti-spam
Manually labelling email
To add white/black lists
1 Go to AntiSpam > Settings.
2 In the White/black list area, click Add.
3 Enter the email address that you want to block or allow.
4 Select Block to add the address to black list, and Allow to add it to white list.
5 Click OK.
6 To modify a list item, select the item and click Edit.
7 To remove a list item, select the item and click Delete.
8 Click Apply.
To add banned words
1 Go to AntiSpam > Settings.
2 In the Banned word list area, click Add.
3 Enter the word that you want to ban.
4 Click OK.
5 To modify a list item, select the item and click Edit.
6 To remove a list item, select the item and click Delete.
7 Click Apply.
Manually labelling email
You can manually mark an email as a spam or as an innocent mail.
If you have not enabled the FortiClient Submit mis-rated Email automatically check box,
you will be prompted to submit a selected email to Fortinet when you mark an email as a
spam or as an innocent mail. Otherwise, the selected email will be sent to Fortinet
automatically to train its FortiGuard database. For more information, see “Submitting
misclassified email to Fortinet” on page 80.
To manually mark an email as spam
1 Open Microsoft Outlook or Outlook Express.
2 If you find a spam in your Inbox folder, select the email.
3 Click Mark As Spam on the FortiClient toolbar.
The email is sent to the Spam folder and is forwarded to Fortinet. When you update the
FortiClient software, the Outlook plug-in will update its spam database so that when an
email from the same sender/address comes in, it will be sent to the Spam folder.
To manually mark an email as an innocent mail
1 Open Microsoft Outlook or Outlook Express.
2 If you find an innocent email in your Spam folder, select the email.
3 Click Mark Not Spam on the Fortinet toolbar.
The email is sent to the Inbox folder and forwarded to Fortinet. When you update the
FortiClient software, the Outlook plug-in will update its spam database so that when an
email from the same sender/address comes in, it will not be sent to the Spam folder.
FortiClient Endpoint Security Version 4.0 MR2 User Guide
04-420-116429-20100108
http://docs.fortinet.com/ • Feedback
79
Submitting misclassified email to Fortinet
Anti-spam
Submitting misclassified email to Fortinet
You can configure the FortiClient program to automatically send misclassified email, that
is, innocent email classified as spam or spam classified as innocent email, to the Fortinet
FortiGuard AntiSpam service to enhance the service’s email-scanning accuracy. In this
case, you will not be prompted to submit misclassified email manually.
You can also just configure the FortiClient program to stop prompting users to submit
misclassified email manually. In this case, no misclassified email will be sent to Fortinet.
For more information, see “Manually labelling email” on page 79.
To configure sending misclassified email to Fortinet
1 Go to AntiSpam > Settings.
2 Select the Submit mis-rated Email automatically check box.
3 Click Apply.
To stop prompting users to submit misclassified email manually
1 Go to AntiSpam > Settings.
2 Select the Don’t prompt users to submit mis-rated email check box.
3 Click Apply.
80
FortiClient Endpoint Security Version 4.0 MR2 User Guide
04-420-116429-20100108
http://docs.fortinet.com/ • Feedback
App Detection
App Detection works in conjunction with a FortiGate to monitor applications running on an
endpoint. An endpoint is most often a single computer with a single IP address being used
to access network services through a FortiGate unit.
FortiClient will periodically send application IDs to the FortiGate unit which will compare it
against the endpoint profile. The FortiGate unit will take the following actions against the
running and installed applications:
•
Allow — For any applications that are configured as Allow, the FortiGate unit will take
no action.
•
Monitor — For any applications that are configured as Monitor, the FortiGate unit
records the application in the logs and in the endpoint list but will not take any action.
•
Block — For any applications that are configures as Block, the FortiGate unit will
quarantine the host and record the violating application in the logs and the endpoint
list.
You apply endpoint control in a firewall policy. When traffic attempts to pass through the
firewall policy, the FortiGate unit runs compliance checks on the originating host on the
source interface. Non-compliant endpoints are blocked. If a user is web browsing, they
receive a message telling them that they are non-compliant, or they are redirected to a
web portal where they can download the FortiClient application installer.
Viewing applications running on your computer
You can use the App Detection > Status window to view which processes are running on
your computer, which category they belong to, the vendor of the application, the version,
and the path where the application is running from on your computer.
For more information, see the FortiClient Administration Guide.
To view the applications running on your computer
1 Go to App Detection > Status.
2 In the Show drop-down list, do one of the following:
• Select Categorized to show the applications that have been categorized and verified
(trusted) by FortiGuard. If the application is categorized, then it can bypass the
firewall with no pop-up messages.
• Select Uncategorized to show the applications that have not been verfied by
FortiGuard. If the application is uncategorized, then pop-up messages will appear
when the application attempts to bypass the firewall.
• Select All Applications to show both categorized and uncategorized applications.
3 To submit a categorized application for re-categorization, right-click on the application
name and select Submit for Re-categorization. Go to step 5.
• Alternatively, you can select the application name and click Submit.
4 To submit an uncategorized application for categorization, right-click on the application
name and select Submit for Analysis.
• Alternatively, you can select the application name and click Submit.
FortiClient Endpoint Security Version 4.0 MR2 User Guide
04-420-116429-20100108
http://docs.fortinet.com/ • Feedback
81
Viewing applications running on your computer
App Detection
5 In the Submit for Analysis window, select a category for this application and click
Submit. The application is submitted to FortiGuard Services.
6 Click Refresh to refresh the list of processes that are currently running.
Figure 37: App Detection
82
FortiClient Endpoint Security Version 4.0 MR2 User Guide
04-420-116429-20100108
http://docs.fortinet.com/ • Feedback
Index
A
antispam, 77
enabling, 78
Microsoft Outlook, 77
Windows Mail, 77
antispam plug-in
installing, 78
antivirus, 47
antivirus settings
configuring, 50, 51
app detection, 81
App_Detection, 81
application detection
see app detection
authentication, 36
autokey keep alive, 29
B
Beep when connection error occurs, option, 33
bytes
incoming VPN traffic, 36
outgoing VPN traffic, 36
C
CA certificate
getting a CA certificate, 42
importing, 42
retrieve, 42
categories
web filter, 71
certificate
eToken, 41
importing a CA certificate, 42
smartcard, 41
city
local certificate request, 39
classification
web filter, 71
code page, 8
comments on Fortinet technical documentation, 6
company
local certificate request, 39
configuration
error, 37, 38
configuration data, 9
connect
to a remote FortiGate gateway, 34
to the remote FortiGate network, 34
corporate policy
complying with, 16
country
local certificate request, 39
FortiClient Endpoint Security Version 4.0 MR2 User Guide
04-420-116429-20100108
http://docs.fortinet.com/ • Feedback
CRL
getting a CRL, 42
importing, 43
retrieve, 43
customer service, 6
D
dead peer detection, 29
default policy settings
modifying, 27
department
local certificate request, 39
DH group
policy setting, 29
digital certificate management
certificate management, 38
domain name
local certificate request, 39
E
email
local certificate request, 39
manually labelling, 79
email address
local certificate request, 39
email scanning, 56
encryption
incoming VPN traffic, 36
outgoing VPN traffic, 36
endpoint profile, 81
entering a license key, 15
error
configuration, 37, 38
eToken certificate, 41
exclude
selecting the file types to exclude, 52
exclusion list
adding a new file extension, 52
exporting
local certificate request, 40
F
file extension
add to the file types or exclusion list, 52
file types
adding a new file extension, 52
selecting the file types to scan or exclude, 52
firewall policy, 81
FortiClient
updating, 20
FortiClient Manager, 47, 54, 61
83
Index
FortiClient software
manual update, 18, 19
FortiGate, 20, 47, 54, 61, 81
FortiGate gateway
connect to, 34
FortiGate models
supported by FortiClient, 8
FortiGate network
connect to, 34
FortiManager, 20
Fortinet customer service, 6
FortiOS versions
supported by FortiClient, 8
Free edition, 10, 15, 18, 19, 21
G
general, 15
general settings, 15
grayware, 52
H
heuristic, 52
I
legacy policy settings
modify, 27
license key
entering, 15
local certificate
city, 39
company, 39
country, 39
department, 39
domain name, 39
email, 39
email address, 39
importing a signed local certificate, 40
IP address, 39
requesting, 40
retrieving an signed local certificate, 40
state/province, 39
local gateway, 36
local id, 29
locking FortiClient, 17
log file
configuring settings, 21
viewing, 22
logging, 12
logs
managing log files, 22
IKE and IPSec policies
configuring, 27
IKE proposals, 28
import
CA certificate, 42
CRL, 43
signed local certificate, 40
install
configuration, 9
data, 9
log, 12
upgrade, 9
installation, 7
introduction, 1
intrusion detection, 67
IP address
local certificate request, 39
IPSec policies
configuring, 27
IPSec proposals, 29
M
K
O
Keep IPSec service running forever unless manually stopped,
option, 33
keepalive frequency, 29
key
entering a license key, 15
key life
incoming VPN traffic, 29
outgoing VPN traffic, 29
obtaining a signed local certificate, 38
OCSP, enabling, 42
options
for VPN connection, 33
L
language support, 8
84
manage
log files, 22
quarantined files, 57
scan schedules, 49
mis-rated email
submitting, 80
mode
policy setting, 28
monitoring VPN connections, 36
name, 36
N
name
monitoring VPN connections, 36
NAT traversal, 29
network detection, 67
Notify user the virus signature is out of date, 52
P
packets
incoming VPN traffic, 36
outgoing VPN traffic, 36
Pause background scanning on battery power, 52
PFS
advanced VPN setting, 29
FortiClient Endpoint Security Version 4.0 MR2 User Guide
04-420-116429-20100108
http://docs.fortinet.com/ • Feedback
Index
ping server, 67
ping servers, 67
policies
IKE, IPSec configuring, 27
policy
corporate security, complying with, 16
policy settings
modifying default, 27
modifying legacy, 27
Premium edition, 10, 15, 18, 19, 21
proposal
IKE, 28
IPSec, 29
protection
configuring real-time, 54
Q
quarantined files
managing, 57
quick scan
running, 48
R
real-time protection
configuring, 54
remote
monitoring VPN connections, 36
remote FortiGate network
connect to, 34
removable drives
scan in full system scan, 49
scan on insertion, 52
replay detection, 29
request a signed local certificate, 40
restore
changed startup list entry, 59
quarantined file, 57
rejected startup list entry, 59
retrieve
CA certificate, 42
CRL, 43
signed local certificate, 40
S
scan
files in a specified directory for viruses, 48
for viruses, 47
removable drives, 49, 52
selecting the file types to scan, 52
security policy
complying with, 16
settings
general, 15
signed local certificate
importing, 40
requesting, 40
smartcard certificate, 41
SSL VPN tunnel client, 34
new connection, 35
FortiClient Endpoint Security Version 4.0 MR2 User Guide
04-420-116429-20100108
http://docs.fortinet.com/ • Feedback
Start VPN before logging onto Windows, option, 33
startup list entries
viewing, 59
startup list entry
restoring a changed or rejected startup list entry, 59
state/province
local certificate request, 39
T
technical support, 6
time out
monitoring VPN connections, 36
traffic summary
viewing, 36
troubleshooting
VPN, 37
trusted ping servers, 67
U
UID, 18
unlocking FortiClient, 17
update
FortiClient software, 18, 19
update schedule
setting, 19
updating FortiClient, 20
upgrading, 9
URL
block or bypass, 71
V
VPN
audible dropped connection alarm, 33
basic settings, 25
certificates, 38
configuring IKE and IPSec policies, 27
connecting before Windows logon, 35
connecting to remote network, 34
connection options, 33
extended authorization (XAuth), 31
import, export policy files, 37
introduction, 23
modifying legacy and default settings, 27
monitoring connections, 36
retrying dropped connections, 33
setting up automatic connection, 23
setting up connection manually, 24
smartcard certificate, 41
startup before network login, 33
testing the connection, 32
troubleshooting, 37
using FortiClient VPN client, 32
virtual IP address acquisition, 30
W
WAN optimization, 45
enabling, 46
85
Index
web filter, 71
categories, 71
classification, 71
global settings, 71
per-user settings, 74
settings, 71
URL block
URL bypass, 73
86
what’s new, 1
X
XAuth
configuring, 31
FortiClient Endpoint Security Version 4.0 MR2 User Guide
04-420-116429-20100108
http://docs.fortinet.com/ • Feedback
www.fortinet.com
www.fortinet.com